
Our look at the Kingroon KPL1 high speed 3D printer continues with setup, calibration, operations and software.
This is part two of a three-part series. We invite you to read parts one and three.
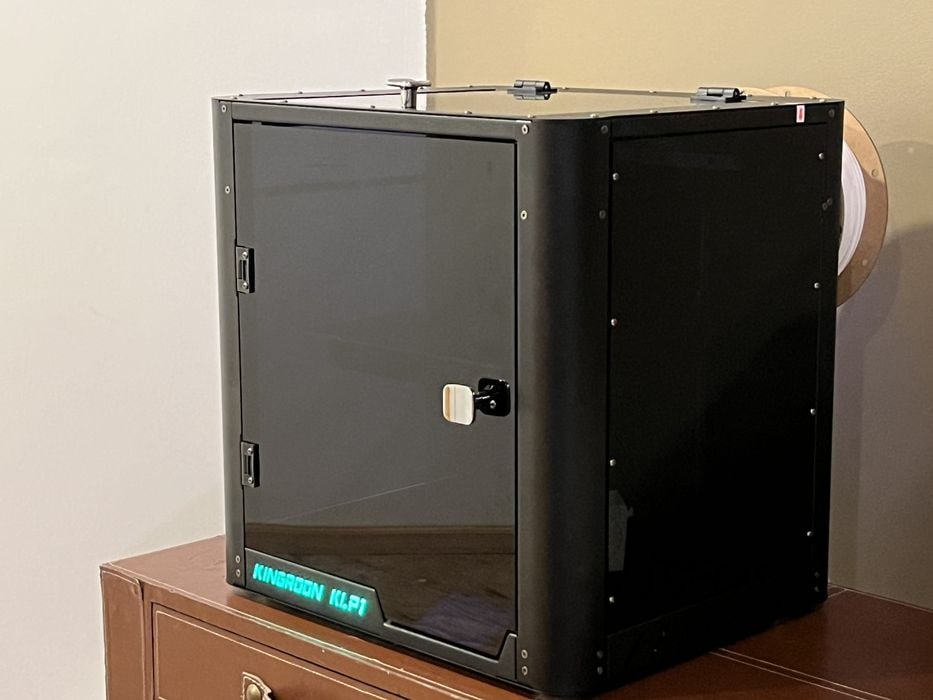
Kingroon KLP1 3D Printer Setup and Calibration
Turning on the printer, a loud fan noise was immediately noticeable. During further inspection we found some cables pressing against the motherboard’s cooling fan due to shipping jostles. After rearranging these cables with zip ties, the issue was resolved.
It’s always advisable to peruse the user manual when navigating a new printer. The KLP1’s manual indicated control through its touchscreen or any network-connected external screen. It provided details on auto bed leveling, Z-gap setting, vibration compensation, filament loading, and more.
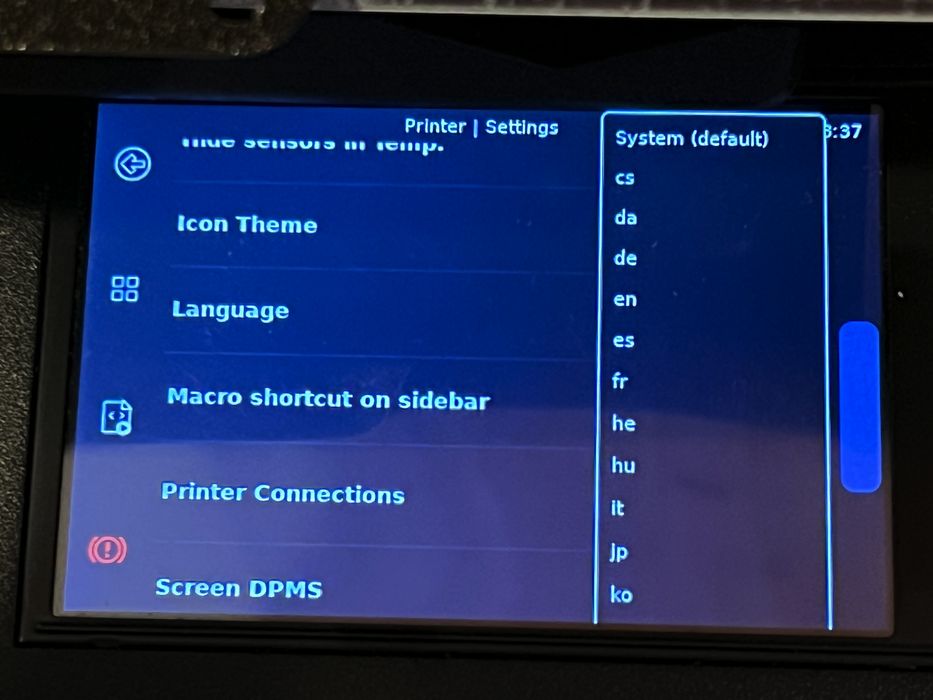
When we first used the touchscreen, it wasn’t set to English. Although the manual lacked a procedure for language settings, referencing GUI photos allowed us to swiftly switch to English. Kingroon might consider presetting the English language for printers shipped to North America.
Our initial task was connecting the KLP1 to our WiFi network. Despite the printer being twice the recommended distance from the router, it still detected the connection.
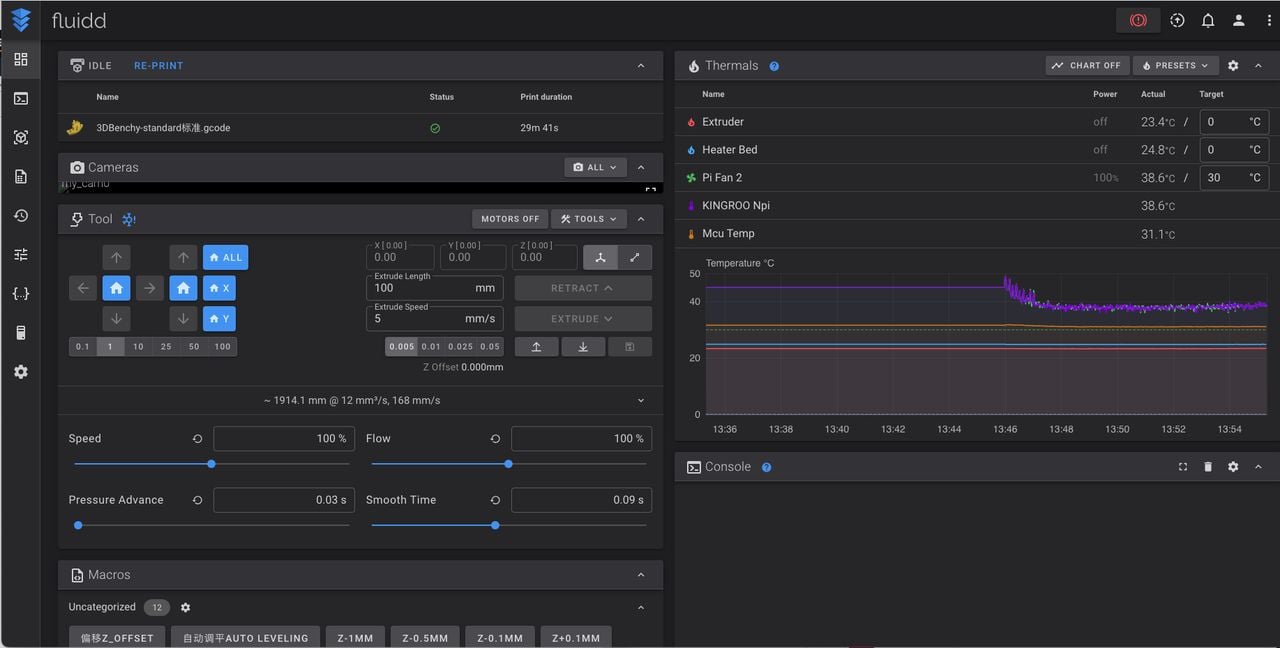
Though the manual detailed a specific connection procedure involving a USB configuration file, a direct password input via the touchscreen sufficed. On confirming connectivity through our computer browser, the “FLUIDD” web interface offered even more printer control options than the touchscreen. It’s like having a very large touchscreen, except it’s not physically on the machine.
Switching back to the touchscreen, we performed the initial calibration procedures that necessitated hands-on access to the printer.
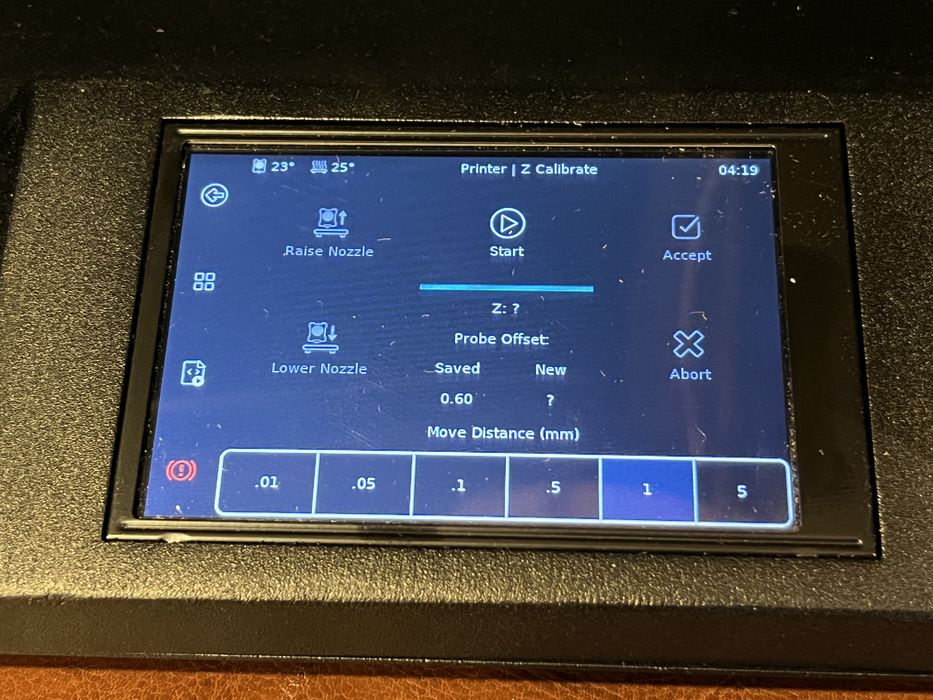
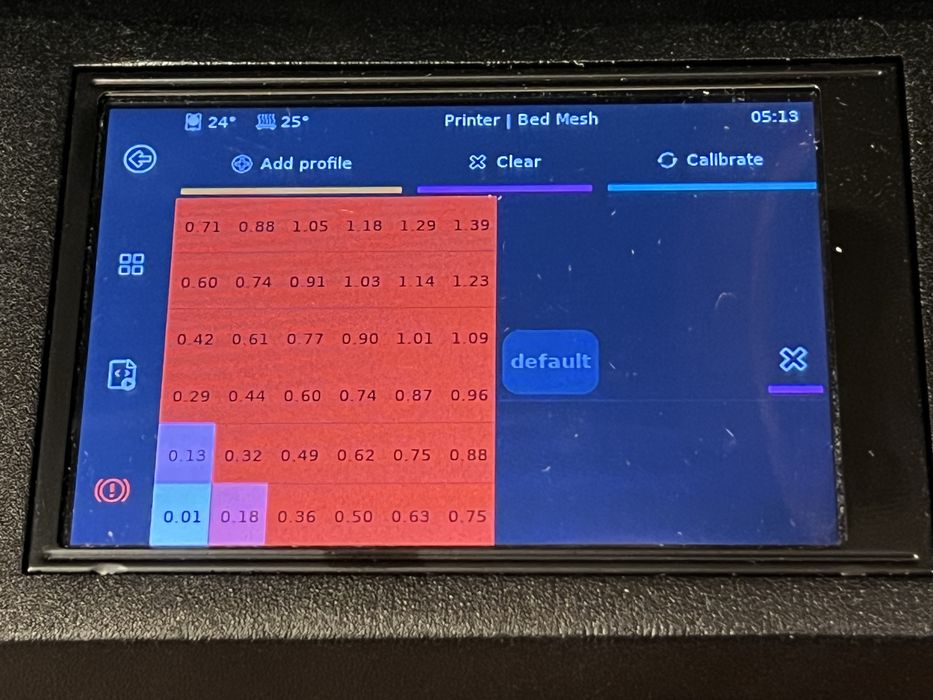
We began with the standard Z Calibration. This step sets the distance between the nozzle and the build plate using an A4 paper sheet. After that, we executed a 36-point Bed Mesh calibration to virtually level the build plate.
As part of the calibration process, loading the filament was next.
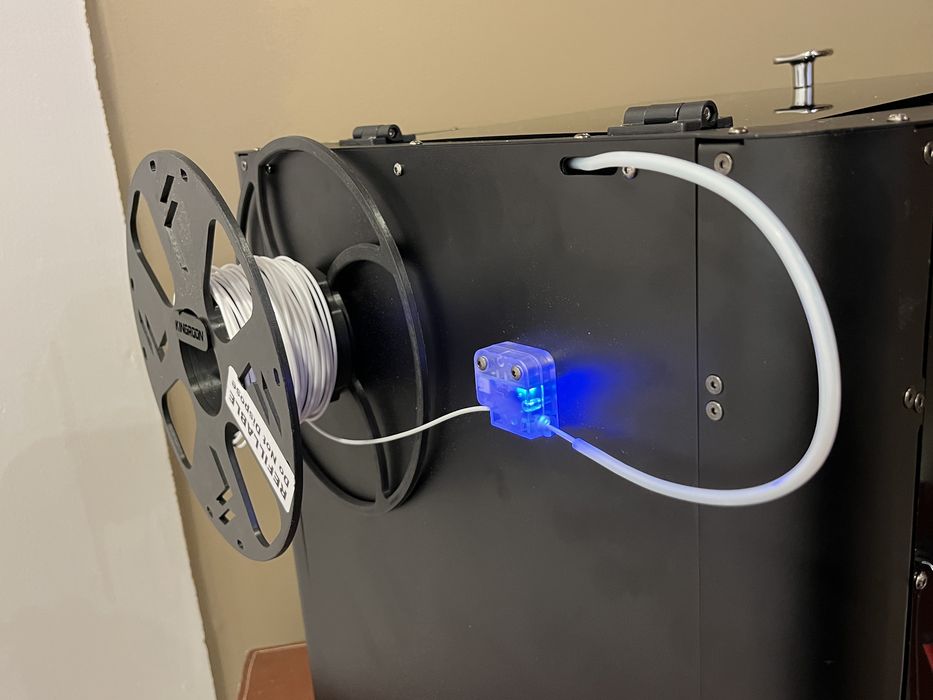
We placed our small HS-PLA filament sample coil onto a two-piece reusable spool while preheating the printer. Subsequently, the filament was fed through the run-out sensor, PTFE Tube, and finally into the extruder. We successfully extruded a total of 100mm.
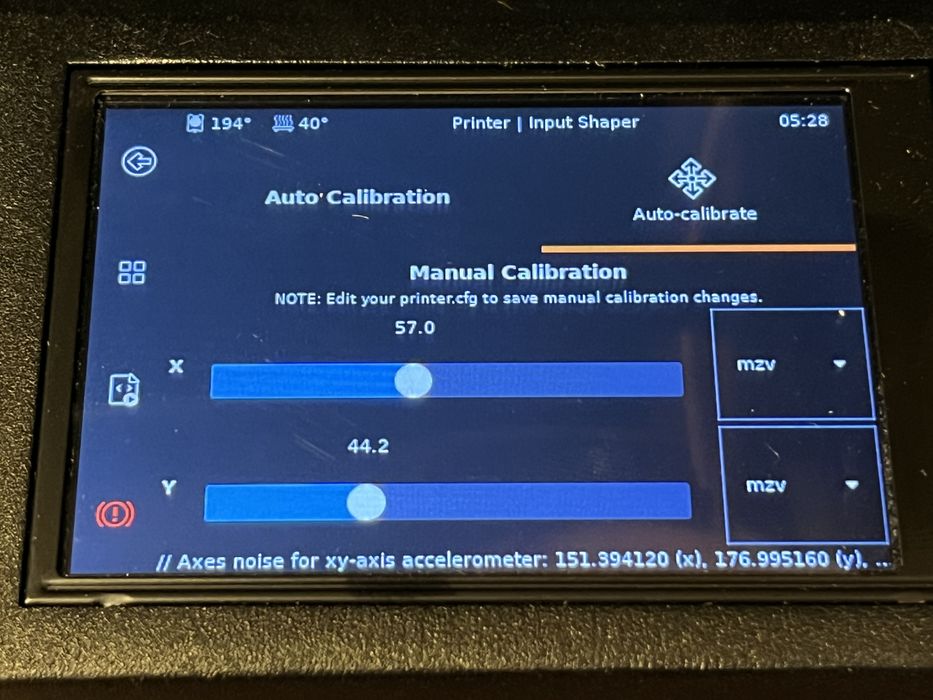
Two unique calibration options caught our attention: the Input Shaper and Pressure Advance Calibration. The Input Shaper runs an automated process on both X&Y axes to measure vibrations from rapid movements.
This procedure involved the axis moving rapidly back and forth, gradually reducing the travel distance. The sound it produced reminded us of a jet engine powering up at a low speed. Throughout this process, the built-in adxl345 accelerometer took essential measurements to minimize future print ghosting or ringing.
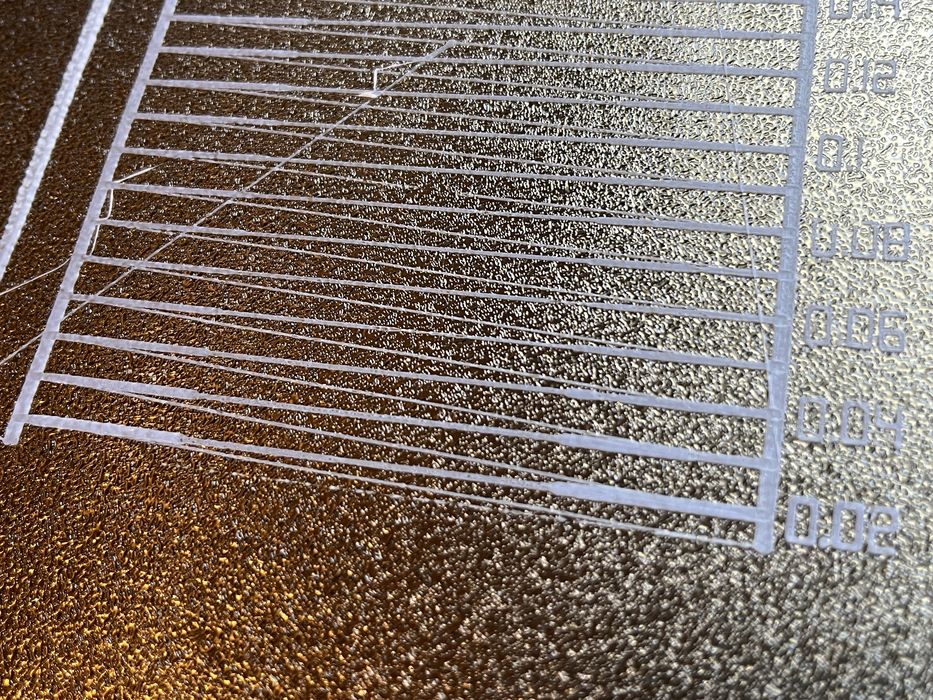
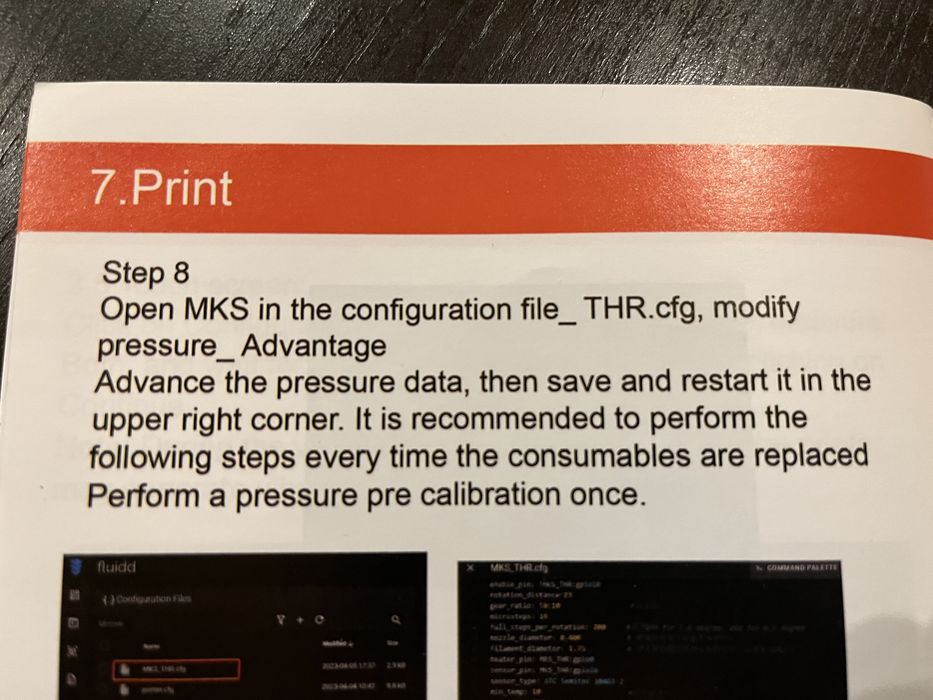
The Pressure Advance involved selecting the most uniform line from a pre-sliced 3D print on the build plate to set the right pressure advance value. We easily identified the best output, but Kingroon could have included photo examples for clarity. The printed manual directed us to modify a specific file in the FLUIDD interface.
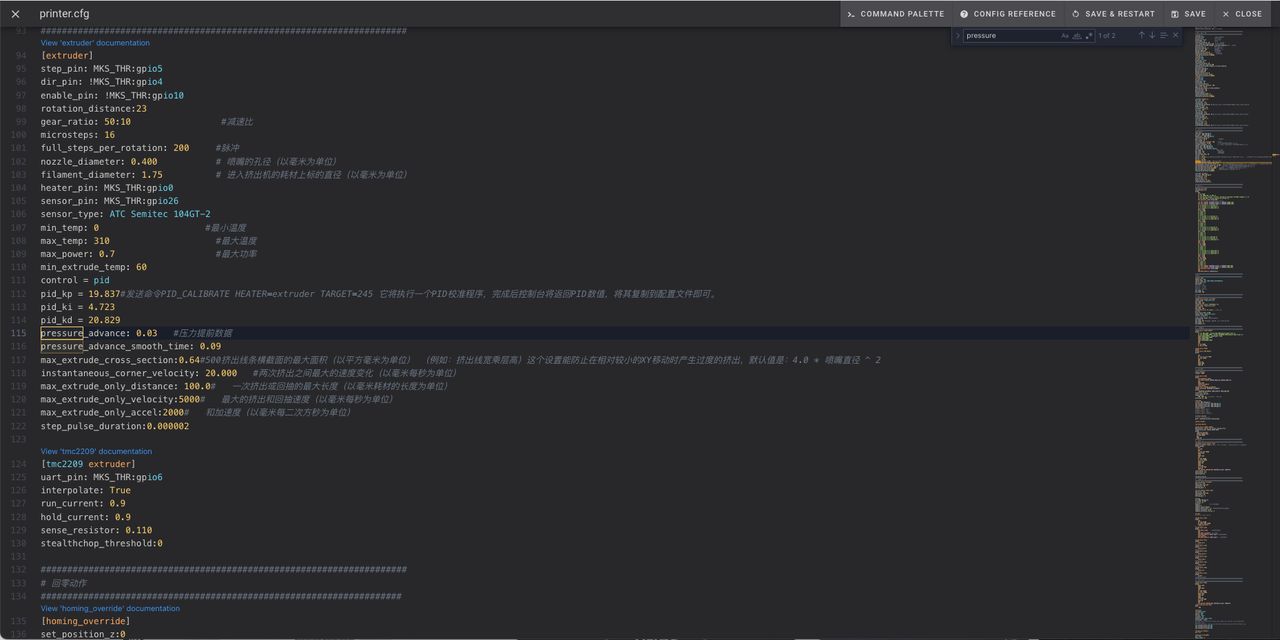
However, a discrepancy in file names between the printed and digital manuals arose. Upon checking, the configuration already had our desired value, so no changes were needed. This highlighted the importance of referring to digital manuals, as printed versions might not be the most updated.
With calibration completed, we eagerly set up our slicer and prepared for our first test print.
Kingroon KLP1 3D Printer Operations
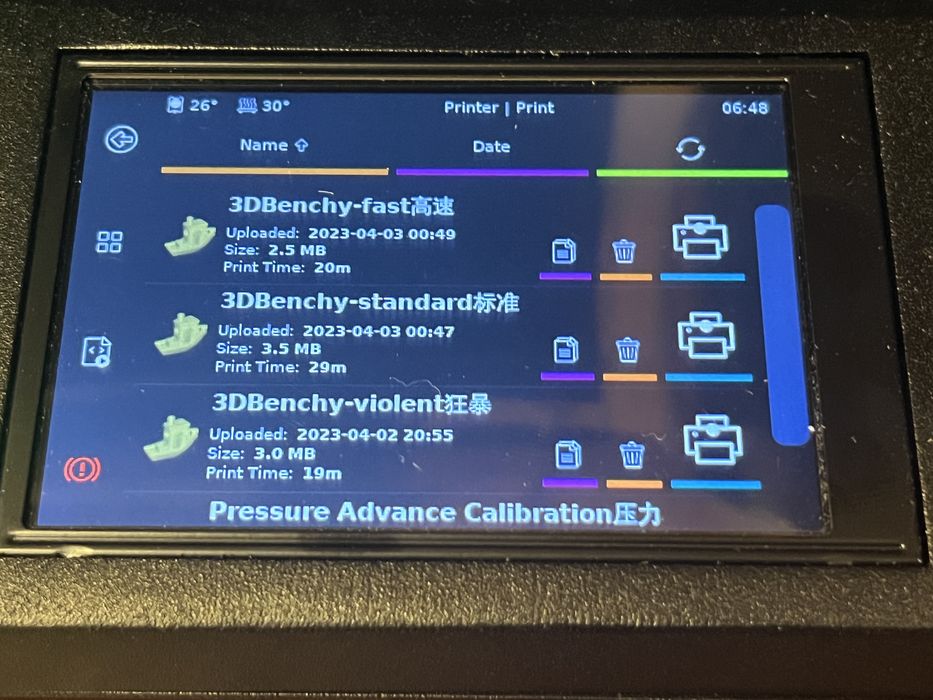
Manufacturers usually provide pre-sliced GCODE sample prints to demonstrate their printer’s capabilities. Although we didn’t discover any samples on the memory stick, we located several within FLUIDD’s job list.
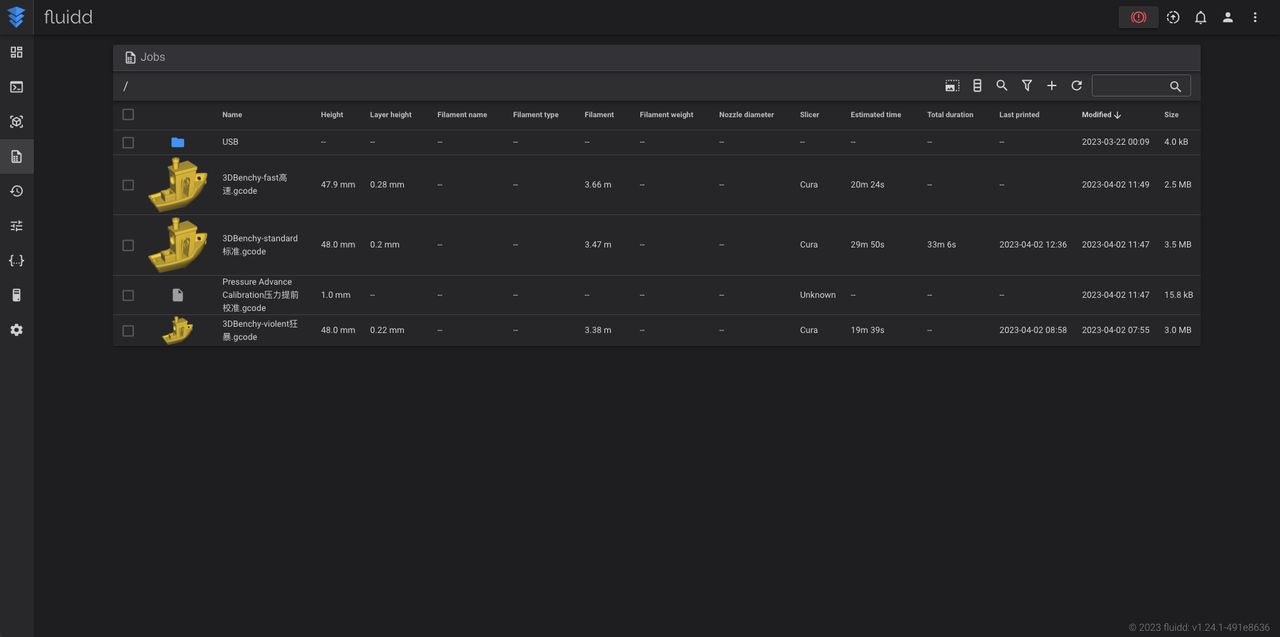
Using the FLUIDD web interface for the remainder of our review, we selected and initiated a 3DBenchy–fast.gcode print with our HS-PLA filament sample.
The first layer was neatly laid down, and we sealed the printer’s front and top doors. The enclosure efficiently muffled the noise of the rapid axis movements.
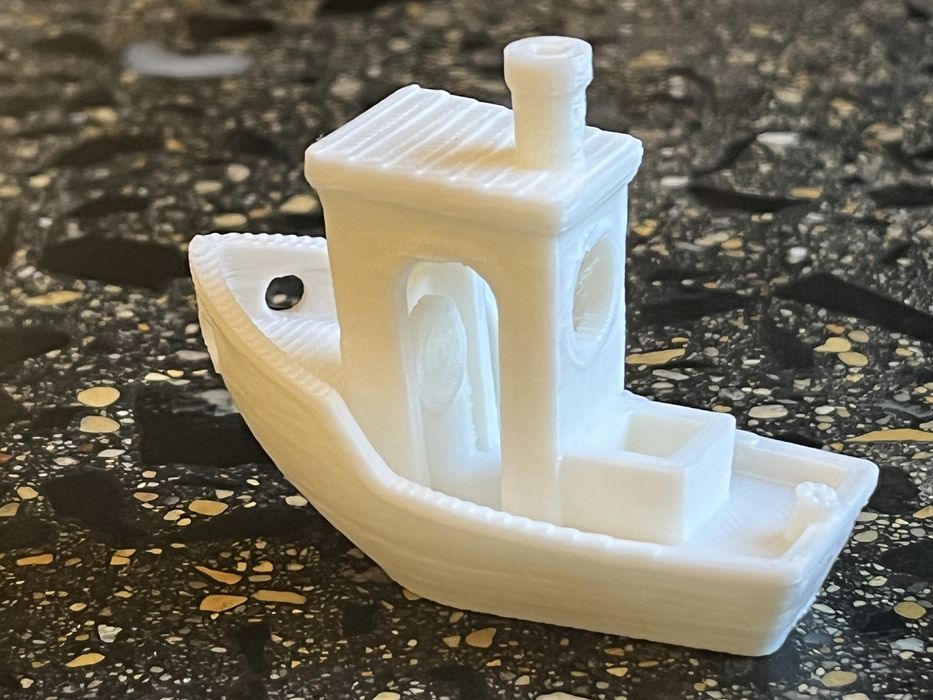
The Benchy print, taking only 23 minutes including warm-up, presented impressive quality. This left us eager to test the Kingroon KLP1 3D Printer with our personally sliced prints.
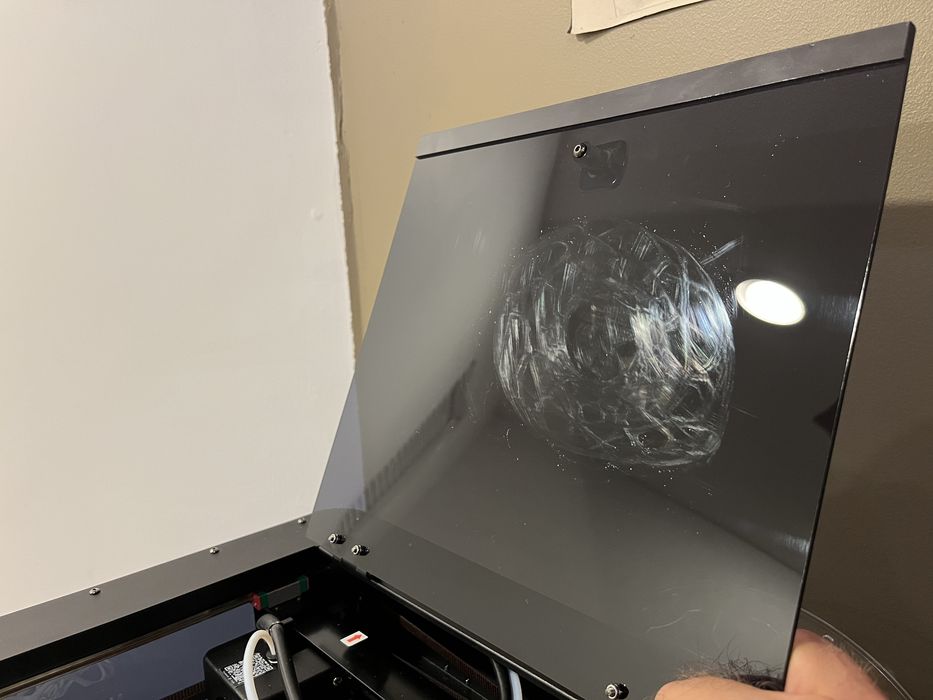
One observation was that the tube happens to rest against the machine’s top lid. Over time this resulted in a bit of mark on the lid, as you can see here.
Kingroon KLP1 3D Printer Software

In our prior Kingroon reviews, both the memory stick and manual furnished software and setup instructions for PC-based UltiMaker Cura usage. We fetched and installed the newest UltiMaker Cura 5.4.0 version for our MacBook Pro.
The KLP1, being a recent addition, isn’t yet on UltiMaker Cura’s list of supported 3D printers. To integrate the printer, Kingroon instructed users to transfer files from the memory stick into the appropriate UltiMaker Cura directories.
However, for Mac OS, the installation path was different than PC. The accurate Mac path was: harddrive/users/admin/library/application support/Cura/, in case you are setting up the software on your Mac platform.
The custom KLP1 Cura install provided a singular 0.2mm PLA profile by Kingroon with a default print speeds of 350mm/s. We expected additional filament profiles for ABS, PETG, and TPU given the manufacturer’s claims, but unfortunately they were not provided with the shipment or online.
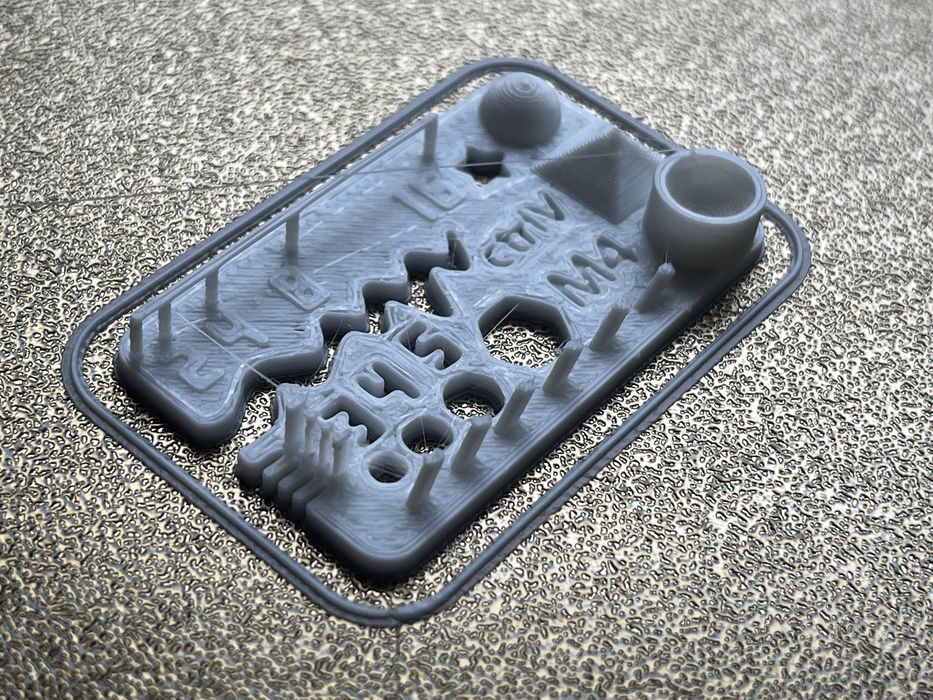
We sliced our CTRL-V test print, saved the GCODE, and uploaded it to FLUIDD. The job list displayed various print data details, with a slight glitch in date fields. We found this comprehensive data was quite beneficial for analysis.
For part of our review, Kingroon had us explore OrcaSlicer, for which they’re creating profiles. This software has its roots in multiple slicers, including Slic3r, PrusaSlicer and Bambu Studio. Its usability and slicing capabilities impressed us, though it lacked data integration with FLUIDD.
Our CTRL-V test print, despite its quick print speed, turned out remarkably well. Given its complex geometry, which is hard to print even at slow speeds, we were genuinely impressed by the results.
This is part two of a three-part series. We invite you to read parts one and three.