
I’ve been testing the Luma 3D scanning app, which uses the new NeRF method, and it’s amazing.
NeRF, or “Neural Radiosity Field”, is an entirely new way to process 3D scans to generate 3D models. It’s quite different from depth scanning and structured light methods, but is superficially similar to photogrammetry in that you must take a series of optical images of a subject.
I wrote more about NeRF earlier.
The first implementation of NeRF in a handheld 3D scanning app seems to be from Luma AI. They’ve created a 3D scanning app called, unsurprisingly “Luma”.
Luma Scanner Process
The app works in a manner quite similar to other scanning apps. There’s been a small explosion of such apps lately, as software developers have taken advantage of LIDAR sensors and powerful 3D software frameworks. But Luma is quite different in the processing.
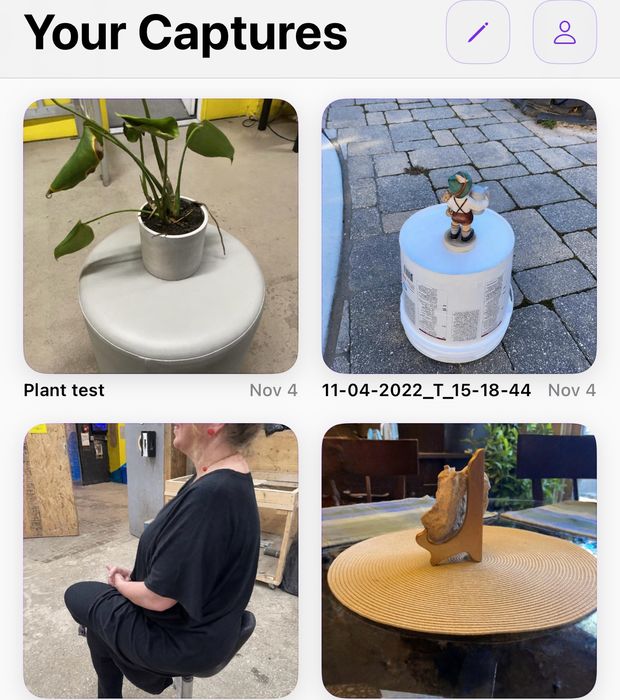
The app presents you with a list of your scans, as well as others that have been marked for public display. There’s a big “+” button which triggers the creation of a new scan.
The first step is to identify the subject to the app. This is done through a guided process where you first point at the subject and touch the screen.
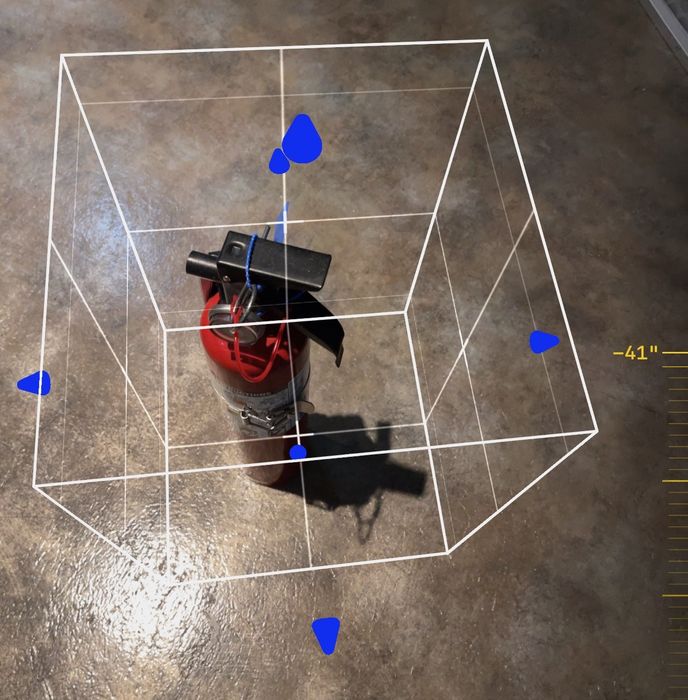
Then you must resize the bounding box for the scan, which is easy to do by pulling and pushing the convenient blue arrows on the sides of the box.
At that point, the app is ready for the actual scan. Like the setup stage, the capture is also done in guided fashion.
Most photogrammetry apps don’t really have any kind of capture guiding, so I was impressed by Luma’s effort here. In fact, I found their capture guidance to be incredibly easy to follow and also very effective.
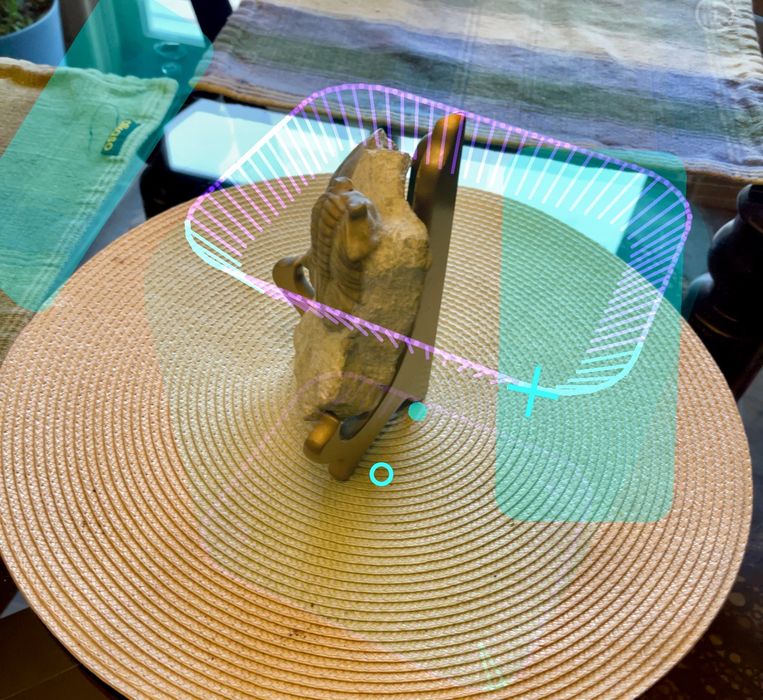
The guiding process establishes three virtual rings around the object placed above, in the middle and towards the bottom. Your job is to take the smartphone along these rings in the correct orientation.
That may sound difficult, but Luma has made it quite straightforward: each ring has small tabs placed at intervals, as seen in these images. These represent where an image is captured. As you put the camera in the right position and orientation, the app provides a satisfying haptic “thunk” to indicate you got an image.
Once you’re “in line”, you simply sweep the camera along the path and, thunk, thunk, thunk, you’ve suddenly completed the ring.
Each ring requires the camera to be positioned slightly differently, each pointing at the center of the subject. Fortunately, Luma also provides virtual cameras that you simply “match” to ensure proper orientation.
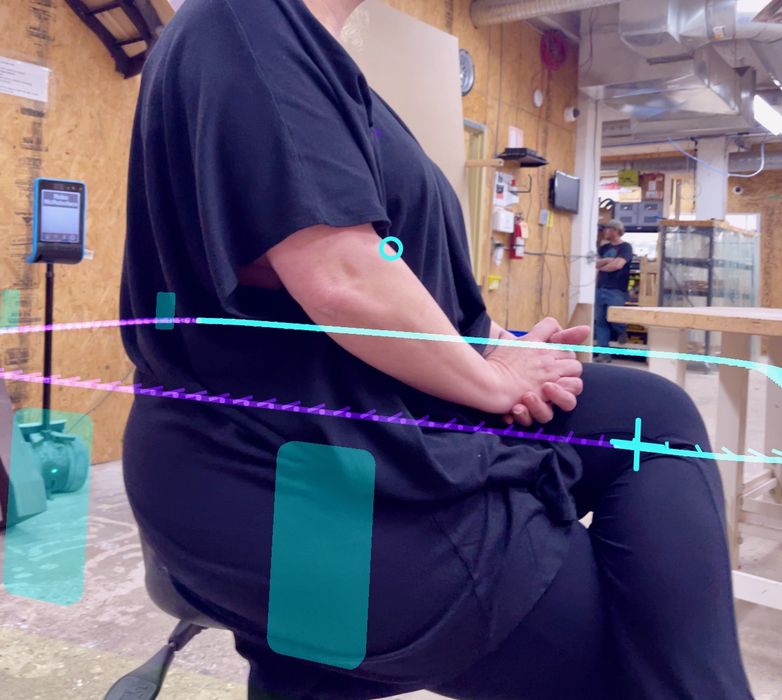
The scanning process is quite easy to do, and do well. The only problem I found was that it tends to take several minutes to complete the rings, and if you’re scanning a person they may wiggle during that period. My advice is to have human subjects in easy-to-maintain comfortable positions when scanning.

The goal when scanning is to turn all of the tabs “green”. When you’ve completed the last one, Luma will automatically stop the scan and upload the data to the cloud server for processing. If you miss a tab, then just go back and knock it off.
It’s possible to stop the scan prematurely, and this can be the case if it is physically impossible to reach some of the ring positions. When there’s enough data, Luma will enable the “Finish” button to stop scanning and begin the upload.
After upload, the scan goes through multiple processing stages:
- Queued
- Preprocessing
- Training NeRF
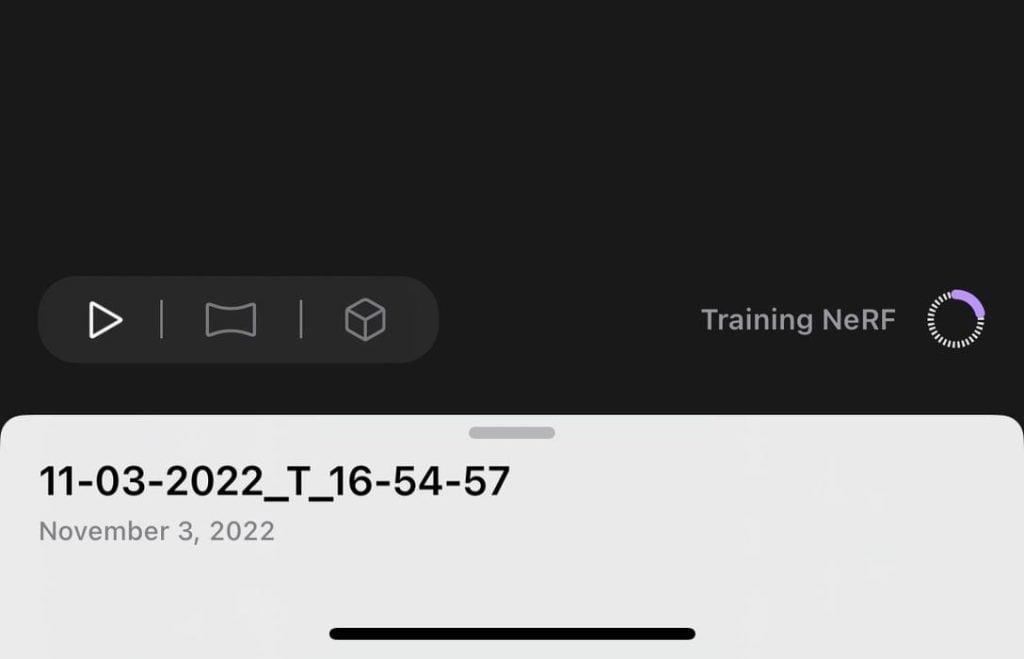
These steps can take some time, but I’ve always obtained a result after 30 minutes or less.
Luma Scanner Results

After a time you’ll be notified that processing has completed, and you’ll see a new entry in your list of scans. A “reconstruction successful” notification will appear. A thumbnail from the scanning session is used to visually indicate which scan is which.
Touching the new scan presents a very smooth 3D view of the scene, courtesy of the NeRF processsing. You can enable or disable the background, which is basically everything outside of the bounding box.
Note, however, that Luma is smart: it consistently takes out extraneous floors automatically, and does quite well at this. This eliminates a typical step to chop out the floor that usually must be done with separate CAD tools.
Luma lets you download the smooth video for reposting to social networks, but of course we’re interested in the 3D model.
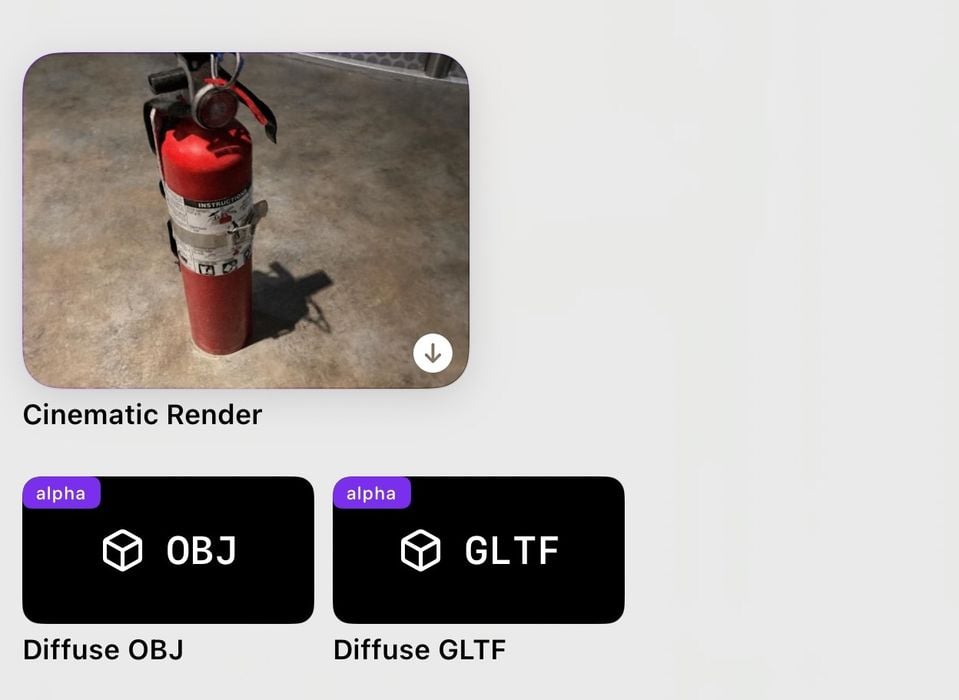
This is done by simply clicking on one of the two download buttons provided for each scan. You can download a color OBJ file, or a GLTF file. These can be shared in a variety of ways; I chose to simply save to iCloud Drive or AirDrop, which works near-instantly. From there you can use any CAD tools on the file as you would normally do.
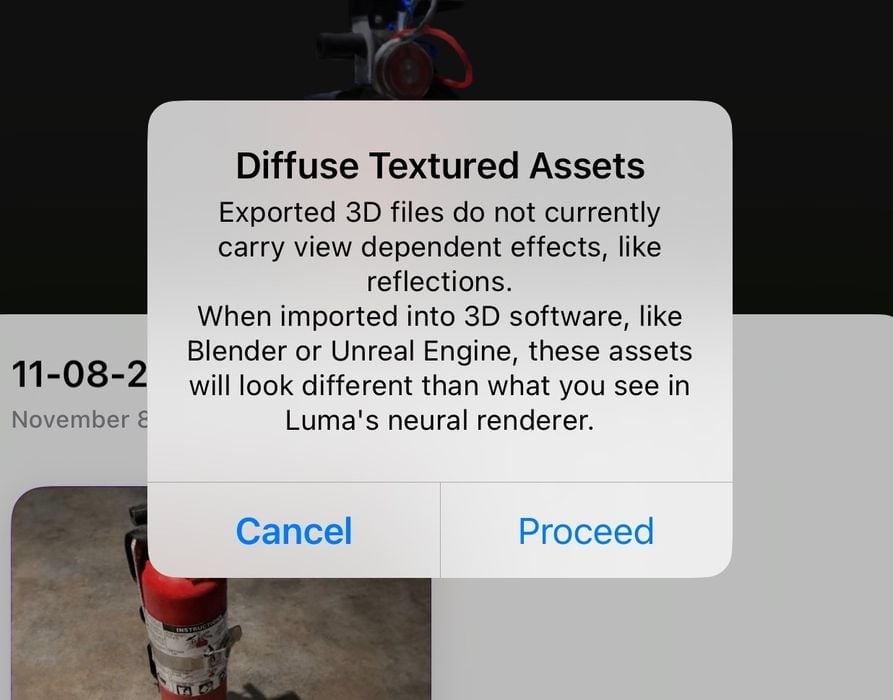
Luma does provide a warning that downloaded 3D assets won’t actually appear the same in a CAD tool. This is because the NeRF system can render the 3D images with far better light and color than other tools. However, you do get the 3D model.
One issue I had was that some of my scans did not present download buttons. After some discussion with other testers, it appears this is because I had not done a “full 360” on the scan. Nevertheless, a couple of days later the buttons DID appear! My suggestion here is to simply be patient.
I used the OBJ format, since it’s something I am more familiar with, and it’s easily converted into STL or other printable formats with tools like MeshLab.
I found every scan captured with Luma was superior to other scanning apps I’ve used. There are more details, better resolution and even an ability to handle tricky situations.
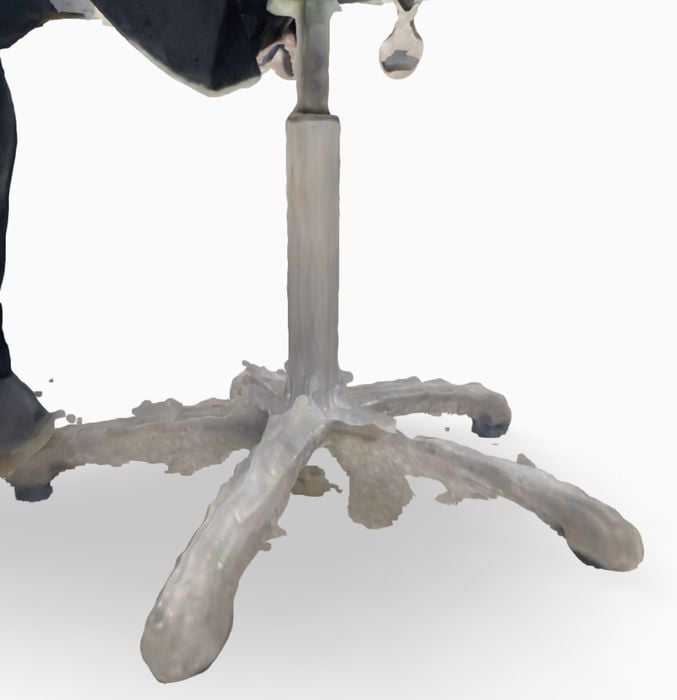
For example, the chair post seen here is captured quite well, considering that it is chrome and highly reflective. In other scanning apps this item simply doesn’t scan well at all. In our review of Scanamaze, a photogrammetry app, I used the very same chair and it turned out so bad I had to edit in a cylinder to make the object printable.
Not so with Luma’s result: it seems to be able to capture reflective objects. This is likely because of the nature of NeRF processing, which is all about predicting light rays.
This is also true of flat surfaces, which typically look bumpy from most scanner apps. Here, Luma does a much better job. Surfaces are not perfectly flat, but they are noticeably flatter.
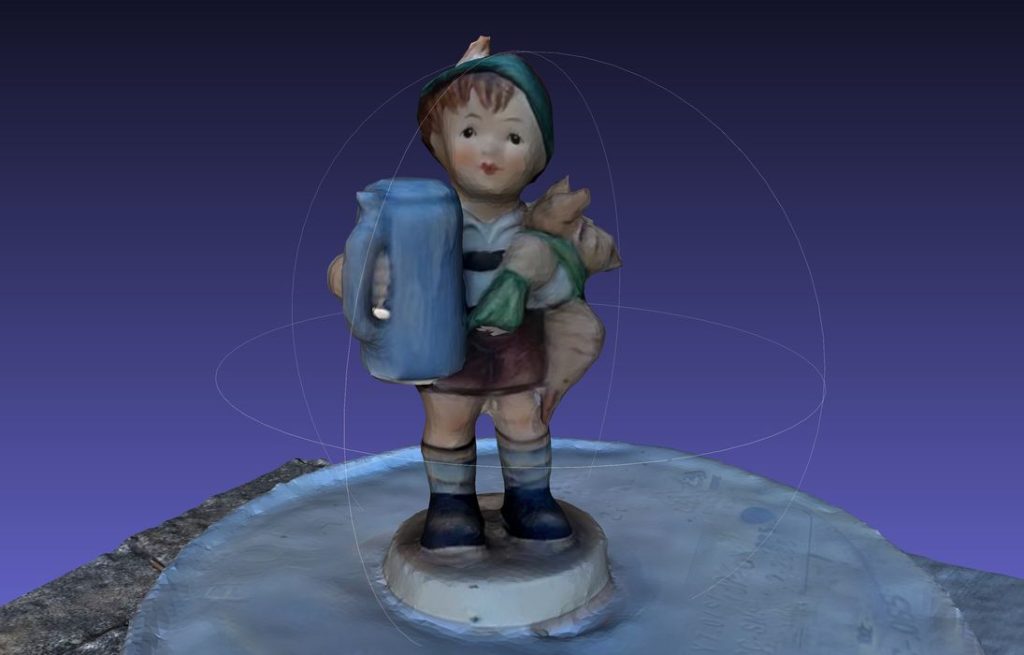
As usual, I tried scanning my test object, a small Hummel ceramic figurine. The results were amazing, perhaps the best scan of this object I’ve ever done.
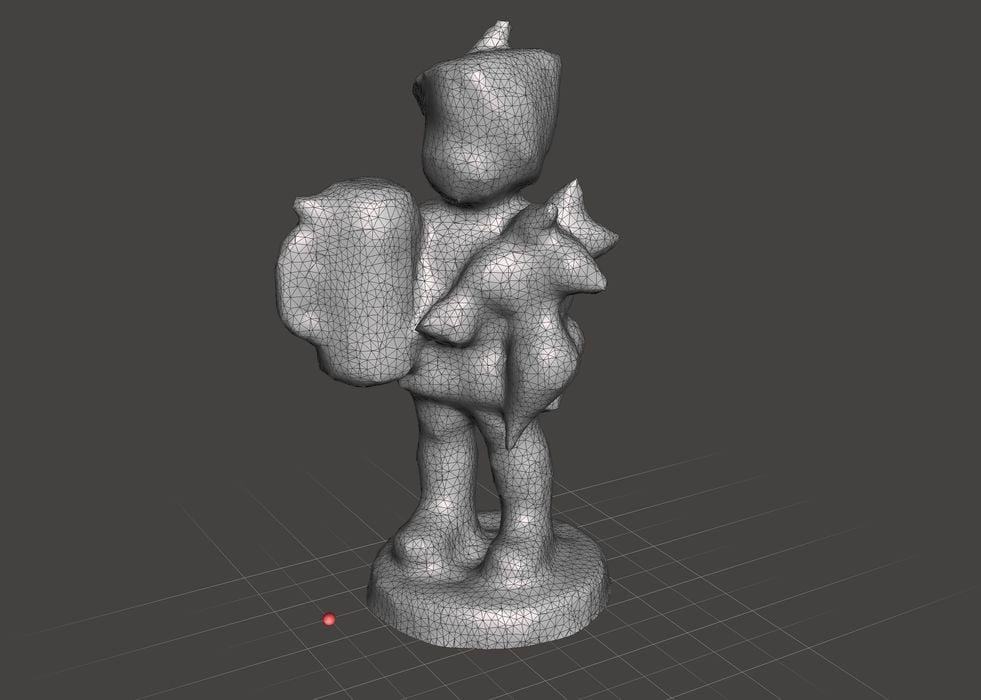
Here you can see the underlying mesh, which is noticeably accurate and smooth. This is quite impressive for a couple of minutes scanning with a smartphone. No other app I’ve tried, and even some fancy photogrammetry apps, was able to achieve this quality of a scan.
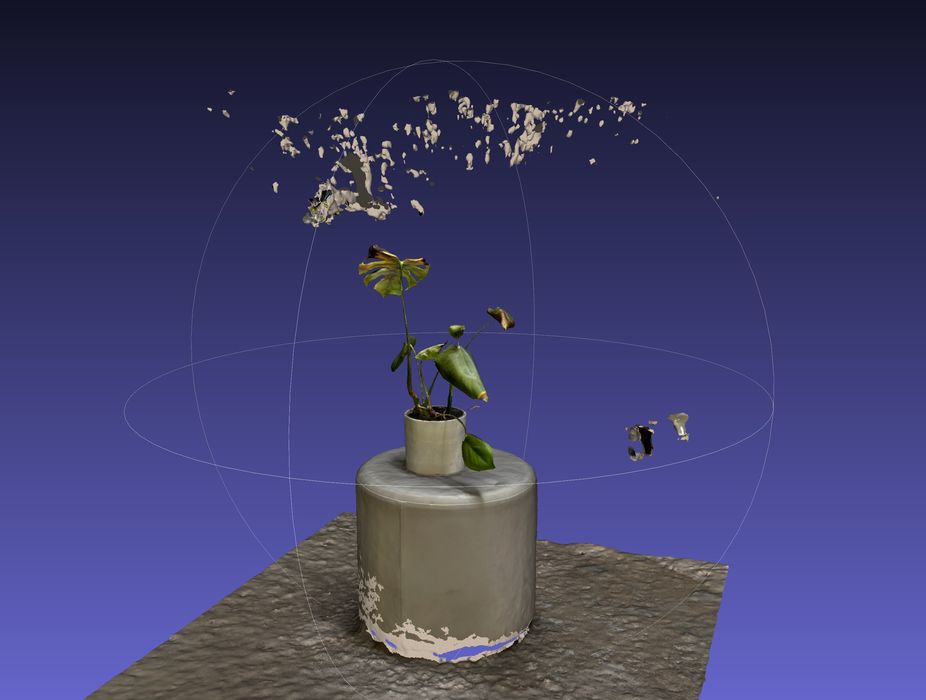
I tried scanning a spindly looking houseplant, thinking it would be near impossible to capture it properly with any 3D scanning system.

Note that when you download a 3D model from Luma, it doesn’t always crop the image as it is displayed in the app, and thus the mesh provided will need some simple editing.

I was completely wrong; the plant capture came out nearly perfect in every way, aside from some extraneous bits that had to be manually cut away. While it’s likely not 3D printable because of its very spindly structure, it was quite accurately captured by Luma. Very impressive!
How To Get the Luma Scanner App
The Luma 3D scanner app has to be the best app of its type I’ve used. The results rival anything I’ve seen, aside from high-end hardware and photogrammetry with many hundreds of images.
But for a 3D scanner in your pocket or purse, you can’t beat Luma.
Is it possible to get Luma? Sort of.
It’s not yet publicly released, and you won’t find it in app stores. However, it is available for selected beta testers on iOS only. The process is to apply for the beta, and if you’re lucky you will get an invite to participate.
From there you will be given instructions on how to download the beta software using TestFlight. There is also a Discord server to discuss issues and tips with others in the beta program.
It’s not clear where Luma is heading with this app. I suspect eventually it will become monetized in some way, and appear in app stores, but we don’t know when.
For now, it’s beta software that’s entirely free to use.
Via Luma