
Our look at the Method X 3D printer continues with setup, calibration and operations.
This is part two of a four part series, please read parts one, three and four.
Method X 3D Printer Setup and Calibration
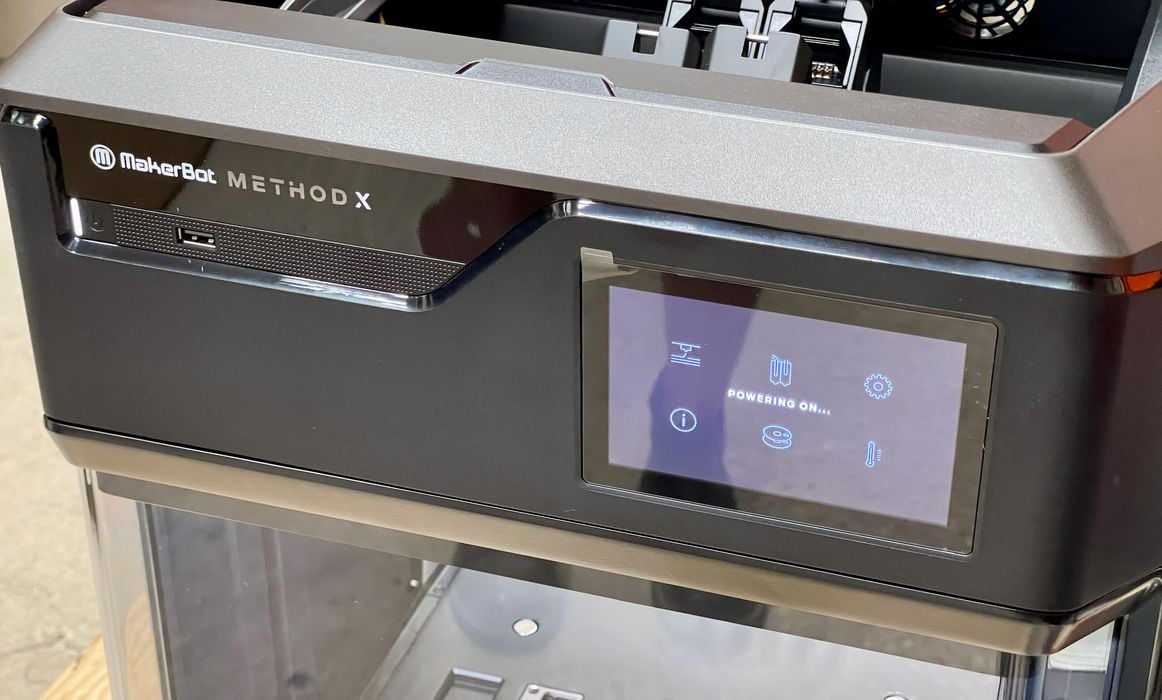
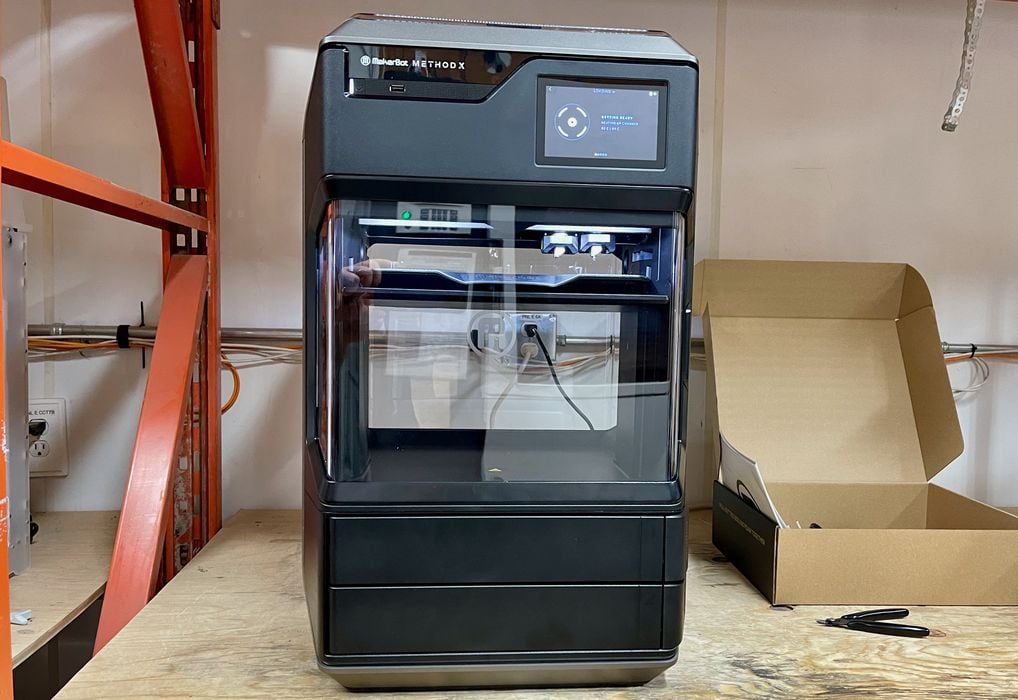
After a moment the Method X whirred to life and the screen activated.
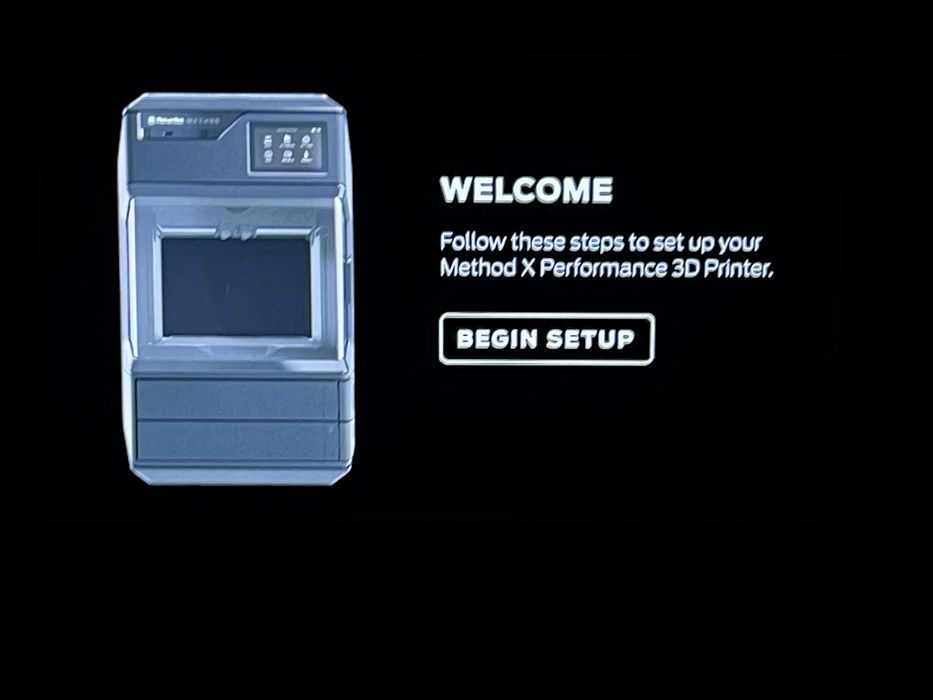
As expected, there is a smart wizard to lead you through the configuration and setup of the machine.
One issue we encountered was that the touchscreen was quite laggy during initial set up. This was puzzling, but after a firmware upgrade the problem seemed to disappear. I expect no one will see that issue going forward.
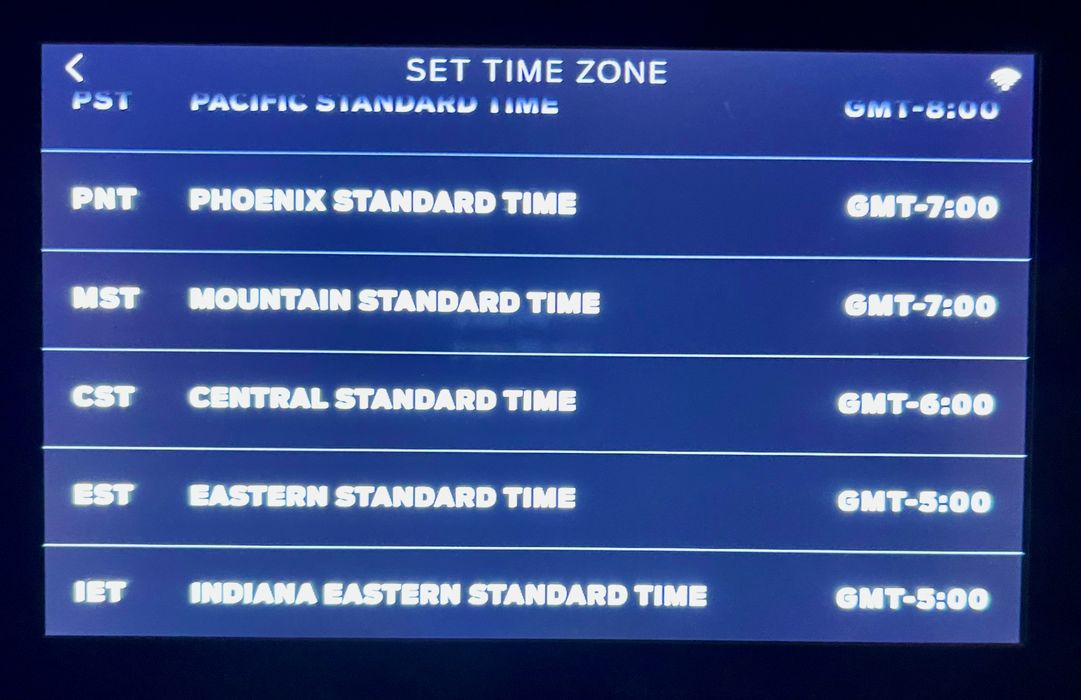
We had to set the timezone. This is a minor thing, but as far as I recall, I have never had to set a timezone on a 3D printer previously. This is likely required to help coordinate timing with the cloud management system.
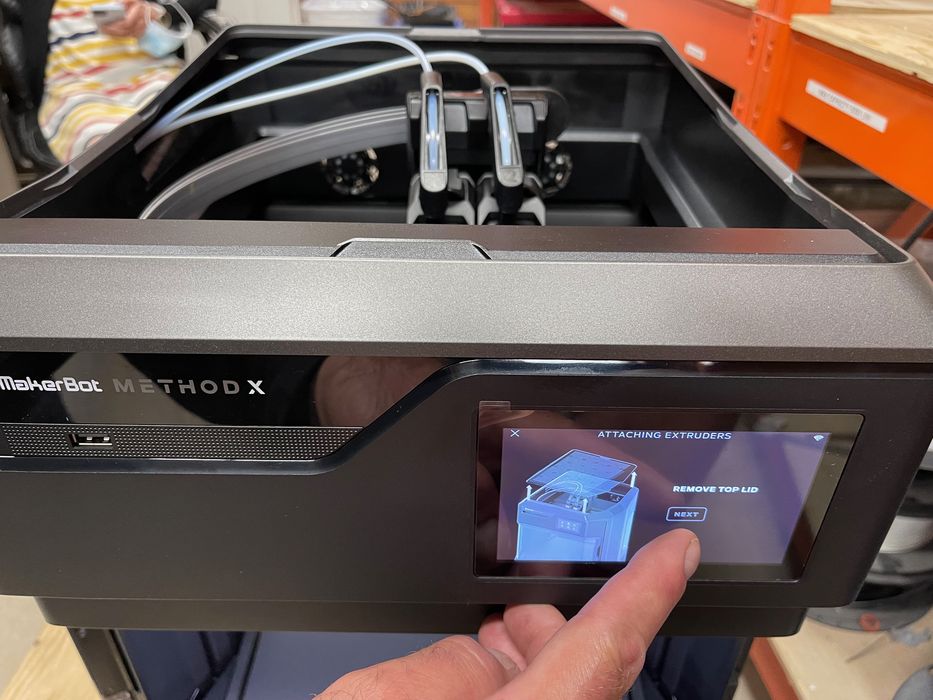
Oh oh! Now the Method X is asking us to install the Smart Extruders. But we already did that on our own. We found this a bit unusual. Normally 3D printers must be assembled before power on, so it was “natural” for us to put it all together. However, it seems that MakerBot assumes a different sequence of events.
In retrospect this is perhaps due to the concept of the Smart Extruder being a consumable: it’s not really a permanent part of the machine as it would be on other 3D printers.
The next step was to level the bed, which is done automatically. However, the method of doing so was quite unique. Instead of probing the surface as every other 3D printer does, here you have to remove the print tray.
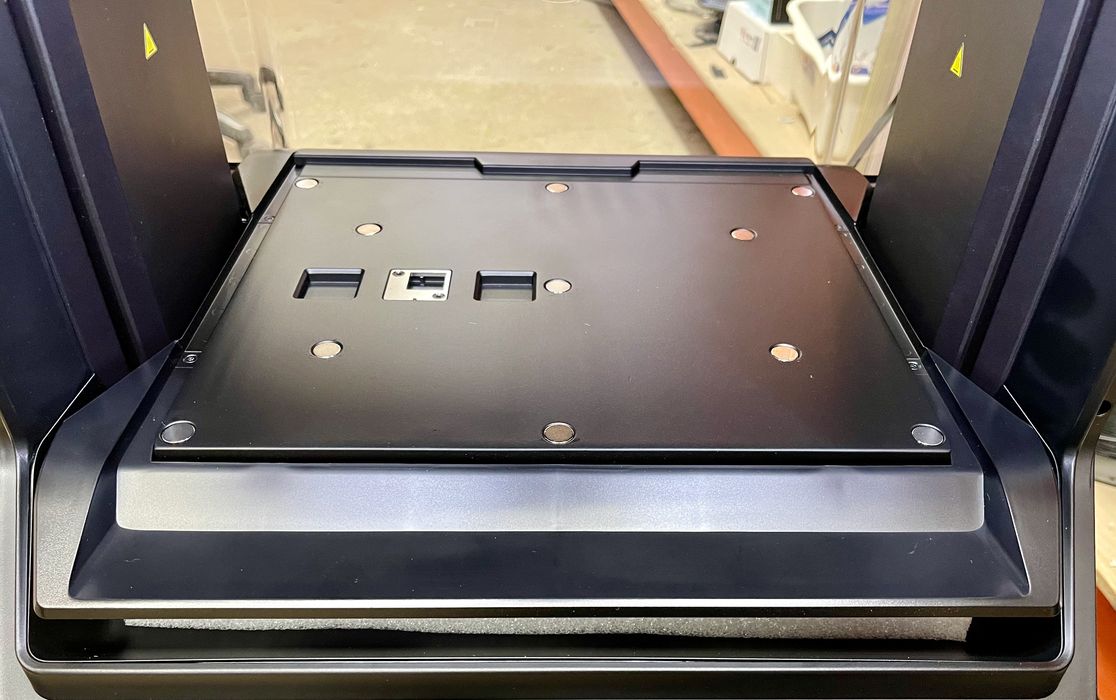
This exposes a cavity in the base plate, and that’s where the nozzle go during the leveling process. I’m not sure how this works, but we encountered no leveling issues during print operations afterwards.
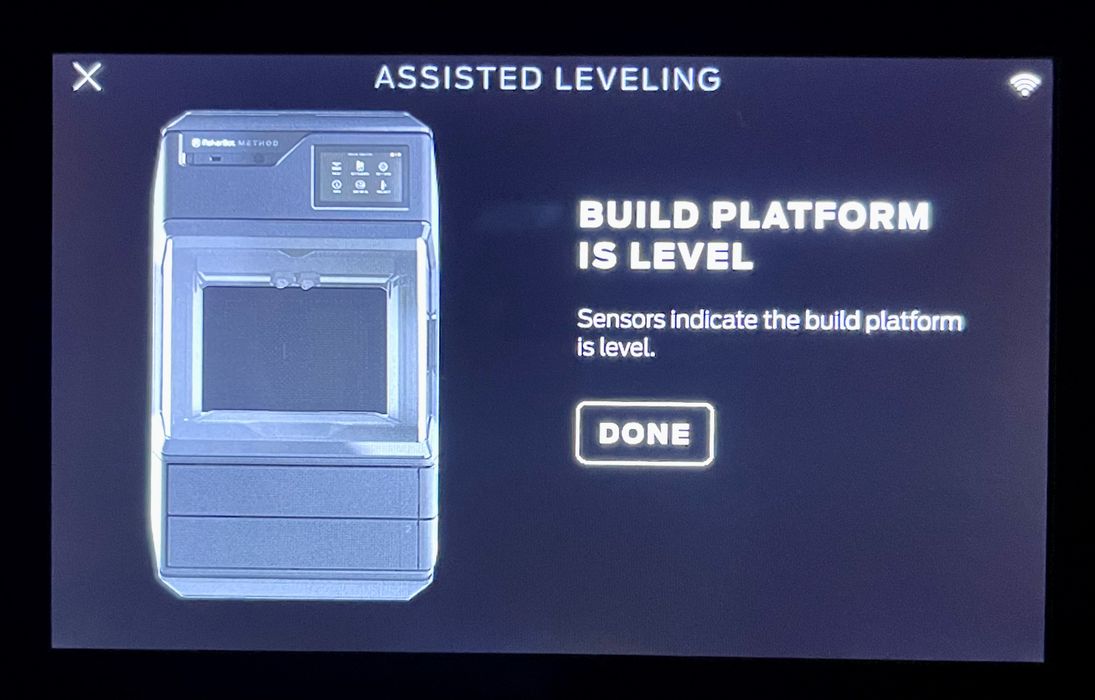
The machine informed us that the leveling had been completed, and now it was time to load materials.
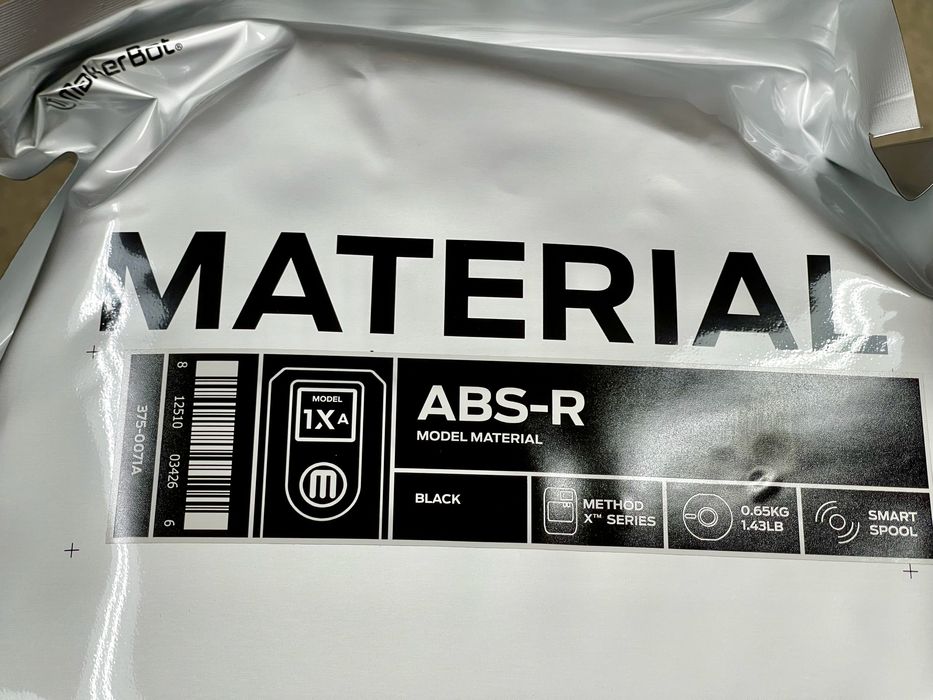
For this machine we were able to use only two different materials: ABS-R. This is a special ABS mix from MakerBot that is used with their soluble support material. This must be loaded into the material bay (the other bay is for support material.) The material spools are very well packed in tight foil packets.
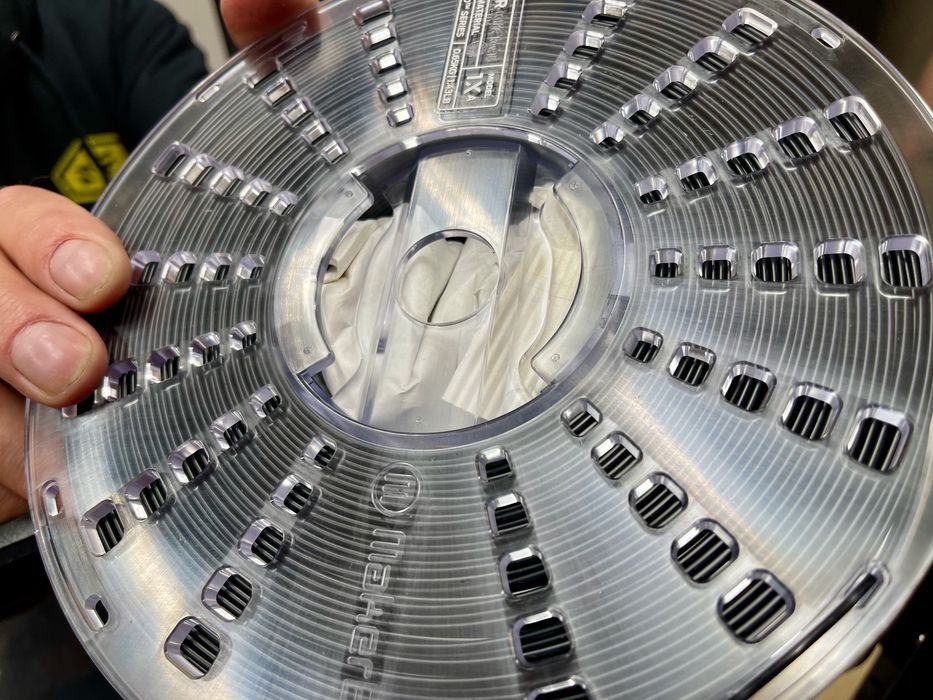
We noticed a considerable amount of desiccant stored with the ABS-R in the center hub. This is quite a bit more than is normally found with third party spools. ABS is also not known for absorbing moisture, so this seemed unusual.
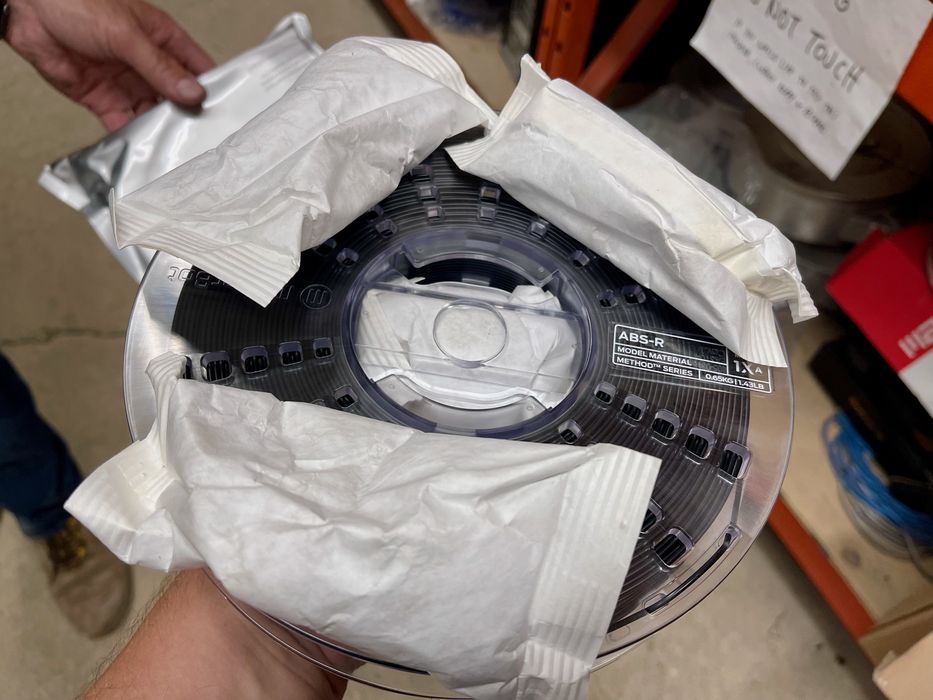
In fact, the foil bag for the ABS-R spool had even more desiccant in it. These are massive bags of the stuff, which would certainly keep the material bone dry during shipment.
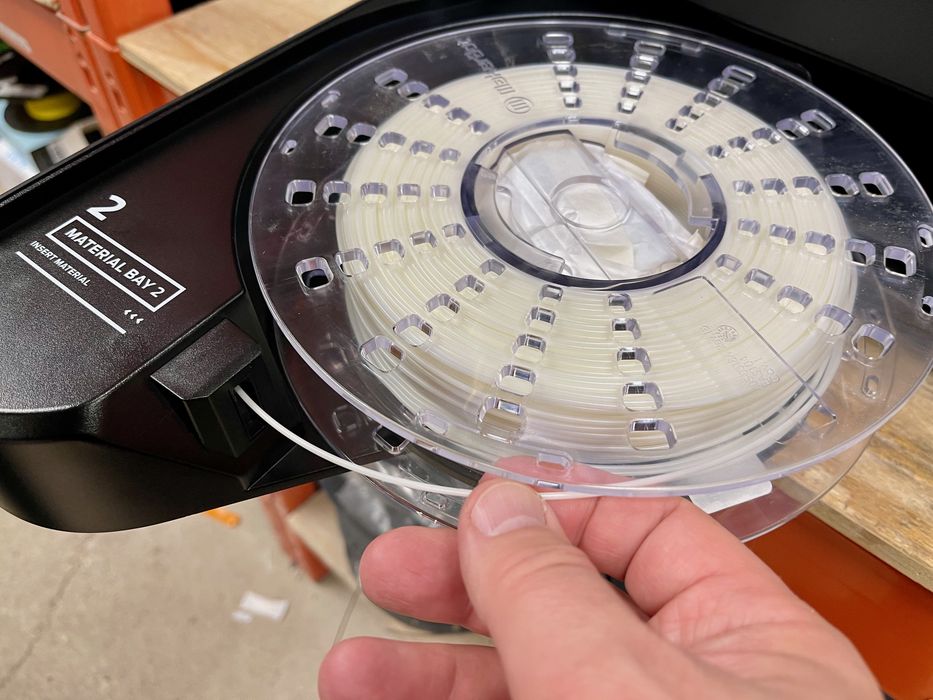
Loading material is easy, so long as you put the spool into the correct bay. They are labeled “1” and “2”, with “1” being for model material, and the other for support material.
The Method X will automatically pick up the filament and feed it all the way through the machine for you. No need to push it as is required on many other 3D printers.
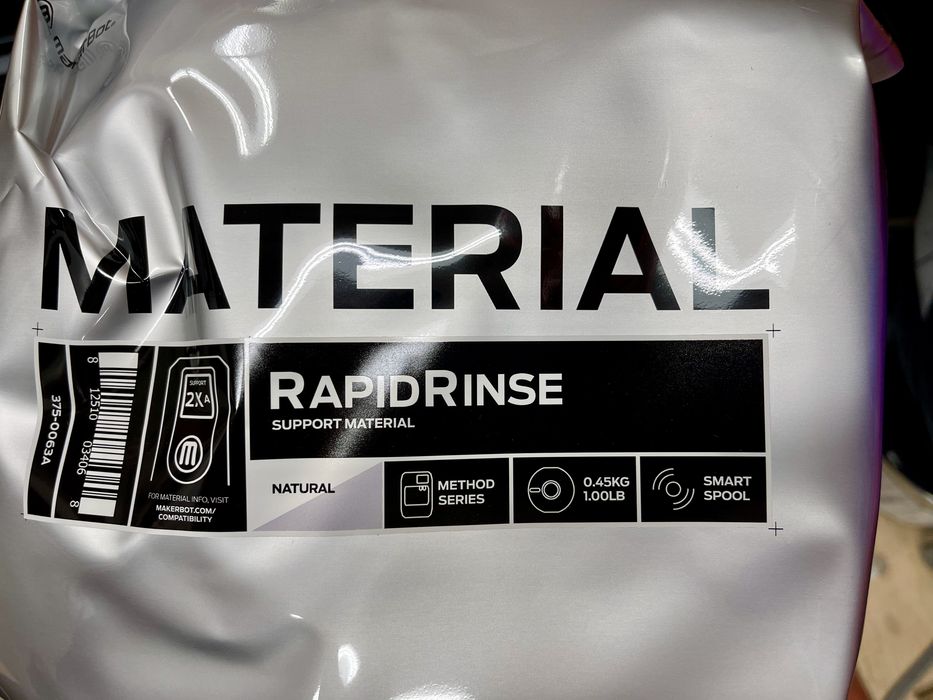
Our support material was MakerBot’s RapidRinse, a powerful soluble support material. The idea is to simply wash away the supports rather than laboriously picking it off. We were quite interested to test this feature. The support material loads in exactly the same manner.
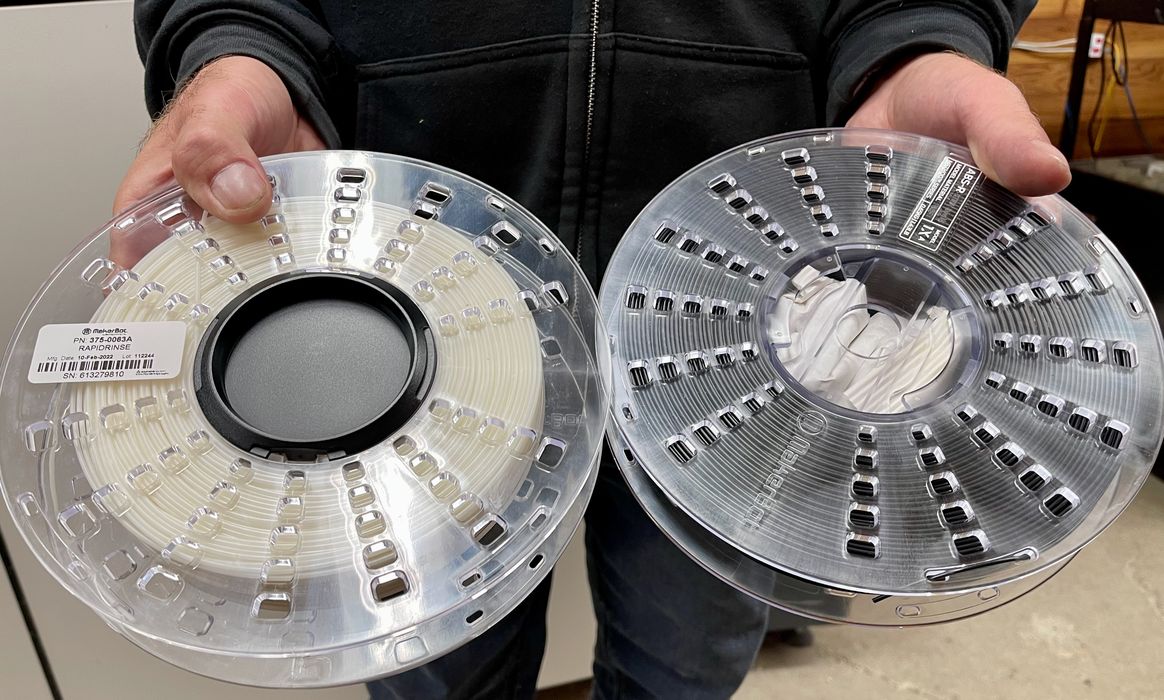
One thing we should point out is that the spools for the Method X hold a fair bit less material than you would expect. The industry standard is 1kg spools, with 750g being seen occasionally. Here the ABS-R spool holds only 650g, and the RapidRinse spool even less, 450g. This support material is also quite pricey at US$119 per spool, or US$264/kg.
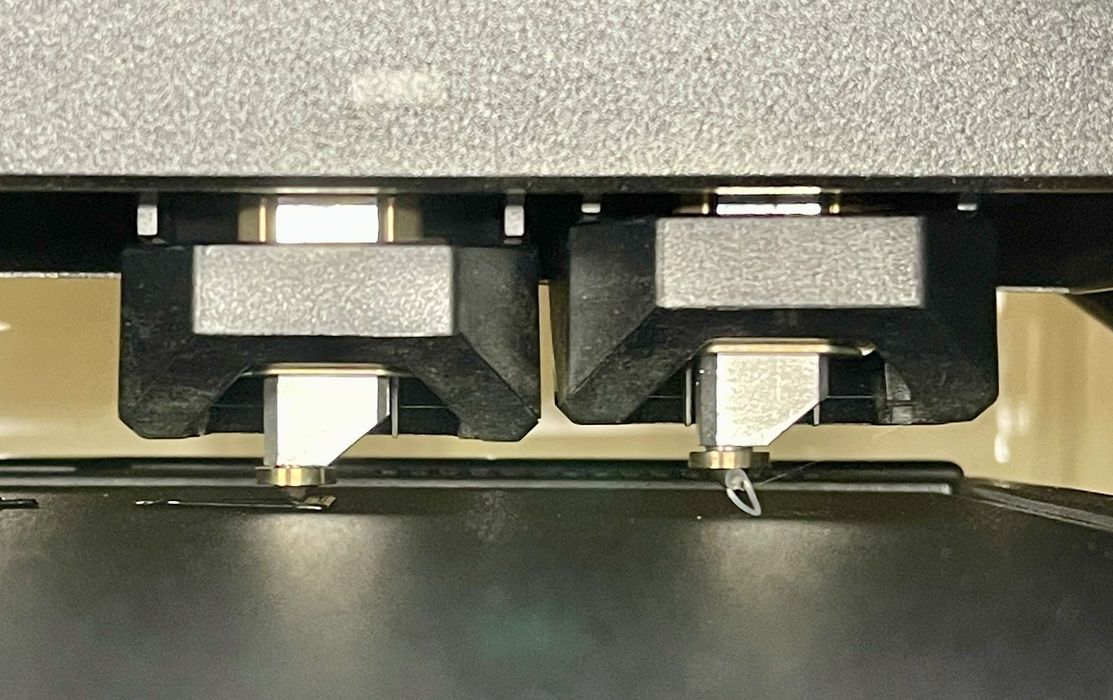
At this point our extruders were ready, although we noticed a bit of a drip from the support nozzle. More about this later.
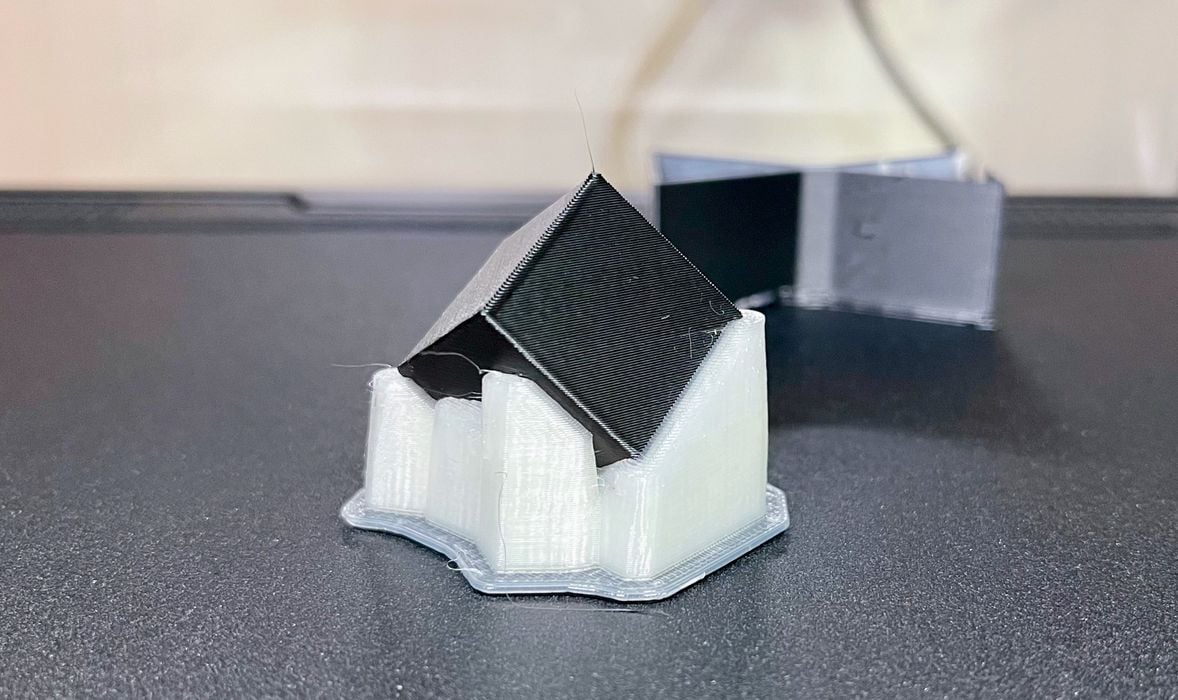
Our first print was a simple calibration cube, which had outstanding quality, particularly for ABS material.
Method X 3D Printer Operations
Operating the Method X is relatively painless, but we did encounter a couple of problems that you should take note.
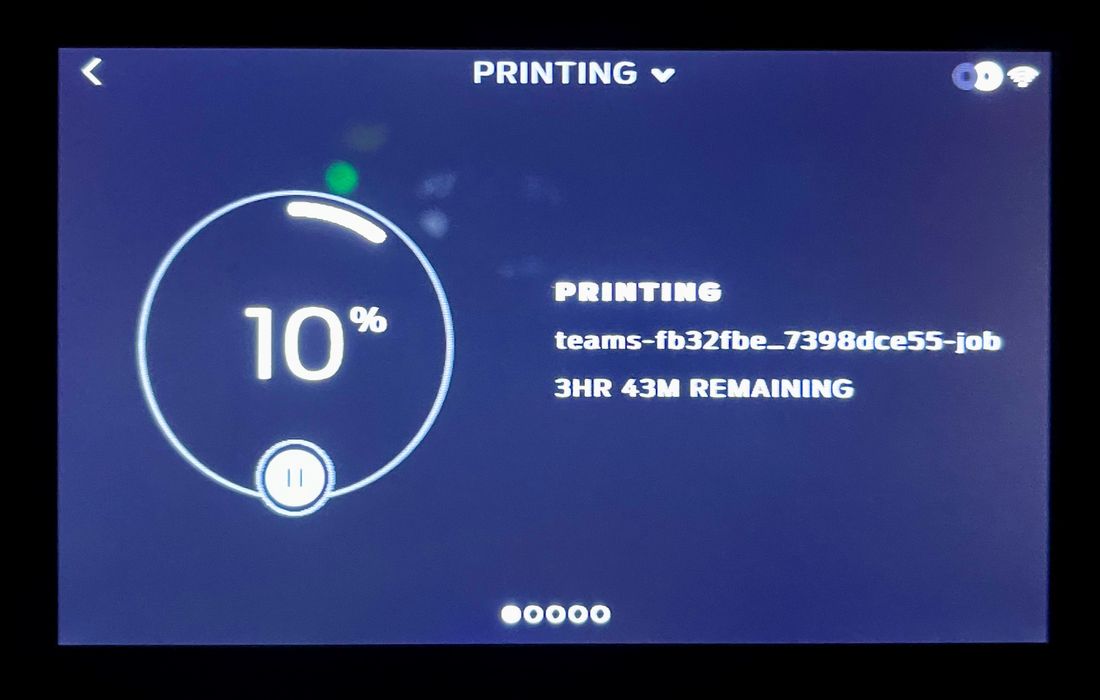
The front panel on the Method X always shows the current status of the machine. There is a status panel, and if you look close you can see that it can slide to the left or right for more detailed information.
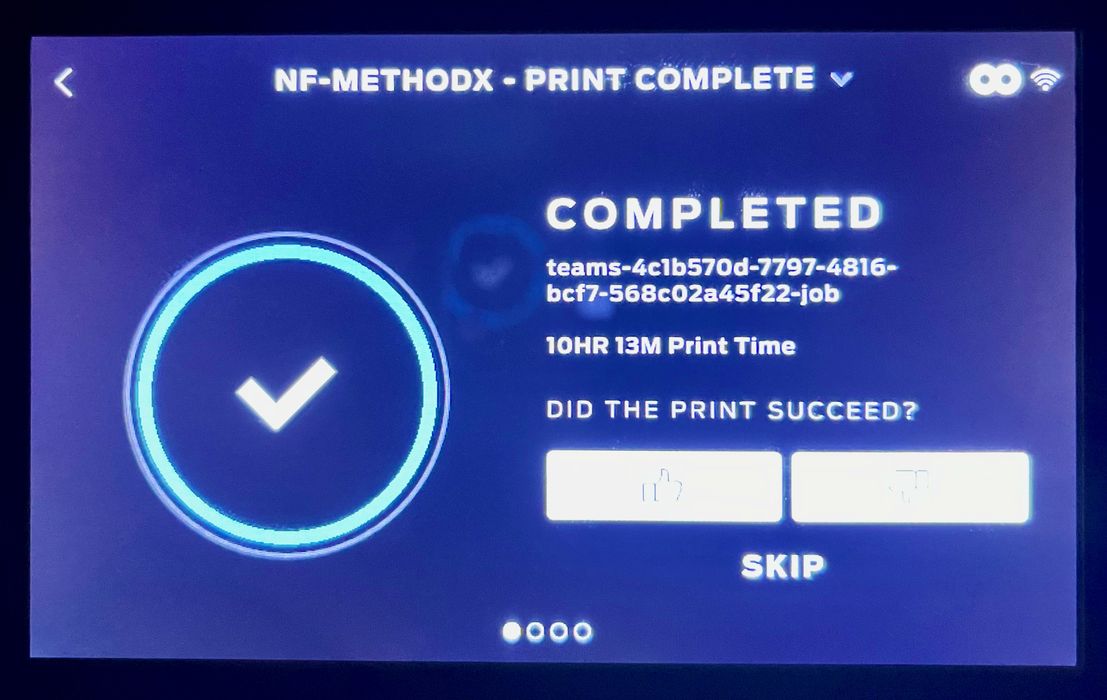
When jobs complete the front panel gives you the information. However, the real notifications are going through the cloud system, which we’ll explore a bit later.
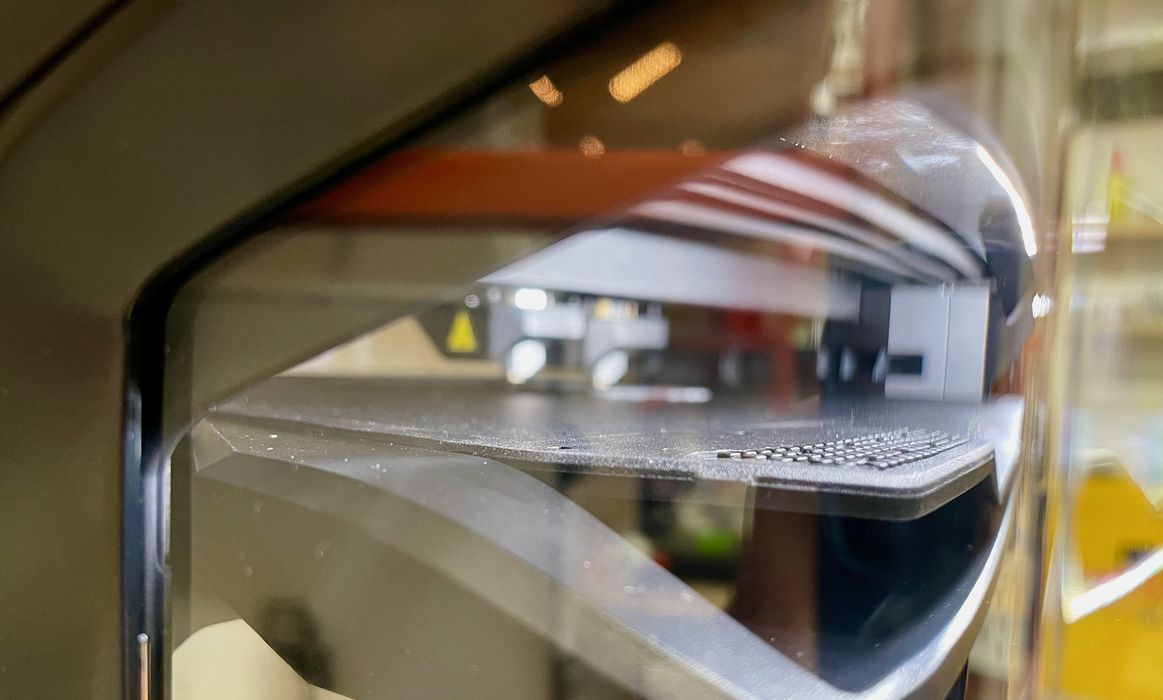
A unique feature of the Method X is the corners. This is perhaps the only machine we’ve seen with a totally clear corner, allowing for terrific views of the action inside the build chamber.
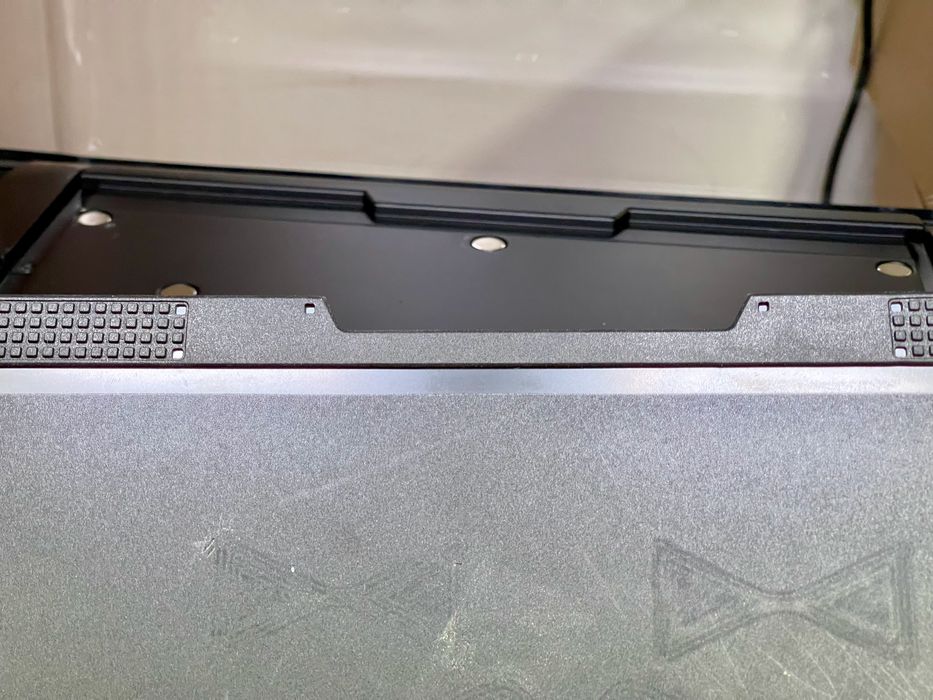
The build tray is magnetically attached, and really easy to mount. Here you can see a notch that perfectly aligns it every time you install it.
Note that the build surface can wear out, and you need to replace the adhesive from time to time. It’s just a sticker that is placed on the actual tray, and easy to replace.
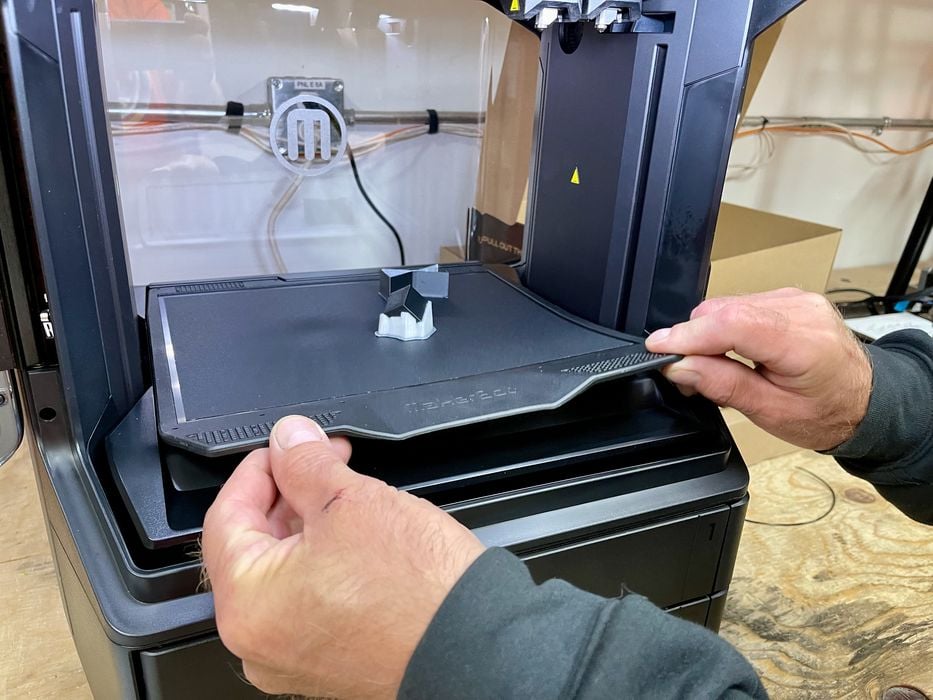
After printing, the operator would lift up the rubbery print tray and give it a twist to release the prints. However, remember that the build chamber can reach 90C, so this is NOT like other 3D printers where you can grab prints as soon as they’re done. Here you will literally burn your fingers if you do so.
I recommend using gloves, or even better, leave the print to cool down on its own. However, that can take some time to do.
This is part two of a four part series, please read parts one, three and four.
Via UltiMaker