
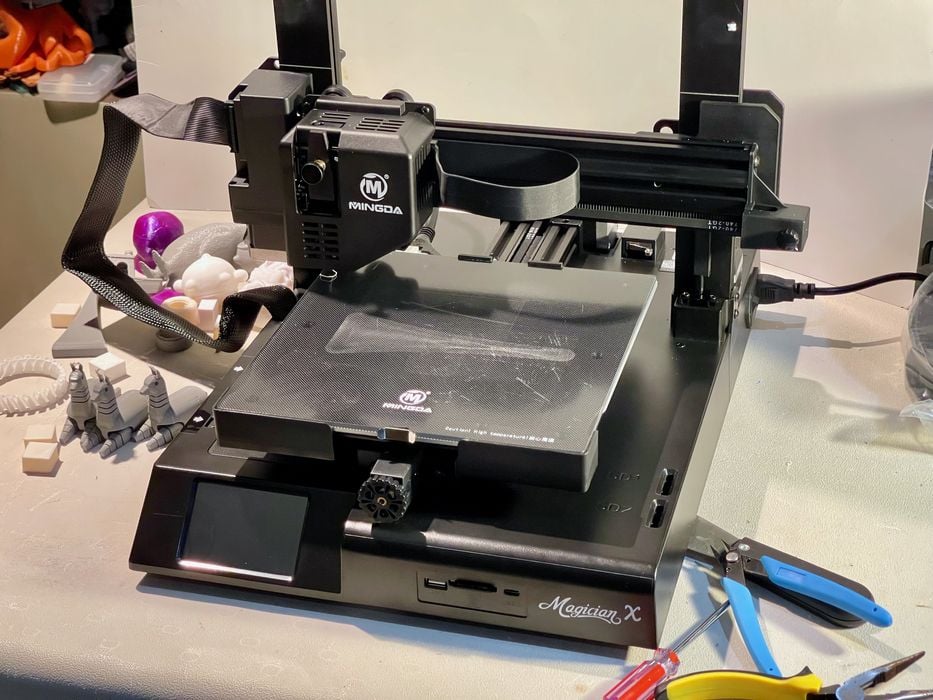
Our test of the MINGDA Magician X desktop 3D printer finishes with a look at software, print quality and final thoughts.
This is part three of a three part series, please read parts one and two.
MINGDA Magician X Software
The Magician X is mostly software agnostic; you are able to use any of the popular 3D print preparation software tools, like Ultimaker Cura and PrusaSlicer.
MINGDA provides a version of Ultimaker Cura on their SD card, which was of course an older version, 4.13 in my case. Meanwhile, Ultimaker has released version 5, which is far more powerful. I found it quite straightforward to add a configuration in the current Ultimaker Cura v5 software to allow use of the Magician X.
MINGDA includes detailed instructions on how to add the Magician X into Ultimaker Cura, and these instructions work for any version of that software, including version 5. Be sure to copy over the snippets for starting and ending GCODE from the default Ultimaker Cura copy. For reference, here is the start code:
G28 ; home all axes
M117 ; Purge extruder
G92 E0 ; reset extruder
G1 Z1.0 F3000 ; move z up little to prevent scratching of surface
G1 X2 Y20 Z0.3 F5000.0 ; move to start-line position
G1 X2 Y200.0 Z0.3 F1500.0 E15 ; draw 1st line
G1 X2 Y200.0 Z0.4 F5000.0 ; move to side a little
G1 X2 Y20 Z0.4 F1500.0 E30 ; draw 2nd line
G92 E0 ; reset extruder
G1 Z1.0 F3000 ; move z up little to prevent scratching of surface
And the ending code:
G91; relative positioning
G1 Z1.0 F3000 ; move z up little to prevent scratching of print
G90; absolute positioning
G1 X0 Y0 F1000 ; prepare for part removal
M104 S0; turn off extruder
M140 S0 ; turn off bed
M84 ; disable motors
M106 S0 ; turn off fan
MINGDA did provide me with a custom PLA profile, but the stock Cura profiles are pretty decent already. It’s good practice to tune your print profile any time you use a new material, so you can start with the generic PLA profile.
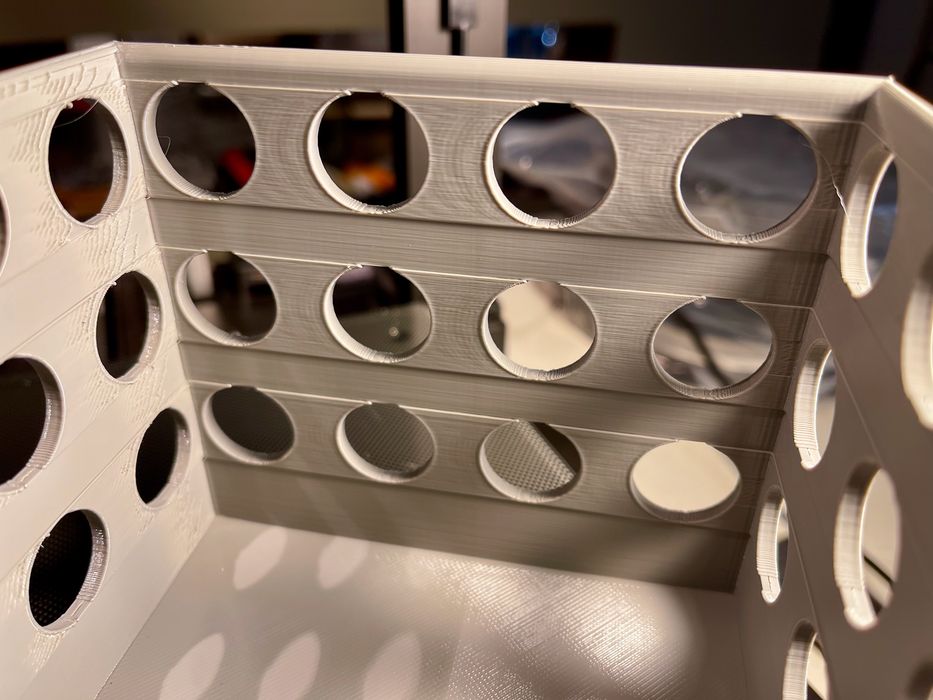
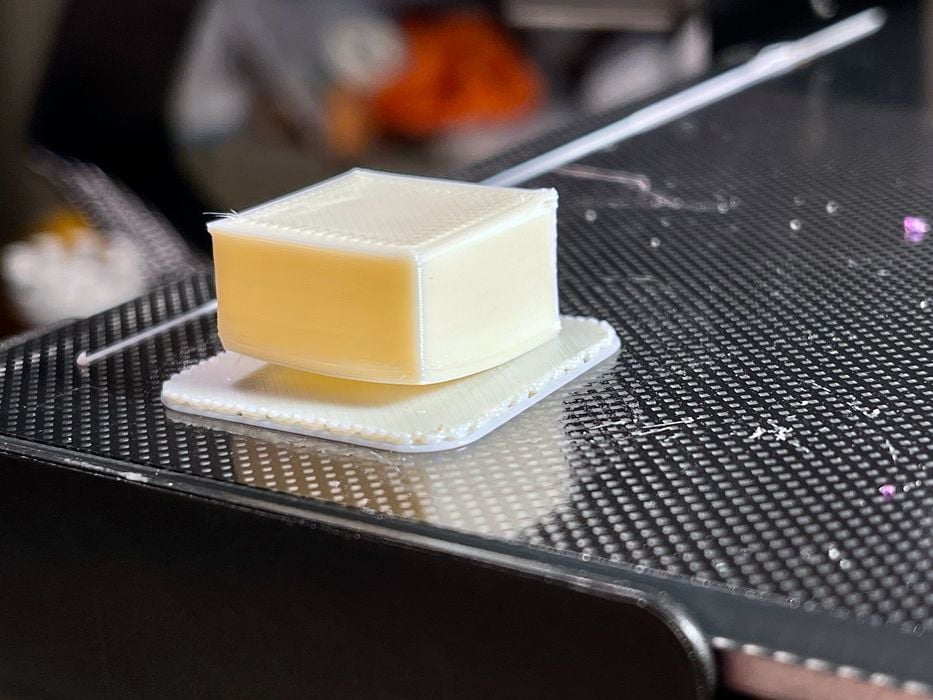
I really didn’t find any issues with using Ultimaker Cura with the Magician X, except for one curious slicing problem — definitely not the fault of MINGDA. I attempted to print a large box with some holes in the sides, as above.
However, you’ll notice an indentation to the box wall between the hole layers. This was NOT in the original CAD design, but I eventually realized that Ultimaker Cura was producing this artifact: the slicer preview actually showed this occurring for some reason. I want to point this out because if you happen to have problems with a 3D printer, it isn’t always the fault of the printer: the slicing software is also quite important.

I found the default profile for PLA used a raft, and this seems to be useful for the glass plate. In general I don’t like to use rafts unless they are required, but it seems to be recommended by MINGDA in their print profile, perhaps because of the adhesion properties of the glass plate.
Using Ultimaker Cura for the Magician X was about as seamless as you could expect with today’s software. I only recommend that you use the most current version of Ultimaker Cura, rather than the older one included with the machine.
MINGDA Magician X Print Results
In general, I found the print results to be quite good on the Magician X, even when using several different materials.
The machine ships with a small coil of PLA, and that’s likely the most frequently used material on this machine. Fortunately, it prints very well. PLA prints were excellent, particularly at 0.15mm layer height.
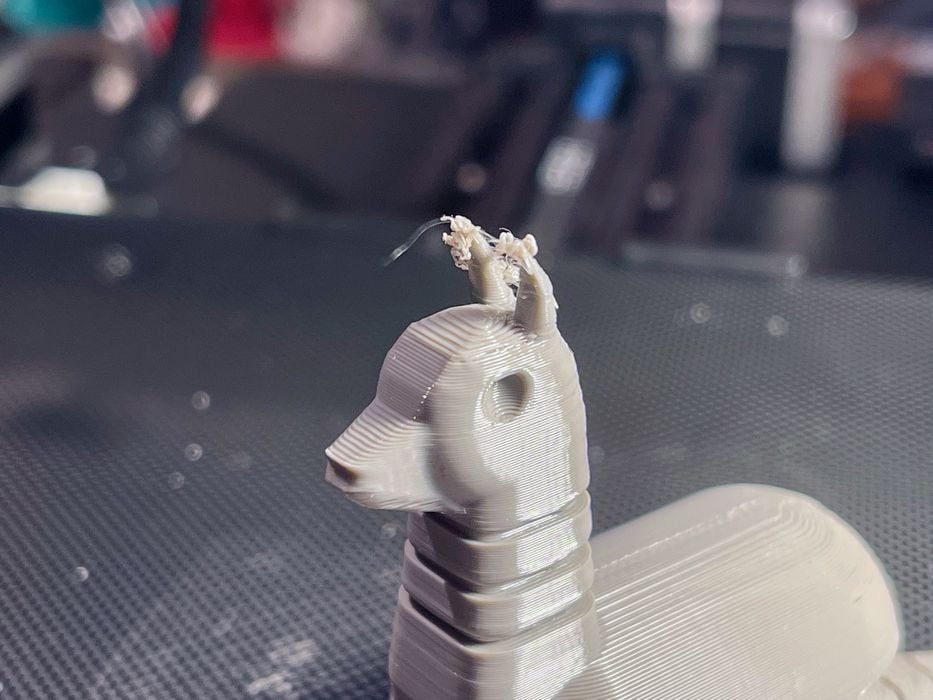
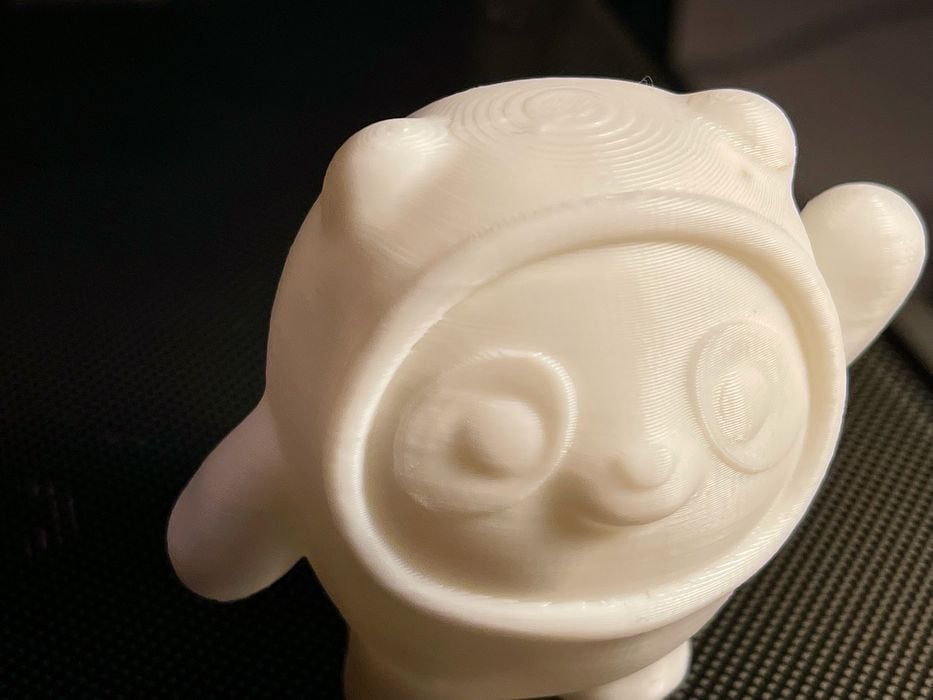
The only issue I encountered with PLA printing on the Magician X is that small-area layers could get messed up, as we can see at the top of this alpaca 3D model.
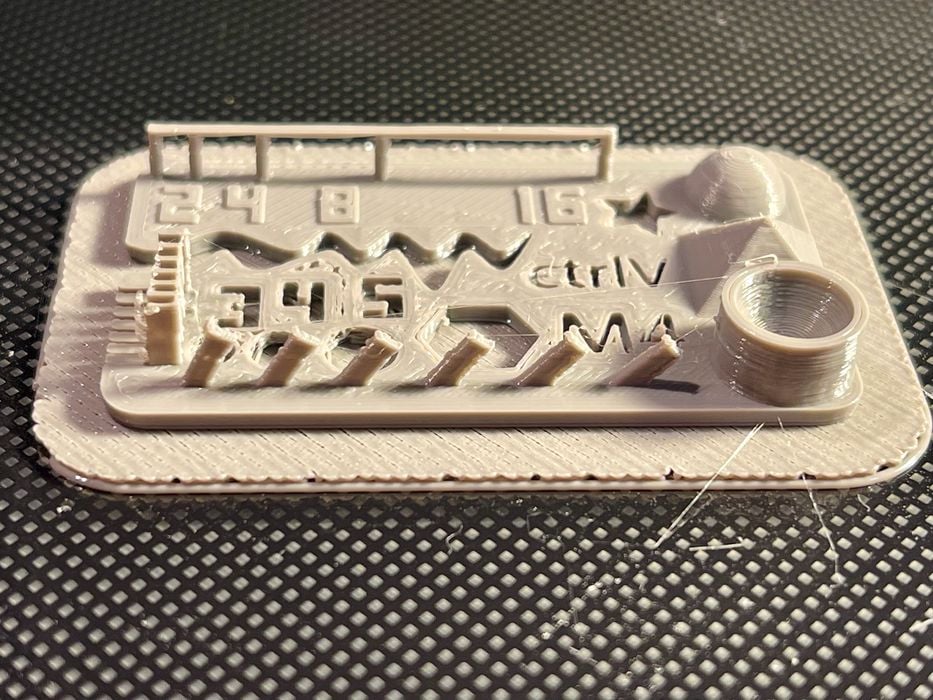
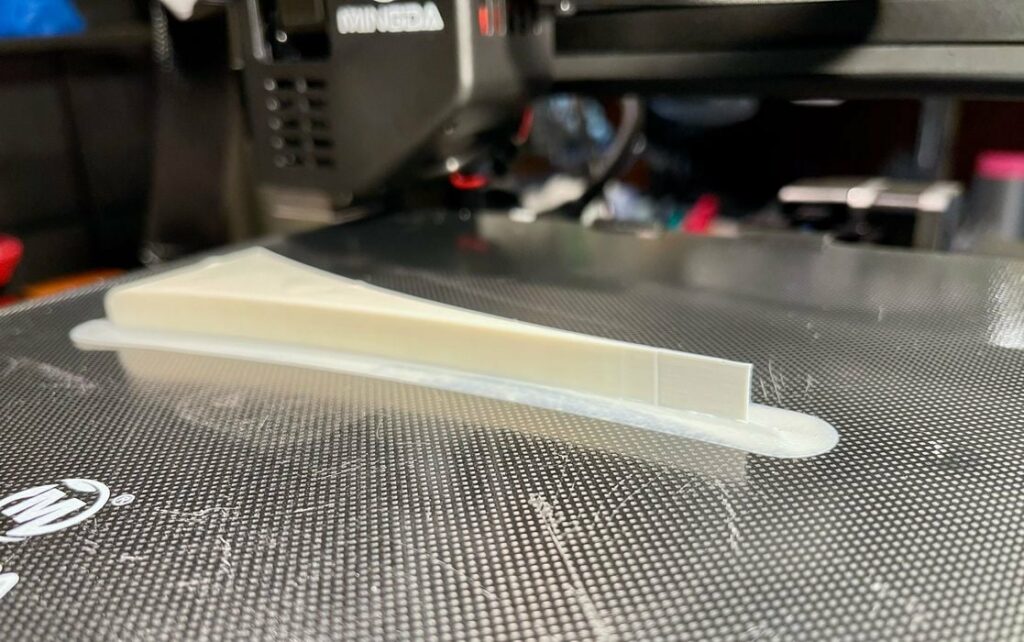
I tried multiple adjustments to temperature, speed and retraction, but could not quite eliminate this issue. I even tested a new print profile from MINGDA, but it did not solve the problem. The issue can cause print failures if encountered at lower levels of the print, as was the case in this spindly bracelet print test:
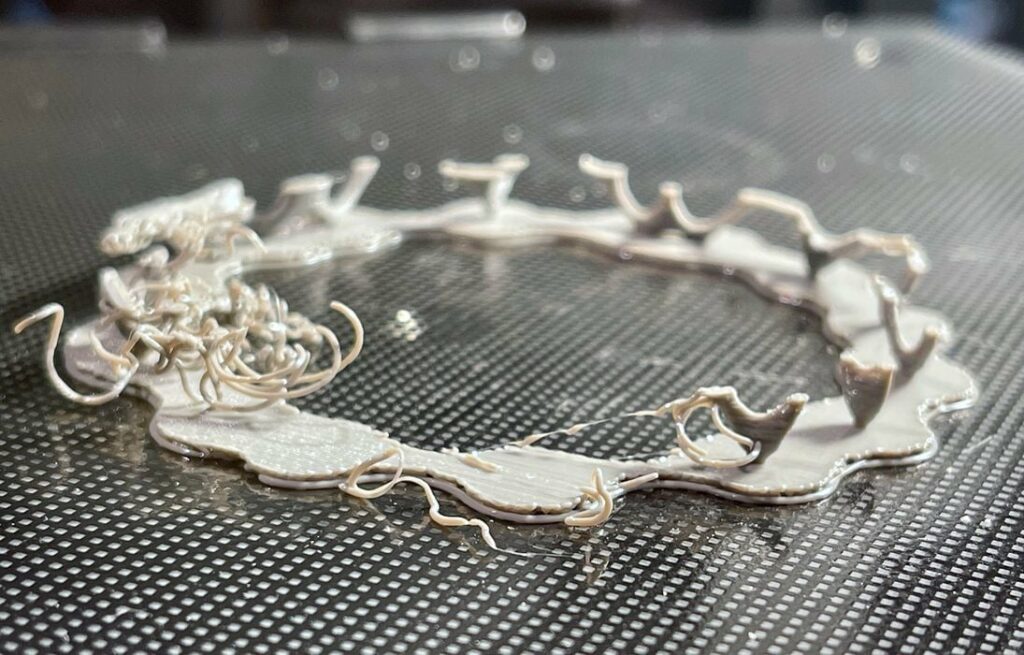
I am quite certain this is a print profile issue, rather than one related to the hardware. I just did not have sufficient time to work out the correct combination of parameters. However, this also suggests that MINGDA might consider providing a set of more fully tested print profiles with the machine on the SD card.

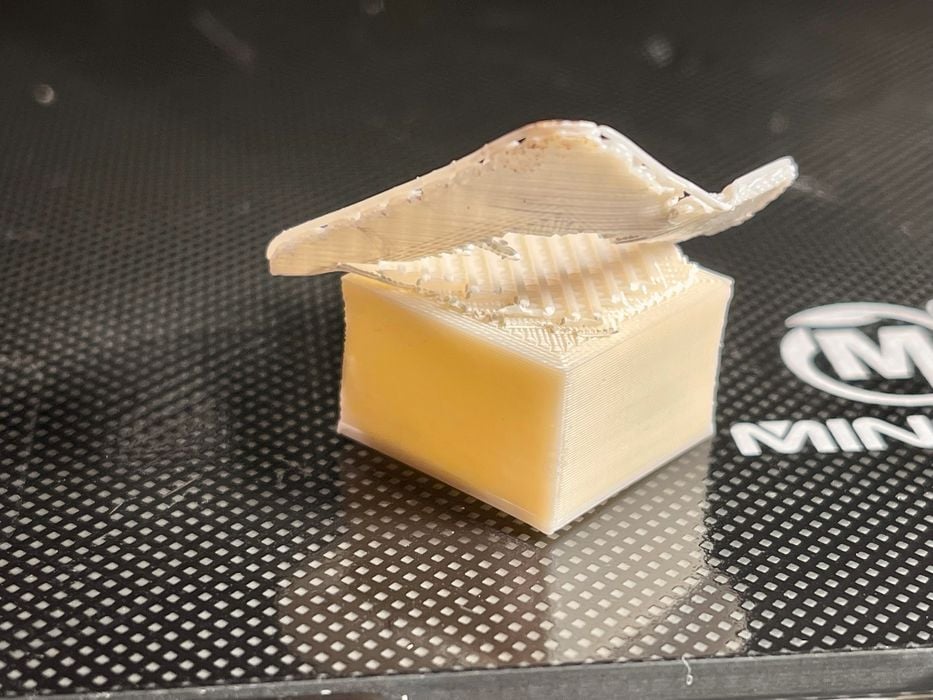
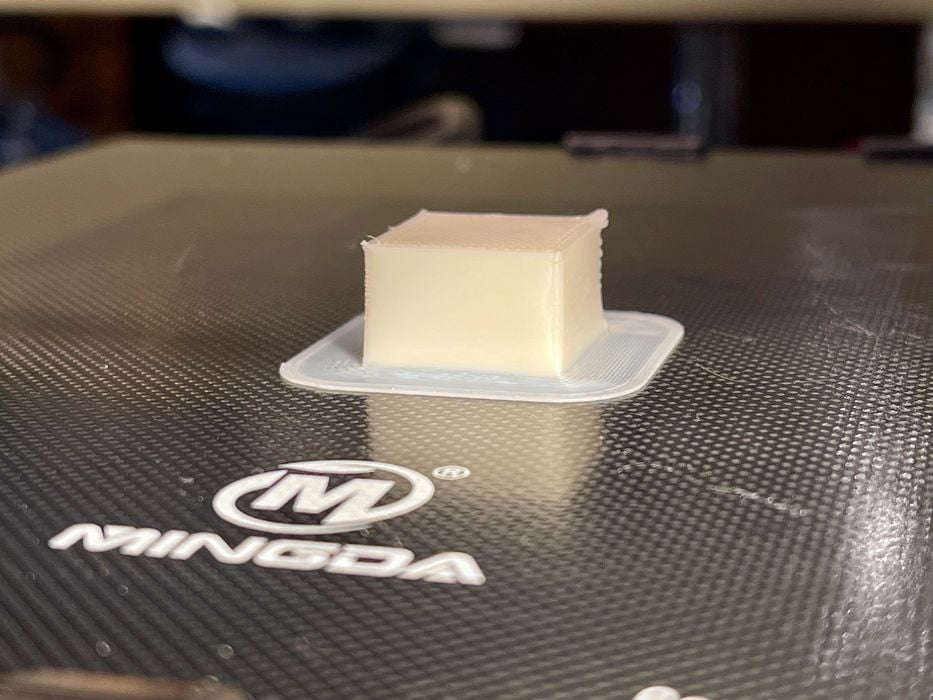
For larger prints I did find the PLA would eventually lift off the glass bed, as seen here. I think this could be resolved by tweaking the Z-gap settings a bit tighter, so this should not be an issue.
The Magician X is fully capable of 3D printing materials other than PLA, so long as the required temperature is less than 260C, since the machine’s hot end contains a PTFE tube that could emit noxious gases at higher temperatures. That opens the door to use of ABS, ASA, PETG and TPU. I tested them all.
The first up was ABS and ASA, both common 3D print materials (ASA is the same as ABS, except its resistant to UV light.) They are tricky substances to print because they tend to significantly warp, and this is doubly challenging on an open gantry machine like the Magician.
I first tried printing with a raft, but the model would separate from the raft during printing. The fix for this was to decrease the gap between the raft and the model, which did work, at least eliminating the warp.
However, this approach proved no good, because the raft would not completely detach from the model.
The correct approach turns out to use a brim, a wide one-layer section surrounding the bottom of the print. I was able to print several ABS and ASA objects using this approach quite successfully, including my evil warp test, which did not warp at all using the brim.
I found PETG to print without issue, and made several successful prints.
However, I did notice that the PETG material I used would leave a bit of an outline on the glass print bed. This didn’t seem to cause any issues with subsequent prints.
The big challenge was to print with flexible TPU material, which is always difficult to print on any 3D printer. The Magician X uses a direct extruder, which should make things much easier than Bowden extruders found on some other equipment.
I found loading TPU could be challenging. The issue was that the flexible material would bend inside the extruder and go everywhere it wasn’t supposed to go, instead of into the hot end.
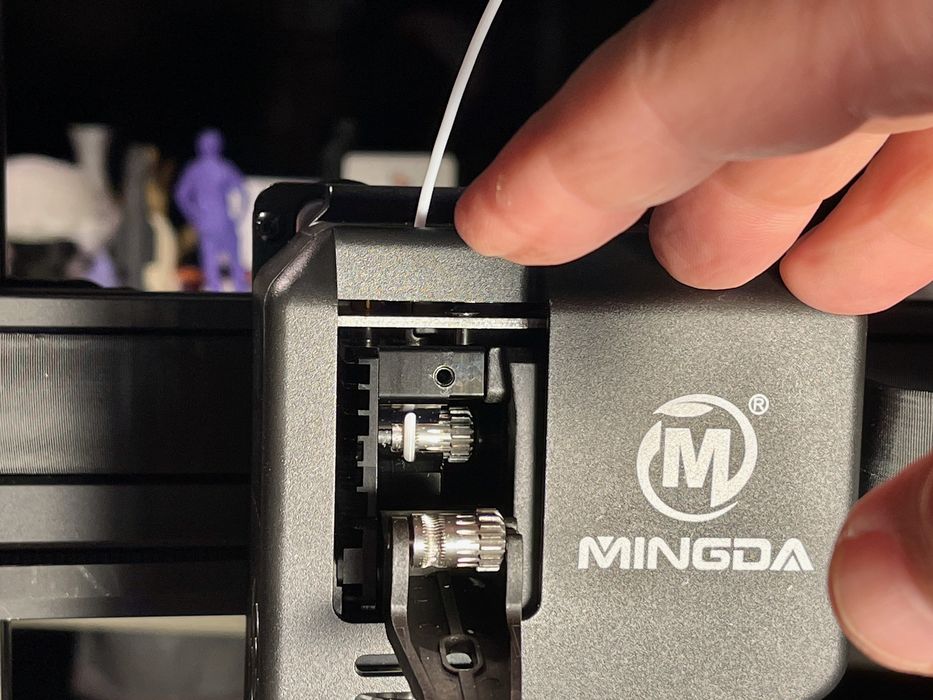
The solution ended up being pretty straightforward: open up the idler arm and just feed it through to the hot end while watching. After initially being frustrated with the normal load procedure, my method for loading TPU worked ever time without fail, and was very easy to do.
But what about the TPU prints?
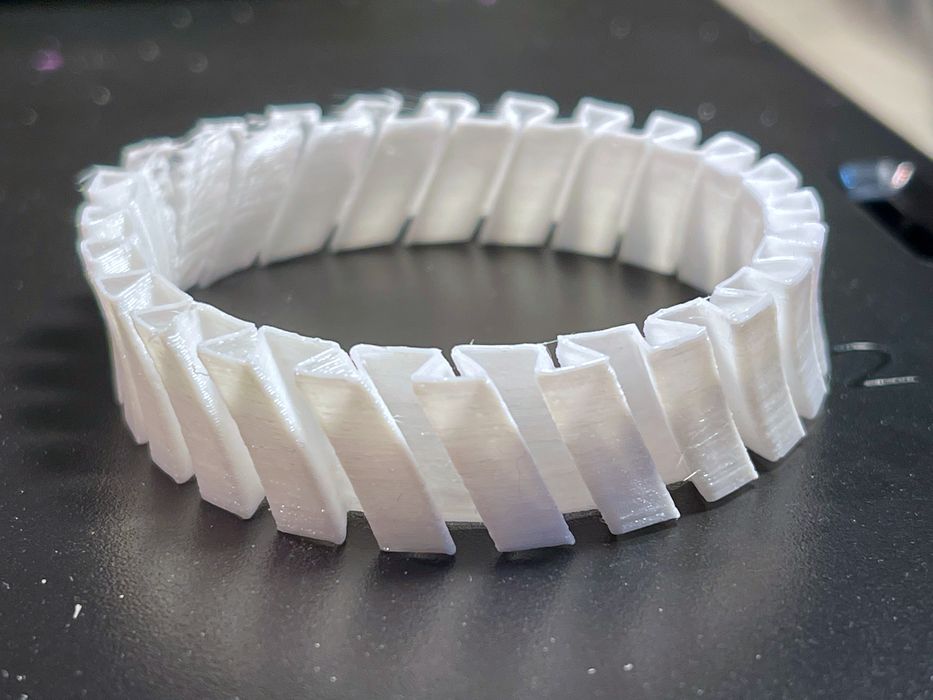
I found them to be quite good, although sometimes a bit stringy, which can likely be solved with some tweaks to the retraction settings. This bracelet worked out quite well.
In almost all cases I found the Magician X to produce very good quality prints, and when avoiding use of a raft the bottoms were as smooth as the glass they were printed upon.
MINGDA Magician X Final Thoughts
The MINGDA Magician X desktop 3D printer is a solid machine, although it has some peculiarities. Its glass bed provides a different experience from other machines with spring steel plates, but does serve the purpose well.
Currently priced at a ridiculously low US$299, this is a device that provides very good value for the money. However, buyers will have to learn the machine’s unique “language” when operating the device.
MINGDA
MAGICIAN X 3D PRINTER
★ BEGINNER 7/10
★ ENTHUSIAST 8/10
★ PRODUCTION 5/10
BEST FEATURES
✔︎ Easy assembly
✔︎ Great print quality
✔︎ Can print TPU, ABS
QUESTIONS
✖︎ Odd menu navigation
✖︎ Print profiles
✖︎ Unloading procedure
This is part three of a three part series, please read parts one and two.
Via MINGDA