
We have been testing the Mintion Beagle V2 Camera for 3D printing, and discovered it’s far more than just a camera.
Mintion Beagle V2 Background
You probably have not heard of Mintion, as they are a very new startup company that’s based in Shenzhen. They describe the company as follows:
“Mintion was reborn in 2022 and founded by some 3D printing enthusiasts and committed to providing simple, easy-to-use, and affordable products for customers; our mission is to make 3D printing more accessible and enjoyable. Our company is still young, and with hardware and software design ability, we will focus on the DIY industry to provide easy-to-use solutions and the best service for customers.”
Their product set is mainly accessories for DIY makers, including cameras for 3D printers and laser engravers, tripods, LED lights, and a variety of 3D printer parts. But the cameras are their key product.
A camera for a 3D printer? This could make sense, as many devices still are not equipped with an on board camera for remote monitoring. This device could act as one for any 3D printer without a camera.
I happen to have many 3D printers without camera systems, so this was an opportunity to give the device a good test.
However, as my testing proceeded, it became rapidly apparent that the Beagle V2 is not just a camera, but instead it’s an entire set top box 3D printer management system!
Mintion Beagle V2 Specifications and Features
There’s not many specs for this item; it’s basically a camera on a tripod. However, it does capture 25fps H.264 video at 1080p resolution. The camera is full color — but also includes a “night mode” to capture images in the dark.
It supports both 2.4GHz and 5GHz WiFi connections, and includes a 32GB Micro SD card.
The Beagle V2 Camera is compatible with Marlin-based FFF 3D printers. Wait, why does a camera require firmware compatibility? Read on, and you’ll find out.
Mintion Beagle V2 Unboxing and Assembly
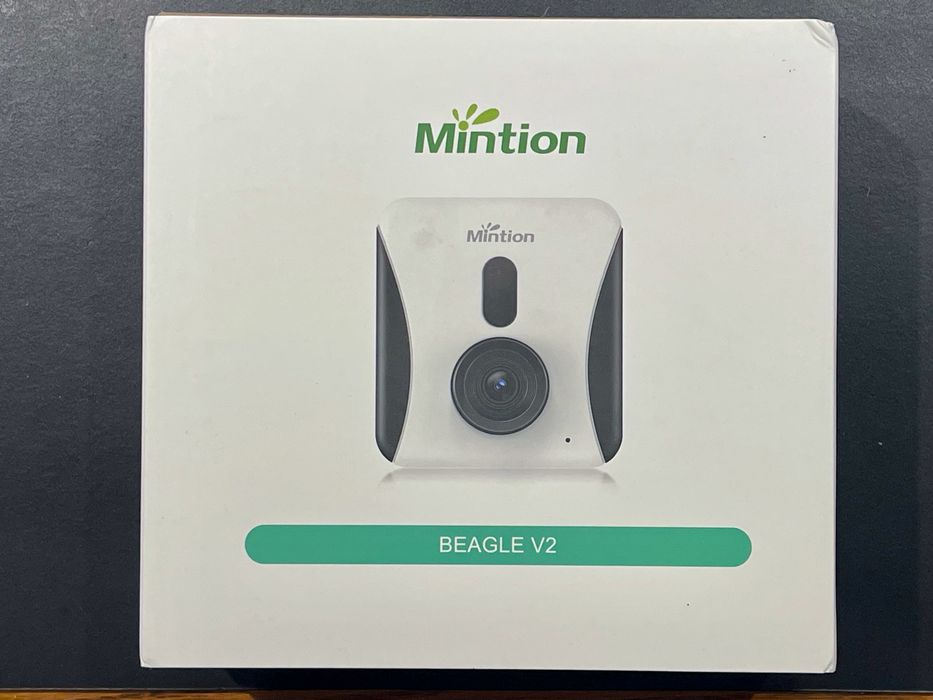
Unboxing the Beagle V2 was straightforward. It ships in a box far smaller than we’re used to seeing for 3D printers — it is just a camera after all.
The box is well padded and we encountered no damage.
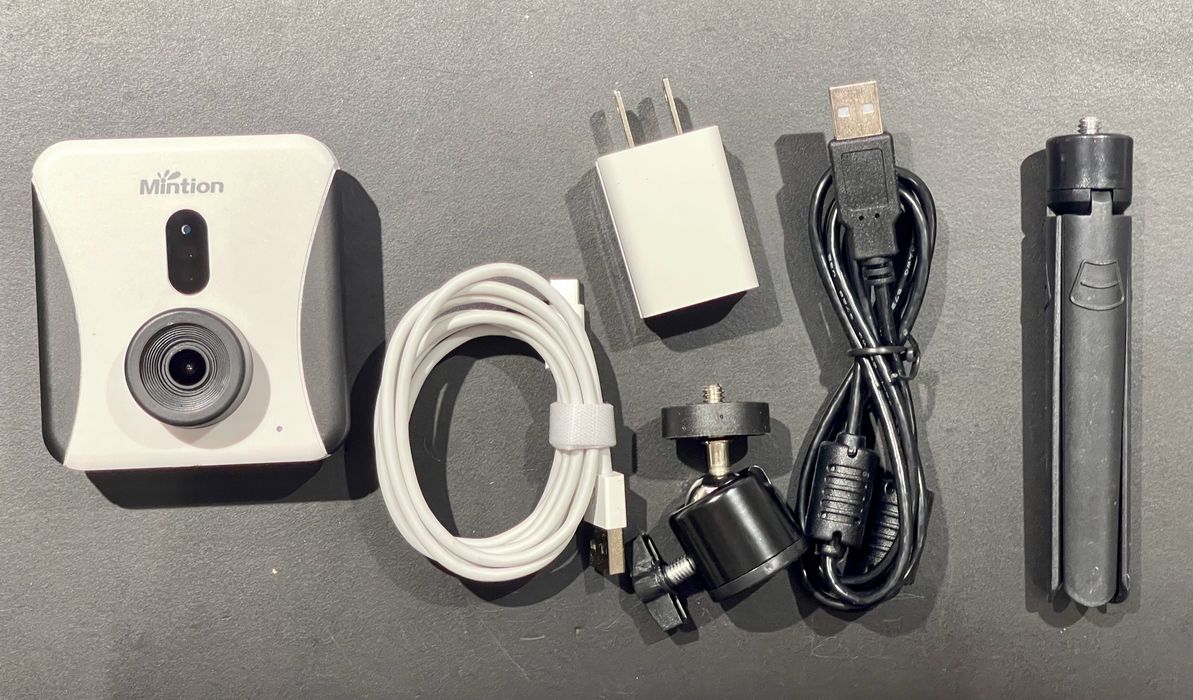
The contents are interesting. There is the main camera unit, of course, and a mini-tripod to mount it. But there’s also several cables:
- USB-C to USB-C
- USB-A to printer
- USB-A to Micro-USB
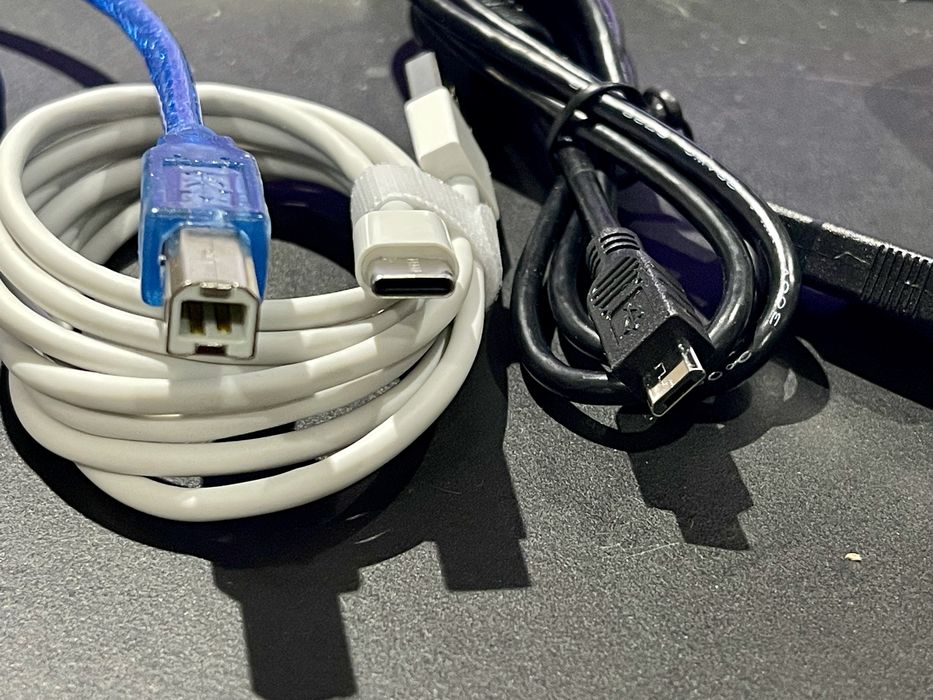
There’s also a USB-C power adapter. I was curious about all these cables, which seemed to be more than I’d require.
Finally, there is a small packet of instructions that walks you through the simple process of setting up the Beagle V2.
Mintion Beagle V2 Setup and Calibration
There are three steps to setting up the Beagle V2: tripod assembly, cabling and software.
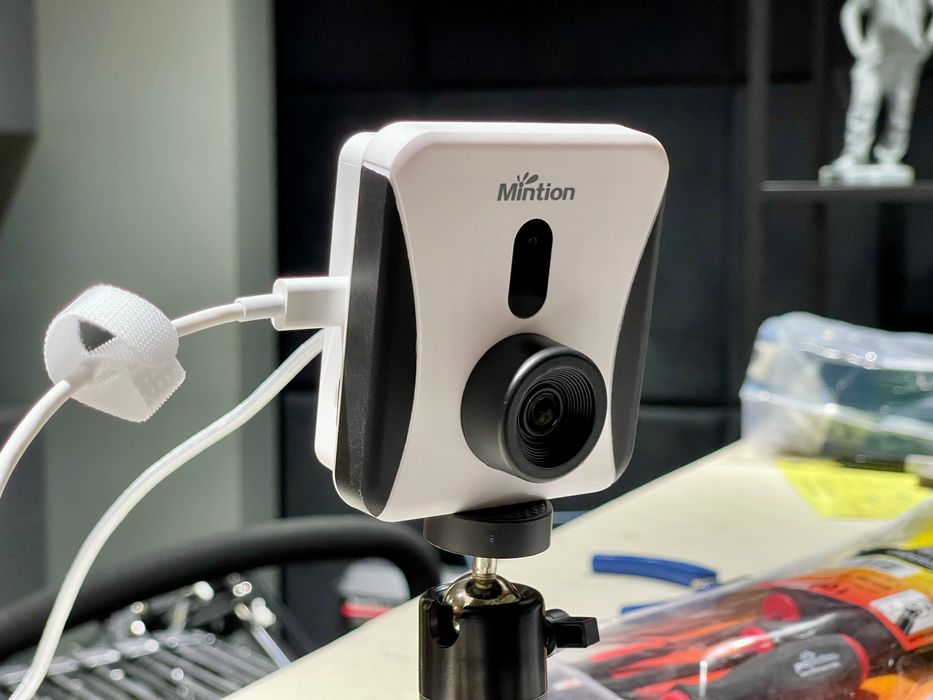
The tripod assembly is straightforward: the tripod easily unfolds and has a screw adapter to bolt in the camera unit on top.
Cabling was more interesting.
It turns out that the USB-C to USB-C cable is used to connect the USB-C power adapter. This provides power to the Beagle V2. The other cables are used to connect the Beagle V2 to the 3D printer.
The data port on the Beagle V2 is USB-A, so you will run one of the cables from that port to the printer. Many of my 3D printers use a standard USB printer port, so that would be the cable to use.
However, some of the newer FFF 3D printers I operate happen to use a USB-C port for data connection, not a printer port. Unfortunately, Mintion does not include a USB-A to USB-C cable for this purpose, so I had to provide my own. I had one handy, so that wasn’t a big deal.
I don’t have any 3D printers that use a Micro-USB port, so that cable is less useful. I recommend that Mintion change that cable out for a USB-A to USB-C cable in the future.
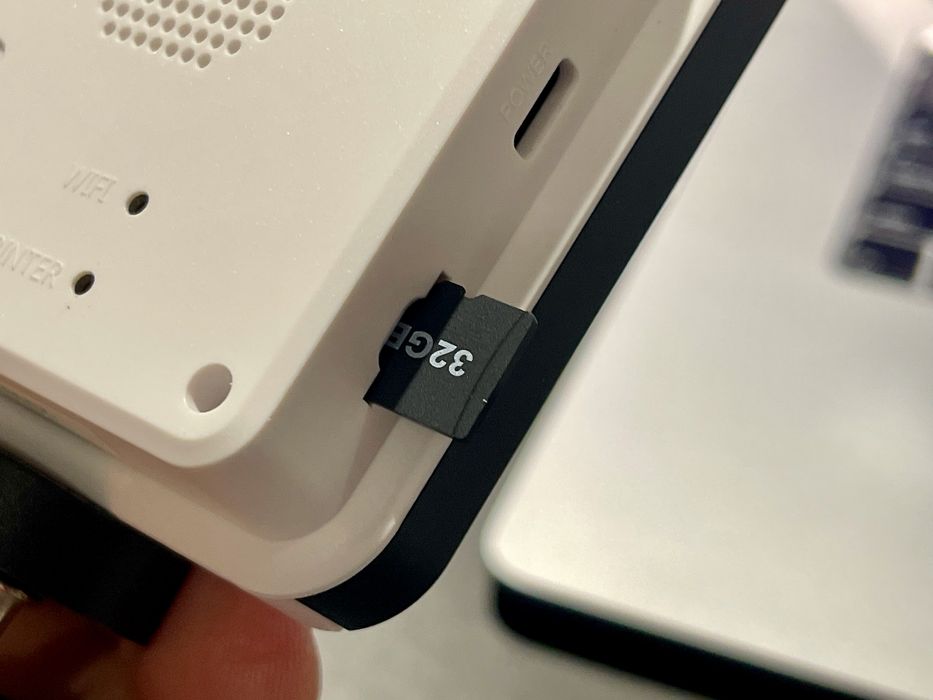
I didn’t mention the installation of the MicroSD card into the camera’s slot because it is already installed.
At this point the Beagle V2 is ready for power up and configuration. That’s when things got interesting.
As it powered up, I heard a voice say, “Camera is ready for WiFi configuration”. This camera has a speaker and there are several voice messages it can present. Very friendly!
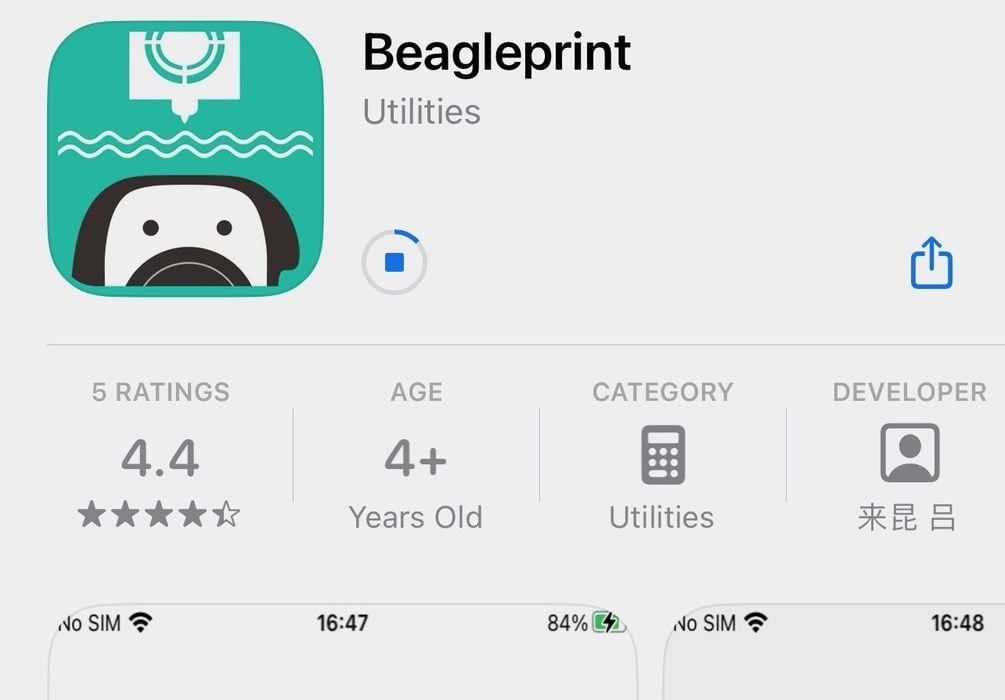
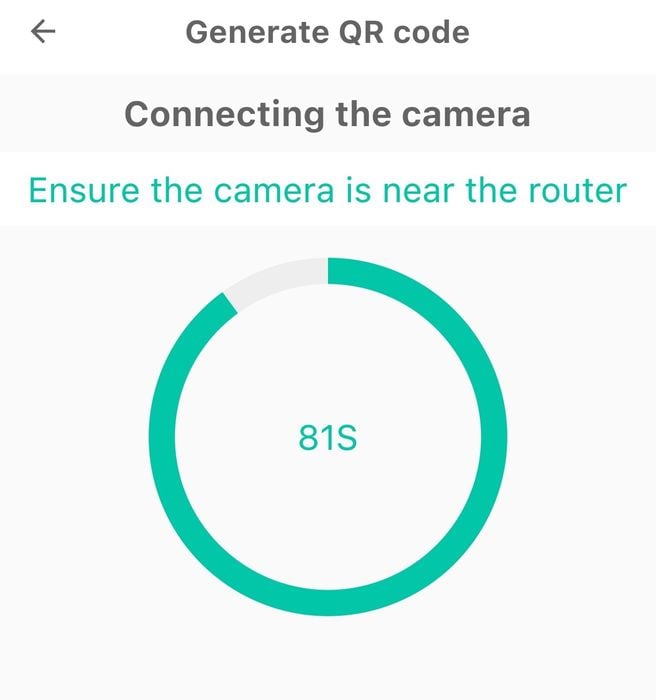
Configuration requires you to download the Beagleprint smartphone app. This app creates a QR code on screen, which is then captured by the camera to set up the necessary connections. It’s all very straightforward and worked the first time through.
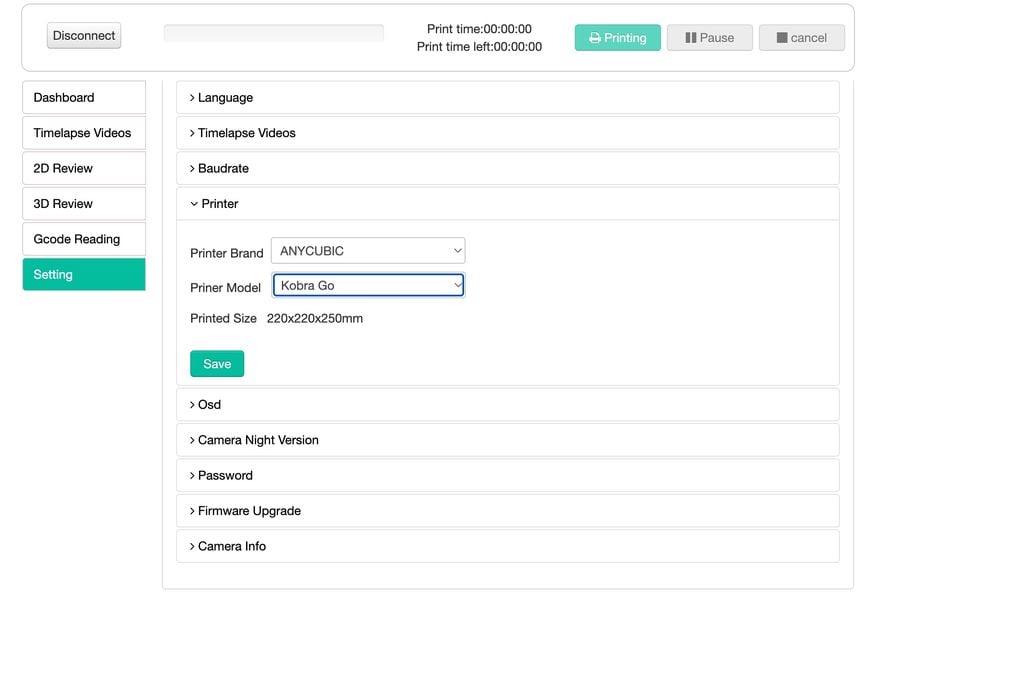
During this process you will set the 3D printer model, and there’s plenty to choose from. If you don’t see your particular printer, just type it in and set the bounding box dimensions.
The Beagle V2 was ready for action.
Mintion Beagle V2 Operations
This is when I realized the Beagle V2 is not really a camera. It’s actually a 3D printer management set top box disguised as a camera.
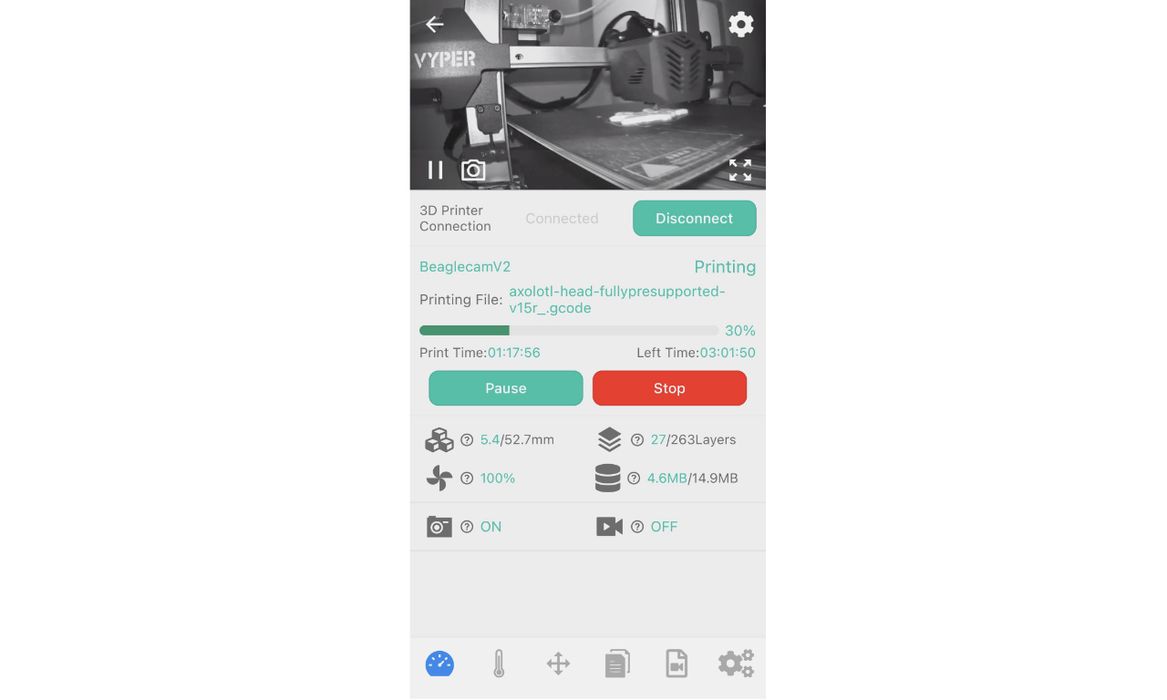
The very comprehensive app does show you a current view of the 3D printer, but also does the following:
- Accepts uploads of GCODE files and stores them on the SD card
- Dispatches jobs to the printer
- Directly control printer temperatures and motion system
- Can pause or stop the jobs
- Automatically captures timelapse videos of jobs
If that isn’t a list of 3D printer set top box functions, I can’t even.
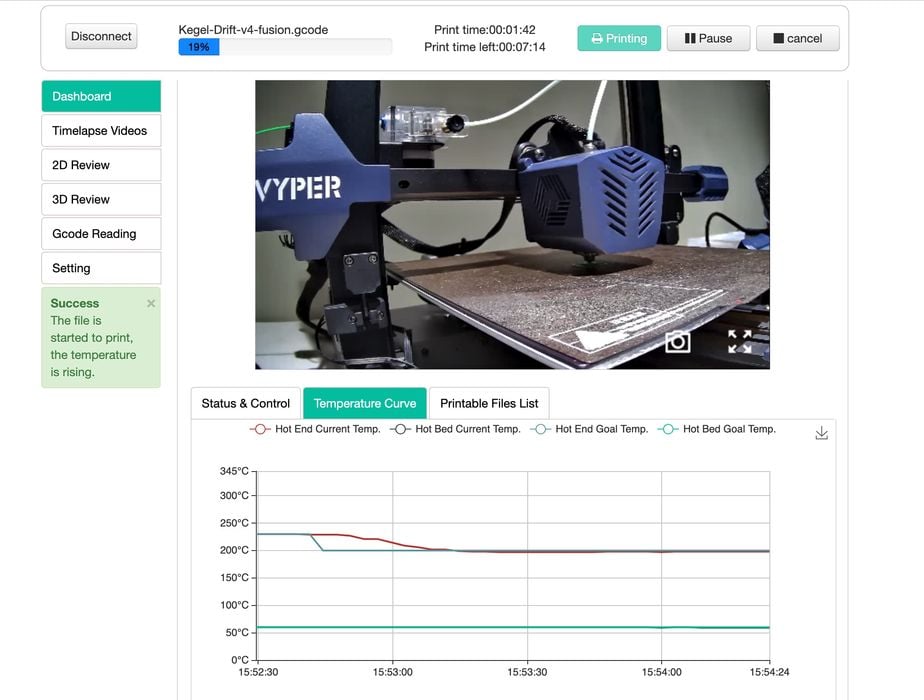
I then sliced a 3D model for printing and uploaded it to the Beagle V2. Note that you can’t slice on the app, so you have to do that with your normal PC. However, the Beagle V2 is accessible as a web app: open your browser to it, and you can drag and drop your GCODE file into the Beagle V2 directly.
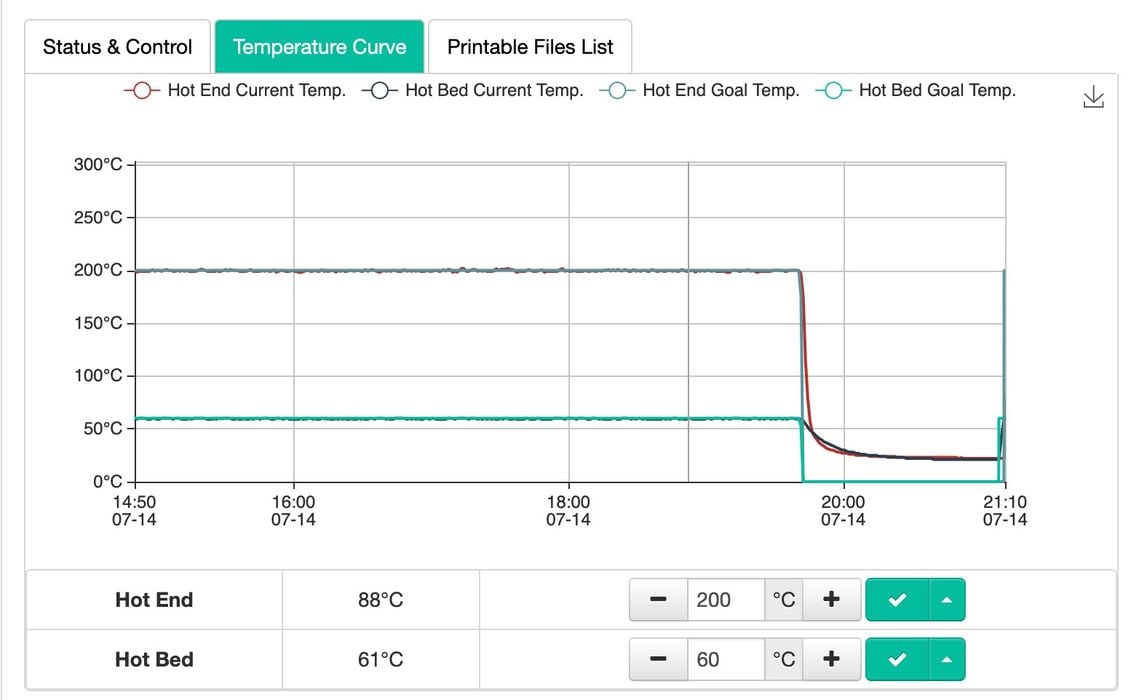
Once GCODE files are stored on the card, it’s possible to dispatch them for printing at the touch of a button. The Beagle V2 then immediately begins monitoring the job, and you can even observe the temperature chart.
I found the monitoring and camera feedback to be quite responsive with almost no delays. It was easily possible to pause and stop print jobs, just as if you were at the machine. However, you can do these actions from your desktop or from the app.
The single issue I found with the app was that I often manually slow down the print speed on the first layer to ensure adhesion. This is done on the printer’s control panel. Every machine has this feature.
But I could not find it on the Beagleprint app. The app does include adjustments for flow rate and feed rate, but I was unable to achieve the same slowdown using them. This could be something that Mintion may want to add in the future.
Mintion Beagle V2 Interesting Features
There were several surprising features on this device.
One was the ability to easily move the device between machines. To do so, you need only pick up the camera and plug it into a new device. As for the configuration, it’s almost instantly done by changing the name and dimensions of the printer. I was thus able to easily move the device on several of my desktop FFF 3D printers.
Octoprint set ups are more powerful, as they provide the ability for interesting plug ins that offer more features. The Beagle V2 doesn’t have that. However, if you want to use Octoprint truly remotely (i.e. off the LAN from somewhere far away), you have to set up a somewhat complex networking configuration through firewalls, etc.
This is not the case with the Beagle V2. It’s automatically set up to bounce through Mintion’s cloud system. I found that I could monitor print jobs anywhere I went through the app, without any complex set up. It just works.
The timelapse videos show up as a list in the app — or on the browser. You can play them after downloading, as they are physically stored on the MicroSD card. It’s also possible to download them for normal video editing and playback in other apps.
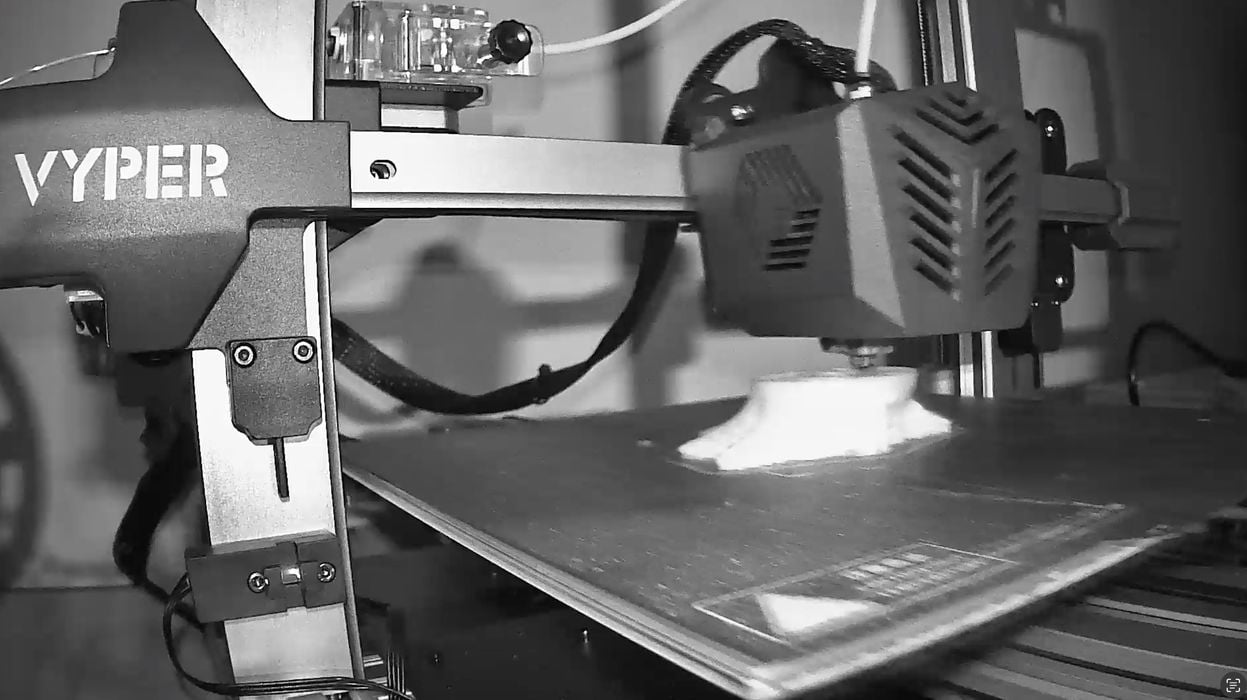
I tested the “night mode” by running a job in complete darkness. As you can see above, the Beagle V2 was easily able to capture the scene even though it was pitch dark in the lab.
Mintion Beagle V2 Final Thoughts
The Beagle V2 Camera was a pleasant surprise. I thought it was merely a webcam, but it’s actually a very powerful and incredibly easy-to-use set top box.
The Beagle V2 was very straightforward to set up, and I expect anyone could do so in minutes. It works with basically any Marlin FFF 3D printer, even if not listed. All you need to do is point the camera at the print surface and plug in a cable.
What really surprised me was the price of this device. On Mintion’s website, the Beagle V2 Camera is priced at only US$90. That’s low for a set top box, many of which are priced quite high.
A Raspberry Pi 4 might cost US$35, but you’ll need cables, power supply, SD card, etc. that will raise the price close to the price of the Beagle 2, which is already set up and ready to go.
The Beagle V2 is available at a very attractive price, so much so that one could even consider buying several for use in a larger workshop.
[UPDATE] We’ve received a discount code for 10% off of the Beagle V2 for Fabbaloo readers from Mintion. Just go here and use code “BeagleV2”.
VOXELAB
AQUILA D1 3D PRINTER
★ BEGINNER 10/10
★ ENTHUSIAST 9/10
★ PRODUCTION 7/10
BEST FEATURES
✔︎ No fuss setup
✔︎ Remote operation
✔︎ Very inexpensive
QUESTIONS
✖︎ USB-C to USB-A cable
✖︎ Print speed option
Via Mintion