
We’ve just finished testing the Pantheon HS3, and wow, what a 3D printer!
This is part one of a two part series, please read part two.
We were fortunate to get our hands on a pre-production unit from Vancouver-based Pantheon Design and were able to test it until we ran out of material.
Pantheon Design describes the HS3 as “The fastest, most reliable printer. Ever.”
They could be right.
Pantheon Design Background
Two years ago we wrote on the new startup that followed the classic 3D print pattern: people trying to use existing 3D printers and discovered they aren’t suitable, so they built their own.
That’s how Pantheon Design and many others launched their manufacturing operations.
The company has been developing their powerful HS3 system for a couple of years now, and thanks to a friendship with the company, we were able to secure a pre-production unit for evaluation.
I should point out that the machine we tested was definitely not a production unit. It had multiple missing convenience features, and probably wasn’t suitable for critical production.
Nevertheless, we were able to experience the core of the machine, and it was quite impressive.
Pantheon HS3 Specifications and Features
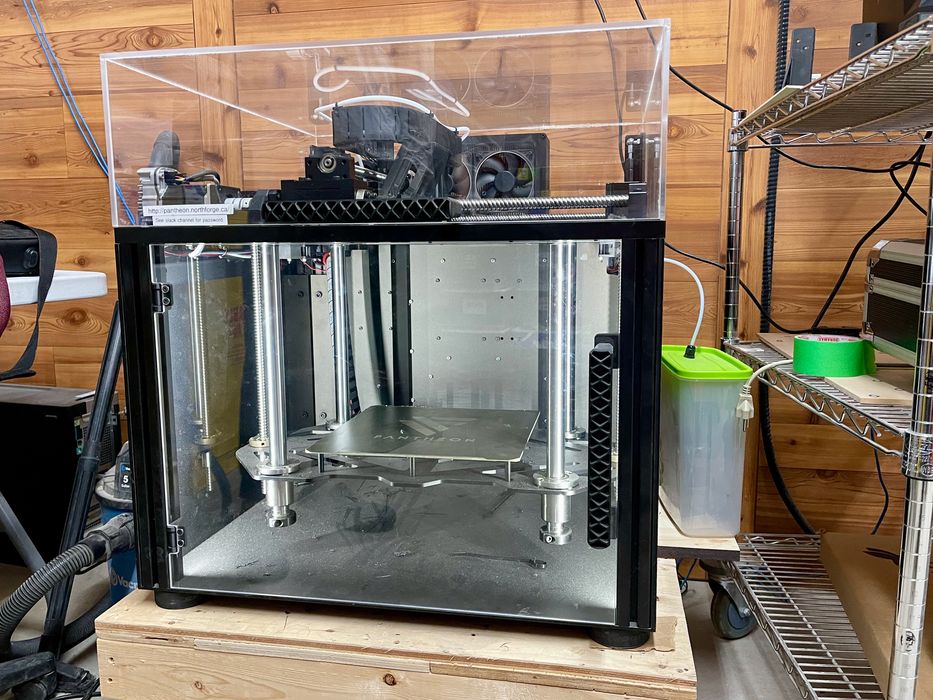
This HS3 is a single extruder, 1.75mm filament 3D printer with a generous 300 x 300 x 300 mm build volume. It has an enclosed build chamber with exhaust fans to cool the chamber should that be necessary.
It’s a somewhat largish device, with an awkward size that is something in-between a desktop device and a standalone unit. This caused us some siting challenges later, as you’ll see.
The HS3 is built from extremely robust and sturdy parts. From the first glance you can immediately tell that the HS3 is not a normal 3D printer. It’s incredible solid.
The device is transparent on the front, and has a fully transparent lid as you can see in the images. This lid tilts back to reveal the entire build chamber and provides an excellent view of ongoing activity.
The main feature of the HS3 is that it prints fast. No, I mean, really, really fast.
Pantheon Design likes to say that the machine is 5-10X faster than normal printers, and honestly — they are correct. The specs say it can print at speeds exceeding 400mm/s, and they’re absolutely correct.
Pantheon HS3 Unboxing and Assembly
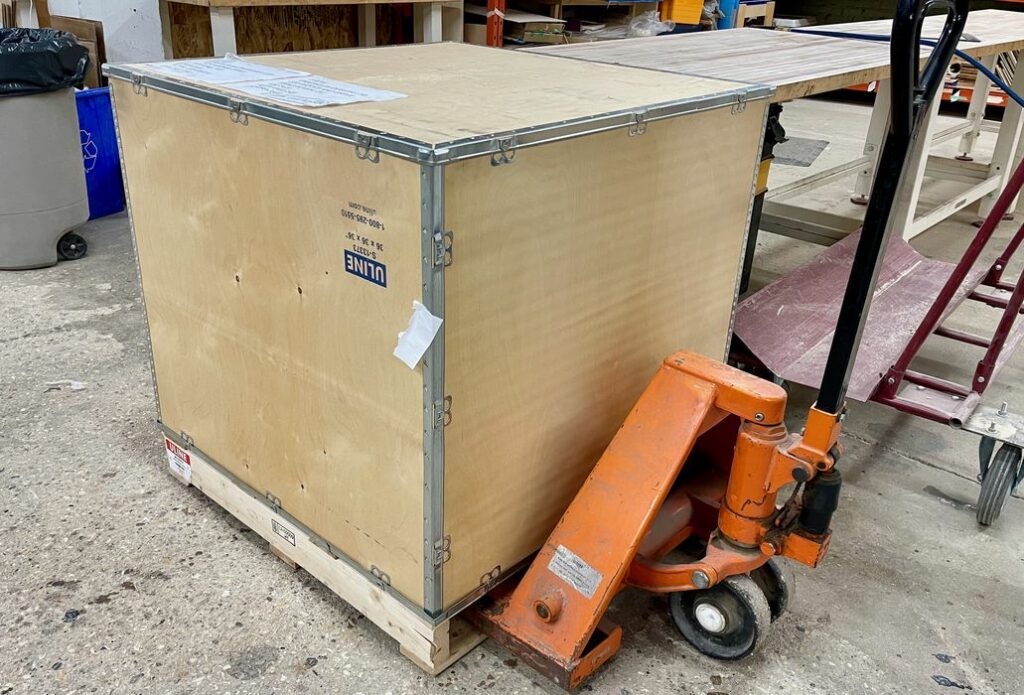
As this was a pre-production unit, and in fact the very first HS3 delivered to a customer not by Pantheon Design staff themselves, they hadn’t yet figured out how best to package the machine.
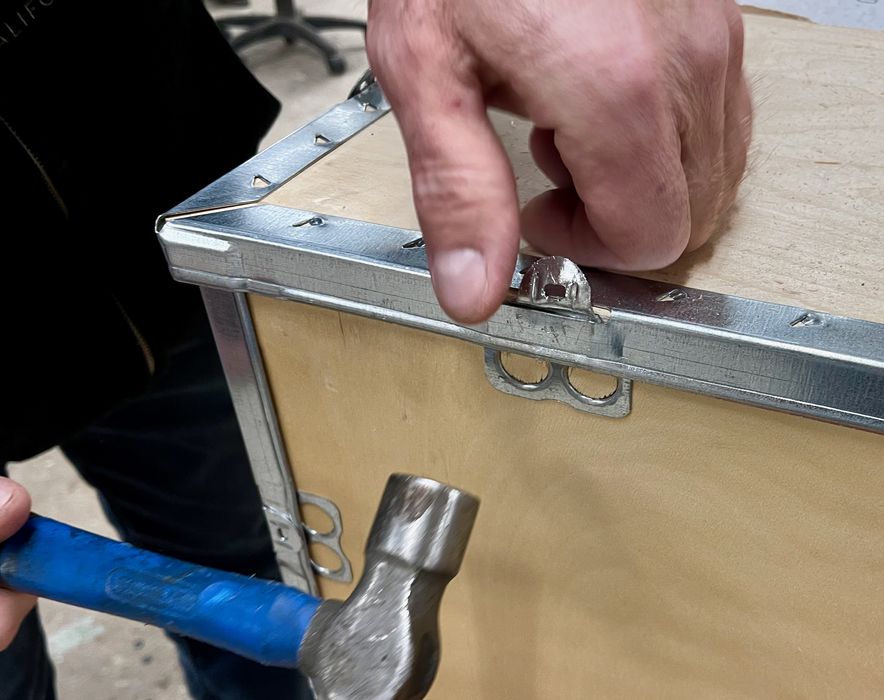
Our machine arrived in a typical U-line wooden shipping box without incident, but it was a bugger to open up. I literally spent an hour with several tools to carefully bend countless tabs to be straight enough to remove the shipping panels.
Since then, Pantheon Design has changed their shipping box on our advice to something far easier to open up. Future HS3 buyers won’t have the box issues we encountered.
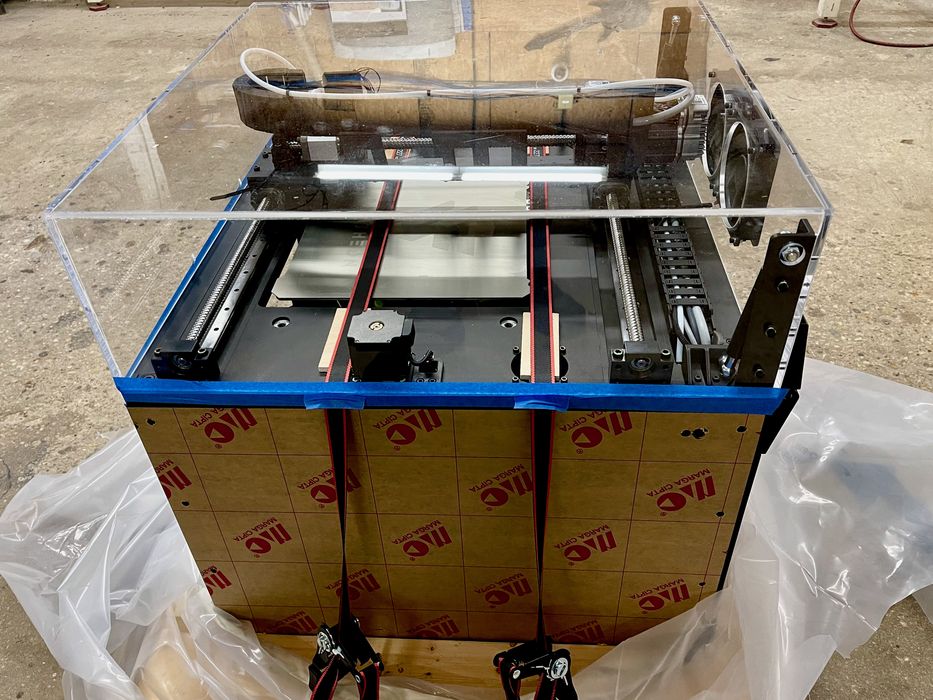
Strapped to a small pallet, the HS3 was easy enough to move, but it is a bit heavy at 47kg (103lbs). You may need a couple of people to set up the fully assembled machine.
There’s really not much to assemble the device aside from removing some shipping straps and placing the device. But that’s where we had some challenges.
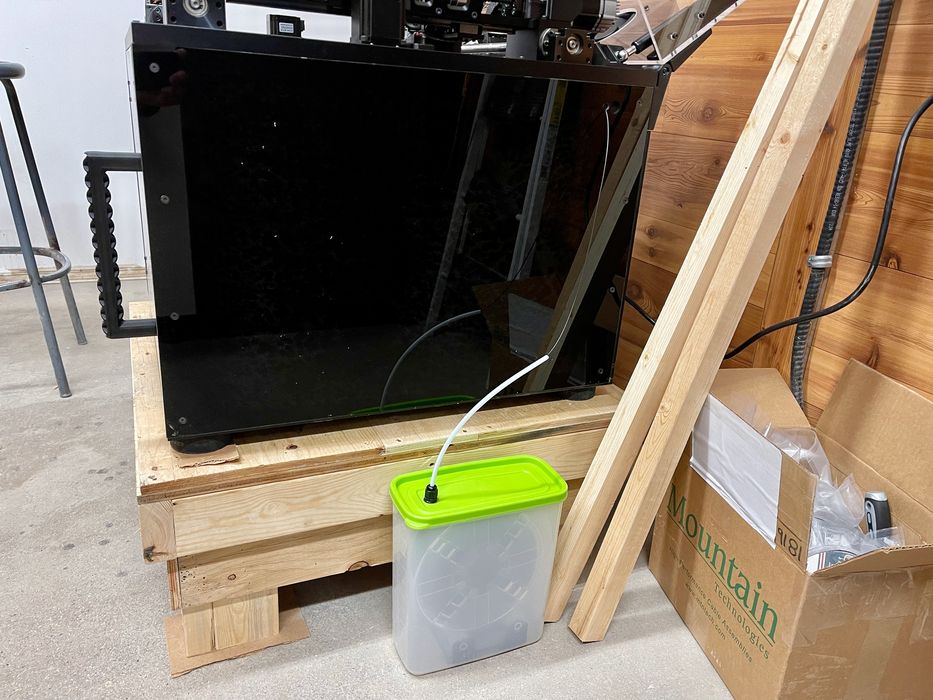
The shelf space we had for the device turned out to be inappropriate, because the large lid lifts upwards quite far, meaning it requires a fair bit of headroom. We didn’t have enough headroom on the shelf we had planned to place the device because a second shelf was too low.
Instead we had to place the unit on the floor. But then it’s too low to easily operate. We ended up building a small platform on which to place the HS3, which positioned the active print area at about hand level, which we thought would be appropriate.
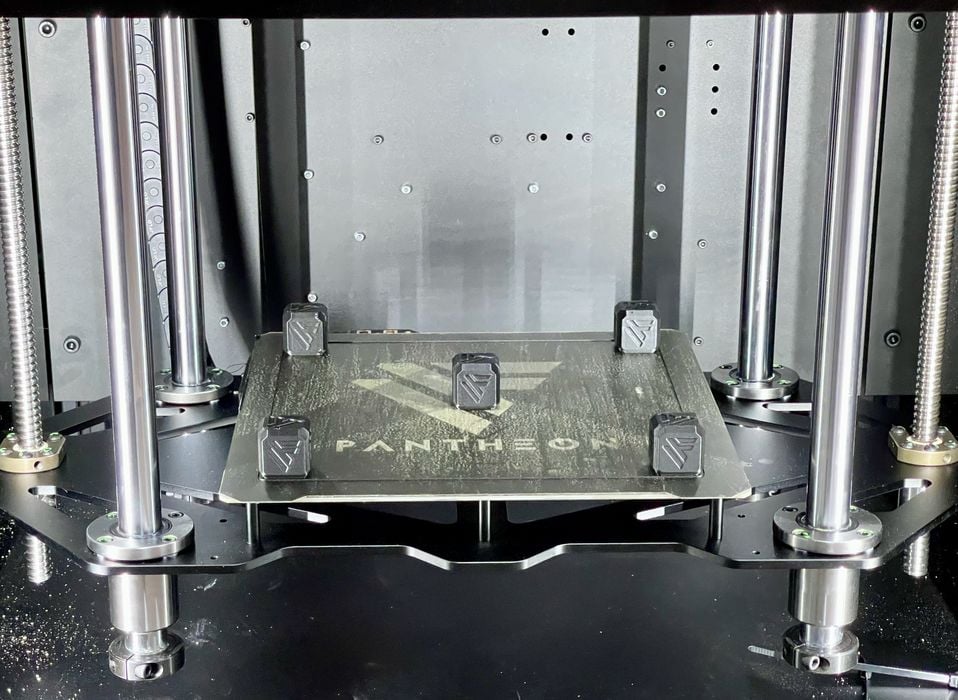
However, it wasn’t appropriate! Unlike most 3D printers, the HS3 prints “down”. That is, the build plate is raised to the top and then gradually lowers as printing takes place. When finished, you have to open the front of the machine and (in our case) bend down to remove the print plate from the bottom of the build chamber.
The lesson here is that the HS3 should actually sit at normal desk height so that you can access completed prints easily. But just be sure you have plenty of space above the machine to open the lid.
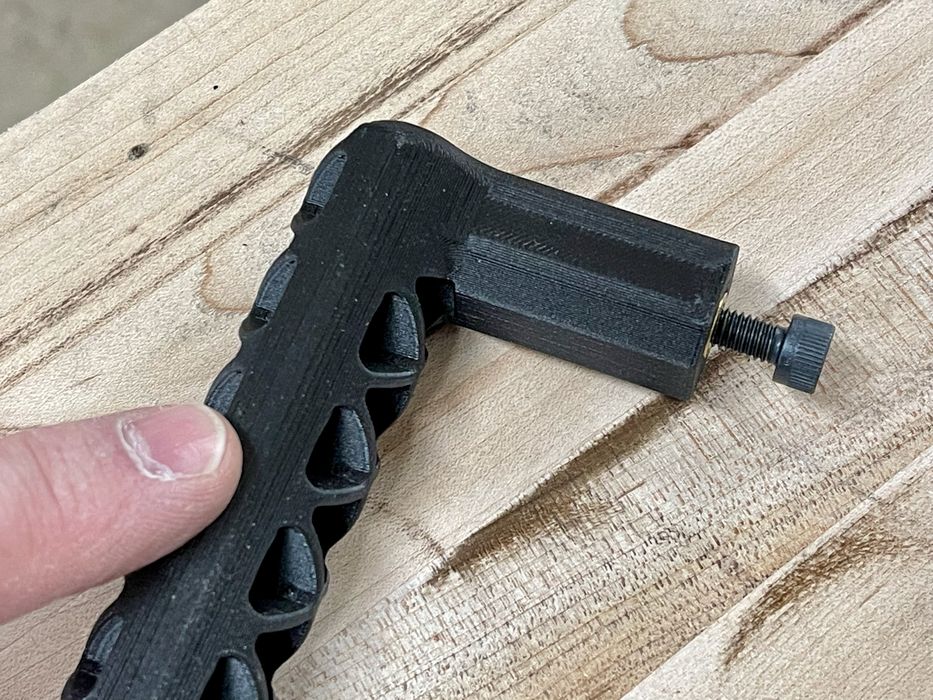
Actually there was one very simple assembly step required: the handle on the build chamber door had been removed for shipping, and it must be bolted back on. Easy to do!
Pantheon HS3 Setup and Calibration
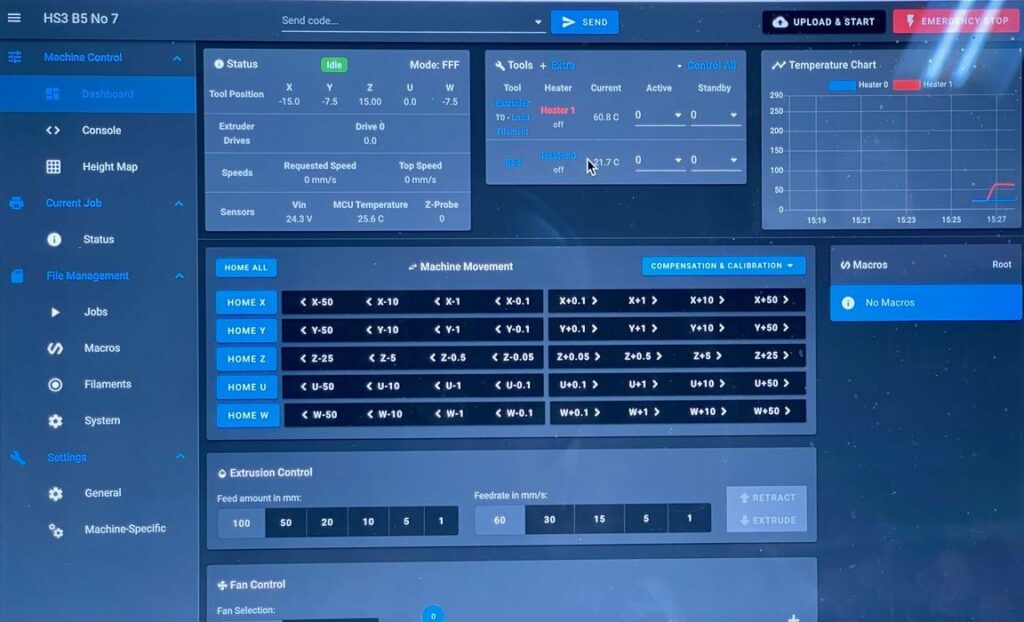
The HS3 was very easy to set up. The version we tested included a Duet board, so the software interface was the normal Duet web page.
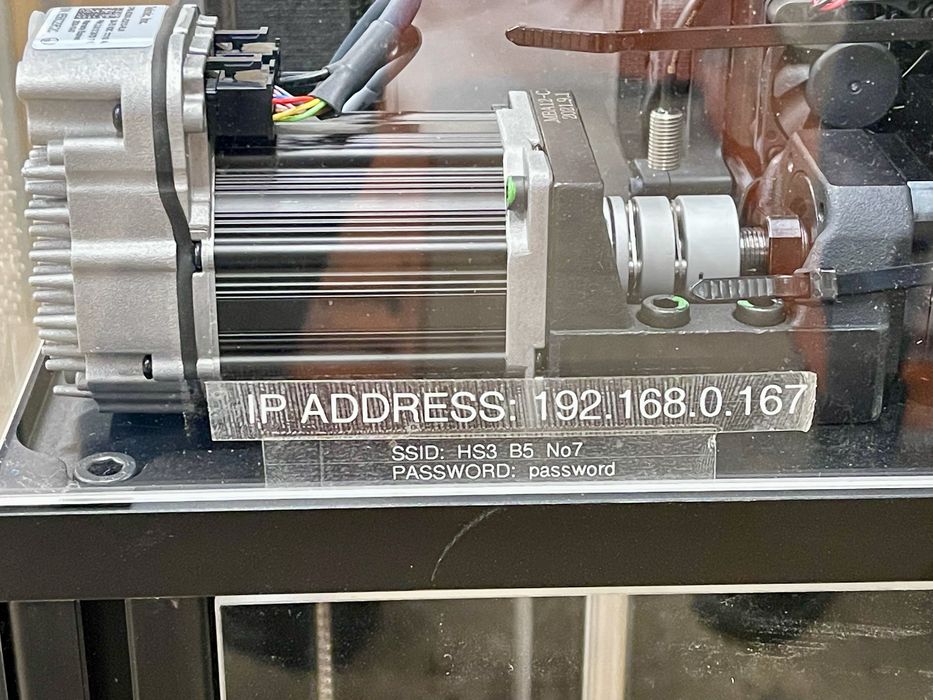
Since the HS3 operates entirely by means of a web interface, setting up a network is critical. Each HS3 comes with it’s own WiFi network that broadcasts to the vicinity. This approach might be appropriate for those wishing to keep their HS3 off the Internet, but it was a bit inconvenient for our operations.
Pantheon Design provides an alternative means to connect to a network, but it is a bit tricky to do. Our network tech figured out a way to not only connect it to our LAN, but also routed it through a secure VPN so the HS3 could be monitored remotely. A camera would be really useful here, but this unit did not have one installed.
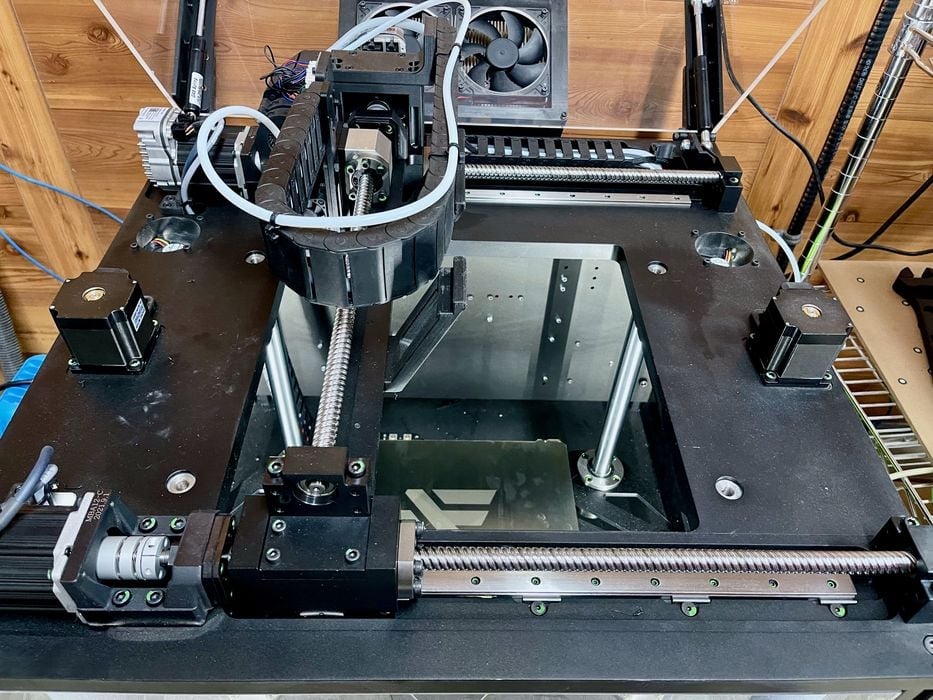
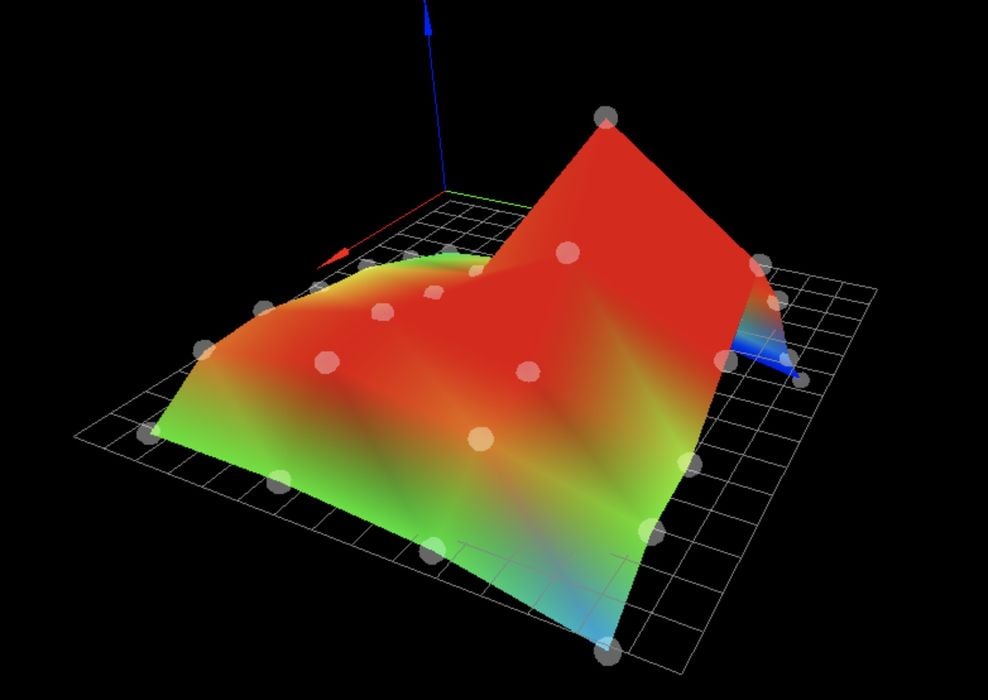
To mechanically set up the machine after power up there was only the need to level the machine. This can be started from a command on the Duet interface. The HS3 uses 49 points (7 x 7) to detect bed level.
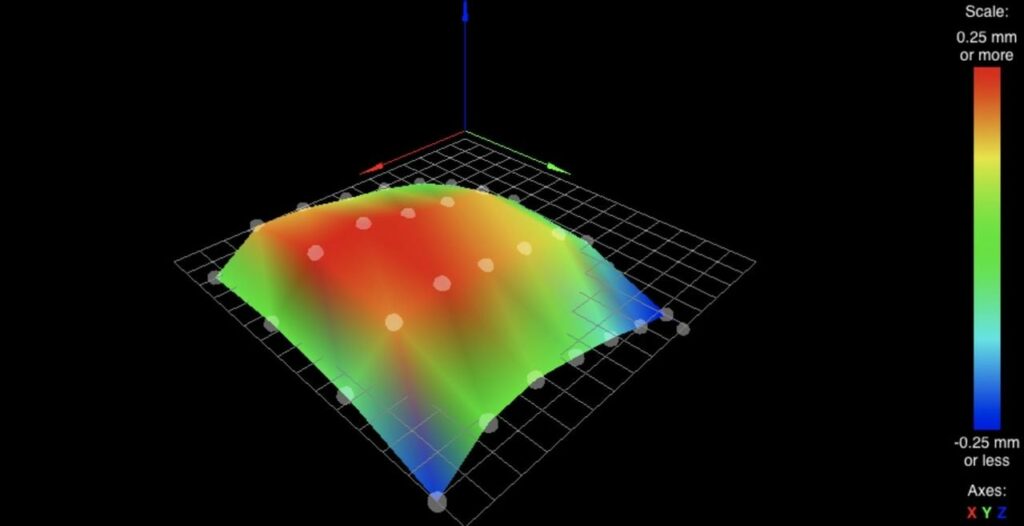
Interestingly, the Duet board stores the findings of the leveling process and can display them in graphical form as shown here. The idea is that if the print plate is way out of wack, which means something even more extreme than this example, you have to fix the plate and relevel.
Loading filament is straightforward. The spool is kept in a sealed dry box on the side of the HS3, and filament flows through a very long tube to reach the extruder, which on this model was the E3D Hemera.
After pushing the filament to the hot end, you simply warm it up and engage the extruder motor. A quick look to see an extrusion emerging from the nozzle confirms a successful load.
This is part one of a two part series, please read part two.
Via Pantheon Design