
Our test of the Voxelab Aquila D1 3D printer concludes with a look at print results and final thoughts.
This is part three of a three part series, please read parts one and two.
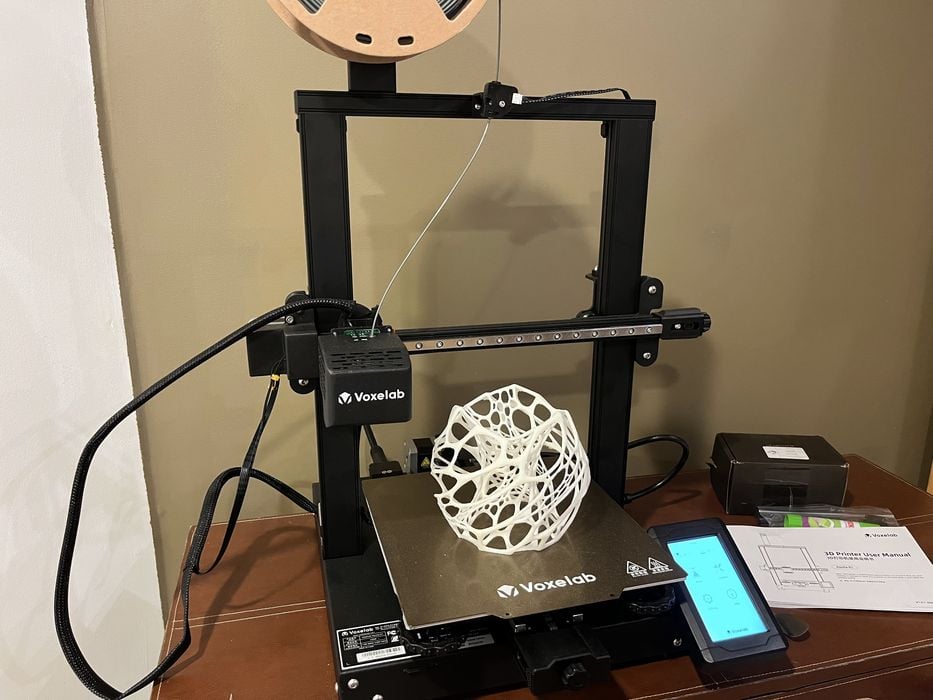
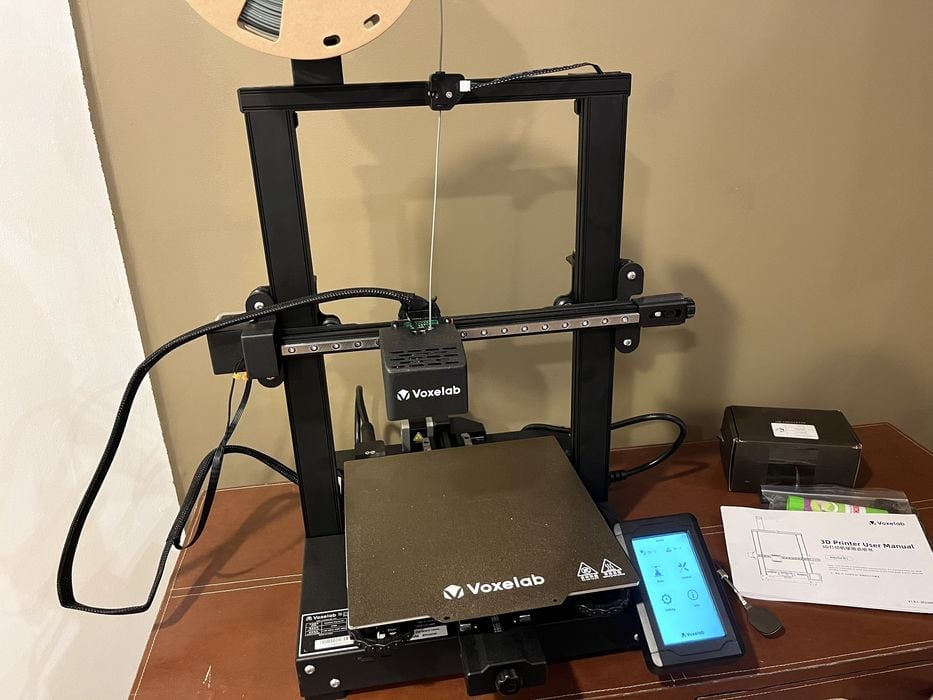
Voxelab Aquila D1 Print Results
We returned to the printer just in time to watch it complete its first print and see the progress bar finish and suddenly disappear, just as the printer homed itself and shut off.
We were a little surprised, as typically a printer will offer some form of print completed screen and elapsed time, but given the lack of an actual counter, it became a moot point anyway. For us, it just meant there would be no way to properly compare software estimated print durations with the actual print duration.
We waited until the printer cooled off and plucked the print right off the build plate with no resistance. Our z-gap setting had been perfect!
The quality of the print was great, with very nice detail and surface finish. We tried the remaining sample prints on the SD card with much the same results. These pre-sliced prints are typically tweaked to give the best results, so we were curious to see what results we would get when we ran our own sliced CTRL-V print.
When we ran the Unload procedure to switch to grey PLA, we were surprised when the LCD screen gave us instructions to manually “squeeze the filament downwards and then quickly pull it out of the extruder”.
Typically this procedure is handled entirely by the extruder, with minimal operator assistance to grab the filament once ejected. Not a big deal to do it manually, but it does leave open the possibility for inexperienced operators to damage the extruder, and it might be challenging to manually push in TPU filaments.
We ran our CTRL-V print with grey PLA and had moderate results for overall print quality, but then had an unexpected problem. The printer no longer responded to the touch screen!
We are quite used to having a hiccup or two when testing equipment, so we sat down and sorted out the issue.
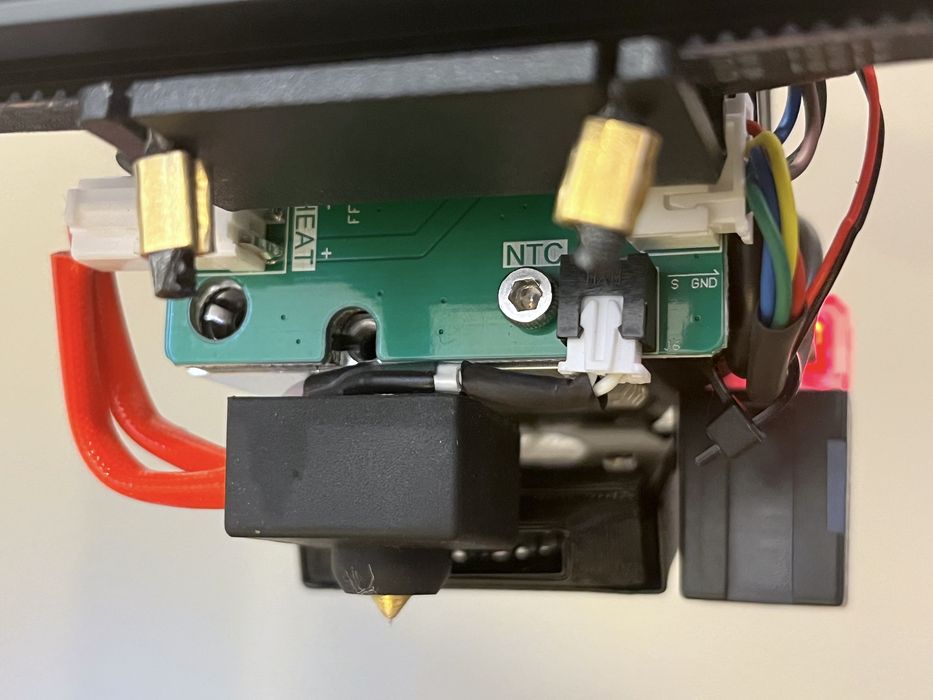
After eliminating cabling and connection issues, we narrowed the problem down to an issue with the extruder assembly, as the touchscreen started responding when the extruder cable was detached. A bit more testing and we further narrowed the problem down to the thermistor. This took us back to the manufacturer for assistance.
Voxelab technical support was excellent to work with and quickly sent us a replacement full extruder assembly and a separate thermistor.
We initially installed the full extruder assembly to complete the review, but then went back later and replaced the thermistor on the other extruder and got that unit working too! We made sure to do PID tuning after replacing anything on the hot end, as all the subcomponents affect the machine’s performance.
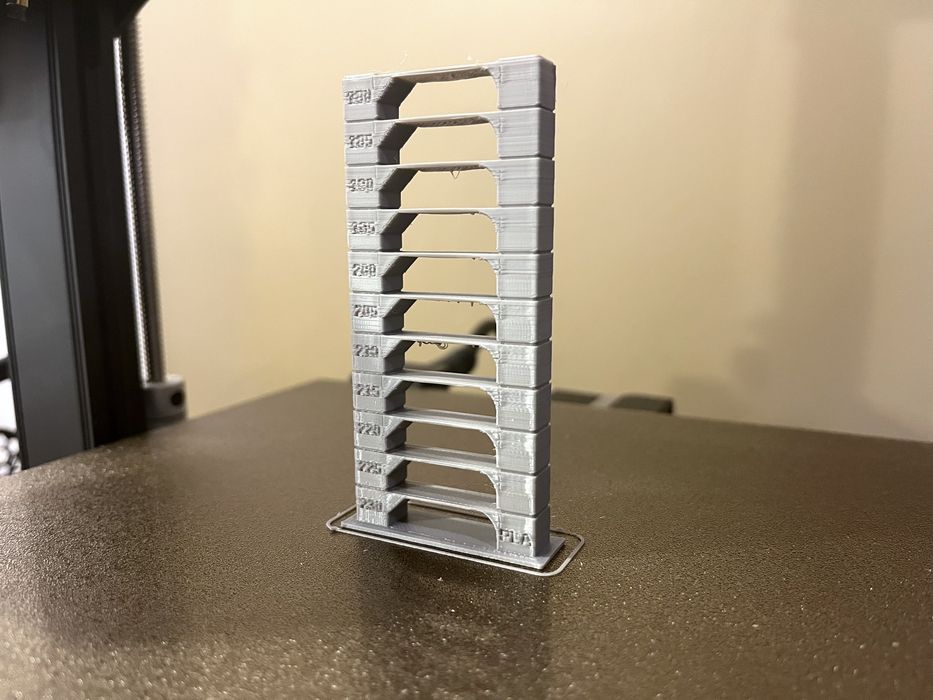
We then installed latest version of Ultimaker Cura and used its incredibly handy “AutoTowers Generator” (available in their Marketplace) and created a PLA temperature tower to dial in the new hot end.
We noted that the Voxelabs supplied Ultimaker Cura profile had much lower print speed settings than that of Voxelmaker, so we made sure to update those settings manually. We then switched back to Voxelmaker for the remainder of the review, downloading and installing the latest 1.2.7 version.
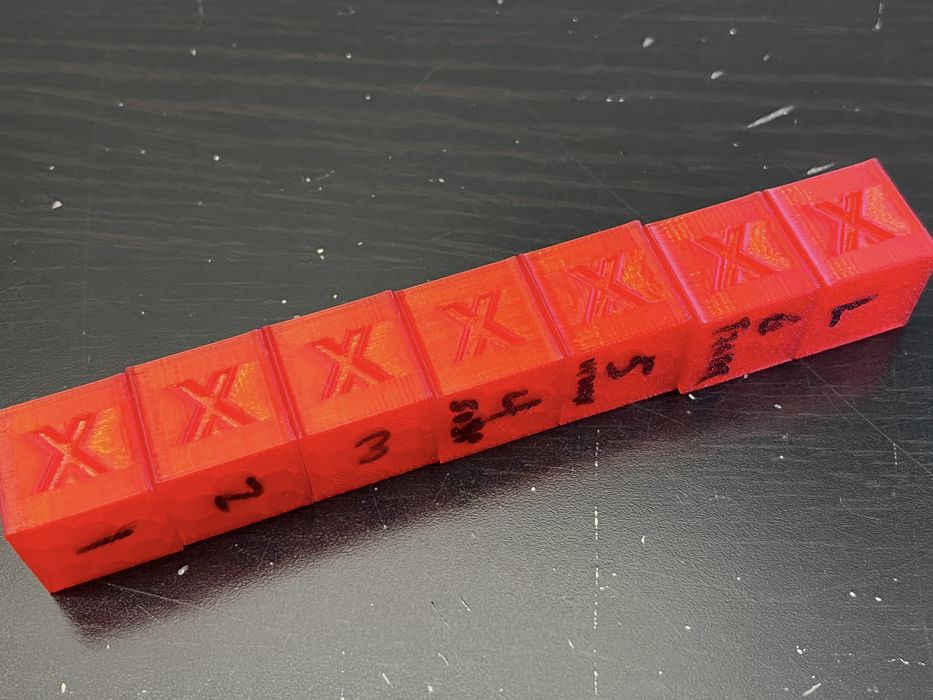
We ran though our various test prints and noted some ringing in the x/y axis of the standard XYZ Calibration Cube.
Adjusting belt tension helped somewhat, and then lowering print speed, removed the issue. By the time we got to our first Benchy, we had everything sorted out and produced an excellent print.
From this point on, we found the Aquila D1 capable of handling anything we threw at it and we didn’t have a single failure until we tried flexible TPU material.
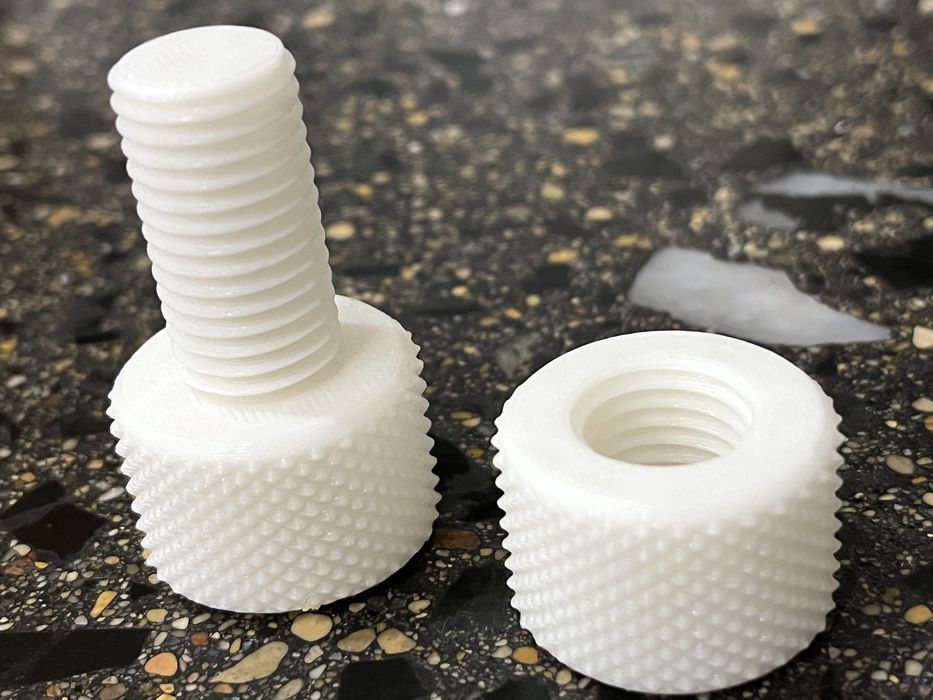
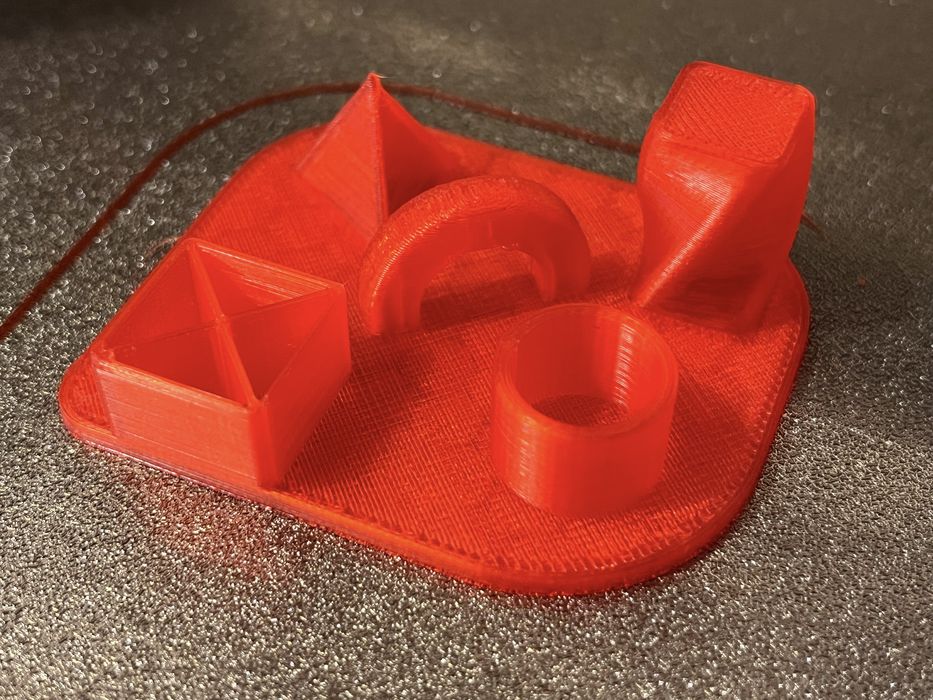
Our PLA Knurled Nut & Bolt prints spun together easily, and the PLA Cylindricity Test smoothly fit like a glove.
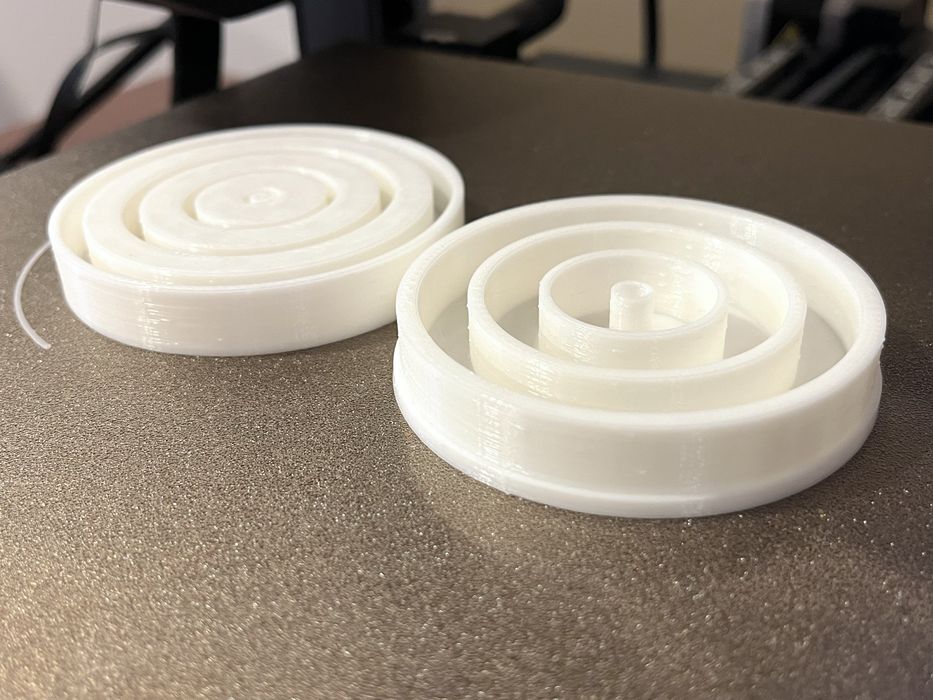
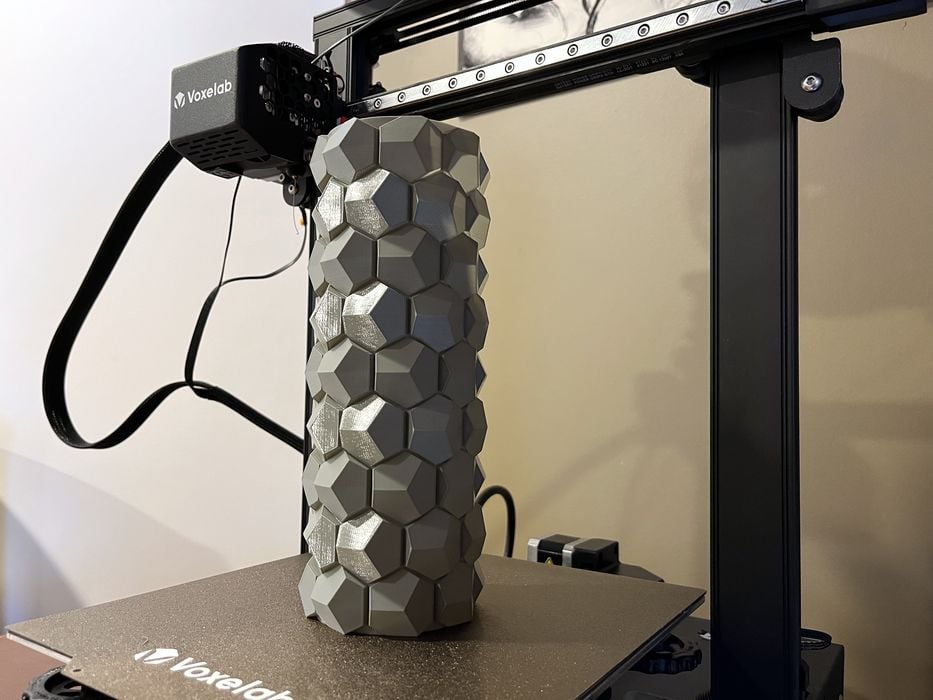
Our PLA Spiral and PETG Honeycomb Vases were of exceptional surface finish.
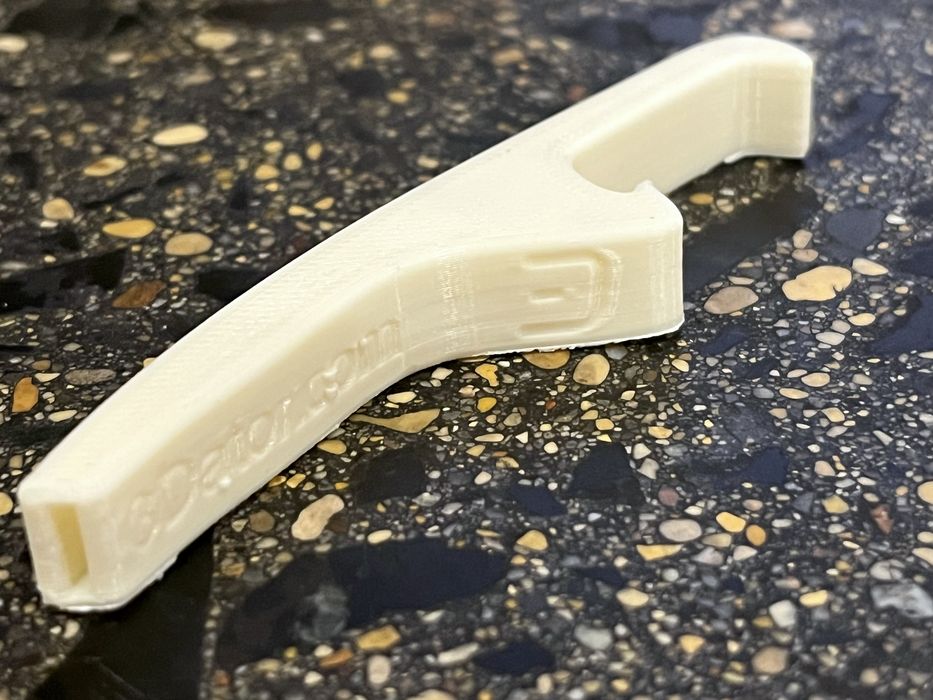
ABS Bottle Opener Whistle looked great and did not lift or warp while printing — but we did have to use a substantial brim to do so.
Even the challenging 11-hour Nervous Lamp print turned out quite well, with negligible stringing.

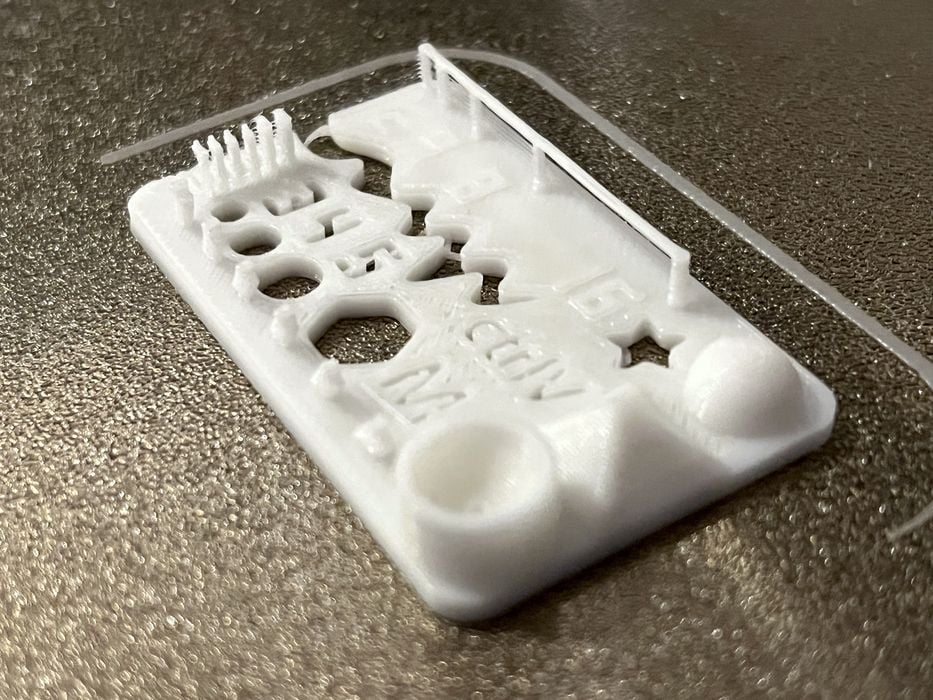
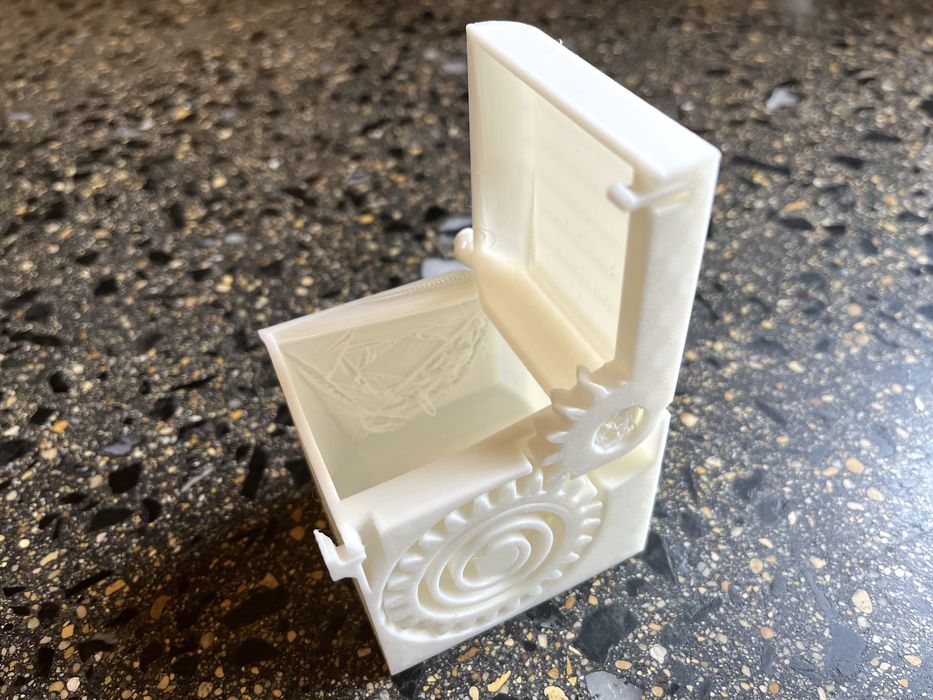
Our three print in place jobs, Clip Helpers, FoldaBox, and PiP Spring Loaded Box all worked well and had full articulation.
We only hit a snag when we got to TPU. We were able to load and extrude our Fiberlogy FiberFlex 30D filament, but it would stop printing and wind itself around the extruder gears. A quick check with Voxelab tech support suggested that we switch to a firmer TPU like 95A.
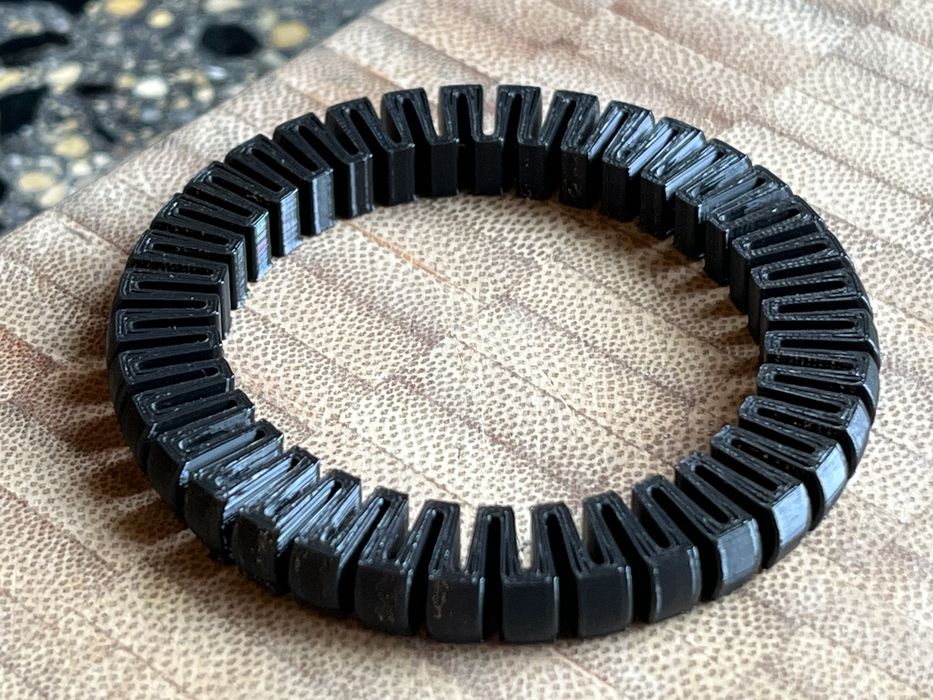
We dug through our supplies and found some 40D filament (approximately shore 90A) and were able to print our flexible Bracelet print and complete our review.
We skipped on trying any CF filaments, as the D1 just ships with brass nozzles, but it should work quite well given the excellent performance of non-CF materials.
Voxelab Aquila D1 Final Thoughts
The Voxelab Aquila D1 was packed well for shipping, with our only issue being that everything was packed upside down. The 5-step assembly was really 6-steps when you include hooking up all the cables. The hardware was all very sturdy and well built, but we did correct an issue with the Y-axis cable connector & conductors pressing against the chassis, as it would eventually be a failure point when the insulation failed from the pressure and vibrations – a three minute fix now vs potential downtime later.
Bed leveling took a long time, but it worked very well and all our prints stuck like glue while printing and popped right off the plate when everything cooled down.
We did run into a hiccup where a faulty hot end thermistor caused the touchscreen to lock up, but Voxelab tech support was great to work with and promptly sorted out our issue and quickly got us up and running again.
Voxelmaker software isn’t as robust as Ultiamker Cura or PrusaSlicer, but did a great job slicing our prints and gave reasonably accurate slicing times, which was handy given the lack of a timer on the printer. Ultimaker Cura has much more to offer as a slicer, but the documentation for getting it properly setup for the D1 was insufficient for a quick cutover.
The filament Unload routine is a bit odd with manually having to push filament in and pull it out, when the extruder could be doing all that work for us. We found that while the D1 was capable of TPU printing, that 30D (80A) was just too floppy for this extruder to handle.
As for the print quality of the D1, we were quite impressed. Our prints generally turned out with exceptional quality, with great surface finish and dimensionally accurate enough to fit together, which is all that really matters.
Although there was some ringing that occurred when printing complicated geometry at the 100mm/s speeds that can always be mitigated by slowing the print speeds. That said, we are very sure they are quite busy at Voxelab sorting everything out for the next version of the Aquila. They might consider switching to Klipper firmware, which could theoretically eliminate the ringing and possibly offer even higher print speeds.
VOXELAB
AQUILA D1 3D PRINTER
★ BEGINNER 8/10
★ ENTHUSIAST 9/10
★ PRODUCTION 7/10
BEST FEATURES
✔︎ Quick Assembly
✔︎ Excellent Support
✔︎ Fast Heating
QUESTIONS
✖︎ Slow Leveling
✖︎ No Print Timing
✖︎ Manual Unloading
This is part three of a three part series, please read parts one and two.
Via Voxelab