
Bambu Lab released a new beta version of BambuStudio that includes a very intriguing feature.
That feature is Texture-to-Color Painting. It addresses the long-standing challenge of manually painting a coloured 3D model that’s been imported. Three different improvements are present in BambuStudio 2.7.
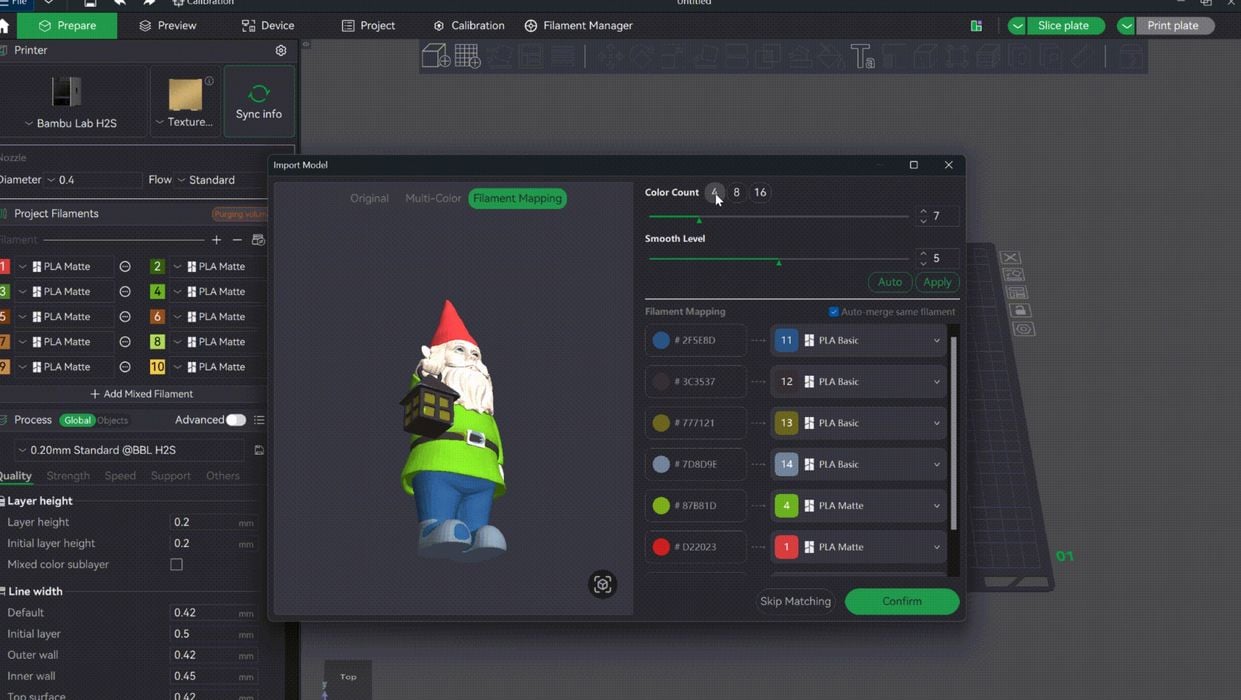
Normally, you’d import a 3D model into BambuStudio and then set about painting all the surfaces with the desired colours, hopefully matching the spools loaded in your AMS unit. This can be extremely tedious, and I can vouch for this via personal experience.
How can painting be done in a more automated fashion? With this new feature, a model that’s been textured externally can be imported and then automatically “painted” by BambuStudio.
This could be ideal for applying logos to a 3D model: apply it to the model and import it, and the automated painting occurs. The paint palette can be 4, 8, or 16 colours, corresponding to the number of AMS units attached.
Note that an automatically painted model might generate an enormous amount of waste material due to purging on each colour swap during printing. However, remember that Bambu Lab offers their Vortek waste-free solution with their latest machine, the H2C. A Vortek-equipped system would be ideal to print detailed colour prints with this feature.
There is another colour feature in BambuStudio 2.7: gradient effect is now supported for per-part slicing. The gradient effect was introduced a while ago but would apply only to the entire plate of parts. Now you can flip this on and off for individual parts on the print plate.
Finally, there is a really important fix: if you have fully painted a 3D model, today if you cut that part with the slicer, you will lose the painting! This certainly would be unwelcome if you’d just completed a complex painting job.
Version 2.7 now retains the painting when a part is cut. Hooray!
As of now, version 2.7 is still in the beta stage, meaning you can try it out, but it’s not yet considered a production version.
Via GitHub