
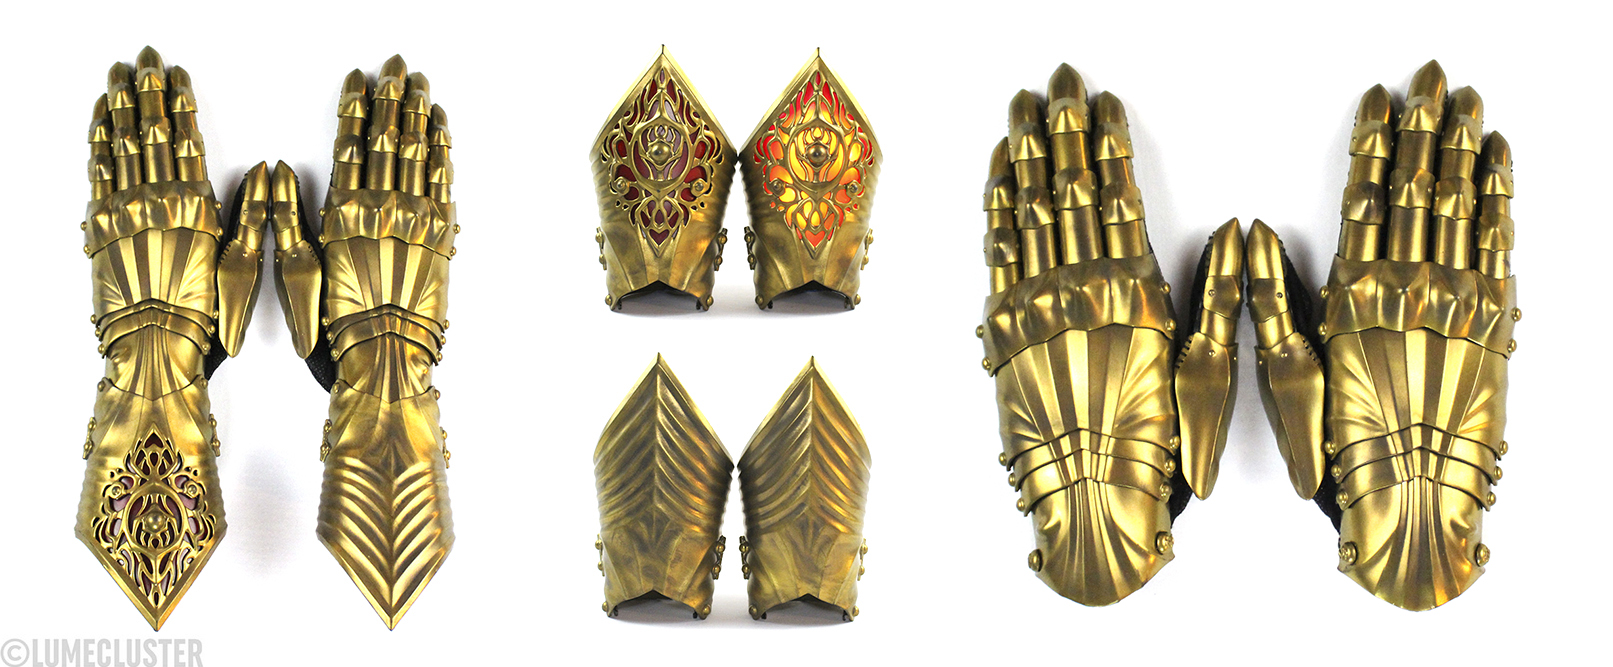
![A look at how the Phoenix Gauntlet can be taken apart and offer more styling options [Image: Lumecluster]](https://fabbaloo.com/wp-content/uploads/2020/05/LumeclusterPhoenixGauntet_ALL_img_5eb09e7c8691c.jpg)
Melissa Ng’s stunning Phoenix Gauntlets are inspired by 15th century armor and brought to new fashionable life with 3D printed jacket molds.
Not 3D printed themselves, the articulated gauntlets took their form with molds created through a hefty prototyping process that relied on 3D printing.
“Hundreds of hours have gone into prototyping on my Form 2 and Taz 6 3D printers,” Ng explains on her Lumecluster blog. She “had to go through multiple redesigns of my gauntlet 3D models countless times” and “hoarded way too many potential gauntlet glove styles.” Through it all, Ng says, she “made more molds than I would have ever liked. Even 3D printed support jackets on my Taz 6 to speed up the mold making process since there were so many gauntlet parts.”
When last we caught up with Ng about her endeavors at Lumecluster, she shared a look at how her work has been developing — and how it had caught the eye of Adam Savage of Mythbusters and now Tested fame. Since then, she has met Savage several times and recently appeared in a Tested video highlighting the Phoenix gauntlets:
The flexible, surprisingly wearable bits of armor show splendidly (including when Savage has to run to get a sword to feel the full effect). In her chat with Savage, Ng discusses some of the process of creating the gauntlets.
For a bit more detail, I turned to the creator herself: how did 3D printing help the Phoenix gauntlets come to be?
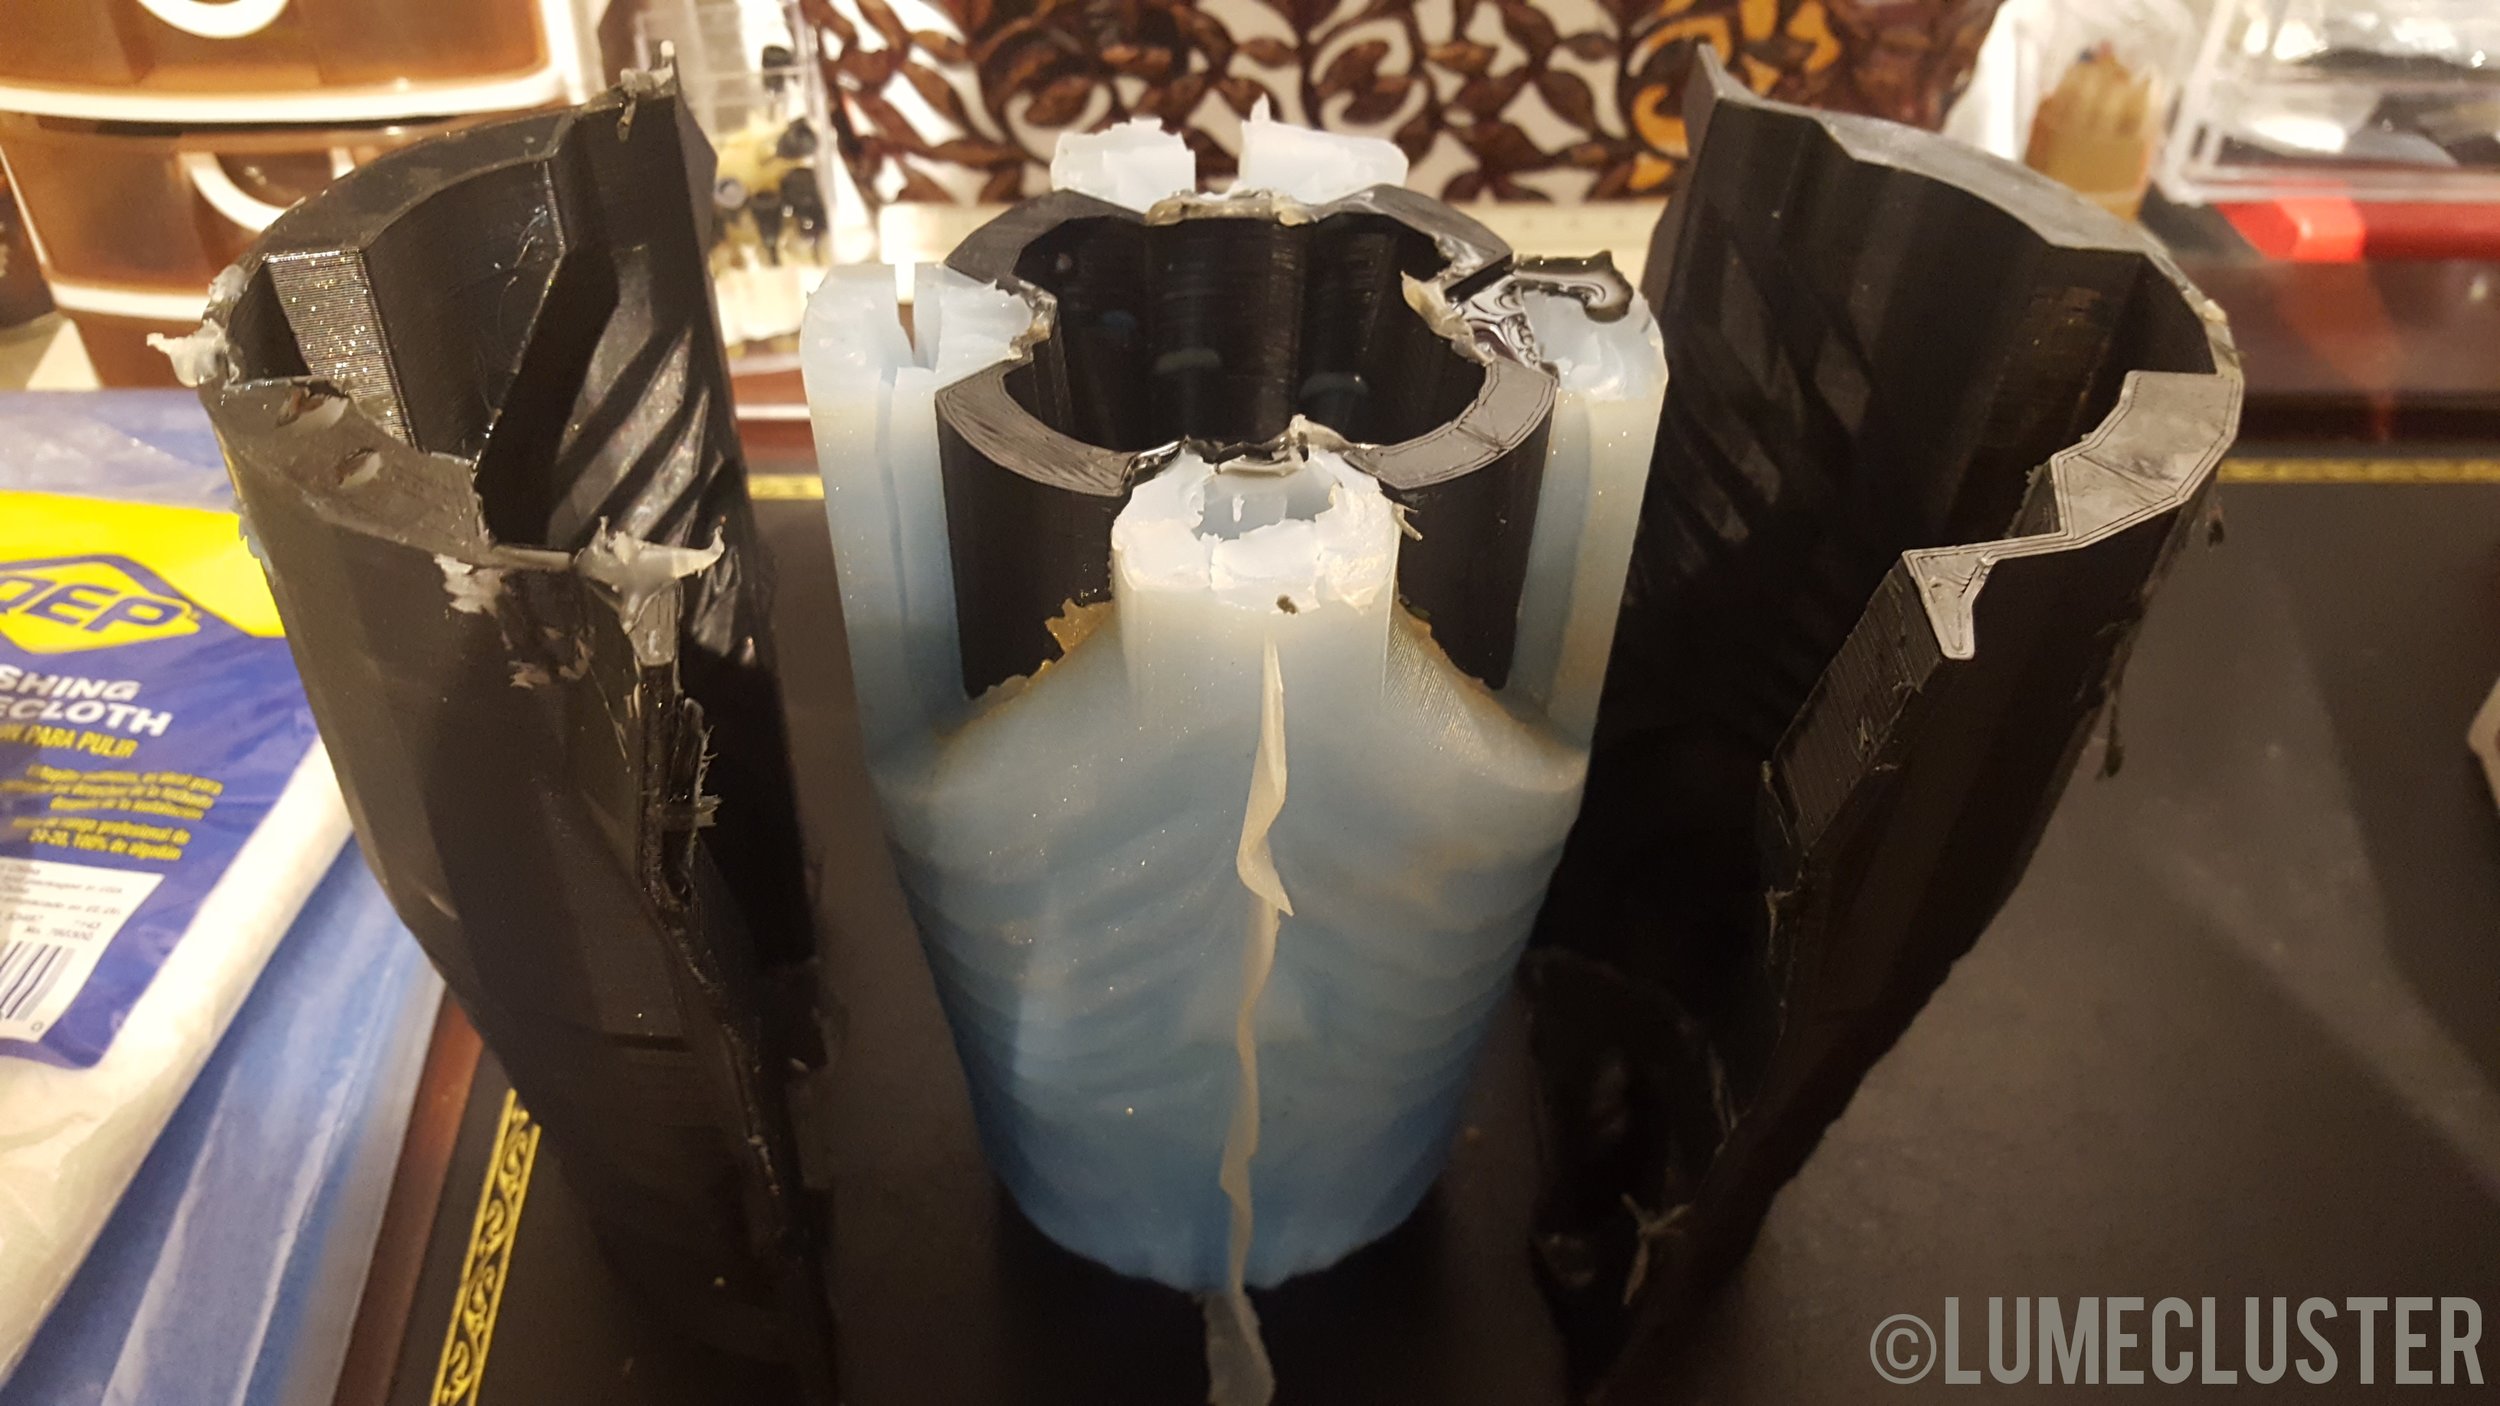
![Early prototyping stages of the Phoenix Gauntlet S/M/L size options. 3D printed on the Form 2 using durable resin. [Image: Lumecluster]](https://fabbaloo.com/wp-content/uploads/2020/05/lumeclusterphoenixgauntlet_sizes_img_5eb09e7d58d77.jpg)
She had, she explained, a goal “to save time and money on mold making and silicone usage (keeping it at 8mm-10mm or less)…especially since there are so many parts to a gauntlet.” One of the most-touted benefits of 3D printing is part consolidation — which greatly helped Ng out as she worked on the molds for this modular design. The articulated gauntlet has 33 individual parts, she explained, but master copies of the pieces for molding were condensed into just 10, making casting and molding more efficient.
“All of the parts had risers and flashing designed right into the 3D print, which saved me a lot of time, money, and labor. In the end, there were a total of ten 1-part molds to make a single gauntlet. Symmetrical parts (i.e. carpels, finger tips, finger joints, cuffs) reduced the number of required molds to make a pair of gauntlets,” she tells me.
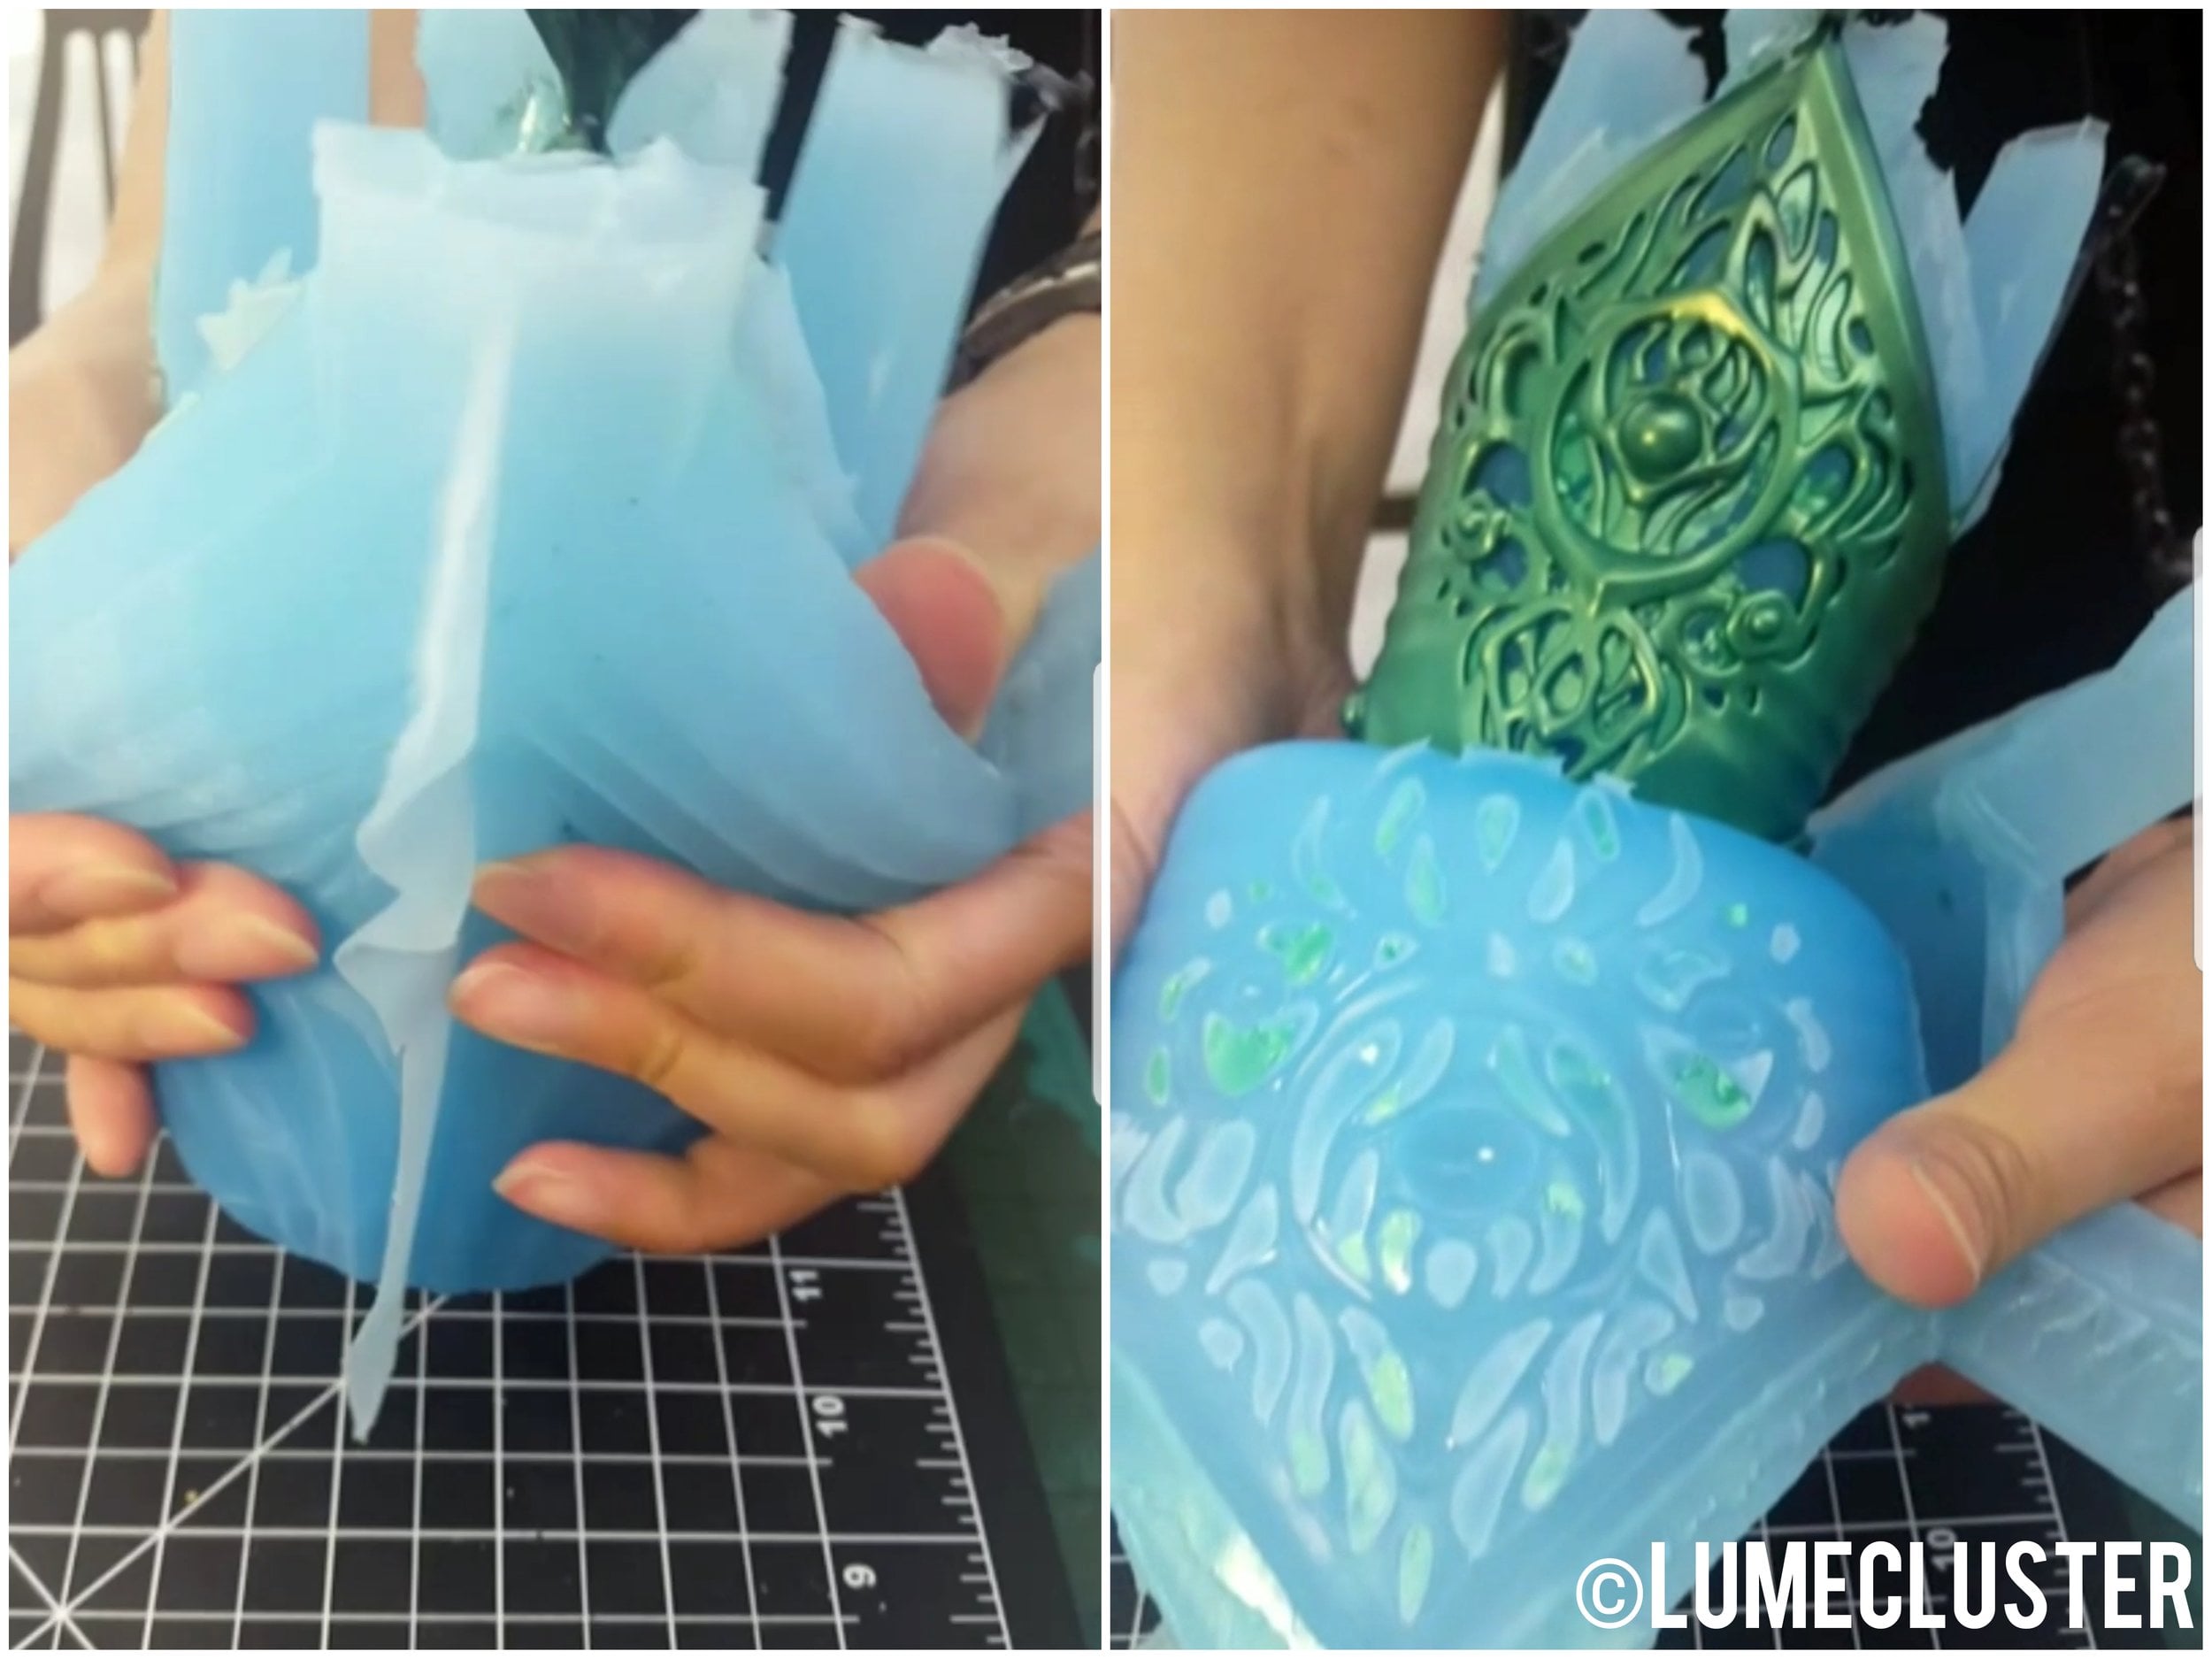
The cuff, which can be worn separately from the main glove part, took a three-part 3D printed mold support jacket, as shown in her design:
![[Image: Lumecluster]](https://fabbaloo.com/wp-content/uploads/2020/05/LumeclusterPhoenixGauntlet_MoldMaking_img_5eb09e7f470f2.jpg)
In her own words, the design considerations were many:
-
Gauntlet cuff is 1.5mm thick with risers and 0.2mm flashing designed right into it and printed on the Form 2 printer (standard clear resin) on lowest resolution setting. Needed only a few sprays of Tamiya, some sanding, and a gloss clear coat to smooth it out.
-
Cuff is put right side up because there was a downward angled flap / pegs and I needed the rubber to get in there. The model was designed to float inside the support jackets to allow silicone to flow all around it. I also wanted to minimize any seam lines.
-
Since 0.2 flashing is 3D printed with the gauntlet cuff, it made cutting open and taking the original cuff out of the mold relatively easy.
-
Cored mold support jacket was 3D printed on the Taz 6 (PLA filament) with a 2.5mm wall thickness (except for the upper portions) and was 3D modeled to be 8mm-10mm away from the cuff.
-
The 3D printed gauntlet cuff was placed inside the 3-part 3D printed mold support jacket (so it was floating inside), Dragon Skin 20 silicone was poured until the mold support jacket, and the entire thing was pressure cast.
Another consideration for the process was mess. Because Ng works in an office space where she also does work for her other company, working with 3D printing was also “an attempt to solve my problem and save time and money… In this case, 3D printing sped up my mold making process and saved me a lot of time to focus on other areas I enjoy more in design and business.”
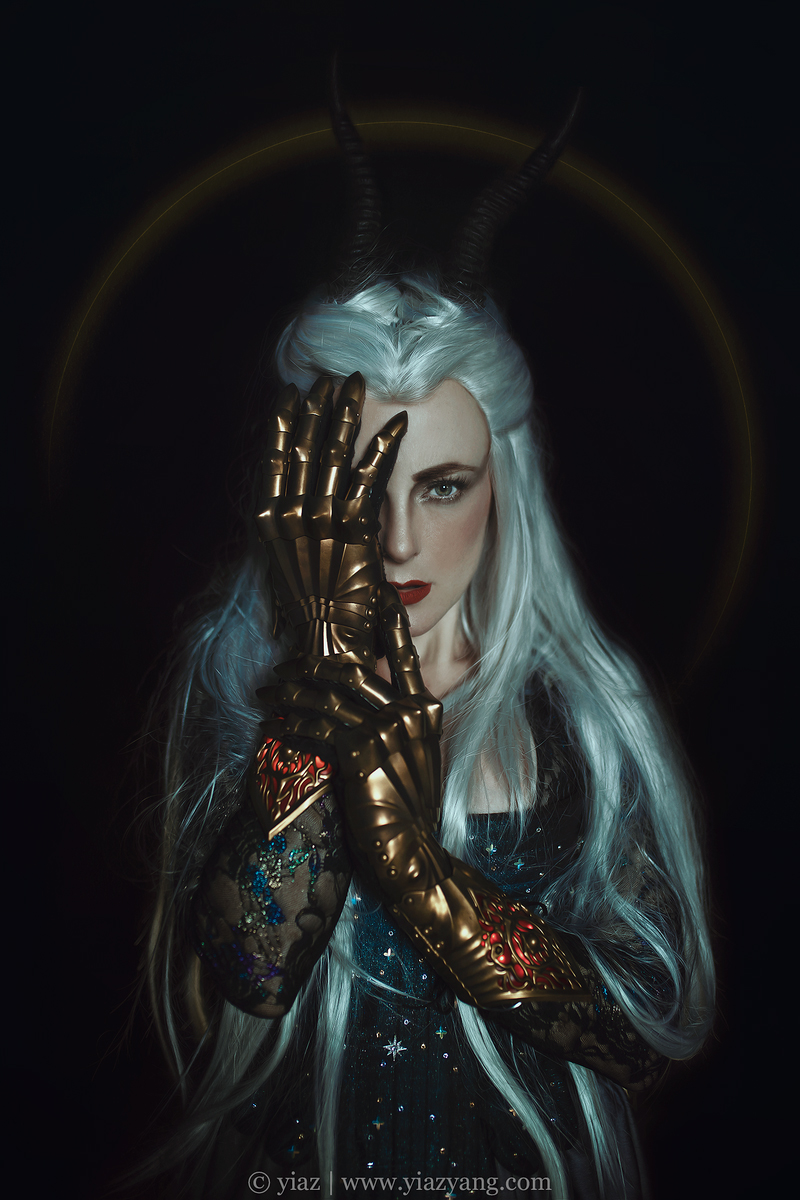
She fully explains the design inspiration and process in her blog (and a bit more on Savage’s podcast), and shares some beautiful photos from a shoot with photographer Yiaz Yang.
Photos by Yiaz Yang showcase fantasy and modern stylings for the Phoenix Gauntlet:

Ng’s dedicated research to create a new fantasy-inspired design featuring elements and functionality from 15th century gothic armor brings 3D printing and traditional molding together to create something wholly new. The Phoenix Gauntlets throw a gauntlet for other designers: look what’s possible.
Via Lumecluster

This week’s selection is a 3D printed Coronavirus!