
Our hands on review of Bambu Lab’s amazing H2D 3D printer continues with a look at operations.
This is part two of a three part series, please read parts one and three.
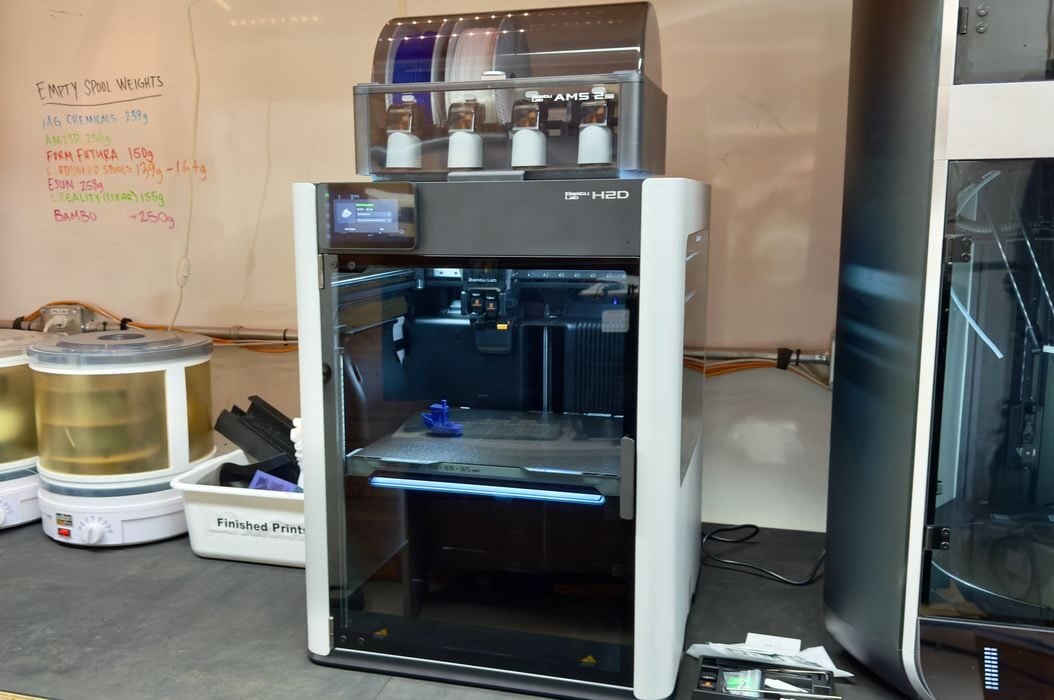
Bambu Lab H2D Operations
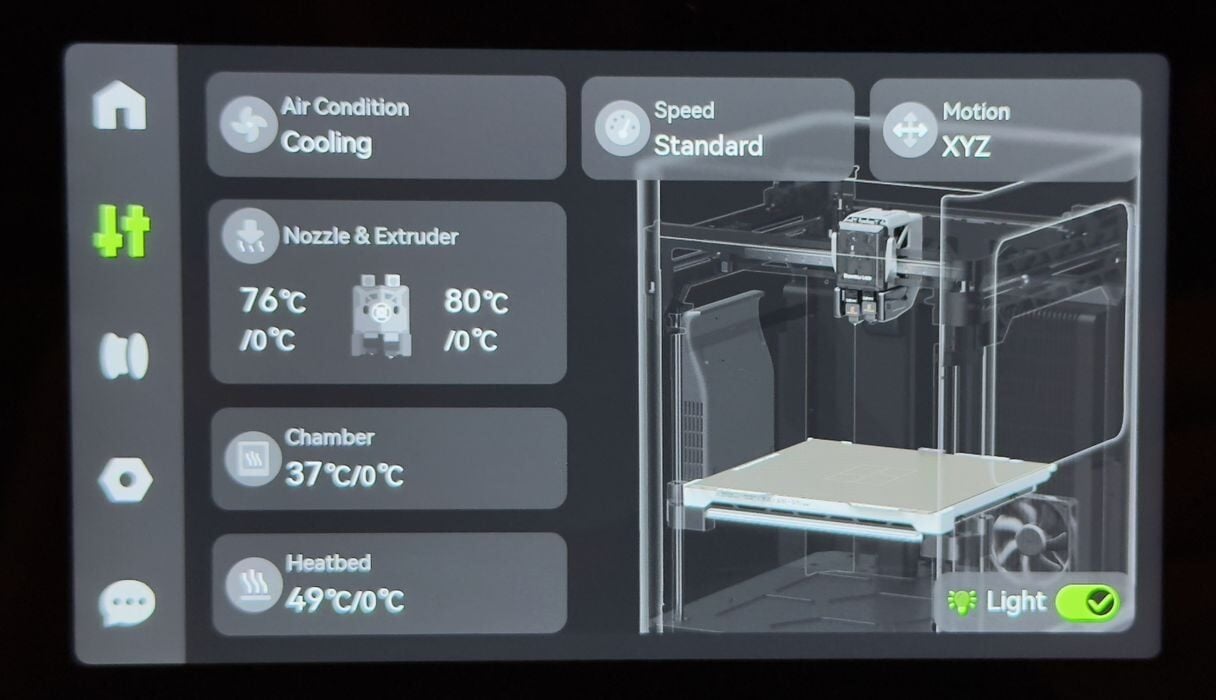
The touchscreen interface on the H2D is both large and beautifully designed, even moreso than the already brilliant X1C. I am constantly amazed at how advanced these screens appear as compared to the three-line LCD panels on 3D printers from past years.
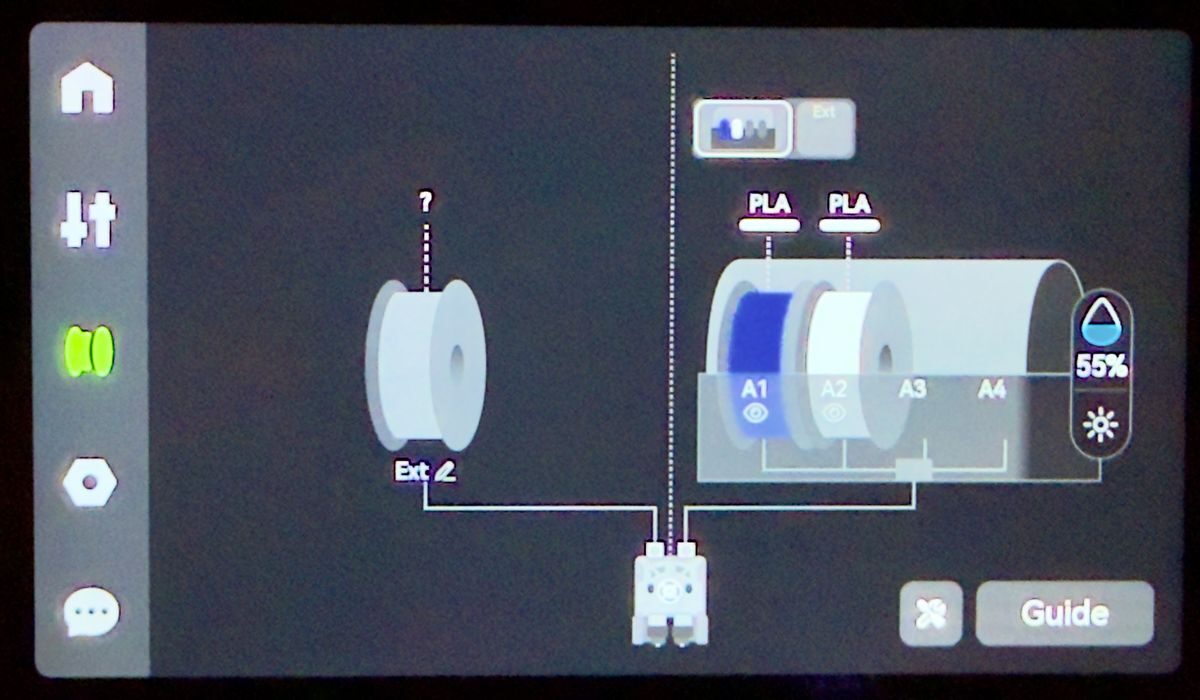
Here you can see how they use graphics to clearly portray the current state of the filament spools.
Our first print would be from the machine’s internal storage of pre-sliced 3D models. We usually do these first because they avoid any problems we might cause by setting incorrect slicing parameters. At this point we just want to see if the printer works.
However, we first had to load some filament into the AMS 2 Pro. This was designed to be relatively easy, but in our case the machine is sitting on a tall work table, and the tall H2D has the AMS 2 Pro sitting way up top. Basically we can open the top, but we can’t easily see down into the AMS 2 Pro.
In retrospect, we probably should have put the AMS 2 Pro beside the machine rather than on top. This means that you shouldn’t trim the PTFE tubes until you confirm where you’re placing the AMS 2 Pro. The H2D is a very tall machine, so take that into account when you are setting it up.
To load a spool you simply place it on the rollers in one of the four slots. The filament end is pushed into the corresponding opening, which opens by pressing a lever. This is somewhat easier than on the previous AMS and AMS Lite units, although we saw less of the action because of the height. The AMS 2 Pro then slurps it up.
We were using Bambu Lab filaments for most of the testing, and these are equipped with an RFID that tells the system the type of material, and even the specific spool so that it can track usage. If you don’t use Bambu Lab filament, you’ll have to manually identify the material on the touchscreen, which is straightforward.

Our first print was a 29m PLA #3DBenchy, which was one of the several pre-sliced models.
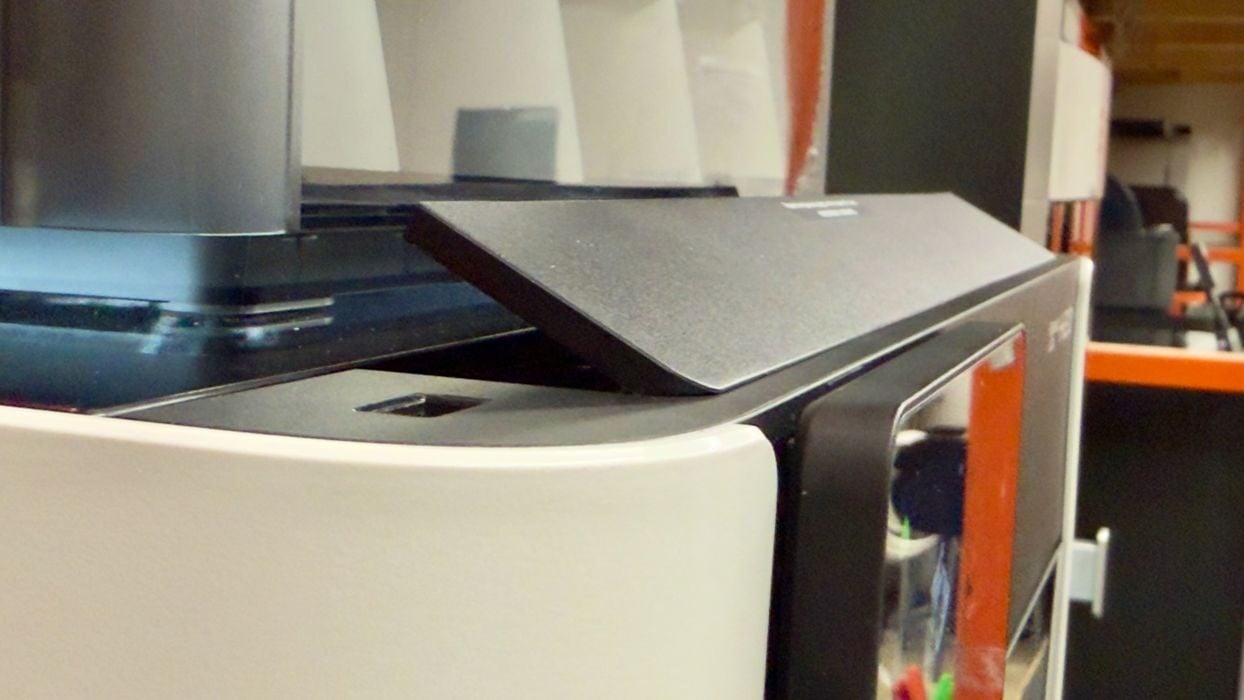
Upon launching the job, we saw this vent open on the top of the machine. This is to let out hot air, as PLA doesn’t require a heated chamber. In fact, if the chamber is too hot, the PLA may droop. The vent releases hot air, keeping the temperature at a moderate level. Do not put anything on top of this vent!
Also interesting is how Bambu Lab designed this. Notice that you cannot accidentally place the AMS 2 Pro on top of this vent because the handle of the glass lid prevents it from moving forward.
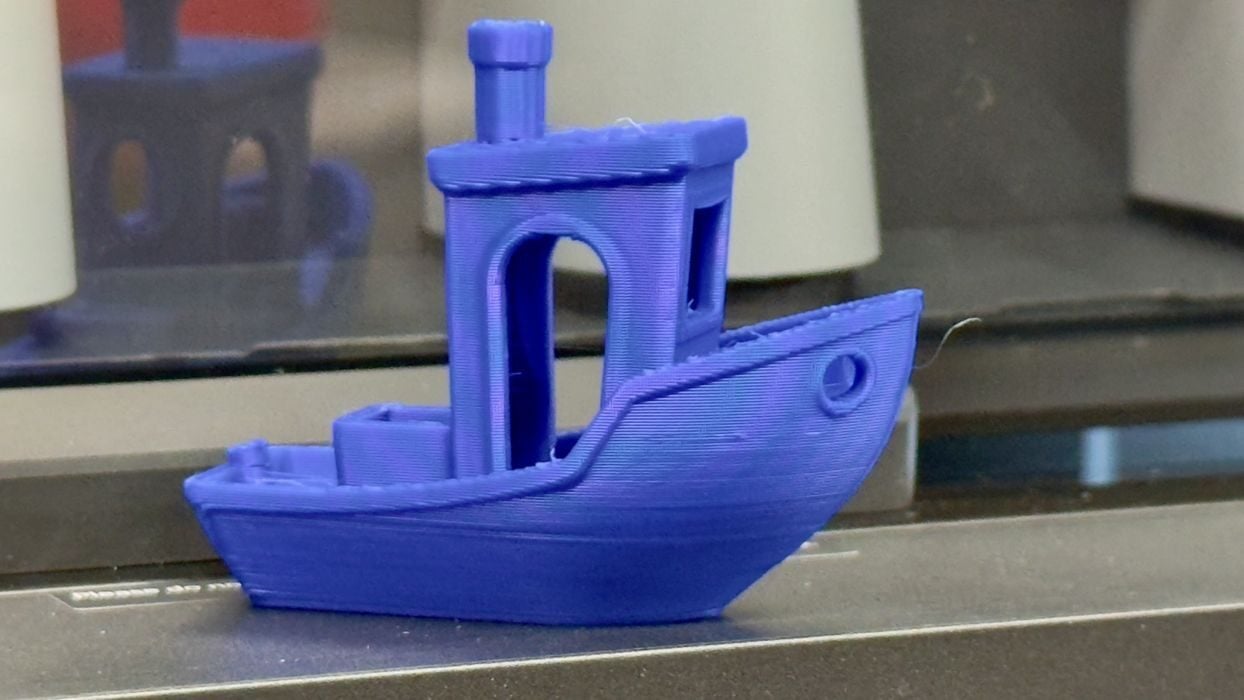
The first print worked really well, and was one of the best #3DBenchy FFF prints I’ve seen. No drooping at all, even under the bow.

There are several pre-made print jobs stored in the H2D’s internal memory, and they can be easily launched. However, there’s not much of a selection of test jobs as compared to those you’d find on other machines. Here there’s really only a couple, plus some utility parts to print.
We couldn’t quite make out the lettering on the stern of the ship, so the resolution isn’t yet as good as a resin 3D printer.
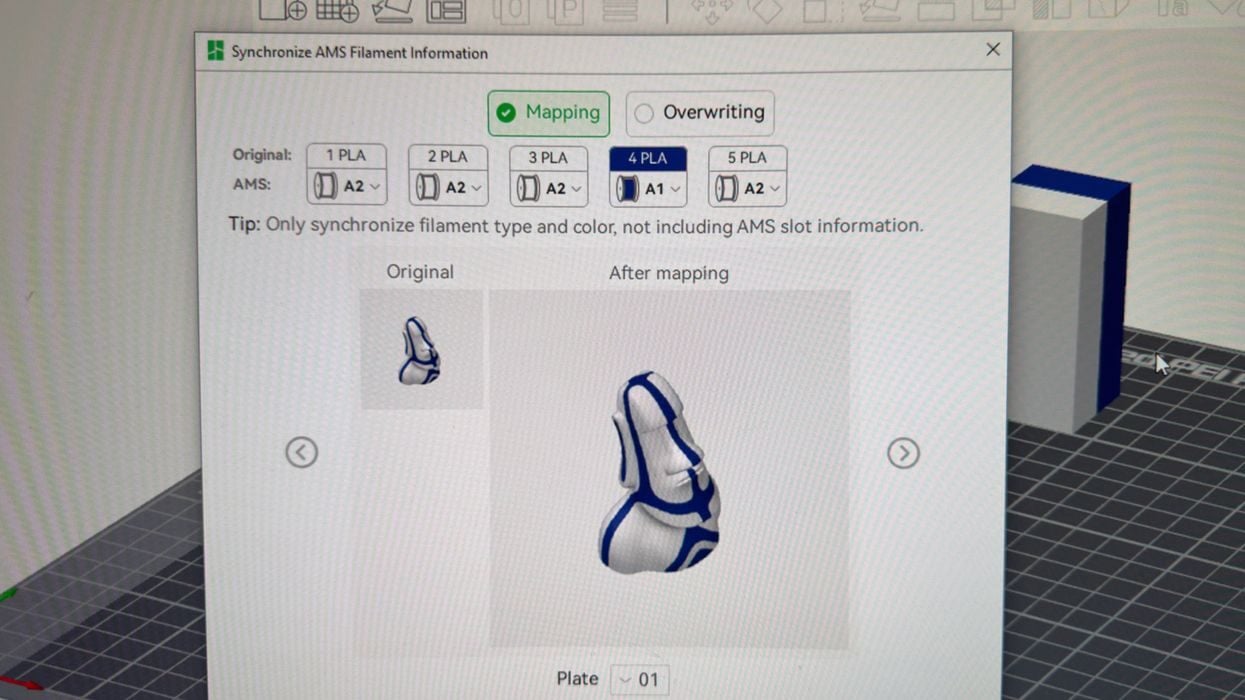
Our next step was to try a multicolor 3D print because we have two colors loaded in the AMS 2 Pro. We selected a two-color Moai 3D model.
This didn’t work at all in the slicer, because the slicer assumed we had one color loaded into each of the two nozzles, rather than having it select the colors from the AMS 2 Pro.
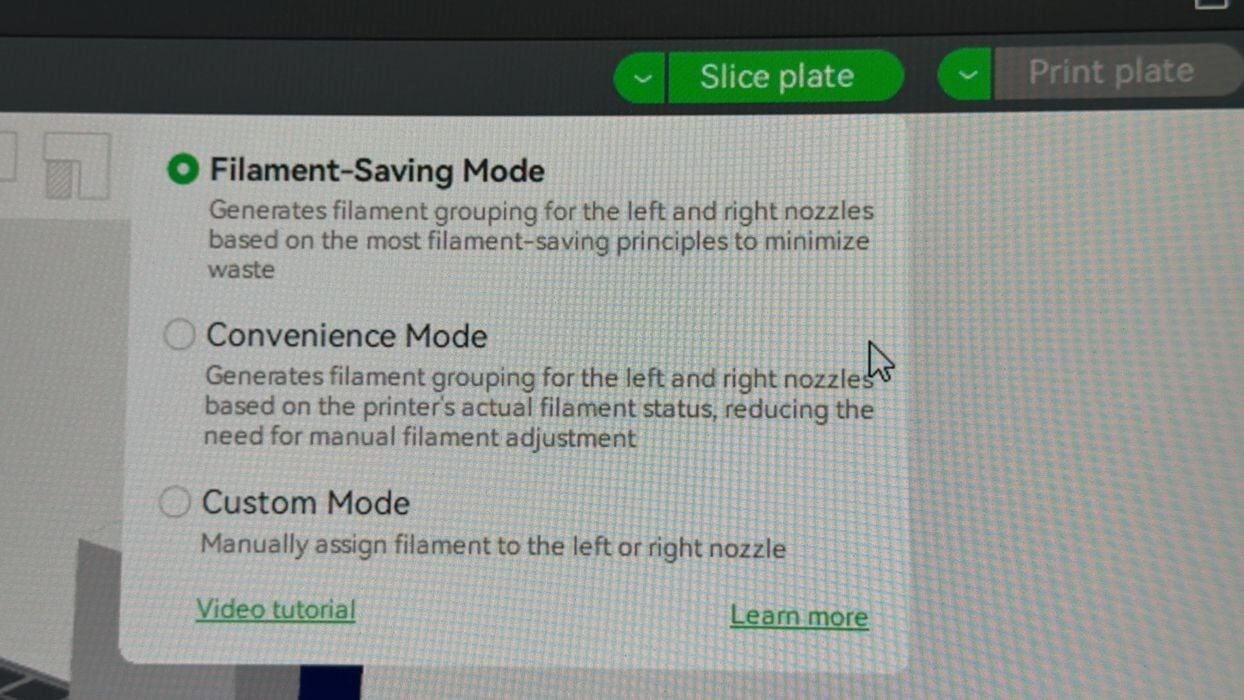
It turns out that the H2D’s dual nozzles introduce a new operational selection. Filament saving mode is the default, and it assumes you are printing in two materials, one on each nozzle. Meanwhile, “convenience mode” uses the AMS 2 Pro as normal. There’s also a custom mode if you want to manually assign materials to nozzles.

Once we figured that out, printing made more sense and we were able to send a job to the printer. In the course of this, we switched to a multicolor frog to save some filament.
And that means it’s time to explain filament waste.
When you’re switching filaments with the AMS 2 Pro, the nozzle will have to be purged of the previous material. To do this the H2D will run through some new material, creating a “poop” that falls out the back of the machine (you’ll need a waste box to collect them). This method works very well, but wastes a considerable amount of filament, sometimes much more than the model itself.
On the other hand, if you use filament-saving mode the H2D simply switches from one nozzle to another without the need for pooping. Depending on the 3D model, this can save an enormous amount of material.
Filament saving mode is also useful with more than two materials. It will determine which nozzle should have the most frequently used filament, leaving the less used materials on the AMS 2 Pro. This also saves material, although less than the two-nozzle setup. You just have to ensure you have the right materials in the AMS and in the direct extruder.
The dual nozzles, while extremely useful, also complicate operations somewhat. You have to be very conscious about which filaments are loaded into which extruder. For this reason I suspect the H2D might be a bit too much for novice 3D printer operators. Until we got the hang of things, it was confusing.
Here’s an example: there are two extruders, and two ports on the back of the machine to load with filament (meaning attaching to the external spool or AMS). But no! There are actually THREE ports on the back of the H2D.
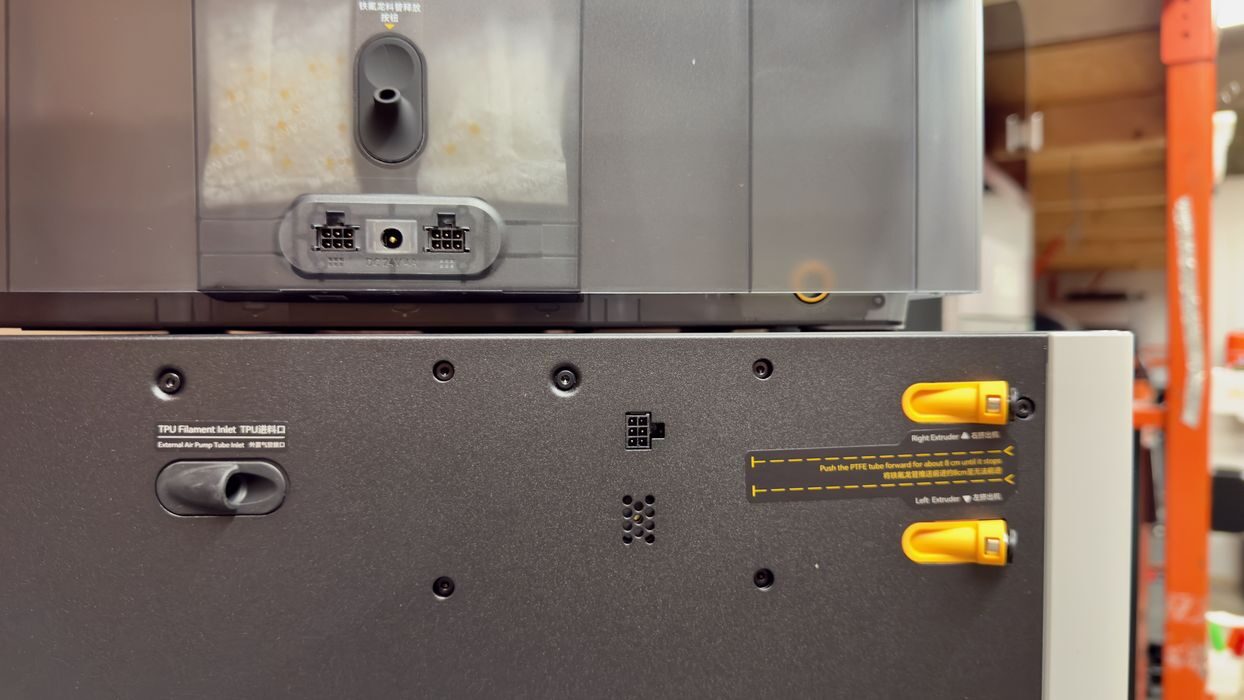
There’s a third port further to the left side of the back that is used solely for soft TPU materials. It turns out that you cannot just load a spool of TPU on the external holder and push it through the direct extruder. It will get hung up in the buffer.
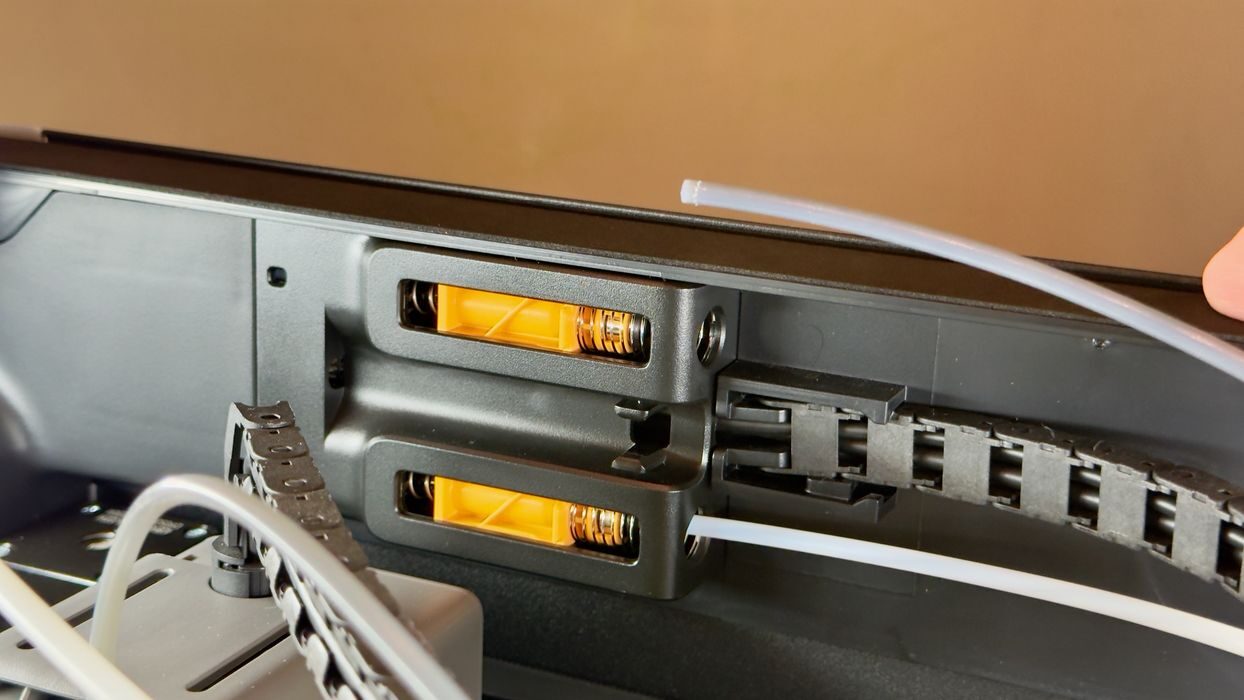
The correct procedure is to go inside the build chamber and disconnect the PTFE tube connected to the port. Then you re-mount that PTFE tube on the third port, where the TPU filament has an easier path to cross.
But it’s even more tricky than just that. After hooking all this up, we still could not get the machine to properly recognize the filament.

It turns out that the problem of the H2D not recognizing TPU on the spool holder requires more action. The AMS is attached to the right extruder and must have its data cable disconnected, otherwise the printer thinks you are trying to use the AMS to print TPU. Once disconnected, a second (right) spool holder will show up in the firmware, which you can then configure.
Situations like this tell me that novices will have quite some trouble figuring all this out.
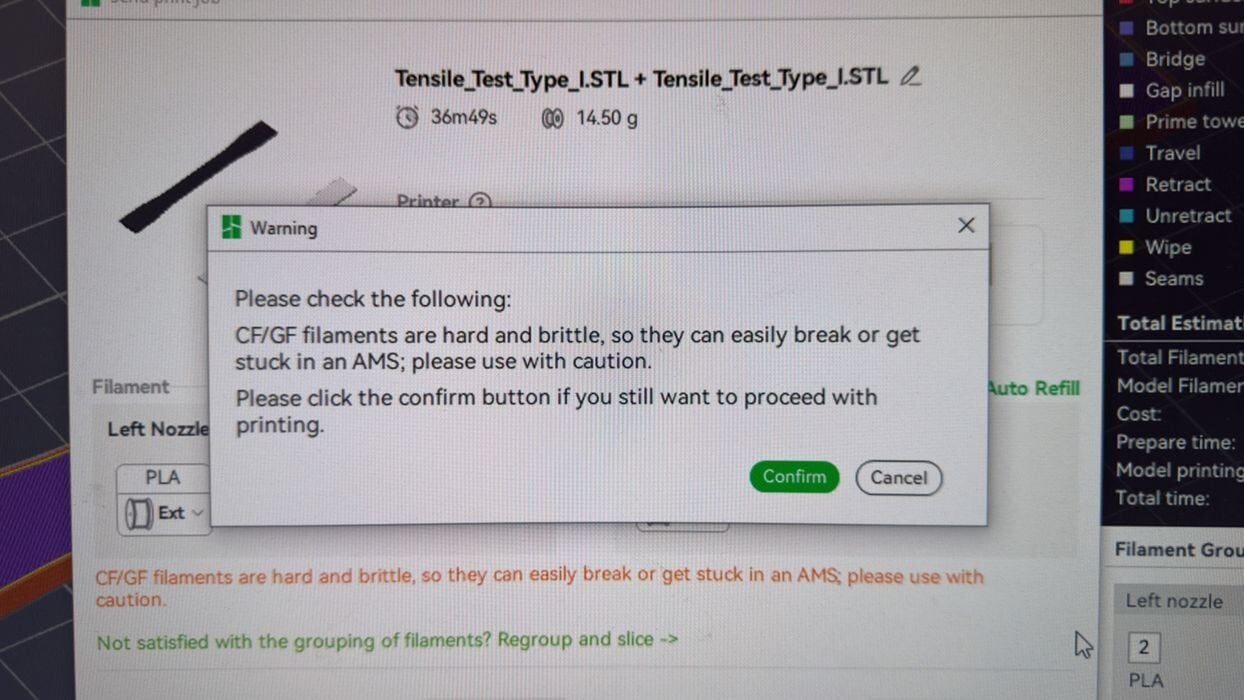
Many of the materials we were testing were CF, polymers mixed with chopped carbon fiber. While these materials do provide for very strong parts, the H2D issued this warning when we put them in the AMS. It seems that these filaments are a bit more brittle — because the carbon fibers don’t provide any adhesion — and they can break in the AMS tubing.
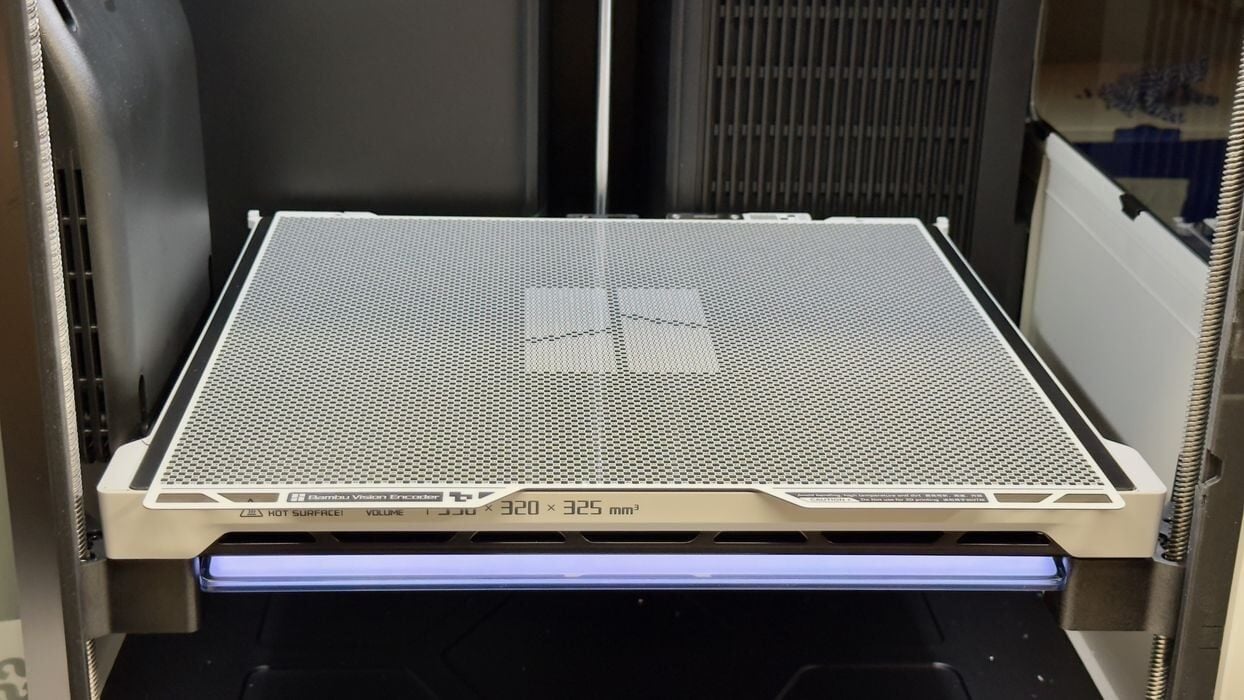
We also tried the optional Vision Encoder. While the stock H2D offers incredible print quality, it’s possible to make it even better. The Vision Encoder is a special plate that temporarily replaces the regular print plate.
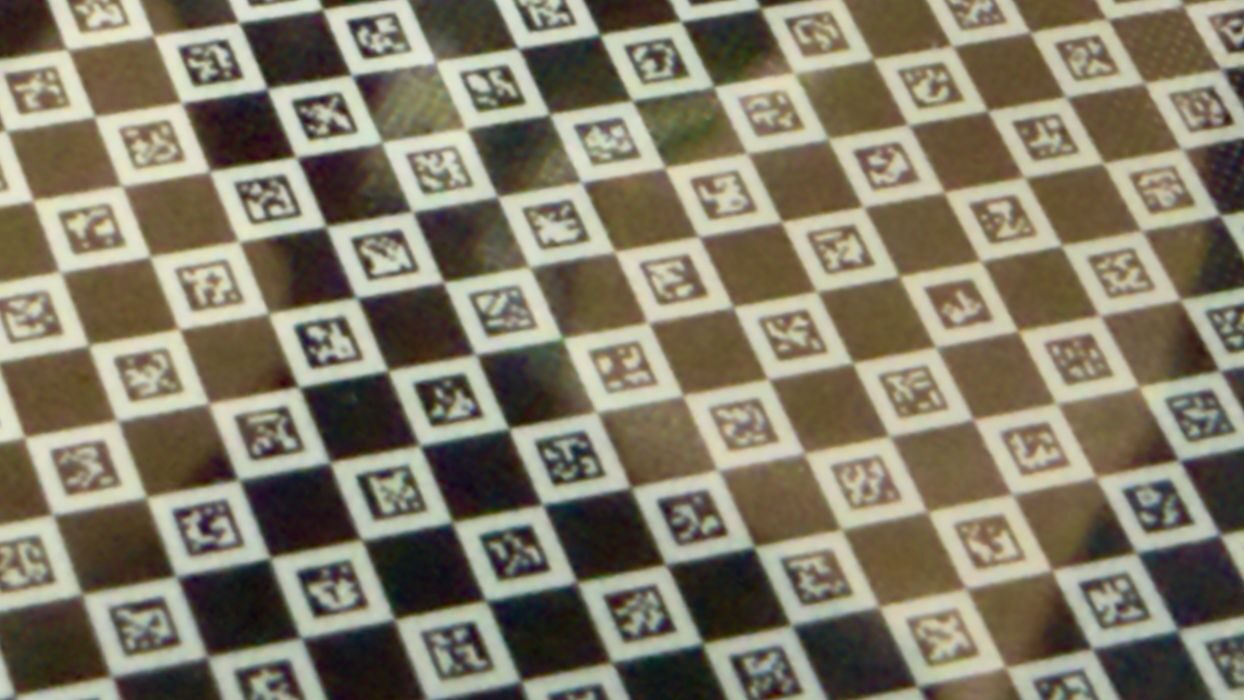
If you look very closely at the Vision Encoder, it is splattered with unique 2D designs. These are carefully measured by the H2D’s optics system and are used to tune the motion system. Bambu Lab said after using the Vision Encoder the motion system has a 0.05mm accuracy.
We ran the Vision Encoder procedure, which you need only do once in a long while, and it takes only a few minutes to complete. Frankly, it was hard to tell much difference on the printed parts afterwards because they are already of incredible quality. However, if you depend on very precise dimensions for your parts, the Vision Encoder might be a good investment.
Be careful: the Vision Encoder is NOT a print plate. It’s used only for calibration and should never be in place when you start a job on the H2D.
During our run with the H2D we encountered only one issue, and it was a very strange one.
We had printed a test coupon early in the testing, and it remained on the print plate overnight — we do sleep, you know.
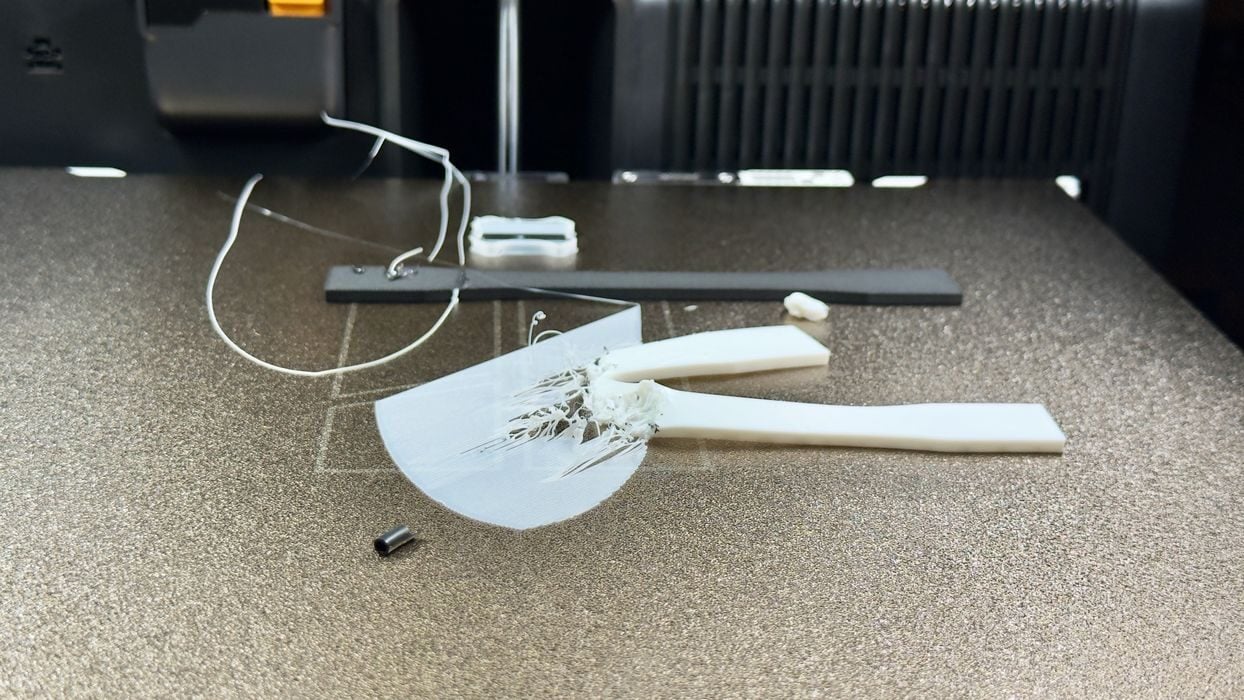
In the morning we discovered this. At first we thought the print job had failed, but upon closer inspection it turns out that a second print job had started on the H2D, crashing into the test coupon. In fact, the strong nozzle literally cut through the test coupon as it was setting up to print a boat.
What happened? As much as we know, someone was in the workshop overnight and attempted to print the boat job on a nearby P1S. They somehow didn’t notice that BambuStudio was pointing at the H2D, and mistakenly assumed their job was going to the P1S.
Somehow BambuStudio dispatched the job to the H2D, and it did not recognize that the plate was occupied with a previous print. The job started and crashed into the previously printed coupon.
Meanwhile, the operator waited patiently at the P1S, not seeing the boat job appear. Eventually he gave up and cancelled the job, which is how the job finished on the H2D. Why did he not hear the obvious crashing and unnatural noises coming from the H2D? It turns out that this operator was hearing impaired!
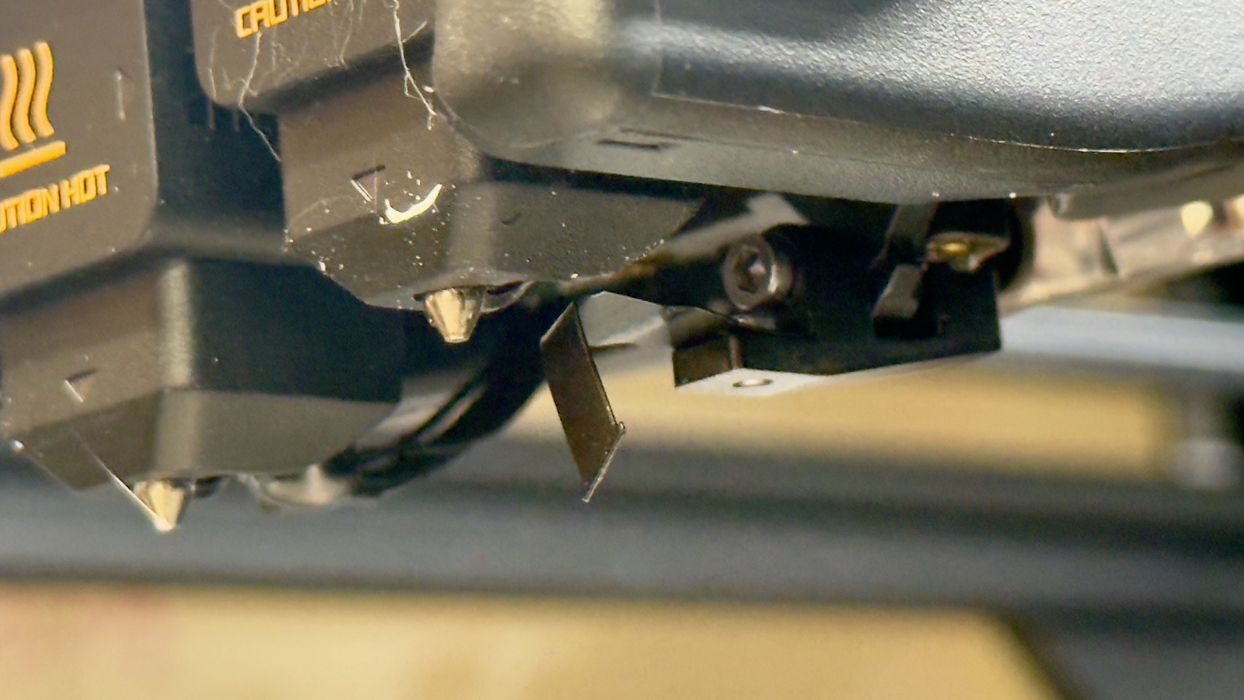
There was minor damage to the toolhead, which we quickly replaced from parts at a local shop. Soon we were back up and running.
We reported this issue to Bambu Lab, who were very interested in the details. I assume Bambu lab is going to fix this, because it should never happen. The AI cameras should have detected the presence of material on the print plate.

Our biggest job was 3D printing a life-size basketball. We used BIQU’s special filament that is specifically designed for basketballs. This job lasted 71 hours, and it completed perfectly.
This is part two of a three part series, please read parts one and three.
Via Bambu Lab