
We had a chance to evaluate the new Prusa MINI 3D printer, and, wow, what a device!
This is part three of a three-part series on the Prusa MINI 3D printer. Please read parts one and two.
Prusa MINI 3D Printer Test Results
Preparing 3D models for printing with the Prusa MINI is very straightforward and is in fact identical to using the company’s excellent PrusaSlicer software.
The only catch is that you must configure and select the Prusa MINI as an available device, which is easy to do from the configuration window. Conveniently, the MINI shows up as the first item, as I suspect Prusa Research may feel they’re going to sell many of them to novice users who would appreciate not having to burrow through a long list of possible 3D printers.
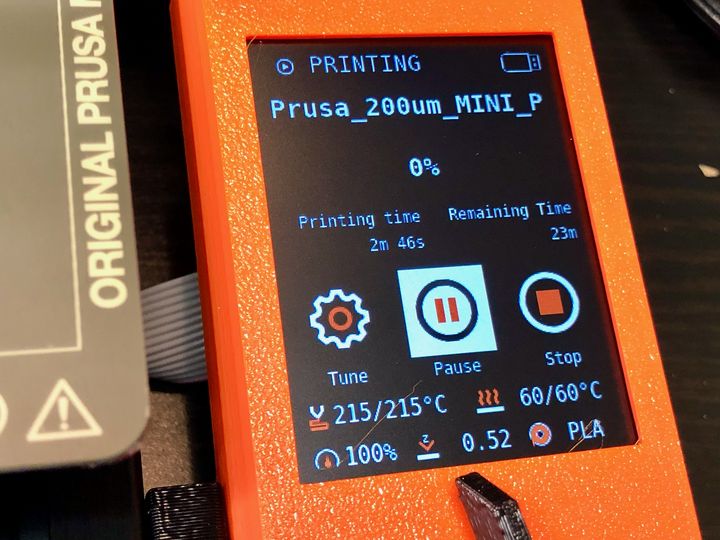
There was one surprising discovery, however. When you load up a 3D model in PrusaSlicer intended for the MINI, you must select the material, printing parameters and the quality level. There’s a popup menu for the quality selection, which is essentially picking the layer size and print speed.
To my surprise, I saw this:

What grabbed my attention were the two highest-quality selections, which offered layer sizes of 0.07 and 0.05 mm.
To put this in perspective, virtually all low-cost desktop 3D printers can barely hit 0.10mm layers, and then its often iffy whether you’ll succeed. Here we have the possibility of layers far smaller than competitive equipment, so I decided to give them a try after using more conventional settings.
But first, I had to print some more basic items. Here’s my first print, the Prusa Plate, which came out perfectly.
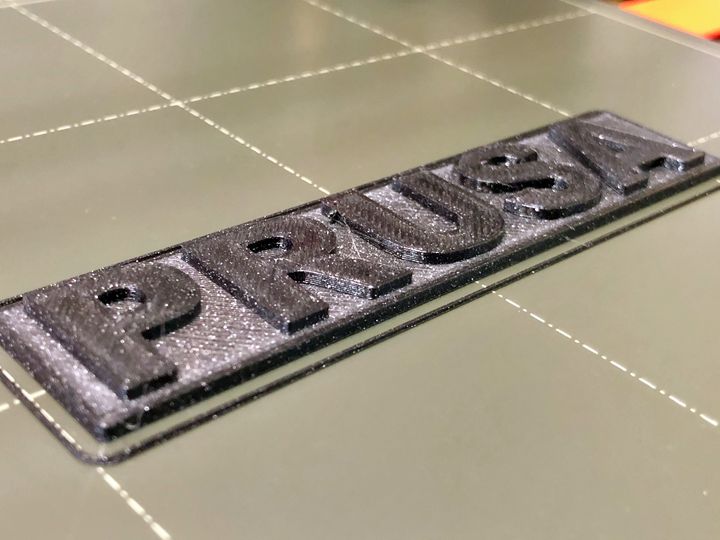
This is important: there were times in the past when achieving the first successful 3D print took days to get working, but here with the Prusa MINI it simply worked immediately. In fact, all my print jobs succeeded, with two exceptions that I’ll discuss later.
The venerable #3DBenchy, pre-sliced version, had outstanding quality.
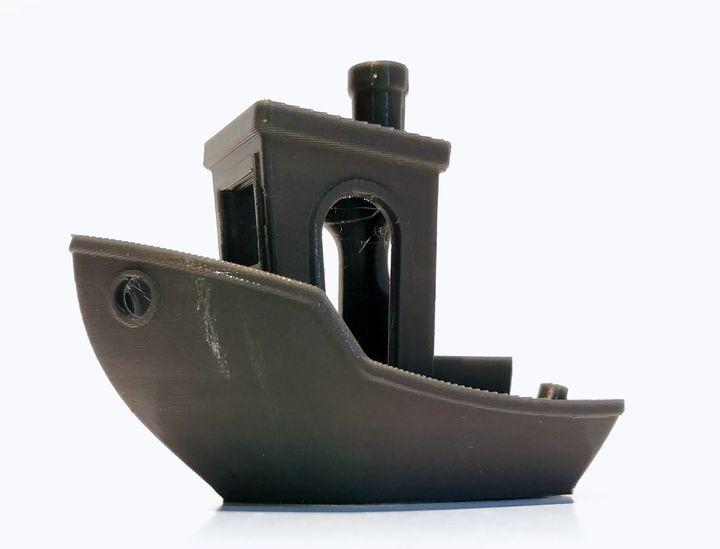
While all elements of the print were excellent, here’s something you don’t see done very well on other devices: the bottom.

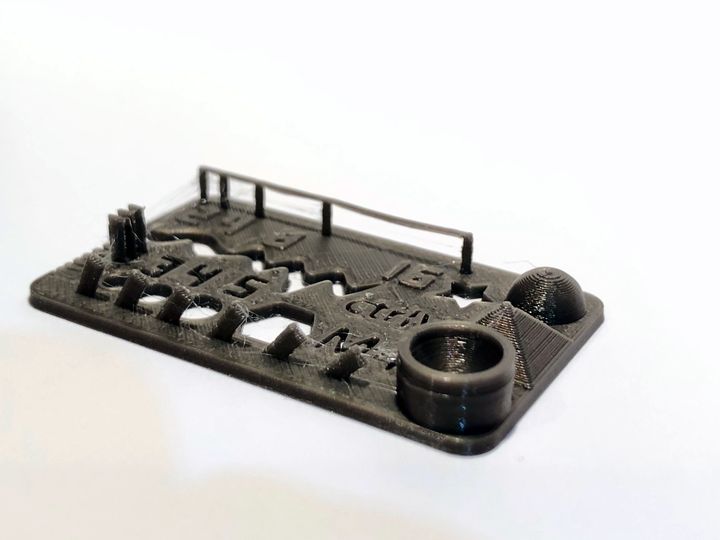
Speaking of benchmarks, I usually try one of the CTRL-V benchmark objects, as it is quick to print and offers more variety of geometries.
Here you can see this benchmark again came out with excellent print quality.
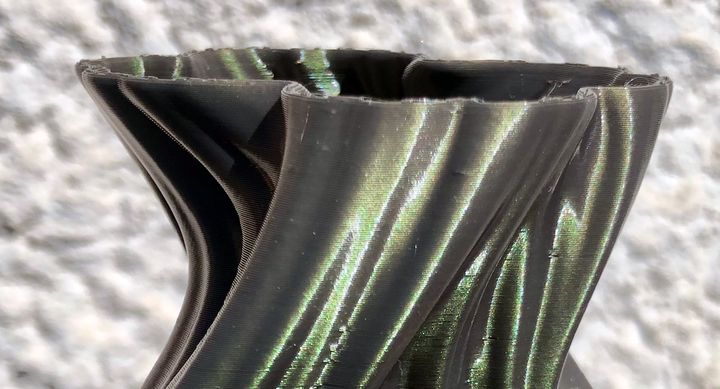
Note I used Prusament Mystic Green on these test prints, which in retrospect might not have been the best color choice for images.
The detail shown by the MINI’s prints was consistently excellent. Here you can see the top lip of a curvy vase.
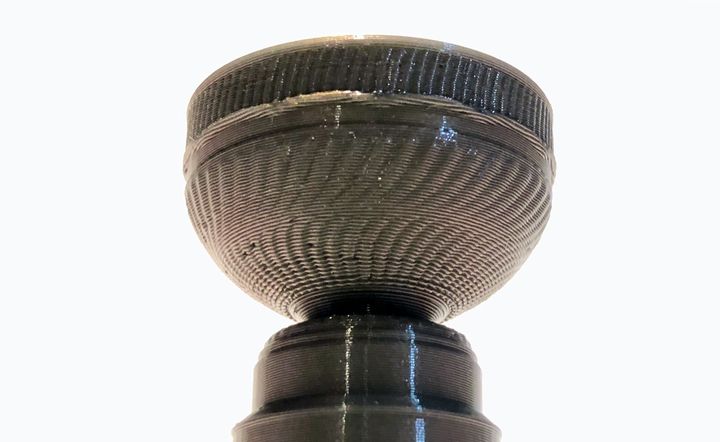
As the NHL playoffs are beginning, I decided to print out a copy of the Stanley Cup. Although this print is only 100mm tall, you can easily see a lot of detail on the cup at the top.
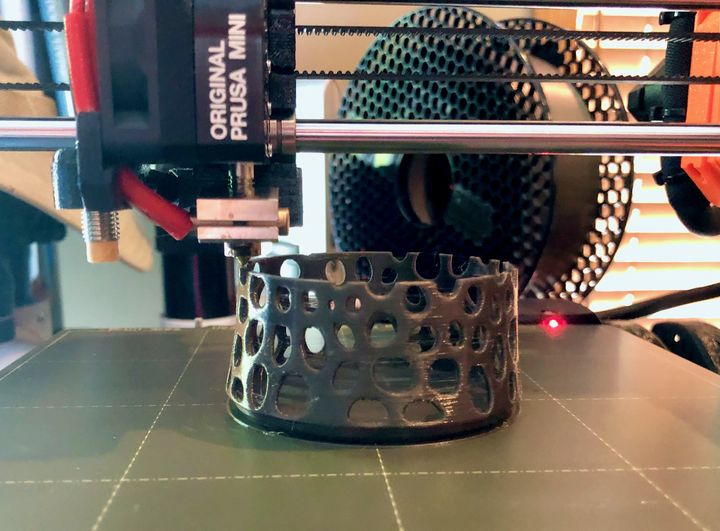
I was curious about support structures, and tried 3D printing an elephant 3D model. As you can see above, the elephant had a considerable amount of support material to support the belly, trunk, tail and tusks.

Everything seemed OK, but when I removed the support structures, the beast looked like this:

It seems that some of the smaller bits broke off when the support was removed. While this isn’t a direct problem with the MINI itself, it does show that the default settings for support material may need to be tweaked to achieve a clean breakaway.
As I mentioned above, the MINI offers the possibility of 3D printing with 0.05mm layers, so I had to try it. Here you see an image of the bottom portion of two identical vases, except that the one on the left was 3D printed with 0.20mm layers, while the right vase has 0.05mm layers. There’s a penny in between them for scale.
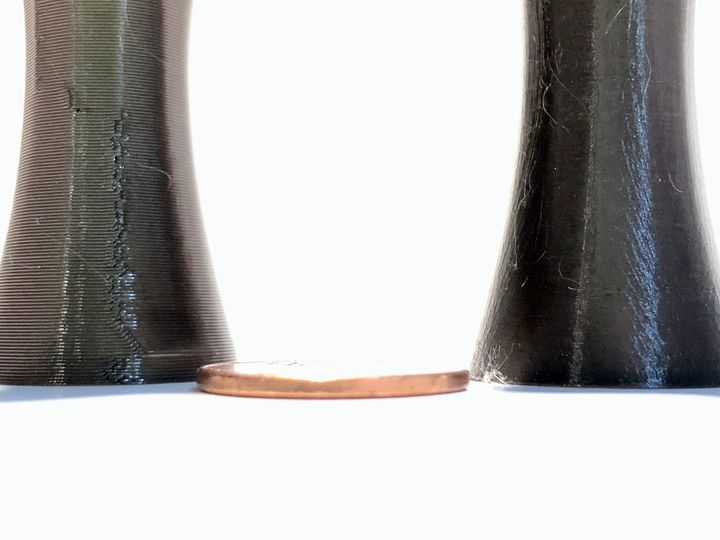
As you can see, the 0.20mm layers are clearly visible, while the 0.05mm layers are nearly invisible! The only way you can easily tell there are layers is to run your fingernail along the vertical axis and you’ll feel a slight vibration. It’s extremely smooth.
This result was so outstanding I printed another object at 0.05mm, the Buddy dog 3D model.
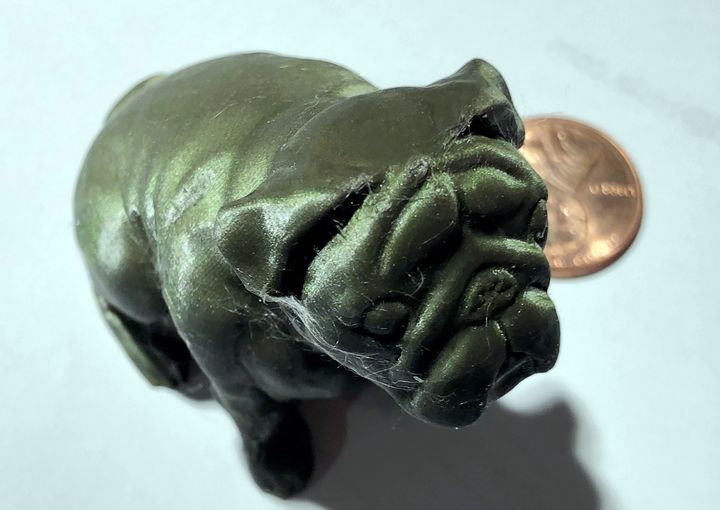
As you can see in this close detail image, there are literally no layer lines visible at all. However, there are many tiny whiskers, something I did see on several 3D prints. I’m not sure why those appear, but they are trivial to remove with a heat gun.
Prusa MINI Watchdog Reset
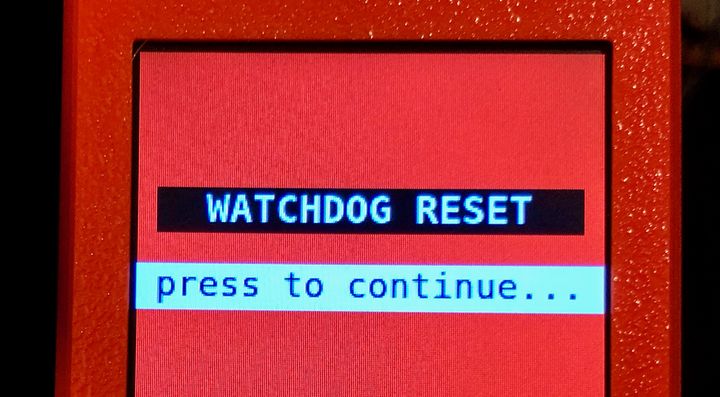
There was one major problem I encountered with the Prusa MINI: the dreaded Watchdog Reset. This event occurs apparently when the controller board encounters an unrecoverable scenario, and it simply gives up and stops everything.
This happened twice to me, both times while 3D printing the pre-sliced Benchy using Prusament filament and default print settings. As all elements were standard Prusa Research options, it should work correctly. However, the same print failed twice, about 3/4 of the way through the job, but not at the exact same point.
I did some research and determined that many Prusa MINI owners have had the same issue, and the problem turns out to be with the provided USB stick. I suspect what’s happening is that as the print proceeds the USB stick heats up. Some USB sticks then don’t read out properly, causing the controller board to be sent trash data, which it rejects and resets.
This makes sense as these test prints were, at the time, the longest prints I had attempted. That duration apparently was sufficient to heat up the USB stick, whereas my short previous prints did not.
The solution was actually quite simple: replace the USB stick. I found another handy stick and transferred the data (from a fresh PrusaPrinters.org download, not from the possibly corrupted USB stick).
This new stick allowed prints to continue uninterrupted, and I had no further issues with the device. In fact, all print jobs completed successfully and with excellent quality after changing the USB stick. Perhaps Prusa Research got a bad batch of USB sticks from their supplier? In any case, it’s as easy a fix as one could imagine.
Prusa MINI 3D Printer Conclusion
I admit that given the low price and “mini” billing, I wasn’t expecting much from this desktop 3D printer. However, I was entirely surprised by the incredible quality and ease of use of this machine. It’s in a completely different class as compared to typical low-cost 3D printers in almost all aspects.
If you’re looking for a low-cost 3D printer to get into the technology, you cannot go wrong with the Prusa MINI.
This is part three of a three-part series on the Prusa MINI 3D printer. Please read parts one and two.
Via Prusa Research