
We had the opportunity to check out Helio Additive’s fascinating 3D print optimization tool with 3D-Fuel’s PCTG material.
Before we get into the details, let’s set the background of each of these two products.
PCTG? What’s PCTG?
Everyone is familiar with the typical desktop 3D print materials: PLA, PETG, TPU, ABS. Others may know of ASA, PA, PC and more. But there’s a sleeper material that could become a lot more popular: PCTG. It’s chemically similar to PETG, and prints with much the same characteristics.
So why not use PETG instead? It’s because PCTG offers greater strength, more chemical and UV resistance, and is actually a bit easier to print than PETG.
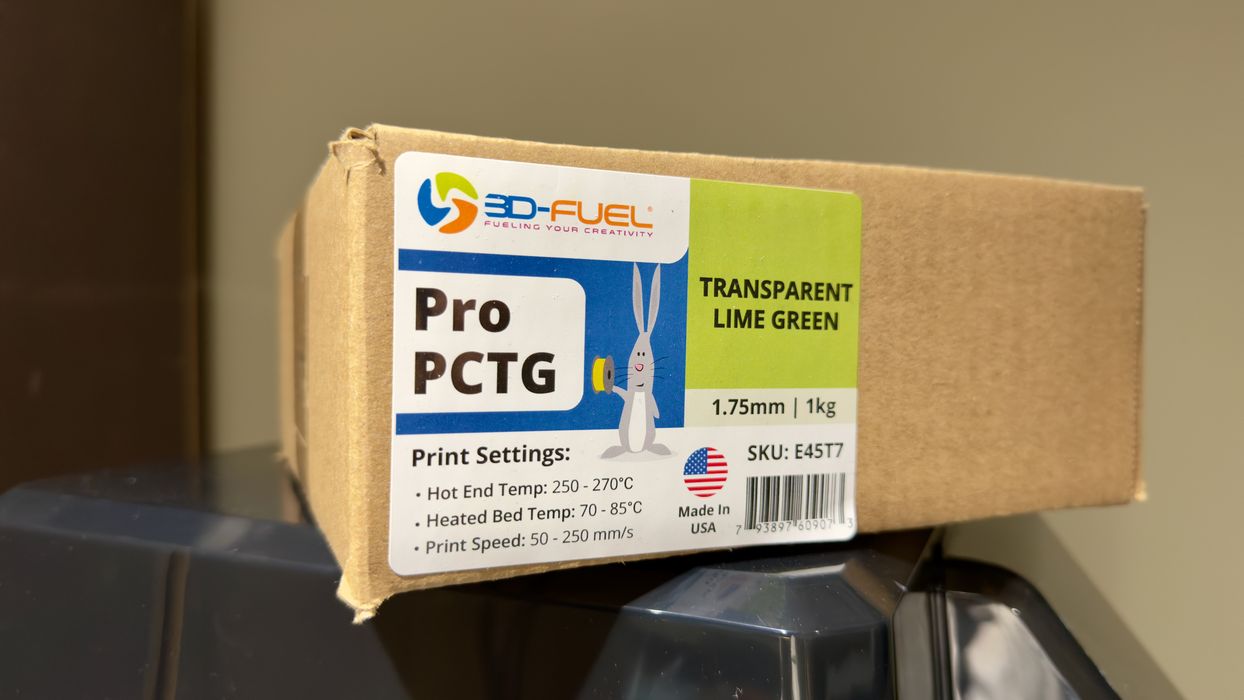
Unfortunately it’s a material that is still becoming known to the 3D print world, and there are very few suppliers of PCTG. There’s one major source in North America, North Dakota-based 3D-Fuel, who provided some material for us to test in this review.
I hadn’t previously used 3D-Fuel’s products, but I was pleasantly surprised about how easy it was to use — and also I found their ordering and delivery process to be very prompt and friendly. If you are considering trying PCTG, take a look at 3D-Fuel’s products.
Helio Additive Background
Helio Additive is a startup company that provides an optimization service for 3D printing. Their key premise is that they believe there are ways to strength the bonds between layers of a print by very carefully managing the temperatures during extrusion.
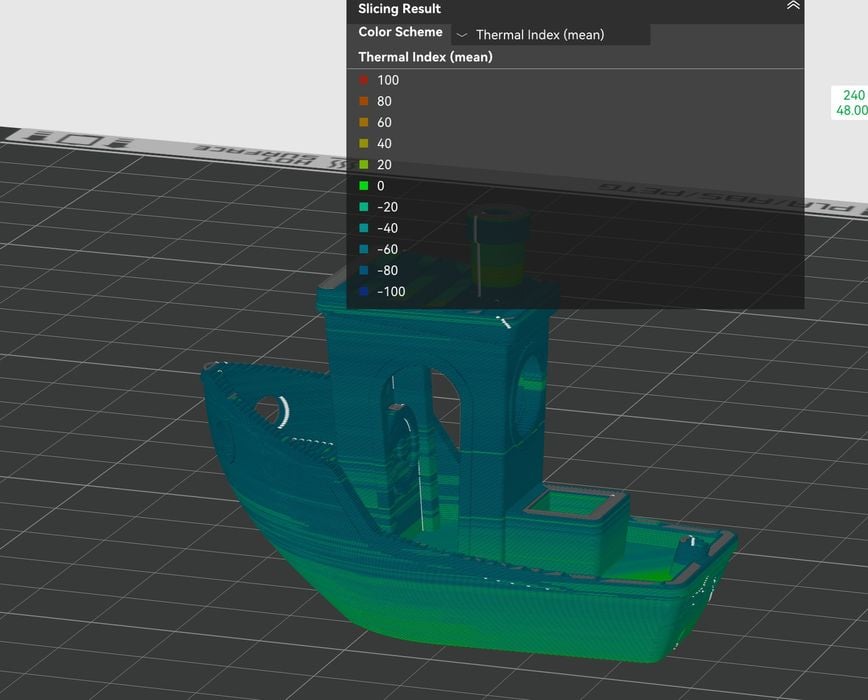
How can they do this? They start with a simulation of the print job, voxel by voxel. While most 3D print jobs simply set a temperature and go with it for the entire run, there are different effects that occur. Heat is tremendously important because that is the factor that enables adhesion between extrusions.
For example, a voxel’s real temperature is affected by the presence of (or absence) of neighbouring voxels. A voxel with no neighbours might cool quickly, while one that’s surrounded will retain heat longer, for example. Another consideration is timing: if a portion of a print is left for longer before the next layer is added, it will cool down more than if extruded on immediately.
The Helio Additive system is able to simulate these thermal conditions throughout the entire print job — so they know when and where less than optimal thermal conditions occur.
The idea is to optimize the temperature during the print job to ensure the best possible result. The other benefits are to increase print speed and decrease warping. This is possible because knowing the thermal situation, they can speed up the toolhead as much as thermally possible in certain motion scenarios, while still maintaining print quality.
Helio Additive Materials
There’s a reason why we are just testing with PCTG in this review: Helio Additive’s operation depends on using specific materials.
Why? It’s because their simulation is calibrated with machine-material pairs. It’s easy to understand: the thermal conditions during a print job on a Prusa XL might differ substantially from those on a Bambu Lab H2S, and at the same time the thermal properties of a given material will vary as well. You have an equation with two unknowns, machine and material, so Helio Additive has preconfigured simulation profiles for a list of machine-material pairs.
Currently, Helio Additive’s portfolio of machines includes all of the current Bambu Lab line, as well as FGF equipment from CEAD, Kings 3D, KraussMaffei, Bram, Piocreat, and “generic robot arm” systems. For materials, they have certified a wide range of materials from Polymaker, Bambu Lab, and of course 3D-Fuel’s PCTG.
Helio Additive Operation
Helio Additive operates as a subscription service, where they offer a range of personal (non-commercial use) or business options with varying capacity limits.
Two features are presented: Assess and Enhancement. In both cases you provide a previously sliced GCODE file to Helio Additive for analysis, along with specifying the specific machine and material as explained above.
The Assess feature is an “engineering grade 3D print diagnosis” that provides a printability report. The report indicates where over- heating and cooling might be present in the job, and allows you to tweak the temperature, print speed or cooling to optimize the print. The usual process is to diagnose, tweak and iterate until you get a good result to print.
The Enhance feature is more sophisticated. It will perform a similar analysis, but actually can automatically tweak the GCODE to account for its analysis. In other words, a print job becomes faster, parts more reliable and stronger literally at the push of a button. Helio Additive says Enhance typically makes jobs 10-40% faster, and with more consistent layer adhesion.

Helio Additive provides the Assess feature at no charge, but the Enhance feature requires one of their subscription options.
Testing Helio Additive
The service is available via web page, where you would upload your GCODE files for analysis, and download tweaked GCODE after Enhance processing.
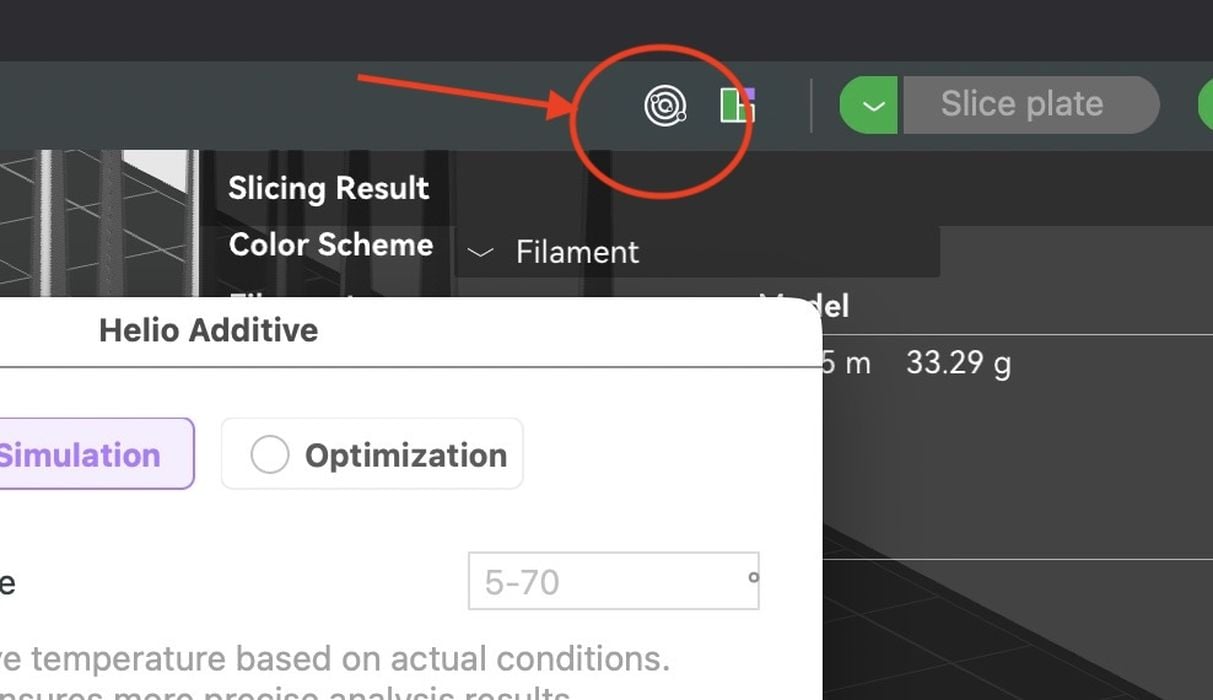
However, Helio Additive also provides their services directly in BambuStudio! This makes it very convenient to use: slice a file normally, then push the Helio button to begin Assess or Enhance processing. If Enhance produced a new GCODE file, BambuStudio can immediately send that to a 3D printer, no uploading or downloading required.
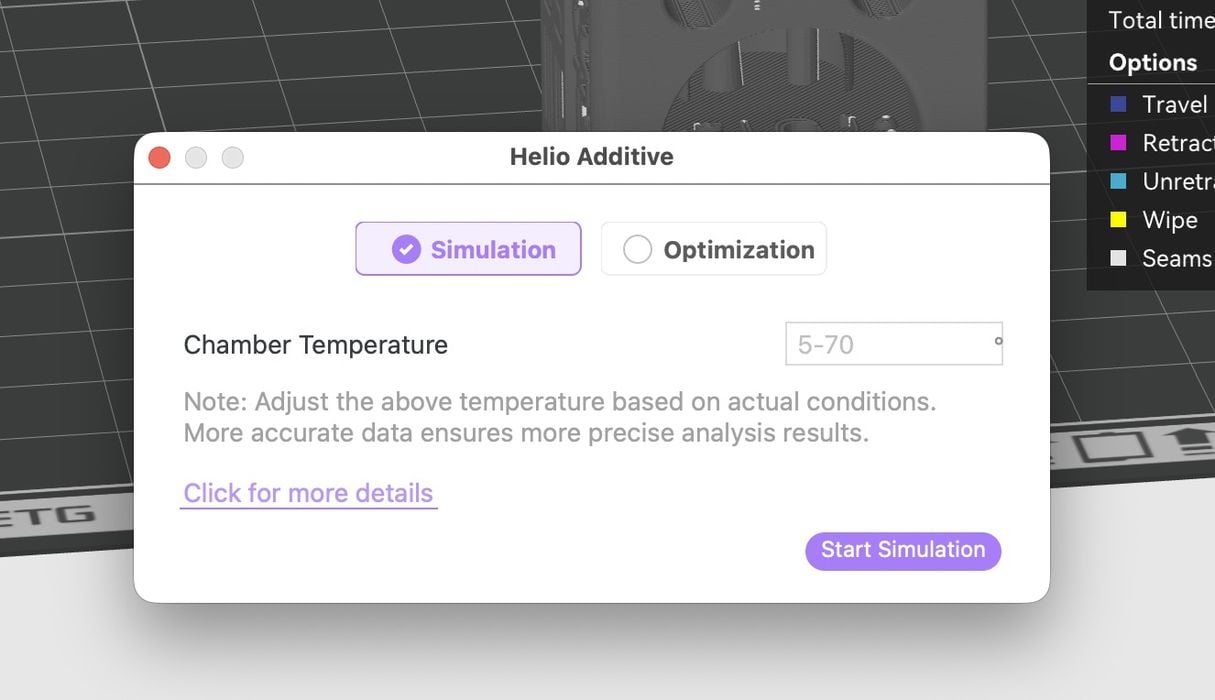
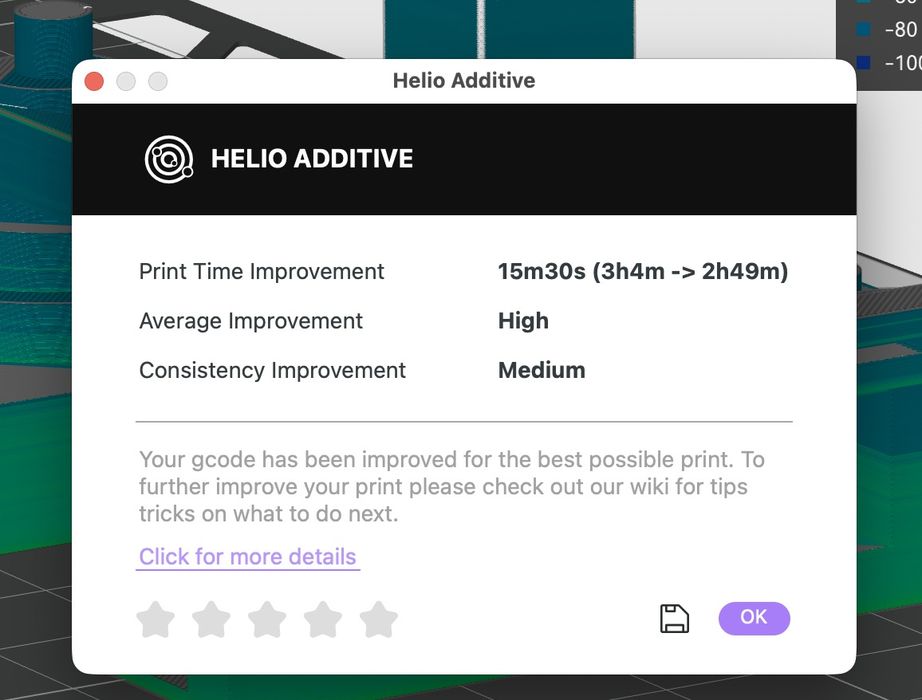
The Helio button appears just above the Slicing Result display, and if you hit it, you’ll see the Enhance window appear. From there you can proceed with using Helio Additive.
However, it works only with certified materials. If you try an alternative material, you’ll get an error like this.
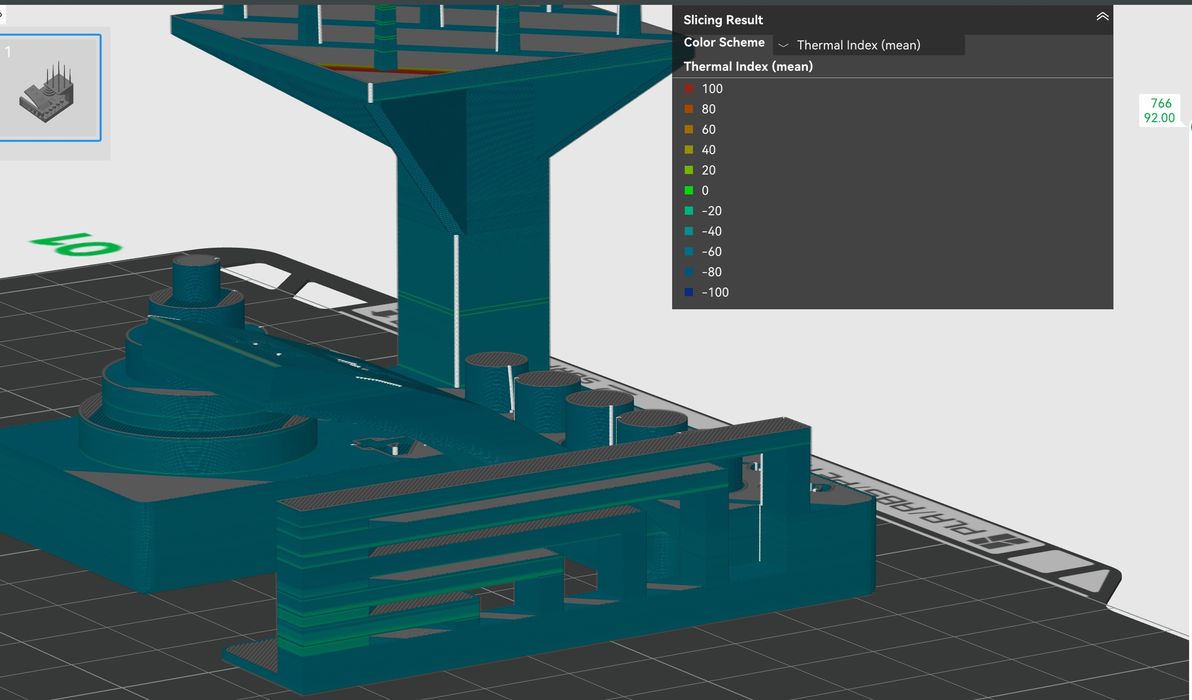
When the Assess window appears, you’ll notice it wants to know the chamber temperature — that gives you an idea of the precision of Helio Additive’s simulation. On some 3D printers the chamber temperature is actively controlled, but others it is simply random based on the thermal characteristics of the machine. So what do you enter? If you can actively set the chamber temperature, use that. Otherwise, observe a previous print job and note the actual temperature in mid-job, because that’s what will no doubt happen in future jobs, assuming it is the same material and temperature profile.
Helio Additive Test Results
I printed a number of items in 3D-Fuel PCTG, using these three profiles on a Bambu Lab P2S:
- The default generic PCTG profile in BambuStudio
- 3D-Fuel’s custom PCTG profile
- Helio Additive’s Enhanced GCODE
Naively, I tried comparing a #3DBenchy printed with the 3D-Fuel profile against a Helio-optimized print. A visual inspection of the parts showed basically no differences.
Perhaps there was a very slight difference in the hole quality, but really it was too slight to mention. I should note that currently Helio Additive does NOT optimize for overhangs; they will be the same as if you did not optimize them.
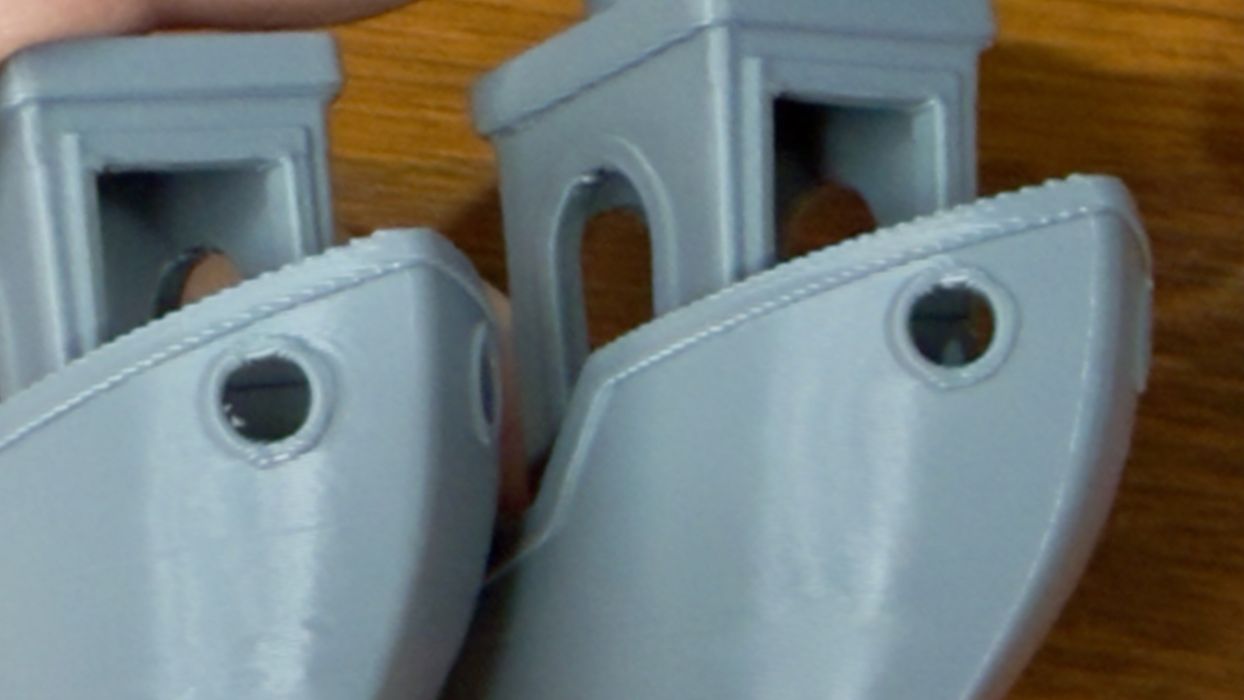
Another part tested was a fan duct. Again, the print quality was almost identical. However, if you look very close the Helio enhanced print did have slightly better surface quality.
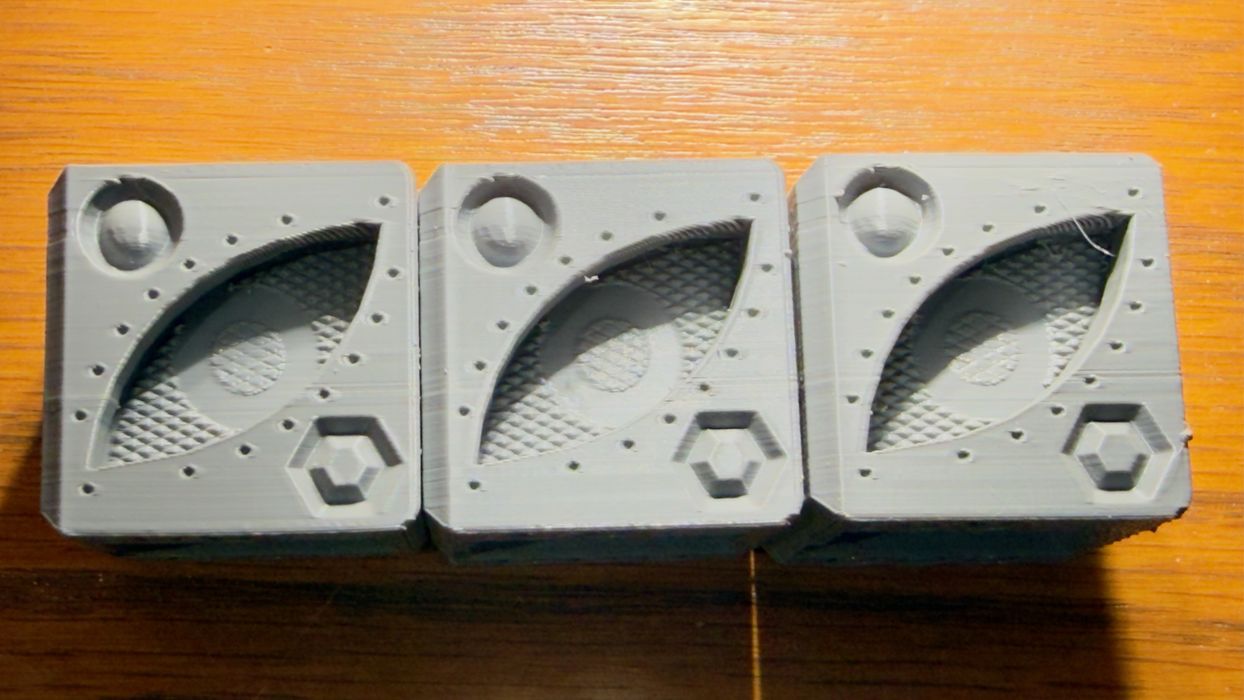
I printed three QuBenchys in the three profiles, and again quality-wise they were pretty much the same. I did notice the Helio Additive enhanced prints did have slightly more stringing than the other profiles on some tests, however.
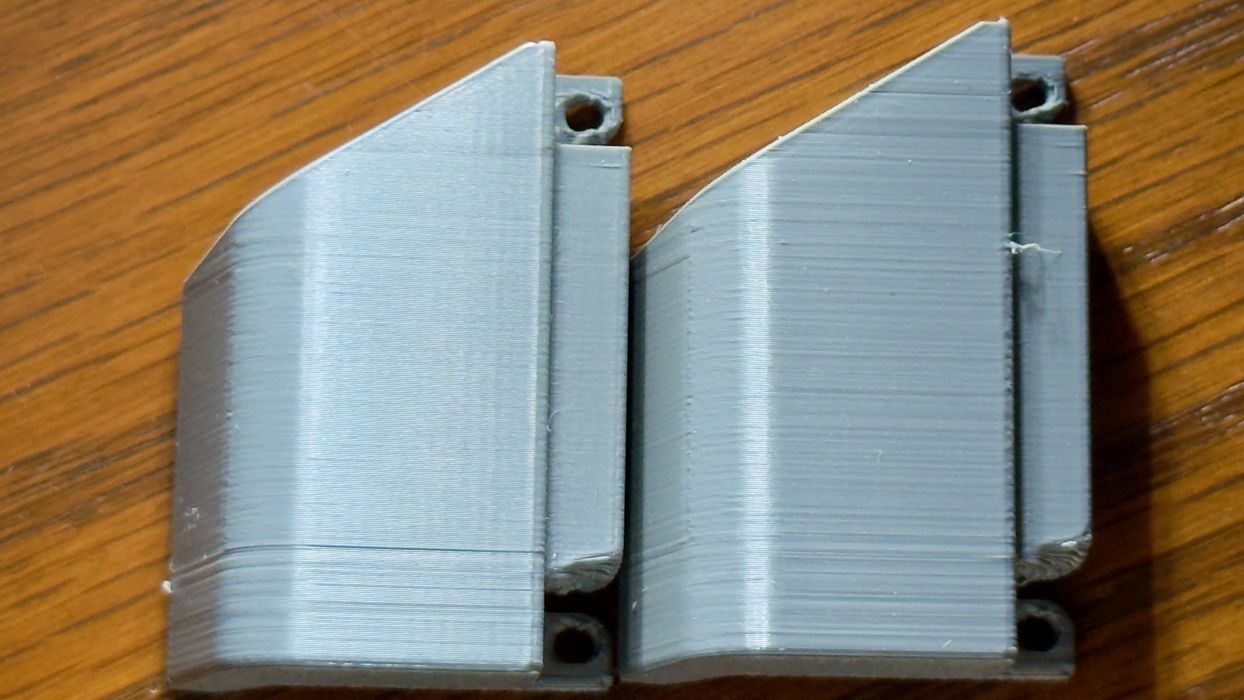
The standard FFF test provides a number of challenging features, and here we did see some differences. Basically all of the features were successfully reproduced on all profiles, and even the gap-testing cylinders were all properly detached on each print.
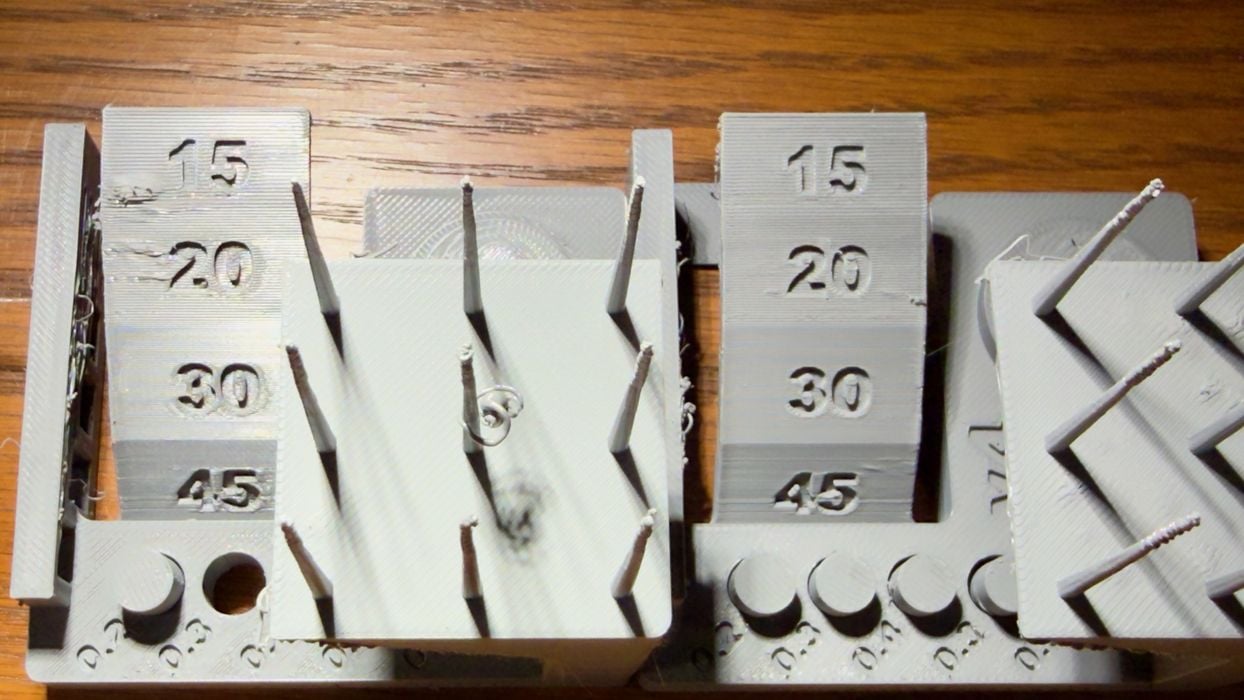
However, you can see some distortions on the (left) stock profile, while this did not appear on the enhanced print (right).
My conclusion is that visually, the print quality of the enhanced Helio Additive prints were only very slightly better. I was not able to properly test the strength differences between prints because we don’t have access to suitable test equipment.
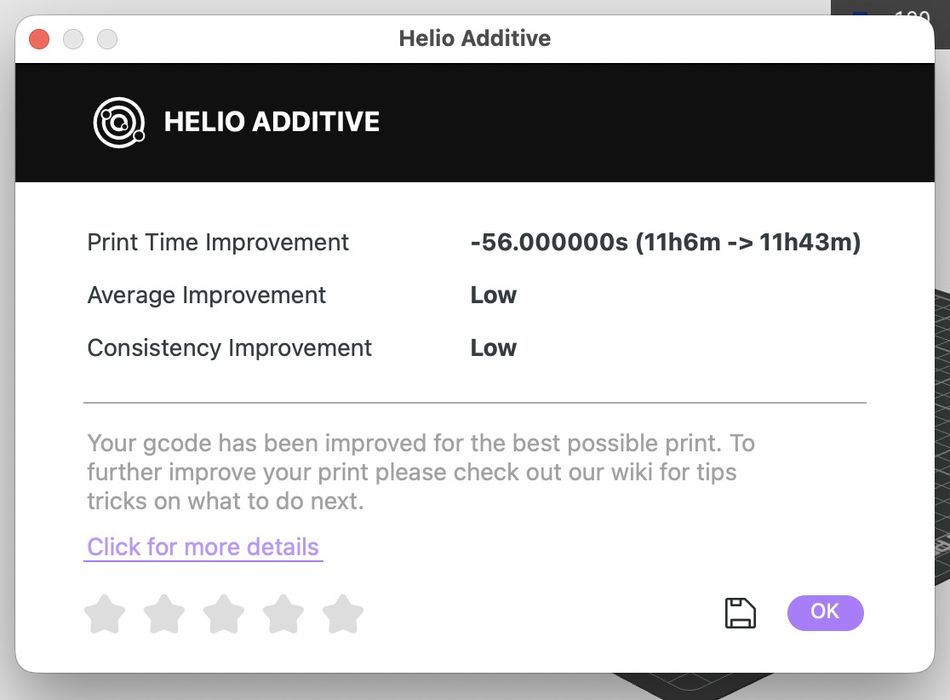
But what about the print times? Here there were definitely some differences. When the Enhance processing completes it presents a report on the effects. An example for a typical print job had the original 3:04 duration was cut to 2:49. That’s an eight percent decrease in print time.
But what about a larger print? In this test, I took a relatively simple geometry part and scaled it up to fill the plate on a Bambu Lab P2S. Using the 0.20mm layer 3D-Fuel profile, the estimated job time was a lengthy 2d19h55m, or 4075 minutes.

I applied the Helio Enhance function, and after several minutes it failed to complete! I encountered the same problem on several very large objects, so I contacted Helio Additive for advice.
They explained that their system does have a capacity:
“At the moment, very large models can trigger this error because they generate computationally heavy GCODE. Beyond a certain threshold, processing times increase significantly, and the error you’re seeing typically indicates a delay caused by the model’s complexity.”
To handle this, they have two strict limits: maximum 750g of material, and less than 100MB in GCODE files. However, it seems it is still possible to run over capacity if you’re slightly under these limits.
Let’s look at some other print time results for a standard 0.20mm layer profile when using Enhance:
| Generic Profile (mins) | 3D-Fuel Profile | Helio Enhanced | vs Generic | vs 3D-Fuel | |
| #3DBenchy | 62 | 51 | 42 | 32% | 18% |
| Fan Duct | 49 | 36 | 22 | 55% | 39% |
| Spool Holder | 96 | 69 | 33 | 66% | 52% |
| Delicate Sculpture | 134 | 114 | 83 | 38% | 27% |
As you can see, the amount of time savings vary depending on what you’re printing. It can be quite substantial in some cases, although a few times the improvement was quite low. On average you will certainly save considerable print time, however.
One thing I also noticed here was how good the 3D-Fuel profile performed. In every case it was miles better than the Generic PCTG profile supplied by Bambu Labs.
In one case, the 3D-Fuel job was actually shorter than the Enhance version. However, there could be a difference in part strength.
Nevertheless, this is where Helio Additive shines: reduced print times, with equivalent quality, as I observed in my print tests.
Where will Helio go next? It turns out they’ve posted a list of “coming” features, which include fan speed optimization, which might help with overhangs, and using GPUs, which could speed up the optimization processing.
Imagine if you are a 3D print service, operating dozens of printers on a 24/7 basis. The game in that business is to keep the printers running at all times to produce the maximum possible output, because that’s where the revenue comes from.
If you could decrease print times by only ten percent, that is equivalent to getting a “free” 3D printer for every ten you already have. Same number of machines, but more throughput. A 100 unit print farm using Helio Additive would produce the same output as a 110 unit farm without Helio Additive.
That is the ideal scenario for Helio Additive: multiple printers in continuous use. If you do operate a farm of any size, you really should take a hard look at Helio Additive. It could be very worthwhile.
Via Helio Additive and 3D-Fuel