
We’ve been quite excited to test Anycubic’s latest high speed 3D printer, the Kobra 2 Pro.
This is part one of a three part series, please read parts two and three.
Anycubic Kobra 2 Pro Background
Anycubic is a well-known manufacturer of desktop 3D printers in FFF, MSLA and DLP forms. They focus on devices that are low cost, but also easy to use.
I was quite interested to see how the new Kobra 2 Pro operated, as it is an evolution of the Kobra 2 machine, which we reviewed earlier this year.
The Kobra 2 was a “high speed” machine, in that it operated quite a bit faster than typical 3D printers. Instead of 40-80mm/s, it ran at up to 250mm/s, but its normal operating speed was 150mm/s.
The reason it could not go faster was that its firmware wasn’t equipped with the latest Klipper-like features to compensate for vibrations. In other words, Anycubic pushed the machine as far as it could reasonably go.
Now the Kobra 2 Pro does include vibration compensation, and should perform much faster.
The key change with the Kobra 2 is that very firmware, which enables far faster 3D printing.
Anycubic Kobra 2 Pro Specifications and Features

The specifications and indeed the appearance of the Kobra 2 Pro is nearly identical to the Kobra 2. In fact, when I received the box I initially thought it was a Kobra 2! However, there are very subtle differences. At first glance, however, it’s very hard to tell the difference.
The machine has a build volume of 220 x 220 x 250 mm, identical to the Kobra 2. There’s a spring steel print plate coated with PEI, and the plate can be heated up to 110C for warp-prone materials.
Both machines are single extruder, 1.75mm filament, 0.4mm nozzle devices. The hot end can reach 260C, able to print most typical 3D print materials, including flexible ones as the machine includes a direct extruder, not a Bowden extruder.
The cooling fan runs at 7000rpm, able to quickly cool material. That’s important for high speed operations, as we shall see.
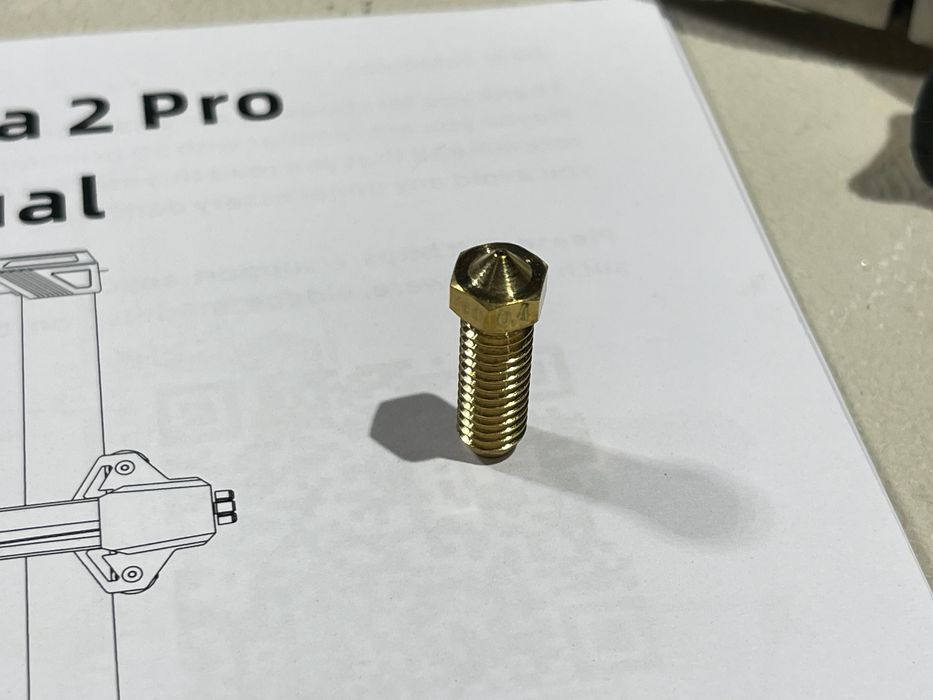
The nozzle seems a bit longer than typical 3D print nozzles and again this is a feature designed to help 3D print at higher speeds.
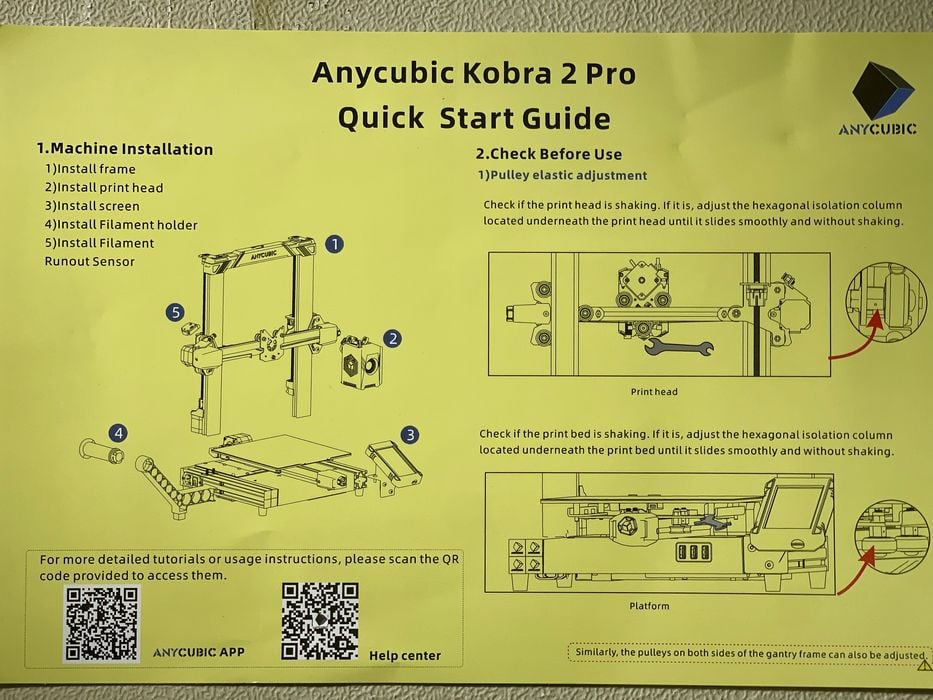
Anycubic includes both a Quickstart page for experienced operators, as well as a more detailed multi-page instruction guide to assist building the machine. Did I say that it requires some assembly?
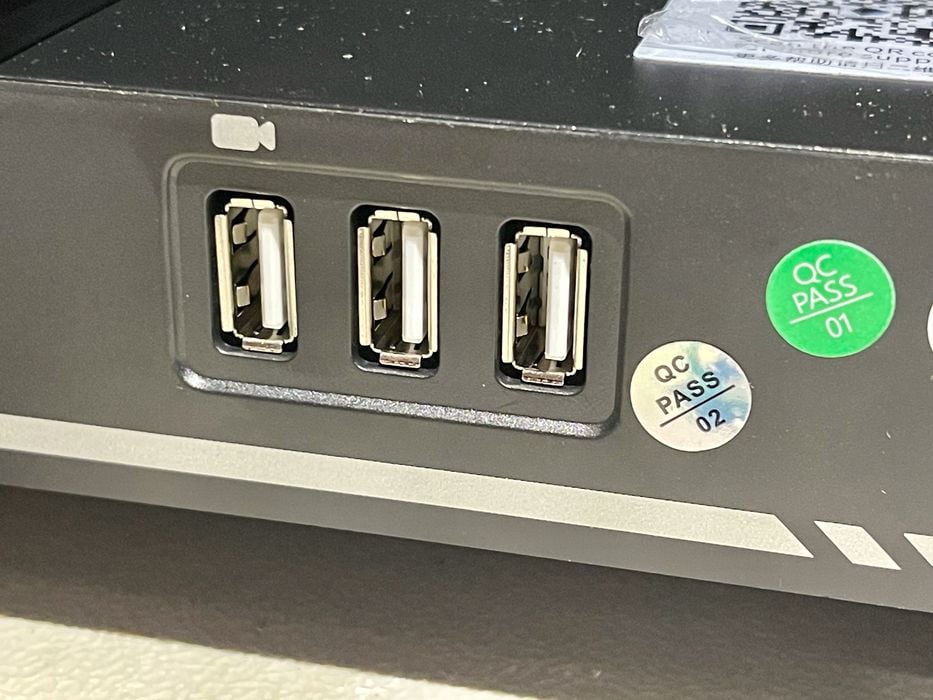
One of the interesting differences from the Kobra 2 is that there are three USB-A ports, as opposed to a single USB-C and MicroSD slot on the older machine.
One USB-A port seems to be for future camera use, but I found no information about that. The other two ports can be used to access files for printing. This is the first machine I’ve seen that has two operational USB ports accessible from the touchscreen. Either one works.
Anycubic Kobra 2 Pro Unboxing and Assembly
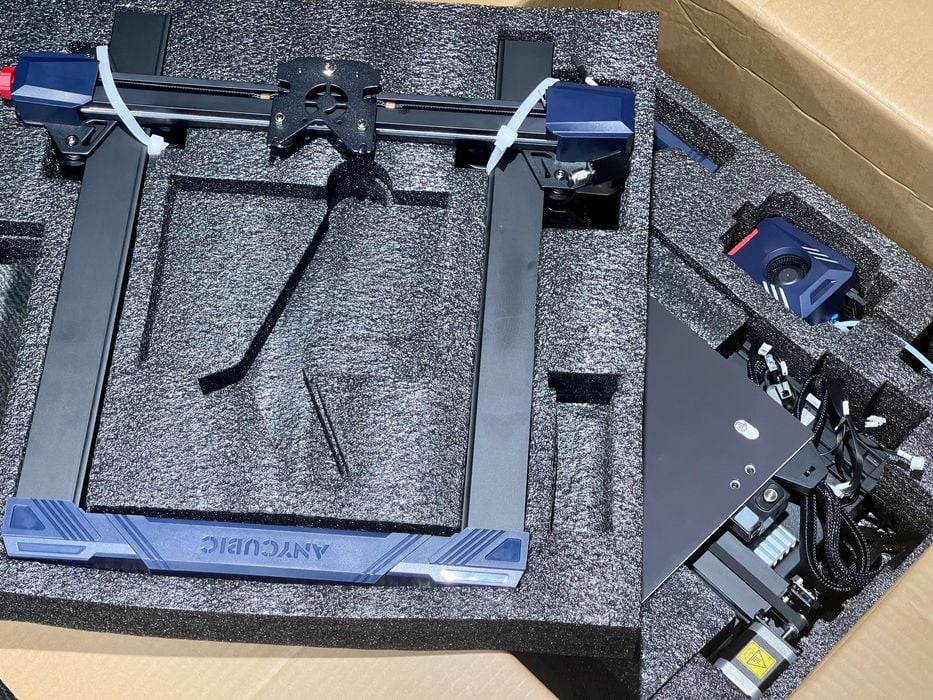
Assembly of the Kobra 2 Pro is straightforward. It’s basically assembled except for some segments that are broken down to reduce the size of the box for shipping purposes.
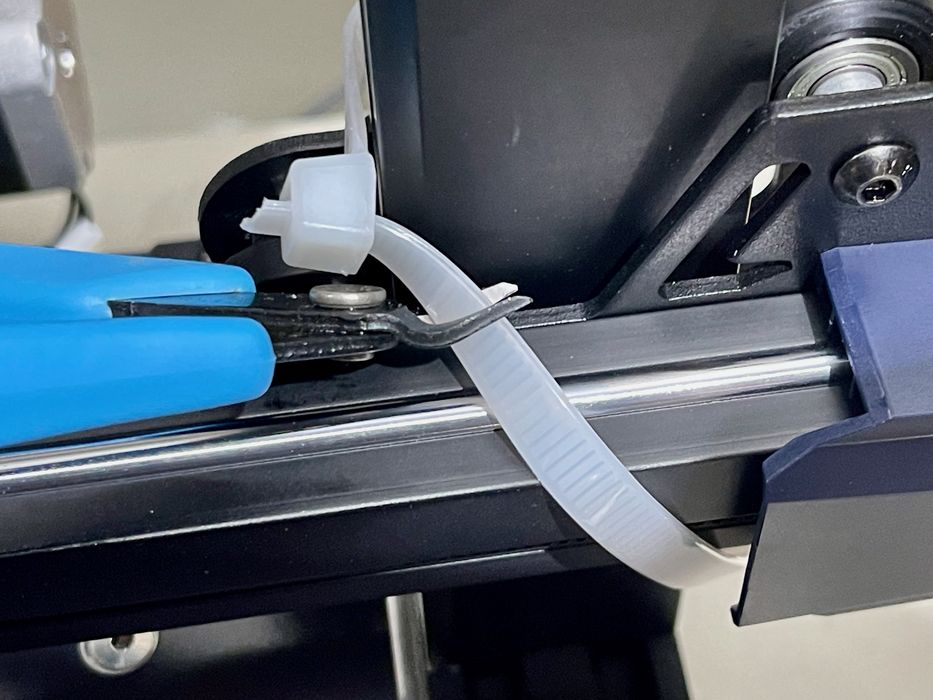
After extracting the parts from the extraordinarily well-packed shipping box, you have to chop through a few hefty tie wraps that held moving parts during shipment.
The main activity is bolting the gantry to the base, which is easily done. Anycubic puts a notch into the base for easy placement.
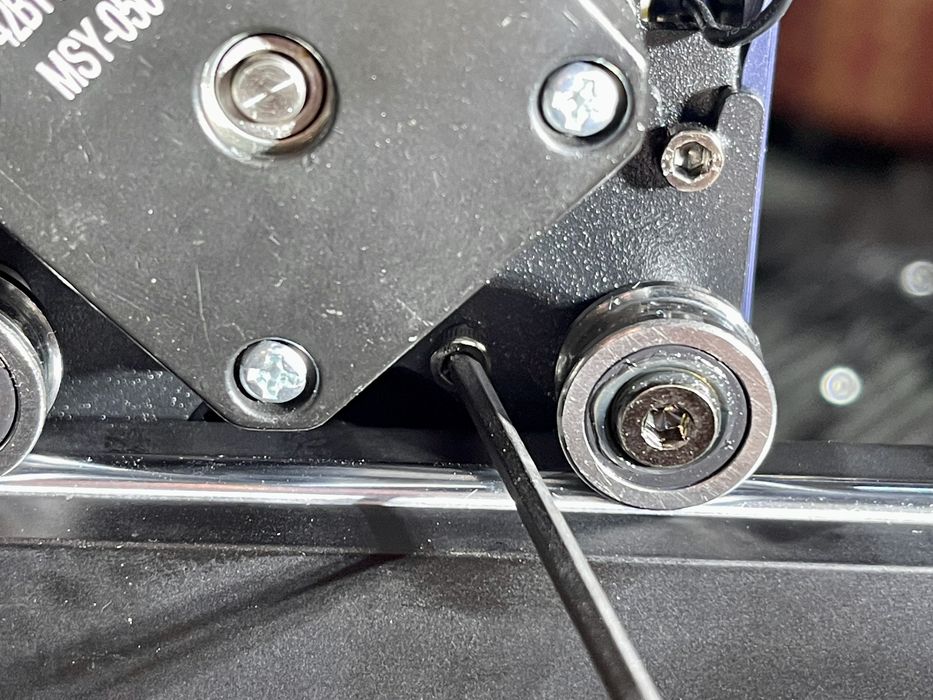
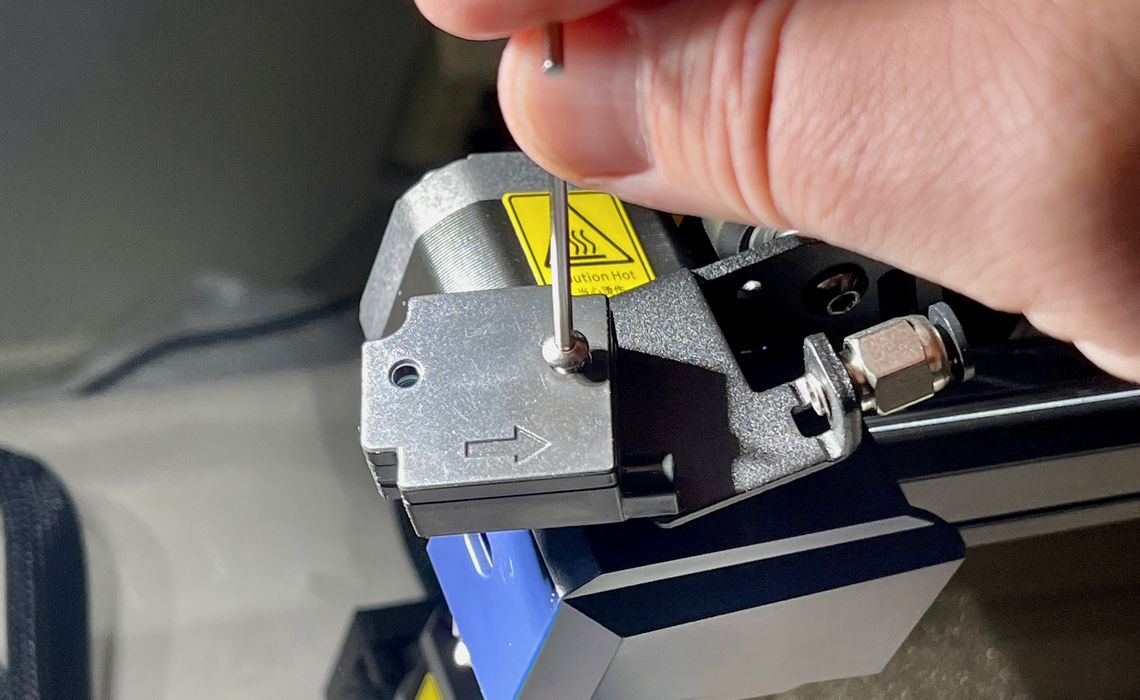
One step I found a bit tricky was attaching the extruder to the X-axis. There are three bolts to connect, but I found them quite deep to access, and it took me several tries to get this mounted successfully. Tip: put the bolts in the holes before moving the extruder assembly forward.
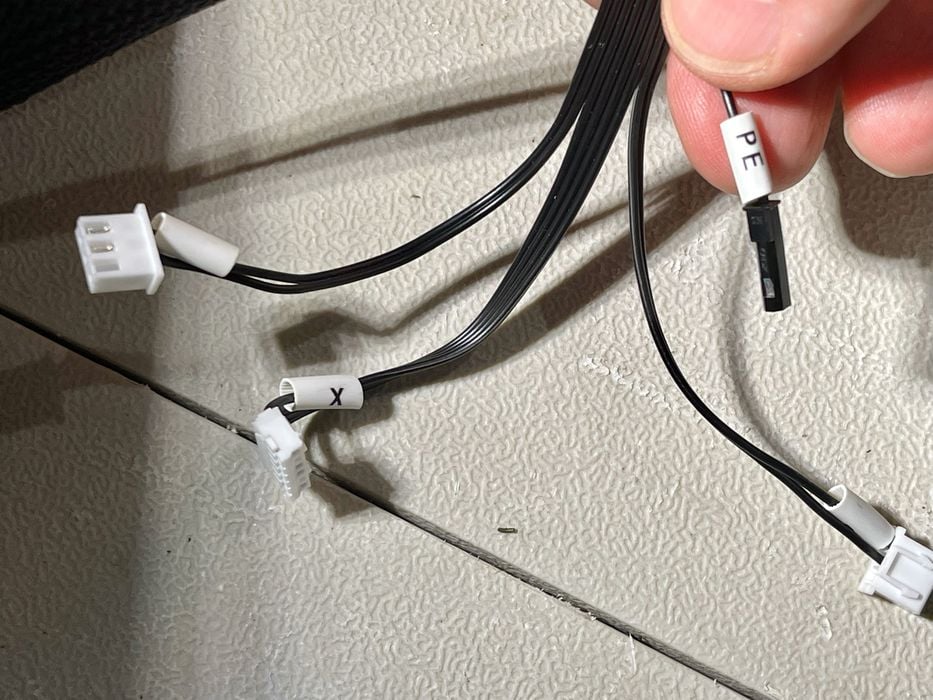
As above, Anycubic labels the cables to avoid confusion when plugging them in.
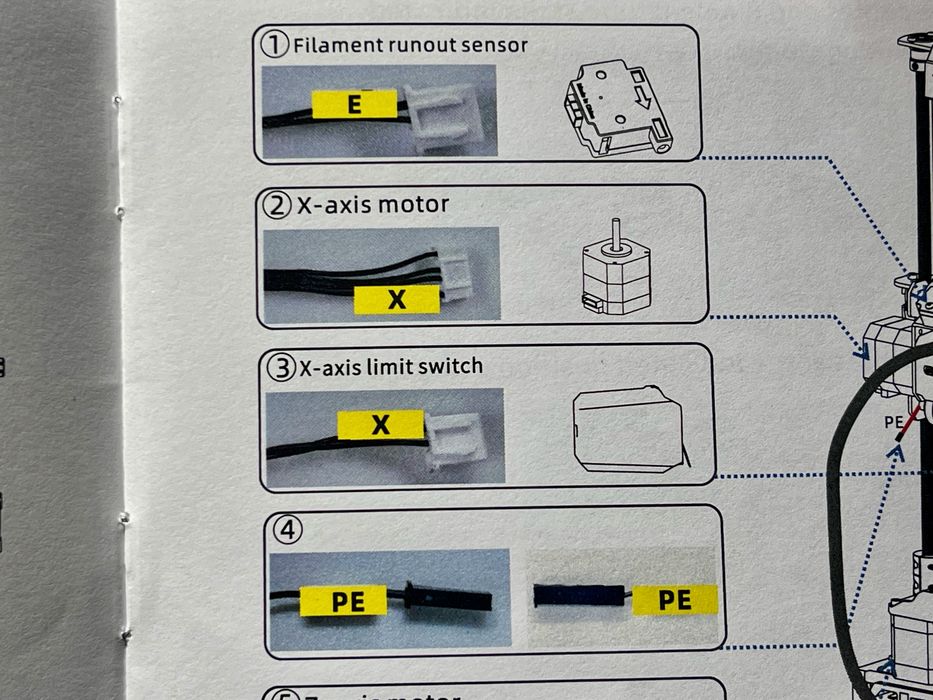
However, some of the cables have the same label! Here you can see there’s two for X-axis operation, and both are tagged with “X”. This is not good. Although the plugs are different sizes, I fear that some may follow the instructions literally and damage the connectors by pushing a connector into the wrong receptacle.
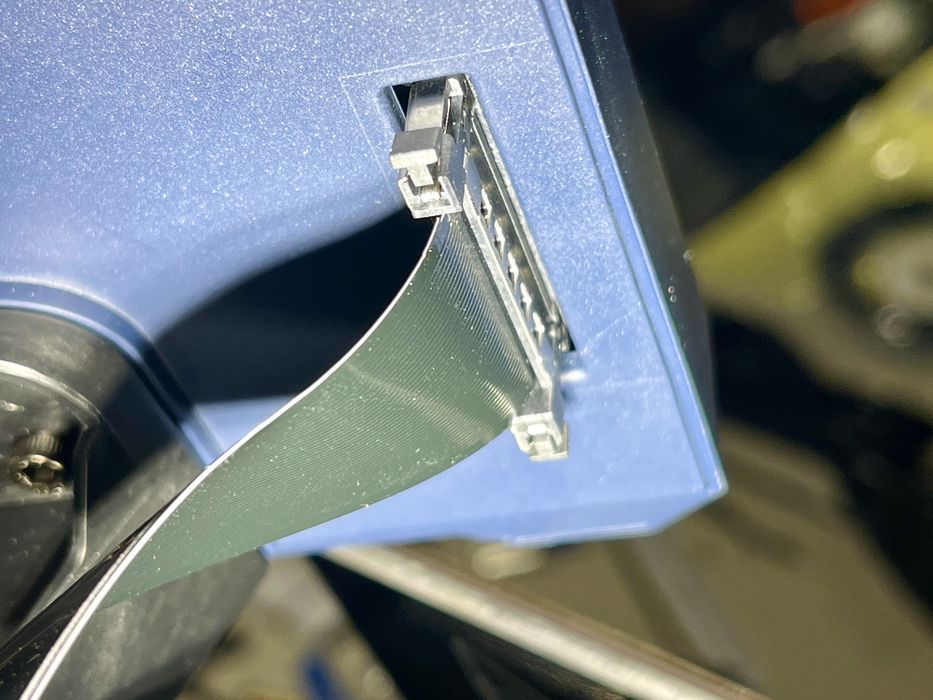
The cable to the touchscreen is more complex than the one used on the Kobra 2, indicating there’s something different with the unit. Evidently the controller has been upgraded to handle the high speed operations and new firmware.
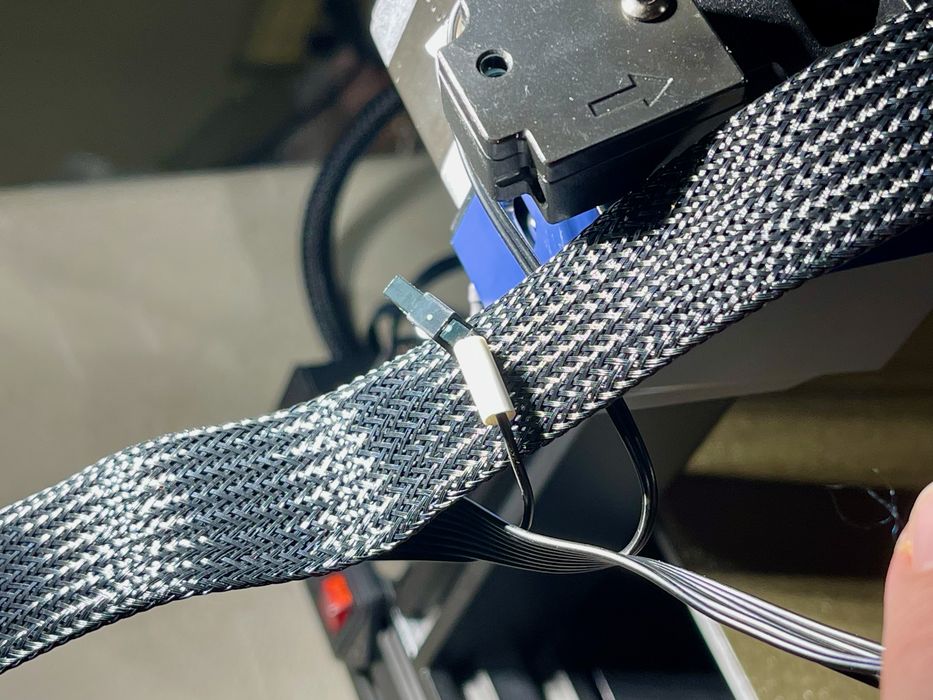
Please be careful when you cable up the extruder, as it’s possible to get a tangle when connecting the main ribbon cable.
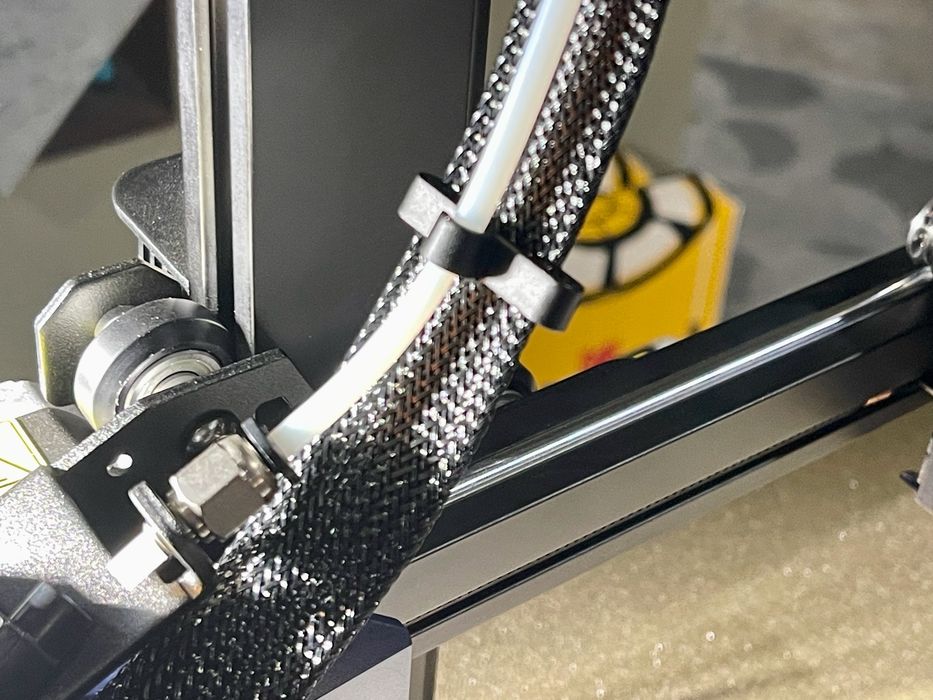
Anycubic has changed the method of tying up cables. While most companies simply offer tie wraps, Anycubic introduced some cool clips in the Kobra 2, but in the Kobra 2 Pro there’s some even more advanced clips that work really well. I expect they will be easy to remove and reuse if maintenance is required.
The filament-out sensor is still a floppy affair that dangles on the left side of the machine. I suppose it is mounted loose so it can twist in the direction of the incoming filament.
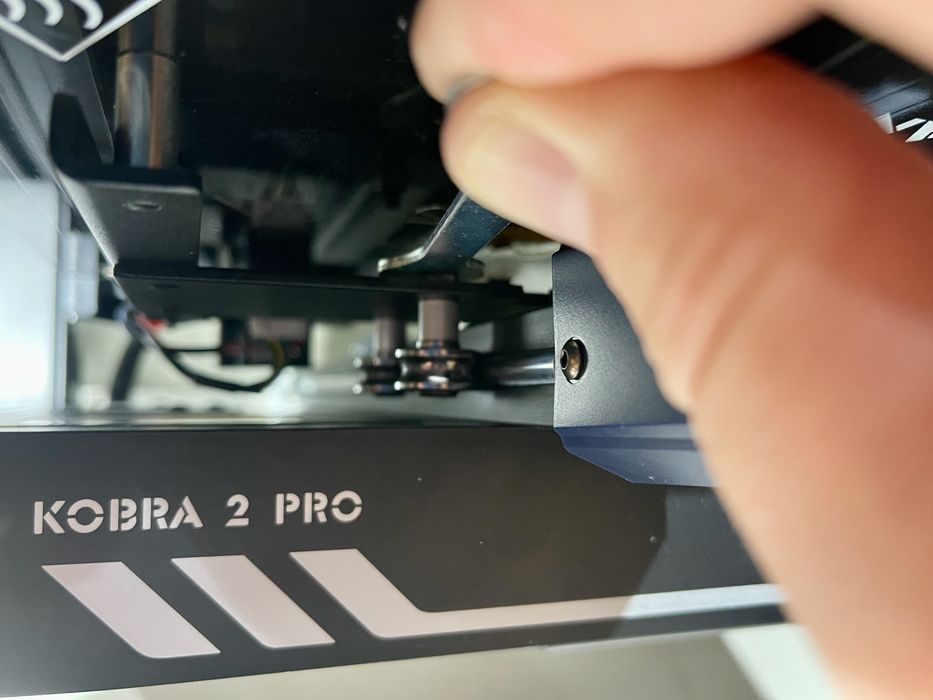
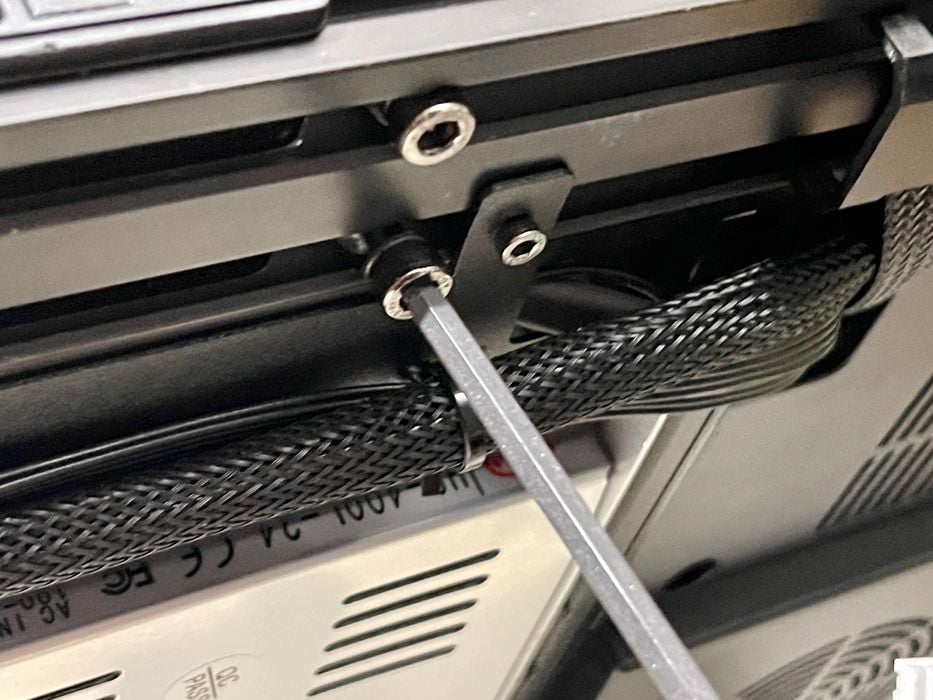
Once cabled, I gave the machine the once-over, and noticed that the Y-axis was loose. This issue was also present on the Kobra 2 after assembly, so I suspect Anycubic should investigate how their Y-axis design loosens up during shipment. The bolts are too hard to reach from underneath.
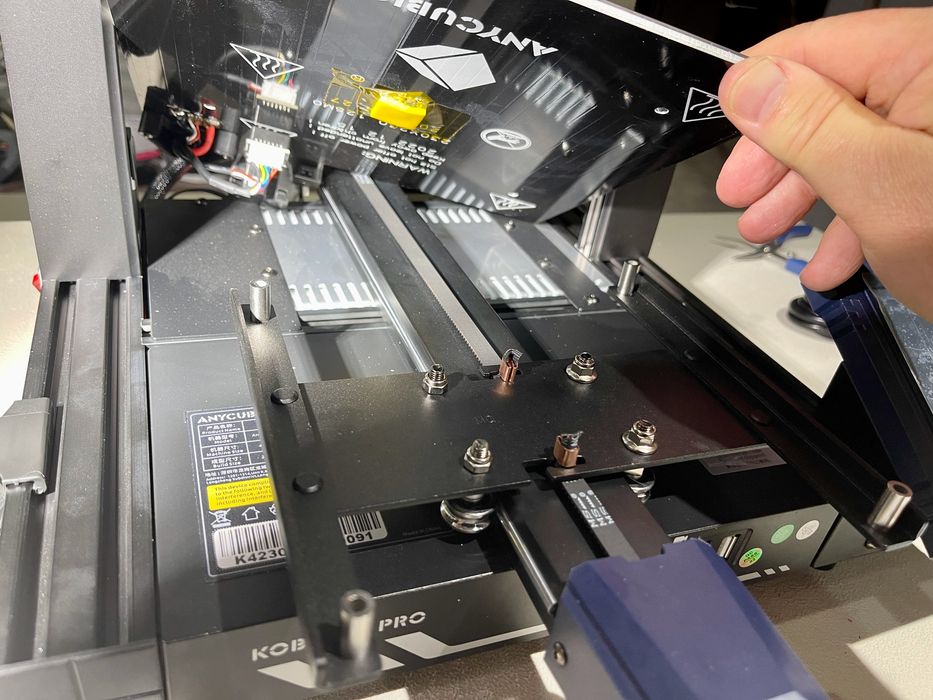
To fix the loose plate, I had to remove the heated print plate to access the bolts holding the Y-axis down.
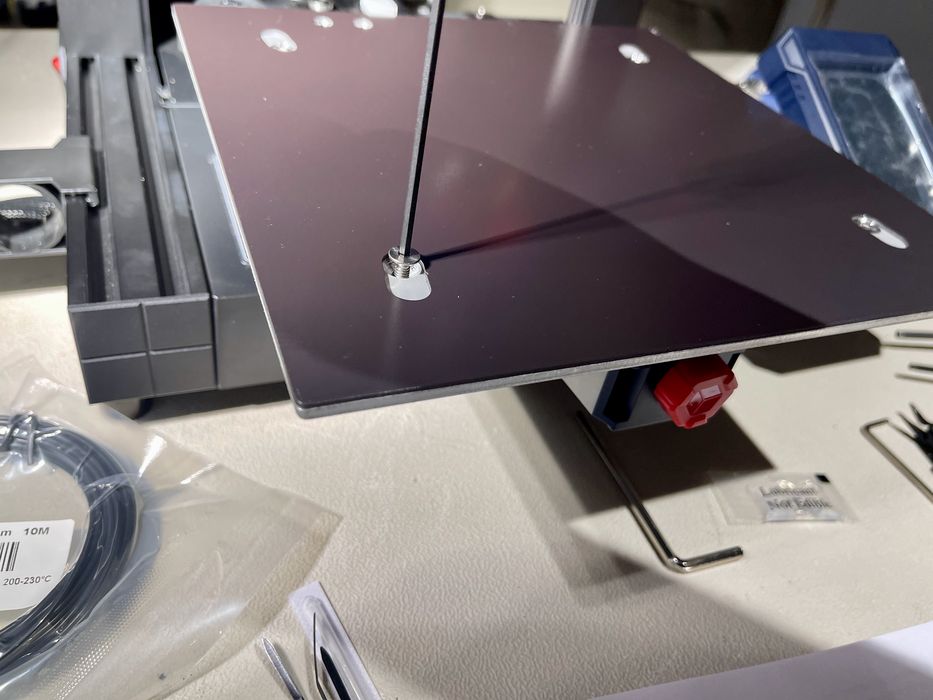
These were quite easy to tighten. One bolt was quite loose, and another was somewhat loose, with the remaining two being tight. After tightening, the plate did not wobble at all.
If you don’t check this, you could have problems as the plate could wobble during printing.
After an hour or so of assembly, the machine was ready for action.
This is part one of a three part series, please read parts two and three.