
Our look at the Anycubic Kobra Plus 3D printer continues with setup, calibration and operation.
This is part two of a three part series, please read parts one and three.
Anycubic Kobra Plus Setup and Calibration
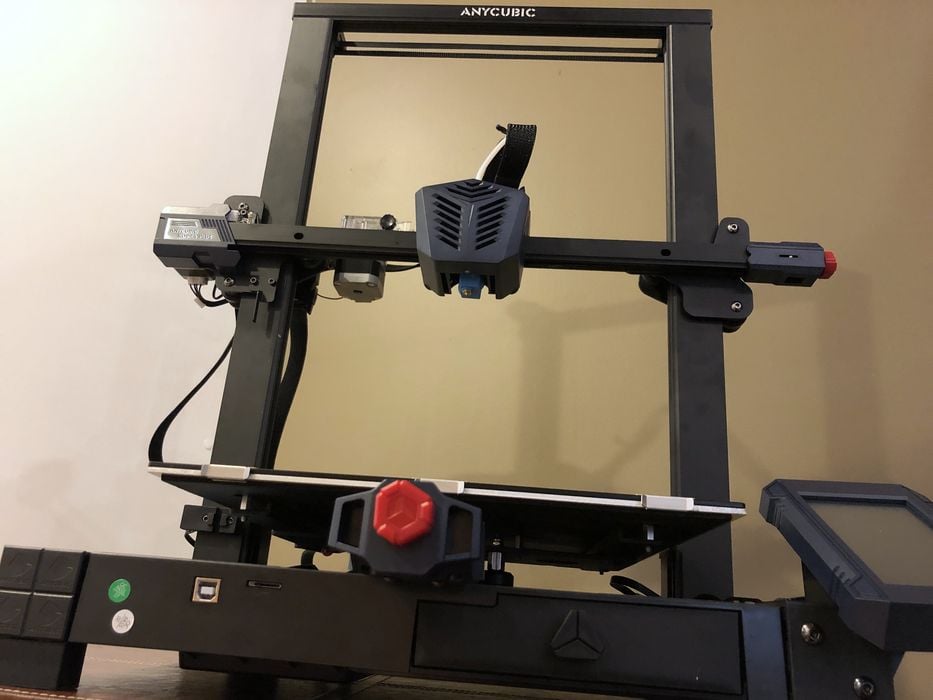
Powering up the Kobra Plus 3D printer involves a brief musical melody and splash screen before the brightly lit interface was ready for use.
We found the touch screen interface to be easily navigated and it was quite responsive to our fingers. While this might seem like an obvious capability, we have actually encountered 3D printers where the touch screen did NOT work properly — too hard touch requirement, misaligned coordinates, or just plain dead. None of that was present on our Kobra Plus.
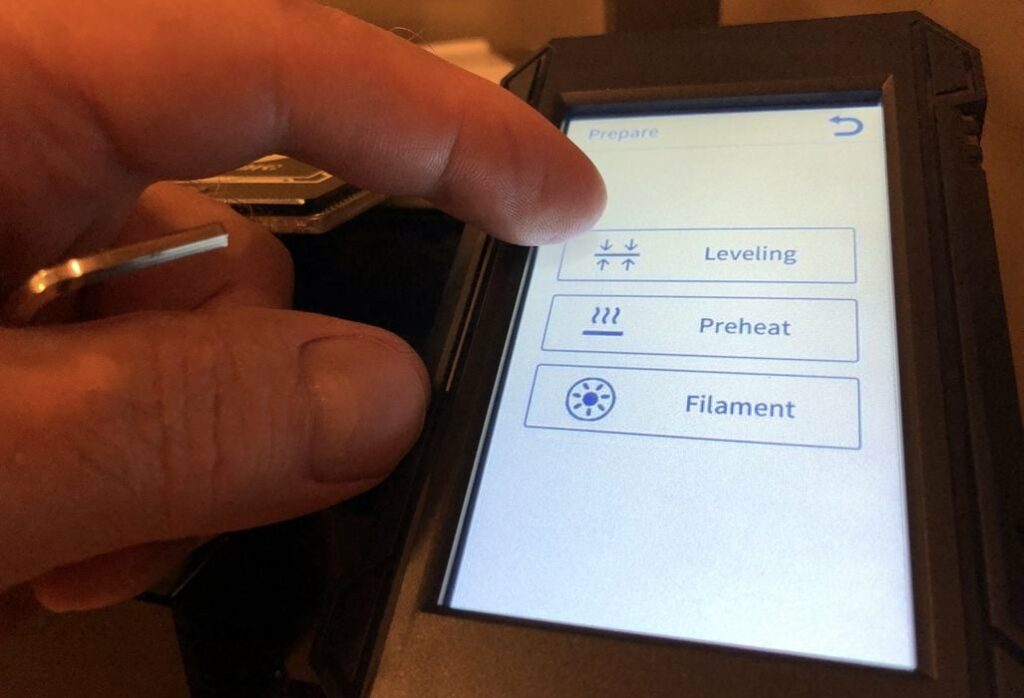
The main setup and calibrations to be done are the bed leveling and setting the z-gap distance between the nozzle and the bed. Of course, you must perform the bed leveling first.
The Kobra Plus employs a slightly different bed leveling system than that of the Kobra and doesn’t use a visible sensor. When we launched the Auto-leveling procedure, it requested that we touch a metal tool to the freshly cleaned extruder nozzle in order to calibrate the leveling sensor.
Once that was done, the bed leveling routine began and the nozzle touched the glass, double tapping 25 spots in a grid across the entire bed. This process records the variations in surface elevation and is used to compensate during the first layer of printing.

Adjustments for nozzle gap during printing are done after leveling with the z-gap offset, located in the Leveling menu.
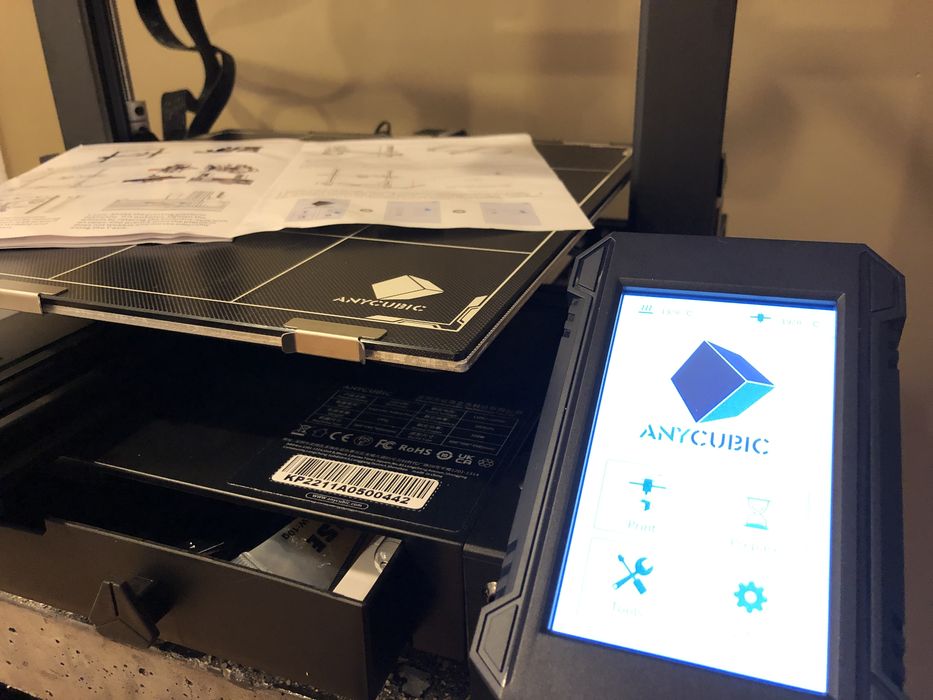
The final setup step is to load filament into the extruder. We mounted the small coil of PLA filament onto the spool holder, being very careful not to tangle it. We then threaded the filament through the filament-out sensor and into the Bowden extruder, where the pickup gears instantly grabbed it and pushed the filament through the tubing directly into the hot end.
Loading filament into the hot end was quite simple, as pre-heating and loading were both done by clicking “Filament In” on the touchscreen — one click to preheat the nozzle and a second click to activate the Bowden extruder.
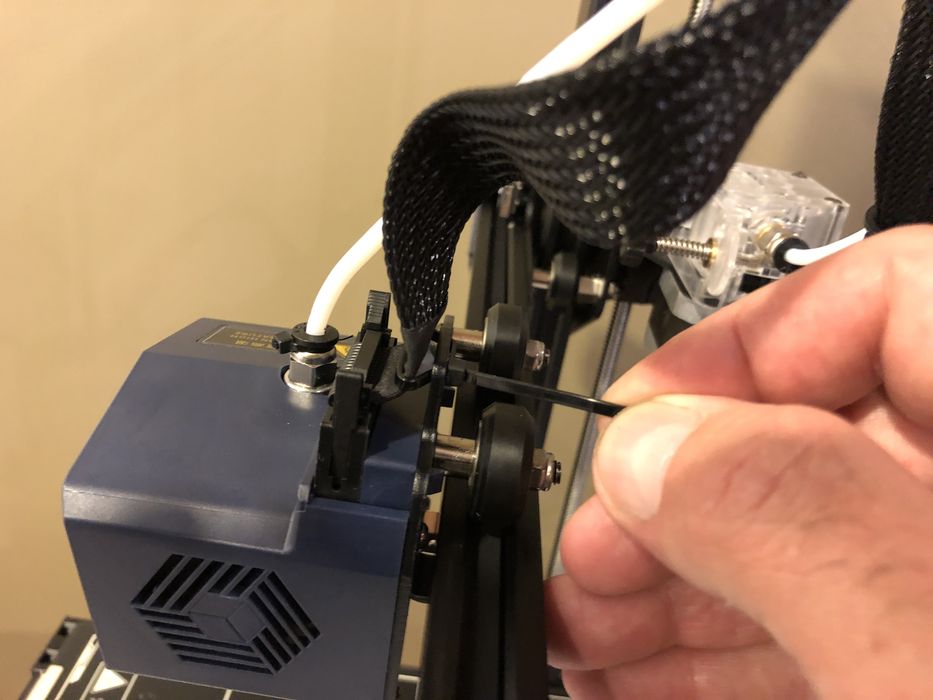
There was a handy tensioner to adjust on the extruder assembly, had there been any issues with the pickup gears grabbing the filament. However, we didn’t have any issues, but this could prove useful if low quality filament with varying diameter was used.
Important: We made sure not to walk away from the filament load procedure without hitting “STOP”, or we would have come back to a huge pile of filament thread sitting on the print bed. The filament load procedure does not automatically stop as they do on some other 3D printers.
Anycubic Kobra Plus Operations
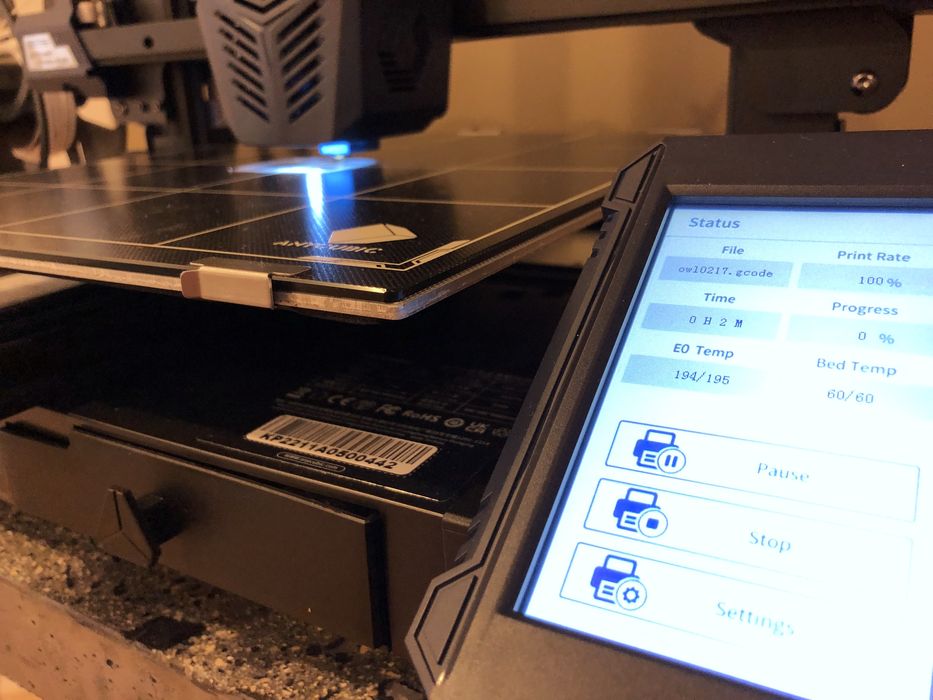
As is customary, the first print is the provided pre-sliced GCODE from the manufacturer on the supplied USB stick. In this case, Anycubic provided a tuned print of an Owl.
The Kobra Plus has silent stepper drivers for the motion system, but when in operation, the machine had the typical loud cooling fans like that of the original Kobra, thus losing some of the benefit of the silent stepper drivers. However, the sound level was not too bad when operated in our large room.
However, we did notice an occasional squawk from the Bowden extruder when doing retractions of TPU filament later in our testing.
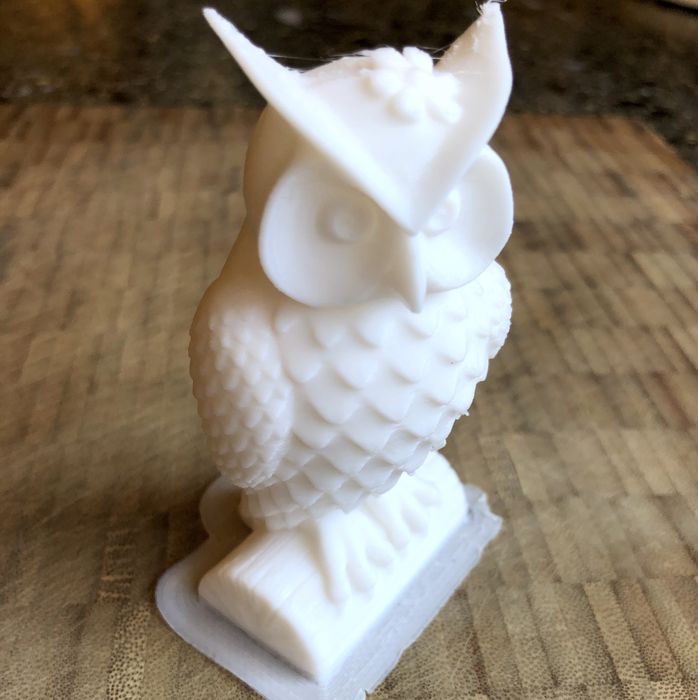
The finished Owl print had great surface finish and good detail in hard to print areas.
Then the fun started.
We were quite surprised when we let the machine cool down. When 3D printing with glass plates, the best practice is to let the glass cool to room temperature, and since glass shrinks at a different rate than the thermoplastic 3D print, it should just pop off automatically.

However, we tried to remove the print only to find it seemingly welded to the plate. It took several minutes to remove the print with much poking and prodding with several tools. We decided to increase our Z-gap for each future print until they detached more easily.
We’re not quite sure what Anycubic has coated the glass plate with, but it has extraordinarily strong adhesion to PLA, perhaps almost too much. Kobra Plus operators should be very careful with the first few prints or else the glass plate could be damaged when prying off a print.
We suggest printing small items on the side of the plate and adjusting Z-gap and other parameters to ensure you can remove prints easily before doing a large print in the center.
The prints were always securely stuck to the bed and took some effort to detach. We slowly increased the Z-gap setting with each consecutive print and found a +.10 adjustment helped a great deal with print removal.
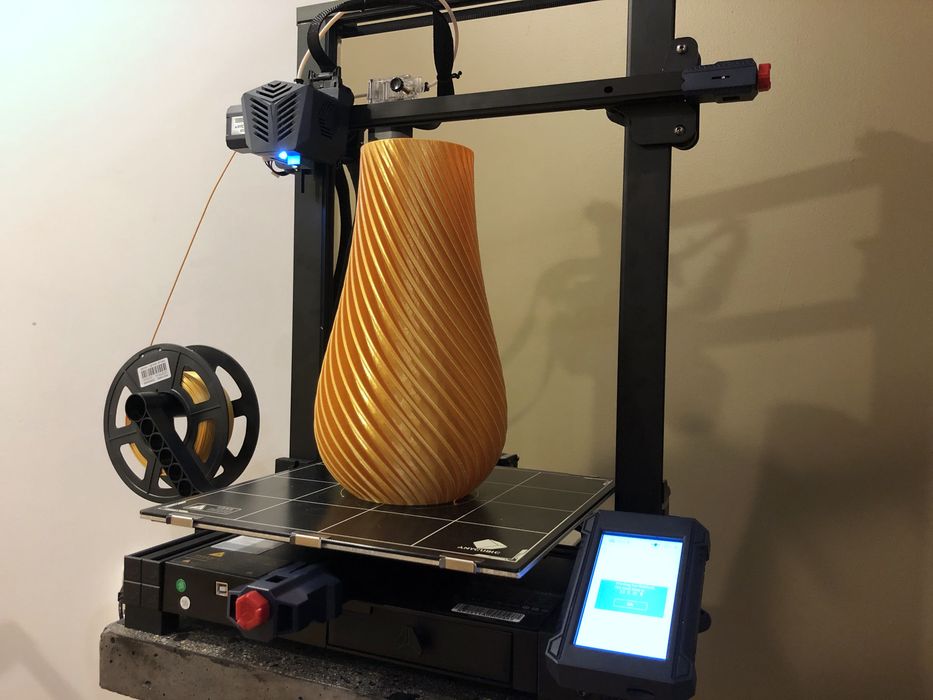
One of our numerous test prints was this 305mm tall Spiral Vase. We decided to let it run safely unattended during its 13:31m print time.
We started the overnight print while bad weather raged outside in the form of thunderstorms. When we checked on our print the morning after, we were greeted by the sound of printer fans, but a dark screen and no X/Y movement. Evidently the power had failed during the night.
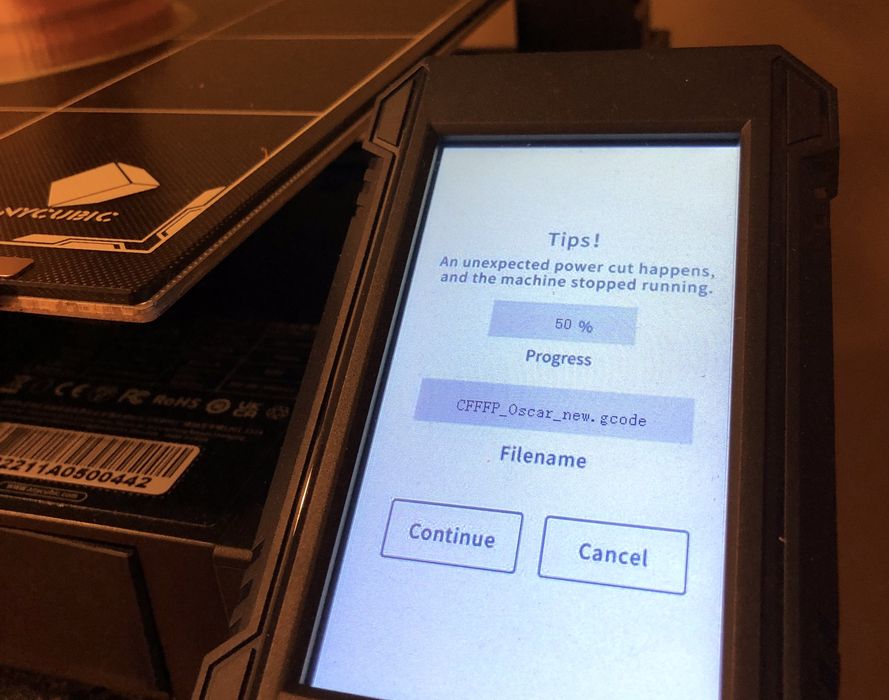
We toggled the power to the machine and were greeted by “Resume From Outage”. Going by the percentage of print left, the power outage had occurred several hours earlier, but the print adhesion to the bed was still good, so we just clicked “Continue” to resume at the 50% mark where it had stopped.
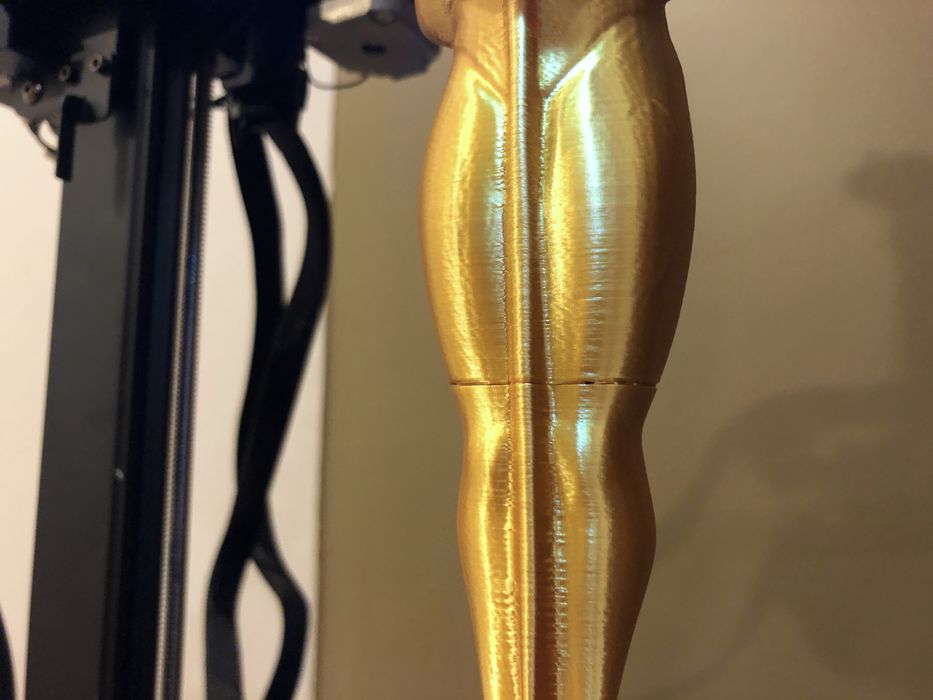
As expected there was a noticeable layer shift where the new printing began, but our 8hr Oscar Award print was saved by Anycubic’s power recovery feature.
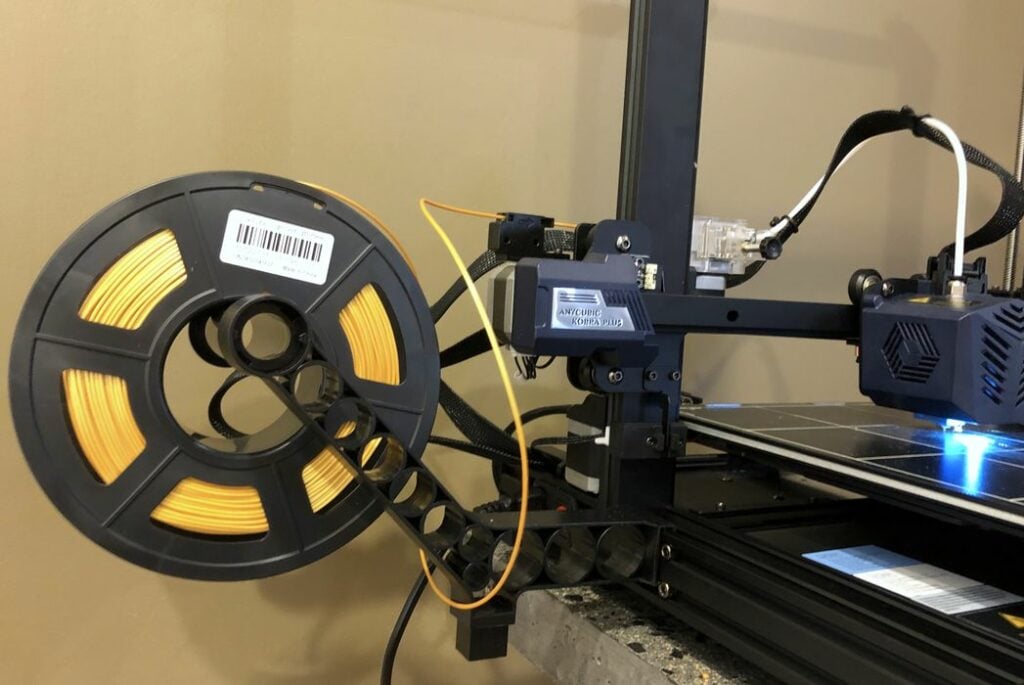
One issue we noted was due to the side mounted spool. When the filament was strongly retracted it could actually cause a tangle by pushing the curve over the edge of the spool. This would not happen on a top-mounted spool, but is a possibility with a side-mount.
This is part two of a three part series, please read parts one and three.
Via Anycubic