

Our review of the new Anycubic M3 Premium resin 3D printer wraps ups with a look at software, print quality and final thoughts.
This is part three of a three part series, please read parts one and two.
Anycubic Photon M3 Premium Software
The job preparation software provided by Anycubic is their PhotonWorkshop tool, which is available for Windows and MacOS. I’ve used this software before, but the version that came with my shipment was slightly updated to include the M3 Premium configuration.
PhotonWorkshop is quite usable once you get used to it, but it could be improved with some tweaks.
One problem I noticed with PhotonWorkshop is that the support generation would sometimes take an incredibly long time. By “long”, I mean literally hours. This seemed to happen only on prints involving complex and detailed support structures. However, once generated you could use the print file; it’s just slow to generate them.
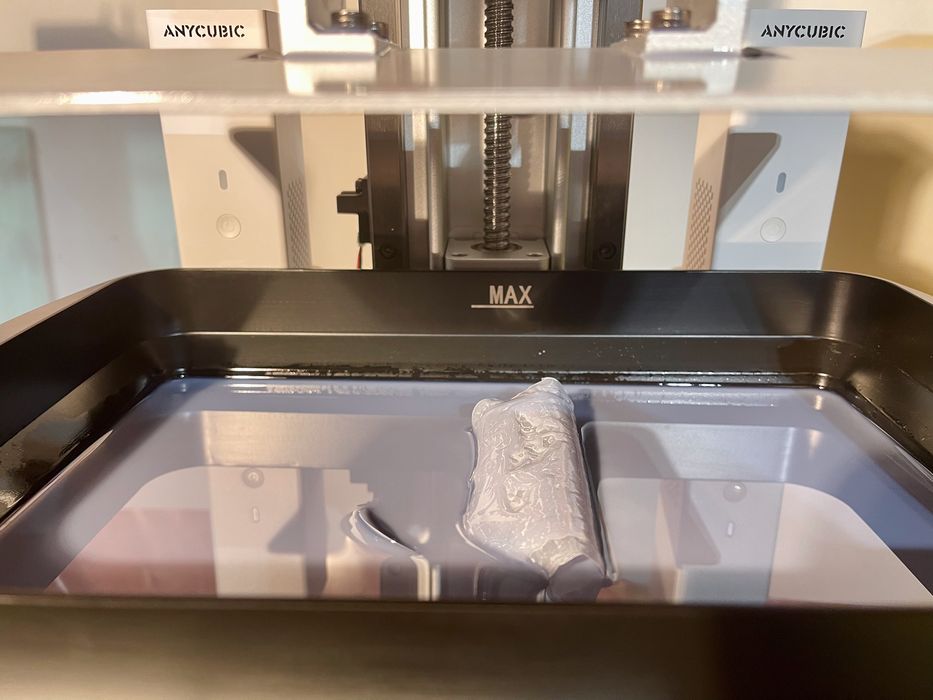
That said, I did have plenty of issues with support generation. Sometimes I would not have enough, and the prints would fail. Here we see a print that fell off during printing. That’s not good. I hope that Anycubic could do some more work on making the support generator a bit more intelligent to avoid these problems.
In the end I always manually inspect the generated supports and add lots more just in case. That seemed to do the trick.
For those that believe better supports could be generated by other software tools, there is good news. Anycubic intends on offering M3 Premium support for Chitubox and a couple of other popular slicing tools for resin 3D printers.
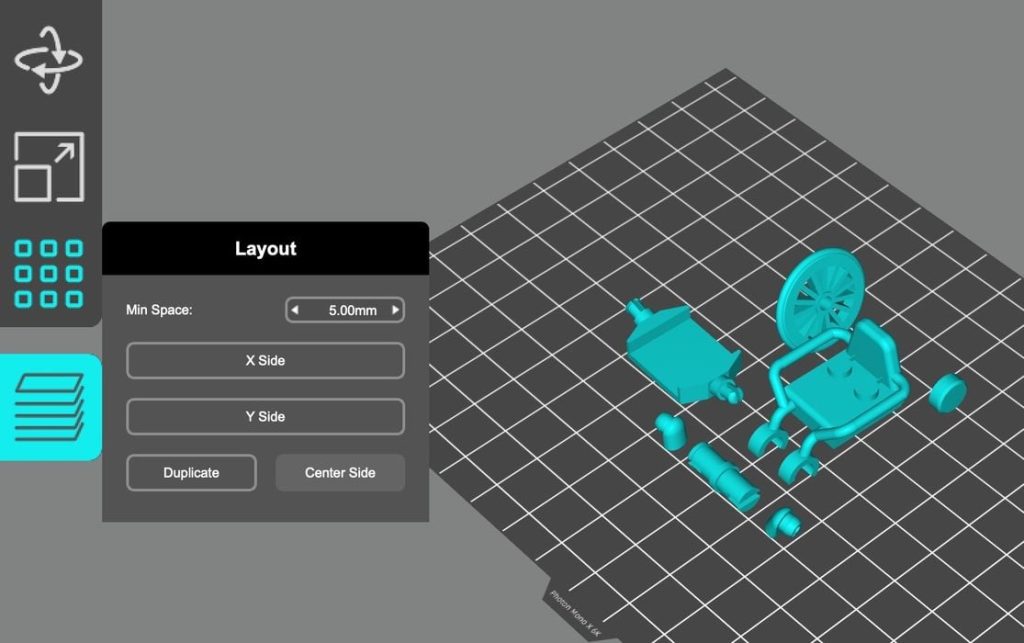
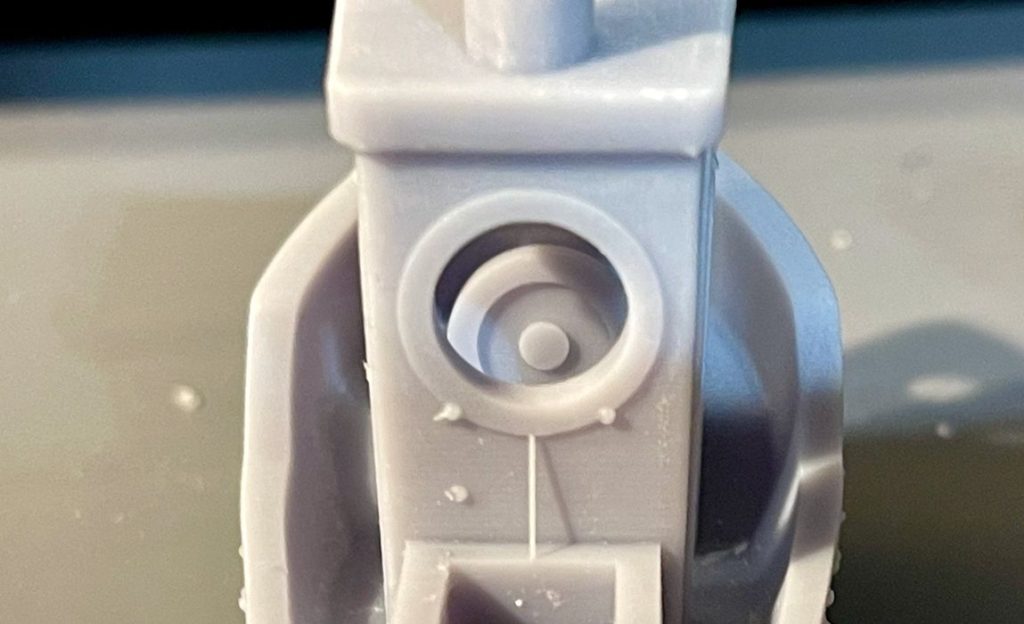
Another curious behavior by PhotonWorkshop was to generate “tiny” support structures everywhere. Here you can see these “mini supports” appearing even though I had requested “only touching buildplate” in the software. Usually they are easy to remove, although you’ll need a tool to do so because of their small size.
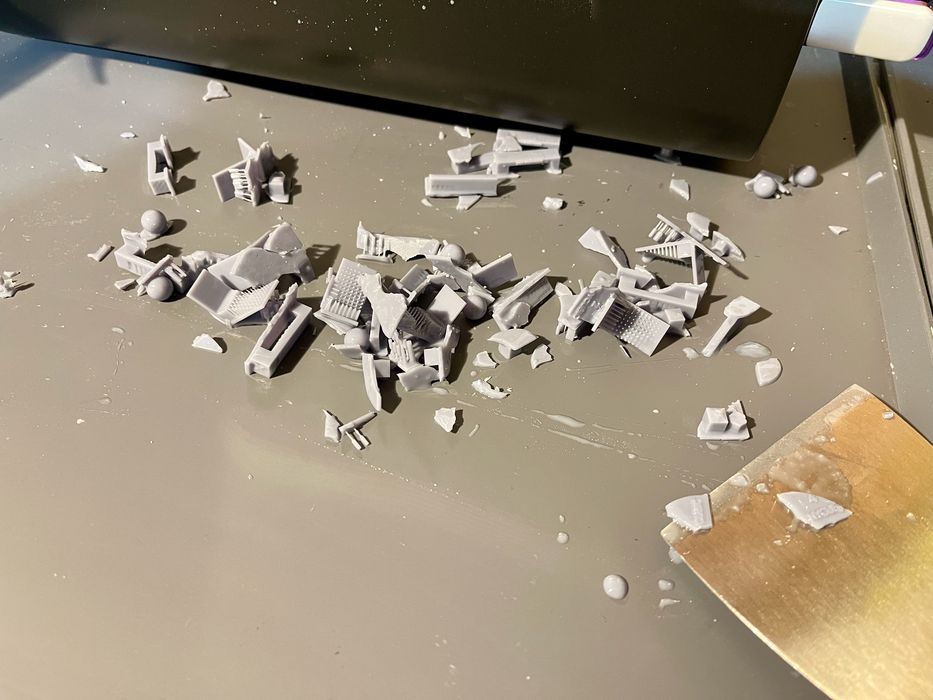
There was one other very strange issue I noticed. Often I found the prints would shatter, particularly around the first layers and raft. Above you can see the result of a R_E_R_F print after removing them from the print plate: they could not be used for calibration.
Usually this means that the first layers are overexposed and have become brittle. The solution is to reduce the exposure time for the first few layers, which is easy to do in PhotonWorkshop.
Except it isn’t.
As I launched a new print job with lowered exposure, I kept seeing the machine expose layers for an enormous 25s, layer after layer. I actually got out my stopwatch app to monitor this behavior. The M3 Premium was basically ignoring my requests for lower initial exposure times, regardless of what I specified.
Eventually, after discussions with Anycubic, it turns out the machine was designed to do this. The idea was to ensure the first layers stick very well, and that was accomplished. However, it causes the print to be too brittle. A firmware update was generated to allow for lower initial layer exposures, which worked perfectly for me.
Readers buying an M3 Premium will likely not see this issue, as we seem to have solved it.
Anycubic Photon M3 Premium Print Results

The print quality I observed on the M3 Premium was quite good, particularly on such a large resin 3D printer. Normally a machine of this build volume would have rather coarse 3D prints.
Here the prints are about the same quality you’d see on a much small device.
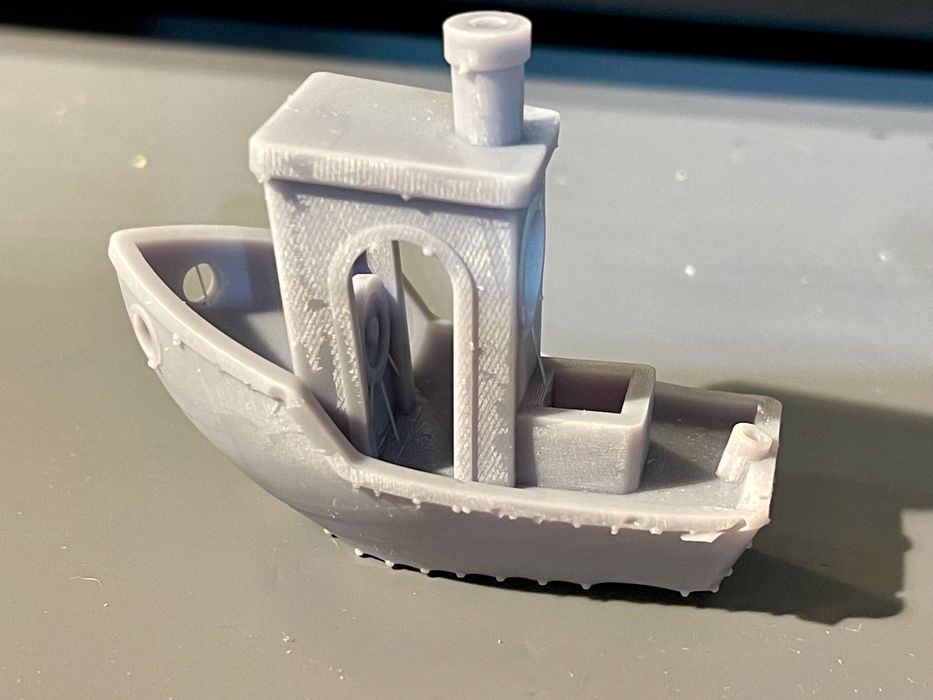
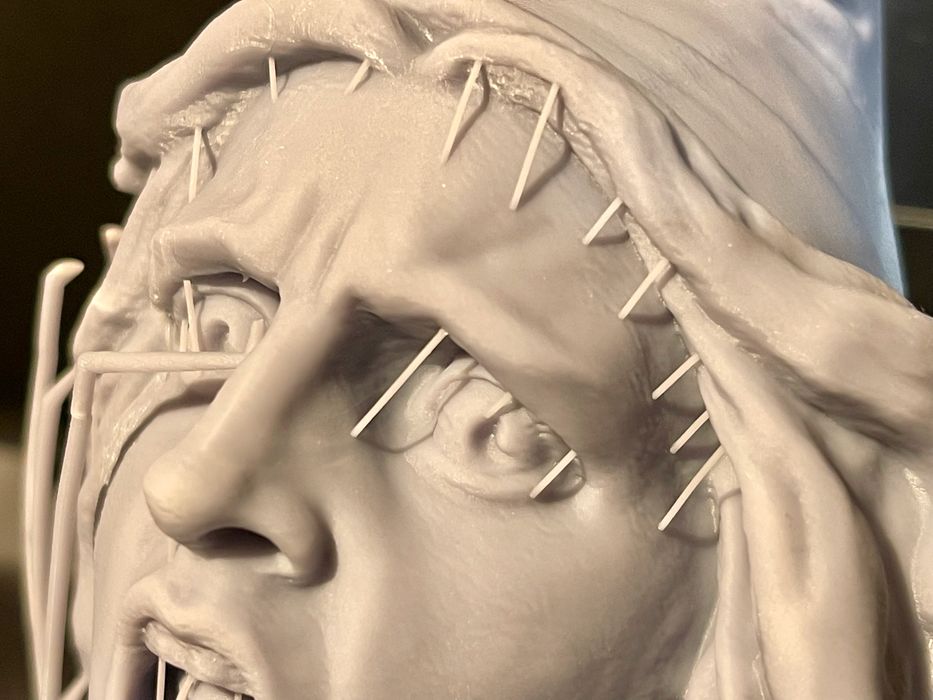
This is the ubiquitous #3DBenchy, which came out quite well aside from the annoying bumps caused by support structures. One thing you might notice is some strange diagonal markings on the side of the #3DBenchy. I’ve seen this before on other machines, and I am baffled as to what it is. It’s not uniform on the corresponding layers, and only occurs on certain surfaces on this object.
Here you can see a closer view showing the incredibly smooth surfaces, again aside from the support bumps that could be manually removed later.
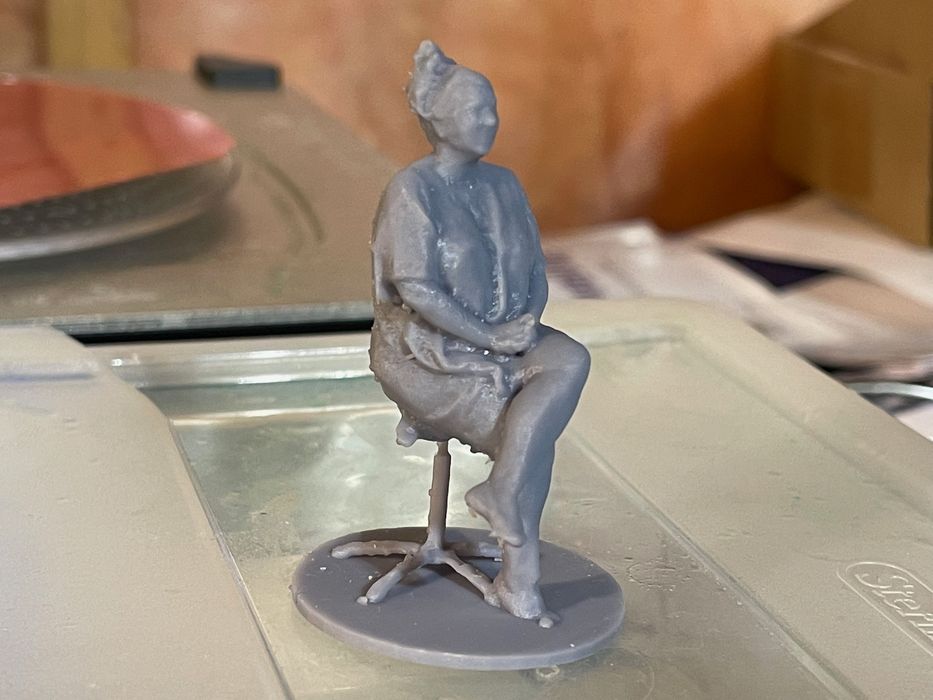
I printed a number of items, and once I had the resin properly calibrated — and the firmware exposure fix installed — everything came out quite well.
Anycubic Photon M3 Premium Final Thoughts
The Anycubic Photon M3 Premium is a very good 3D printer. It has a large build volume that isn’t compromised by resolution issues; all of the prints I made had outstanding surface quality.
If there’s a flaw in the M3 Premium, I think it might be that it deserves improved job preparation software.
If you’re looking to print large, detailed objects, the M3 Premium is a good choice. On the other hand, if your 3D prints tend to be smaller objects, then the M3 Premium could be overkill.
ANYCUBIC
M3 PREMIUM 3D PRINTER
★ BEGINNER 7/10
★ ENTHUSIAST 8/10
★ PRODUCTION 8/10
BEST FEATURES
✔︎ Large print volume
✔︎ RERF calibration
✔︎ Easy assembly
QUESTIONS
✖︎ Heavy build plate
✖︎ Too big for small prints
✖︎ Support generation
This is part three of a three part series, please read parts one and two.
Via Anycubic