
Our look at the Artillery Sidewinder X3 Pro 3D printer continues with a look at setup, operations and software.
This is part two of a three part series, please read parts one and three.
Sidewinder X3 Pro Setup and Calibration

Tramming the X3 Pro’s print bed was our initial task. This machine utilizes a standard four-point manual leveling method with an A4 paper and four screws beneath the bed. Although the provided instructions were somewhat unclear, the process is straightforward.

After leveling, we proceeded to auto bed leveling, a step detailed in both the manual and a separate handout. Interestingly, only the handout recommended preheating the bed, a step we deem essential for accuracy during printing.
Loading filament was next. The manual directed us to the “Extrude” option under tools, but we opted for the more user-friendly “Filament Change” feature. This allowed us to select temperature presets for different filament types and offered more extrusion volume options, saving us from repetitive button pressing to extrude length after length of filament.
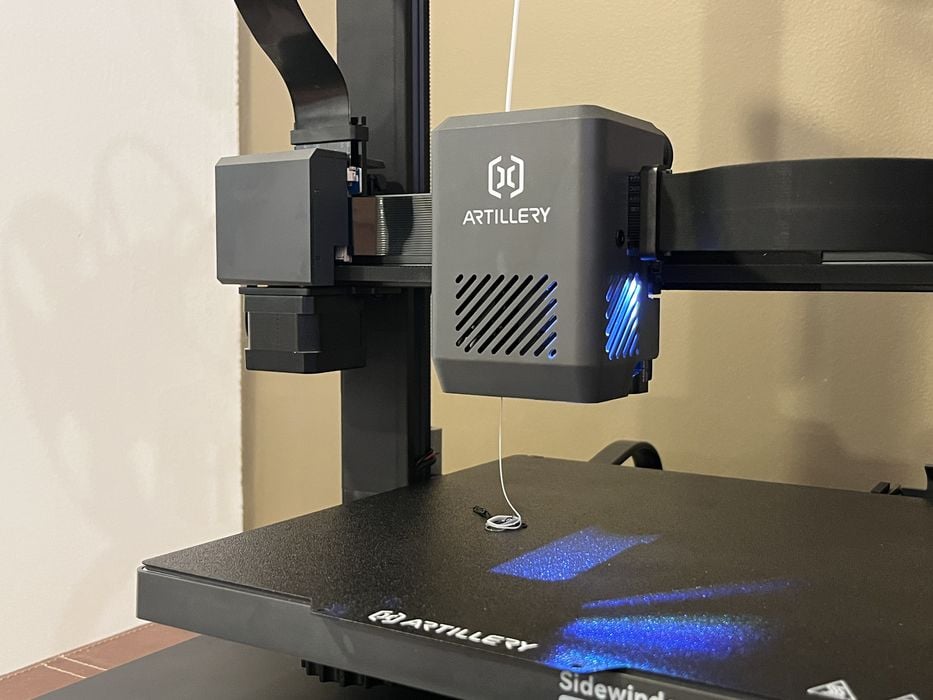
During the extruder’s impressively rapid heating, we prepared the HS-PLA sample coil on a reusable spool. Surprisingly, we discovered a pre-loaded black filament, flush-cut at the extruder cover’s top. Removing this filament revealed the absence of a manual lever for the feed gears, hinting at the need to remove the cover for any filament issues. Also, the extruder lacked visible tension adjustment for the gears, a feature typically necessary for different filament types.
Notably absent from the manual were instructions on the crucial nozzle gap Z-Offset setting and the setup for the clean nozzle procedure using the tip wipe assembly. We decided to address these omissions later, focusing on our initial print job.
The X3 Pro boasts high-speed printing capabilities, with a maximum speed of 300mm/s. To support this, it incorporates firmware features like “shake compensation” (input shaping) and “linear advance” to mitigate vibration and regulate nozzle flow rates.
However, the user manual lacks instructions on how to use or adjust these features. The manual vaguely refers to “random instructions” and videos on the provided SD card, but our examination of the contents revealed no such resources. Consequently, we reached out to the manufacturer for the necessary setup information, highlighting a gap in the provided documentation.
Sidewinder X3 Pro Operations
While awaiting a response from Artillery, we initiated the pre-sliced test prints from the microSD card.
The first attempt revealed the nozzle was set too high, floating above the build plate. This misalignment also affected the tip wipe assembly, which failed to engage at the print’s start. We used the mid-print Z-Offset adjustment to correct the nozzle-to-plate distance, ensuring proper first layer adhesion.
However, the firmware lacked a feature to save this new Z-Offset value. We manually noted it, paused the print, entered the new setting in the firmware, and saved it. With the corrected Z-Offset, the nozzle now properly interacted with the wipe assembly, making several back-and-forth wipes with a clicking sound before beginning the print.
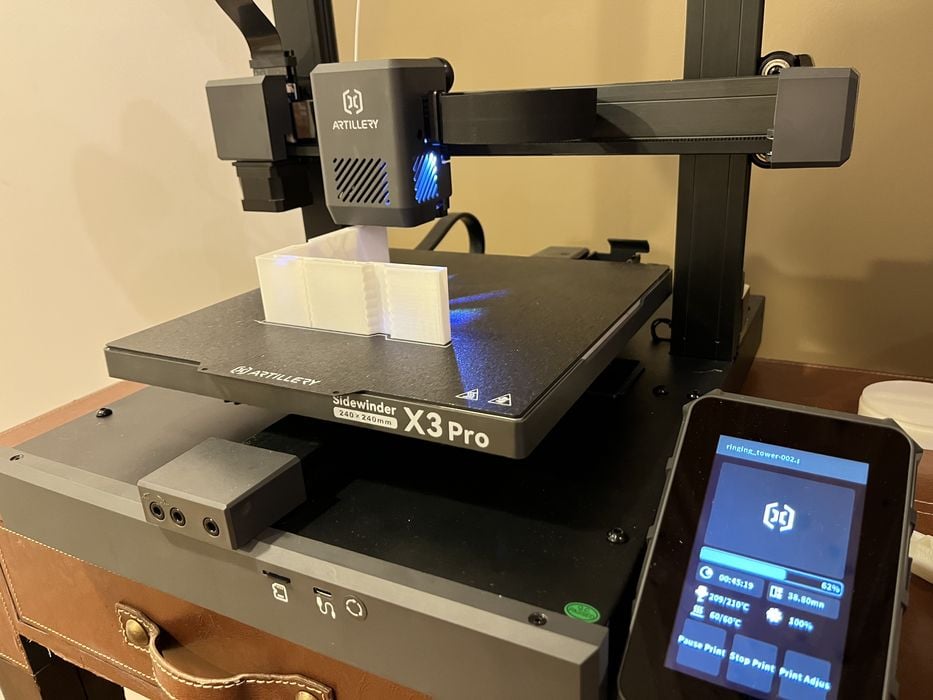
We tested two pre-sliced G-code prints, 3DBenchy-18 and 3DBenchy-37, using the HS-PLA sample. Their names seemed to indicate approximate print durations, completing in 20 and 35 minutes respectively. Both prints were successful, with the longer print displaying finer detail.
The printer operated quietly throughout. On completion, we appreciated the convenience of the flexible steel build plate, featuring notches and locating pins for easy reattachment after print removal.
Artillery then responded to our queries, guiding us through a firmware update, improved slicer settings, and provided missing information on linear advance and input shaping. These processes required dedicated setup and test print generation. For ease, we suggest Artillery include these pre-sliced GCODE test files on the SD card in future releases.
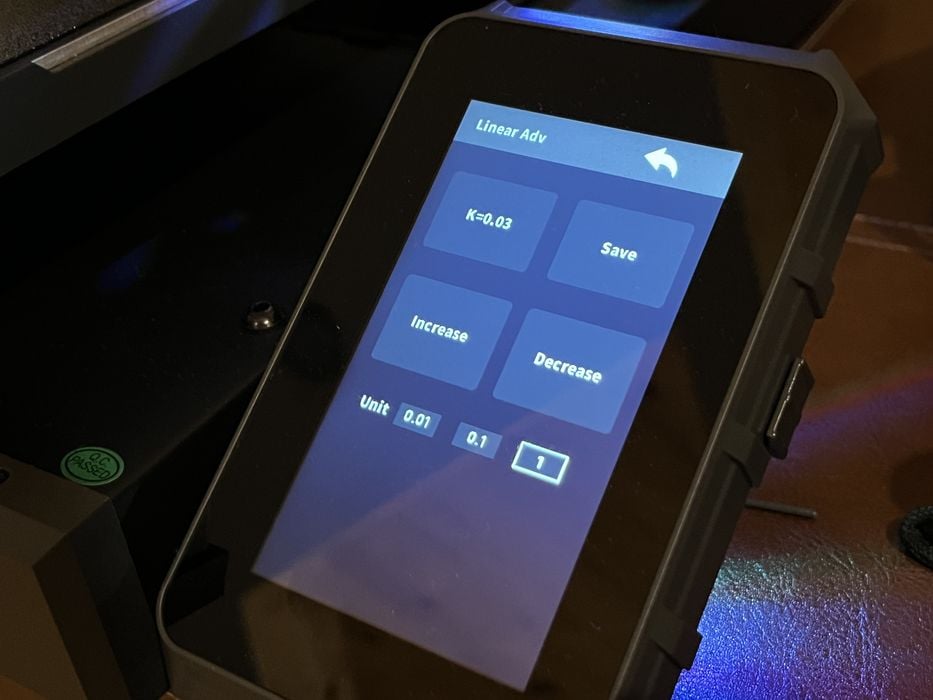
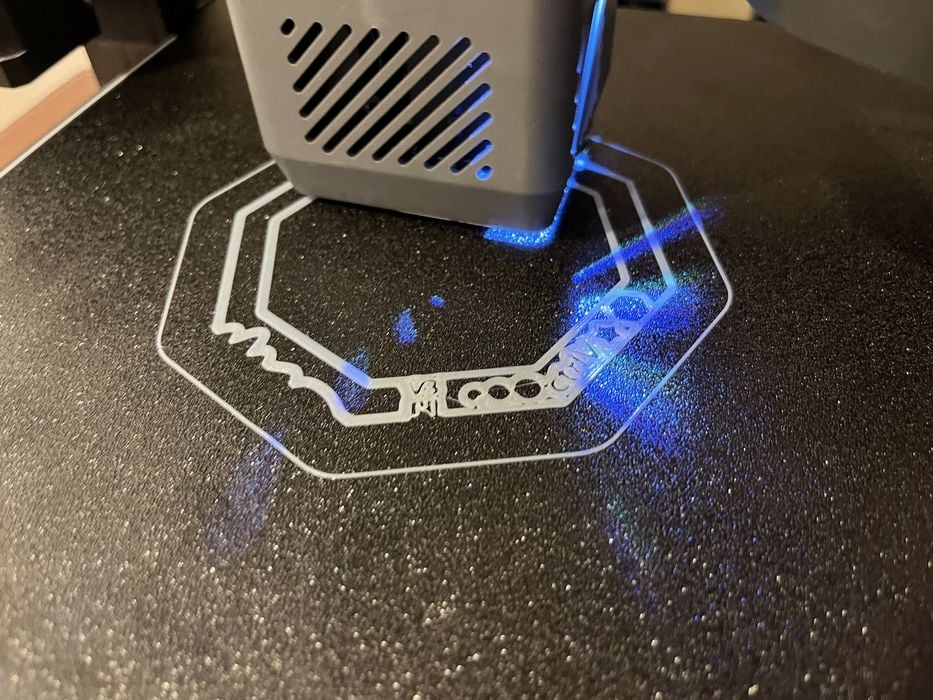
For Linear Advance, Artillery’s detailed documentation directed us to Marlin’s online tool to generate the K-Factor Calibration Pattern.
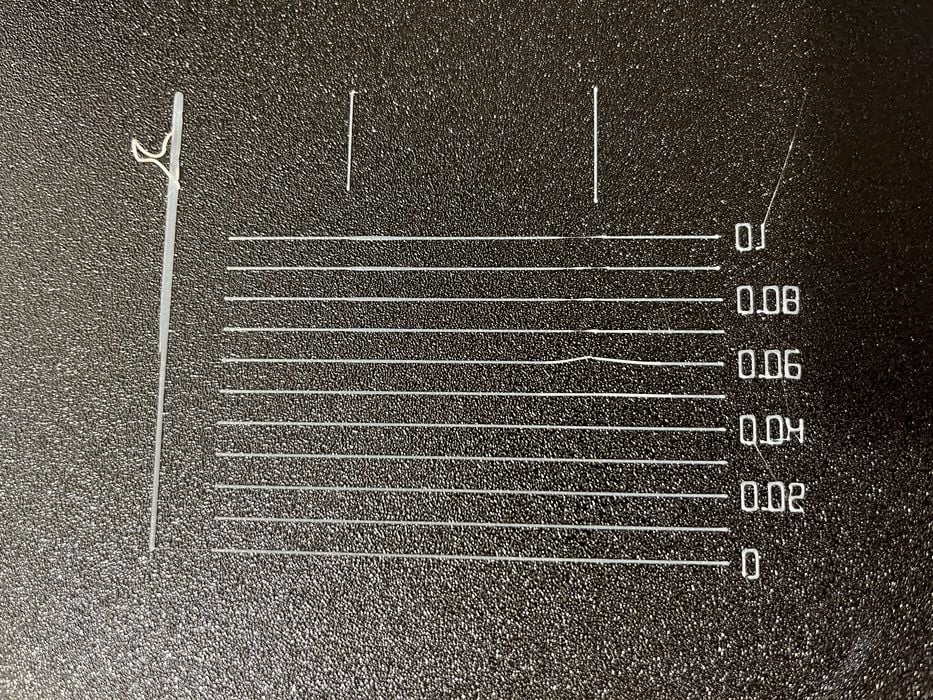
After printing the pattern on the X3 Pro, we identified the best-printed line, a task requiring some expertise and potentially challenging for novices. Artillery could enhance this by providing visual examples of well-printed lines. Our evaluation showed the pre-set firmware value was accurate, so no changes were needed.
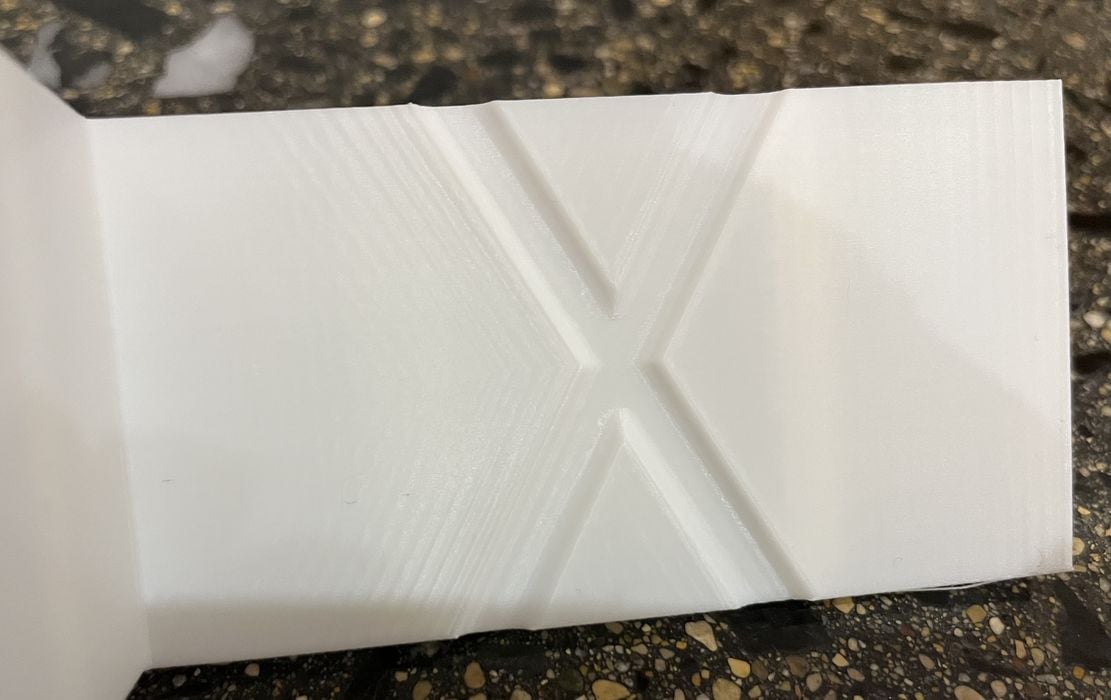
Input Shaping involved printing a ringing tower from Marlin’s website, using the web-based slicer Kiri:Moto, as per Artillery’s instructions. This process, including setting up a machine profile and adjusting print parameters, was time-consuming. After printing, we analyzed the model for ringing on the X and Y axes. Using a caliper, we measured the least ringed sections and calculated the correct input shaper values using an online calculator. Interestingly, our findings matched the pre-existing firmware settings, indicating Artillery’s effective factory calibration.
Overall, while Artillery’s support was helpful, the initial lack of guidance in the manual and the complexity of these advanced setups highlight the need for more comprehensive and accessible instructions, especially for those new to 3D printing.
Sidewinder X3 Pro Software
Artillery includes a customized UltiMaker Cura version, dubbed ArtilleryCura, with an extensive digital manual that complements the physical user manual, specifically for slicer setup. However, we encountered a snag: no Mac version of ArtilleryCura was provided, nor was there a download link.
We contacted Artillery for assistance and, in the interim, used their Slicing Software Usage Guide.PDF to manually configure our Mac version of UltiMaker Cura. The digital manual proved sufficient for creating an X3 Pro printer profile and a 0.2mm PLA filament profile with a conservative print and travel speed of 150mm/s, a bit of a contrast to the 300mm/s maximum speed touted by Artillery.
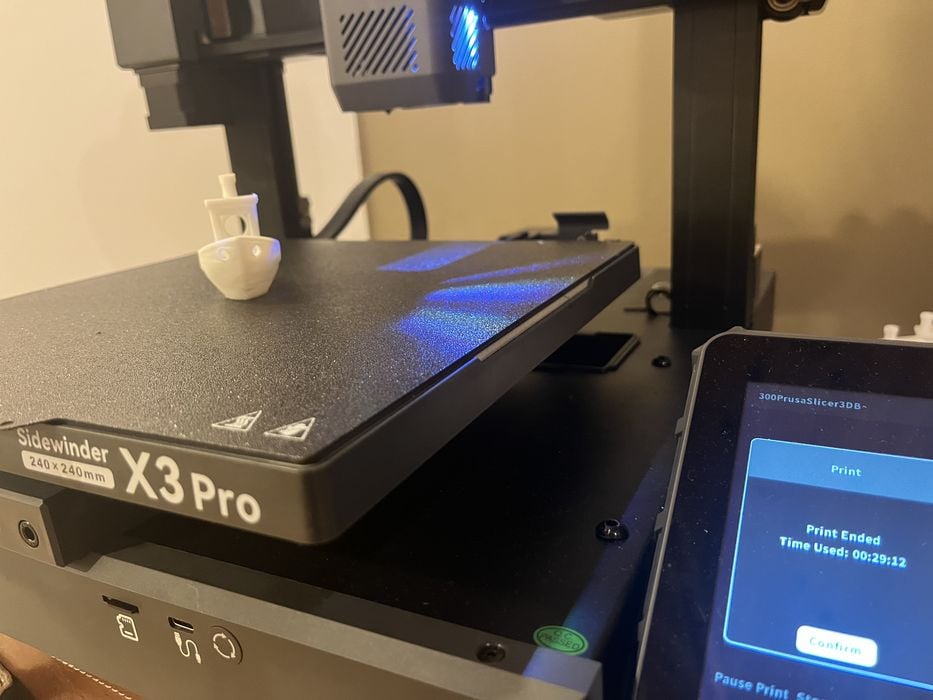
Our initial tests involved the CTRL-V test print, the remainder of the HS-PLA sample, and our custom PLA profile. The estimated UltiMaker Cura print time was 26 minutes, but the actual print completed much faster, in just 16 minutes and 27 seconds. This significant discrepancy between estimated and actual print times was a consistent trend throughout our review.
We also observed that GCODE files lacked associated images on the X3 Pro’s LCD screen. This was due to the lack of the “MKS plugin connection” in our Mac UltiMaker Cura setup, a plugin included in the PC version of ArtilleryCura for saving Gcode with TFT files. Consequently, our UltiMaker Cura-sliced prints lacked previews on the X3 Pro’s LCD.
Despite these limitations, we continued using our custom profile for various print tests, tweaking settings to explore faster print speeds. This process highlighted the need for better cross-platform support and clearer guidance for Mac users, especially regarding software compatibility and features.
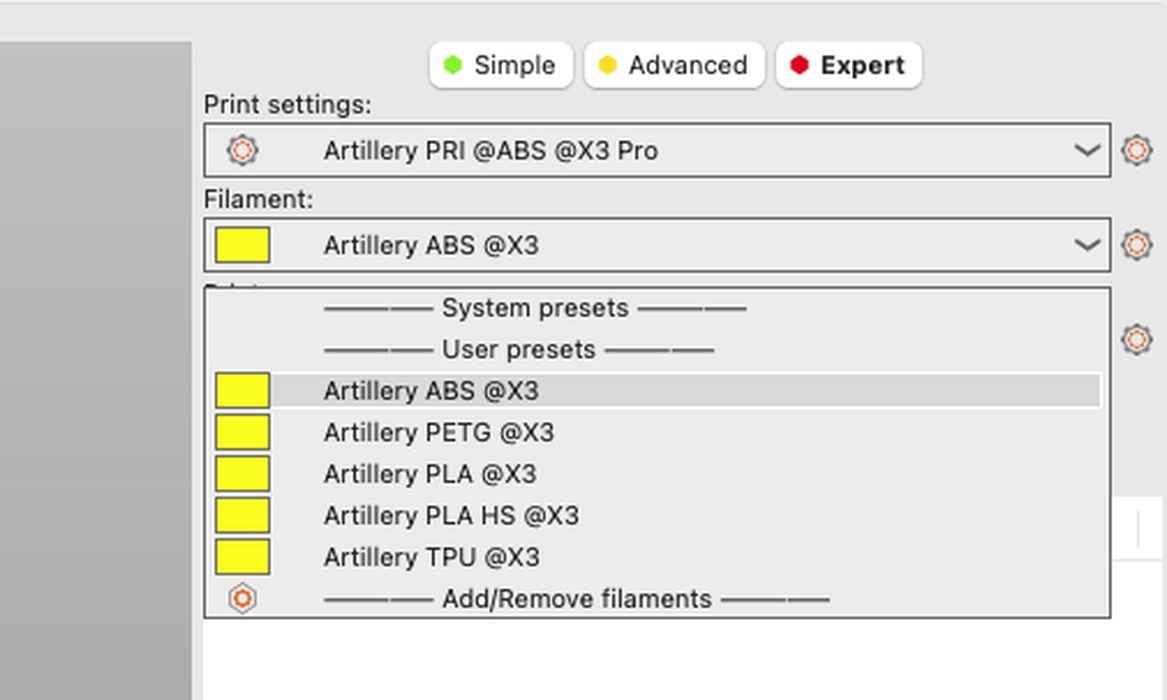
Artillery resolved our software issue by directing us to PrusaSlicer, along with their new PrusaSlicer_config_bundle_X3 file. This bundle automatically integrated the X3 Pro and standard filament profiles like PLA, ABS, PETG, and TPU.
We noticed, however, that the slicer settings were conservative compared to the printer’s advertised capabilities: perimeters were set to 120mm/s, external perimeters to 50% of that speed, and infill speeds reached the promised 300mm/s.
It may be that Artillery is following the lead of many desktop 3D printer manufacturers in speed specifications: the machines DO run at 300mm/s, but only when printing 0.1mm layers. That small layer size requires far less material flow, which is within the capacity of the device. We wanted 0.2mm layers, however.
Adopting these manufacturer-recommended settings, we proceeded with our review. Towards the end, we experimented with the slicer settings, pushing the limits to achieve the fastest print time for a #3DBenchy using “speed boat race” parameters. This approach allowed us to test the X3 Pro’s high-speed printing claims more rigorously, providing a practical assessment of its performance under accelerated conditions.
This is part two of a three part series, please read parts one and three.
Via Artillery