
Our hands on review series this week looks at the Artillery Sidewinder X3 Pro 3D printer.
This is part one of a three part series, please read parts two and three.
Sidewinder X3 Pro Background
Artillery3D, also known as Shenzhen Yuntu Chuangzhi Technology Co. LTD in China, has made a name for itself in the realm of consumer-grade FFF 3D printers. Since their inception in 2018, they’ve been steadily churning out innovative 3D printer hardware, with the Sidewinder series standing out as a their most notable offering.
The 2019 launch of the Sidewinder X1 caught the attention of many for its impressive capabilities during that period. Fast forward to 2023, and there’s a interest in the release of the new Sidewinder X3 Pro. The tech community is eager to see how Artillery has evolved this latest model, especially considering the success and impact of its predecessors.
Sidewinder X3 Pro Specifications and Features
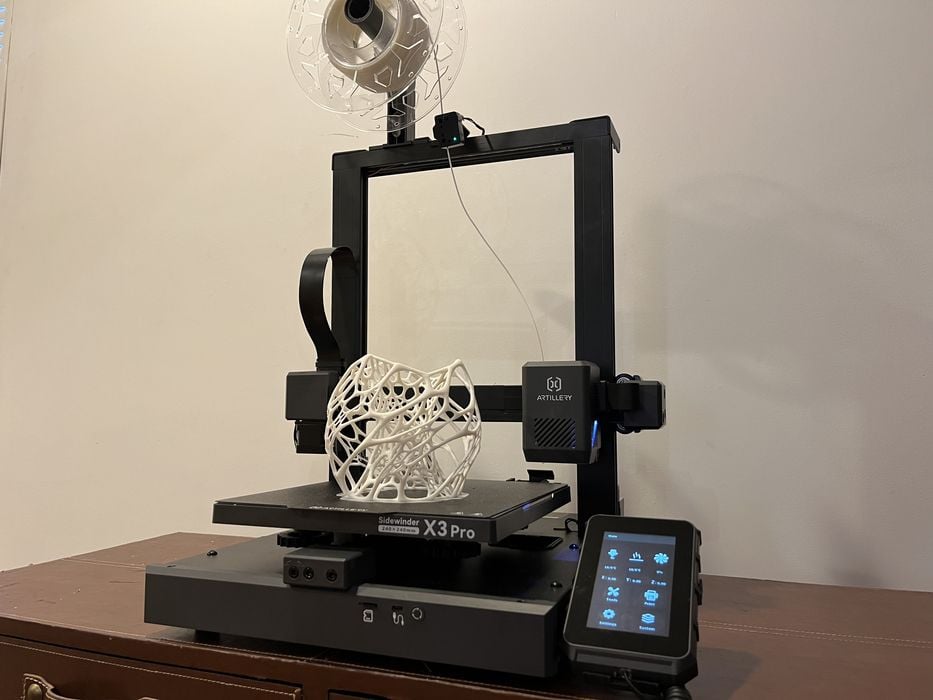
The Sidewinder X3 Pro, a bed slinger-style 3D printer constructed from aluminum extrusions, supports FFF technology and offers a substantial build volume of 240x240x260mm. Its build platform features a dual-sided PEI magnetic spring steel plate, underpinned by a segmented 100C heat bed. Initial tramming is facilitated through four thumb screws, complemented by a comprehensive 49-point auto bed leveling system. Movement across all axes is smooth, thanks to dual z-axis lead screws, motors, and v-slot wheels.
This printer is equipped with a dual-gear, direct drive extruder, and a high-temperature, all-metal hotend capable of reaching 300°C, ensuring compatibility with a wide range of filaments. At its core lies an STM32-bit motherboard running Marlin firmware, with system components interconnected via FFC cables. User interaction is made easy through a detachable 4.3-inch full-color LCD touchscreen.
In terms of performance, the Sidewinder X3 Pro boasts a maximum print speed of 300mm/s, although optimal results are often found within the 150-200mm/s range. Data transfer to the printer is seamless, supported by both MicroSD card and Type-C USB cable. Additionally, the printer includes a top-mounted filament spool holder and a filament detection sensor for efficient filament management.
Enhanced with user-friendly features, the Sidewinder X3 Pro has a convenient LED light bar illuminating the build area and an automated nozzle cleaning station for maintenance ease. These features contribute to a more streamlined and efficient 3D printing experience.
Sidewinder X3 Pro Unboxing and Assembly
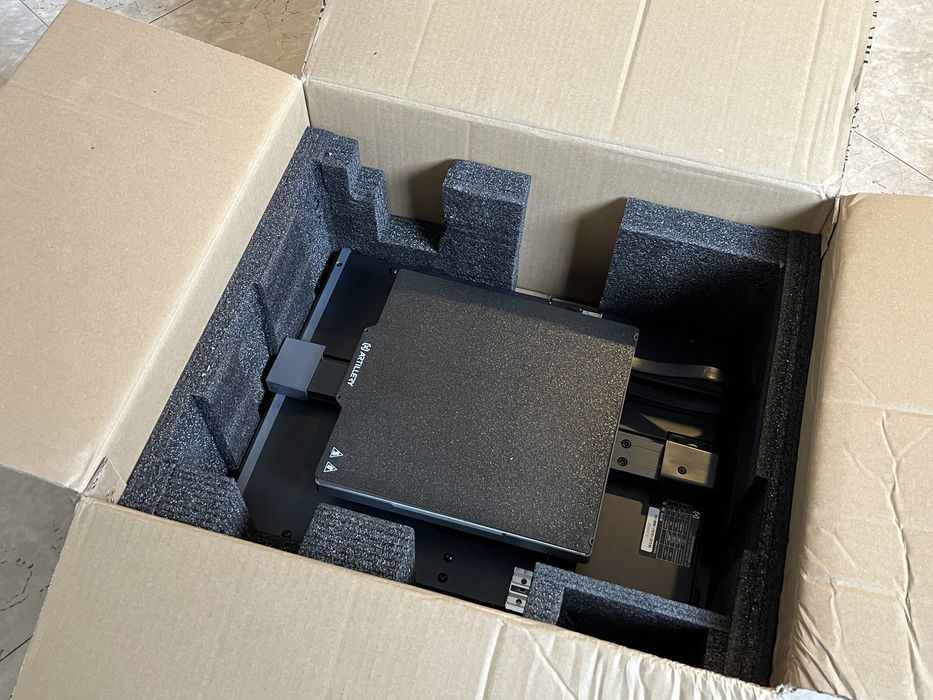
The X3 Pro’s arrival was in a solid cardboard box, typical for printer shipments, cushioned with tailored foam padding. This packaging was vital, as we noticed a dented corner and a rattling noise inside.
The box’s content upon opening started with the user manual, followed by neatly stacked pre-assembled parts, miscellaneous assembly items, and a bag of extras. Intriguingly, the rattling turned out to be a small, cracked 3D printed piece, resembling a bin, not listed in the manual.
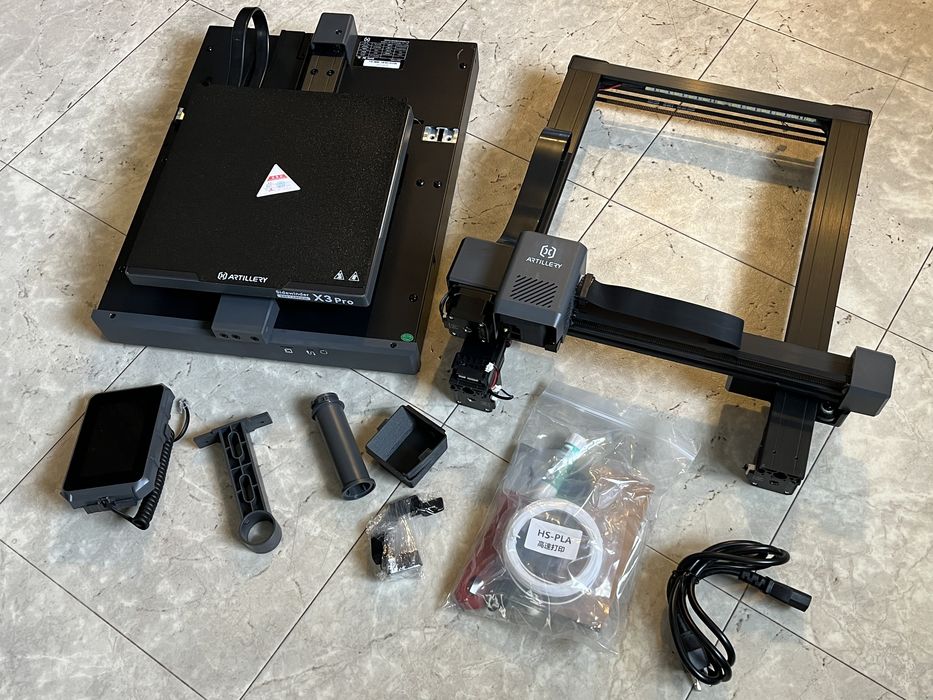
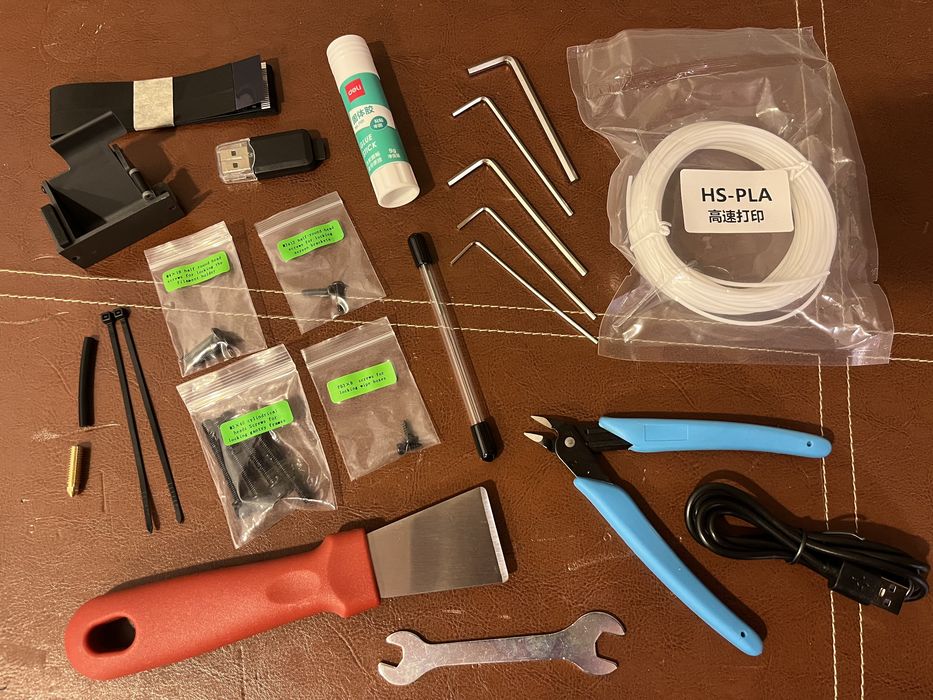
Laying out the X3 Pro’s components, we assessed the parts for assembly. The robust base included the Y-axis, build plate, internal power supply, and motherboard. The gantry featured the X-axis, carriage, and Z-axis. Other elements were an LCD touchscreen, spool holder, filament sensor, power cord, and a bag filled with a spare ribbon cable, “wipe case,” zip ties, screws, hex wrenches, side cutters, spatula, needle for nozzle care, an extra nozzle (minus wrench), Teflon tube for repairs, USB cable, microSD card and reader, a sample of HS-PLA filament, and a glue stick for bed adhesion. And, of course, the small, mysterious cracked piece.
Upon reviewing the X3 Pro’s manual, we encountered some confusing language, requiring multiple reads to grasp the assembly steps. Such issues, though minor for experienced users like us, are common in printer manuals but can perplex novices. Illustrations helped, but clearer instructions are crucial for first-time users.
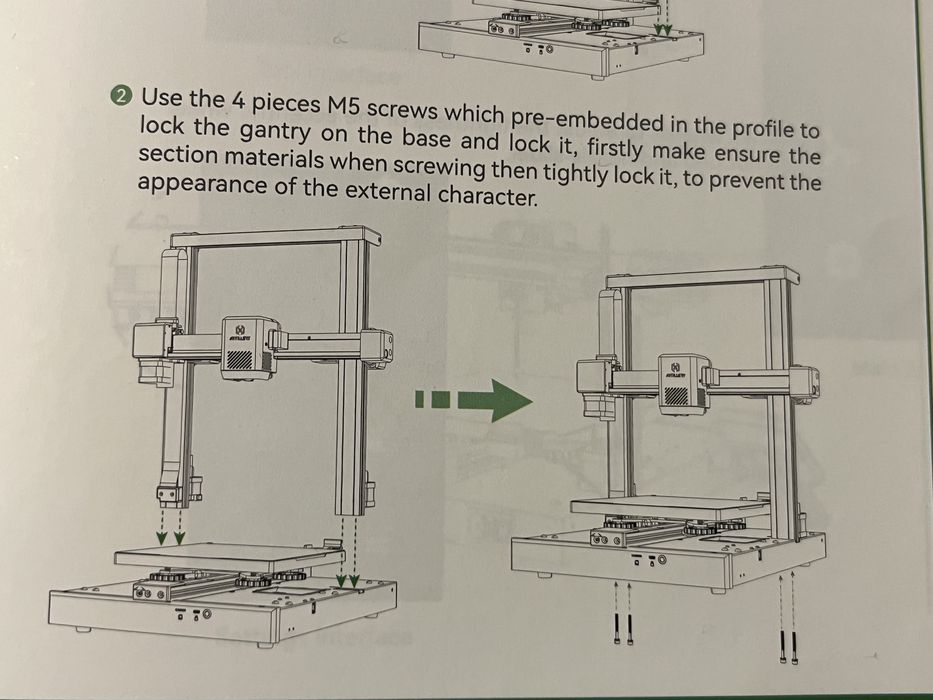
Assembly began with a challenge: attaching the gantry to the base. For shipping convenience, the Z-axis was lowered and secured with a zip tie, necessitating manual adjustment. The manual, showing the Z-axis mid-gantry, lacked guidance for this step. We cut the zip tie and manually raised the Z-axis to clear the build plate, then connected the gantry to the base, ensuring proper alignment of the X-axis power/data connector, secured by M5 bolts.
Further ambiguity arose with the spool holder and LCD bracket installation, as the manual repeated M5 instructions instead of specifying the correctly sized bolts. However, bolt bags were helpfully labeled.
A minor backtrack occurred during filament sensor installation, requiring us to reposition a spool holder screw to attach the sensor bracket.
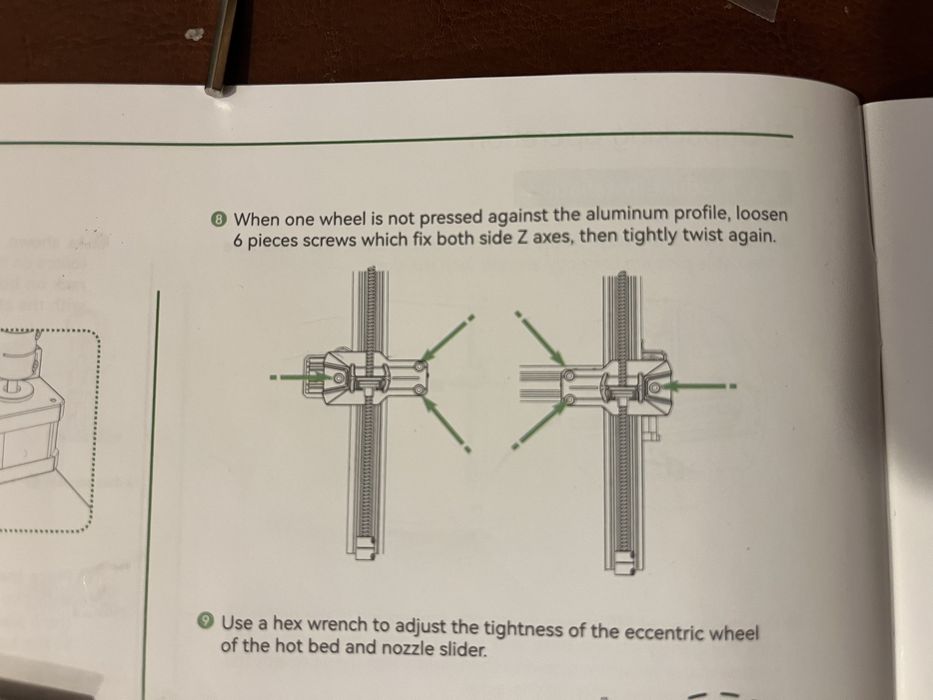
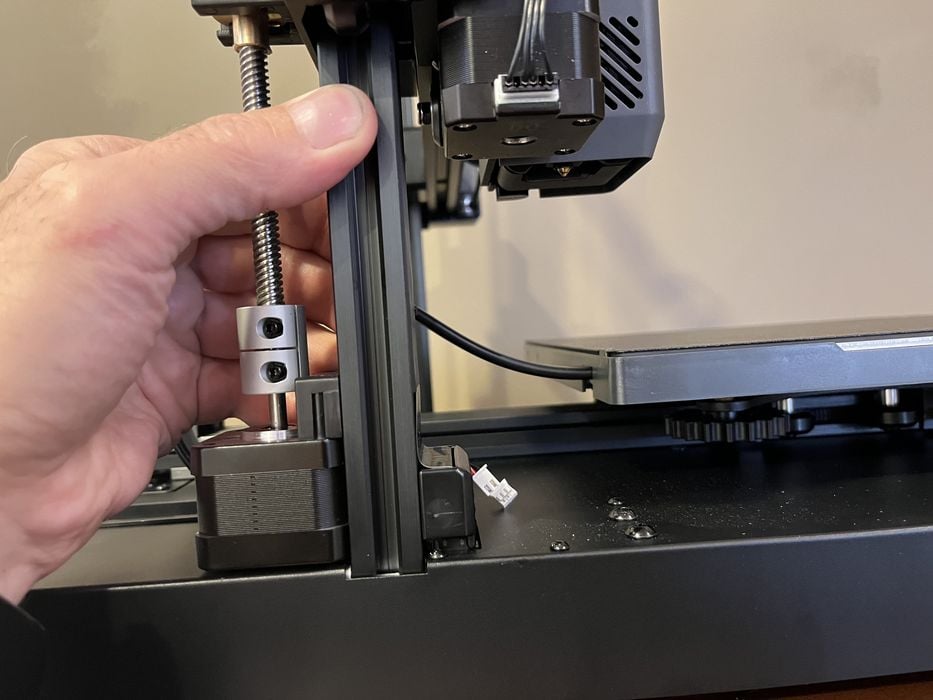
The final assembly steps of the X3 Pro involved adjusting the Z-axis.
The instructions to loosen and retighten bolts on the Z-axis side assemblies quickly resolved a wheel alignment issue, suggesting spring-loaded mechanisms.
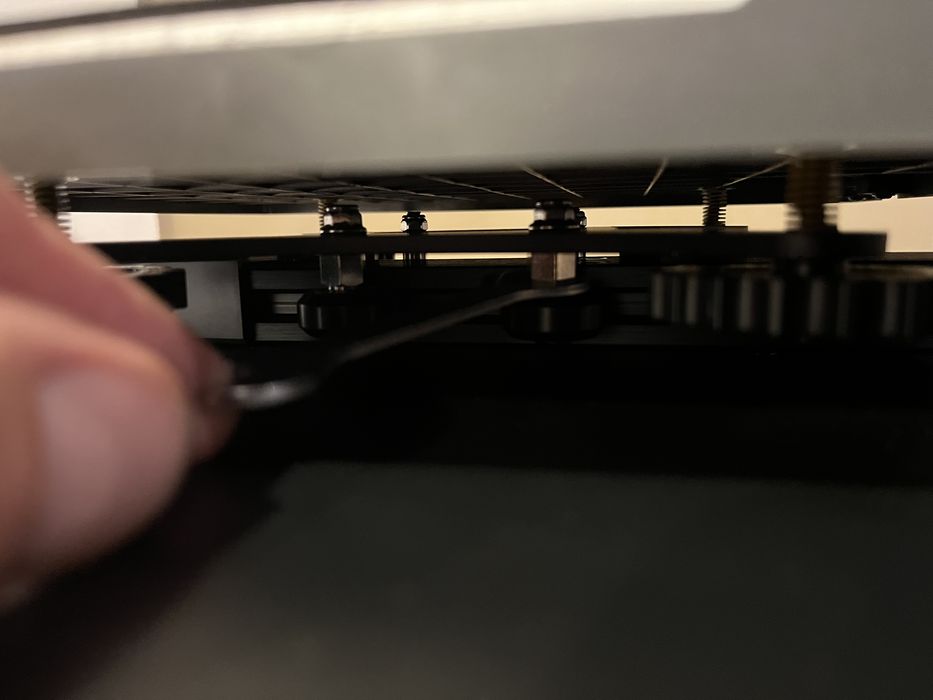
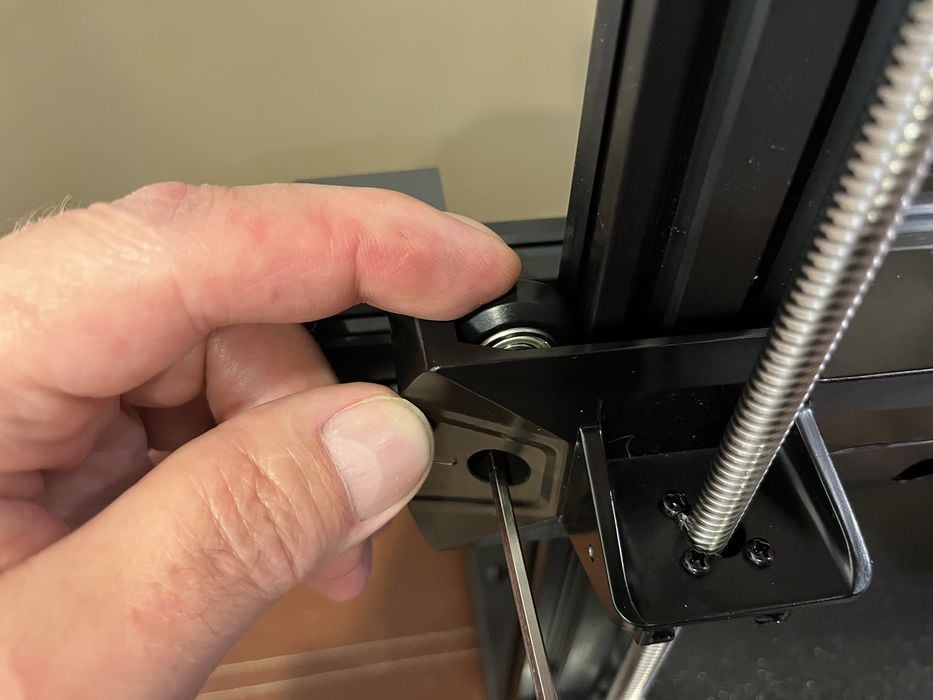
Next, we tackled the Y-axis wobble, which was quite pronounced due to shipping. Tightening the eccentric nuts fixed this, though the manual didn’t mention the need to do this. Also omitted were steps for using the zip ties and connecting data and power cables, which we addressed.
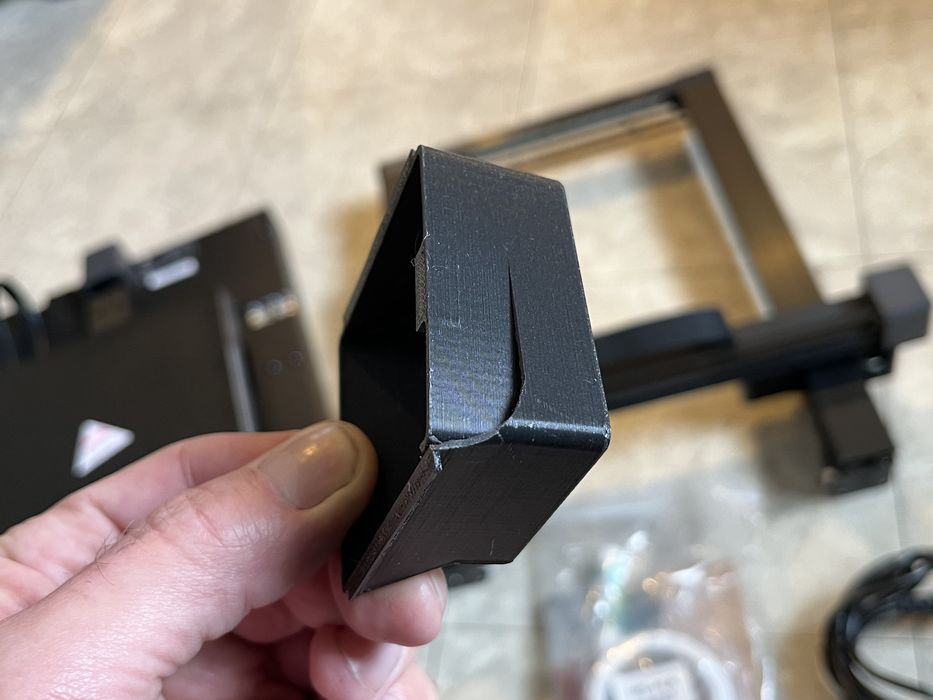
Our attention then turned to the mysterious pre-printed bin.
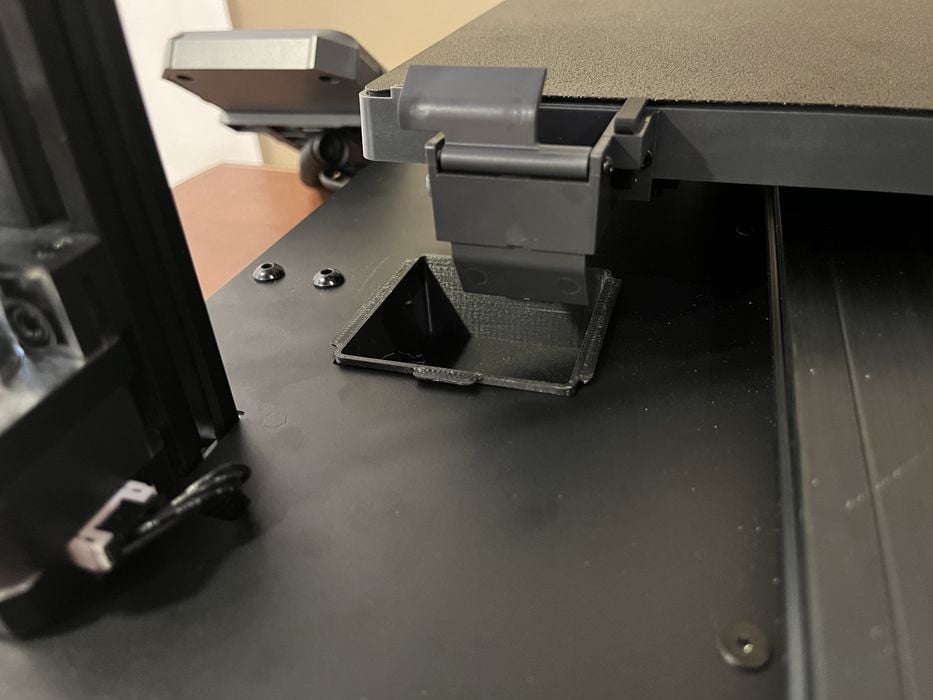
It fit perfectly into a hole in the printer’s base, likely serving as a nozzle wiper catch bin. Fortunately, the small crack it had didn’t affect its function.
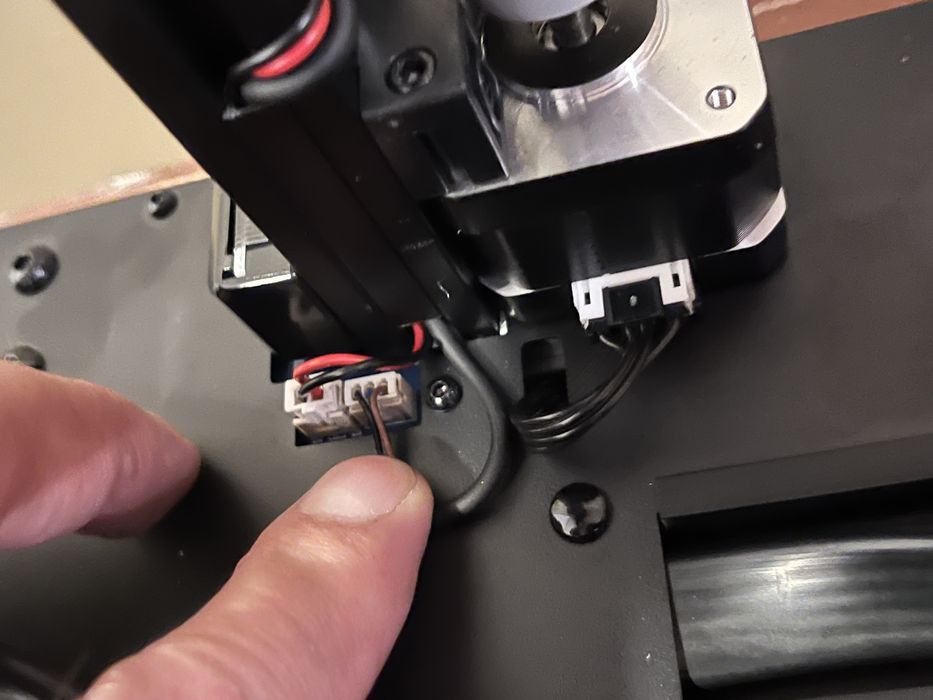
After ensuring the ribbon cable to the extruder was properly seated, we removed the LCD screen’s protective cover and checked for a hidden power voltage switch, finding none. Powering up the printer, it was ready for calibration, marking the end of our assembly journey.
This is part one of a three part series, please read parts two and three.
Via Artillery