

Our look at the Creality Ender-3 KE continues with setup, calibration, and operations.
This is part two of a three part series, please read parts one and three.
Creality Ender-3 KE 3D Printer Setup and Calibration
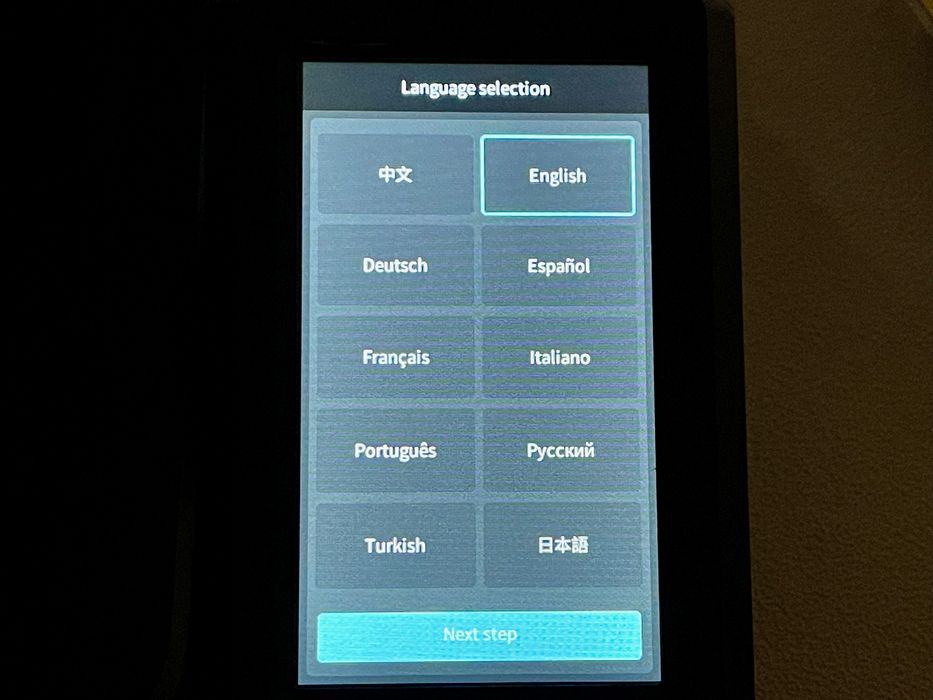
creality-ke-setup-language – 1.jpeg
The first item on the initial power up is to set the machine’s language. I’m impressed that Creality has so many possible languages, as most other machines have only one, two or maybe three options. Perhaps this shows how broad Creality’s sales are made around the world.
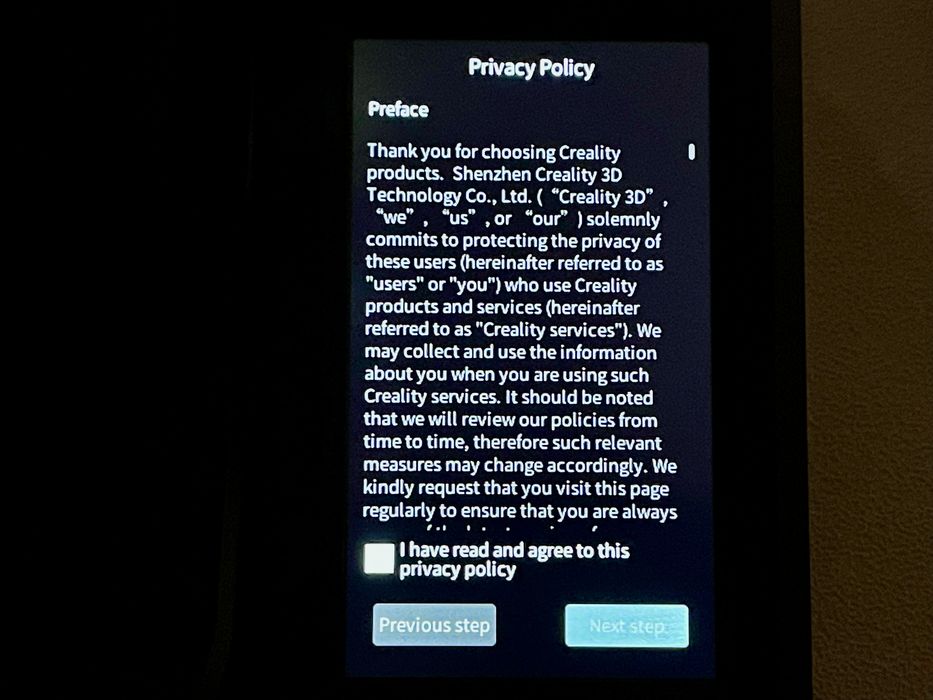
This is quite new. I’ve never had a 3D printer ask me to agree to a privacy policy, but here we are. I suspect this will be handled by most operators in the same way it’s done on web pages: click yes!
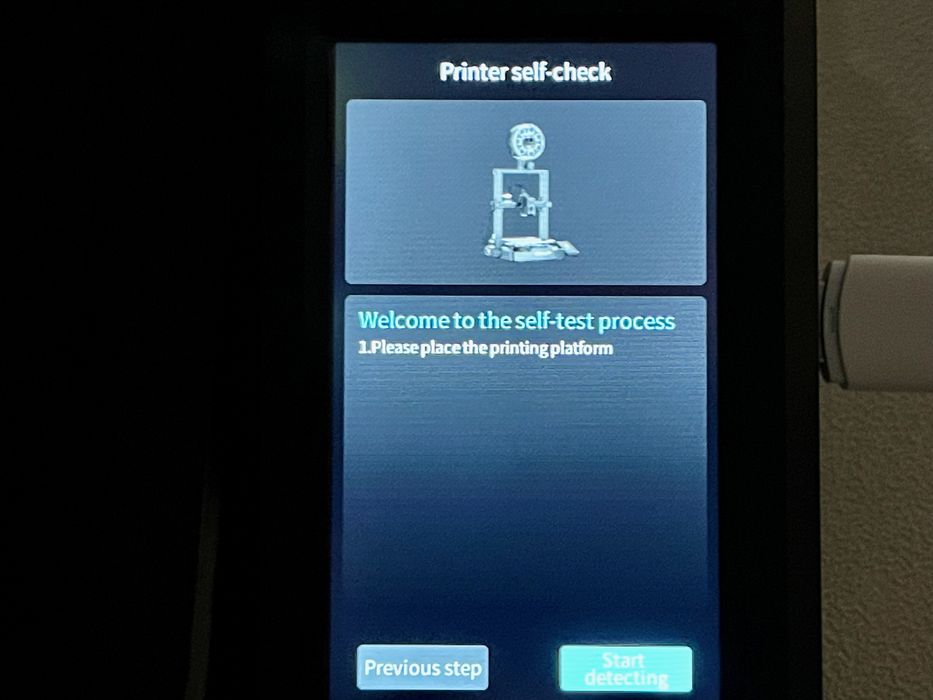
After the agreement, the KE went into a self check mode, where it proceeded through a series of steps, most of which were calibration.
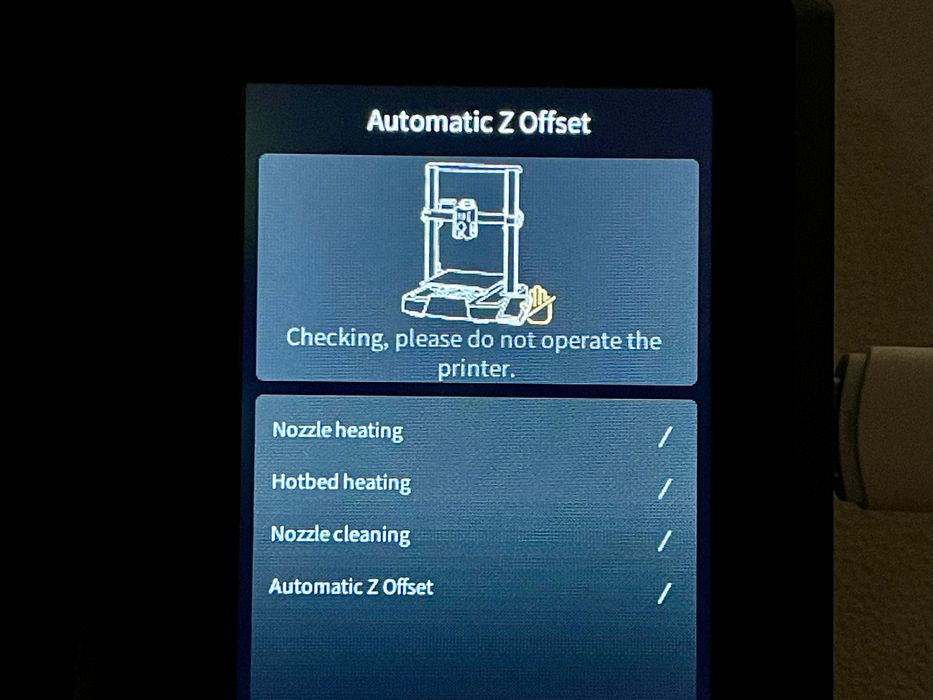
The KE is able to automatically set the Z-gap, which is normally done manually. This was a great benefit, and while I am used to doing it manually, I’m very quickly getting accustomed to the automatic setting.
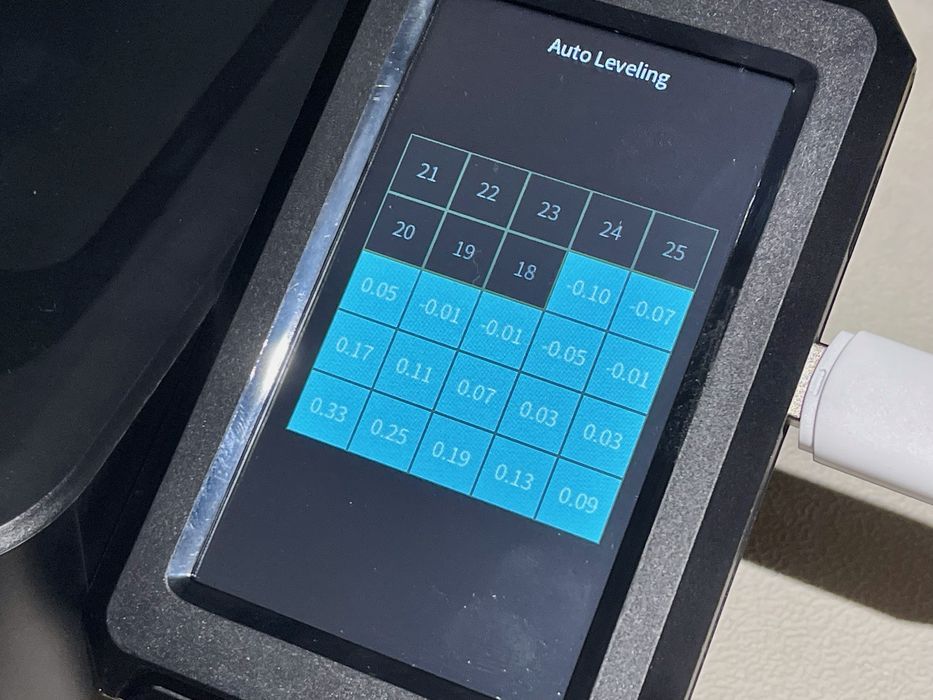
One of the setup steps was automatic bed leveling. Here the KE proceeds through an inspection of the bed and it actually shows you the findings in a digital matrix. I’m not sure how useful that is, since you really don’t want to change the values, but it’s interesting to watch.
Another setup item is to connect the KE to the local WiFi network, which is easily done.
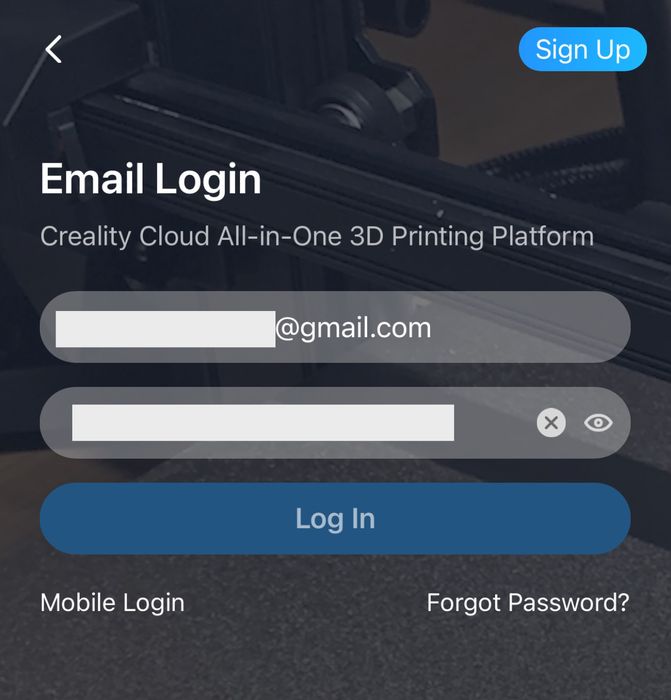
At this point I had to connect the machine to my Creality Cloud account. This is Creality’s massive cloud system that provides model sharing and download, machine control, slicing and a lot more.
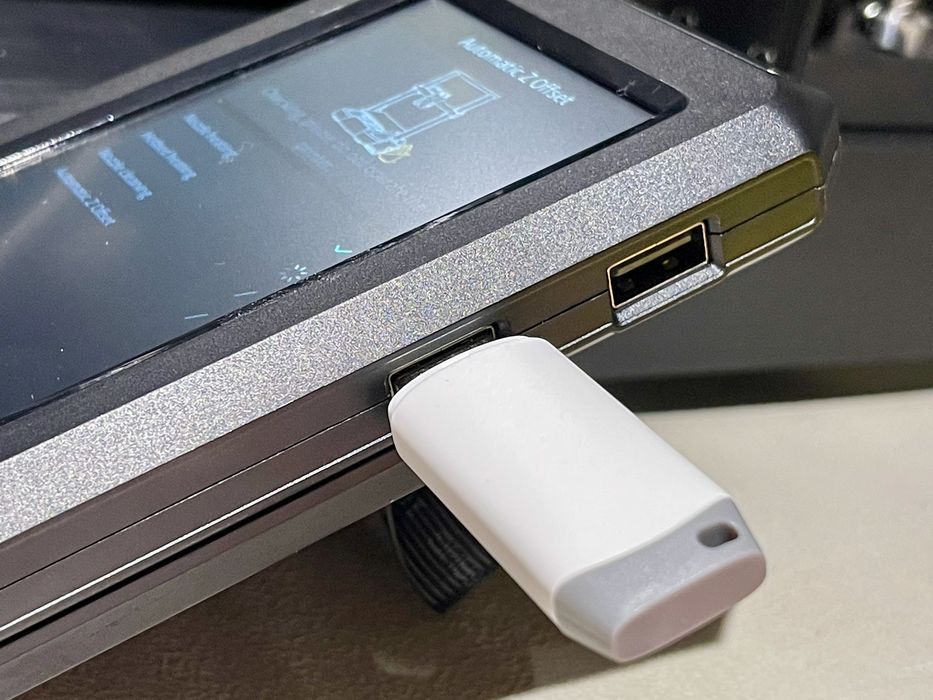
Note that this is optional. It’s entirely possible to use the KE in local mode: slicing on your PC, using a USB stick to get GCODE to the device. There are even two ports for this, and any printed jobs are stored on the machine’s internal storage for future reference. However, there are a ton of conveniences when using the KE through the cloud.
You’ll have to download the Creality Cloud app on your device, and sign up to the service.
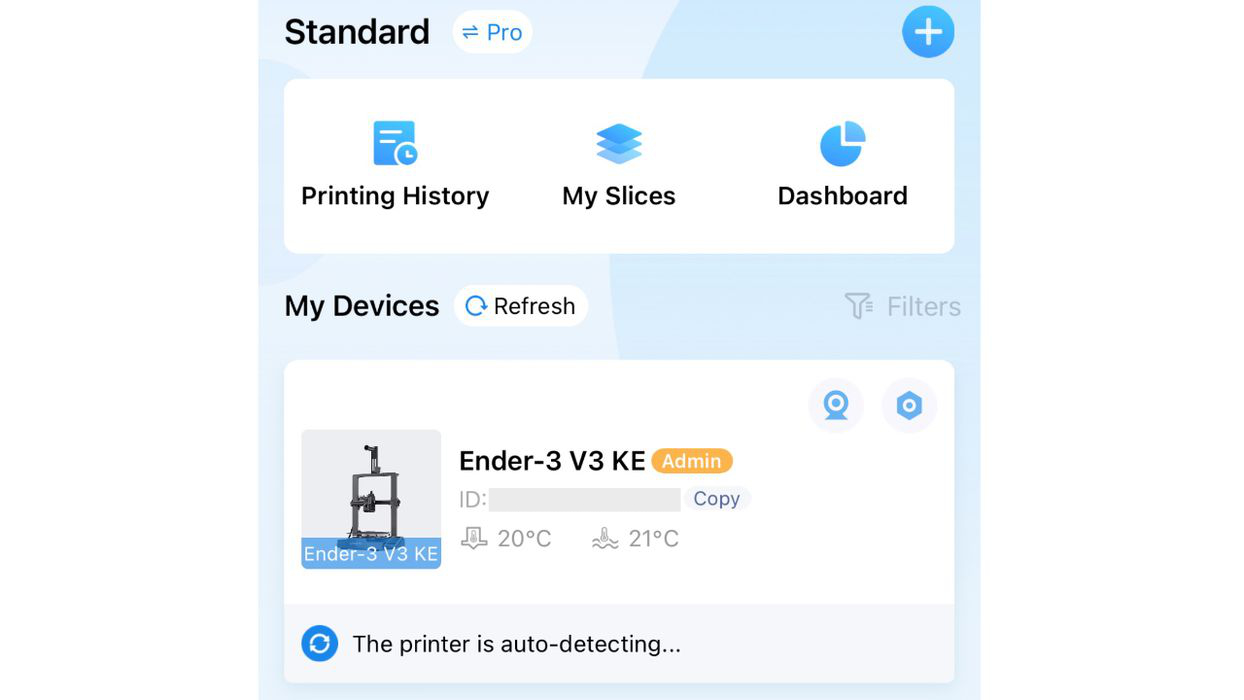
Once online in the app, you can then scan the WiFi network to automatically detect any compatible Creality 3D printers. This meant there was no need to look up IP addresses, etc. It’s pretty well done and automatic.
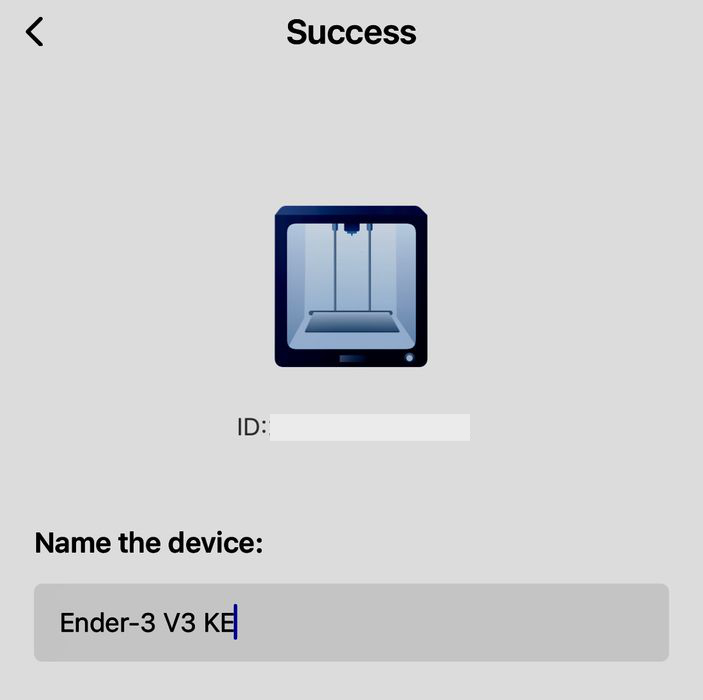
Once found, you are asked to name the new device. This might seem like a redundant step: why do you need to name a device? It’s because multiple machines can be confused. If you have one machine, not a big deal. But if you have two or more, they really have to have names.
At this point I was ready to start a print job. I found the setup sequence pretty painless in spite of the additional complexity of the cloud connection.
Creality Ender-3 KE 3D Printer Operations
I usually attempt a pre-made GCODE print supplied by the manufacturer as the first job, and that was the case here. However, I found only one job on the USB stick provided: a #3DBenchy.
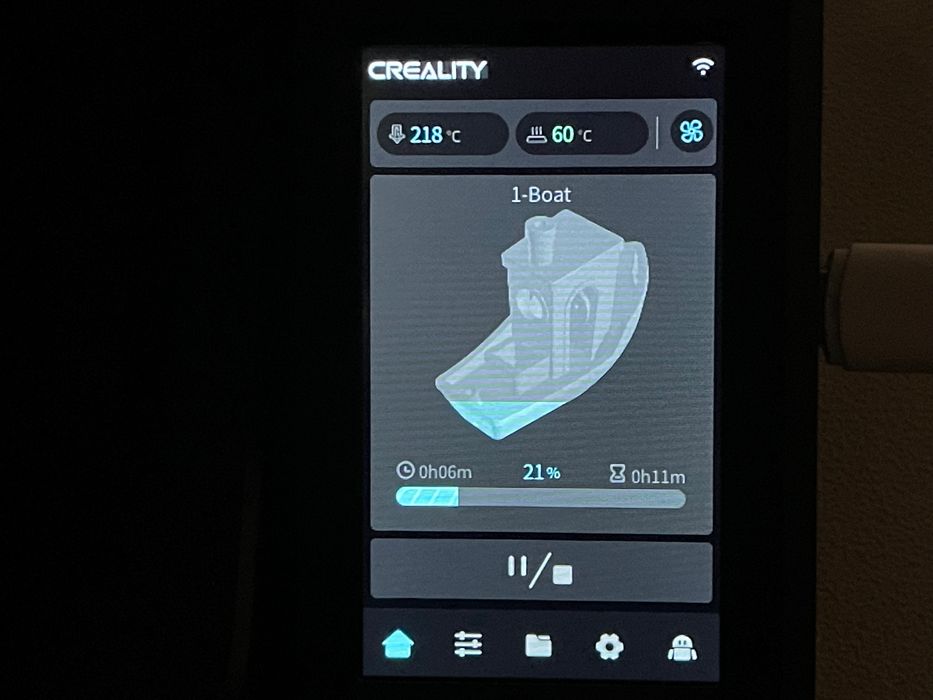
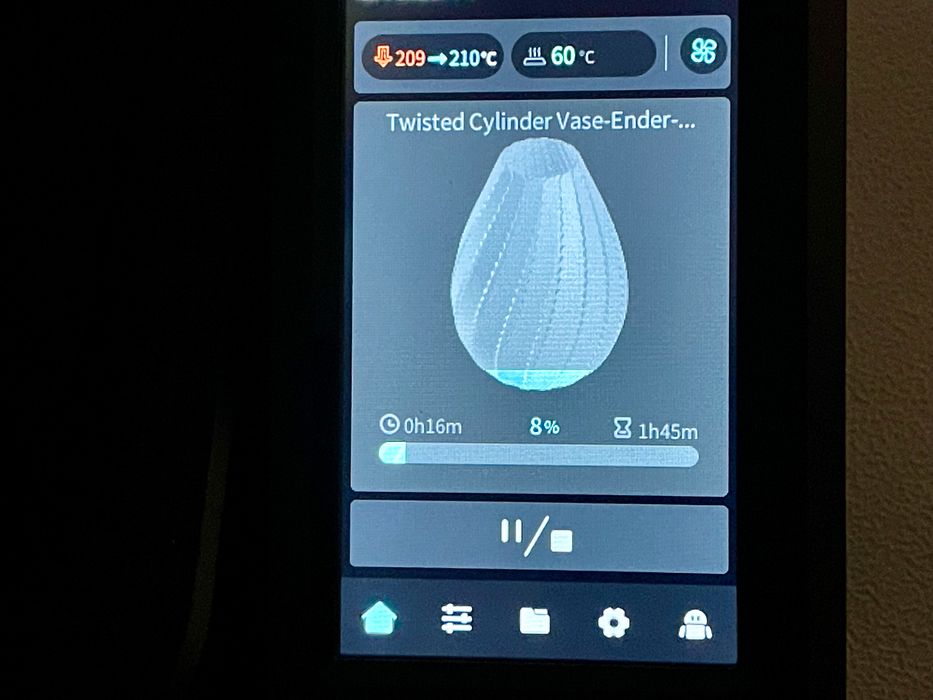
Above you can see the typical touchscreen view during the print. As the print proceeds, the “progress bar” is actually a highlight that travels up the 3D view of the object.
It’s possible to tune the job settings during the print through the menus, but I found this was totally unnecessary for all of my jobs. It seemed that the automated calibration does a very good job to get the machine ready to go.
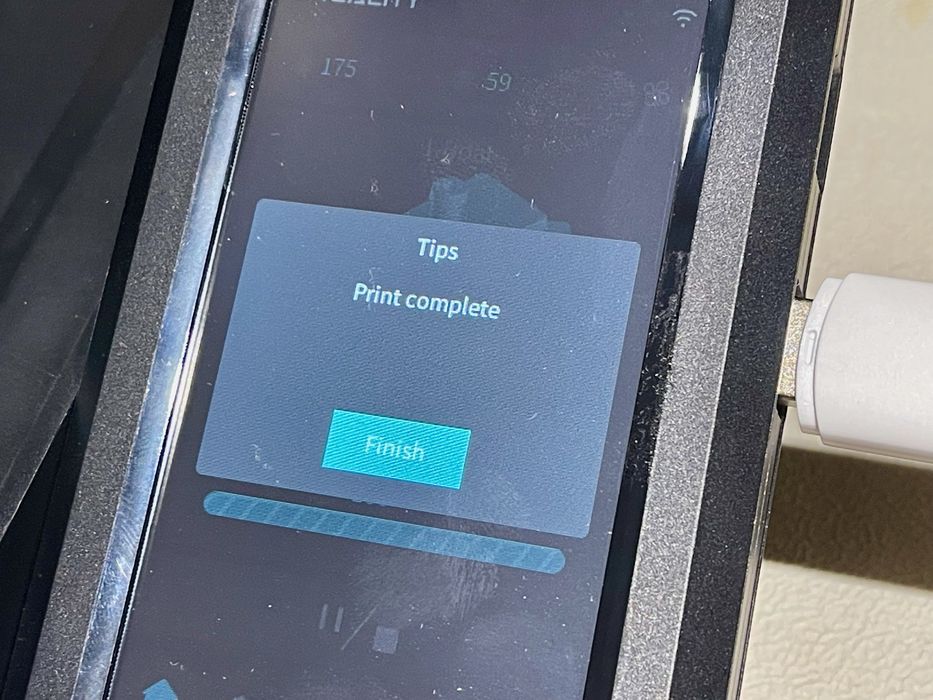
When the job completes you’ll see this message. It’s a bit confusing: what does “Tips” mean? While improved over the past few years, Creality should do another sweep of their wording to ensure they have the best and most informative text.
Also note that the completion message does not indicate the total time for the job. This will come up a bit later.
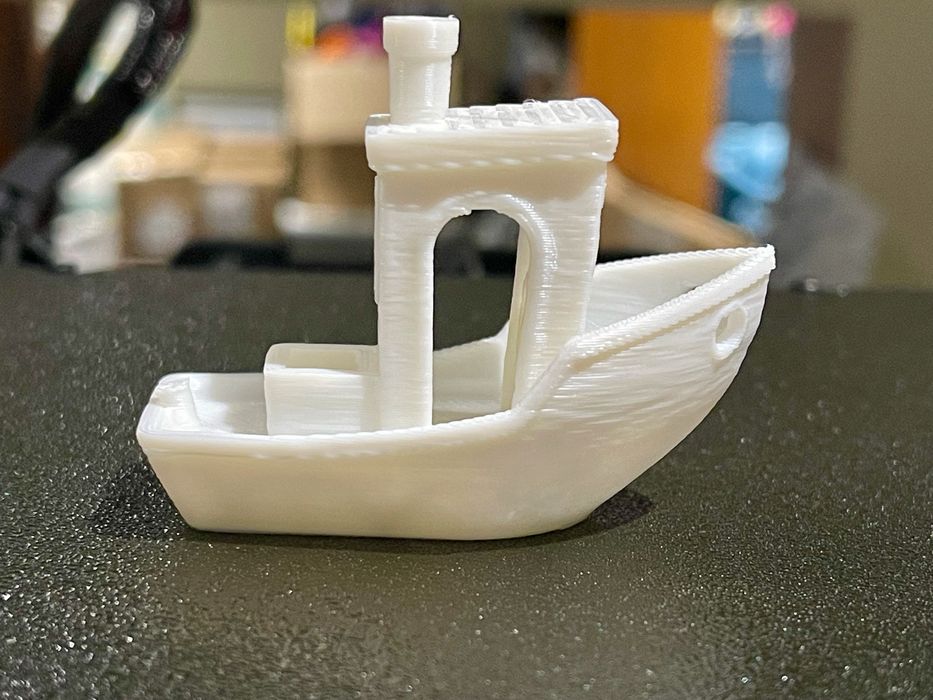
Here’s the #3DBenchy result which was printed quite fast, but it’s only of moderate quality. There are some distortions and wobbly surfaces, so I was a bit disappointed given that this was the pre-sliced GCODE that could have been very finely tuned.
However, as it turned out this was perhaps the worst print I’ve made on the KE. Other prints were much better, as you will see.
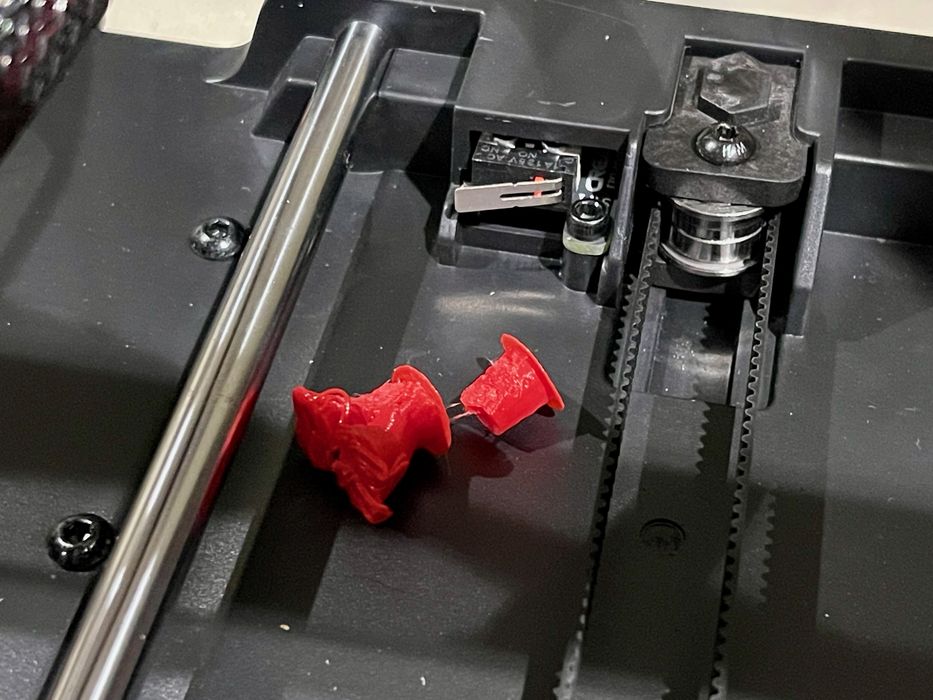
There were some occasions during printing where some spindly tree supports didn’t quite stick to the plate. They unexpectedly detached and due to the Y-axis movement, would fall off the plate. I found this to happen several times, and was a bit concerned that the debris could fall into the belts.
I’m wondering if Creality might consider putting a plate or something on top of the mechanism to prevent this from happening? I didn’t encounter any damage myself, but I can easily see that happening if the debris trajectory is just right.

For my first few prints I used the tiny coil of PLA provided with the KE. I then remembered why I should never do this. Coils are terrible, and here it produced perhaps the worst tangle I’ve seen. Advice: toss out the coils, and manufacturers should never include them.
One thing I’d like Creality to do is to adjust the colors on the touchscreen. There is a design tendency to use grey letters on grey background, which is pretty terrible for contrast. Sometimes I found it hard to read the screen, depending on the lighting conditions.
I haven’t said much about how to run jobs, because it’s really done from the software rather than from the hardware, unlike most 3D printers. That’s what we’ll get to next.
This is part two of a three part series, please read parts one and three.
Via Creality