
Our look at the Creality Ender-3 KE concludes with software, print results and final thoughts.
This is part three of a three part series, please read parts one and two.
Creality Ender-3 KE 3D Printer Software
When using the KE, you’re going to spend most of your time in Creality Print, the company’s custom print management software. Sure, you can use other slicers if you have a suitable machine profile, but there’s a big advantage to Creality Print: device connectivity and management.
You can slice and dispatch a model to a printer all from the desktop, and it’s incredibly convenient. When using other slicers you have to revert to the “put it on a USB stick” approach, something I’m gradually losing patience to do.
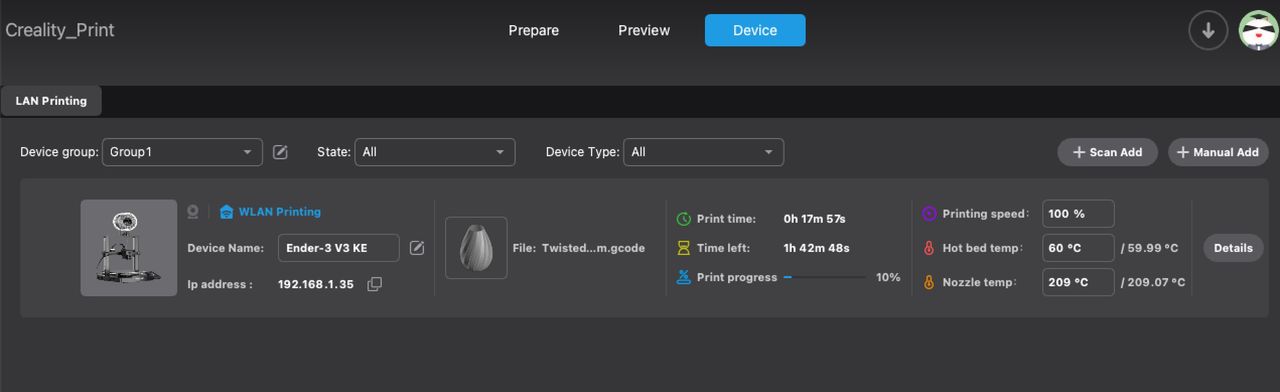
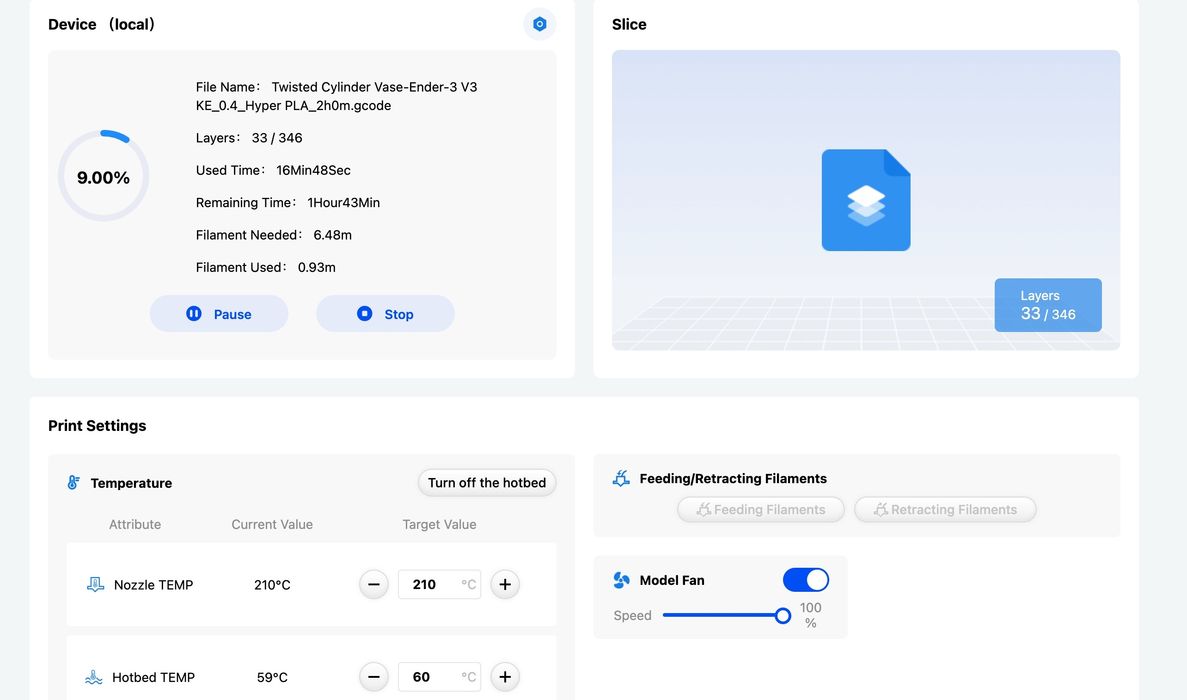
Here you can see the job monitoring panel in Creality Print after you dispatch a job. It’s quite informative and shows you more than you see on the sometimes-hard-to-read machine touchscreen. You can also stop or pause the print if required.
Note that you cannot see the action from Creality Print, as the KE does not by default include a webcam. This is an optional feature, and if attached it apparently will show up in Creality Print. I did not have a camera for my testing, unfortunately.
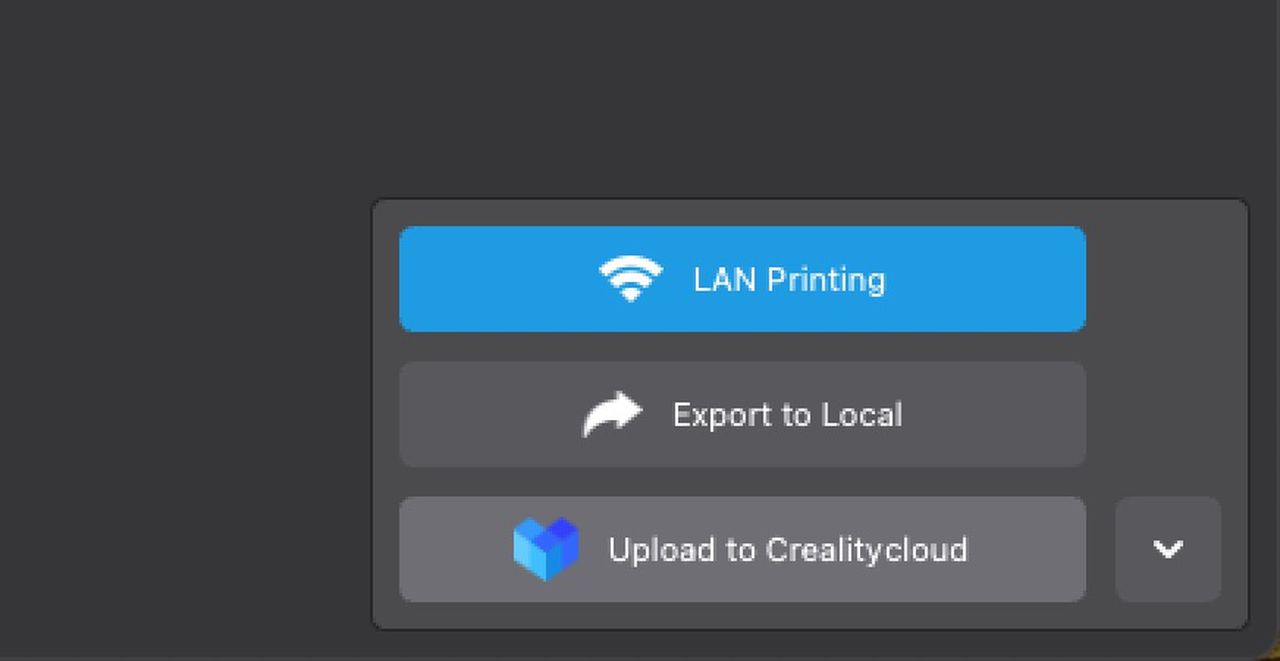
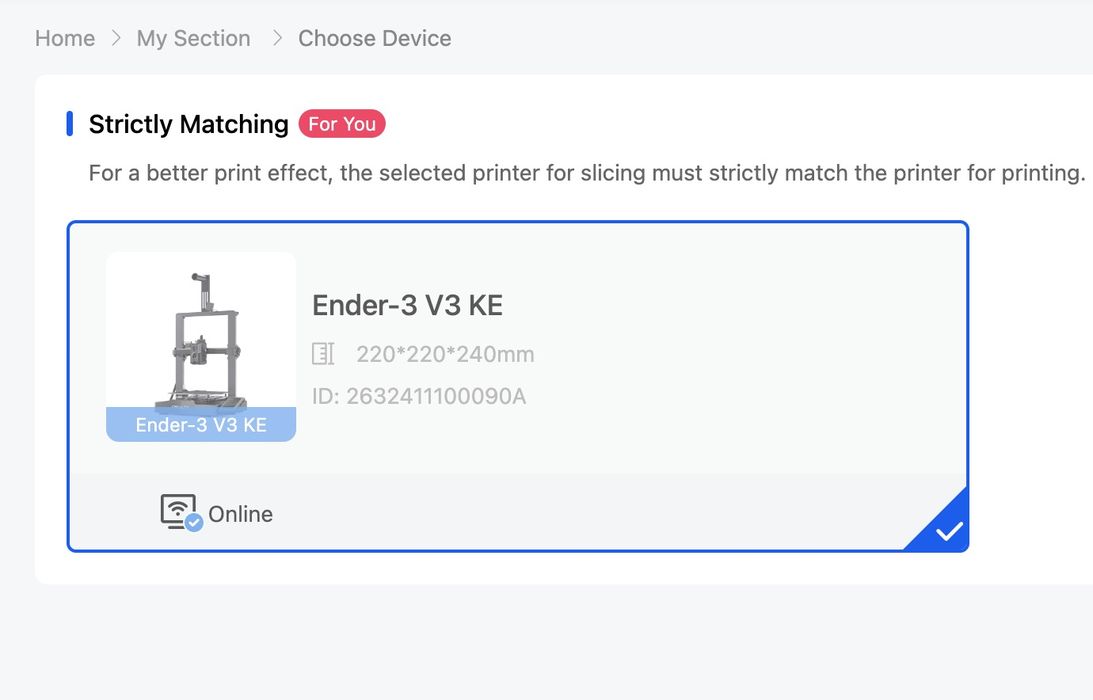
When you slice a job in Creality Print you’re provided options. You can save it to a USB stick for manual mode, or you can do “LAN printing”. The catch here is that you have to select which machine should receive the job, and that’s again why we need to name the printers.
The catch here is that sometimes I found my machine missing! I found the connectivity to be flaky, with the machine appearing and disappearing for no apparent reason. I tried various combinations of powering up, then launching Creality Print, etc., but it’s just random.
However, as long as it is connected and able to receive the job, you’re ok. The job is stored locally on the KE and does not require continuous connection for printing. I found the job download to be pretty quick over the LAN, even for large jobs.
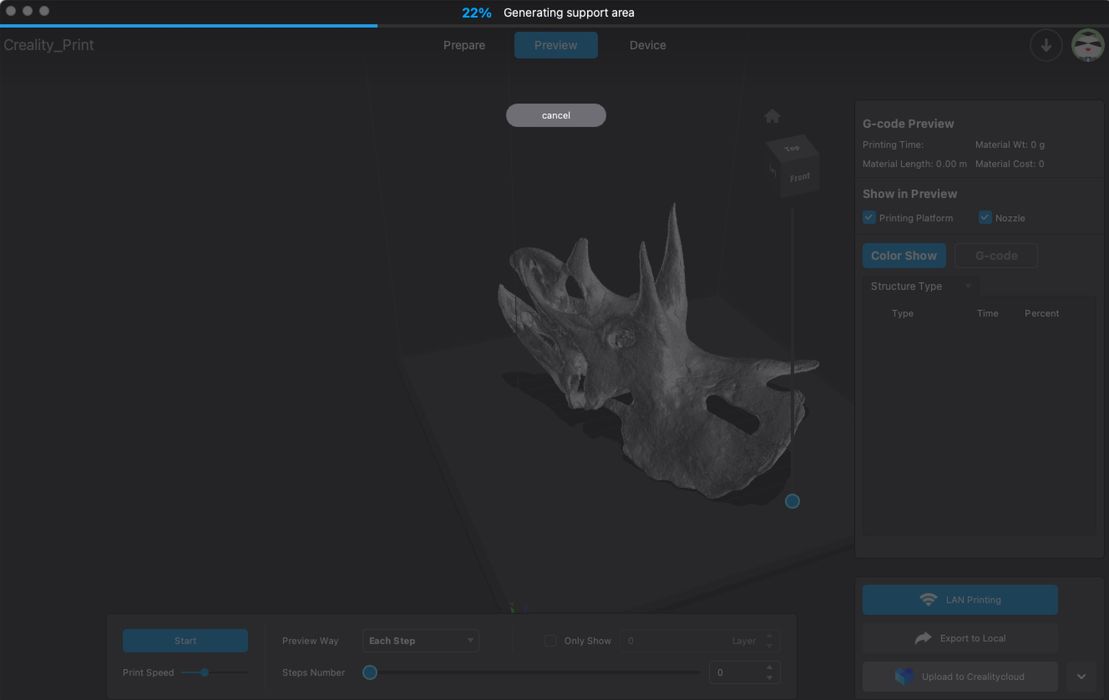
I encountered a series of issues with Creality Print, however. One was shown here, where I attempted to slice a pretty big 3D model. It seems that the software locks up during processing of large models. In this case I had to crash the program and try again with a smaller 3D model.
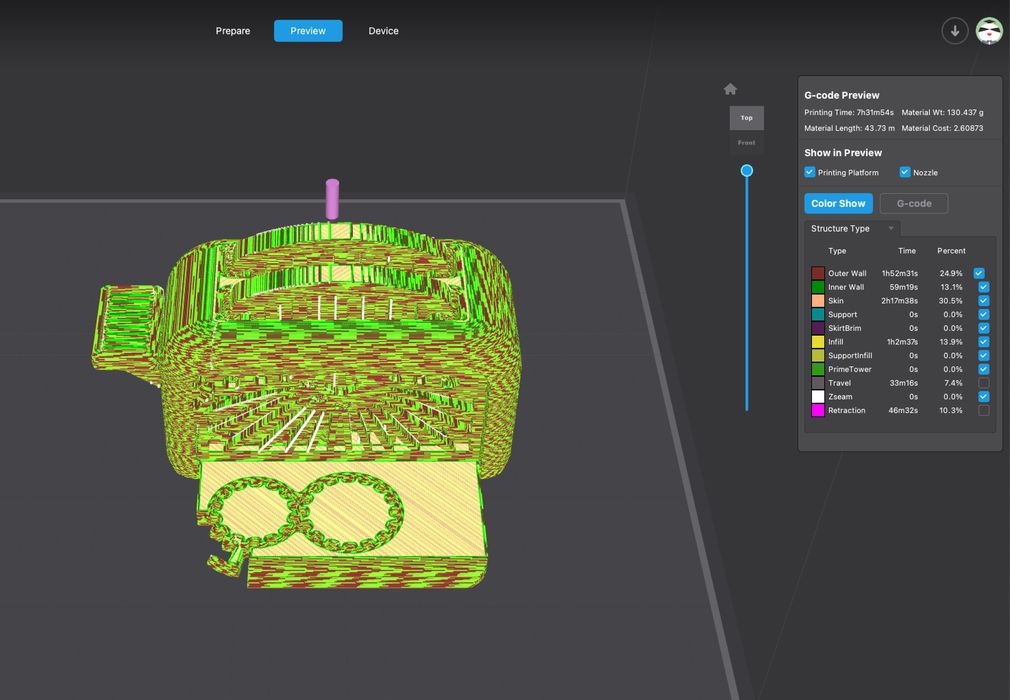
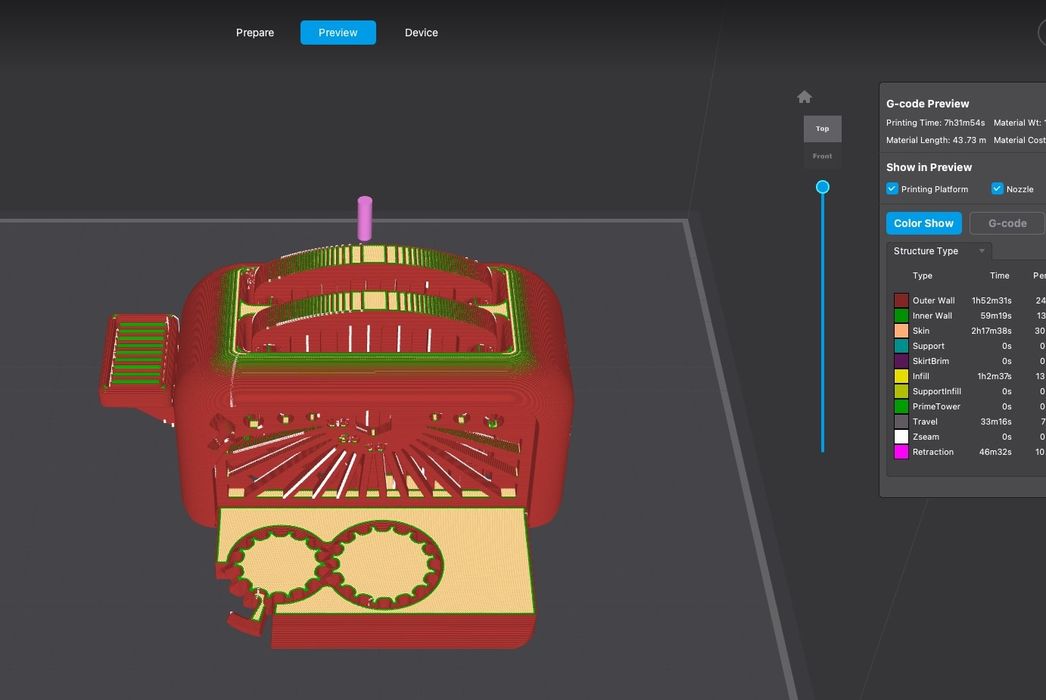
Another strange bug in Creality Print is shown here. This is the preview screen, where the colors of the display should correspond to the legend on the right. Unfortunately I frequently found the preview to be randomly colored. Sometimes it worked, sometimes not.
I asked Creality about these issues and they recognize they have some work to do. They say the Mac OS version of Creality Print apparently has some issues that are being resolved. I’m hoping for improvements in future releases.
Here’s another view of managing a print job, this time from the Creality Cloud app. Remember, this is a cloud-based system, so all your devices share the same account information. You can monitor a job at the touchscreen, from Creality Print, from the app and even from a web page logged into your Creality Cloud account. Note, however, that the app seems to disable display timeout, so the device will remain on the screen until you take action.

It’s possible to do slicing in the cloud as well, although I preferred to use the local Creality Print software.
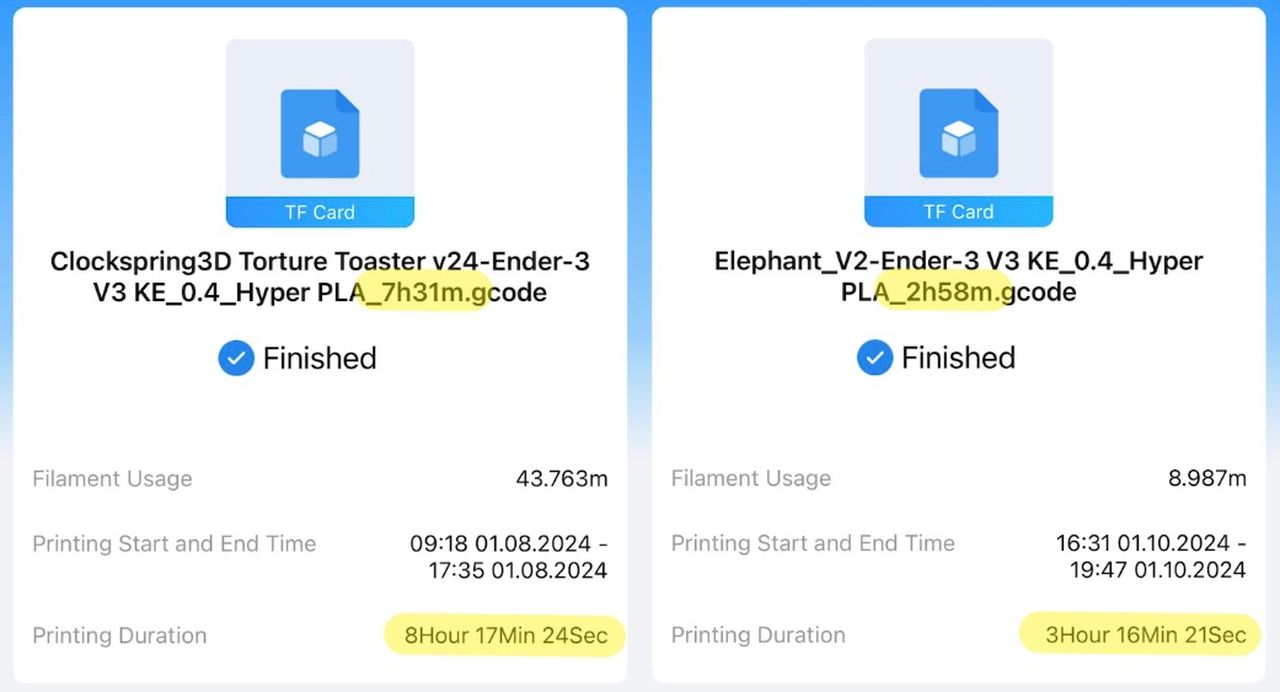
Here’s one issue with Creality Print: the job time estimates are always too quick. In these examples above, notice that the sliced estimate (in the job name) is always lower than the actual print time. Also, remember that the completion message does not mention the total time.
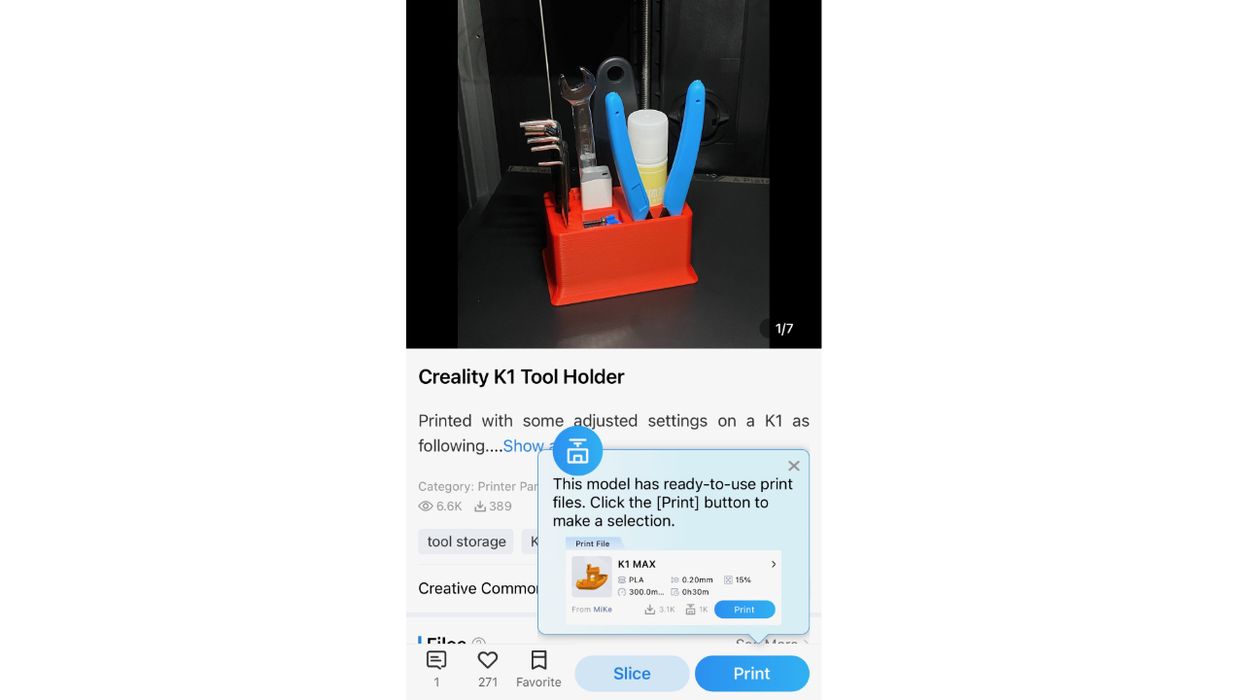
It’s possible to use the app/web/Creality Print to select and download models from their increasingly vast library. These can also be sliced and printed. However, note that many models are not free and require payment in credits on the Creality Cloud system.
One issue I had with this is that some models are loaded with the assumption of a specific (other) machine. For those you have to do some extra work to reconfigure the model for the KE.
While Creality Cloud does provide a lot of convenience for managing your printer, there is a lot more going on at the site. It seems that Creality is jamming in every possible item and service they can think of, and it is extremely confusing.
On almost every page you are bombarded with popups, coins, points systems, signups, offers, models, and other items. It’s extraordinarily noisy and sometimes does not properly guide the user to where they want to go. I feel like I’m at a carnival and vendors are screaming at me from every direction when I use Creality Cloud. Creality should really spend some time cleaning up the interface rather than just adding more and more features.

And yes, there are still plenty of wording mistakes in the service. However, in spite of the errors, it’s usually easy to figure out what’s going on.
Creality Ender-3 KE 3D Printer Print Results
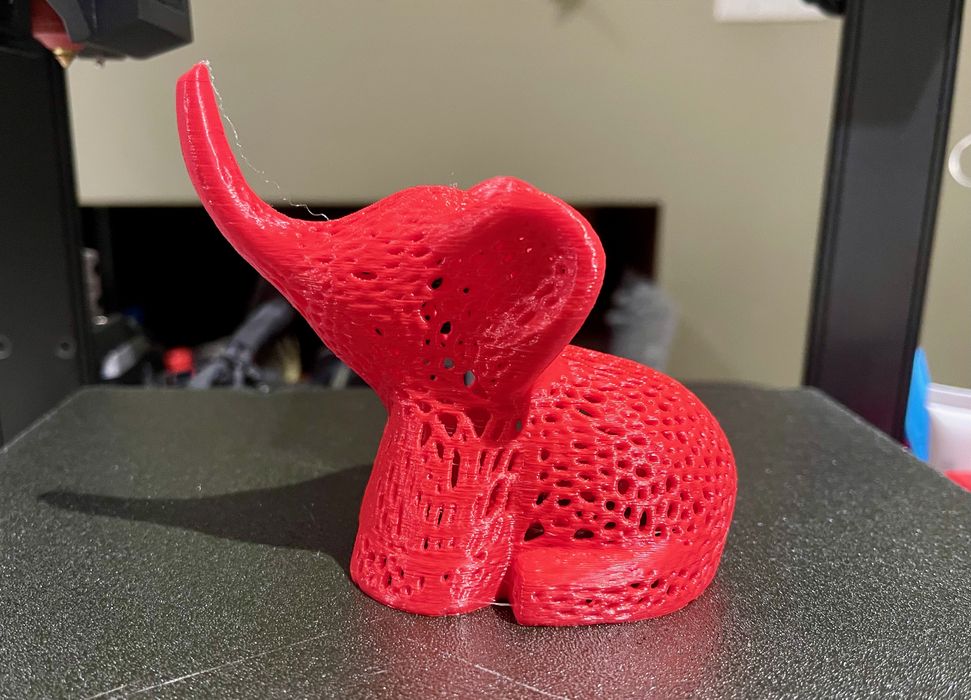
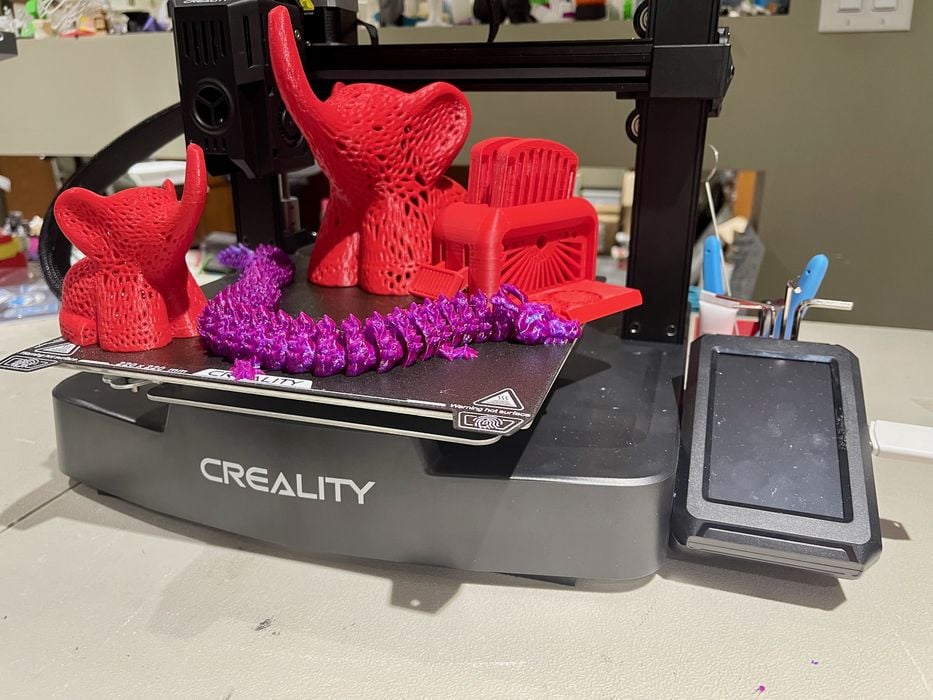
In spite of the software issues, I was easily able to get prints done. Here you can see a wonderful PLA elephant print that finished with minimal stringing.

I used Creality Cloud to find a model for a tool holder for the KE, downloaded it and printed it. It worked very well, and now sits beside the KE holding all the tools included with the machine.
Throughout my testing I kept using the standard profiles provided by Creality, because that’s what most people will do. Any 3D printer can be made to print perfectly if enough time is spent tuning, but that’s not what most people will do.
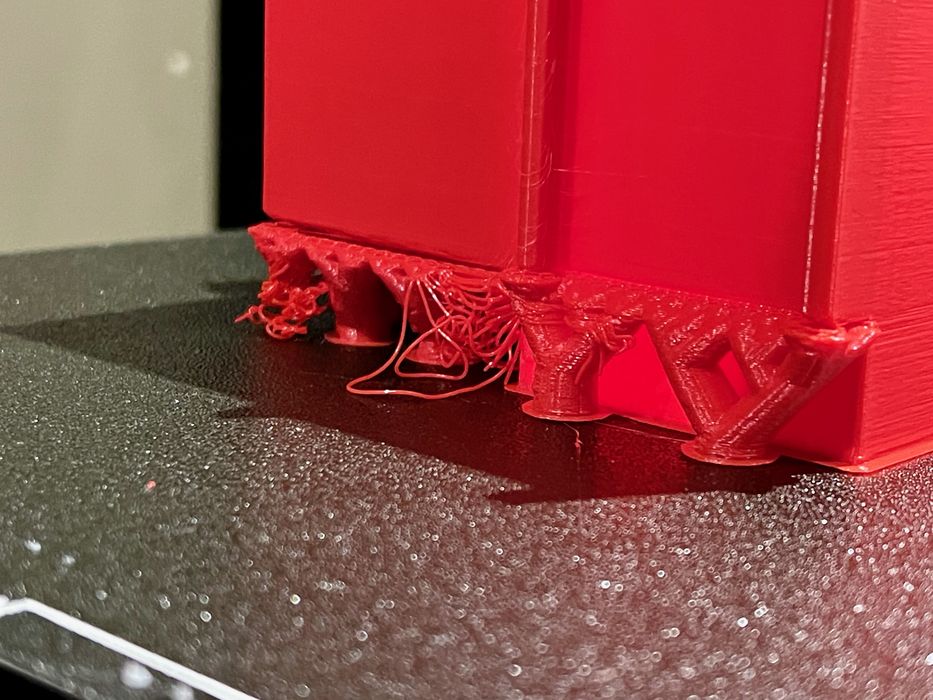
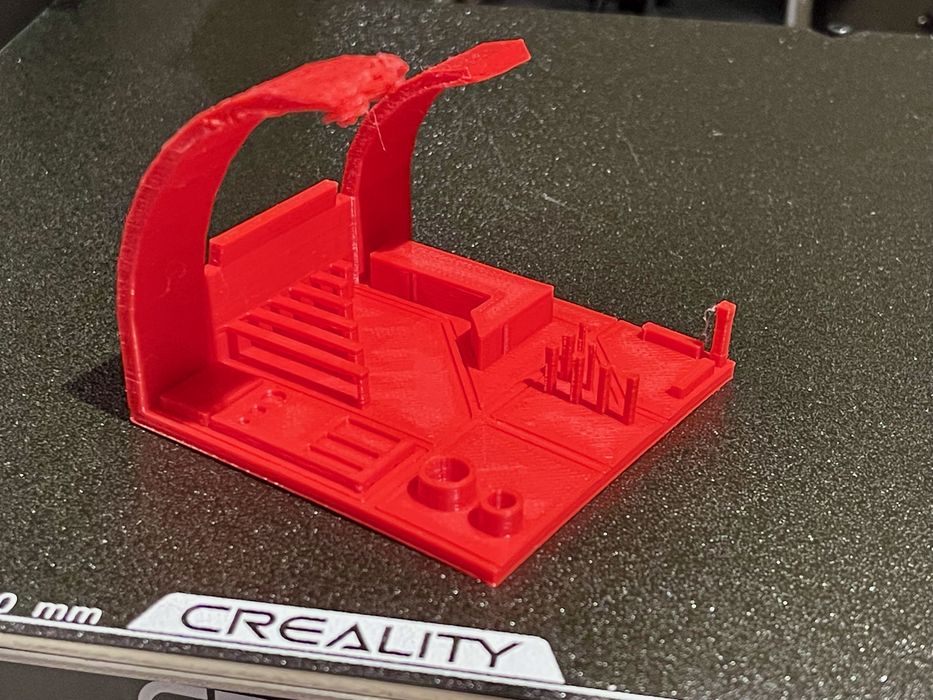
I observed a few instances where there were issues with support structures. As mentioned above, I did see some spindly support trees detach because their base wasn’t wide enough. That’s a tuning issue in the profile that could be easily fixed.
Another parameter that might require tuning is the support gap. I did see some irregular surfaces that were above support structures, although it was always easy to remove the supports.
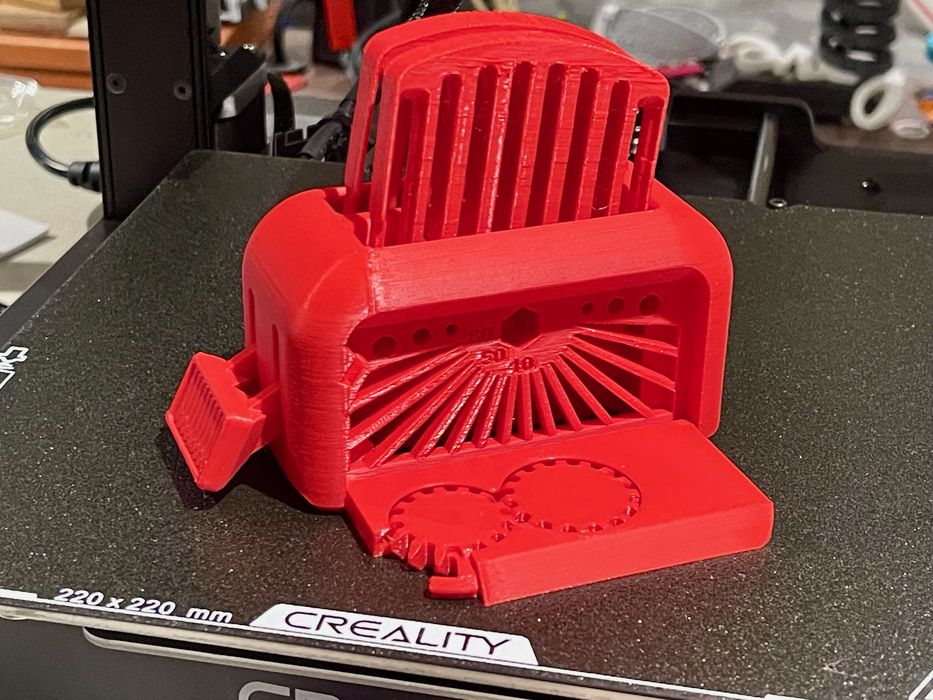
This is the famous torture toaster, which includes a number of mechanical parts. This printed perfectly using default settings, and all feature worked properly. This is why I like the KE; the prints are invariably good quality.
This is a benchmark object that came out near perfect. It is designed to fail at the top where support angles gradually increase, but the test showed that the extra cooling on the KE was able to enable some pretty high overhang angles.
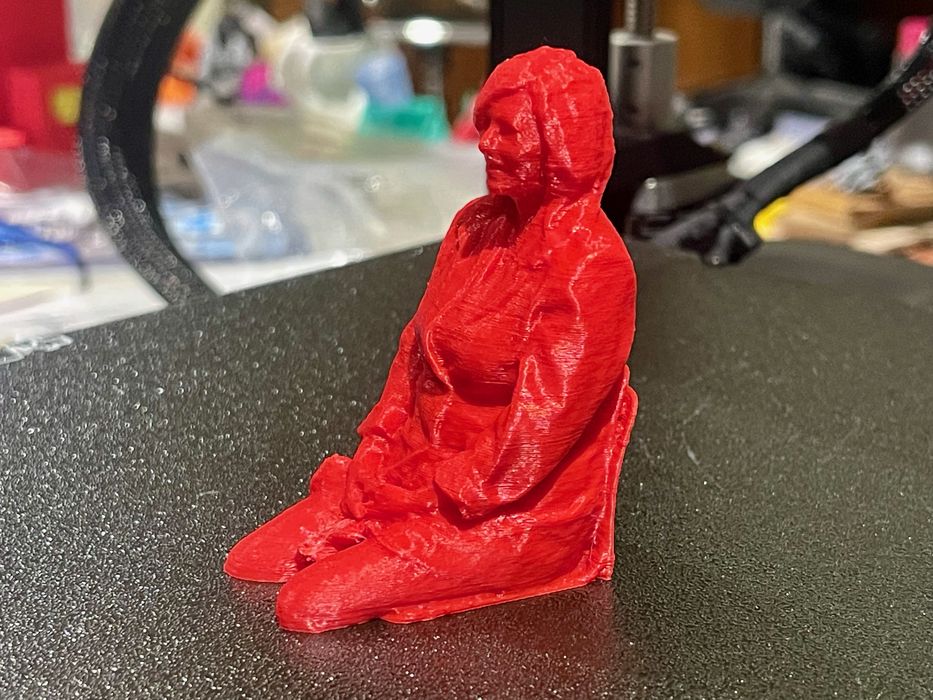
A nice PLA print of a scan I captured. Aside from support structures, I found the KE would easily print objects with pretty good quality.
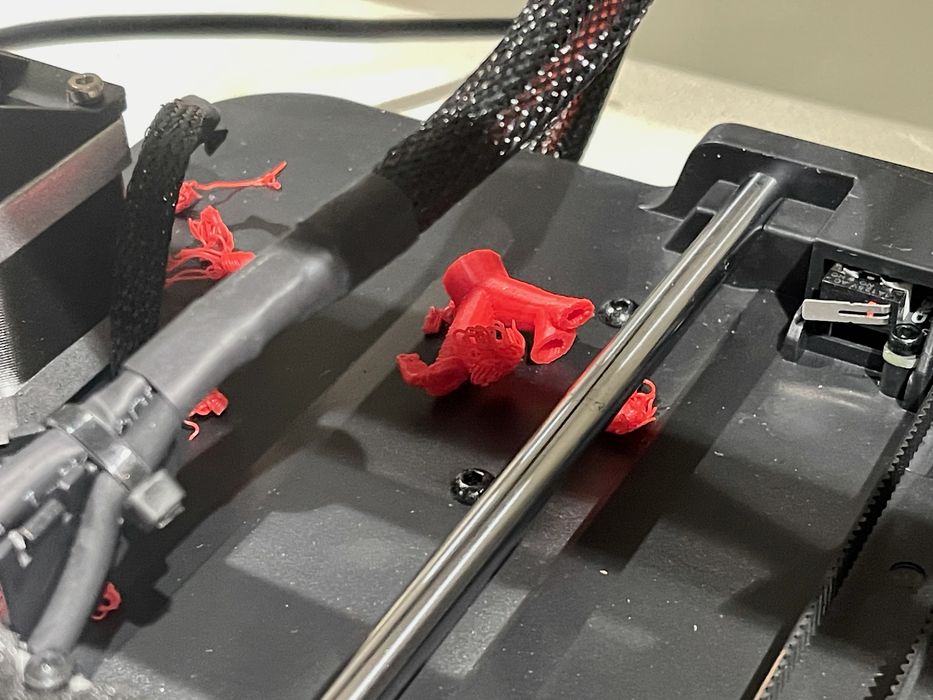
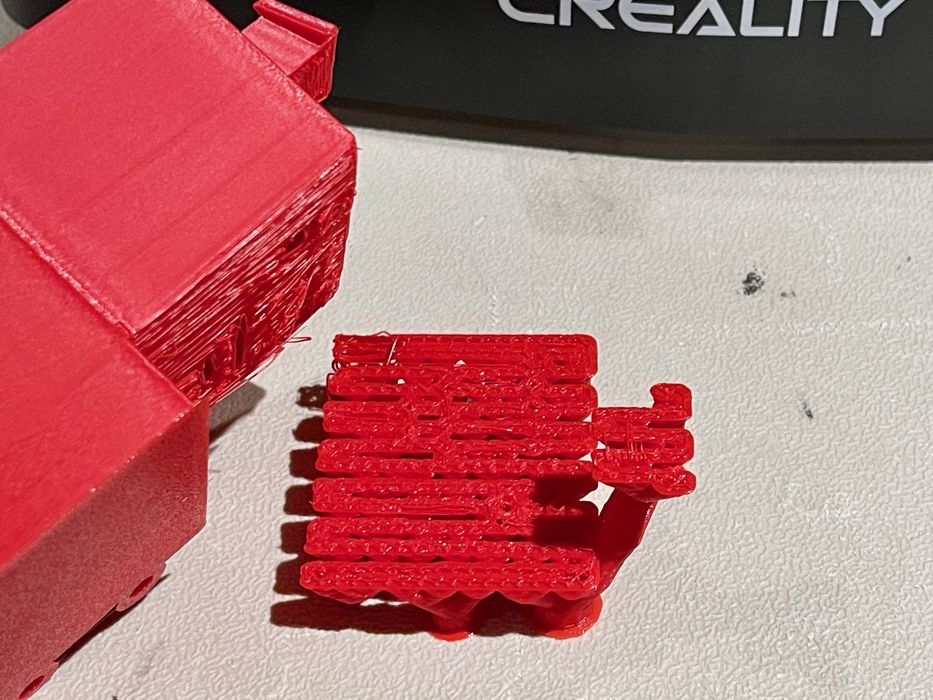
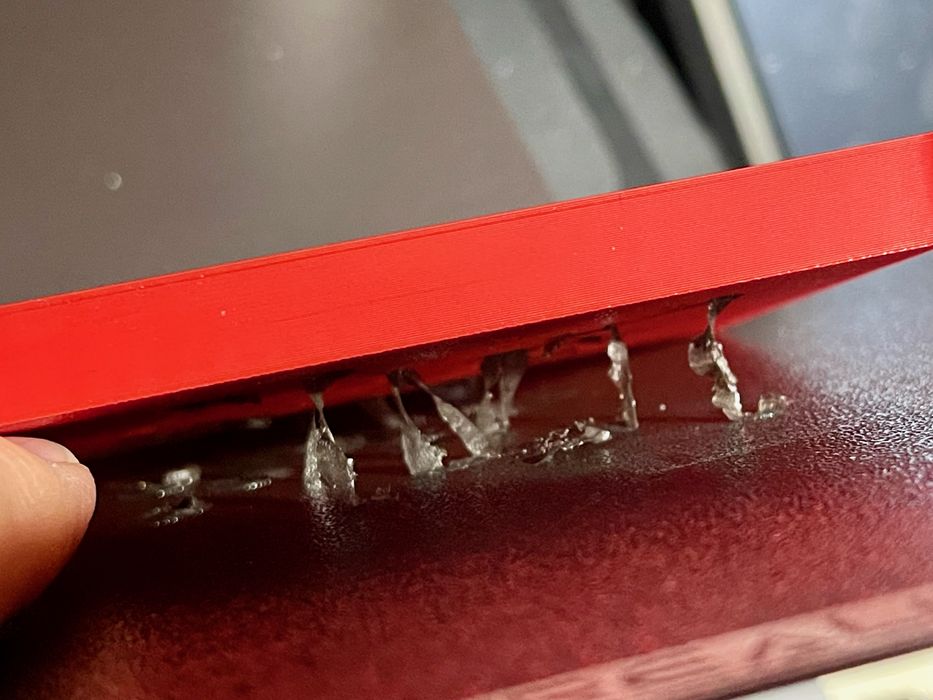
More debris scattered among the mechanical parts of the KE after a detach. I eventually got into the habit of washing the print bed with soap and water after each print or two, just to ensure proper adhesion.
Adhesion is a tricky thing: it must stick during the print, but also release the print afterwards. Creality has to somehow balance both in their design.
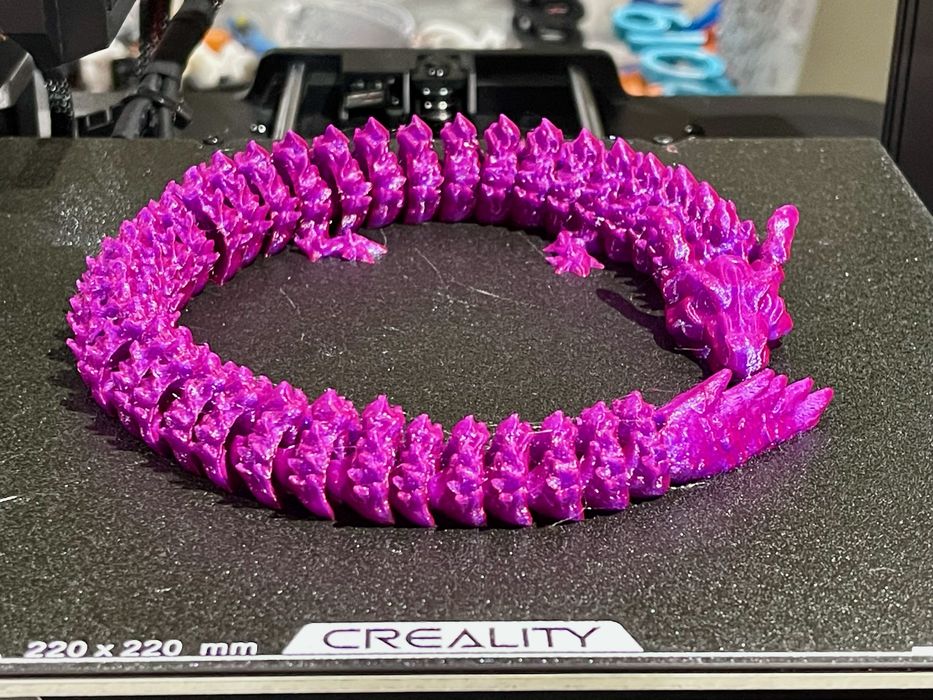
This is a wonderful segmented lizard print made in PETG. I found no issues in printing PETG, and it stuck properly to the plate without the need for glue sticks.
I attempted a TPU print, as that was a supported material. It came out very well, and the TPU was easily loaded into the extruder.
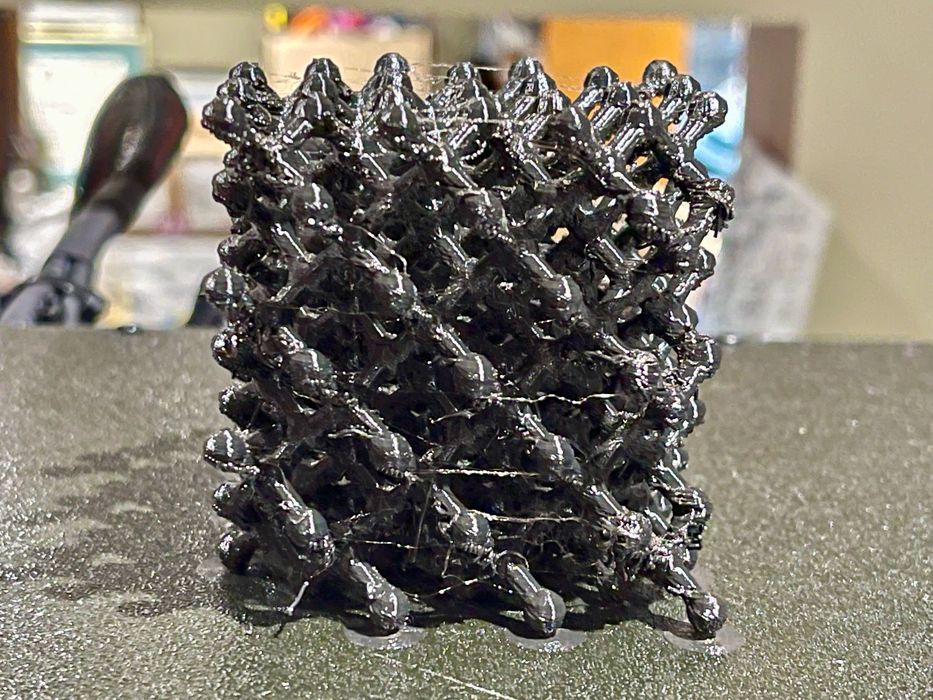
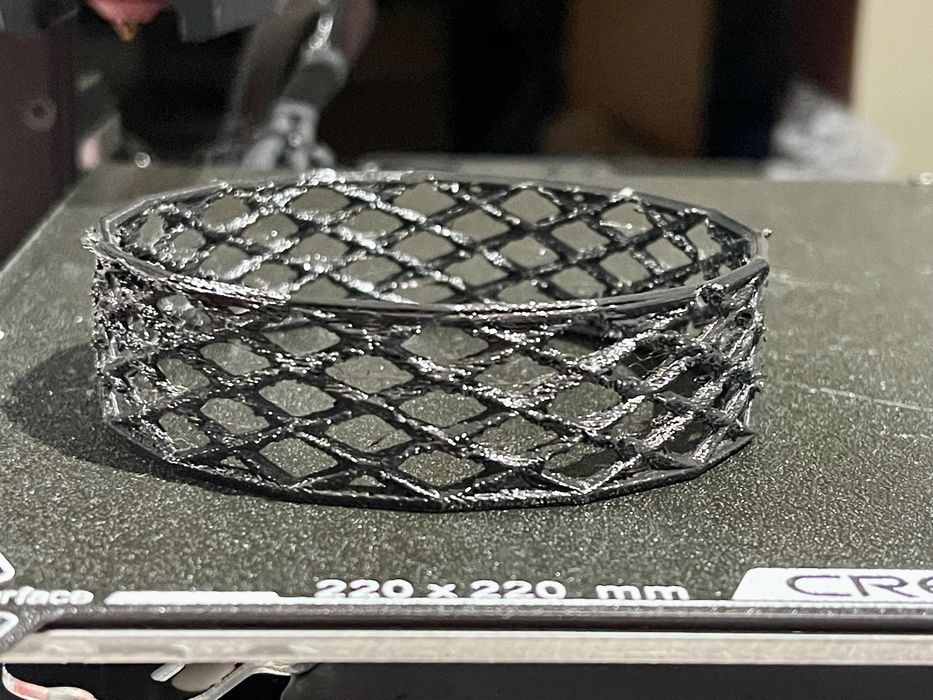
After such a good TPU print, I found a more challenging model, this matrix shape. I was curious to see how the KE would handle stringing on this highly complex model.
The print mostly came out well, with the exception of a missed pillar at the back. But here’s the interesting part: the TPU profile by default includes “autobrim”, which adds a thin brim at the bottom where the model touches the plate.
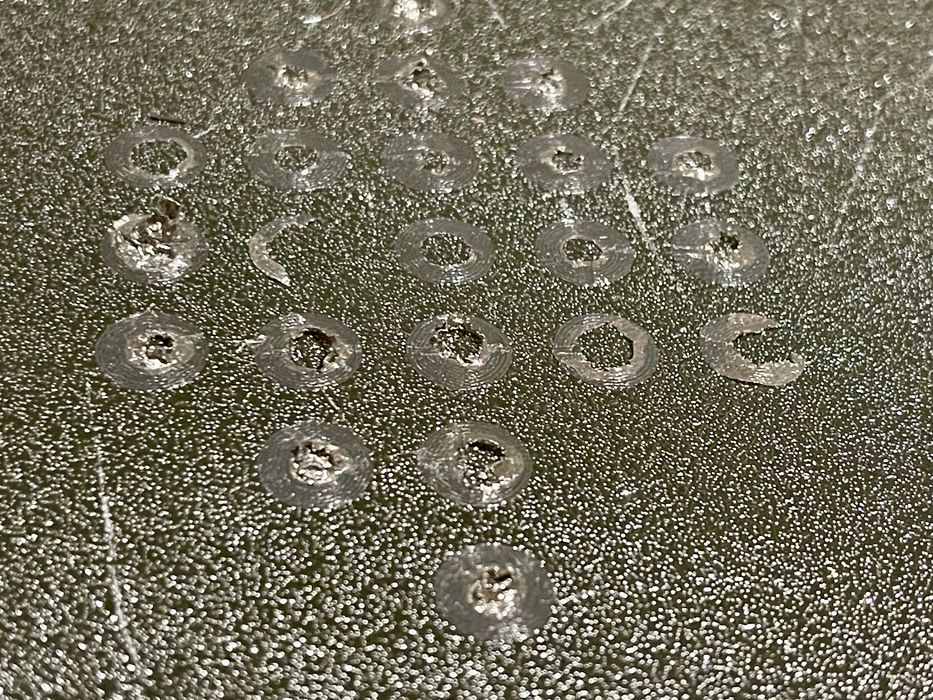
For this model it placed brims around each of the matrix nodes, but they detached as the print was removed, and remained stuck to the plate! I could not pull them off, and flexing the plate didn’t help because, well, they were flexible, too.
My solution was to print a chunk of PLA on top to pull them off, which was sort of successful. There were a few bits left after this, which fortunately came off easily. In retrospect I probably should have printed a plate of TPU instead of PLA, but you get the idea: be careful with TPU printing.
Creality Ender-3 KE 3D Printer Final Thoughts
I’m quite impressed with the KE. It produces very good quality output and from a hardware point of view is an extremely solid device. The only printing issues I encountered were with plate adhesion, which might be solved with glue stick or more frequent washing.
I really liked the remote control and network job dispatch. It’s become an essential feature for me. However, I really did not appreciate the confusing and overly busy cloud environment.
At a price of only US$279, the KE is certainly a feature-packed machine that gives you good value for a low cost.
CREALITY
ENDER-3 KE 3D PRINTER
★ BEGINNER 8/10
★ ENTHUSIAST 8/10
★ PRODUCTION 7/10
BEST FEATURES
✔︎ High speed
✔︎ Solid hardware
✔︎ Remote job dispatch
QUESTIONS
✖︎ Confusing cloud
✖︎ Adhesion
✖︎ Profile tuning
This is part three of a three part series, please read parts one and two.
Via Creality