
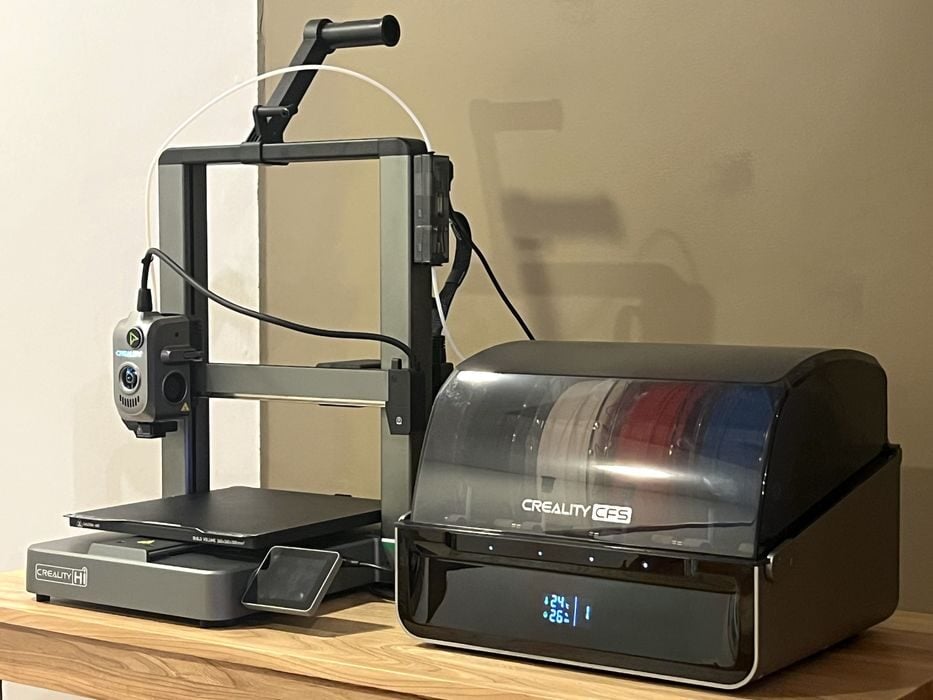
Our review of the new Creality Hi Combo multicolor 3D printer continues with print results.
This is part three of a four-part series, please read parts one, two and four.
Creality Hi Combo Print Results
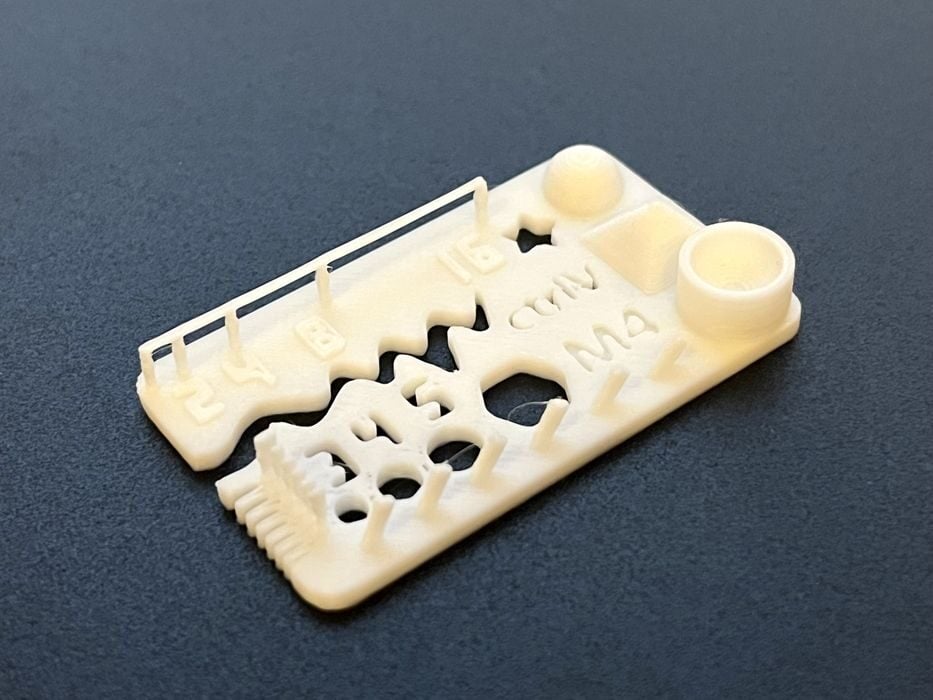
We finished off the sample coil of hyper filament by going through some typical test prints at a 0.2mm layer height.
CTRL-V with an estimated print time of 12m, completed in 13m and had excellent quality.
When we ran out of the sample coil, we loaded a roll of Elegoo Rapid PLA+ onto the spool holder.
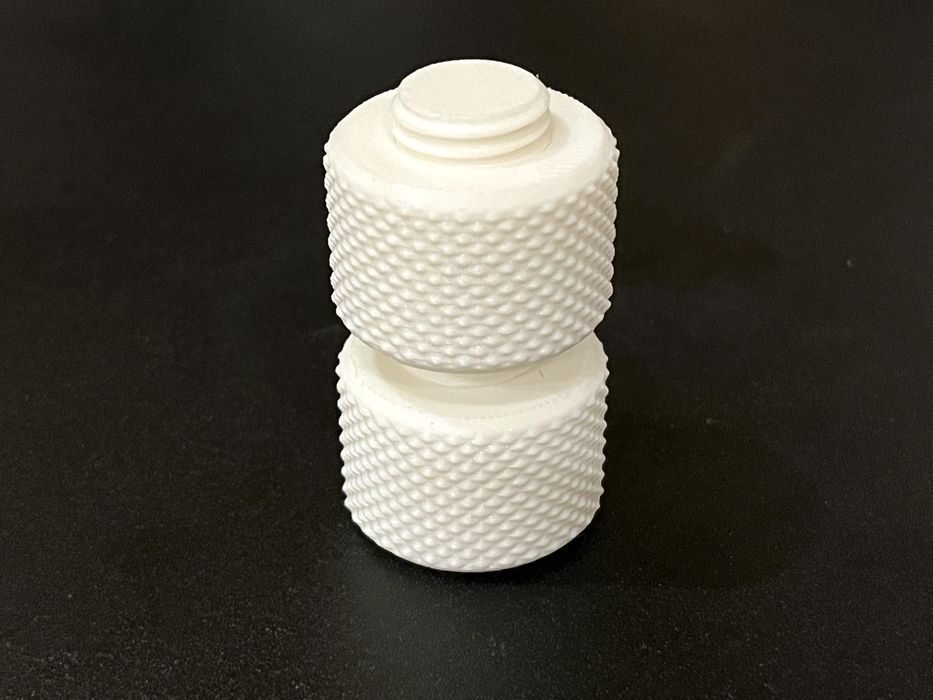
Since the Elegoo filament was similar to Creality’s, we left the material setting the same and printed a Knurling Nut & Bolt, getting an estimated time of 58m that completed in 53m, with both parts having an excellent surface finish and spun together fairly easily.
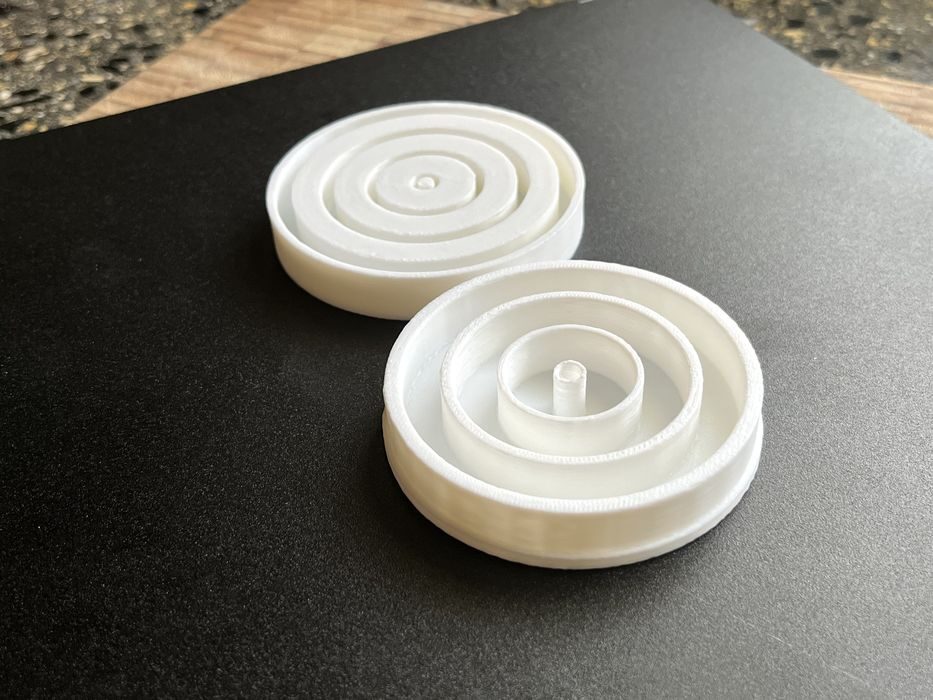
The Cylindricality test got an estimated print time of 1h17m, completed in 1h16m and fit together perfectly.
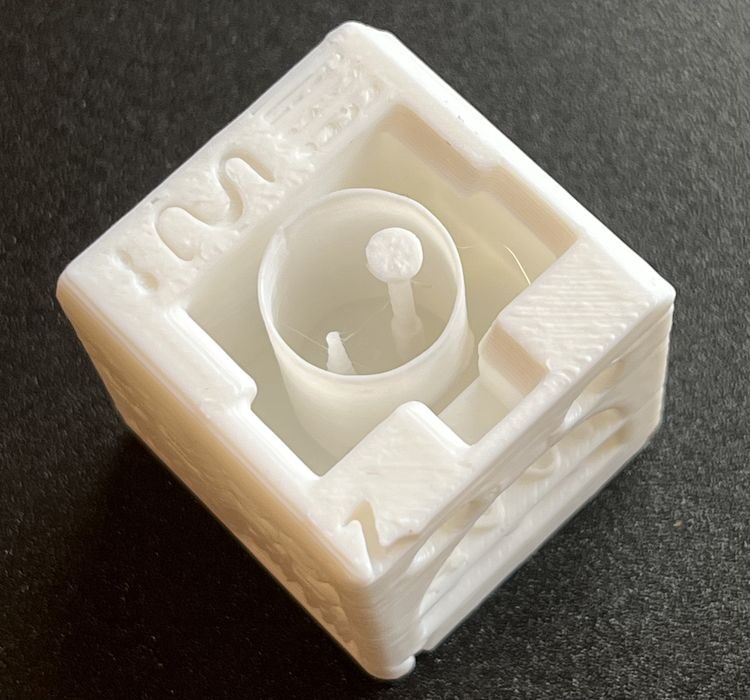
QuBenchy got an estimated print time of 40m, completed in 40m and had really nice details.
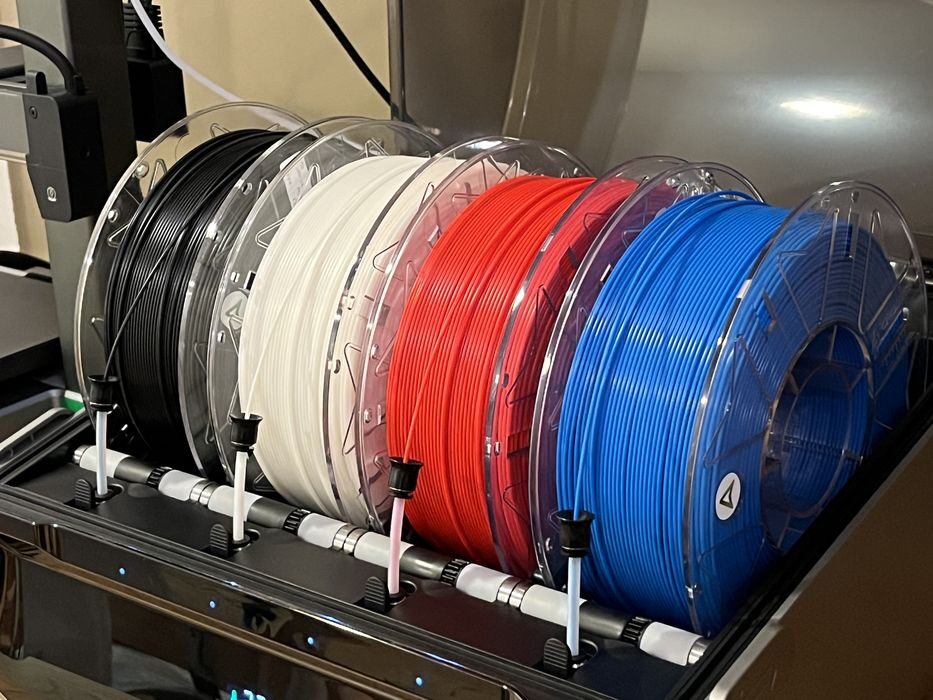
Now that we had a feel for the Creality Hi Combo, it was time to swap over to the CFS and try some multi-material prints. To keep things simple, for our first attempt we chose a dual-colour poker chip model.
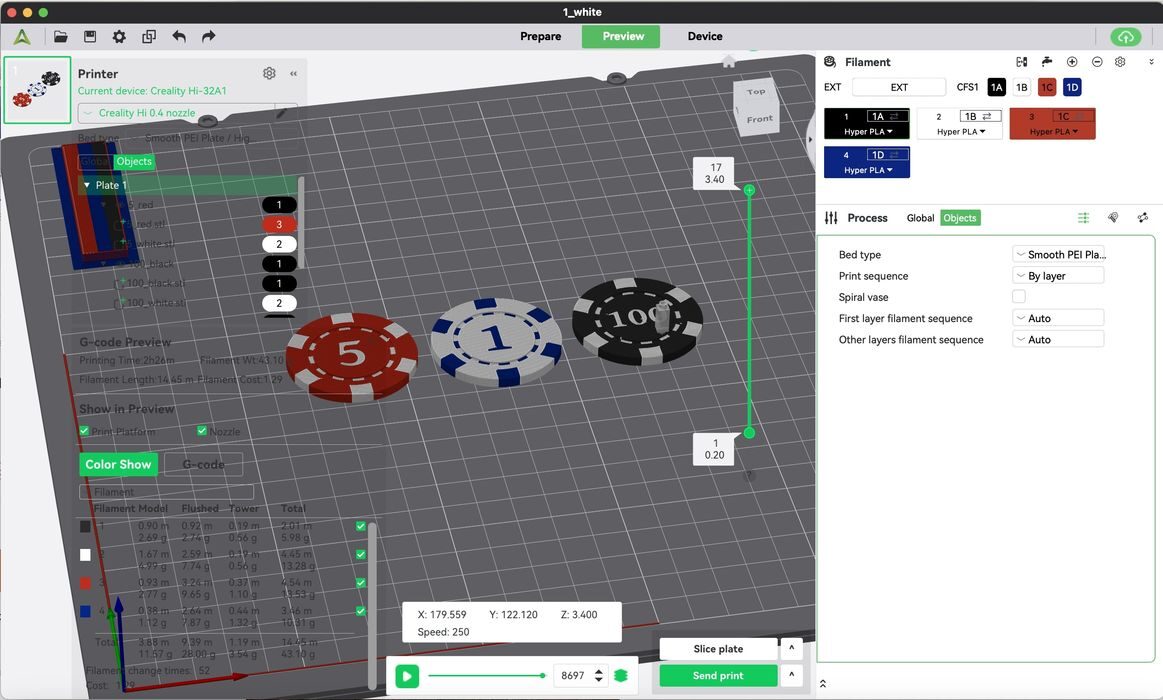
After importing the STL into Creality Print, we switched to Object under Process and right-clicked on the various parts of the model, changing each part to the required filament colour and then sliced the print.
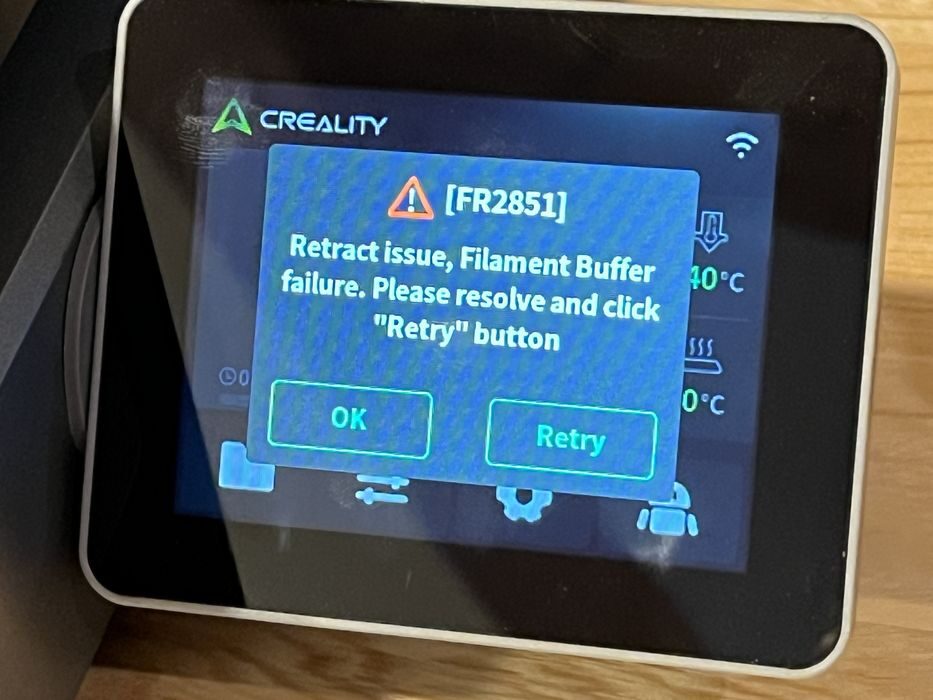
The job started with white PLA and then switched to red PLA with no issue, but when it went to retract the red it gave an error message of, FR2851: “Retract issue, filament buffer failure. Please resolve and click the retry button”.
We weren’t quite sure how to resolve the problem, so we clicked retry, but the error persisted. We cancelled the print, unloaded the red PLA and restarted the print from scratch to see if we would get the same failure, which we did.
We went back to the slicer to double-check our settings and noticed a warning that said the flush multiplier setting was too low.
When we checked that setting, it said to Recalculate and then displayed a flush multiplier of 1.3 instead of 1.0. Was that our issue? Given that we were able to initially extrude white filament and then unable to extrude red, we deleted the red poker chip, re-sliced our job, and sent it to the printer, but had the same error retracting white filament.
We stopped printing and began testing multiple instances of loading and unloading filament from the CFS and noticed that the gears on the extruder itself were not activating when filament arrived.
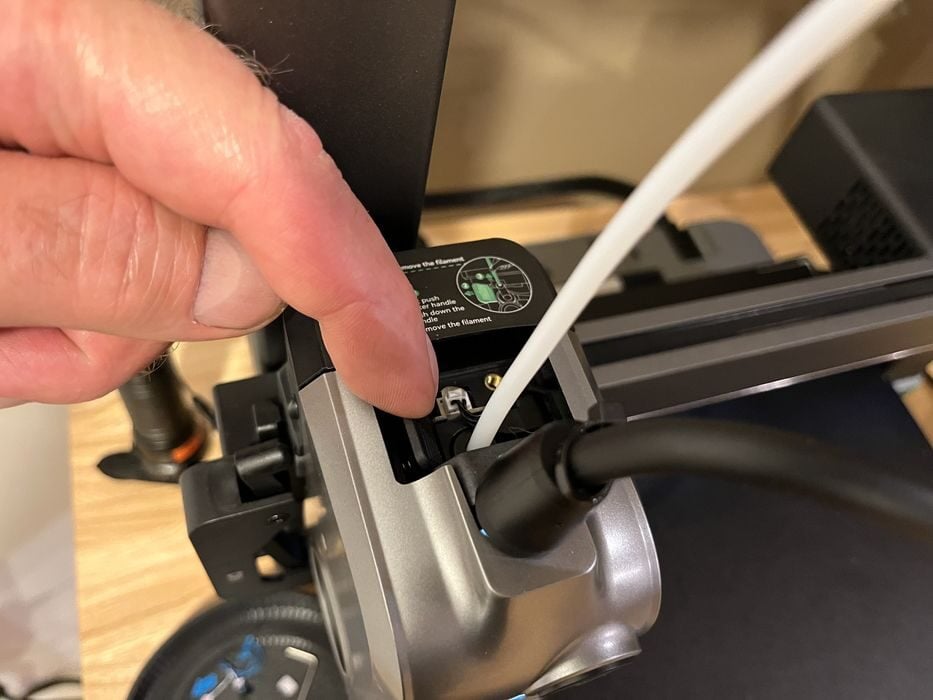
To be specific, the filament could not load from the CFS and into the extruder unless we held open the lever for the extruder gears as the filament arrived.
Also, the CFS would fail to unload the filament unless we manually held open the same lever during a retraction. We also noted that the load routine was far too brief overall to properly load the filament into the extruder and purge properly.
We contacted Creality support with our strange issue and they had us check to see whether the filament buffer LED was lit. We found that it was not, but looking back in our photos found that it had been lit when we had initially installed and hooked it up.
With the buffer dysfunctional, loading and unloading of filament with the CFS was simply not possible, as the buffer sensor is clearly part of the load or unload routines.
The replacement buffer Creality provided did not come with any instructions or double-sided tape, so we went to the Wiki to check if there was a different way of installing the buffer.
After a quick search, we found that Creality now employs the use of a filament buffer bracket that is available as either a downloadable STL, or pre-sliced GCODE file. This simple bracket clips into place on the frame of the printer and acts as a holster for the filament buffer, making the buffer removable whenever required. A much more eloquent solution than double-sided tape!
The pre-sliced G-Code for the bracket had an estimated print time of 1h27m. However, there wasn’t any information to tell us what kind of filament to use. But when we started the print, we saw the nozzle temperature go to 220C and the build plate temperature reach 60C, so PLA was the mystery material.
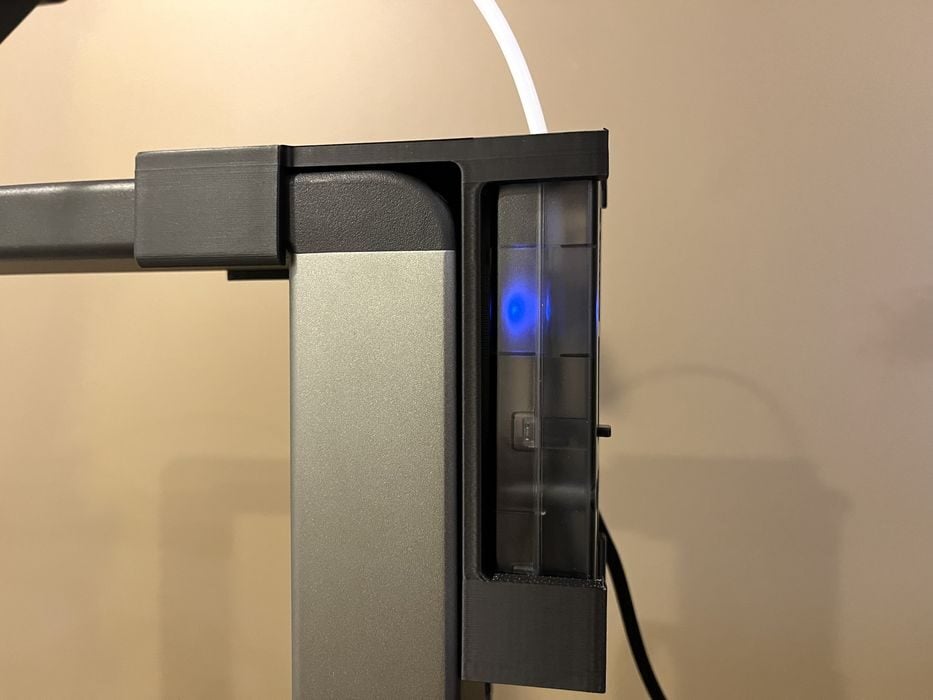
The finished bracket clipped into place nicely and the buffer easily installed into the holder. When we connected everything back up again and turned on the printer, we saw that the LED on the new filament buffer was active!
We reloaded the CFS with all the filaments and relaunched our previously failed Poker Chip print from the history tab on the touchscreen and waited to see if everything would function correctly.
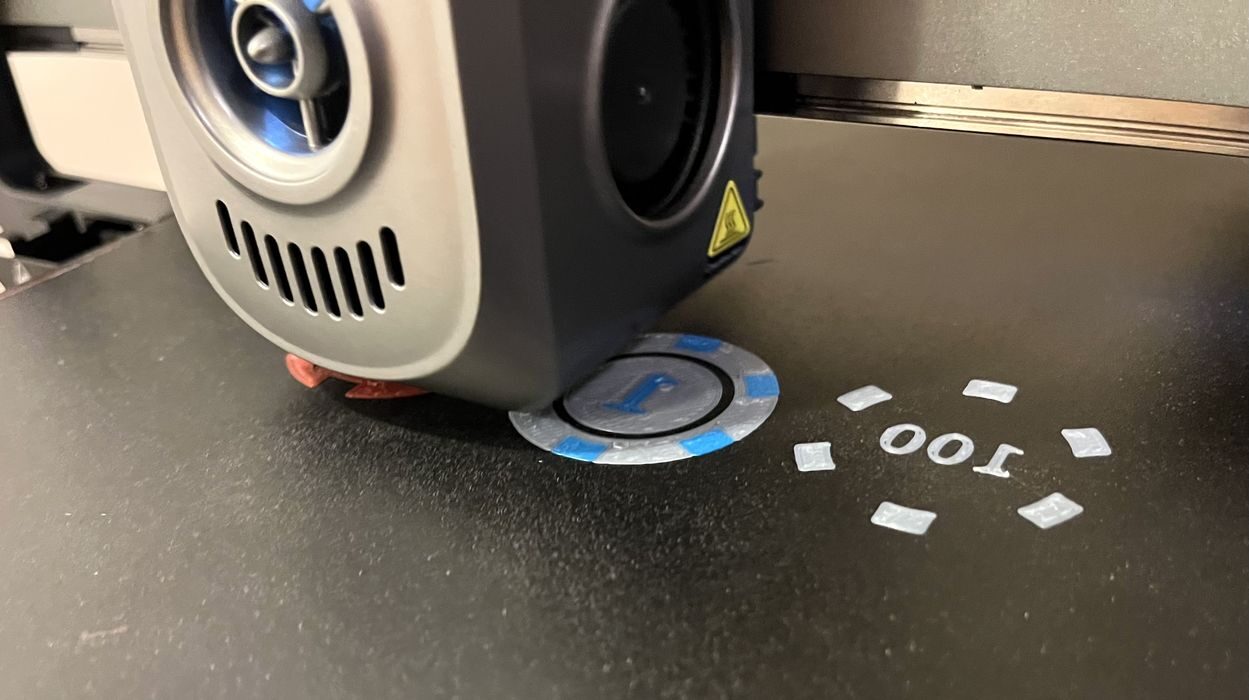
The printer went through its various start-up procedures and this time when the filament moved from the CFS to the extruder, the gears were turning and grabbed the filament, purging it twice before laying down the first layer of white filament onto the build plate.
When it was time to switch to the red filament, the extruder moved to the right and cut the filament, retracted the white back into the CFS, loaded the red filament and purged it twice, and then began printing red on the build plate. We were happy to see the system working properly now and left it alone to do its business.
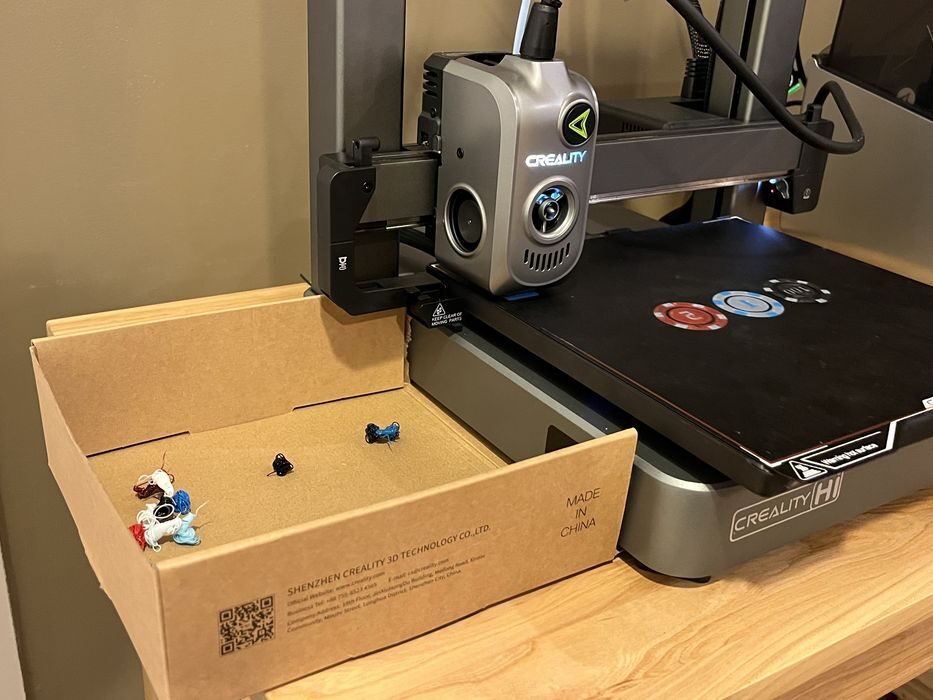
But before we walked away, we realized that there wasn’t anything to catch the filament “poop“ being generated with each filament change and we really wanted to keep track of how much we were generating per print. We tore the lid off one of the boxes the filament shipped in and found it was perfect to use as a poop bucket.
We came back later to find the touchscreen displaying that the print completed in 2h10m using a total of 12.9m. It would have been more useful to see the total in grams instead.
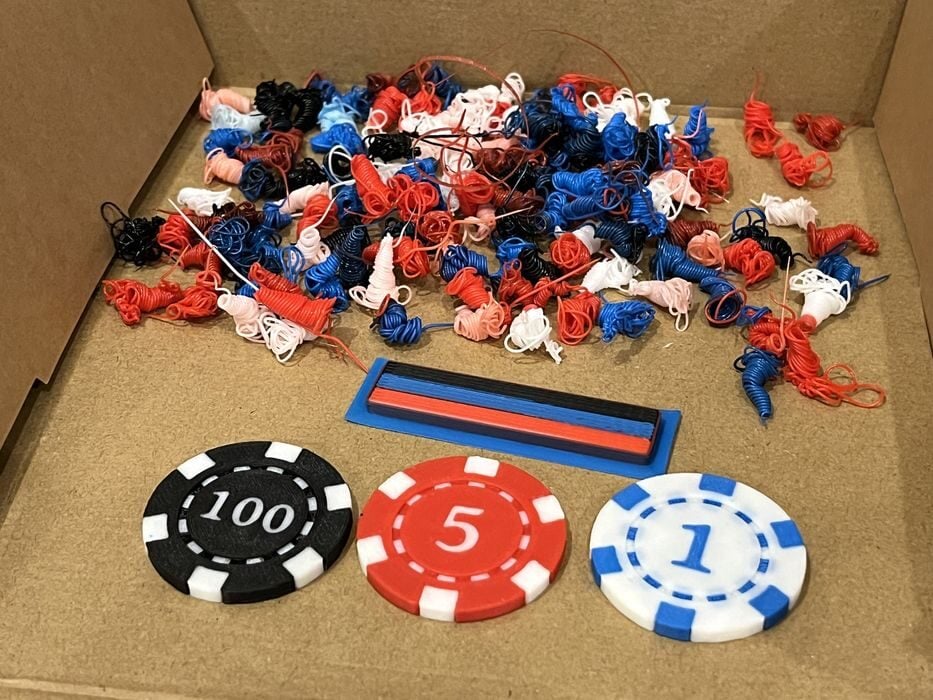
That said, the info generated when slicing gave us much more detailed information on the amount of filament estimated to be used, measuring it in both metres and grams – model was 3.88m or 11.57g, prime tower was 1.19m or 3.54g, and flushed amount was 9.39m or 28.0g, giving a grand total of 14.45m or 43.10g. There were 52 filament changes in total. The completed Poker Chips print looked fantastic, but we certainly had wasted a lot of filament getting them.
Next we decided to demonstrate the usefulness and convenience of a CFS, but without all of the waste. We imported and sliced a Spider-Man Wall Art print getting an estimate of 55.9g for the model, 1.03g for the prime tower and approximately 5.87g for flushing, getting a total of 62.89g of filament over 13 filament changes.
This was a much better ratio of filament used to produce a model. A good practice on any multimaterial FFF 3D printer is to play with different part orientations to reduce filament waste.
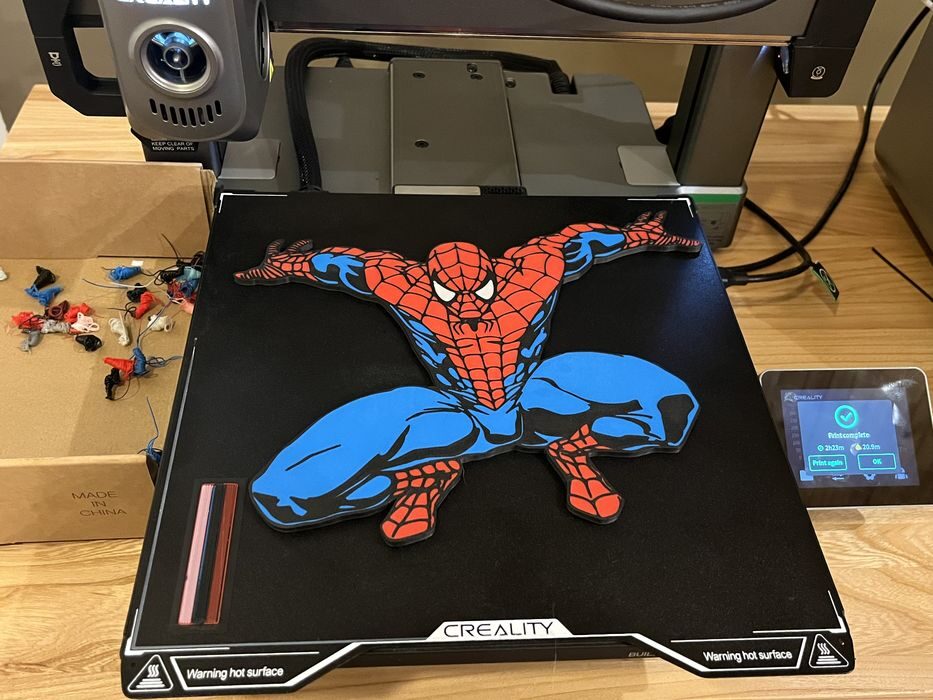
The Spiderman print was oriented good side down to take advantage of the textured build plate for a nice finished surface. It completed in 2h23m and really wowed us when we flipped it over to see the finished surface!
Our next print was Race Frog with an estimated print time of 8h54m using a total of 145.94g of filament – 19.26g for model, 17.90g for prime tower, and 108.78g for flush and doing 241 filament changes. The ratio of model to wasted filament for this print would be quite high.
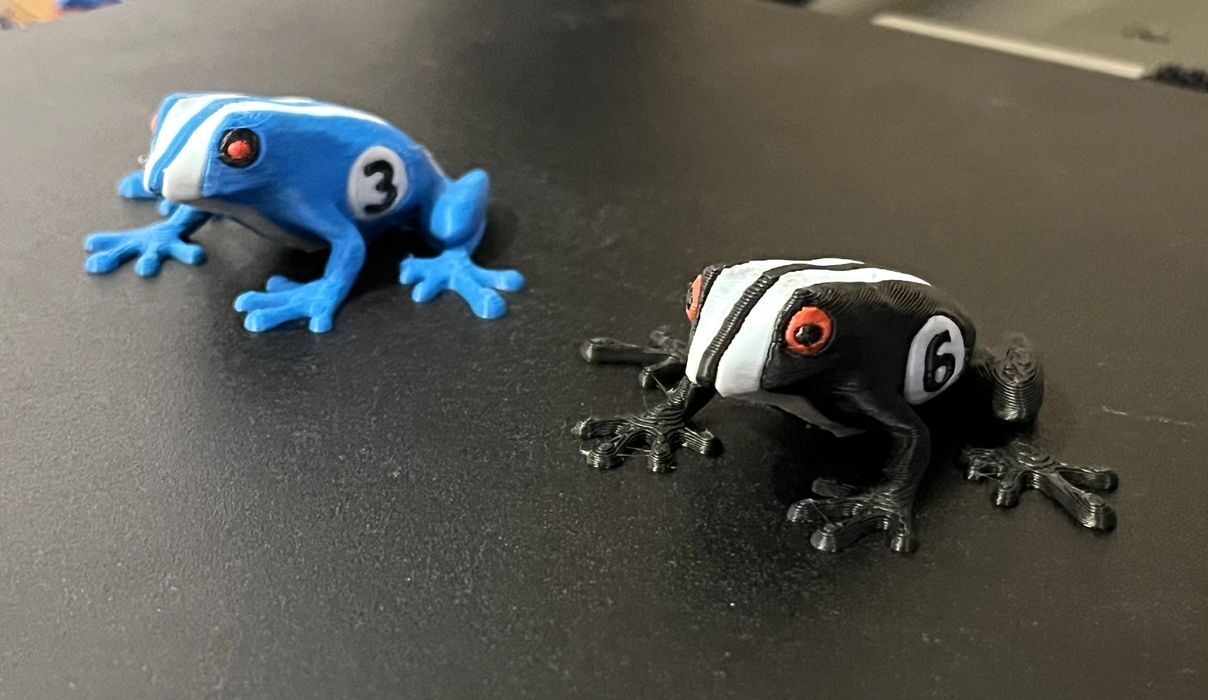
We noticed before uploading the job to the printer that the file name had assumed the name of one of the parts of the model. For the convenience of tracking, we changed the name of the file before starting the print, something operators should always check.
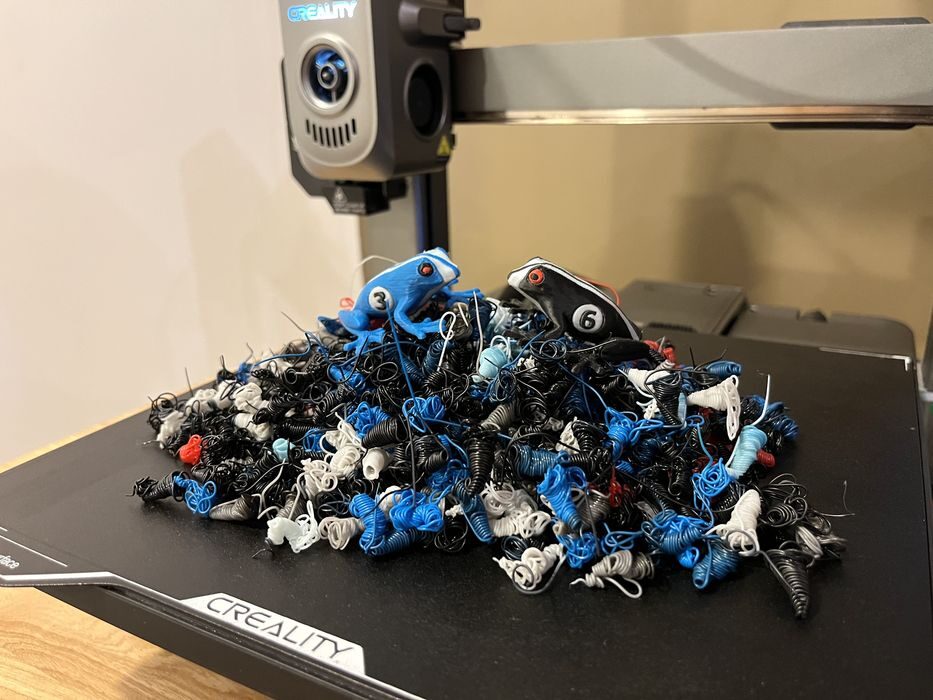
The job completed in 6h51m, with both of the frogs both looking quite good, but the amount of filament wasted to make them was enormous.
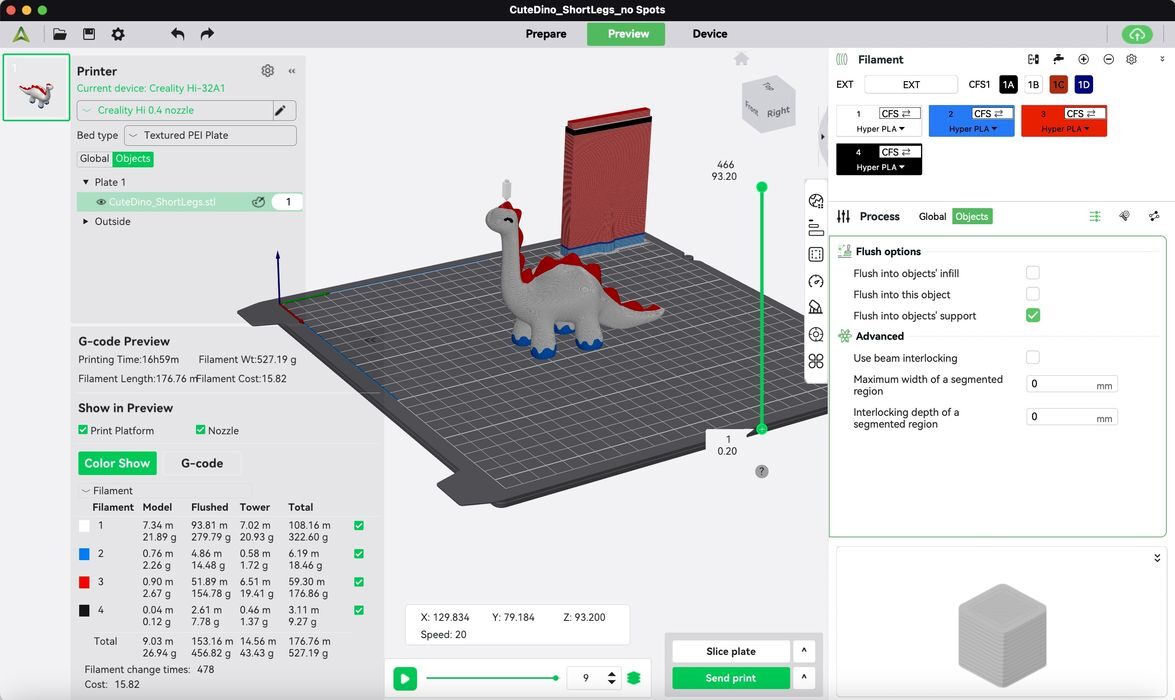
Next up was Cute Dino Short Legs. When we sliced this fellow we were shocked by the amount of predicted filament usage.
The model itself would only use 26.94g of filament, but the total amount consumed would be 527.19 g! Then we remembered that the Flush Multiplier had been changed from 1 to 1.30 back when we were troubleshooting the buffer issue.
We decided to delay printing the Dino and instead reprint our Poker Chip job with a lowered multiplier of 0.8 to see if we could get a quality print using less filament. It completed in 2h10m and looked very good with nice clean colours and used slightly less filament.
We reloaded and sliced the Dino print with the new 0.8 flush multiplier and also tried disabling the prime tower. Doing so dropped our estimated total filament usage down to 307.91g versus 527.16 g!
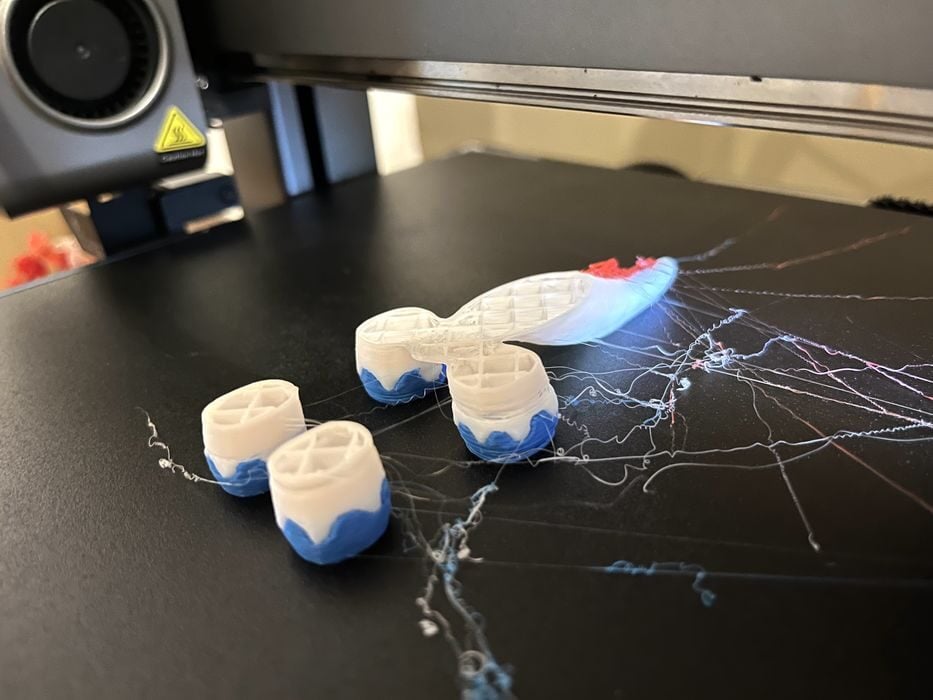
We checked in on our print after some time, and found under extrusion and stringing, so we stopped the print and re-sliced it, adding the prime tower back in for a total of 351.43g of filament over 478 filament changes.
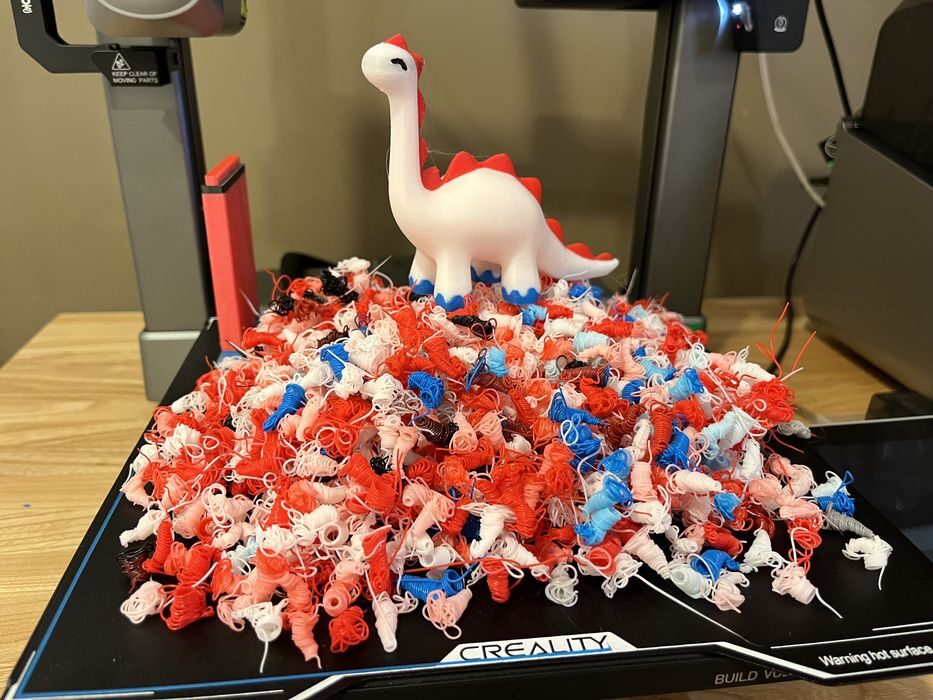
This new print was successful and looked great, but the amount of purged filament was enormous.
We determined that the poor extrusion for the initial print had been directly related to not using a prime tower, as without it extrusion was inconsistent at the start of each material change.
We switched back to the spool holder to load up some PETG and adjusted the material type on the touchscreen. When we launched Creality Print we were notified that there was already a new version available.
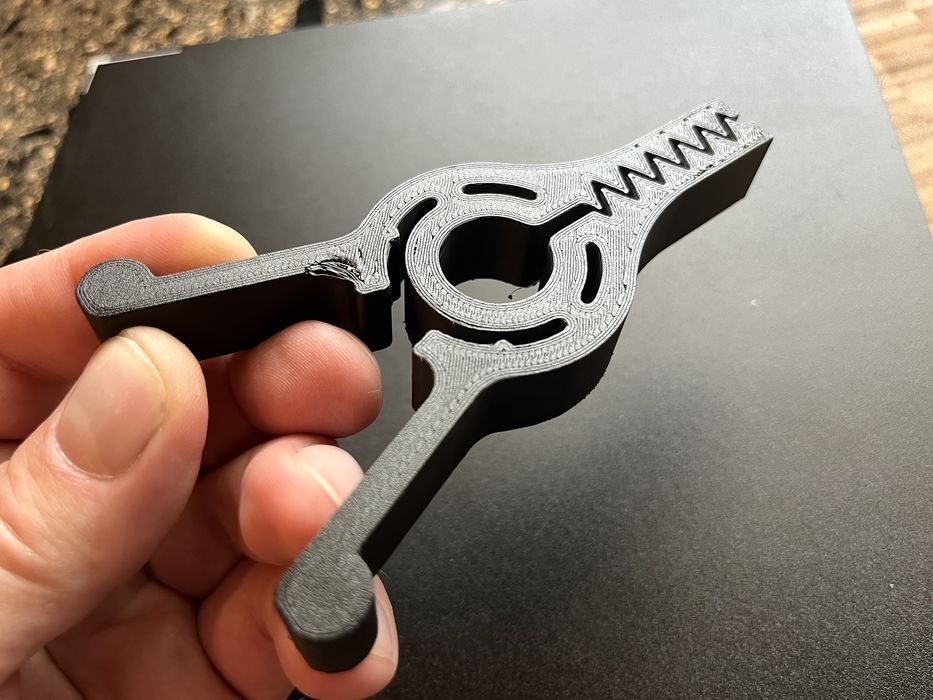
Once updated, we loaded and sliced a Large Chip Bag Clip model getting 1h10m and using 24.98g of filament. When we sent the print to the Hi we made sure to select the Spool Holder as the filament device. The print had a small first layer defect, but otherwise very good.
We loaded up some ABS filament to do a Bottle Opener Whistle print, adding a brim just to be safe and sent it to print. Time to completion was only 16m and the finished print looked great with no warping.
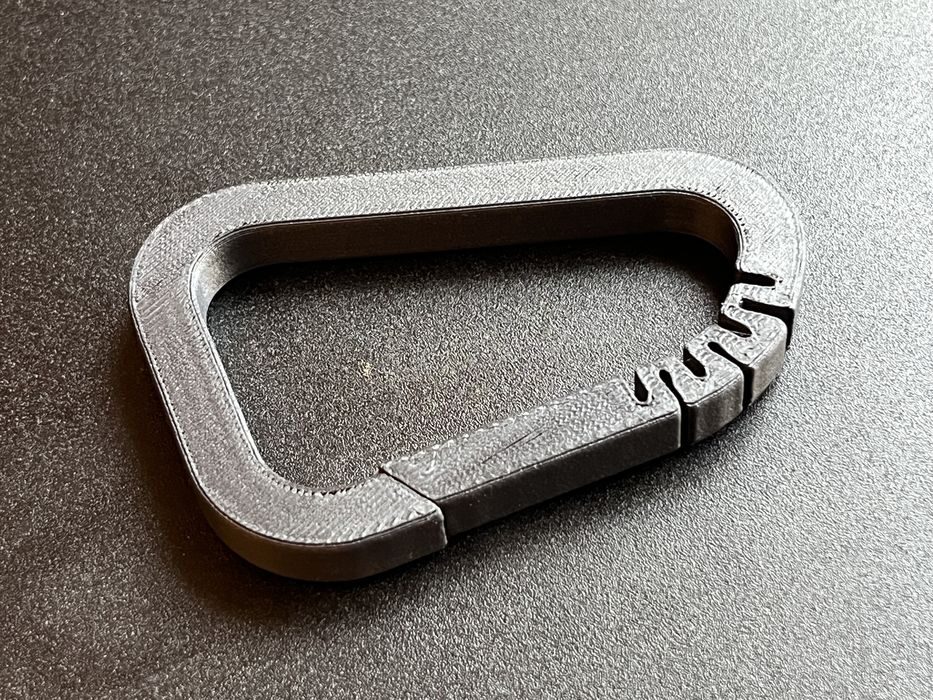
The Hi Combo is advertised as being able to print PLA-CF, so we loaded some up to do a carabiner print. The closest available profile in Creality Print was for Hyper PLA-CF, but our filament wasn’t high-speed, so we edited and saved a new filament profile with a lower volumetric flow to better match up with our slower 70mm/s filament. The print completed in 19m and had a great surface finish.
Creality Hi Combo printer specifications do not list TPU as a supported filament; however, the Wiki walks through the steps you can try if you want to attempt printing TPU from the spool holder, but warns of several possible failure points.
The instructions make it clear that the CFS does not support TPU at all. The printer material menu and the slicer both have TPU profiles, but only for 95A as they advise that anything softer would cause jams.
To help mitigate controlling the floppy filament, the maximum volumetric speed is limited to 3 cubic mm/s. We opened up a new spool of Overture High Speed TPU 95A and sliced a flexible bracelet, getting an estimated print time of 31m. We used the reverse side of the build plate and applied some glue stick to the surface to act as a release to make sure the TPU didn’t damage the build surface.
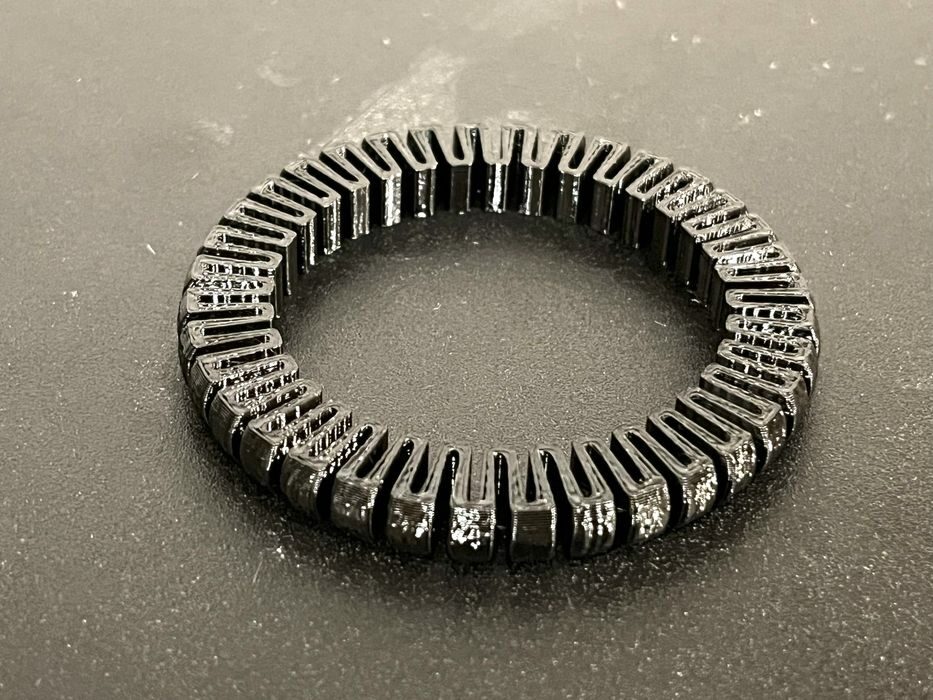
The print took 33m and ended up turning out perfect and was easy to remove from the build plate.
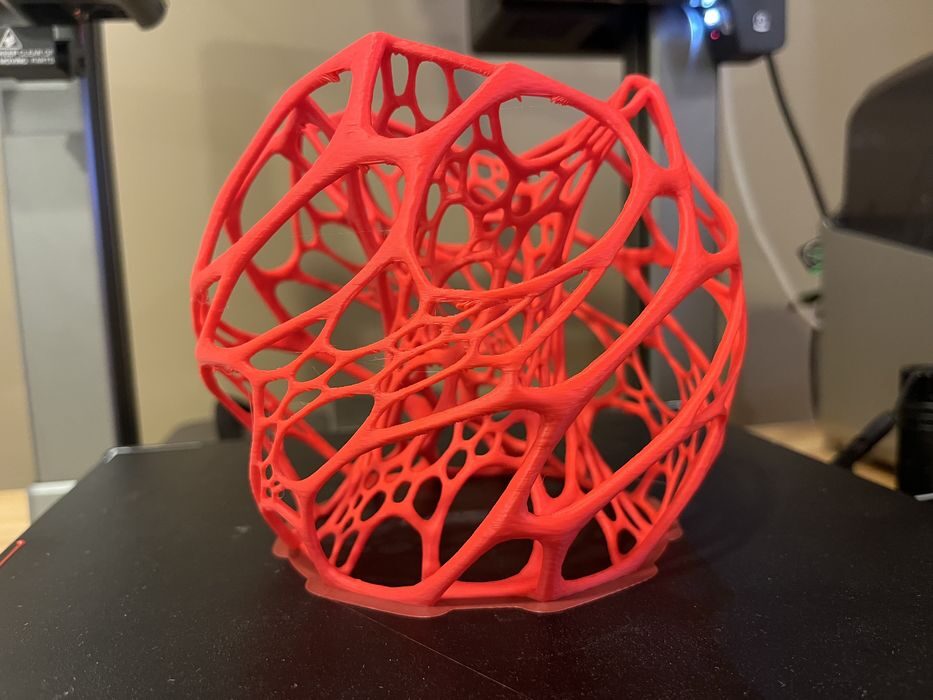
We switched back to using the CFS for our next print, Nervous Lamp, slicing it at 0.20mm layer height, adding a brim, and choosing red PLA filament. We got an estimated print time of 6h31m and a completed time of 6h50m with the finished print looking fantastic.
We decided to try the Creality Cloud phone app one more time to print a spiral vase. We removed and reinstalled the app from scratch and this time chose “new slicer” to be able to add the Creality Hi printer.
We selected Spiral Vase as a model and went looking for the Spiral Contour Mode that is typically under the “Others“ tab in the slicer. Unfortunately, this feature did not exist in the Cloud Slicer. So we switched back to Creality Print and prepared and sent the model, getting an estimated build time of 1h47m, using 32.33g of the blue PLA in the CFS. The finished print took 1h33m and looked fantastic.
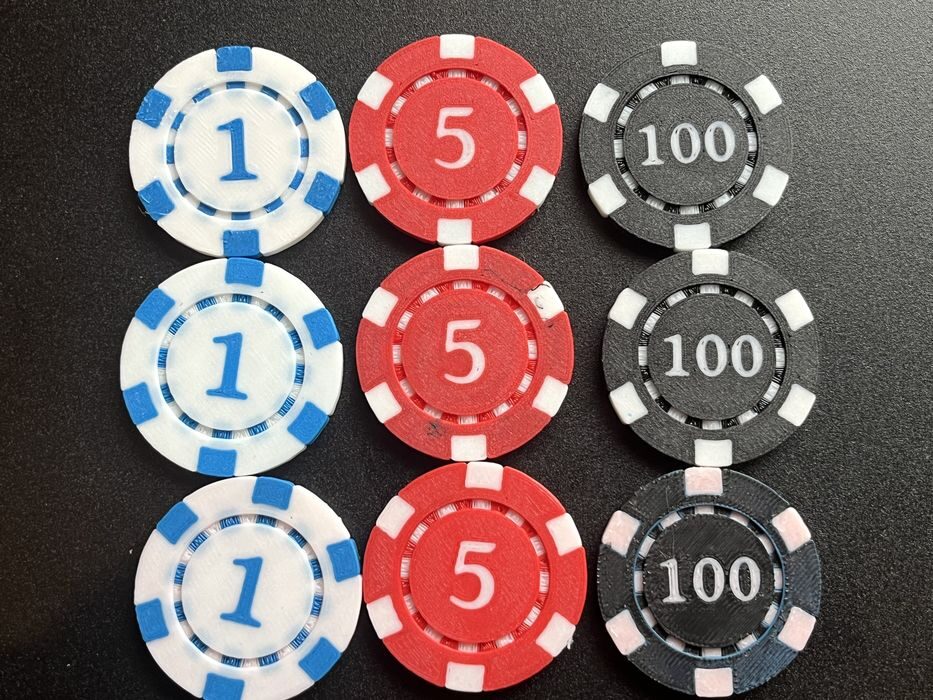
We did one final test with the Poker Chips model to see if we could get the flush multiplier down even lower. We dropped it to 0.5 and kept everything else the same. When it completed, we observed some discoloration in the white areas, which were especially visible on the black andwhite 100 chip. The red filament had not been sufficiently purged and had mixed in with the white, so a 0.5 multiplier was definitely too low to give quality prints.
This is part three of a four-part series, please read parts one, two and four.
Via Creality