
Our review of the new Creality Hi Combo multicolor 3D printer continues with setup, calibration, operations and software.
This is part two of a four-part series, please read parts one, three and four.
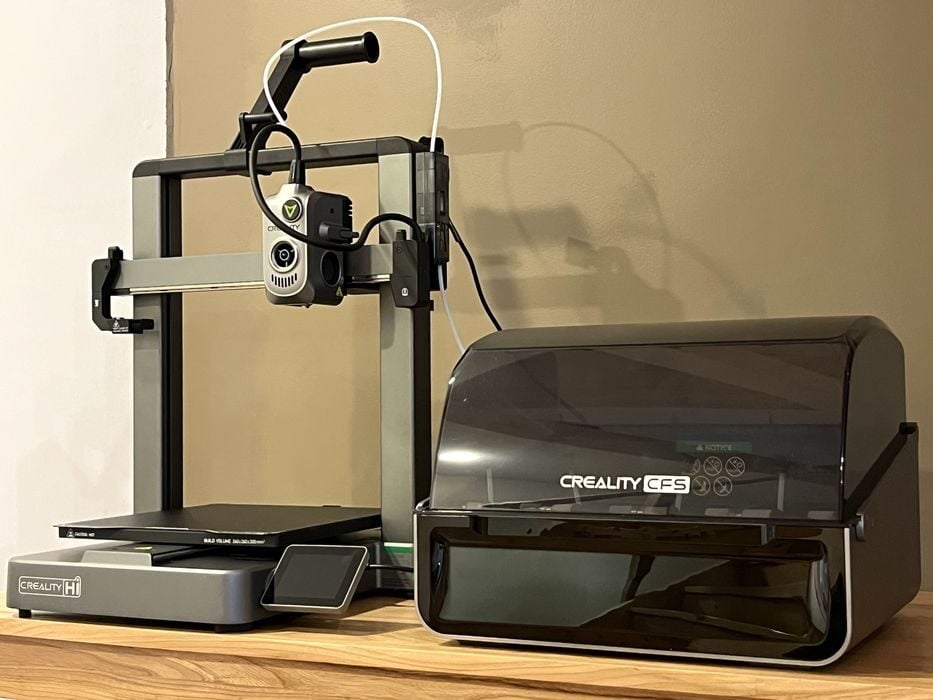
Creality Hi Combo Setup and Calibration
Initial setup of the printer was very easy, and the touchscreen walked us through all the necessary steps we needed to take. We chose our language, checked to make sure there was no debris on the build plate, agreed to the privacy policy, chose our network, and picked our time zone and international area. We were asked to bind the printer to our Creality cloud account, which we skipped for now.

The printer performed a series of system self-checks on its motors, heating, fans, camera, cutter, input shaping, and auto levelling. Then it searched for and found a new version of firmware, which we agreed to download and install.
When the update was complete, the printer requested that calibrations be run all over again, so checking and updating the firmware FIRST would have been nice and would have saved some time.

It was now that we remembered the RFID sensor icon on the left side of the HI’s base. We decided to give it a try and opened up a fresh spool of Creality Hyper PLA Black, held it beside the RFID reader on the printer, and heard a beep.
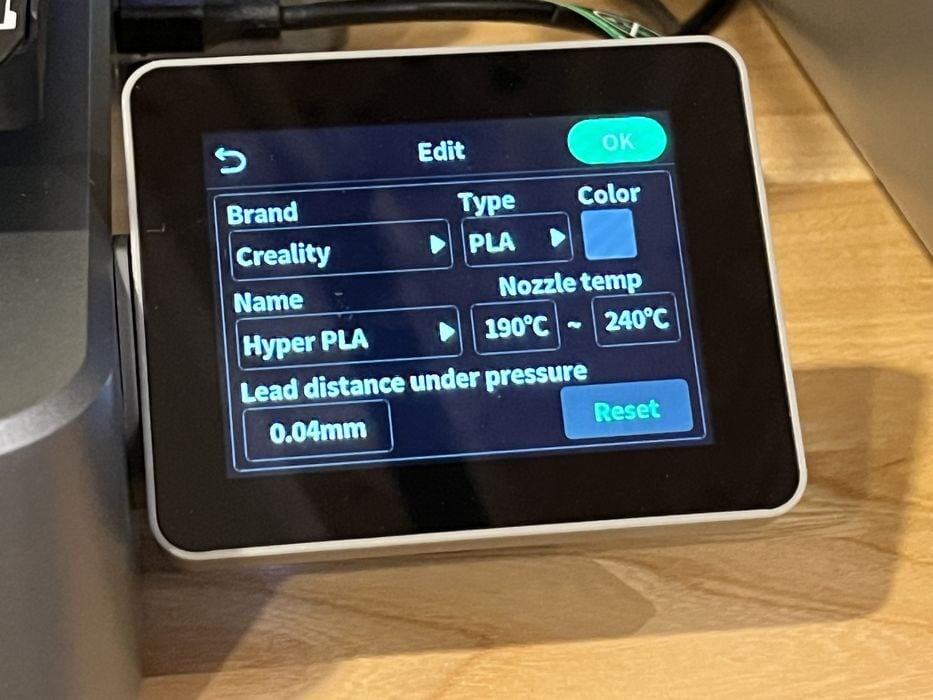
When we checked the Material menu, we saw that the information for the spool holder had been updated to show the correct filament. Such a quick and easy way to let the printer identify the filament! We cleared the spool holder settings to avoid any confusion when we went to install the various rolls into the CFS.
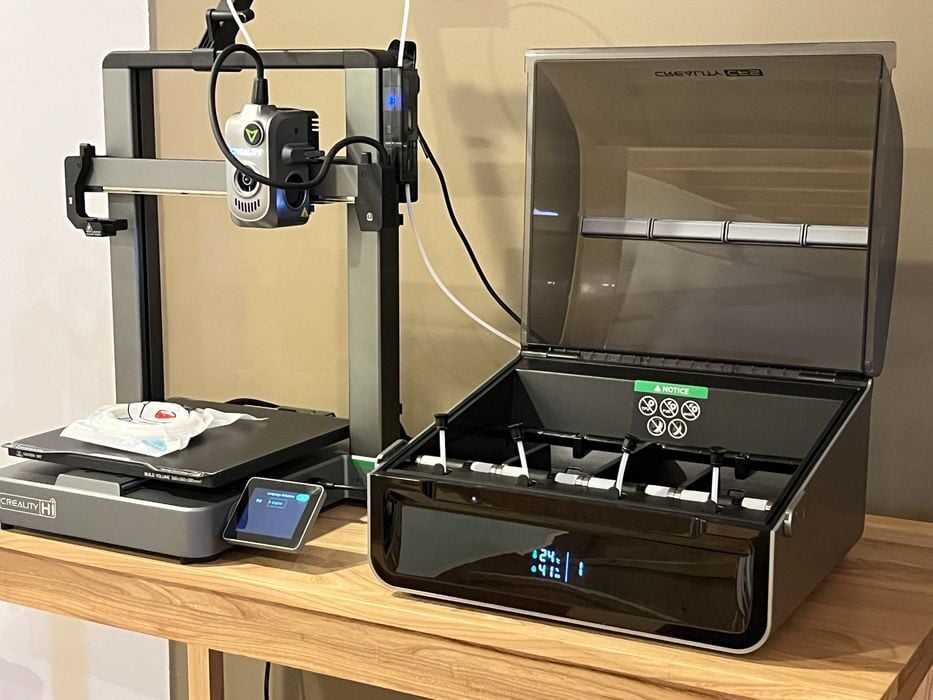
As it turned out, installing filament into the CFS is super easy. Before we began, we made sure to swap the PTFE tube from the spool holder anti-tangle device and onto the top of the CFS buffer.
We placed a spool into the CFS and carefully slid the end of the filament into the pick-up tube. The filament was pulled from our fingers and loaded automatically into the CFS, travelling back-and-forth a few times before going all the way to the buffer and back again, where it came to a stop. We did the same procedure for the remaining spools, and when we checked the material screen on the printer, we saw that all were recognized correctly.
Creality Hi Combo Operations
Now it was time to print one of the pre-sliced files typically supplied by the printer manufacturer and do so using the supplied small sample coil of filament.
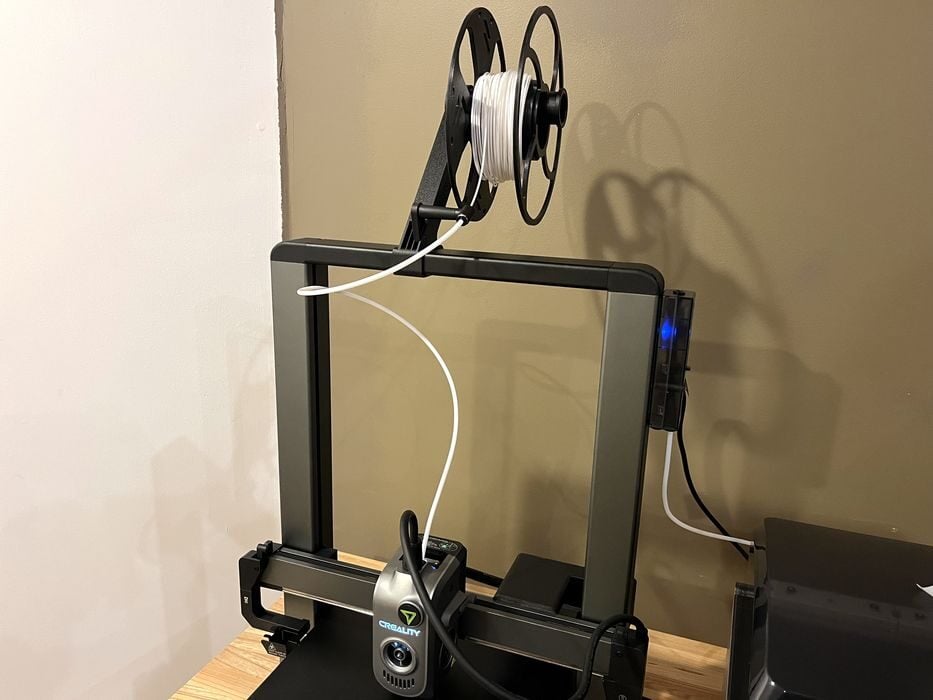
We swapped the PTFE tube from the top of the filament buffer and back onto the spool holder anti-tangle, transferred the sample coil onto one of our reusable spools and onto the holder, passed the filament through the anti-tangle & PTFE tube, pulled back the lever on the extruder, and pushed the filament through by hand until it stopped at the extruder gears.
As the sample filament coil had no RFID, we made sure to go to the LCD and edit the spool holder material settings to show the correct type of material. When we hit Extrude to begin loading, the hot end moved to the left side of the Creality Hi Combo and warmed up, extruding some filament which was promptly ejected sideways and onto the table. This purge process happened several times.
Given that there wasn’t a USB stick provided with the printer, we checked local storage on the printer and found some pre-sliced files, choosing “Wheel Logo PLA 32M”.
We made sure to disable the CFS option before launching the print, as we were printing directly from the spool holder.
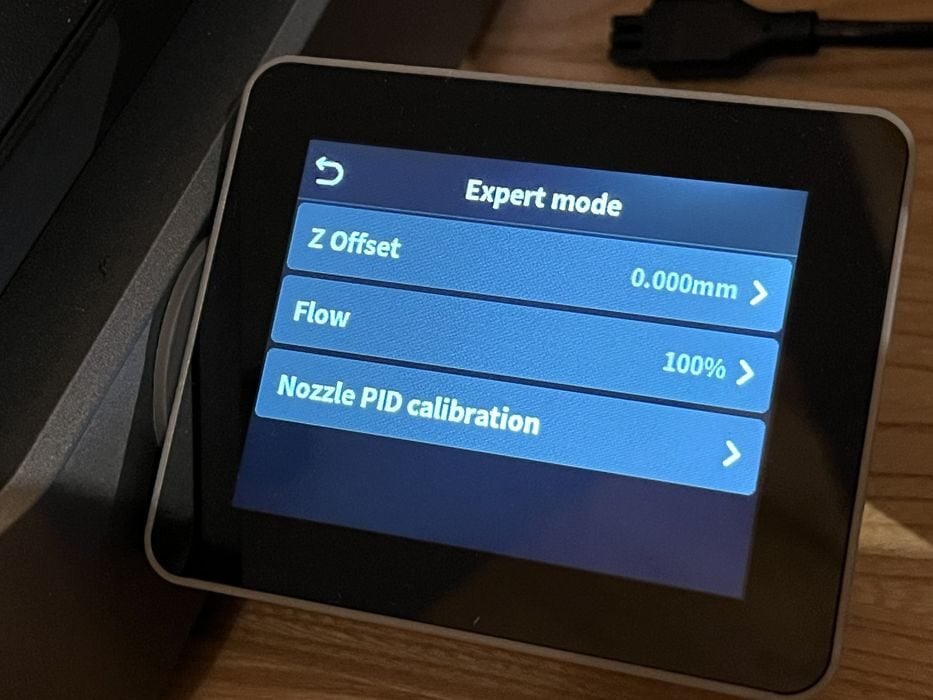
Incidentally, the controls on the Hi touchscreen are well designed and easy to navigate: we saw all the common functions as we went through the menus, even finding an Expert Mode where you could make adjustments to the Z Offset, Flow, or Nozzle PID Calibration.
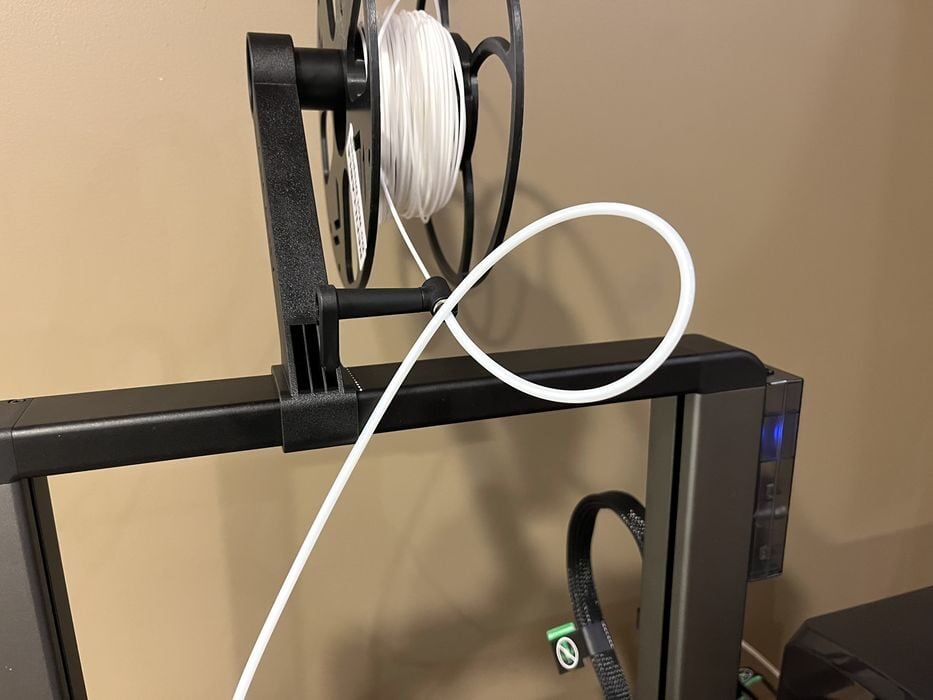
Unlike most 3D printers, homing for the Z-axis on the Hi is located at the top of the Z-axis, and while it was raising we noticed that the PTFE tube moved into a rather awkward location and ended up getting slightly pinched at the top.
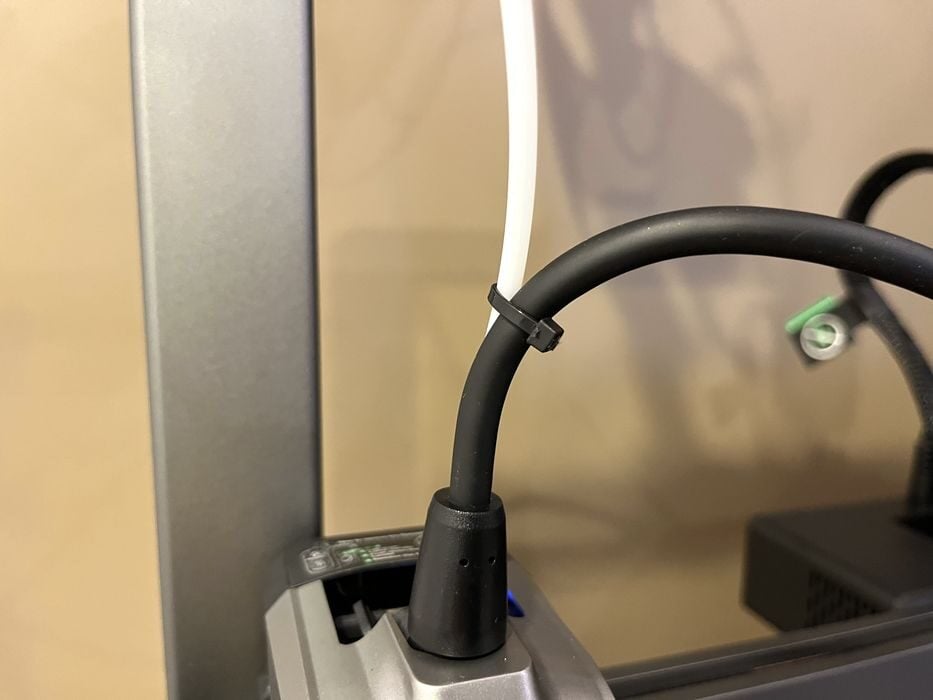
This is never a good thing, because if the PTFE were to snag on something near the top of the Creality Hi Combo then it could end up abruptly stopping all movement in the X or Z axis. We added a zip tie between the PTFE and extruder cable to help keep things in check, something not in the instructions.
The Creality Hi Combo lowered back down the Z-axis without an issue and did the following:
- A filament poop
- Z calibration on a metal plate at the back of the build plate
- Swiped the nozzle several times on a silicone wiper
- Another calibration check on the metal plate where it waited until the temperature dropped to 120C
- Homed the Z axis to the top (again)
- Back down again where the nozzle touched off the build plate several times
- A full bed levelling procedure
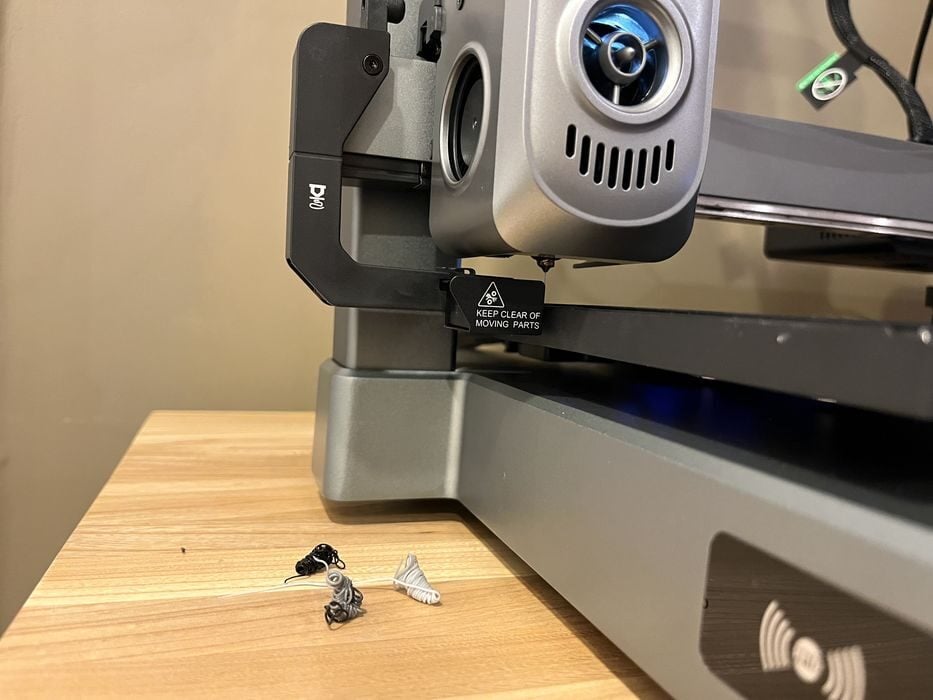
Once that was all complete, the extruder assembly went back to the purge bin where it waited until it reached 220C, did a purge line on the build plate and finally started to print. The job took 34m to complete and turned out quite well.
We noticed there was a history tab on the touchscreen where we could review any print completed. It showed the elapsed time, material used, and the option to launch the print again.
Creality Hi Combo Software

Now we took the time to download and install the Creality cloud phone app and used the QR code supplied in the manual and then paired the printer with the app with no issue.
We had a bit more sample filament coil left, so we decided to use the phone app to try printing a #3DBenchy. We found several print job variations on the Hi, but they were all pre-sliced with no possibility of changing or even knowing the print parameters. Out of curiosity we chose one and launched it.
- When the print started, the Hi did the following:
- Purged more filament
- Went to the rear of the build plate to do calibration off the steel plate.
- Raised the z-axis to find home.
- Did a bed levelling.
- Went to the purge bin until it was at temperature.
- Did a purge line on the build plate.
- Finally began to print.
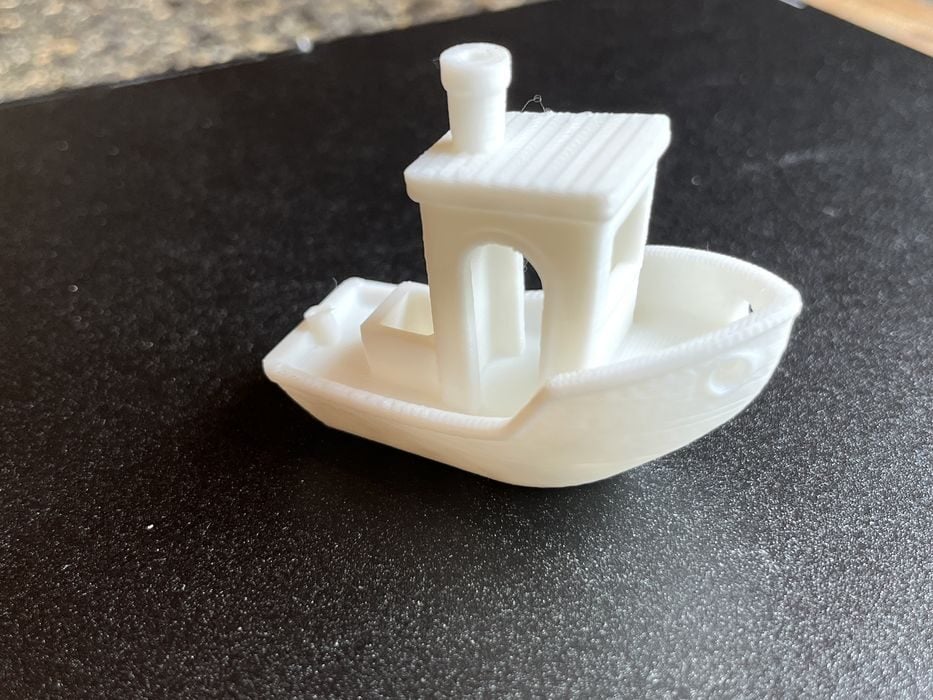
This was a few less steps than the previous Wheel print job, and we noted that the zip tie we added kept the PTFE tube in check. This #3DBenchy print completed in 41m and looked quite good.
We decided to go back to the phone app and try slicing our own #3DBenchy, but found there was no way to do this, as the Hi Combo was not a printer choice in the Cloud slicer!
Perplexed, we went back to Creality Wiki to look for how to log onto Creality Cloud from a desktop computer and see if we’d have any more luck that way.
We initially ran into the same problem but eventually noticed an option to switch to the “new slicer”, that gave us the Hi Combo as an option!
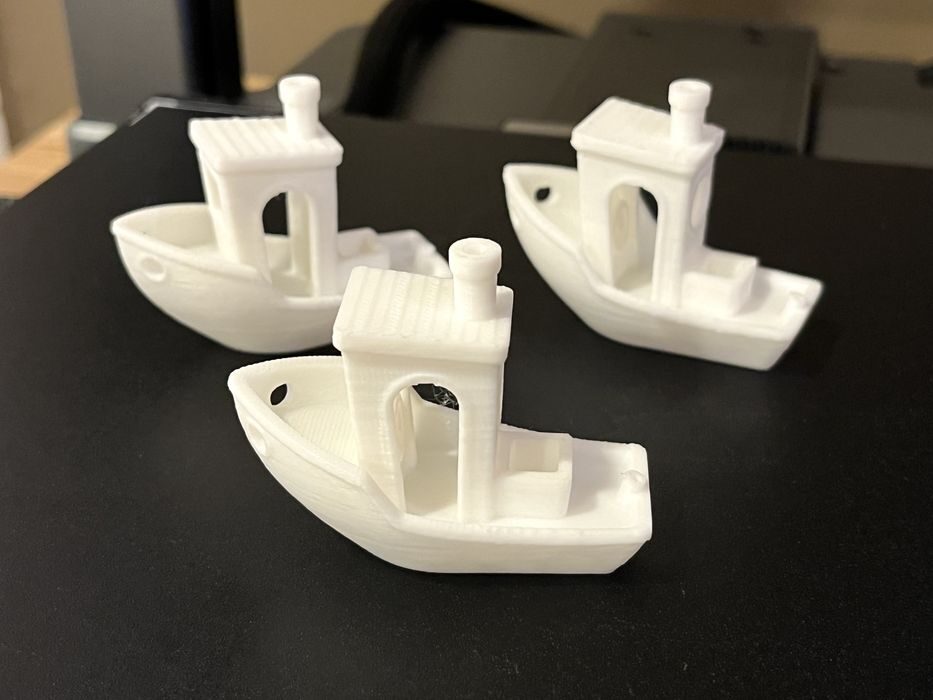
We loaded up a #3DBenchy and went about slicing the file as per typical speedboat race settings. At first glance the slicer appeared rudimentary, but we were able to get the settings we wanted and sliced the print, sending it remotely to the printer.
While we waited for the print to complete we went back to the Wiki and noticed that there was a Creality Print slicer program to download. We grabbed and installed the Mac version and were able to set up the Creality Hi with no issue.
The cloud sliced #3DBenchy completed in 37m, with the build quality about the same as our first #3DBenchy. We decided to slice the #3DBenchy one last time with Creality Print and compare results. The new #3DBenchy completed in 35m and looked just as good as the other two.
To get a proper feel for the printer, we decided to stick with just one slicing tool, and chose Creality Print for the rest of the review.
This is part two of a four-part series, please read parts one, three and four.
Via Creality