
Our test of the Kingroon KP3S Pro V2 3D printer concludes with a look at print results and final thoughts.
This is part three of a three part series, please read parts one and two.
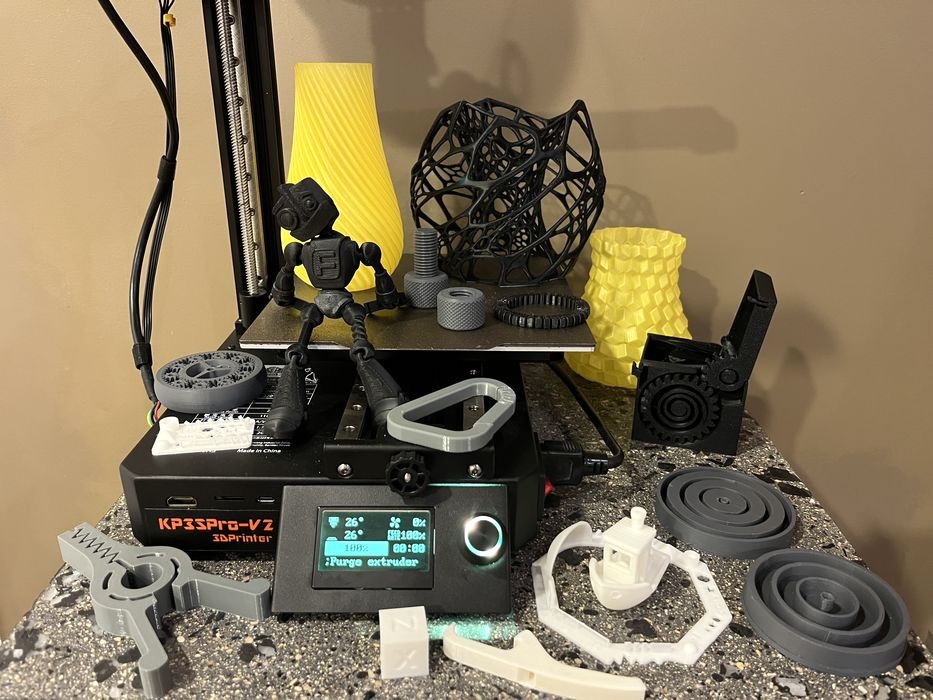
Kingroon KP3S Pro V2 Print Results
We used the OrcaSlicer profiles supplied by Kingroon for our all test prints.
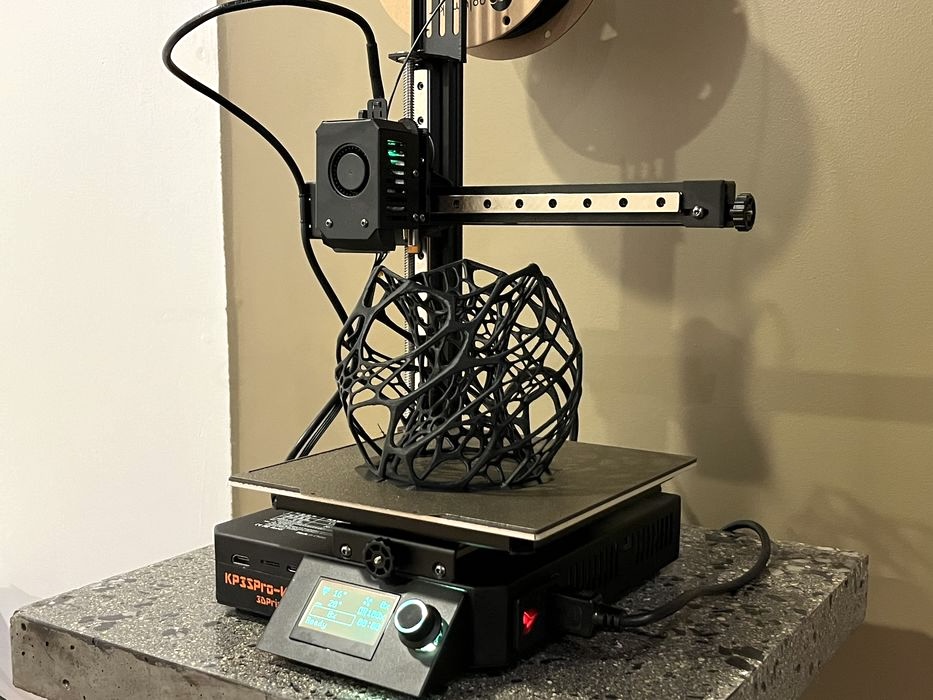
Our 3D_test_V3_0.4MM had an estimated build time of 31:18, but an actual print time 38:14. This was much faster than the older KP3S Pro S1 (1:49) and the print quality was very good.
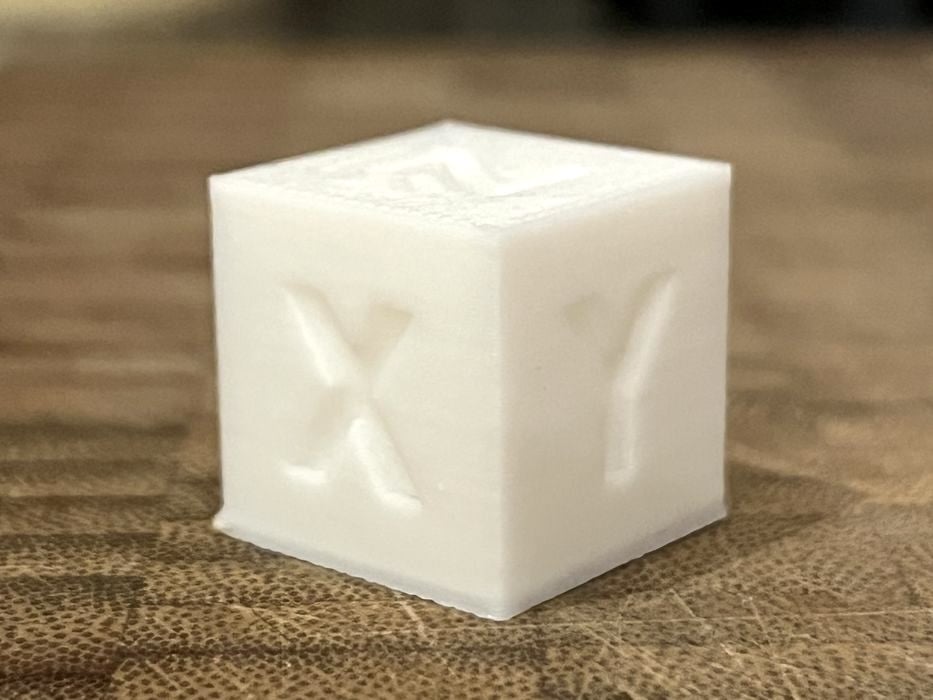
Our Cube_V1 turned out with zero ringing and had great surface quality. Minor elephant foot was noted at the bottom of the print, so we adjusted our Z-gap setting before our next job.
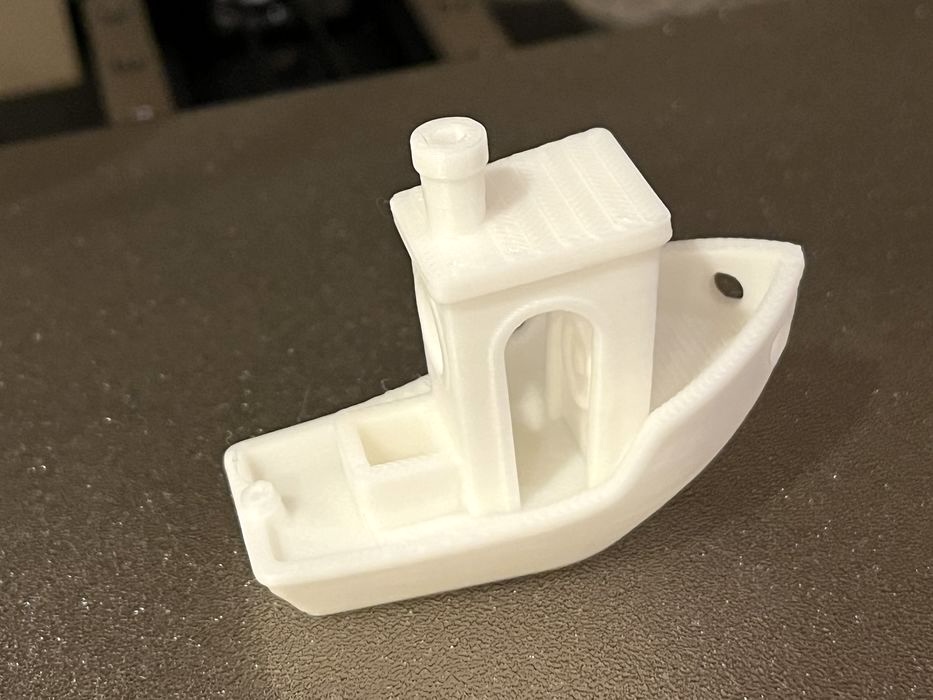
We sliced our first #3DBenchy using the default profile settings and received an estimated print time of 44:29. We decided to tweak the parameters to match the #SpeedboatRace challenge. The new estimated print time was now a much faster 36:15. However, the actual print time was 42:15, including heat up times and we got our best #3DBenchy.
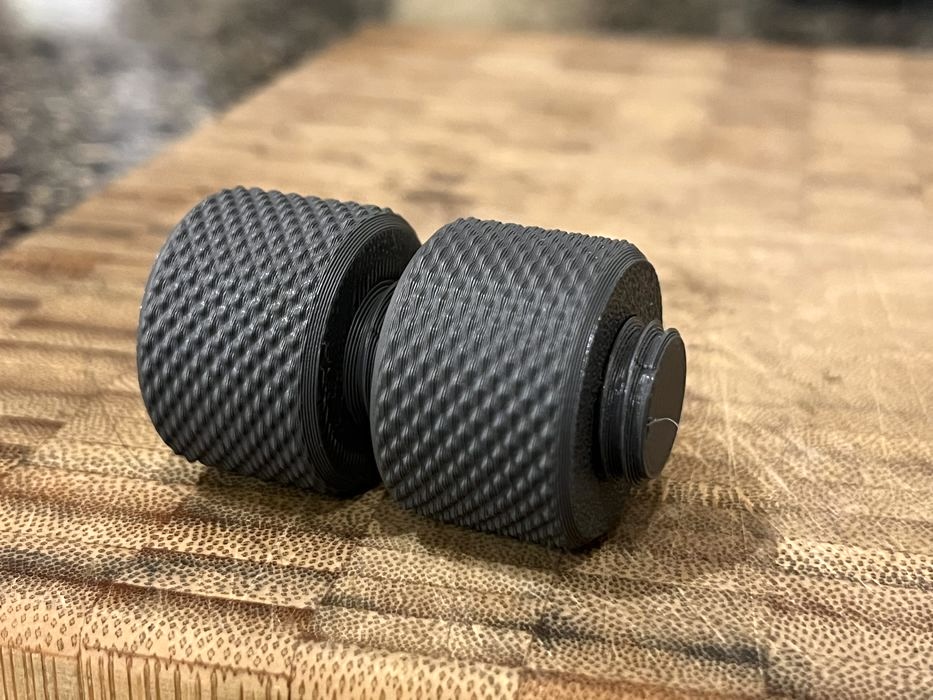
Our knurling nut and bolt test print had a nice surface finish and spun together easily.
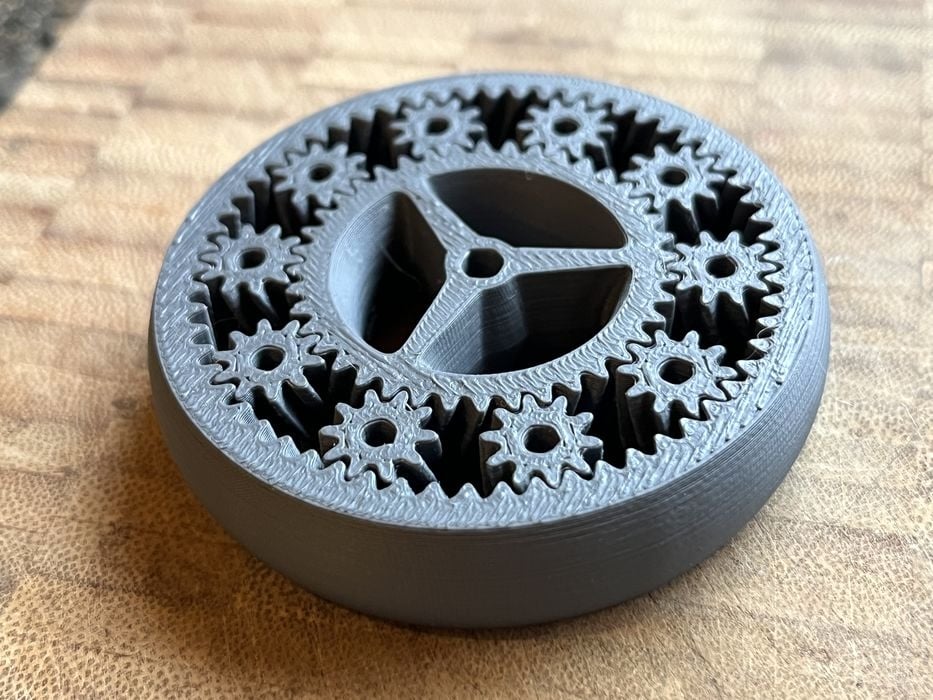
Our planetary gears turned out good as well and with a little coaxing broke free and spun as intended. This shows that the profiles have been well-tuned.
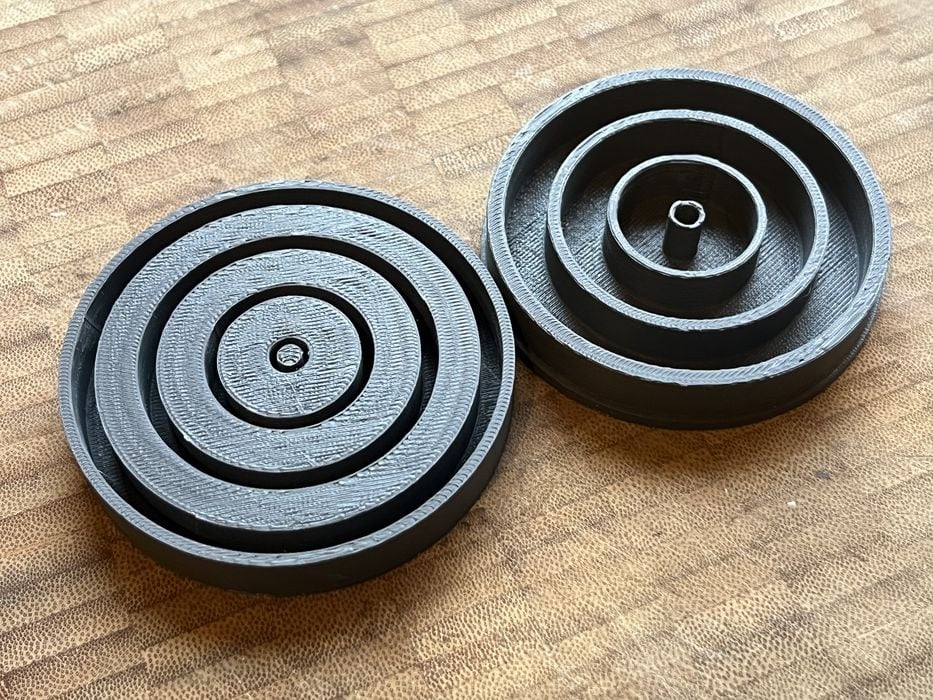
OrcaSlicer detected an error in our cylindricity test model that we were unaware of, which we quickly repaired in Meshmixer. When we went to put the two printed pieces together, it was tight but they fit and had good surface finish.
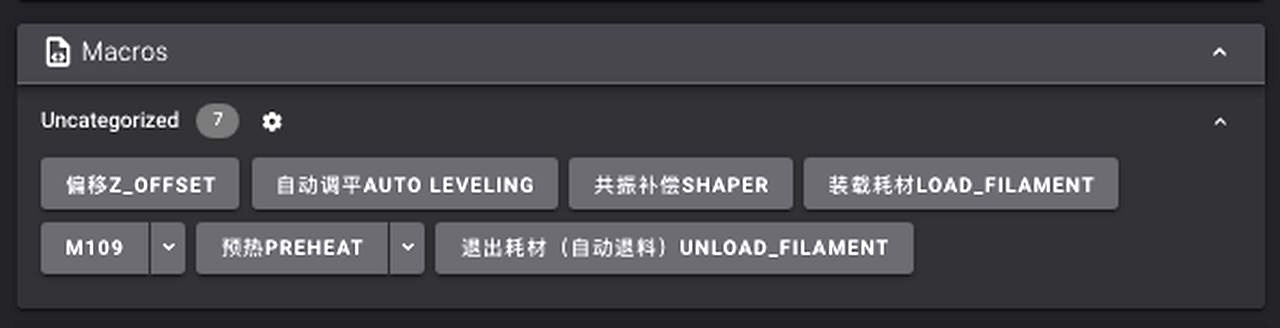
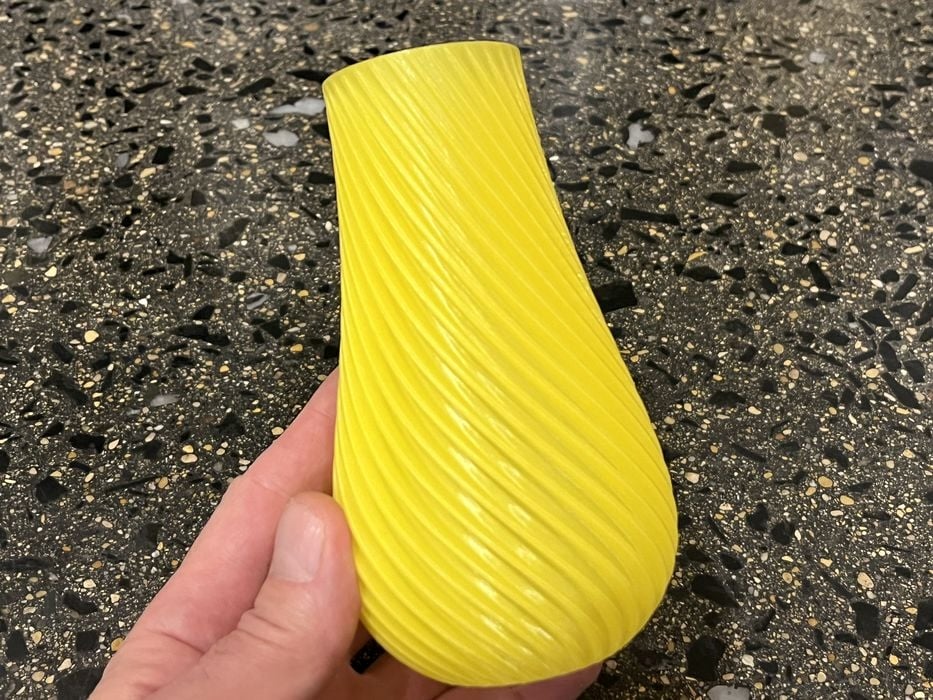
We used the device tab at the top of OrcaSlicer to bring up the web interface, where there were some handy macros for filament unload and load. We switched over to some yellow Kingroon branded PLA from a previous review to do our Spiral Vase tests.

We decided to preheat the nozzle and build plate prior to starting the print to see test the accuracy of the OrcaSlicer estimated print time. The estimate was 2:11, and the actual time was 2:22, with the print turning out fantastic. We had similar results with our curved honeycomb vase. It seems that the majority of the estimate variance is due to not accounting for the preheat time.
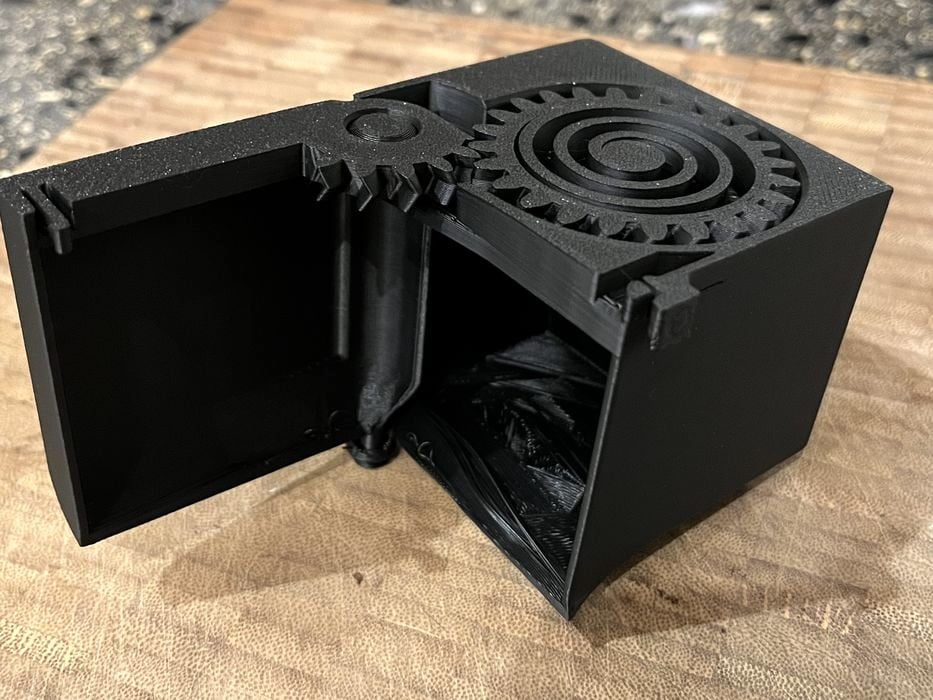
We switched to black Polymaker PLA filament and tried our PIP spring loaded box. We noticed that the delicate detail of the gears was not sticking properly to the build sheet and was being pulled off when the printer switched to high speed, so we resliced the model with slower speeds for the first 10 layers and had no further issues, getting a great print that articulated as designed.
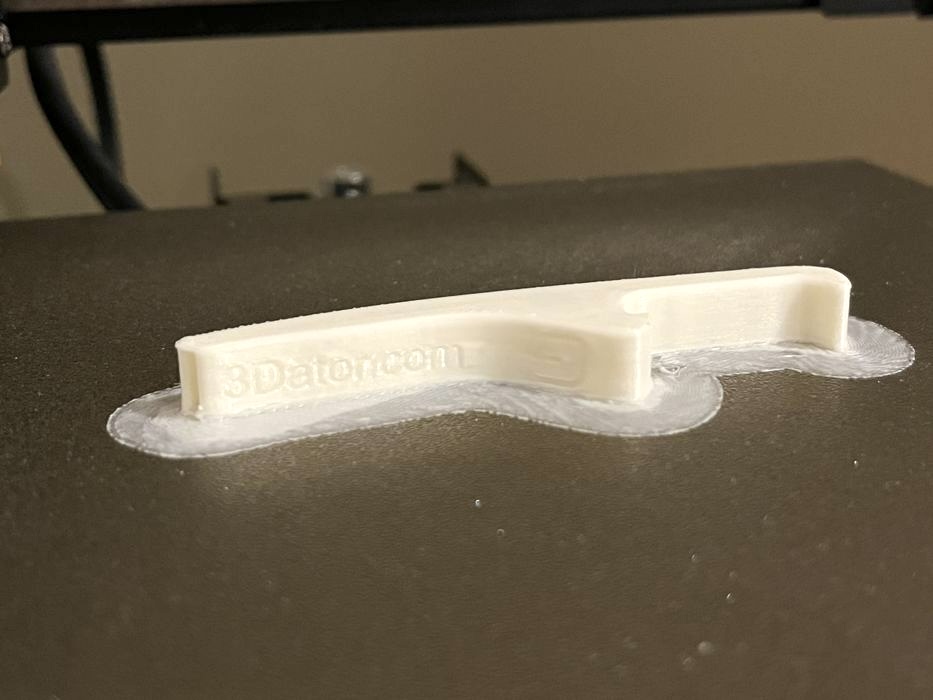
The Nervous Lamp test turned out excellent, and completed in just 7:02 with high surface quality and zero failures.
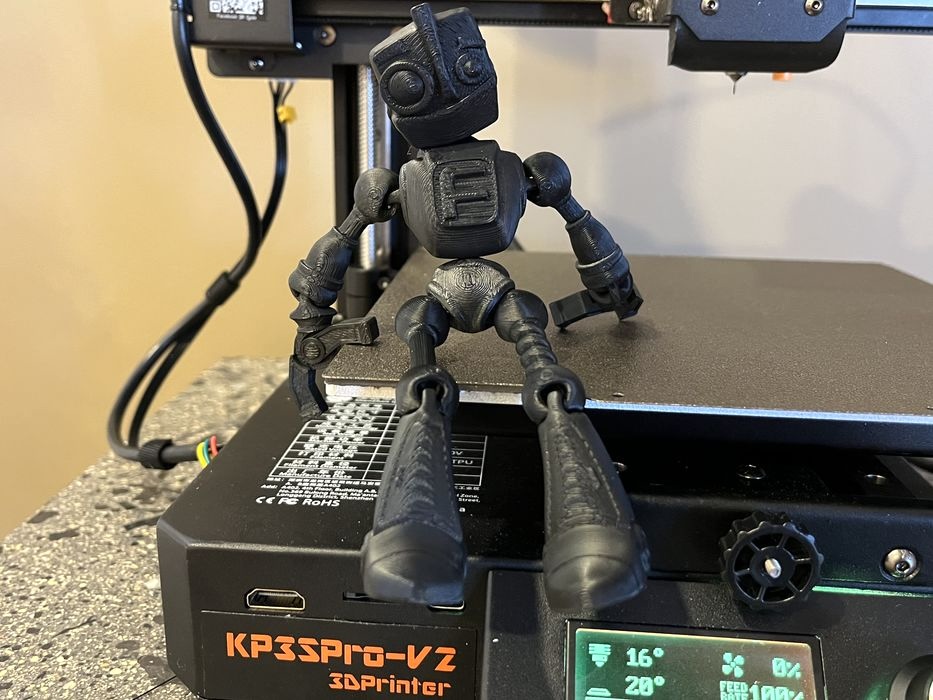
Our final PLA print was a PIP flexi_fokobot (Robot) which turned out with superb quality, easily releasing from the cooled build sheet and fully articulating with no coaxing at all. Kingroon doesn’t have any reference on their website as to which filament types the KP3S Pro V2 actually supports, although the printed manual does make mention of PLA/WOOD/TPU. We looked through the filament profiles that we had downloaded previously and only recognized PLA and PETG.

We switched over to gray PETG filament using the screen on the printer and sliced our Carabiner_V 1–0 and chip bag clip V7_ 1 large models, using the supplied PETG filament profile, but paired it with the same 0.20mm process preset that we had used for PLA, as no PETG specific process presets were supplied.
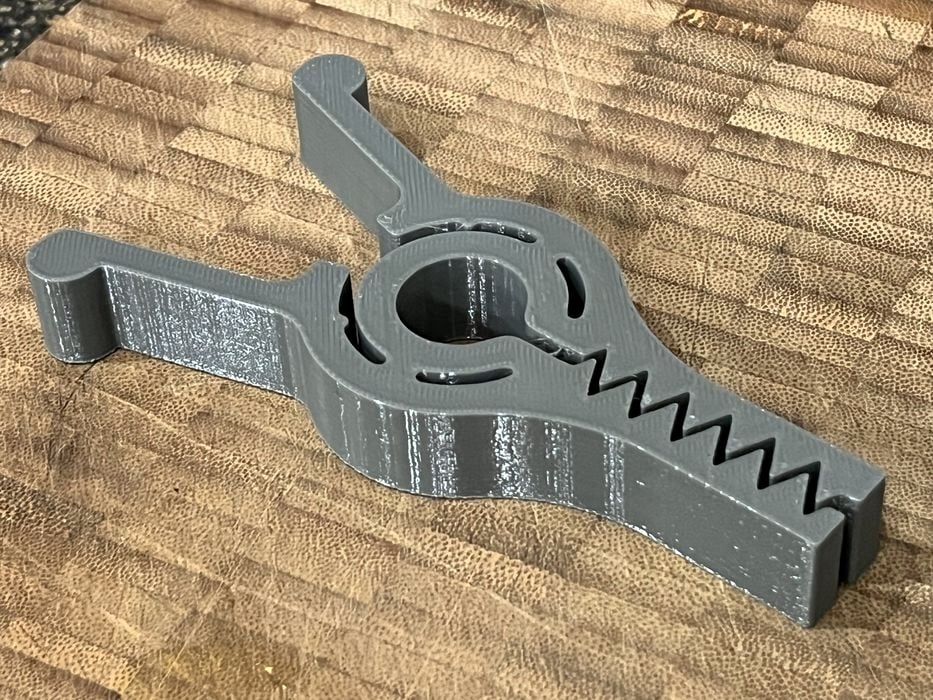
This meant that all our speeds, cooling, etc for PLA were applied to our PETG print, however both prints turned out with excellent surface quality and articulated properly.
Although not officially supported, we decided to try ABS filament. To accomplish this without a preset, we adjusted the bed temperature on PETG profile, slowed things down a bit, stopped cooling and added a wide brim.
We had a few issues saving the new filament profile name in OrcaSlicer as it would crash the software, but we eventually sorted it out by just duplicating the filament profile in Finder and then making changes. The quality of the ABS print was satisfactory with no warping given the large brim.
Our last test was a bracelet was printed in flexible TPU material. Again, no filament profile or process was supplied, so we tried using the TPU filament profile from Kingroon’s other high speed printer, the KLP1, adjusting the slicer settings to slow down speeds a bit.
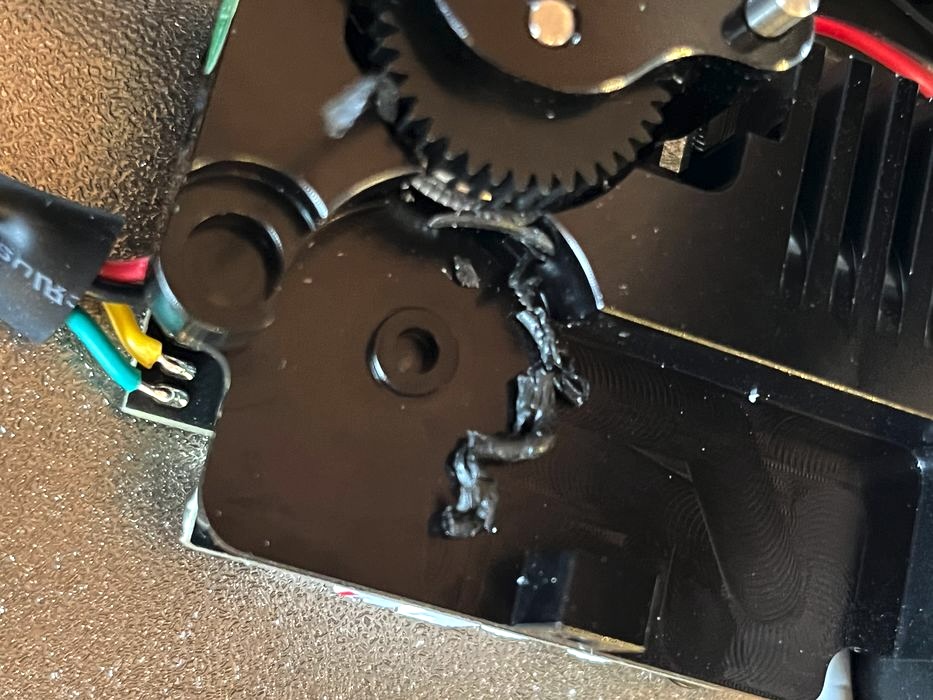
We attempted to load TPU 95A filament and it jammed the extruder, wrapping around gears and coming out the side, with a piece breaking off in the assembly.
Since there was no easy way to clear the debris trapped in extruder gears, we cooled off the extruder assembly and removed it from the X-axis to disassemble. The repair process was straightforward, and we were able to quickly remove the filament fragments.
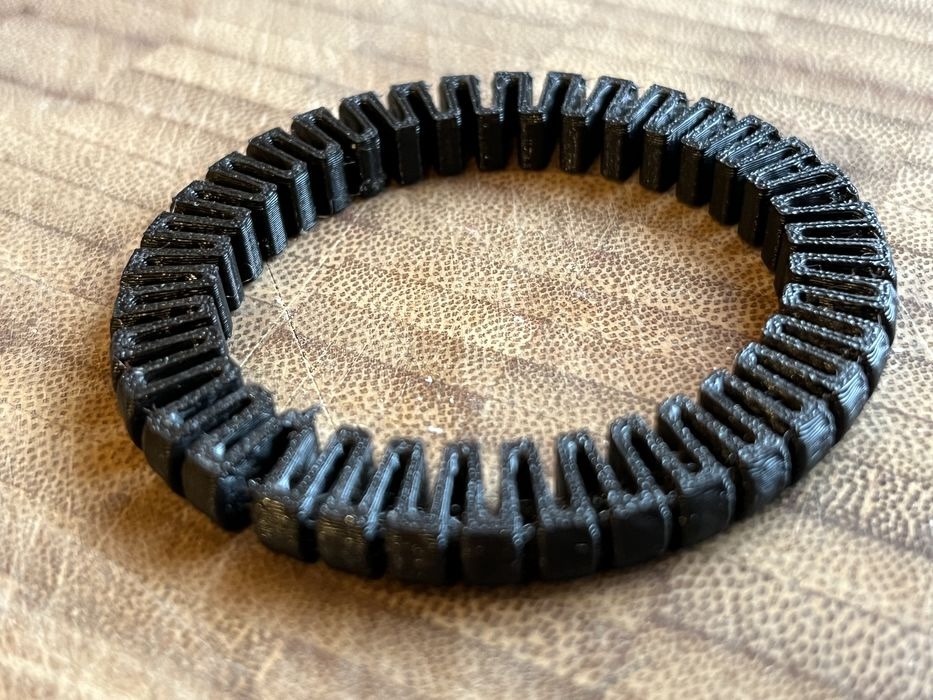
Just to be safe, when we reassembled, we ran some PLA through the hot end to purge out any remaining TPU filament and had success when we tried to load the TPU filament again. The bracelet printed with no issues, turning out great with excellent surface quality. However, operators are cautioned to take care when loading TPU.
Kingroon KP3S Pro V2 Final Thoughts
The KP3S Pro V2 is Kingroon’s bedslinger entry into the high speed 3D printing market, priced at a very affordable US$259. While the printer was packed well for shipping, something very heavy was stacked on the box during the journey to our lab, causing the heat bed bracket of the printer to deform under weight, something far beyond the manufacturer’s control. Kingroon was superb in rushing a replacement part to us.
Instructions in the printed manual for assembling the printer were a bit vague and missed some detail, which would surely cause difficulty for beginners, but not a problem for more experienced users.
We made fantastic prints with zero failures when we sliced our own prints and used better quality filament.
The Kingroon website has the KP3S Pro V2 listed as capable of 350mm/s high-speed printing & 10000mm/s/s acceleration. We found the PLA profile in OrcaSlicer to have speeds of 200mm/s for inner walls, 180mm/s for outer walls, 350mm/s for infill and acceleration of 10000mm/s², so the speeds advertised on the website were met.
Slicing and sending our prints directly to the printer with OrcaSlicer over WiFi was extremely useful. The handy “Device” tab that brought up the KP3S Pro V2’s web interface allowed us to monitor & control the printer remotely from our computer, with the job history supplying valuable data for the workflow of our review.
There were few minor glitches, such as the filament loading routine did not raise the nozzle off the build plate prior to loading. There was no mention of how to perform a Pressure Advance routine. Input shaping was available and worked quite well, but we had to babysit the printer when running the calibration routine, as the vibrations generated in the y-axis almost walked the lightweight printer off our table.
The hardware of the printer performed quite well and produced terrific prints. Apart from the shipping damage, the only problem we experienced was a filament jam when trying to load TPU, but that can be expected with that material.
Kingroon has designed a great 3D printer with the KP3S Pro V2, making it the fastest printer in their KP3S bed slinger lineup. At the very low price point, it’s one of the most inexpensive high speed 3D printers on the market.
Finally, Kingroon has provided a terrific discount code for Fabbaloo readers. To obtain a US$40 discount off the already-low price of this desktop 3D printer, use code “FBLOV2” at this link.
KINGROON
KP3S PRO V2 3D PRINTER
★ BEGINNER 7/10
★ ENTHUSIAST 9/10
★ PRODUCTION 7/10
BEST FEATURES
✔︎ Web control
✔︎ Accelerometer
✔︎ Quality prints
QUESTIONS
✖︎ Vague instructions
✖︎ Filament loading
✖︎ Poor GCODE samples
This is part three of a three part series, please read parts one and two.
Via Kingroon