
Our test of the new Kingroon KP3S Pro V2 continues with a look at setup, calibration, operations and software.
This is part two of a three part series, please read parts one and three.
Kingroon KP3S Pro V2 Setup and Calibration
Just when we thought we were ready for calibration, we hit a snag. The mounting bracket that attaches the heat bed to the Y-axis was significantly bent, skewing the build plate. This damage seemed to result from heavy weight being placed on the shipping box during transit. Upon contacting Kingroon, they confirmed the bracket was beyond repair and promptly sent a replacement.
However, the saga continued as the replacement bracket wasn’t compatible with our KP3S Pro V2’s mechanical setup. A section of metal interfered with the heatbed connector, risking bending the heatbed upon tightening.
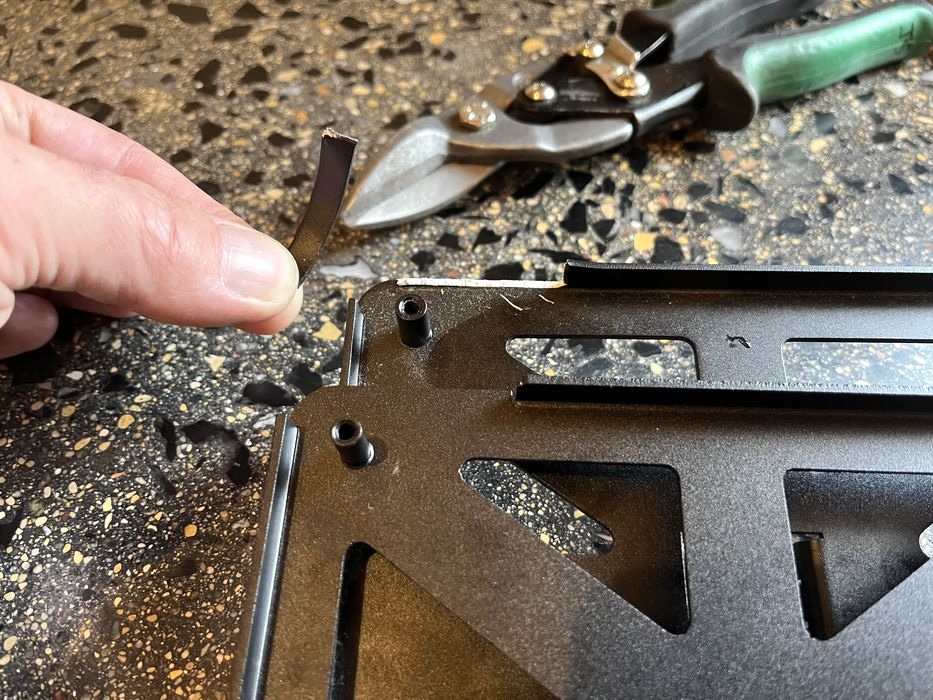
To avoid further delays, we took matters into our own hands. With a pair of cutters, a file, and a bit of paint, we modified the bracket ourselves. This DIY fix allowed us to correct the issue, ensuring everything fit perfectly.
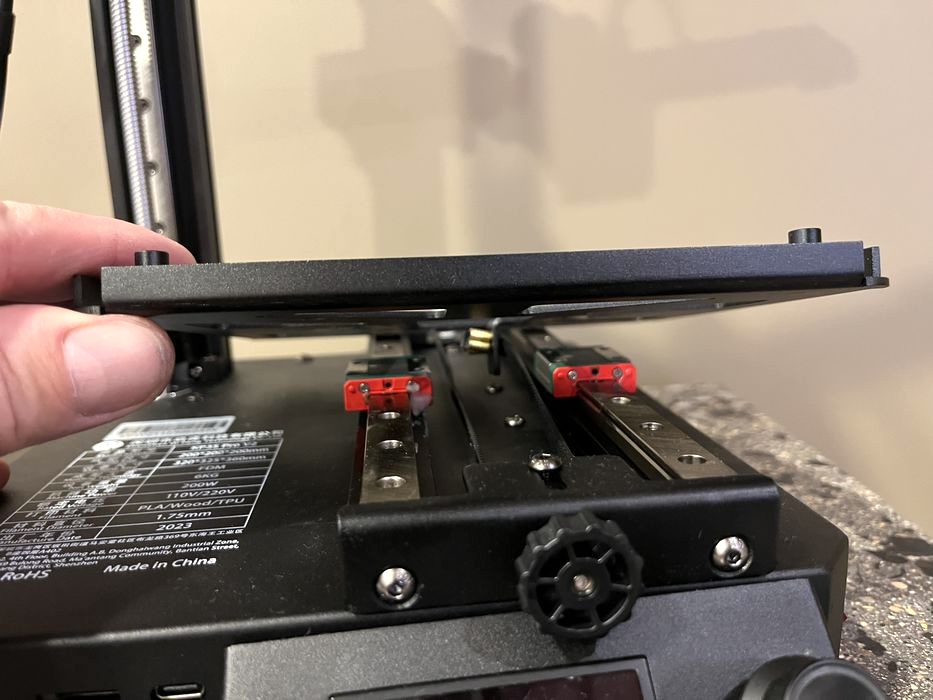
Finally, with the build plate leveled, we were back on track, ready for calibration.
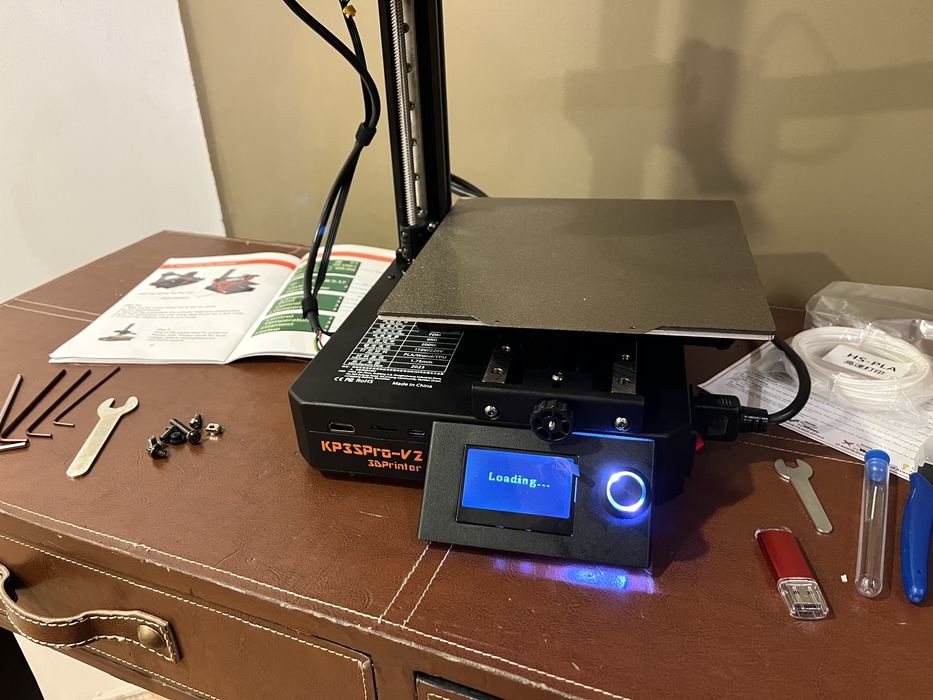
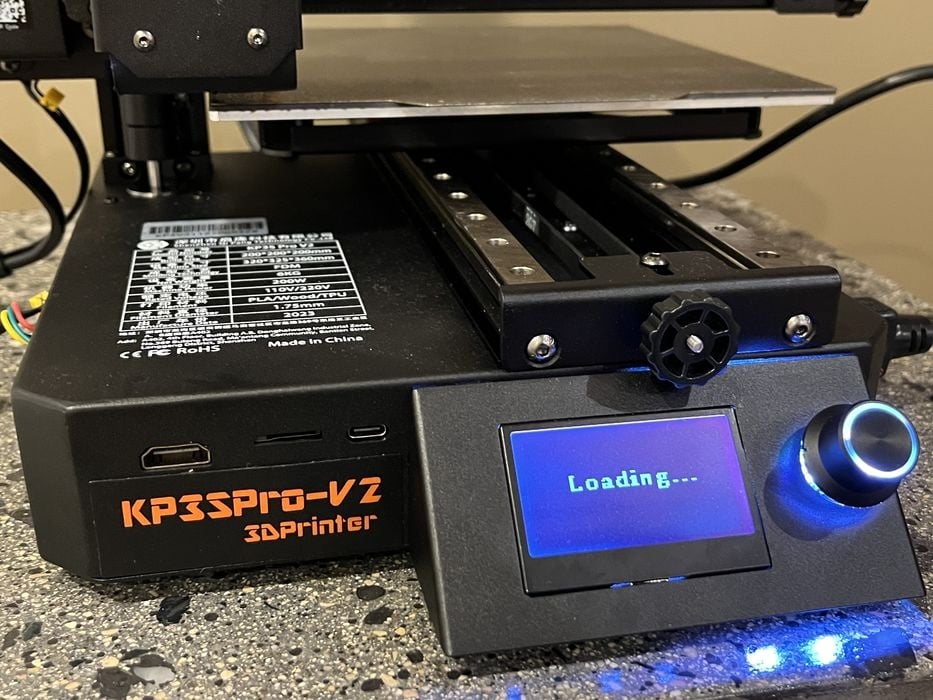
When powered on, the printer took approximately 50 seconds of “loading” until it reached the main menu and was ready to use. The first step in the manual was to run the Z-offset procedure. Once the proper gap between the nozzle and the build plate was determined, we performed a 36-point auto leveling process, which Klipper saved in firmware when complete.
Input shaping calibration was the next step. This calibration routine rapidly moved the X&Y-axis back-and-forth while the accelerometer measured the frequencies of vibrations. During the Y-axis, calibration, the rapid motion actually made the printer move around, getting precariously close to the edge of the table! Once completed, the routine automatically saved the values collected, with no need for manual entry.
This 3D printer includes WiFi, and setting that up was the next step. There was no direct way of using the LCD screen to enter our Wi-Fi credentials. Instead, we had to manually edit a specific configuration file on the USB stick and then plug it into the printer. Powering off for one minute and then on again triggered this file. If successful, an IP address would be displayed on the printer’s screen.
Before we did that, we copied the entire contents of the USB stick to our hard drive, just in case something went wrong and we corrupted a file, we’d have a backup of all the important information contained on the memory stick.
We edited the file, did the procedure and when we checked for an IP after the printer booted up, we found it had made a successful connection!
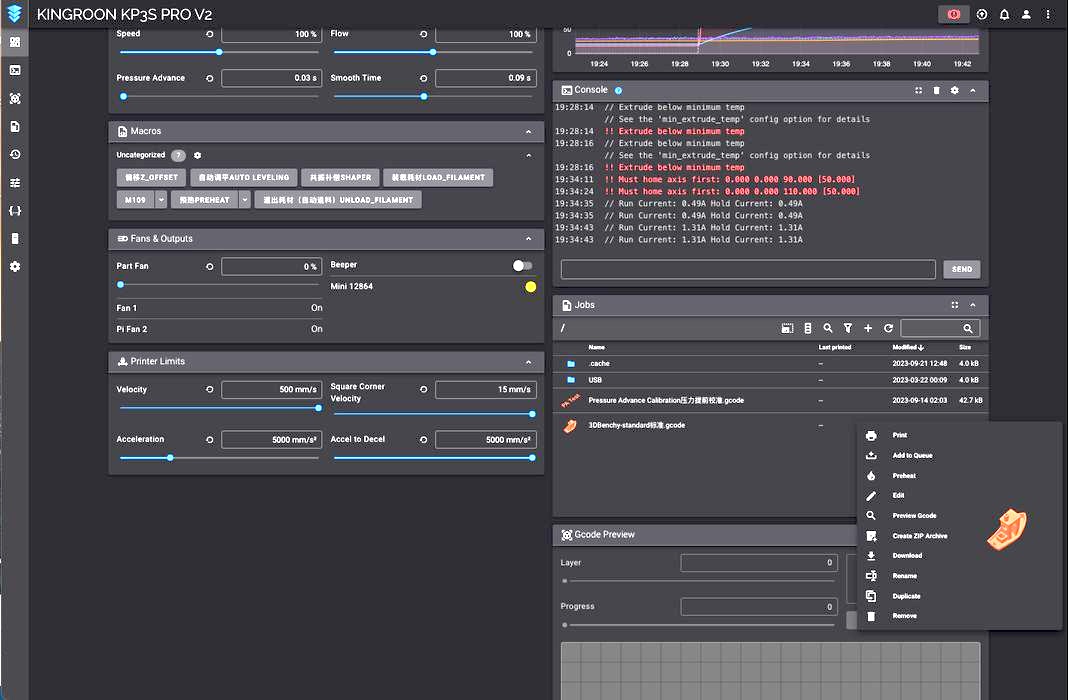
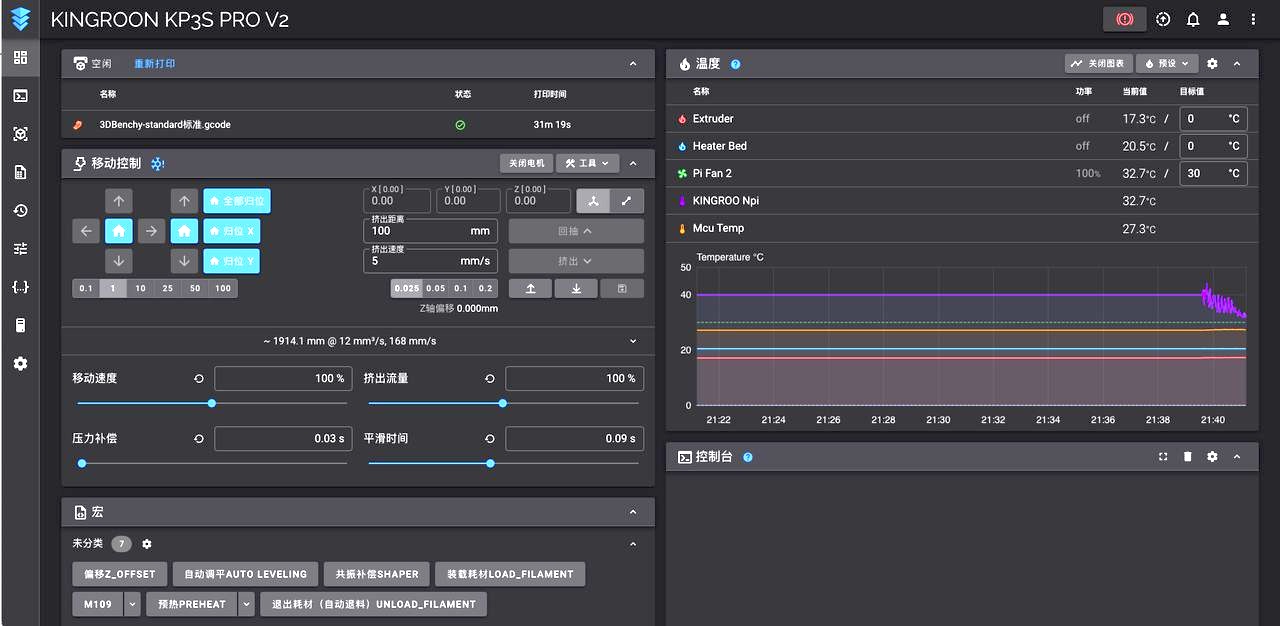
Now that we had an IP, we could access the web interface for the printer. This interface is much more robust than the built-in screen and rotary knob on the printer could ever offer. We opened up a browser window on our computer, entered the IP that the printer had acquired, and voilà we were in the web interface. Note that this browser connection will only work on the local network.
We noted that all text appeared to be a combination of Chinese and English, with some seemingly important bits being unreadable. So we navigated to “the gear”, the universal symbol for Settings, and were quickly able to deduce where to change the display language to English. This might be an area where Kingroon could make some improvements.
A quick look through the web interface made us aware that it indeed had much more to offer than the LCD screen on the printer. From here we could’ve done the Z-offset, auto-leveling, input shaping, load & unload filament, move any of the printer’s axes, see job progress and history, just to name a few. Perhaps this could be the recommended process for future operators?
During our inspection of the browser control window, we noticed several previous jobs that presumably had been run at the Kingroon factory, specifically Pressure Advance Calibration. There was no mention of this feature in the printed manual, or how to perform it, so we assume that since Kingroon had already done the procedure they didn’t think it was necessary mentioning the option.
We are familiar with this particular calibration process and it is fairly straightforward. It involves only printing out a series of numbered lines and then choosing the one determined to be the best and entering that value into firmware.
Given that the web interface allows you to click on a file, download, and save it, we saved the pressure advance calibration GCODE in case we ever needed to run that calibration in the future.
Kingroon KP3S Pro V2 Operations
The machine was now ready to start a test print.
We began by loading filament using the screen controls. There didn’t seem to be any all-in-one loading filament procedure, so we instead used the menu sequence: Temperature > Preheat PLA > Preheat All.
There didn’t seem to be any acknowledgement when we pressed the button, but when we went back one level on the menu, we saw the temperatures were indeed rising.
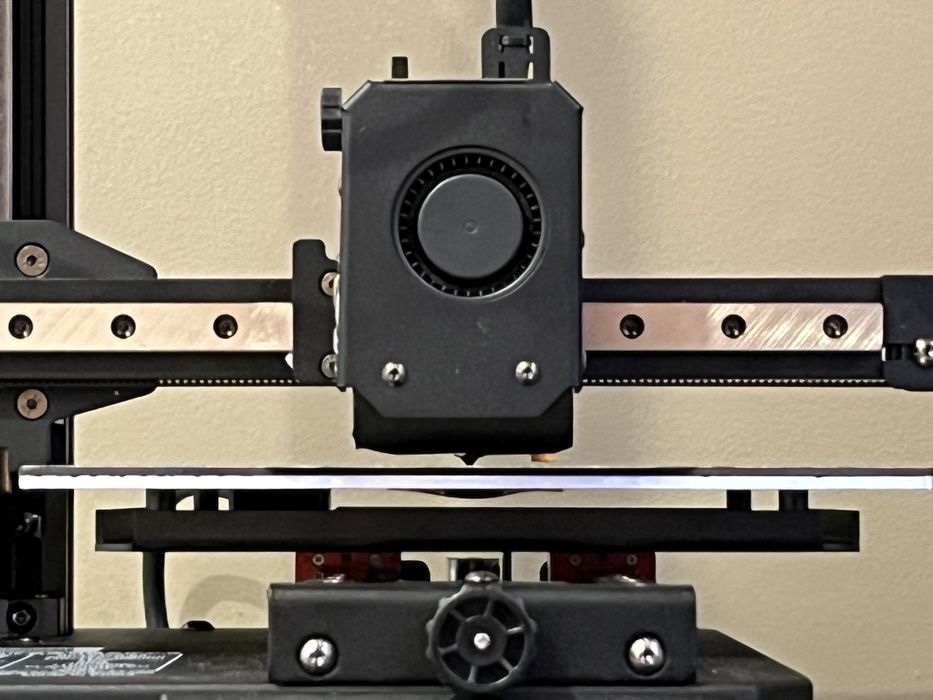
When the hot end reached the correct temperature, we inserted the filament and went to the LCD and clicked Filament Load > Filament Slow. However, we then canceled the load when we noticed that the nozzle was far too close to the build plate.
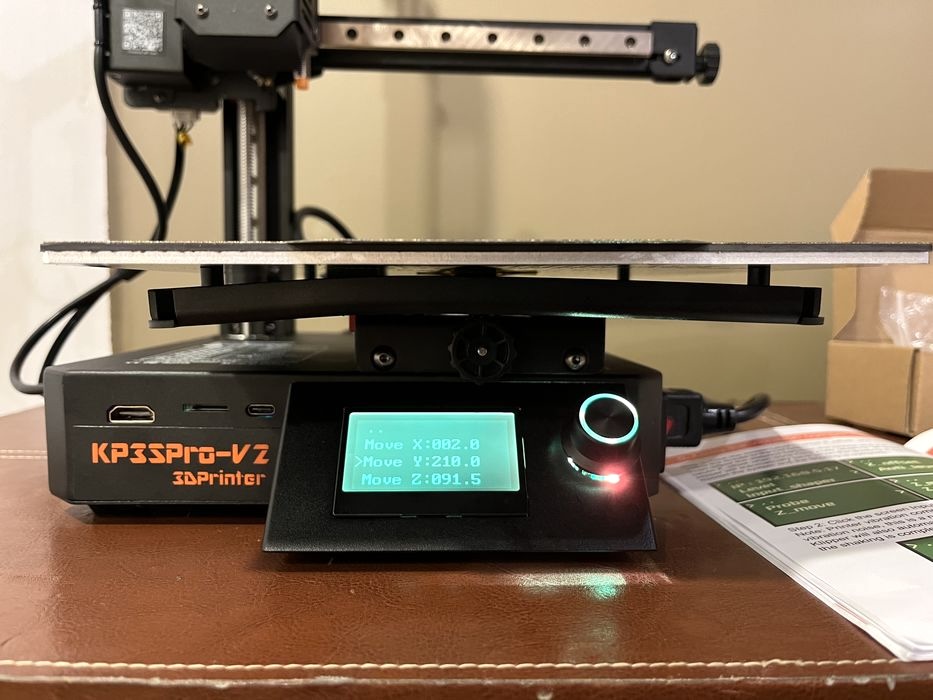
We homed all axes, and then manually raised up Z using Control > Move 10 MM > Move Z, and then rotated the knob to our desired height and clicked to accept. When we tried again to load filament we had no issues and were successful. Perhaps the filament load process should automatically raise the Z-axis slightly.
Moving to the web interface to launch our first print, we chose a pre-sliced #3DBenchy file already provided from the factory.
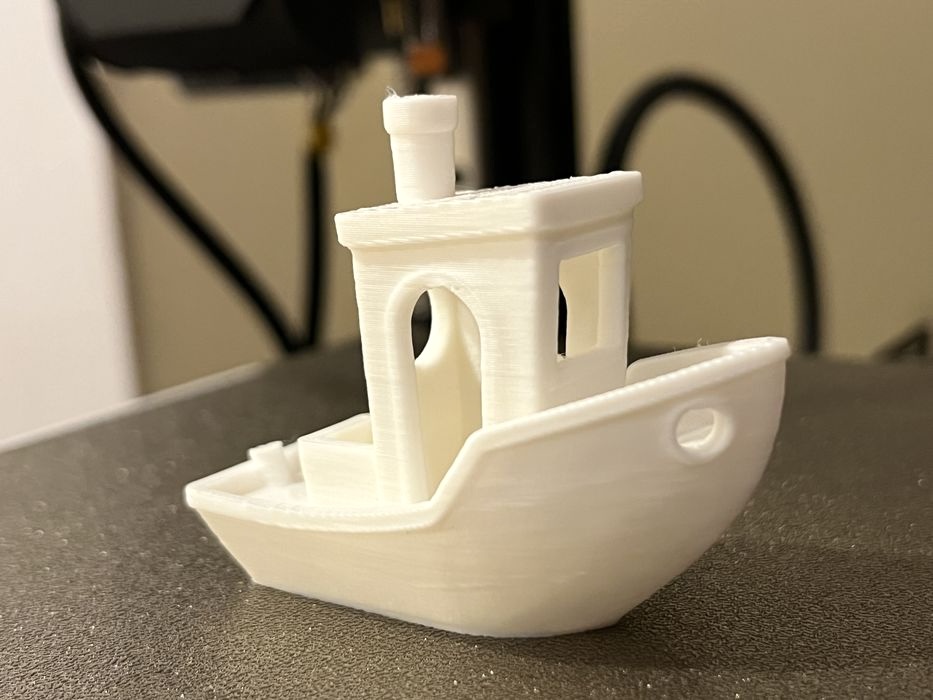
The first layer went down at a very modest speed, but when that layer completed the printer switched into high-speed motion, with a hefty increase in speed for the parts cooling fan.
3D Printing PLA at high speed requires a fairly aggressive approach to cooling, and the fan on the KP3S pro V2 really lets you know it is working at 35 dB. The total duration of the print was 31:56 including warmup time for the build plate and nozzle.
The small sample coils of filament aren’t usually the best indicator of how well a printer can perform, the print quality was not great, but not overly bad.
We checked the USB stick to see if it had any other pre-sliced files and found two of them.
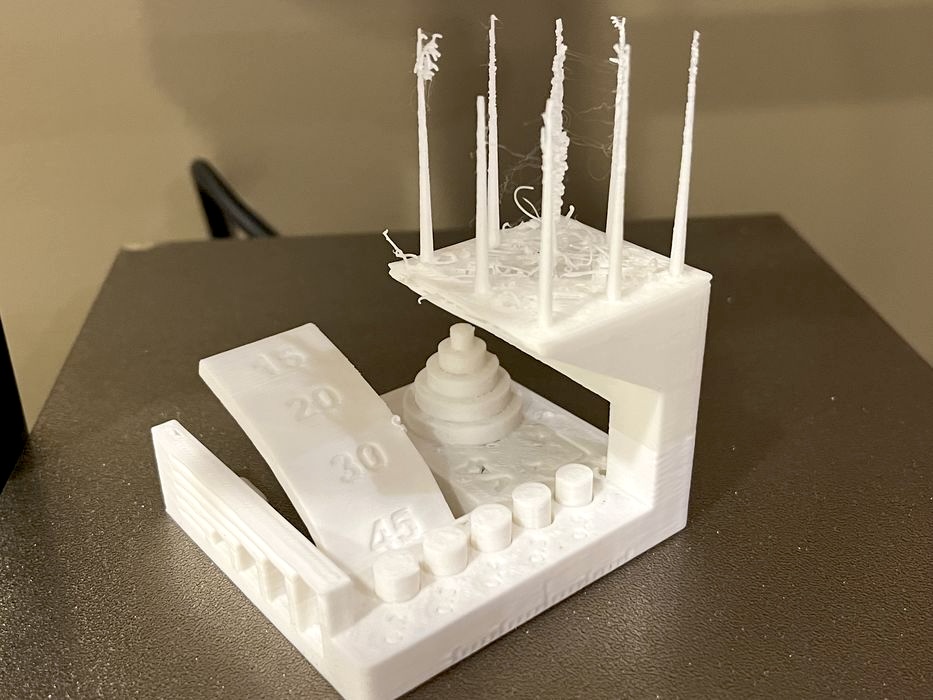
We decided to run a mysterious file named “All Test” and used up the remainder of the sample coil of filament. The print took 1:30 to complete this item, and overall the print quality was not very good.
We then suspected the sample coil of filament to be not in the best condition, and now that it was used up we switched to a better brand name PLA to continue testing.
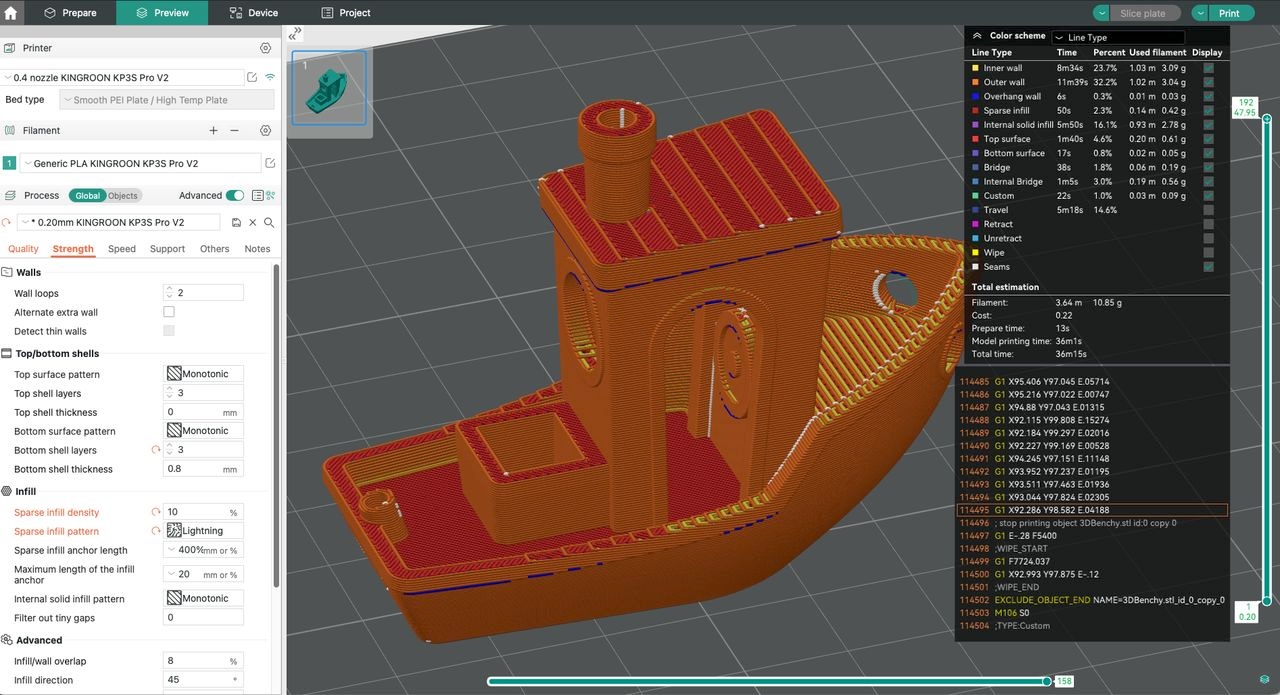
We printed the remaining pre-sliced GCODE prints on the USB stick, #3DBenchy, which completed in a reasonably quick 23:58. Surface finish was good, with the exception of a very thin top surface, most likely due to the top and bottom layer counts being lowered to speed the print up. We would know more when we went to slice our own prints.
Kingroon KP3S Pro V2 Software
The printed manual that ships with the KP3S Pro V2 shows instructions for setting up then 3D printer for use with UltiMaker Cura. It also turns out that Kingroon created profiles for the 3D printer in UltiMaker Cura, PrusaSlicer, and OrcaSlicer and made them available for download.
These additional profiles must not have been available before the printer shipped out for review, so it’s always a good idea to check out the manufacturers website for any updates. We decided to go with OrcaSlicer, as Kingroon had us switch from UltiMaker Cura to OrcaSlicer partway through our last review with them, so we decided to use the latest version of the OrcaSlicer.
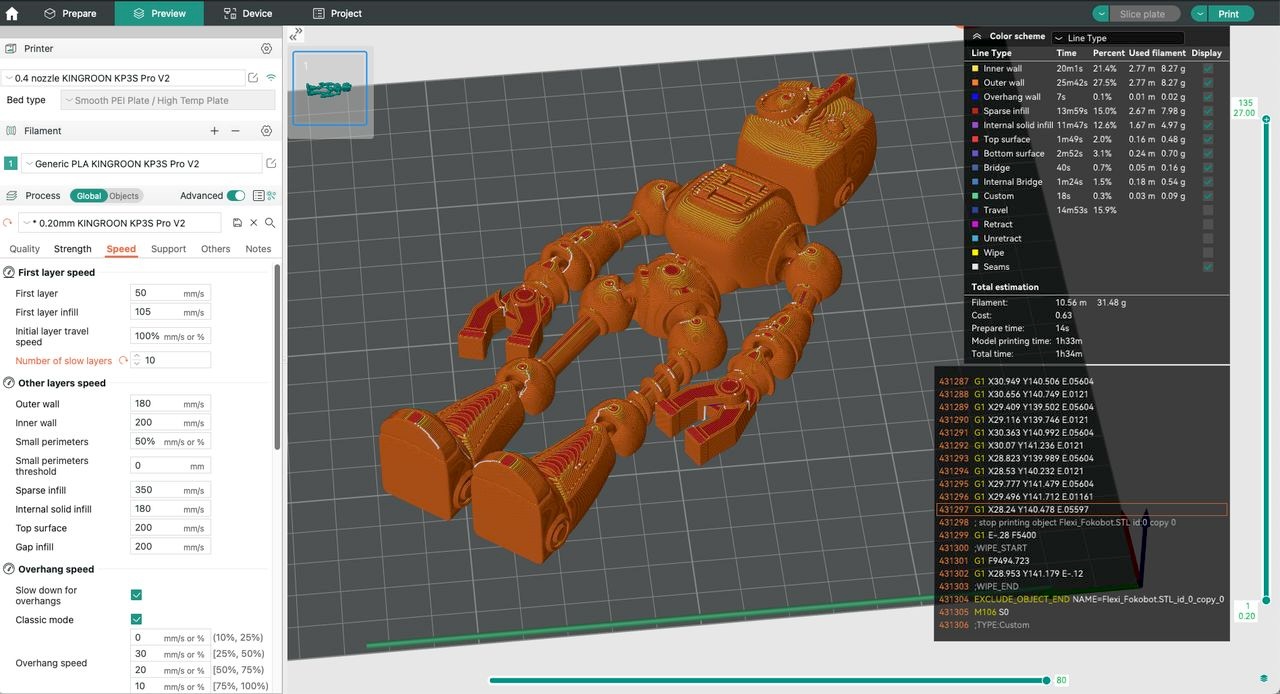
We looked through them all and saw the newly imported KP3S Pro V2 settings under Printer, Filament and Process, which had presets for nozzle size, filament settings for PLA, PLA TS, & PETG, and several process settings. Under the Printer section at the top of the column, we noticed a WiFi symbol. When we clicked on that we found we could add the IP for the KP3S Pro V2! This would allow us to send jobs directly to the printer from the slicer. We sliced our first model, the CTRL–V test object, and clicked Print > Upload and Print. The slicer promptly sent the job to the printer with an estimated print time of 14:20.
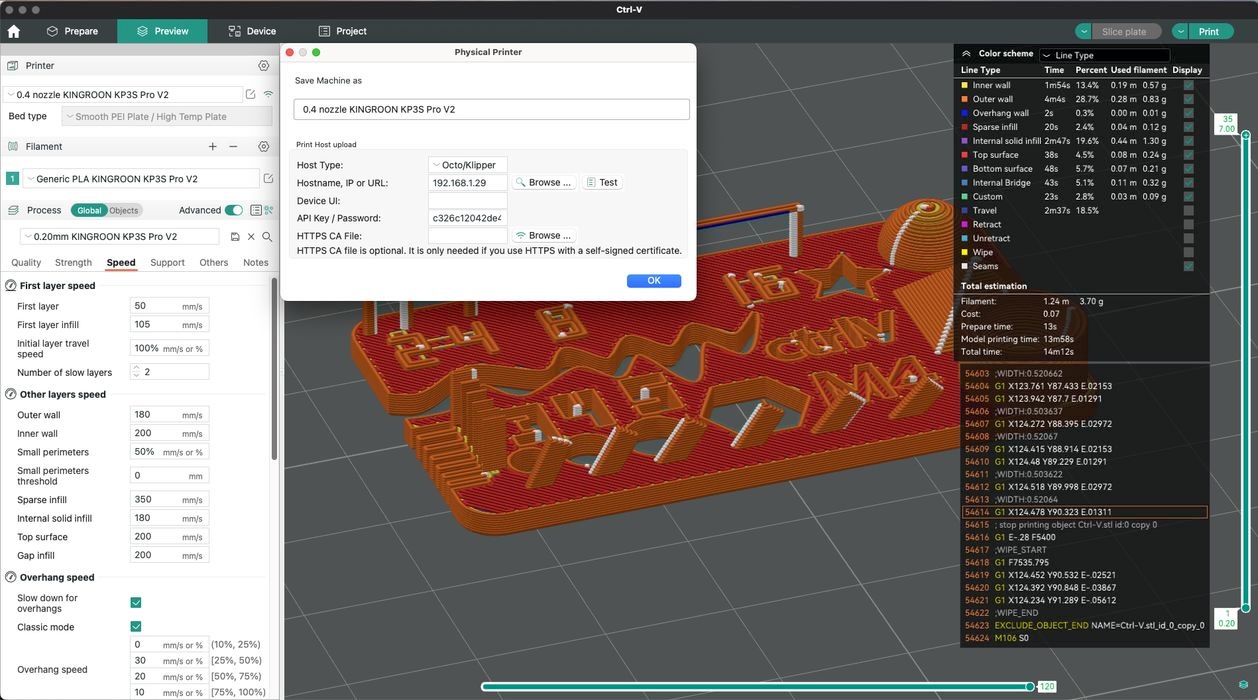
We noticed a curious tab at the top of OrcaSlicer labeled “Device”. Clicking on that tab brought up the KP3S Pro V2’s web interface, where we saw that the job was indeed printing, and that the machine was preheating. The addition of this tab to the slicing software was very handy and certainly made our workflow much easier.

The actual time for our finished CTRL-V test was 20:44, with the print having good detail and zero failures and the surface finish was much improved over the supplied sample GCODE files.
This is part two of a three part series, please read parts one and three.
Via Kingroon