
My review of the Kobra X desktop 3D printer from Anycubic concludes with a look at software, print results and final thoughts.
This is part three of a three-part series; please read parts one and two.
Anycubic Kobra X Software
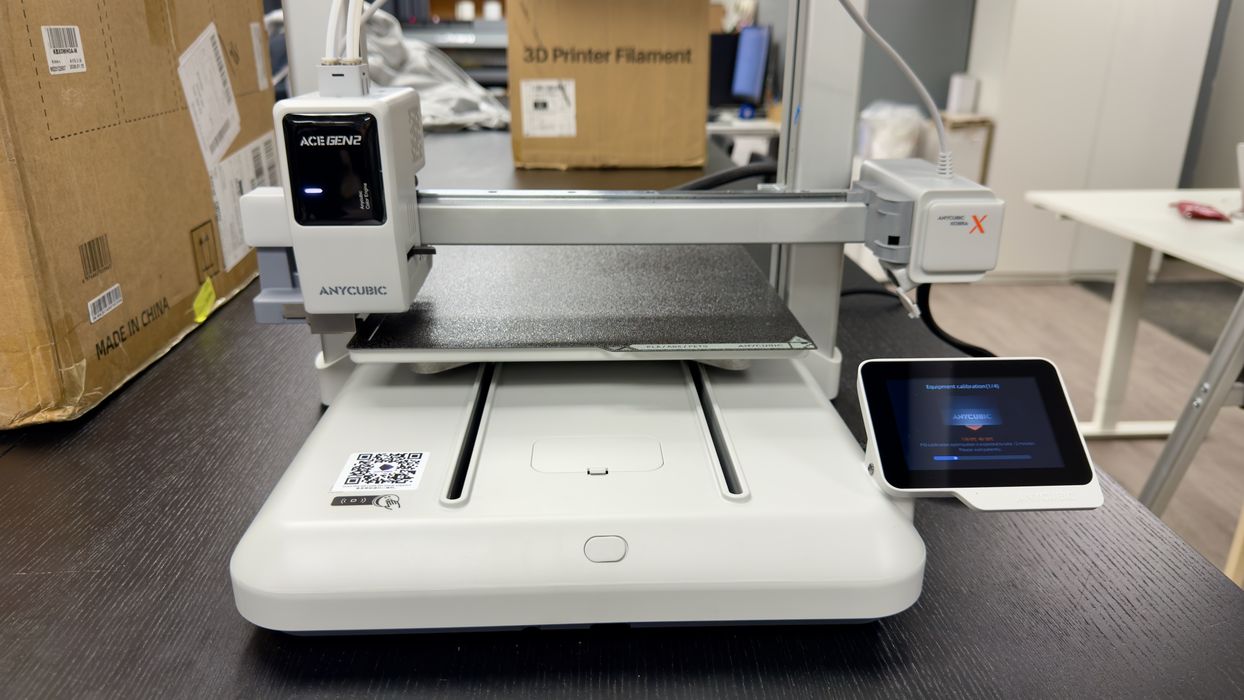
It is time to add the Anycubic app to my phone and desktop slicer to my laptop. Once the printer was connected to WiFi, I scanned the QR code on the control panel to add the app to my phone. This was my first time adding the Anycubic app, so I needed to register an account before proceeding.
On the Anycubic app, I added the printer and scanned the QR code on the printer to link the accounts. This process was very easy to do.
I downloaded the slicing software on my laptop. The software has all of the Anycubic printers, and when I selected Kobra X on the same WiFi network, it synchronized everything, even on the desktop slicer.
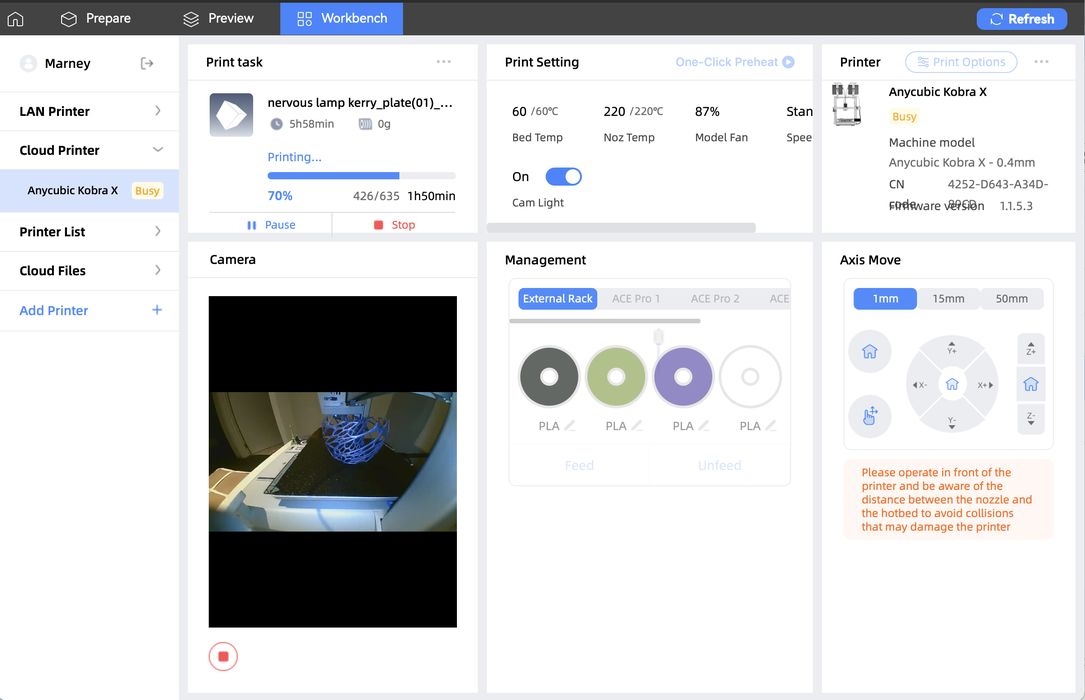
I discovered I could not use the Kobra X’s webcam. Eventually, I discovered that you need to select an icon at the bottom of the camera (on screen) to turn the camera on.
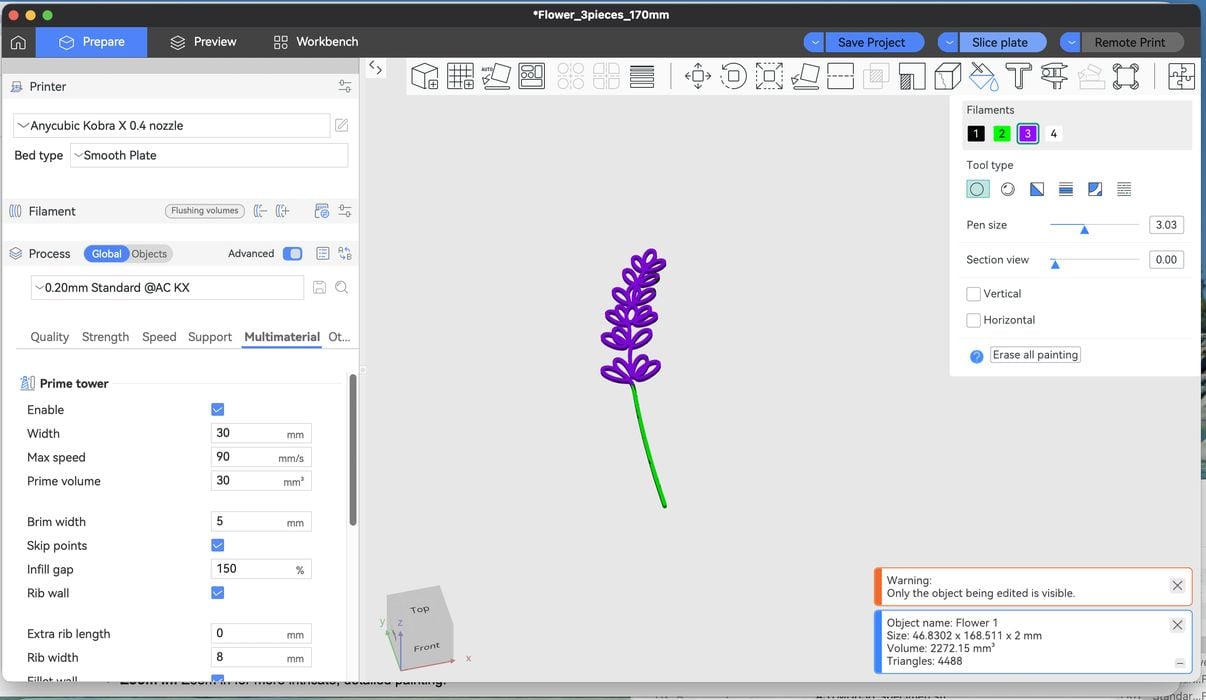
I decided to manually paint a print in the slicer with some colours. I picked a simple 3D model of flowers and added the colours by selecting the part and the colour painting icon.
I thought I painted the lines accurately; however, you can see in the image that I didn’t. Some hidden sides were missed. Manually painting parts is still pretty tedious, and you need to remember to paint both the top, bottom, and sides of the part. Tip: paint, then rotate the view to all angles to make sure you covered everything.
The software crashed a few times on 2 separate days, both while I was changing the colour on the slicer. I don’t know why that happened, but that could be annoying if I lost a complex paint job.
I also noticed during a temperature tower test, when the part was actively printing, that if I went into a previously printed part on the workbench, the completed print’s temperature always matched what was currently printing. I am not sure if that is correct.
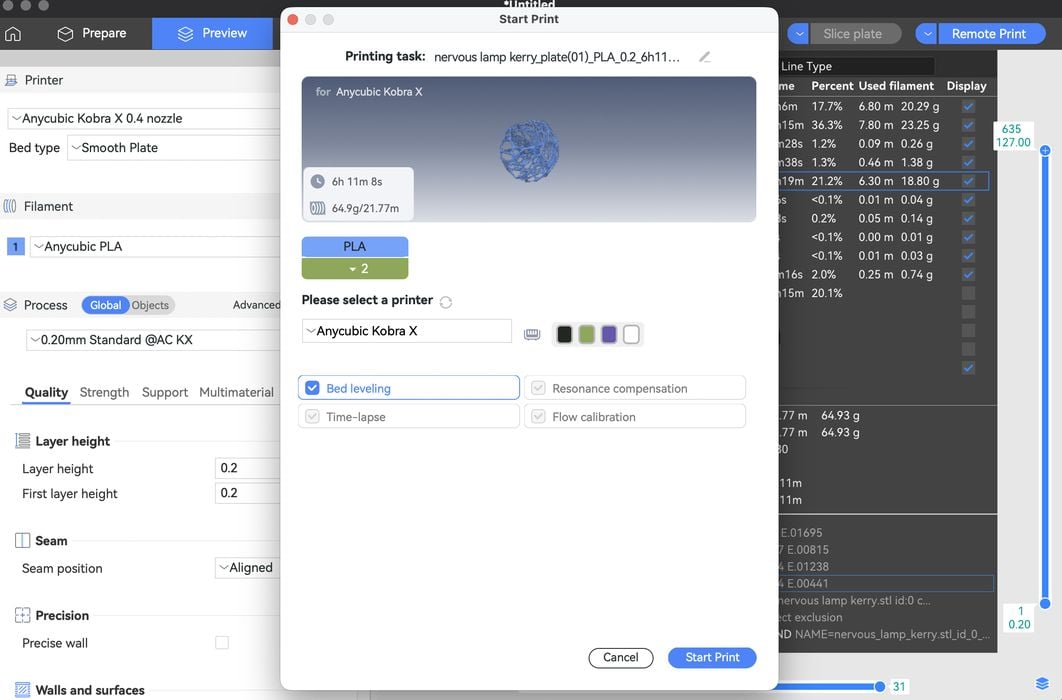
With the multicolor settings for filament, it took me about 20 minutes to find the edit beside each filament spool to change the presets. See image above.
The software worked reasonably well, but I did have to figure out how to do a few things. Once I learned how, it was pretty easy to use.
Anycubic Kobra X Print Results
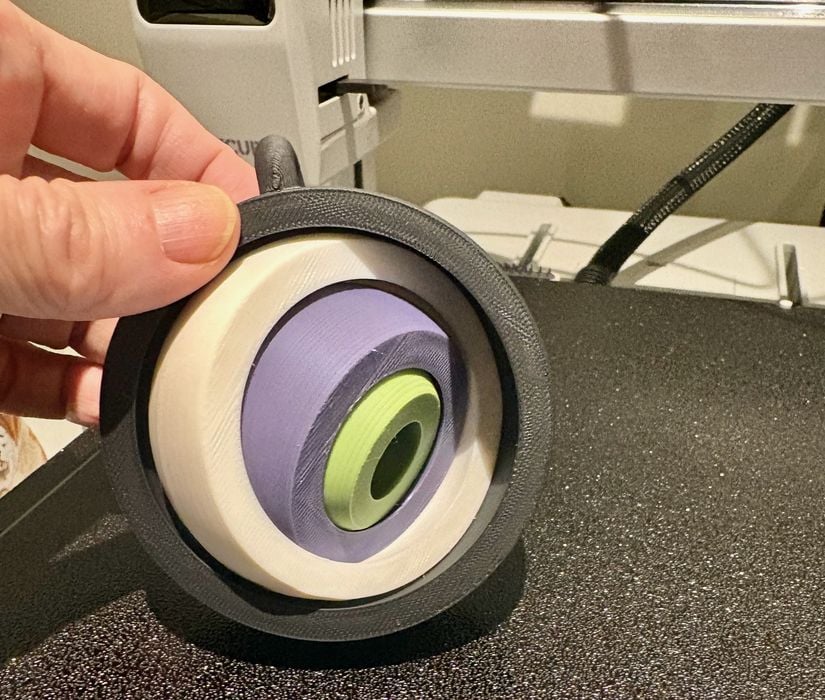
My first non-#3DBenchy print was this four-colour spinny thing. It printed perfectly and all cores rotated properly without sticking, right off the printer.
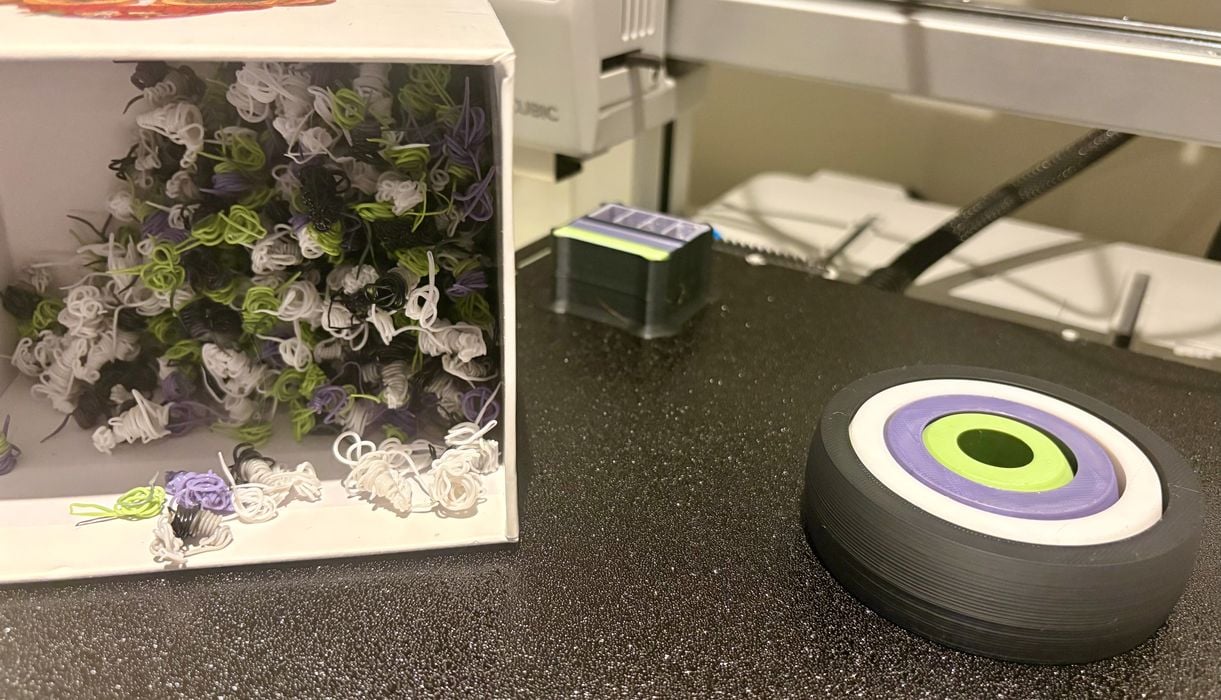
However, since it was a multicolour job, the Kobra X had to poop each time the colour was changed on each layer. Here you can see the amount of poop produced for this job. It is a bit less than you’d see on a typical filament swapping 3D printer, but there is still a fair amount of wasted material.

Here I tested another multicolour print, which came out quite well. Since it was taller, there were more layers to change colours, and you can see there was a lot more poop produced. Tip: be careful when printing multicoloured objects because it is still possible to produce a lot of waste.
I was pretty impressed with the quality of the prints — they came out with good quality and quickly, too.
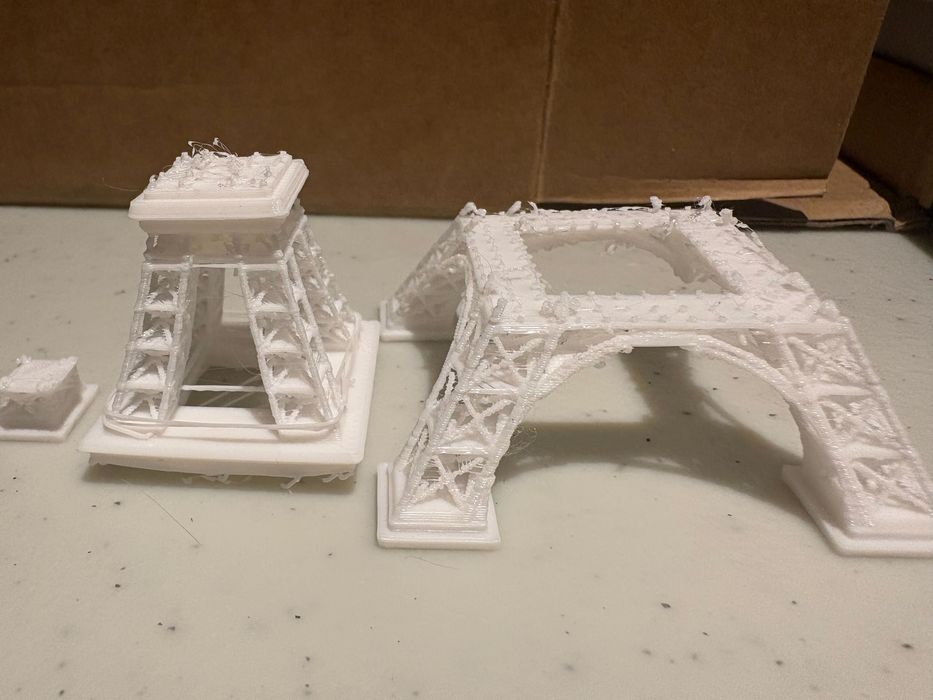
I decided to push the envelope by trying to print a really detailed model of the Eiffel Tower. We’ve printed this one before, but usually when testing high-resolution resin 3D printers. How would it do on the Kobra X?
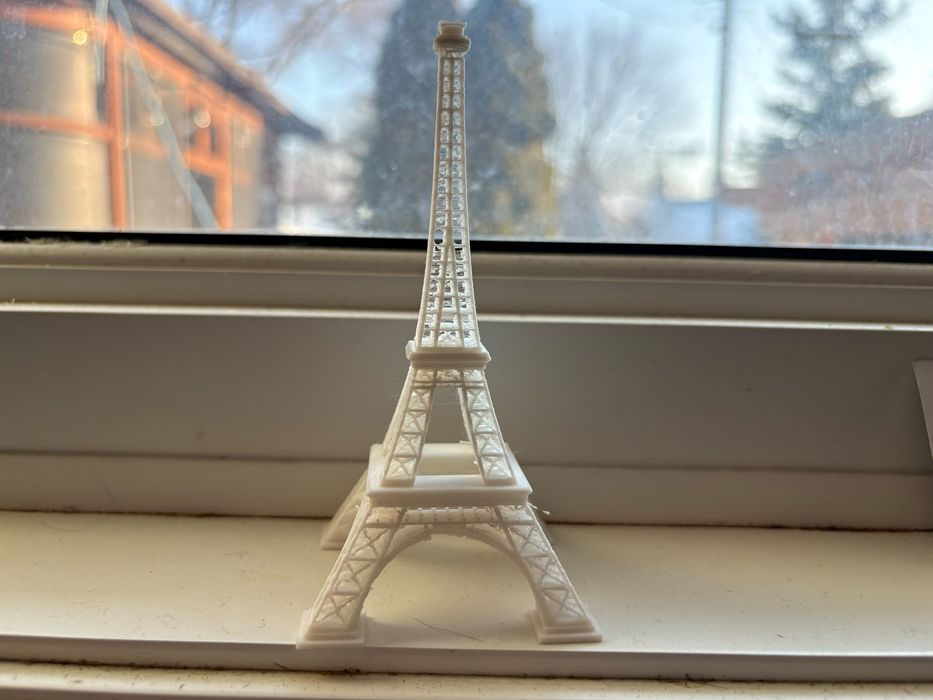
The Eiffel Tower first print was not bad, but when you look close-up, you can see all of the filament strings in the middle of the tower.
This Eiffel Tower print caused me to print a Temperature Tower for each spool of filament. The end result seems to be that the nozzle temperature at 215C is the best temperature for this particular filament.
Retraction settings for the AnyCubic Kobra X are .8 mm. This seems to have produced some stringing on the Eiffel Tower print, so I override the setting to 3.0mm. I also adjusted the nozzle temperature to a max of 215C rather than 230C.
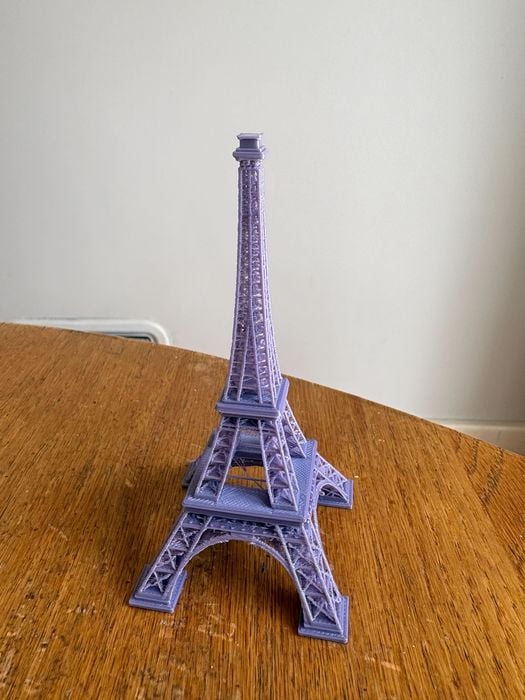
I reprinted the Eiffel Tower at the nozzle temperature at 215 and changed the filament retract length. I cannot see much difference myself, but someone with a more discerning eye could.
Reprinted the Eiffel Tower again with a 2.0mm filament retract length, and the print had a catastrophic failure.
I looked up why the printer’s default is 0.8mm. Researching this, it turns out that 0.8mm is the optimal default for the Kobra X because the distance between the extruder gears and the nozzle is very short; only a small amount of filament needs to be pulled back to relieve pressure and stop oozing.
A small retraction distance, typically under 1mm, is ideal for all-metal hot ends. If the retraction distance is too high (e.g., >2mm on a direct drive), the molten, soft plastic can be pulled up into the cold zone of the hot end, causing it to harden and create a “heat creep” clog. It does look like this is what happened to the print.
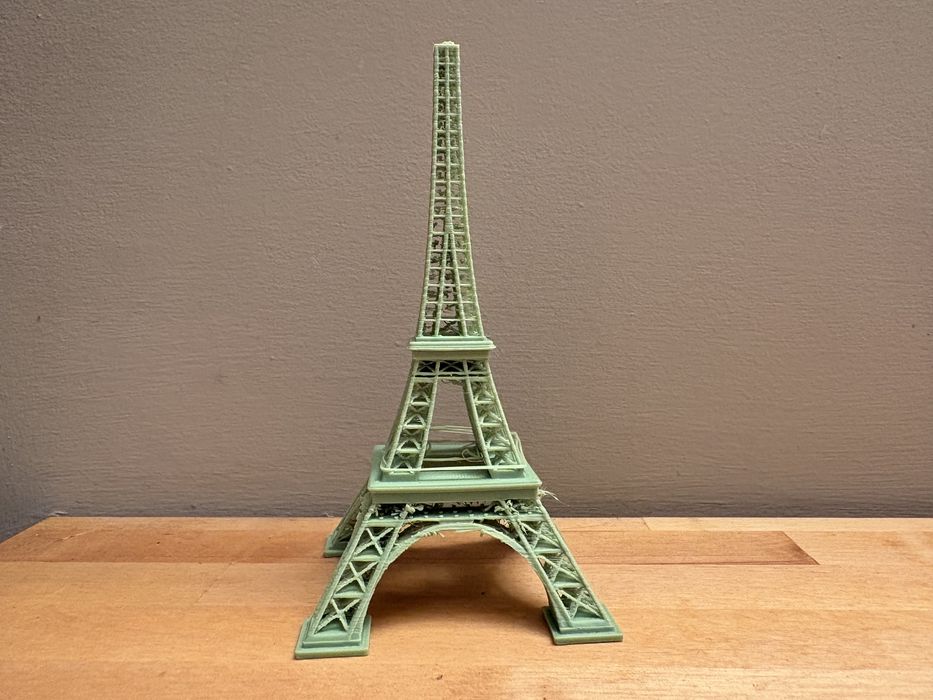
I am reprinting the Eiffel Tower again, and this time I kept the filament retract length at .8 and changed speeds for infill, outerwall, and innerwall. I reduced all of those speeds by 50%. The Eiffel Tower printed, however, with stringing again. I feel as though I could continually adjust the print settings with this printer. I guess the moral of the story is that this is a very challenging 3D model to print on a FFF system.
Anycubic Kobra X Final Thoughts
I recommend this printer for an enthusiast because of the four-colour capability. However, managing four colours could be difficult for some beginners, especially mounting spools. A 3D printing enthusiast would enjoy fine-tuning the print settings in the slicer, but it might frustrate a beginner or a professional operator.
At only US$299 for the Kobra X, you can get yourself multicolor capability for less than any other 3D printing option.
ANYCUBIC
KOBRA X
★ BEGINNER 7/10
★ ENTHUSIAST 8/10
★ PRODUCTION 7/10
BEST FEATURES
✔︎ Four colours
✔︎ Less purge waste
✔︎ RFID Reader
QUESTIONS
✖︎ More tools!
✖︎ Tuning required
✖︎ Spool assignment
This is part three of a three-part series; please read parts one and two.
Via Anycubic