

Is it possible to 3D print full-colour images with filament? Apparently, it is now.
A recent video from 3D Revolution describes a new online tool, Prime3D. It allows you to upload a 3D model and not only paint it in any colour, but also import images and project them onto the model. The resulting colour 3D model can then be exported in .3MF format for printing.
Hold on, how could this possibly work? Desktop FFF devices typically have only four filaments/colors available during a job, so how could you reproduce arbitrary colour shades for a print job?
It’s all an optical illusion: the idea is to stagger layers and use adjacent placement to fool your eye into seeing a different colour: a tiny bit of magenta beside a tiny bit of yellow would look blue, for example. By varying the amount of mixtures, it’s possible to reproduce a range of colours, albeit in rough form.
Prime3D, which by the way is open-sourced on GitHub, is an online tool to produce these .3MF files, and it’s pretty easy to use.
You first import your base 3D model, which should have a lot of curves in it. This is because a curved model will have lots of small triangles in its mesh, allowing many spots where colours can be implemented. Flat surfaces don’t work well because they are represented by larger and fewer triangles.
The image is then projected onto the 3D model, which is easily done by rotating and resizing the model so that the image lands properly. Then you hit the “Process” button to create the .3MF file.
I gave this a try, putting an image on a #3DBenchy. But would this actually work?
Here is the .3MF file after importing it into BambuStudio. It does seem to work.
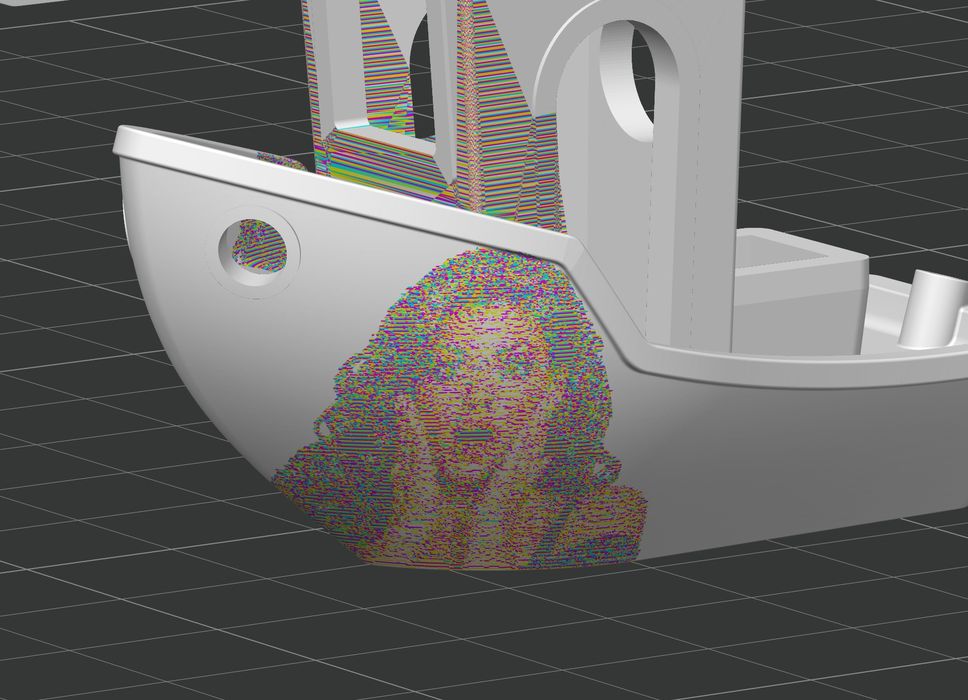
However, in order to maximize the opportunities to place colours beside each other, you should slice at a minuscule 0.08mm layer size. You can see that the image is roughly present, and if printed, it may actually appear like the desired image.
But there’s a problem.
Print jobs at 0.08mm layer size are quite lengthy to start with, but this approach also adds in a significant amount of filament swapping. You can see that this simple #3DBenchy job will take 34 hours to complete. Kinda like the opposite of the #SpeedBoatRace competition.
Even worse, the amount of wasted filament is staggering. A total of 437g of filament would be consumed on this job, with the model weighing in at only 14.13g. That’s a 97% wastage rate.
I am very impressed that this can be done at all, but clearly it is only feasible on tool changers or Vortek-equipped systems like the Bambu Lab H2C. No one with a conventional filament swapper should attempt this approach.
Via YouTube