
We’ve just finished testing Creality’s K2 Pro Combo 3D printer.
This is part one of a four part series, please read parts two, three and four.
Creality K2 Pro Combo Background
Shenzhen Creality 3D Technology Co., Ltd., better known as Creality, is one of the leading brands in desktop 3D printers, established in 2014.
Creality are known for their popular Ender, HALOT, and Sermoon models, and also have a large ecosystem of additional products such as 3D scanners, laser engravers, filaments, and other accessories. The K2 Pro Combo is part of Creality’s new Flagship K2 printers and is a CoreXY setup paired with a CFS multi-material unit. The Creality K2 Pro Combo is targeted at advanced hobbyists and semi-professional users who need bigger build volume, speed, and affordability, for prototyping and creative projects.
Creality K2 Pro Combo Specifications and Features
Creality’s new K2 Pro Combo is the larger sibling to the K2 Combo, which we’ve previously reviewed. The Pro shares a lot of the K2’s great features and is basically a bigger and better Creality K2 Pro Combo, with a few extra tricks up its sleeve.
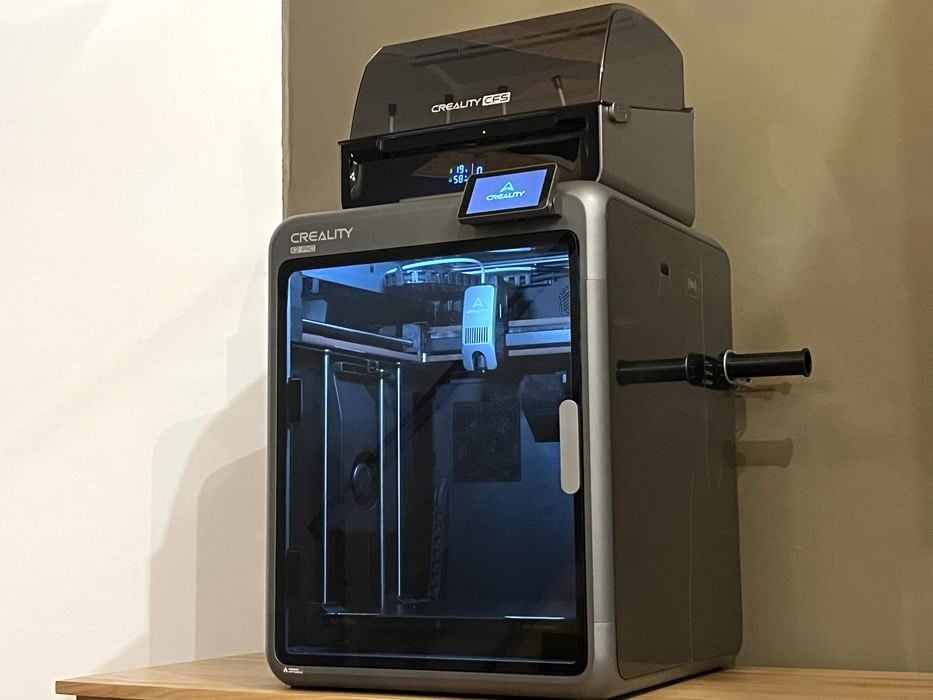
The K2 Pro has a 300 × 300 × 300 mm build area and supports high-speed printing of up to 600 mm/s (300 mm/s typically, unless you’re printing with 0.1mm layers) with 20,000 mm/s² acceleration.
The K2 Pro comes equipped with a direct drive extruder and hardened steel hot end rated at 300C, with a 40 mm3/s volumetric rate. This is paired with a 110C heated bed and dual-sided coated flexible steel buildplate – that’s 10C hotter when compared to the K2.
A 60C heated chamber has been added to the design to help keep prints thermally stable and not warp during printing — making the Pro capable of handling PLA/PETG/PET/ABS/ASA/PLA-CF/PA-CF/PPA-CF filaments.
The K2 Pro has a 4” touch screen, smart AI camera detection, dynamic auto leveling, and CFS system support. The Creality Filament System (CFS) is the company’s four-spool filament swapping unit.
A rigid metal frame provides overall physical stability, with the printer operating quietly at less than 45dB, making it suitable for home, office, or classroom environments.
For connectivity, an RJ45 port is included, in addition to WiFi (2.4G only), USB, Creality 485 port (for CFS attachment), with a whopping 32GB of internal storage, versus just 8GB on the K2.
A built-in 720p @ 30 fps camera AI monitors the build chamber and can take timelapse videos of prints in progress.
Cooling fan, air filter and alarms look after the Creality K2 Pro Combo and help keep both it and an operator safe. However, you will need to manually tension the belts when they eventually need adjustment.
New features on the K2 Pro include Auto Flow Rate and PA Calibration via a nozzle camera, and a Built in RFID reader, are all quite welcome.
Finally, the part that makes this a combo printer, a CFS is included – a 4 bay motorized spool enclosure with RFID readers in each bay. It’s designed to sit on top of the K2 Pro and handle non-stop filament changes during print jobs. Additionally, up to 4 CFS units can be connected to the K2 Pro’s filament buffer, enabling up to 16 filament choices per print job.
Creality K2 Pro Combo Unboxing and Assembly

The Creality K2 Pro Combo arrived in a large two-piece shipping box and is fairly hefty at 37kg (81 lbs) shipping weight.
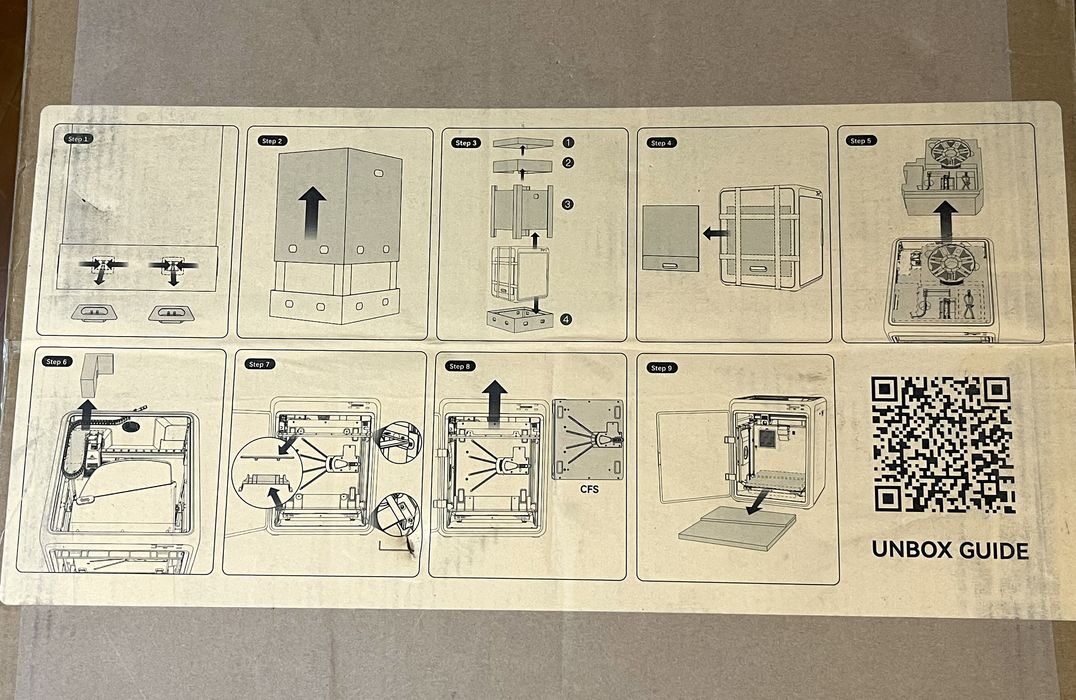
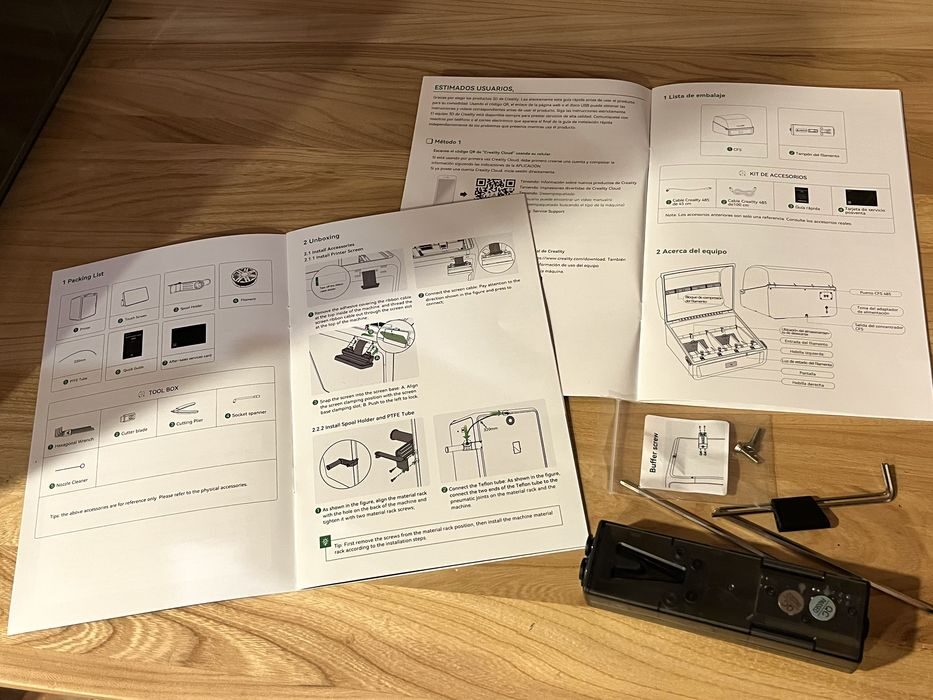
Much like the K2, the K2 Pro has a nine-step illustrated unboxing guide printed right on the outside of the box, with a handy QR code for a video that walks you through the entire unboxing, setup, and calibration of the Creality K2 Pro Combo. This will certainly be appreciated by anyone using this machine.
Given the added weight and size of the Pro when compared to the smaller K2, the method of unboxing is slightly different. Eight connecting clasps located around the outer lower edges of the box must be released and then the box top gripped by the handles and lifted upwards to remove it. Then some foam packing and cardboard corner protectors are removed, exposing the bagged printer.
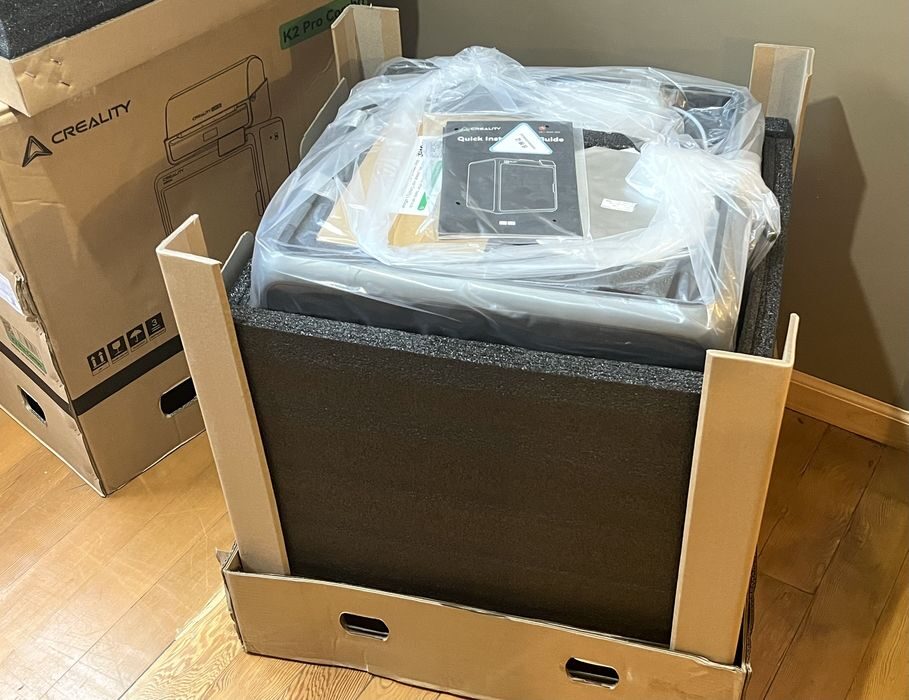
Much like the K2, we found the quick installation guide on the first layer of foam packing – now becoming a standard feature for unboxed 3D printers.
We removed a few foam inserts from the top of the printer that were loaded with various accessories, finding the CFS unit resting inside the cavity of the build chamber. But unlike the K2, it didn’t simply lift up and out. It was firmly bracketed and bolted in place during shipping.
Transferring the entire bundle from the floor to our work table was a bit of a lift for one person, but still doable. If needed, a single operator could first disassemble the CFS brackets and remove the CFS unit to lower the overall weight prior to attempting the lift, but you’d be doing all that on the floor.
Since removing the brackets holding the CFS would be easier to do at eye level, we transferred everything over to our workbench. Given that we needed some tools, we spread the various accessories and their contents out on our workbench to get a good look at everything.
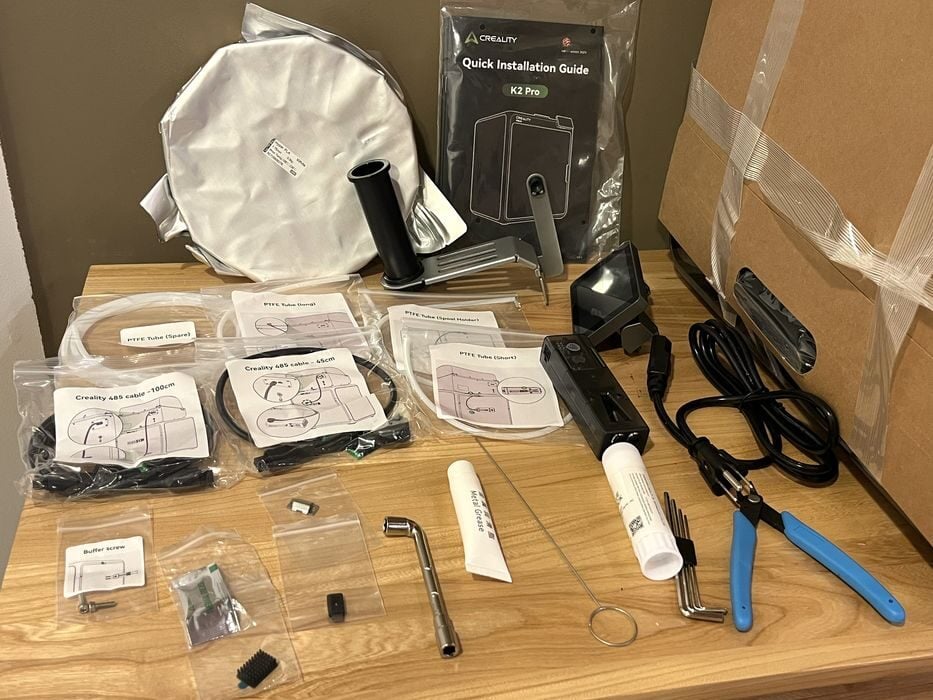
Here we saw the LCD screen, assortment of PTFE tubes, regular sized sample roll of filament, power cord, spool holder, filament buffer, tube of grease, hex wrenches, nozzle cleaner, side cutters, communication cables, spare cutting blade, spare nozzle wiper, nozzle wrench, thermal grease, glue stick, and a few bolts.
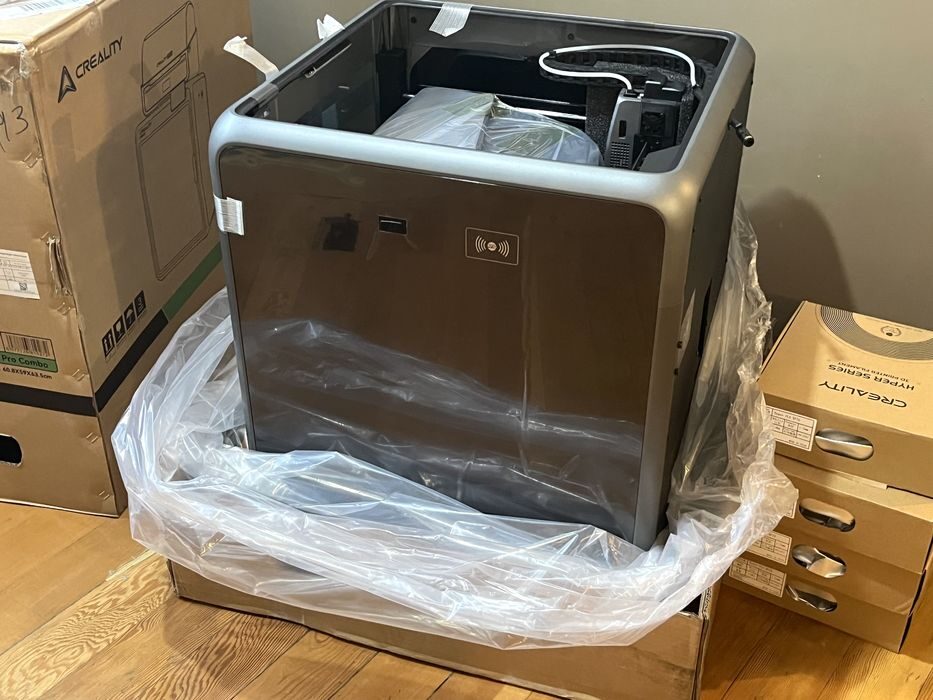
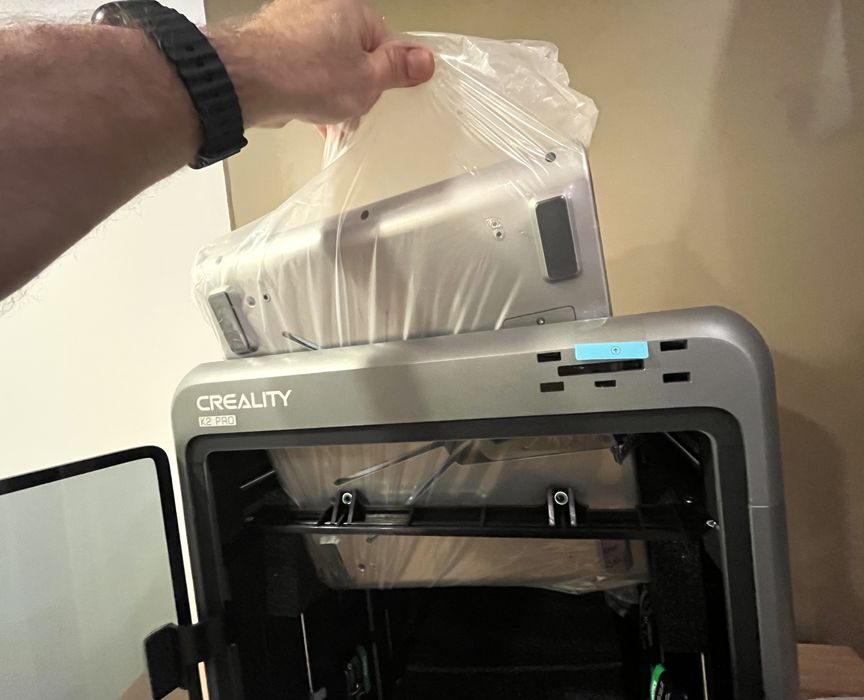
We began by removing some tape and protective plastic film from the printer and then set about extracting the CFS from the build chamber.
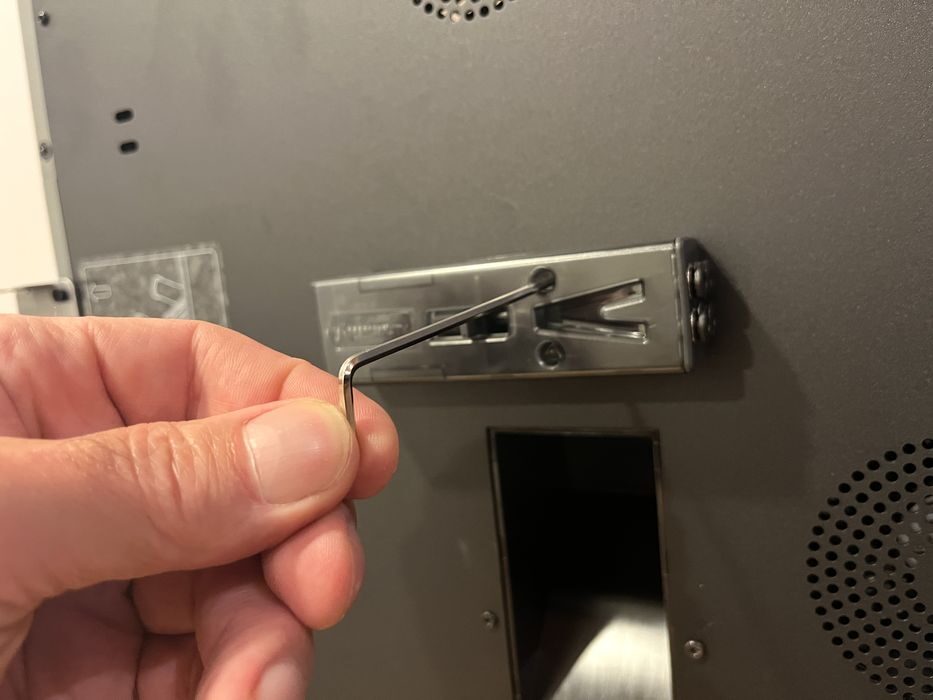
The CFS is held in place for shipping via some top and bottom brackets. We located the correct hex wrench and removed the four screws attaching the CFS to the brackets, and then lifted the bagged CFS up and out.
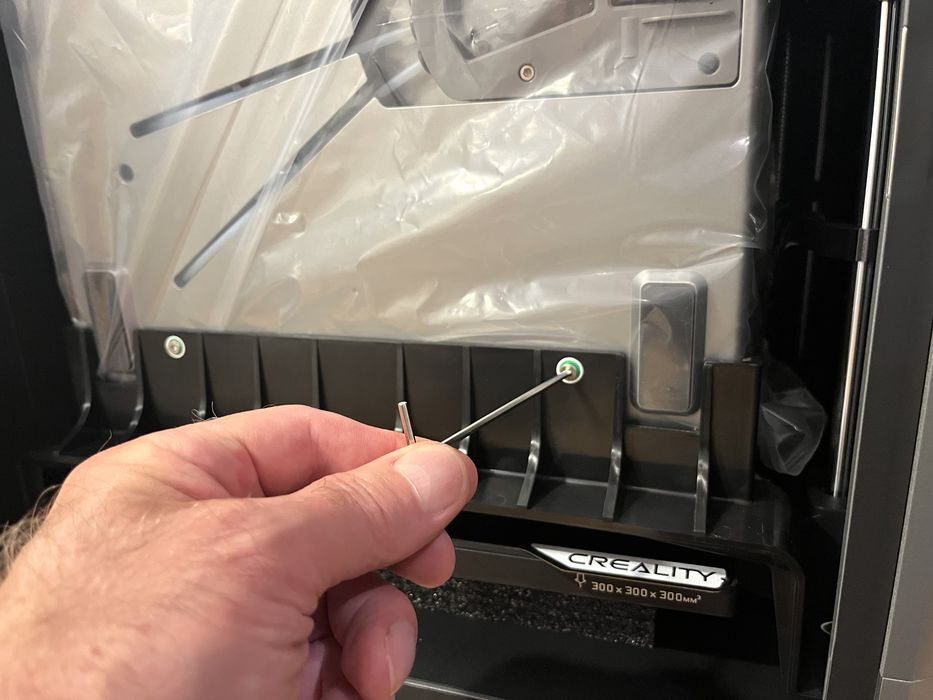
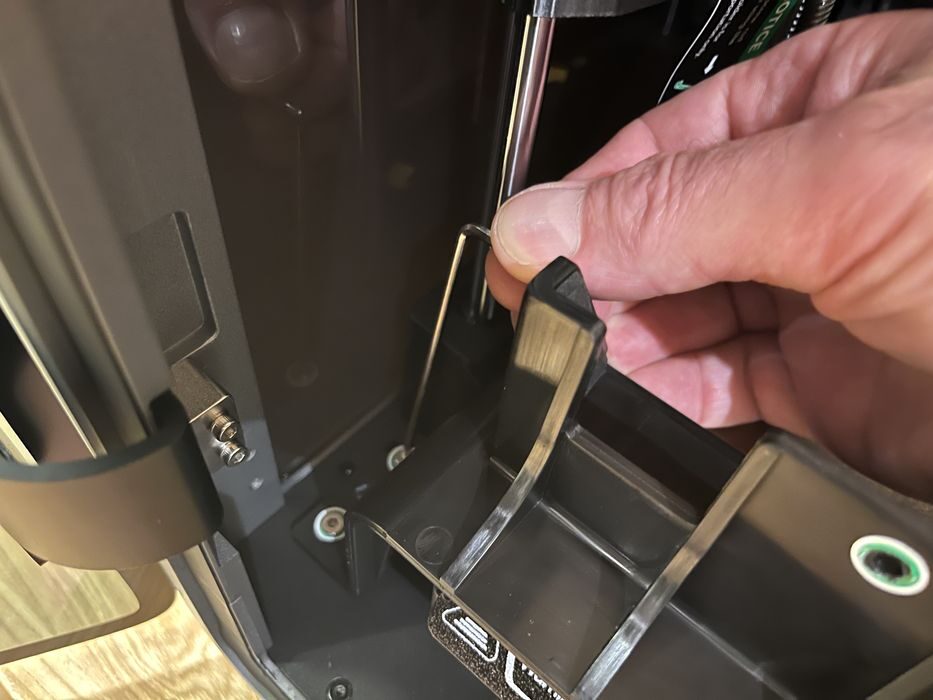
Next we removed the brackets themselves, by detaching two fasteners on the top bracket and four on the bottom bracket — the latter which would have been much easier to remove had the hex wrench been longer. Once done, we removed some foam shipping blocks, detached a package mounted onto the side of the K2 that appeared to be the glass lid, and removed four snap-on brackets holding the Z-axis in place for transport.
Assembly of the Creality K2 Pro Combo began by removing four well marked screws holding down the print bed for shipping. A few stickers and plastic wrap were removed from the build chamber.
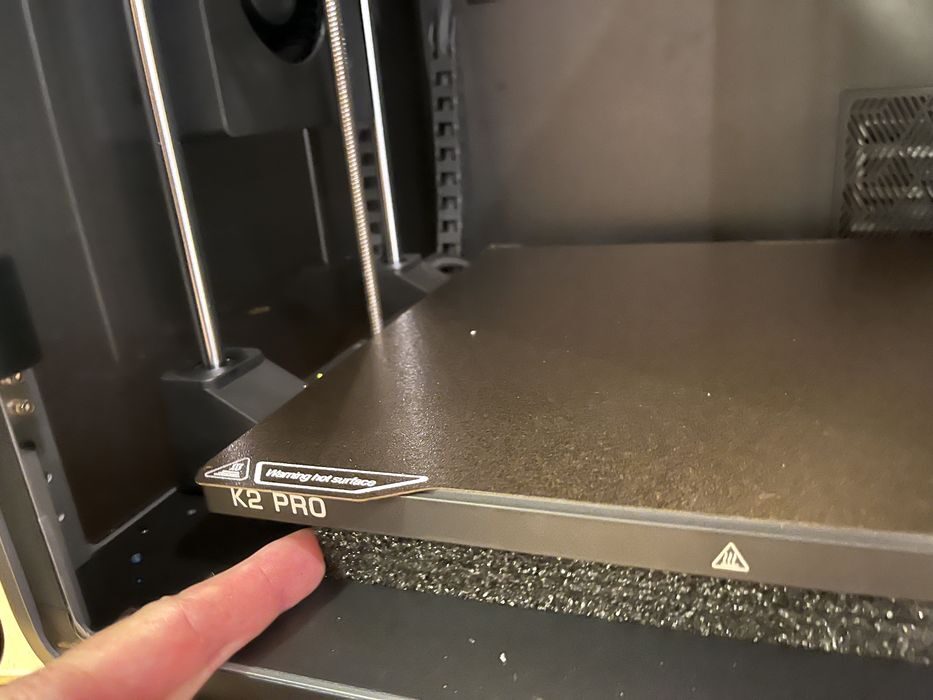
Along the way we found some foam stuck under the build platform that we were unable to remove. After a bit of tugging we noticed a sticker informing us that we could remove said foam after the device had completed its self-check.
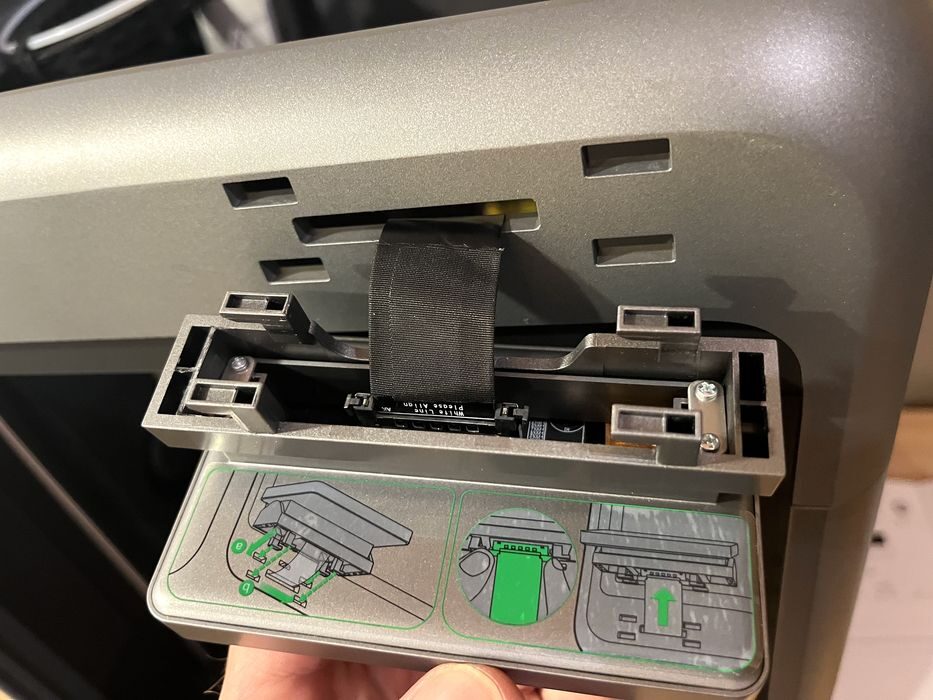
We freed the ribbon cable for the LCD, plugged it in and then clipped its bracket into place, removing the protective film as we went.
Then attached the spool holder to the chassis by removing two chassis screws and then using them to fix the holder in place.
We removed the glass top lid from its protective shipping envelope, installed it on top of the printer, and removed a clear film before placing the CFS unit on top.
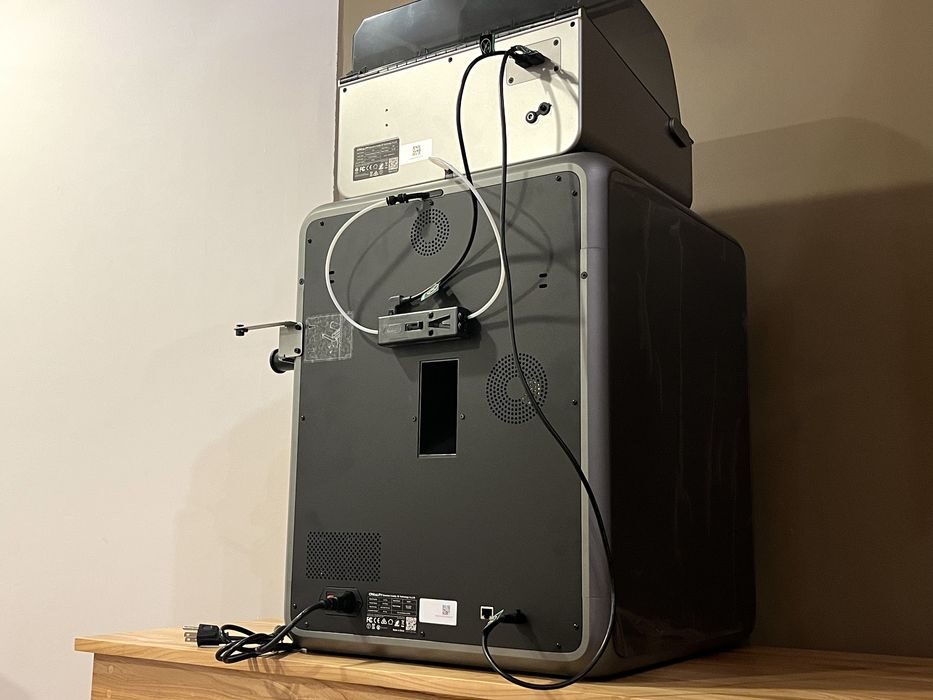
The unboxing video shows where and how to attach the filament buffer in place, but the printed manuals strangely didn’t. An item that was unfortunately overlooked given the separate manuals for both the K2 Pro and the CFS. There wasn’t a proper K2 Pro Combo combined manual.
It really wasn’t a problem, as the video gave superb directions on how to attach the buffer with two bolts to the rear of the Creality K2 Pro Combo, and then connect the PTFE tubes and communication cables in place. There were no issues figuring out which part to use, as they were all bagged and labelled clearly.
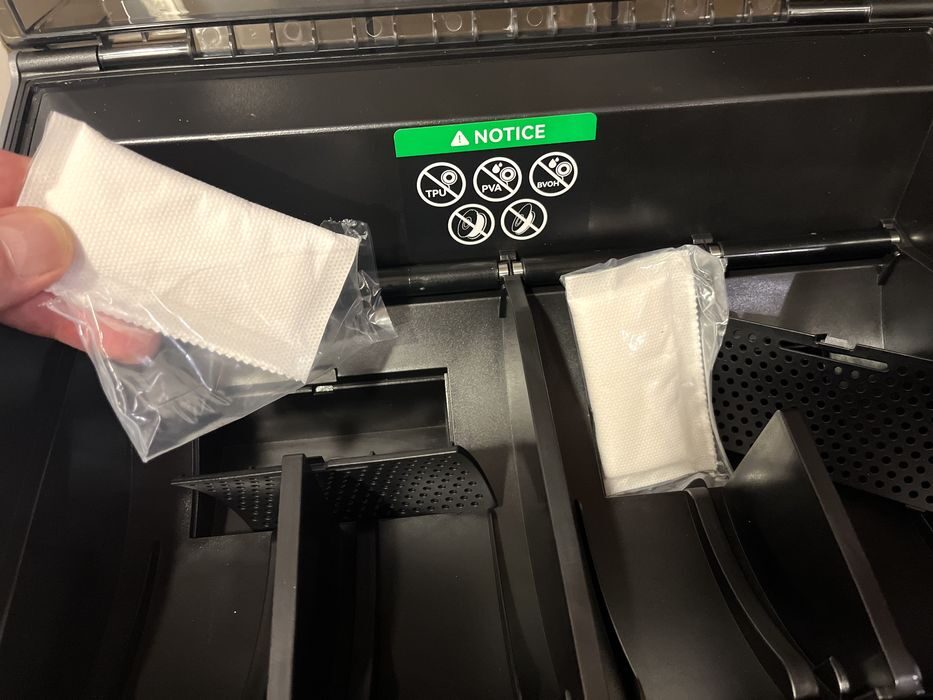
Prepping the CFS was very simple. We located two desiccant packages, extracted them from their plastic shipping bags and reinstalled them. Then attached the Creality 485 communication cables and PTFE tubes that travel between the printer, buffer and CFS unit. A package of spare PTFE tubing was also included, which will be handy as these tubes eventually wear out and need replacing.
The final item of assembly was to double check to see if input voltage needed to be changed. It turns out that Creality’s power supply looks after this for you by automatically switching voltages. So we just plugged in the power cord and were done the assembly!
This is part one of a four part series, please read parts two, three and four.
Via Creality