
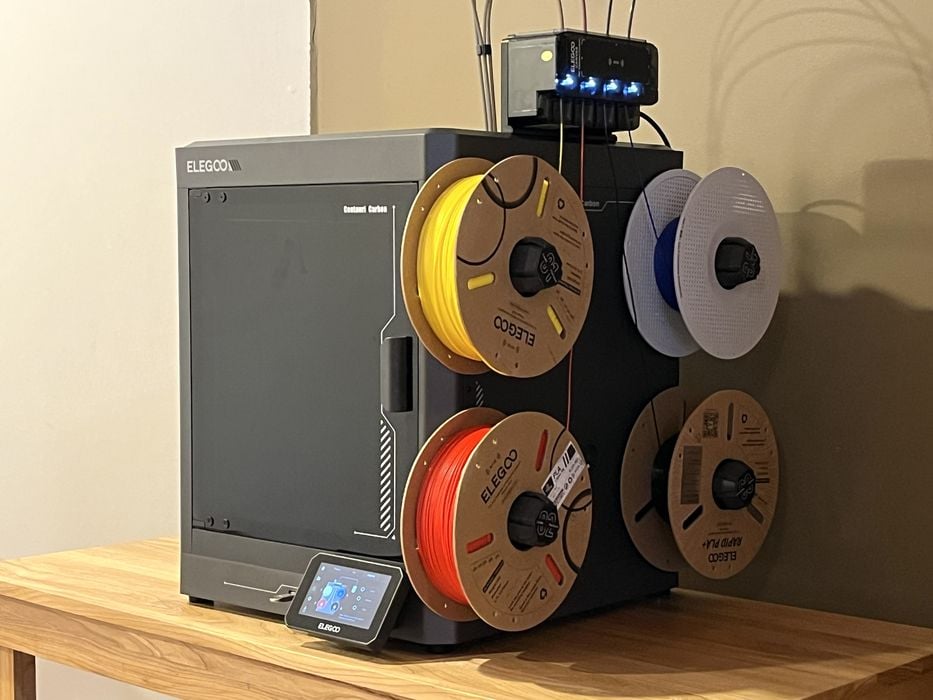
Our review of the Elegoo Centauri Carbon CANVAS upgrade concludes with operations, software, print results and final thoughts.
This is part three of a three part series, please read parts one and two.
Elegoo Carbon Centauri CANVAS Upgrade Operations
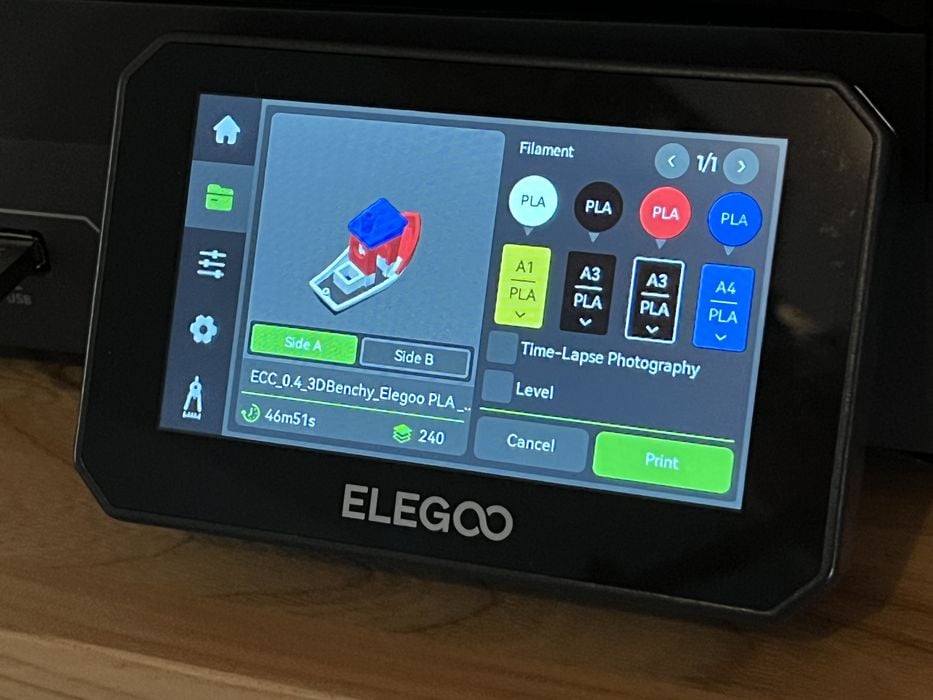
Elegoo supplied some pre-sliced sample GCODE files to test out the CANVAS, so we copied one of the files to a thumbdrive, plugged it into the CC1 and launched the print.
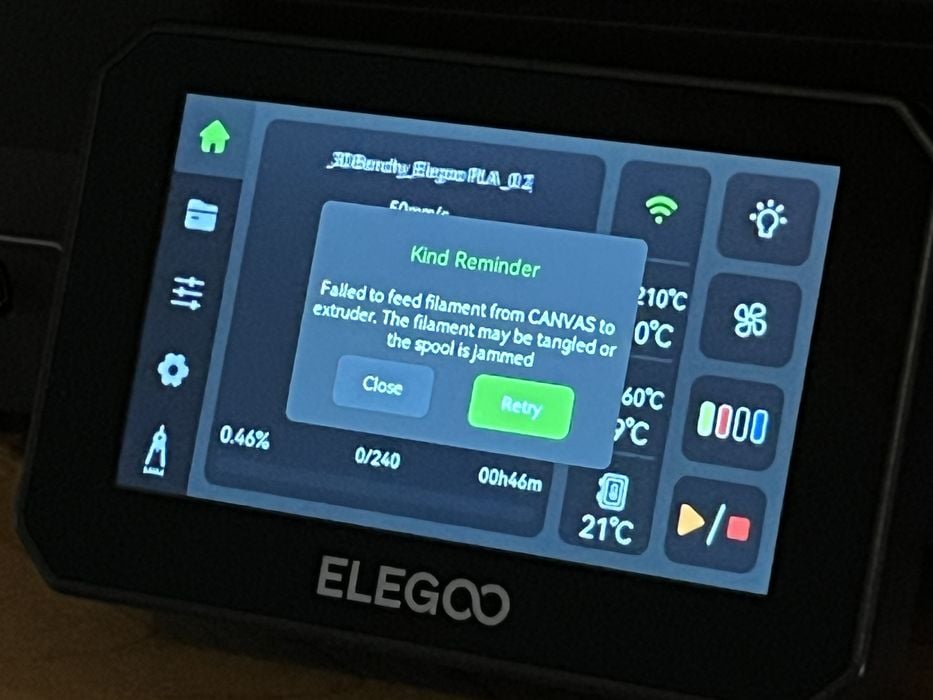
We left to grab a coffee and when we returned to check on print progress, we found that the black filament from spool #3 had advanced and extruded a large blob at the nozzle and hadn’t wiped, with the CANVAS unit flashing red for spool #3 and the LCD displaying the message, “failed to feed filament from CANVAS to extruder. The filament may be tangled, or the spool is jammed“.
Our only option was to Retry, or Close. We clicked Retry and the red light on the canvas went from red to blinking white. We received the same error again and this time clicked Close. Nothing seemed to happen so we stopped the print after several minutes.
We attempted to unload the filament by first clicking on the spool #3, and then Unload, where a Unload dialog box briefly flashed on the screen and then disappeared. When we tried clicking Load, a dialog box popped up and stayed. However, when it got to step 5 – load new filament, the CANVAS made noises and began ejecting filament from spool holder #2 and #4. But wait, we were not trying to unload filament?
We decided to try rebooting the printer to clear the error. When it powered up we noted the CANVAS unit was flashing red on all four spool LEDs. Perplexed, we tried rebooting the printer again and this time all four LEDs displayed as white. Very odd.
We tried another unload of spool#3, but were still unsuccessful. The filament was trapped in the extruder and CANVAS unit, and as a result we were unable to disconnect the PTFE tubing from the fittings to clear the filament.
Instead, we removed the screws attaching the buffer and gently pulled it upwards to expose some filament. Then used the LCD menu on the CC1 to manually heat & extrude some filament to determine if there was some sort of blockage. Everything seemed to work correctly, which suggested some sort of communication issue.
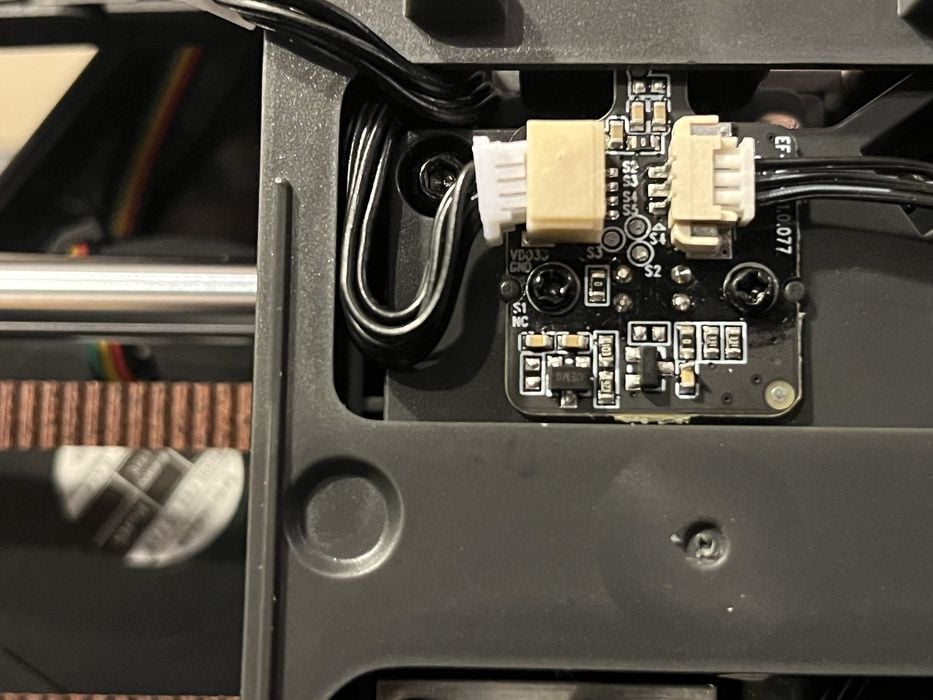
We double checked all of the cable connections we had made during the upgrade and found the culprit – a loose sensor board connector, most likely knocked out of place when we installed the cooling fan cover, as the two connectors share the same place.
Now all our issues made sense. We hadn’t had an operating filament sensor! We reseated the loose connector, rebooted the printer, and were now able to successfully Load or Unload filament. The sensor in the extruder was now alerting the firmware as to when filament was present.
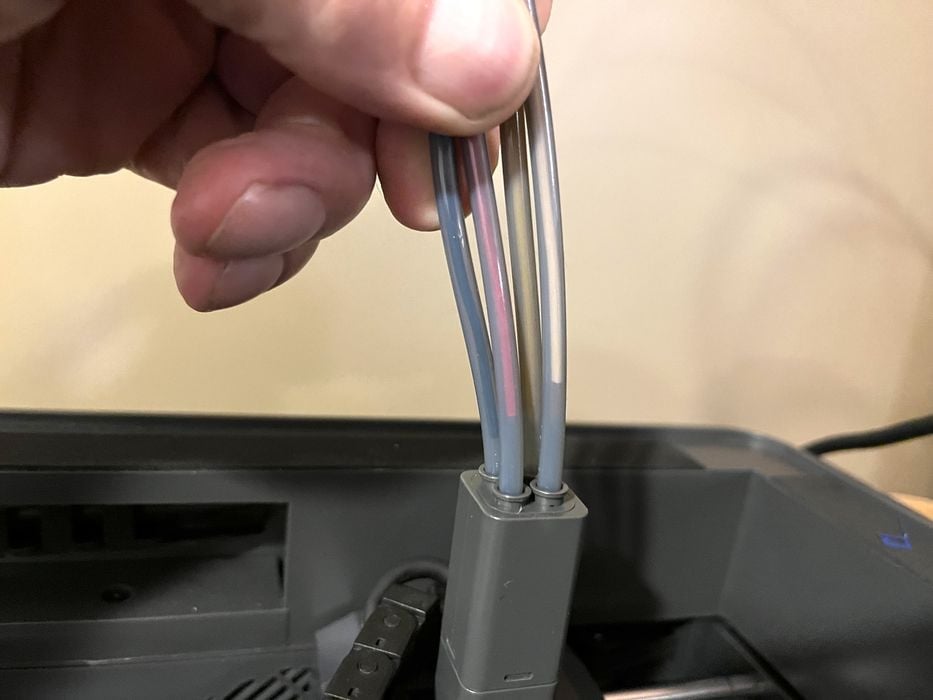
It was during all these tests that we found the CANVAS unit doesn’t actually rewind a spool in the way traditional AMS units do when unloading. Any loaded filament is simply cleared from the extruder gears and into the buffer and then it is up to the operator to manually pull the filament out of the PTFE tubing and CANVAS.
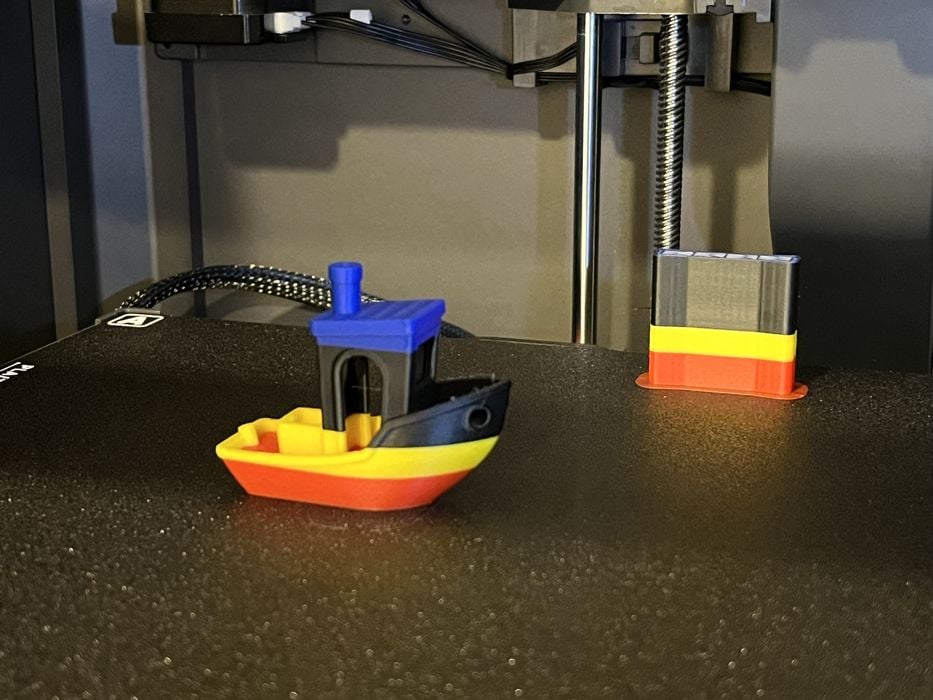
With everything now working properly, we tried launching the provided #3DBenchy job again and it completed without issue in 0h46m with superb quality.
CANVAS Upgrade Software
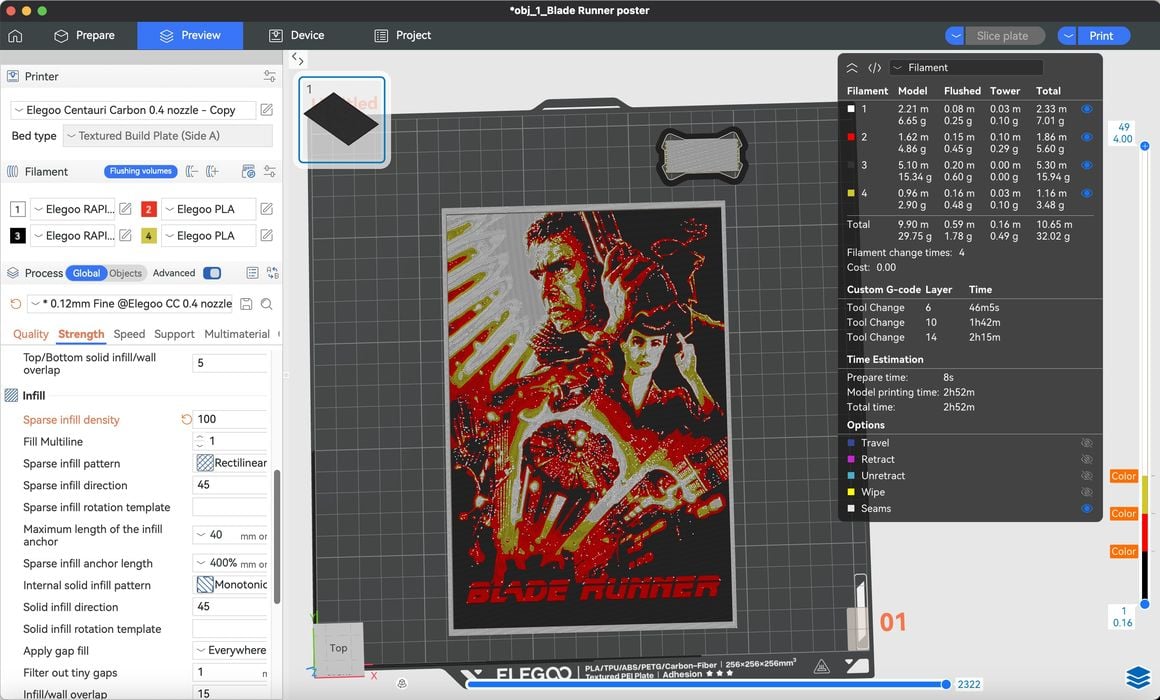
Now it was time to test out slicing our own CANVAS prints, so we went to our Mac and downloaded and installed Elegoo slicer v1.5.0.7 followed by adding the upgraded CC as a printer.
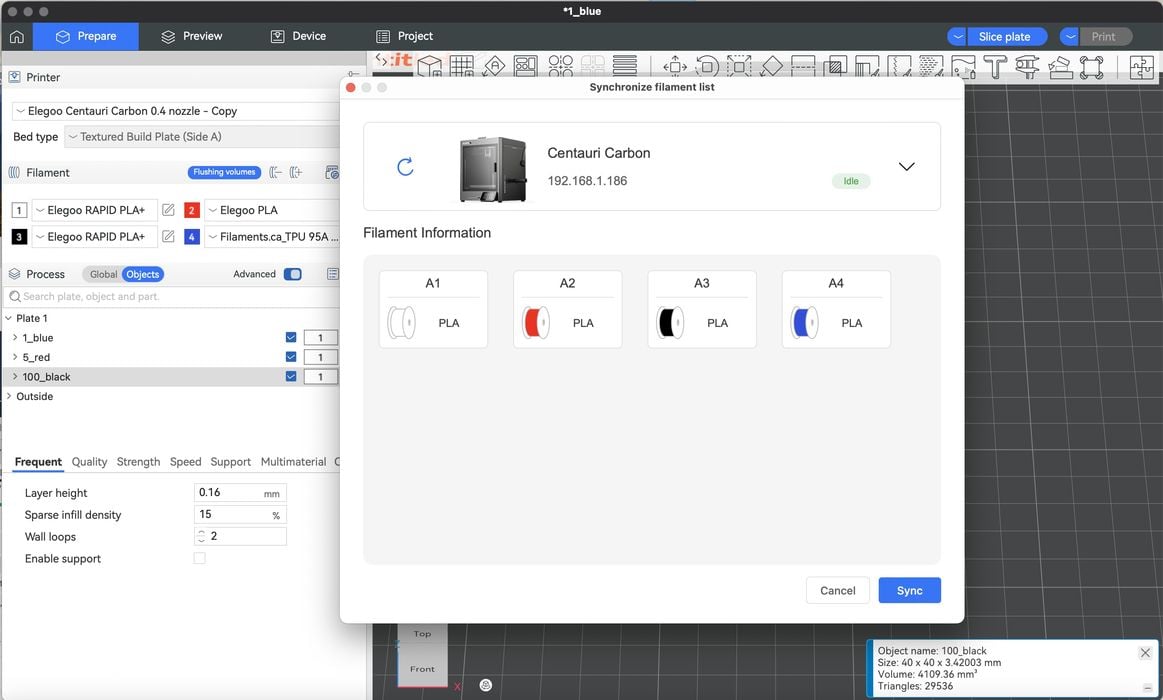
The slicer looks and functions just like previous versions, with the exception of a new button in the Filament section named “Synchronise Filament List”. Clicking on it brought up a dialog box showing the CANVAS’s four spool holders. Clicking a refresh button synced what was currently installed on the printer to the slicer.
As with all Orcaslicer based slicers, filament choices can be made either under the Process–Objects tab or by right clicking on a model and then scrolling down to Change Filament. A Flushing Volumes tab is available to change the amount of filament purged. Once a model is sliced, detailed info is generated showing a breakdown for the amounts of filament used for model, flush volume and purge tower.
CANVAS Upgrade Print Results
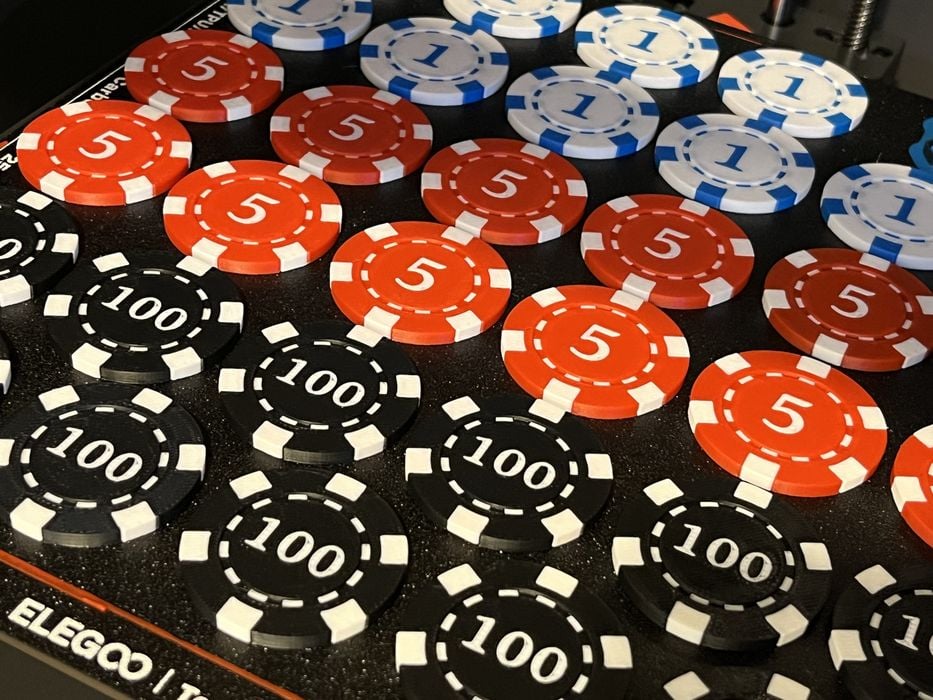
Our next print, Poker Chips, required the yellow filament be swapped for a spool of white, so we went to the CANVAS menu on the LCD, clicked on the yellow spool icon and then Unload. Nothing happened, as there was no filament present in the extruder, so we just tugged on the yellow filament and it pulled out effortlessly from CANVAS. We swapped in a roll of Elegoo Rapid White PLA+ and then edited the spool information manually, as this particular spool was not RFID capable.
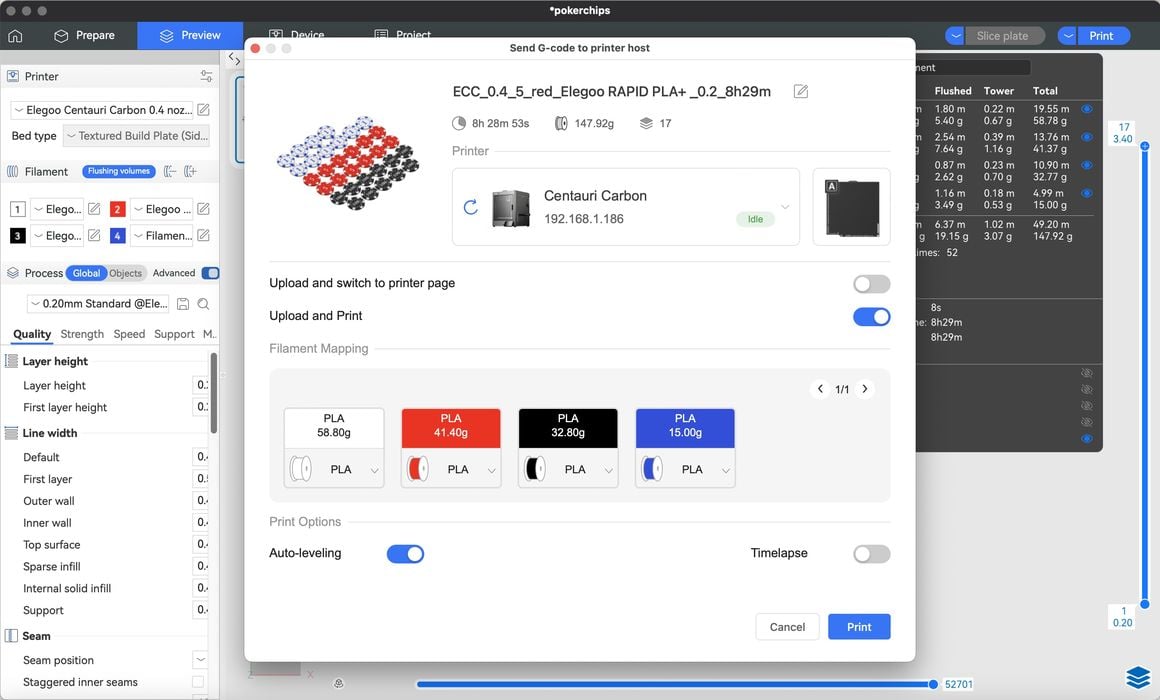
We clicked on Synchronize Filament List to update the slicer as to which filaments were installed on the printer, then went to the Objects tab and assigned the correct filament to each part. We sliced a full tray of poker chips, getting an estimated print time of 8h29m using a total of 148g of filament, with 126g of model, 19g flushed, and 3g of tower. The whole batch turned out fantastic, as you can see in the image.
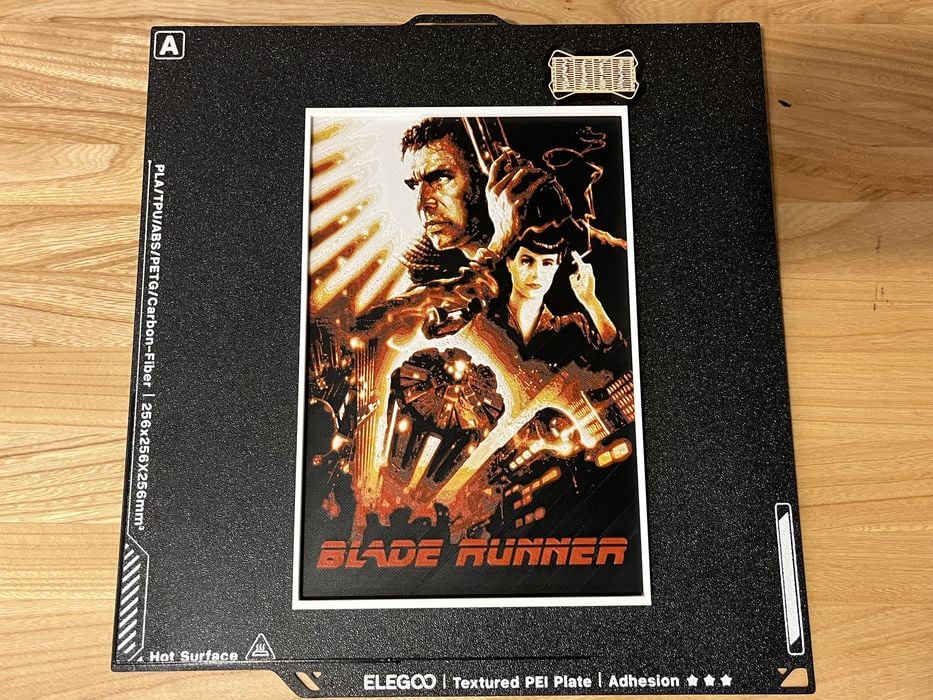
As a final test we sliced a Blade Runner HueForge panel that used 32g of filament, with 30g for model, 2g for flushed, 0.5g for tower. The print completed in 2h40m and looked quite incredible.
CANVAS Upgrade Final Thoughts
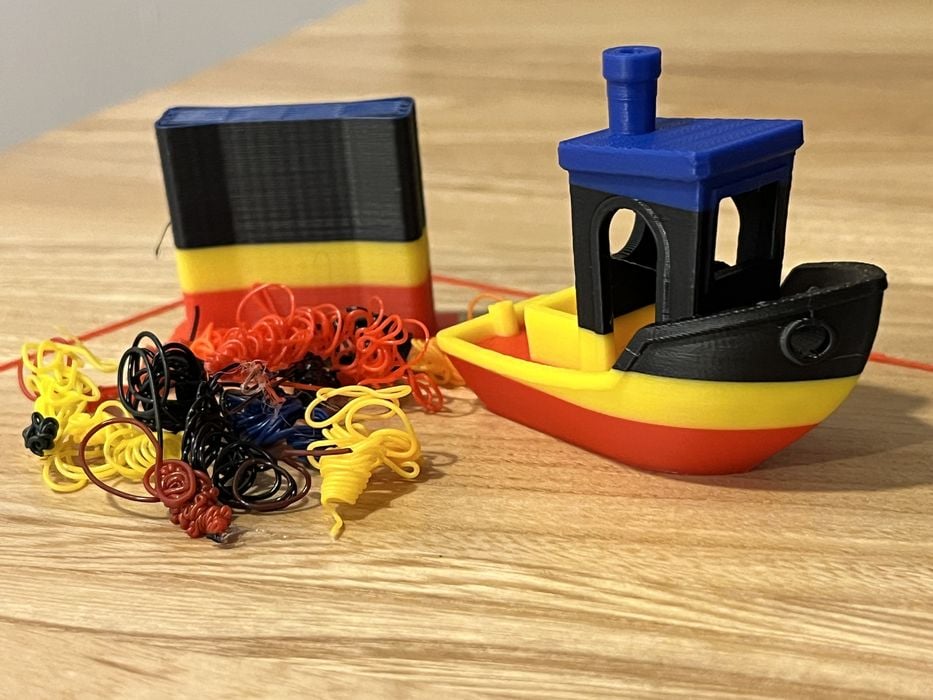
For those of you that have been patiently waiting, multi-color printing has finally arrived for the Centauri Carbon 1.
We found the CANVAS to be a great addition to the CC, with our only issue being a self-induced error with a loose filament sensor connector. That aside, the hardware performed admirably during the course of the review and we got some fabulous prints.
The upgrade is not terribly difficult for anyone with a general understanding of assembly, but we highly recommend anyone considering the upgrade to take the time and watch the install video prior to purchase, just to confirm they have the skillset to do the build properly and/or troubleshoot any issues arising, as was our case.
One really nice feature of the CANVAS is that filament swaps are quick compared to regular AMS setups. Given that four PTFE tubes lead right up to the buffer, the filament need only pull back far enough to clear the extruder gears, totally eliminating the requirement for motors to tediously reel filament back and forth to an external AMS via a single PTFE tube, as is usually the case. That said, you will need to pull the filament out of the CANVAS by hand when unloading, as the filament only gets pulled back as far as the buffer.
Our only real issue with the design of the CANVAS is its external side mounted filament spools that are open to the elements vs a standard enclosed AMS, and the fact that the printer now has no lid to retain heat, unlike its cousin the CC2 with its custom top.
But then we still did get some fantastic prints out of the hardware. Bravo Elegoo!
ELEGOO
CENTAURI CARBON CANVAS UPGRADE
★ BEGINNER 6/10
★ ENTHUSIAST 8/10
★ PRODUCTION 8/10
BEST FEATURES
✔︎ Quick color swaps
✔︎ Reliable hardware
✔︎ Low price
QUESTIONS
✖︎ Difficulty level
✖︎ Prerelease compatibility
✖︎ Open to ambient air
This is part three of a three part series, please read parts one and two.
Via Elegoo