
Our look at the Bambu Lab A2L 3D printer concludes with Operations and Final Thoughts.
This is part three of a three part series, please read parts one and two.
Bambu Lab A2L Operations
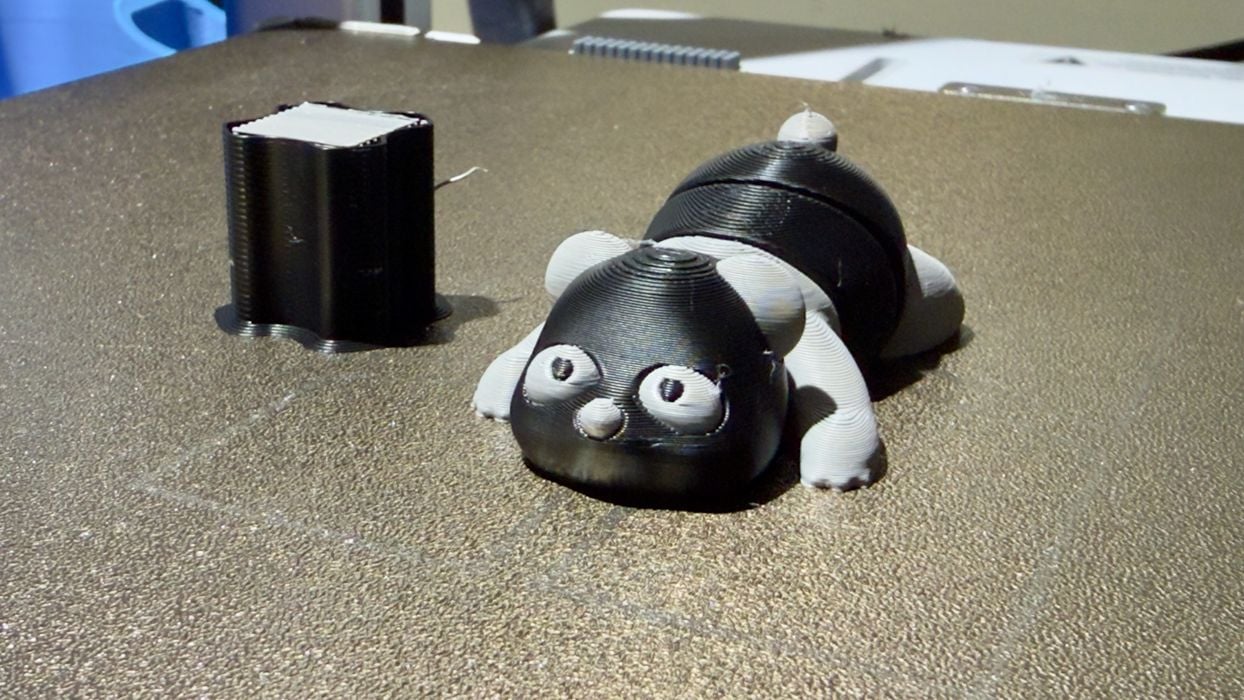
I ran several tests to see how the A2L worked. Here we have a two-colour job for a small animal, apparently a panda, and I got the colors backwards. It completed without issue, but due to the two colors it produced an amount of poop.
Thinking that I don’t want a poopy mess, I decided to quickly model an A2L-compatible poop bucket. It’s not pretty, but I quickly got it printed on the A2L itself.
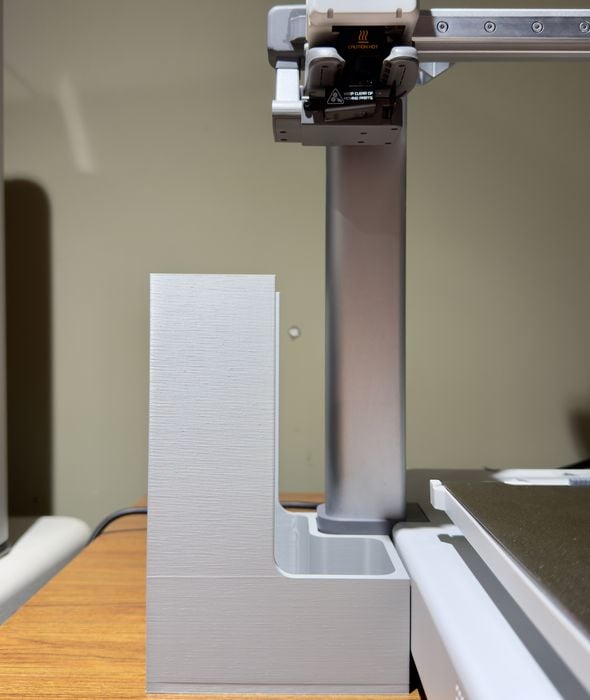
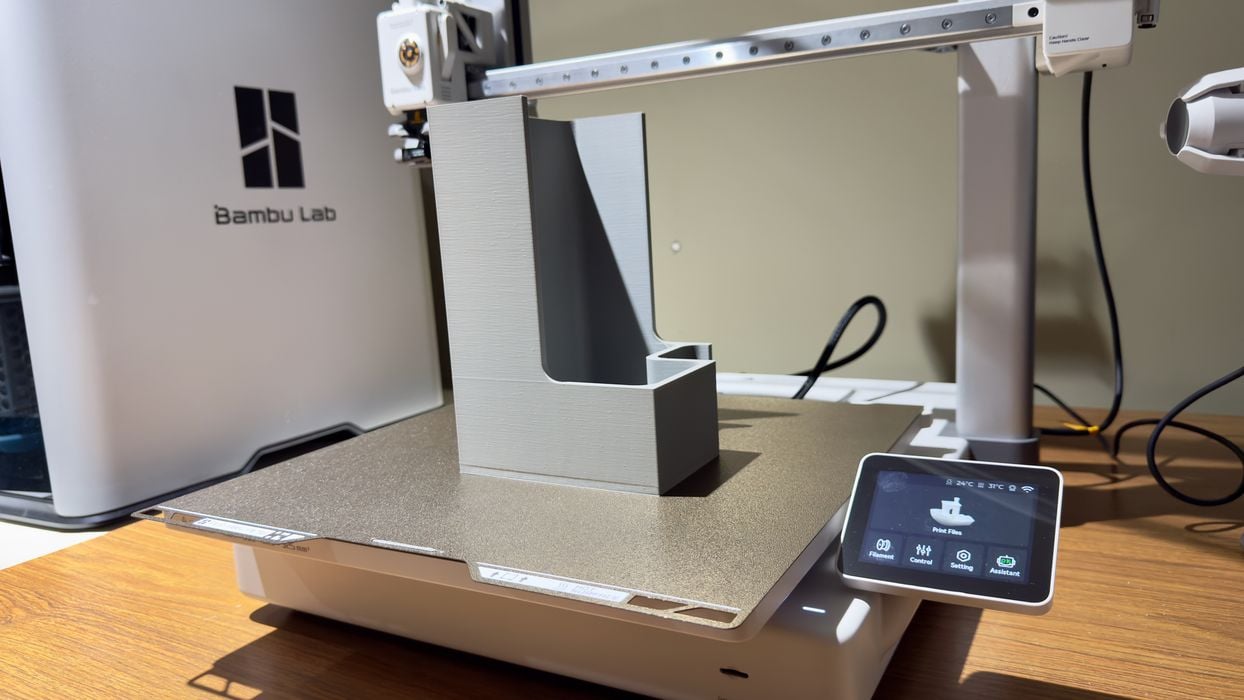
While my poop bucket design mostly worked, it did have a significant problem: it’s not tall enough. As you can see here the A2L is really quite tall, and as the print layers increase, the poops are ejected from higher and higher elevations. You will need a pretty big poop bucket to properly catch it all.
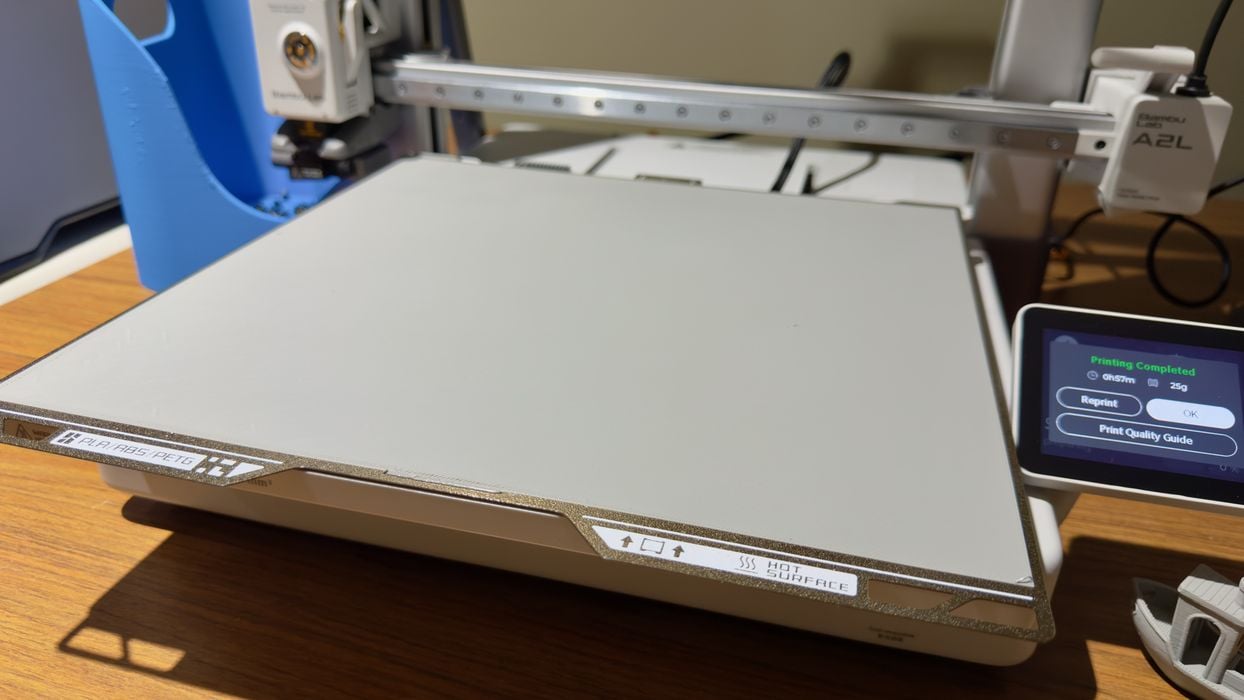
The A2L is so similar to other Bambu Lab machines it really wasn’t worth printing the usual test models, so I focused on tests that examined the machine’s performance for its major feature: bigness.
My first test was straightforward: print a single layer over the entire, massive build plate to examine the quality. This would test whether calibration, plate heat and the motion system would work properly at a larger scale.
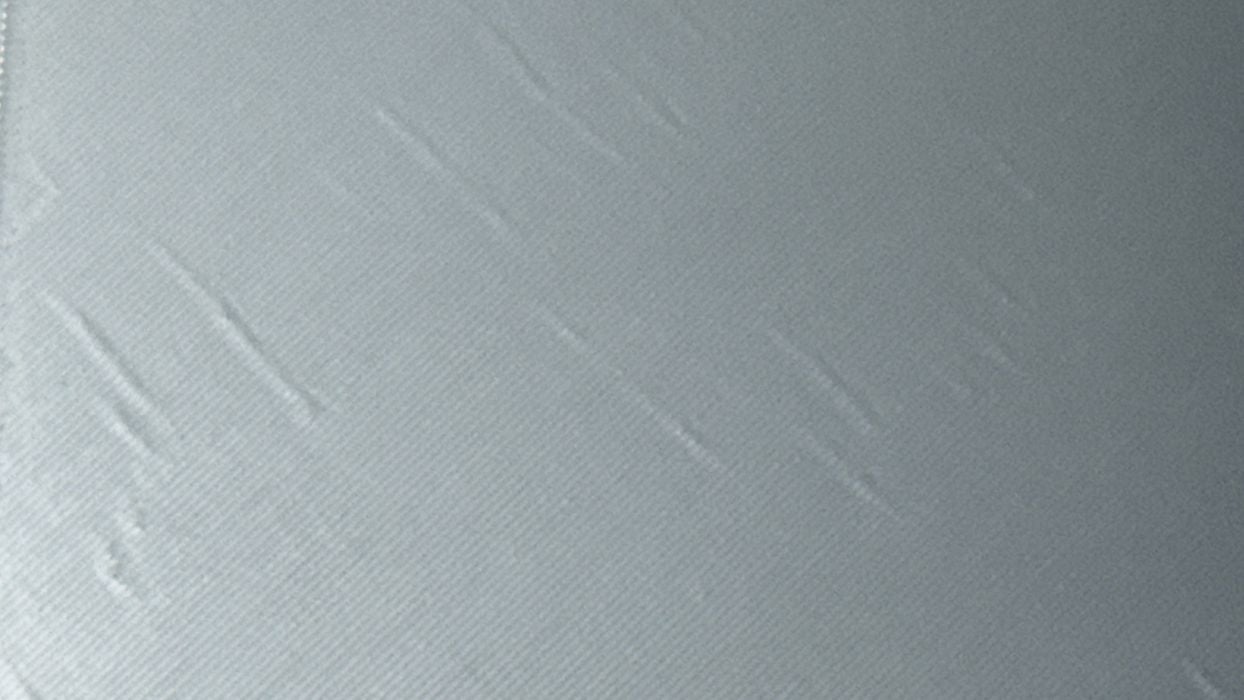
Most of the sheet was perfect, but in the front left corner there were some slight aberrations. It’s not clear why they appeared, but it was pretty minor.
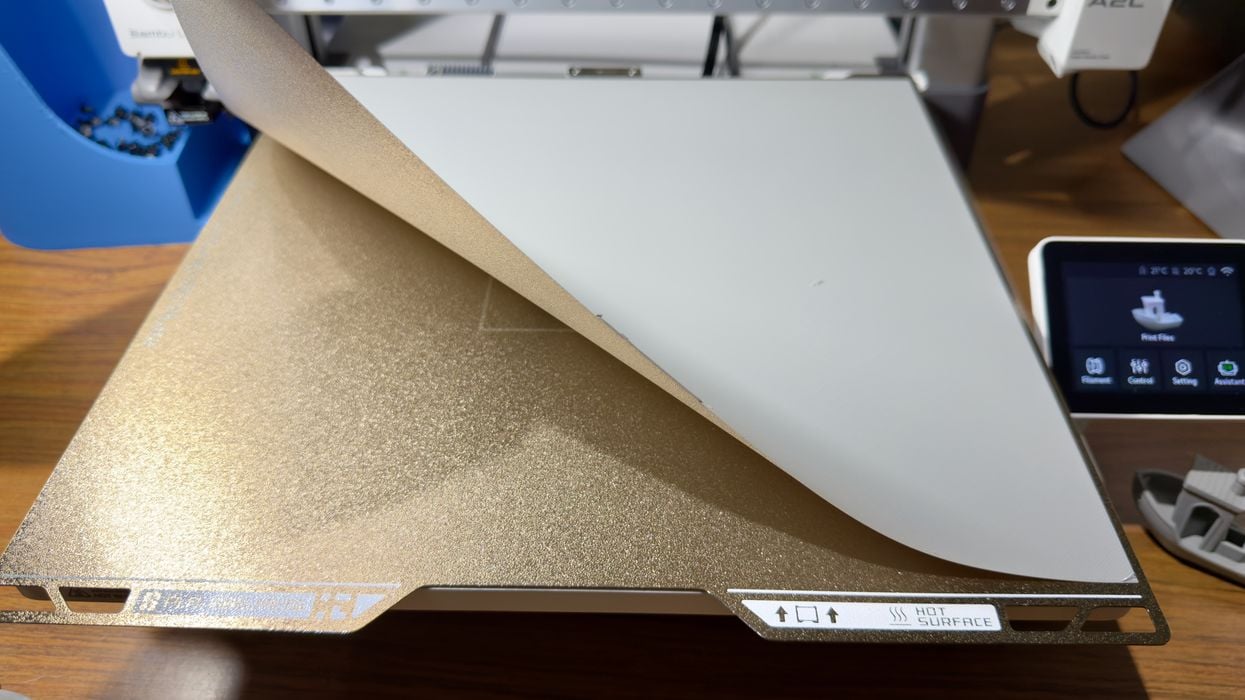
Regardless of the quality problem, it is always good fun to pull these single layer tests off the print bed.
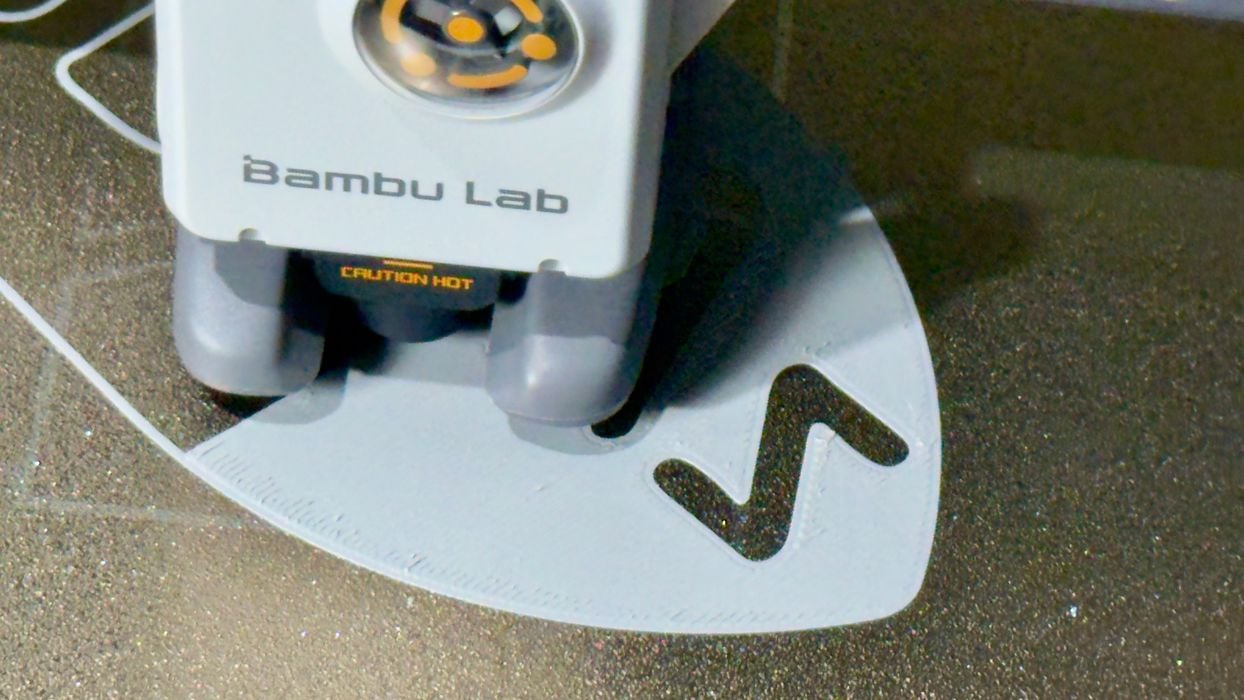
Generally I found the first layers of each job to be quite good quality, as you can see here in this job.
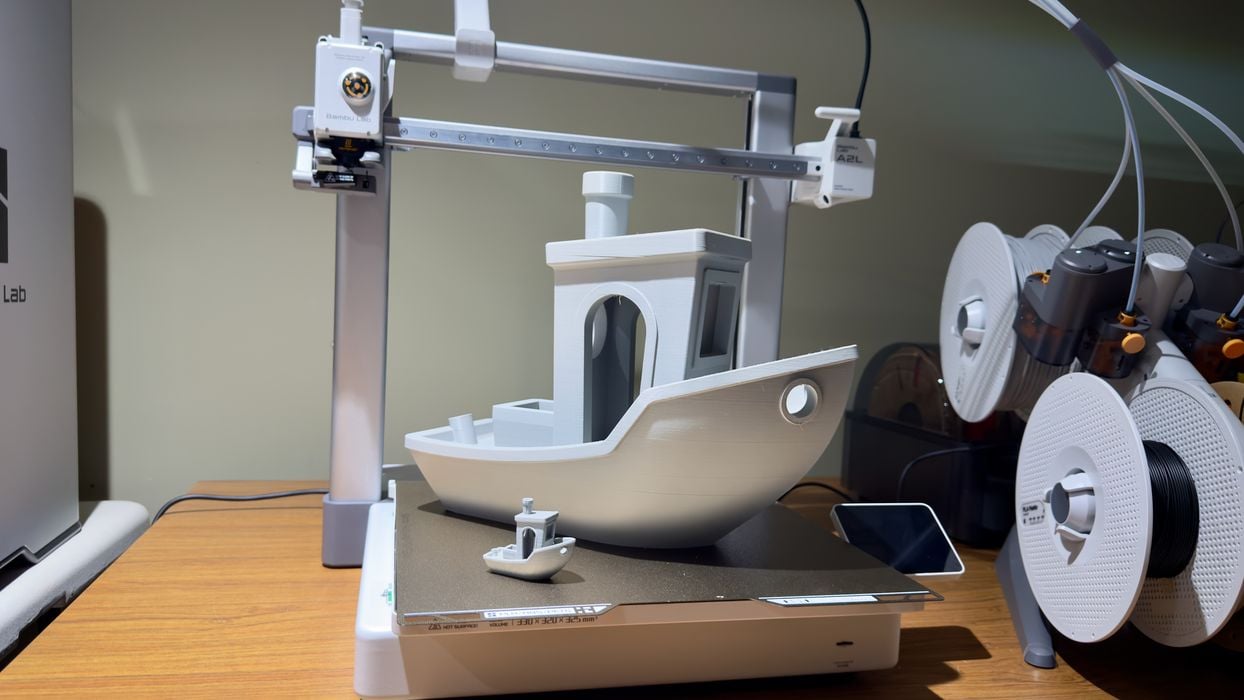
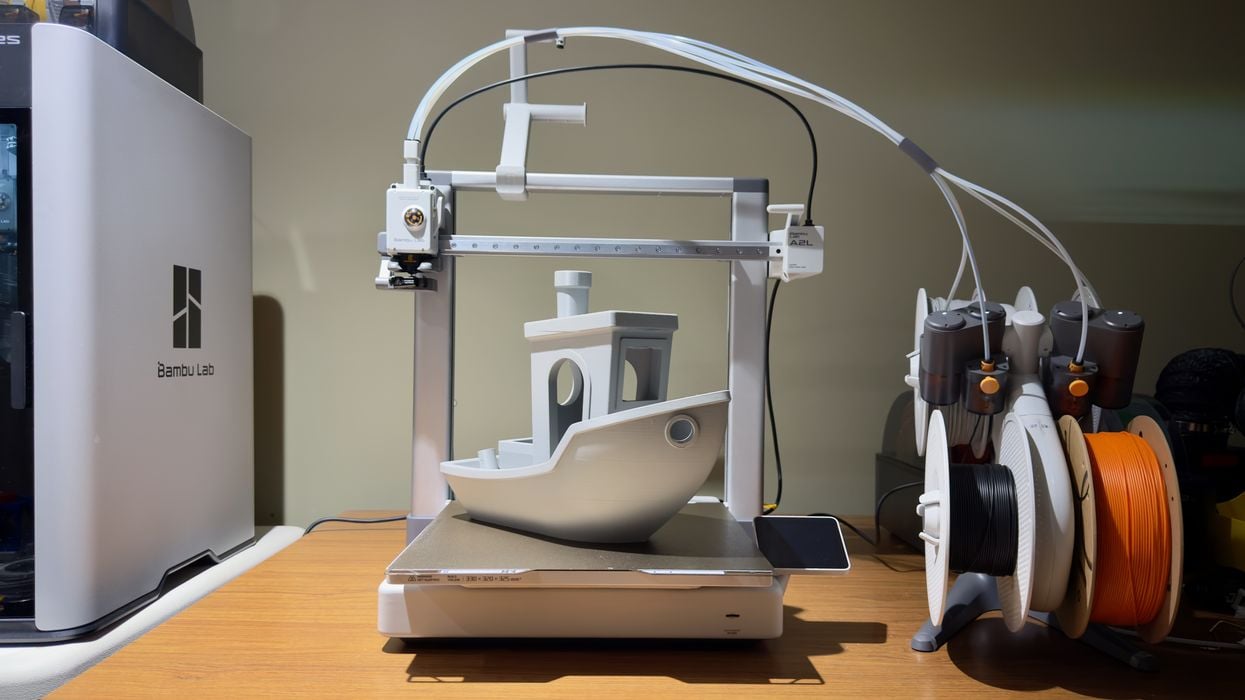
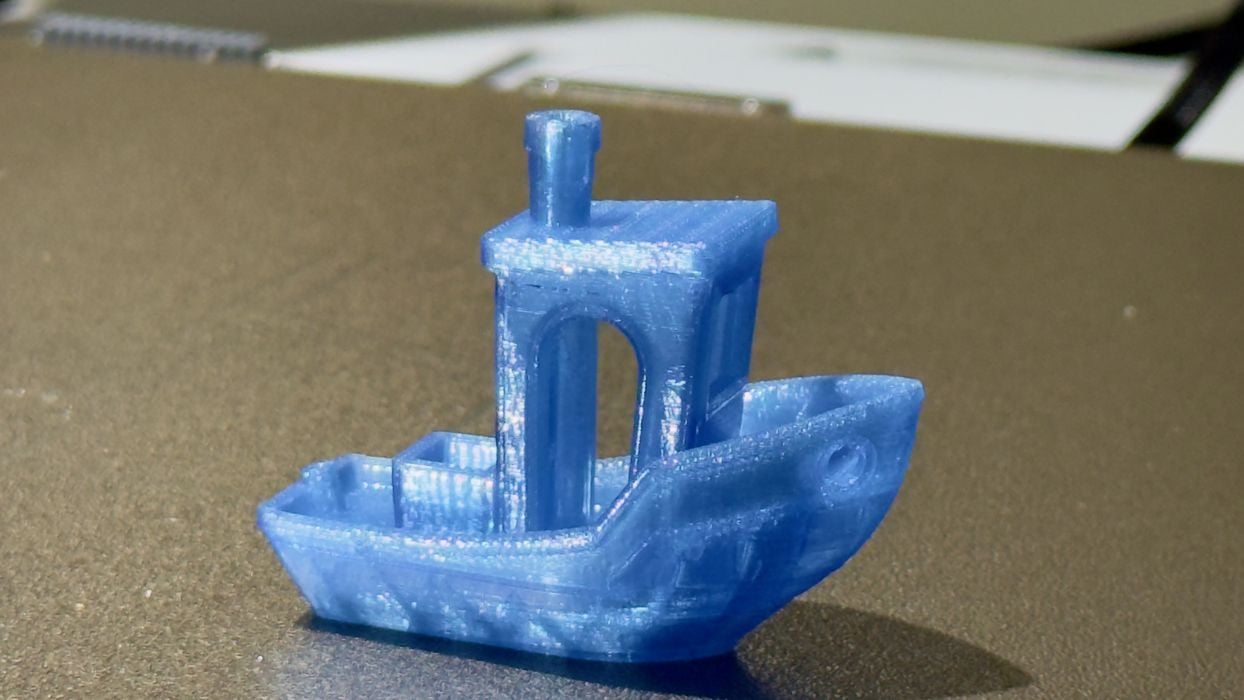
What to test next? Something big, that’s what this machine is for. Obviously, this required me to print the biggest possible #3DBenchy that could fit on the A2L. I positioned it diagonally to squeeze a bit more size out of it.
This is by far the largest #3DBenchy I’ve ever printed, and it came out quite well, although there were a few quality issues. They were mainly because the boat is designed to be printed at a much smaller scale. For example, the bridge features were extremely long and a few were a bit droopy as a result. That’s not unexpected, and I was pretty impressed with the boat overall.
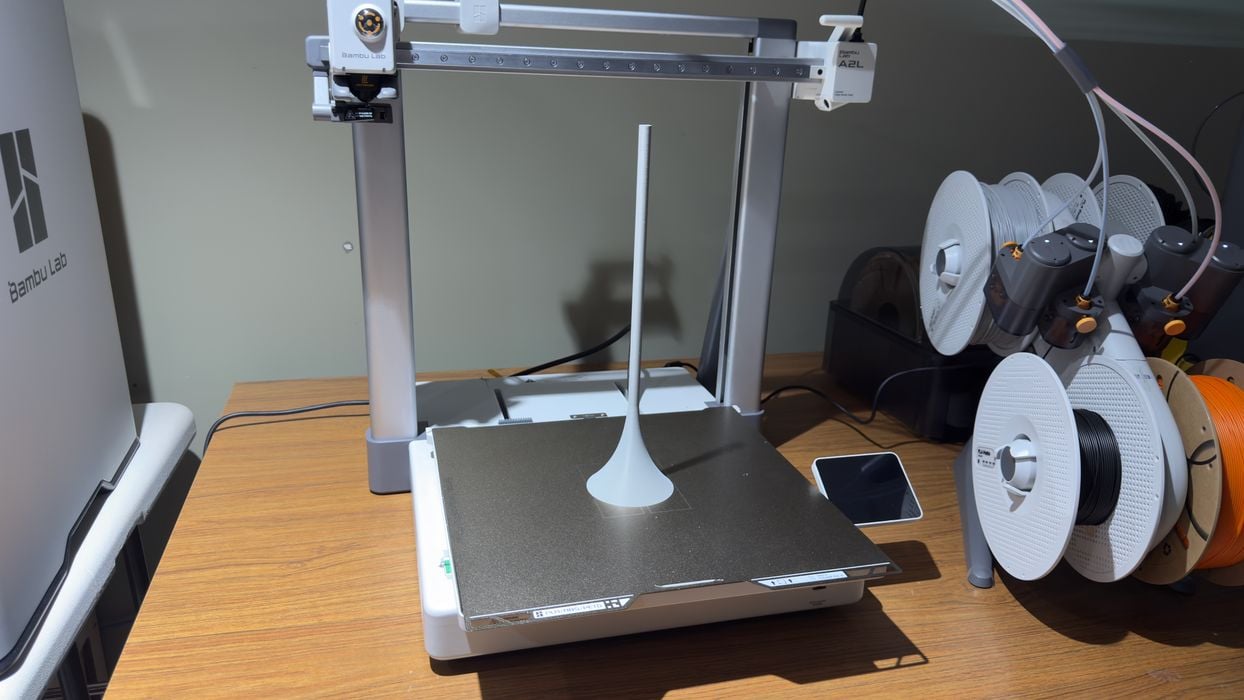
I was concerned with the height issues as mentioned earlier. To test this I designed a pathological tall print, which was basically a cylinder with a wider tapered base. Would this tower jiggle uncontrollably at the top layers? Would the quality suffer? How would this compare with a non-bedslinger print?
Surprisingly, the test completed and appeared quite normal.
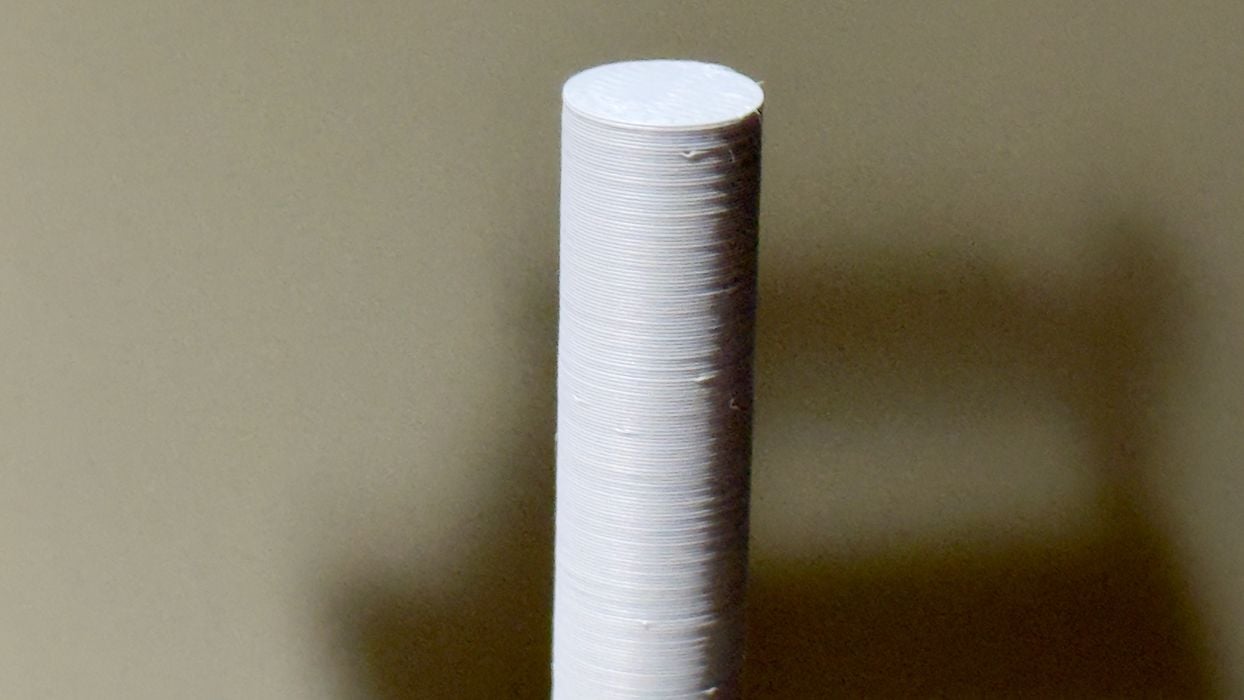
I printed the same model on a nearby H2S system, which uses the CoreXY motion system. That motion system does not sling the print bed back and forth: the tower is motionless throughout the job. As you might expect, it came out perfect fro the H2S.

Here we compare the tops of the two prints, blue being the H2S. Really, there is almost no difference. I was very impressed that Bambu Lab was able to design the A2L to achieve this result.
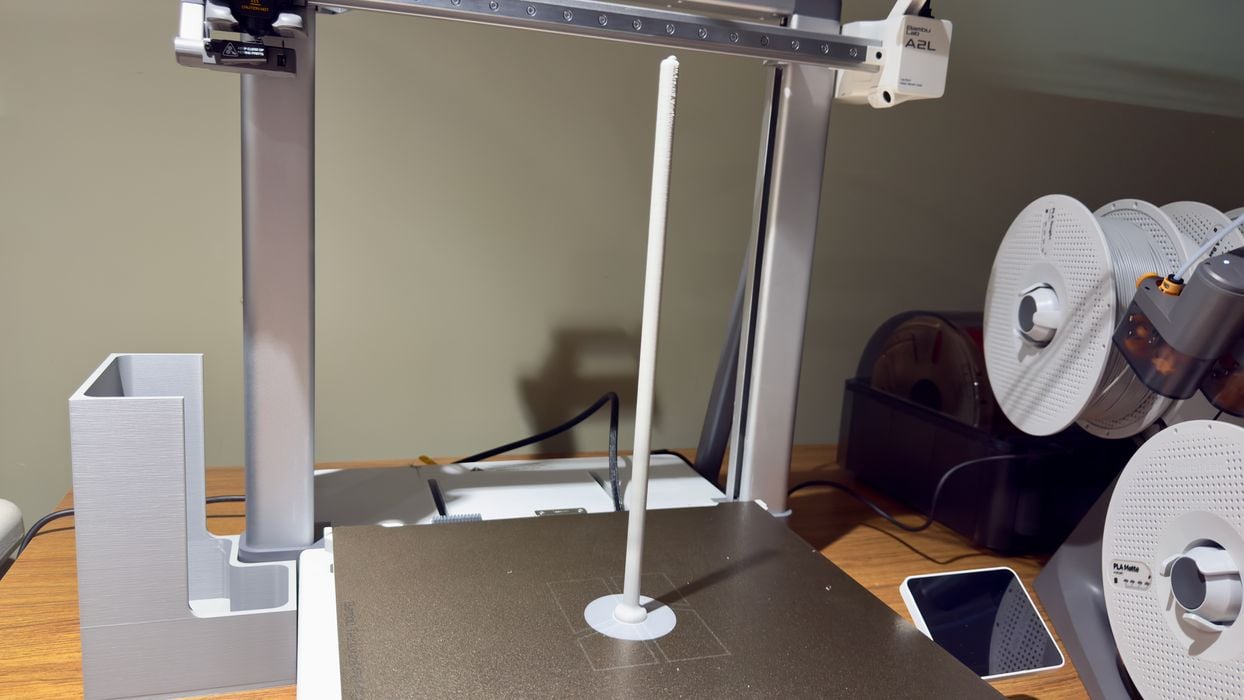
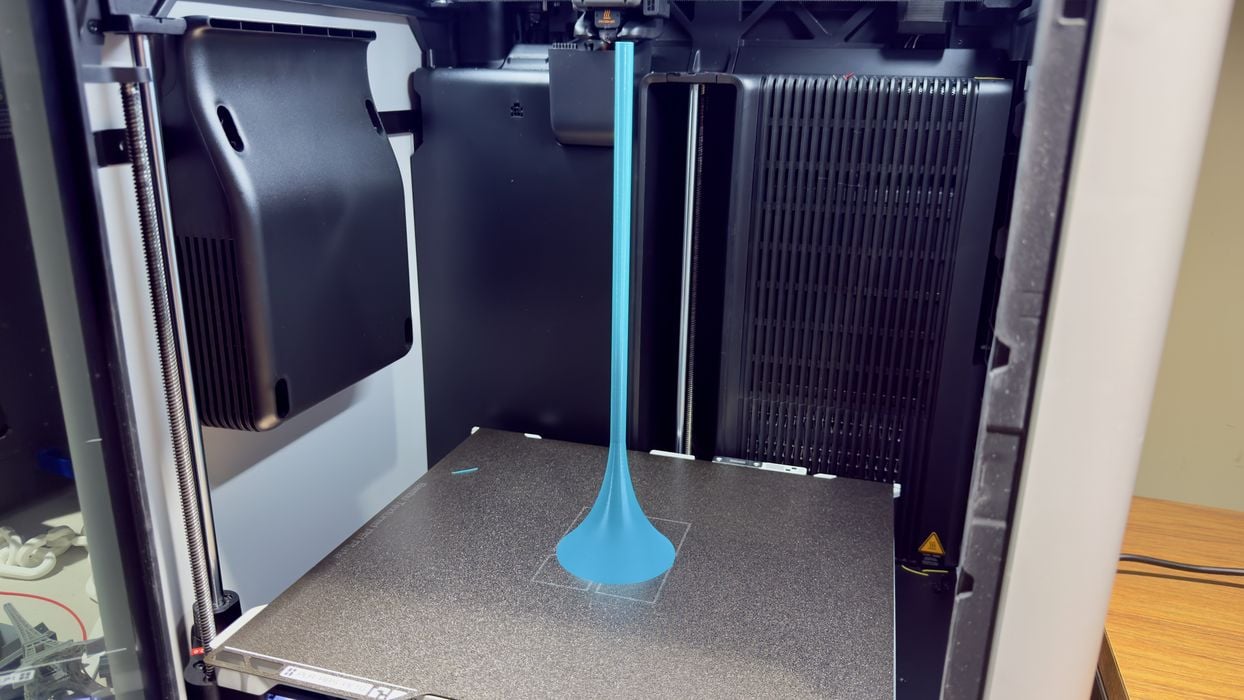
But I wanted to push further, so I modified the tower design to be even more pathological. Same diameter, but hardly anything at the bottom to provide stability. I repeated the test on the two machines, with the same colors.
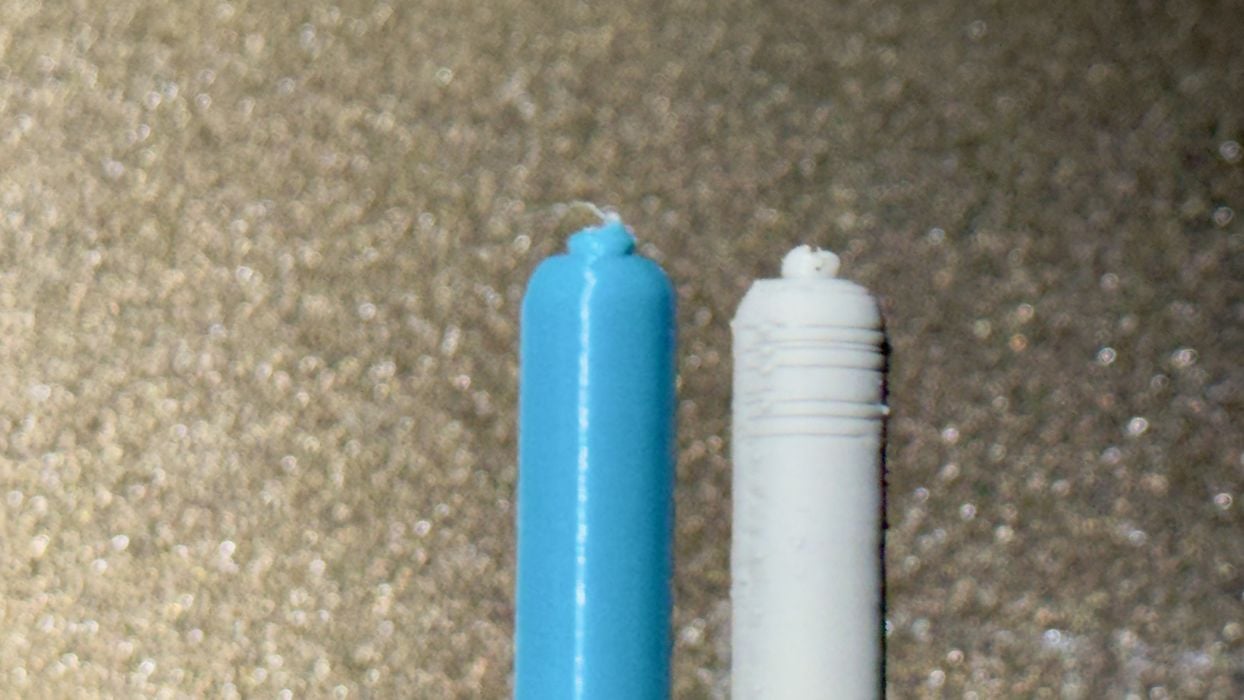
Comparing the results we can see that I was able to find the point at which the A2L will fail. There were some artifacts that appeared near the top of the tower, but not on the H2S print.
This is not surprising. After all, the Y-axis is flying back and forth during printing, and it is quite amazing that there is only this small amount of artifacts on the print. Good job, Bambu Lab!
My testing had been in PLA, the core material for the A2L. The device does support a few other materials, but you can’t print any engineering material on this device, like ABS, ASA, PC, etc. I thought I should try PETG, and the #3DBenchy came out very well, as you would expect.
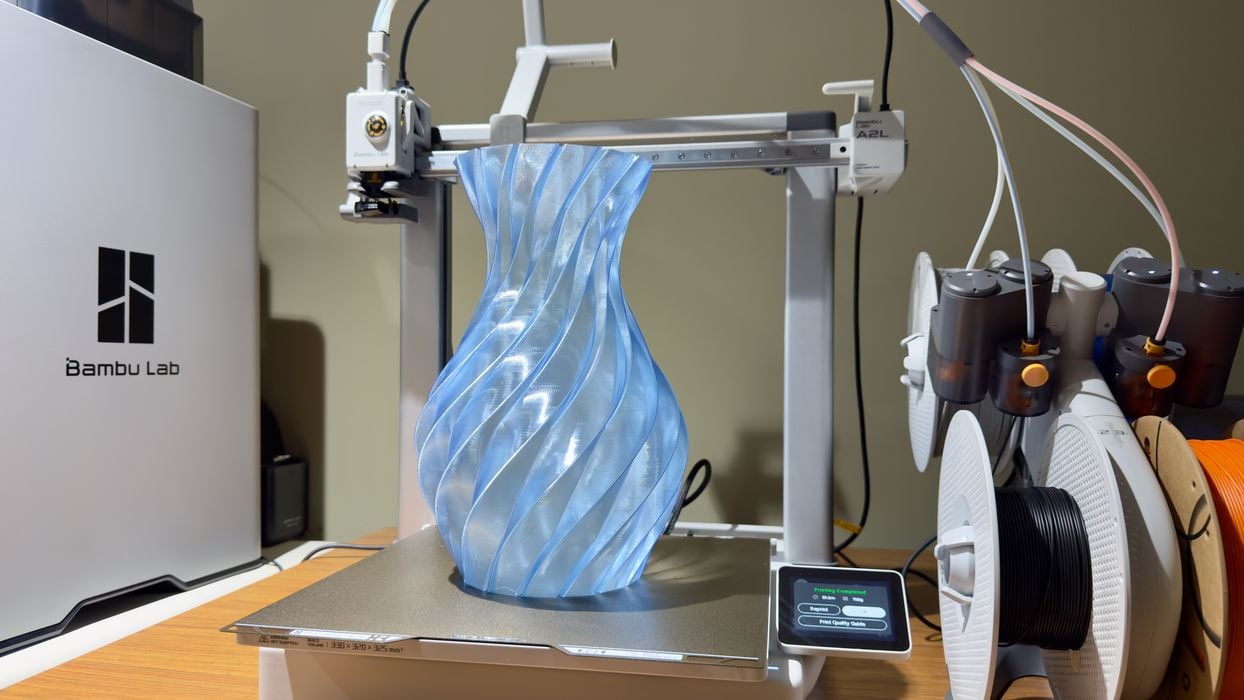
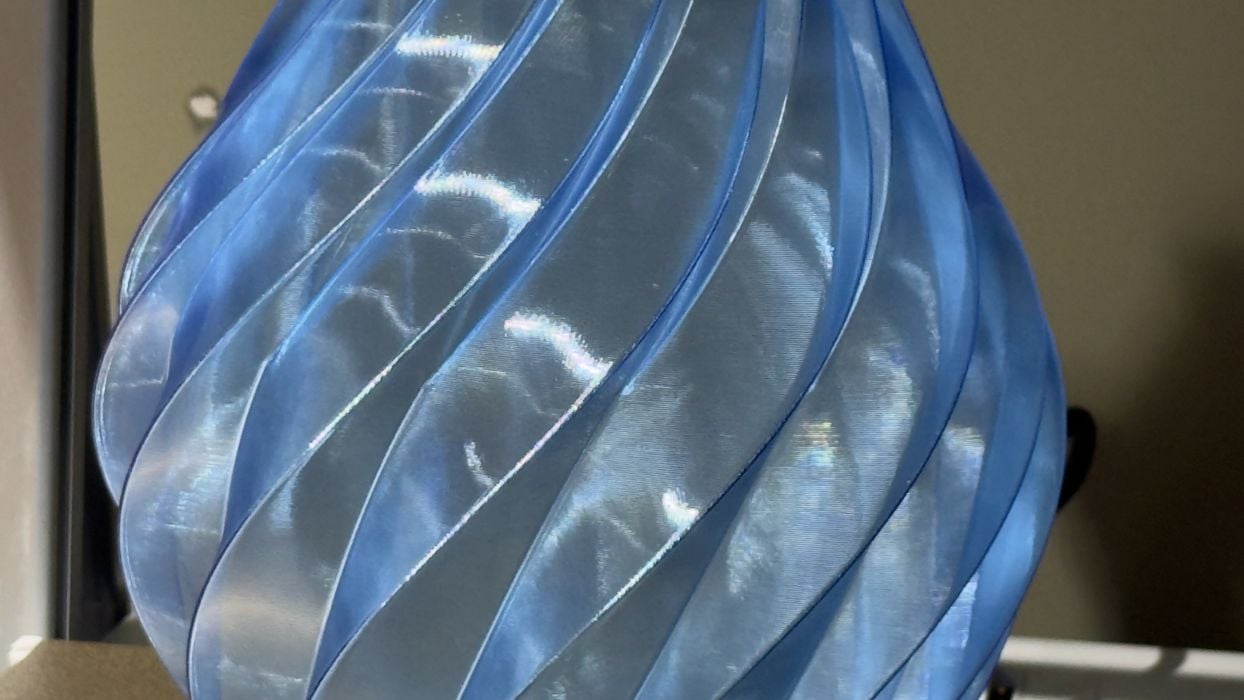
I printed a very tall vase in PETG using spiral mode, which prints only one wall. The print completed normally and the vase was near perfect. But the single wall made it somewhat weak and fragile.

I decided to swap nozzles on the A2L. It turns out that the A2L uses exactly the same nozzle format as the other A series machines, so you can easily swap them in. I installed a 0.8mm nozzle on the A2L for the next test.
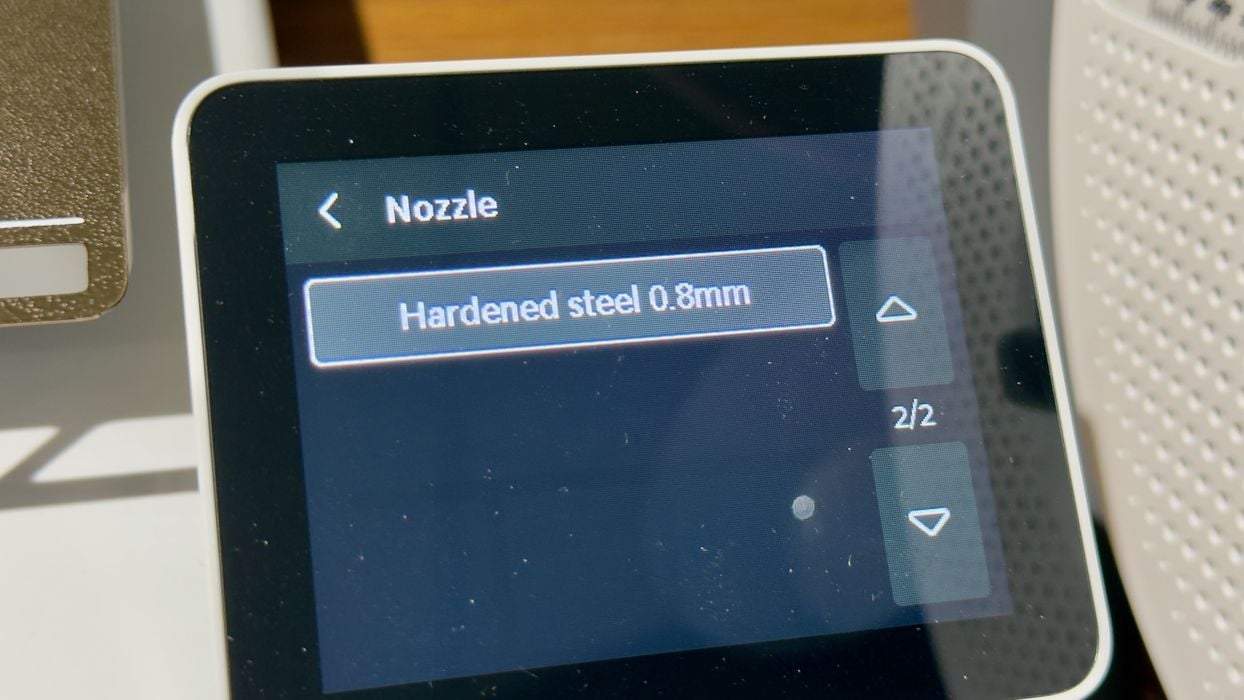
Note that when you physically change a nozzle, you have to tell the A2L that you did so. Otherwise it continues to assume the previous nozzle is still installed. This gets matched by Bambu Studio when you attempt to dispatch a job: only jobs sliced for 0.8mm are able to print on a 0.8mm nozzle.
You could theoretically install a 0.2mm nozzle and print highly detailed prints, but at a large scale such prints would take an enormous amount of time to complete. The A2L is best used for very large prints, or full beds of small parts.
The same tall vase was printed with the 0.8mm nozzle and the result was far superior. It not only was noticeably stronger, but the visual appearance was significantly better.
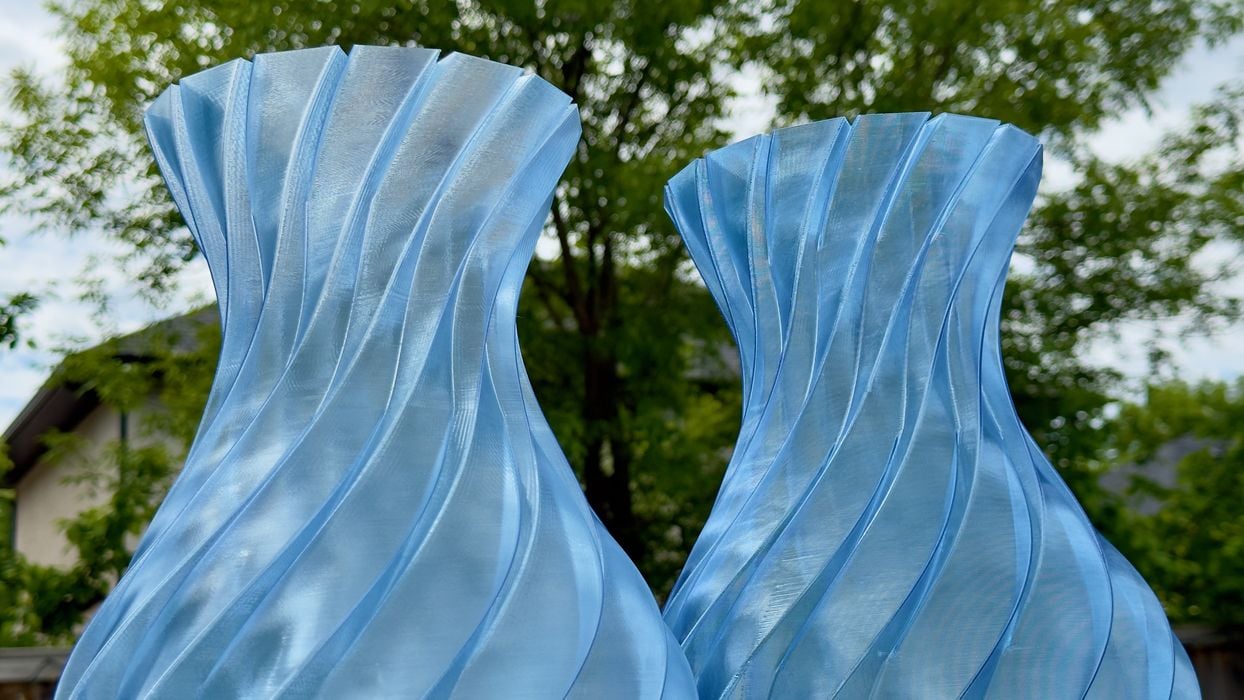
Here we see the two vases together. The 0.8mm vase is on the right, and it had significantly better color and shine. It was also more transparent. I strongly recommend using a 0.8mm nozzle if you are printing in spiral mode.
Bambu Lab A2L Final Thoughts
Bambu Lab has a winner with the A2L. It is essentially a very large A1 system, which means it is very easy to use and reliably produces high quality output.
It’s large enough to attempt printing of helmets, something that never works on smaller machines. For that reason alone many cosplay participants will want the A2L. It’s also quite accessible with the US$469 (US$569 Combo) price.
The A2L took quite a while to get printing, but all the steps were pretty easy to do. Almost anyone should be able to set up this machine. Just remember to remove ALL the tape.
Perhaps the biggest issue I had was the table space required for the A2L: from left to right you have: a large poop bucket; A2L; AMS Lite. You’re going to have to allocate at least one full meter of width on a table for this configuration.
That said, if you want an easy to use machine that can print large objects at relatively low cost, the A2L is your machine.
BAMBU LAB
A2L
★ BEGINNER 9/10
★ ENTHUSIAST 9/10
★ PRODUCTION 7/10
BEST FEATURES
✔︎ Large scale
✔︎ Easy setup
✔︎ Reliability
QUESTIONS
✖︎ Table space
✖︎ Calibration time
✖︎ Material choice
This is part three of a three part series, please read parts one and two.
Via Bambu Lab