

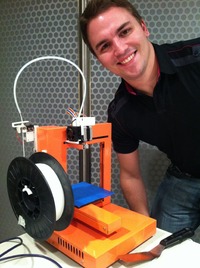
 Meet Phil Letourneau, an Up! 3D Printer Operator. This week Phil dropped by the Fabbaloo office to demonstrate the rarely seen Up! 3D Printer. We put this elusive device put through some basic tests to see how it works. The result? Overall, we’re pretty impressed – but there are some caveats. Here’s what we found:
The device retails today for USD$2690, but Phil managed to grab one of the few early shipments that were discounted to USD$1500. He’s not sure if he’d buy it again at the full price, given the other 3D printer options available today. You can choose a pre-assembled unit from any of six colors; Phil’s was bright orange.
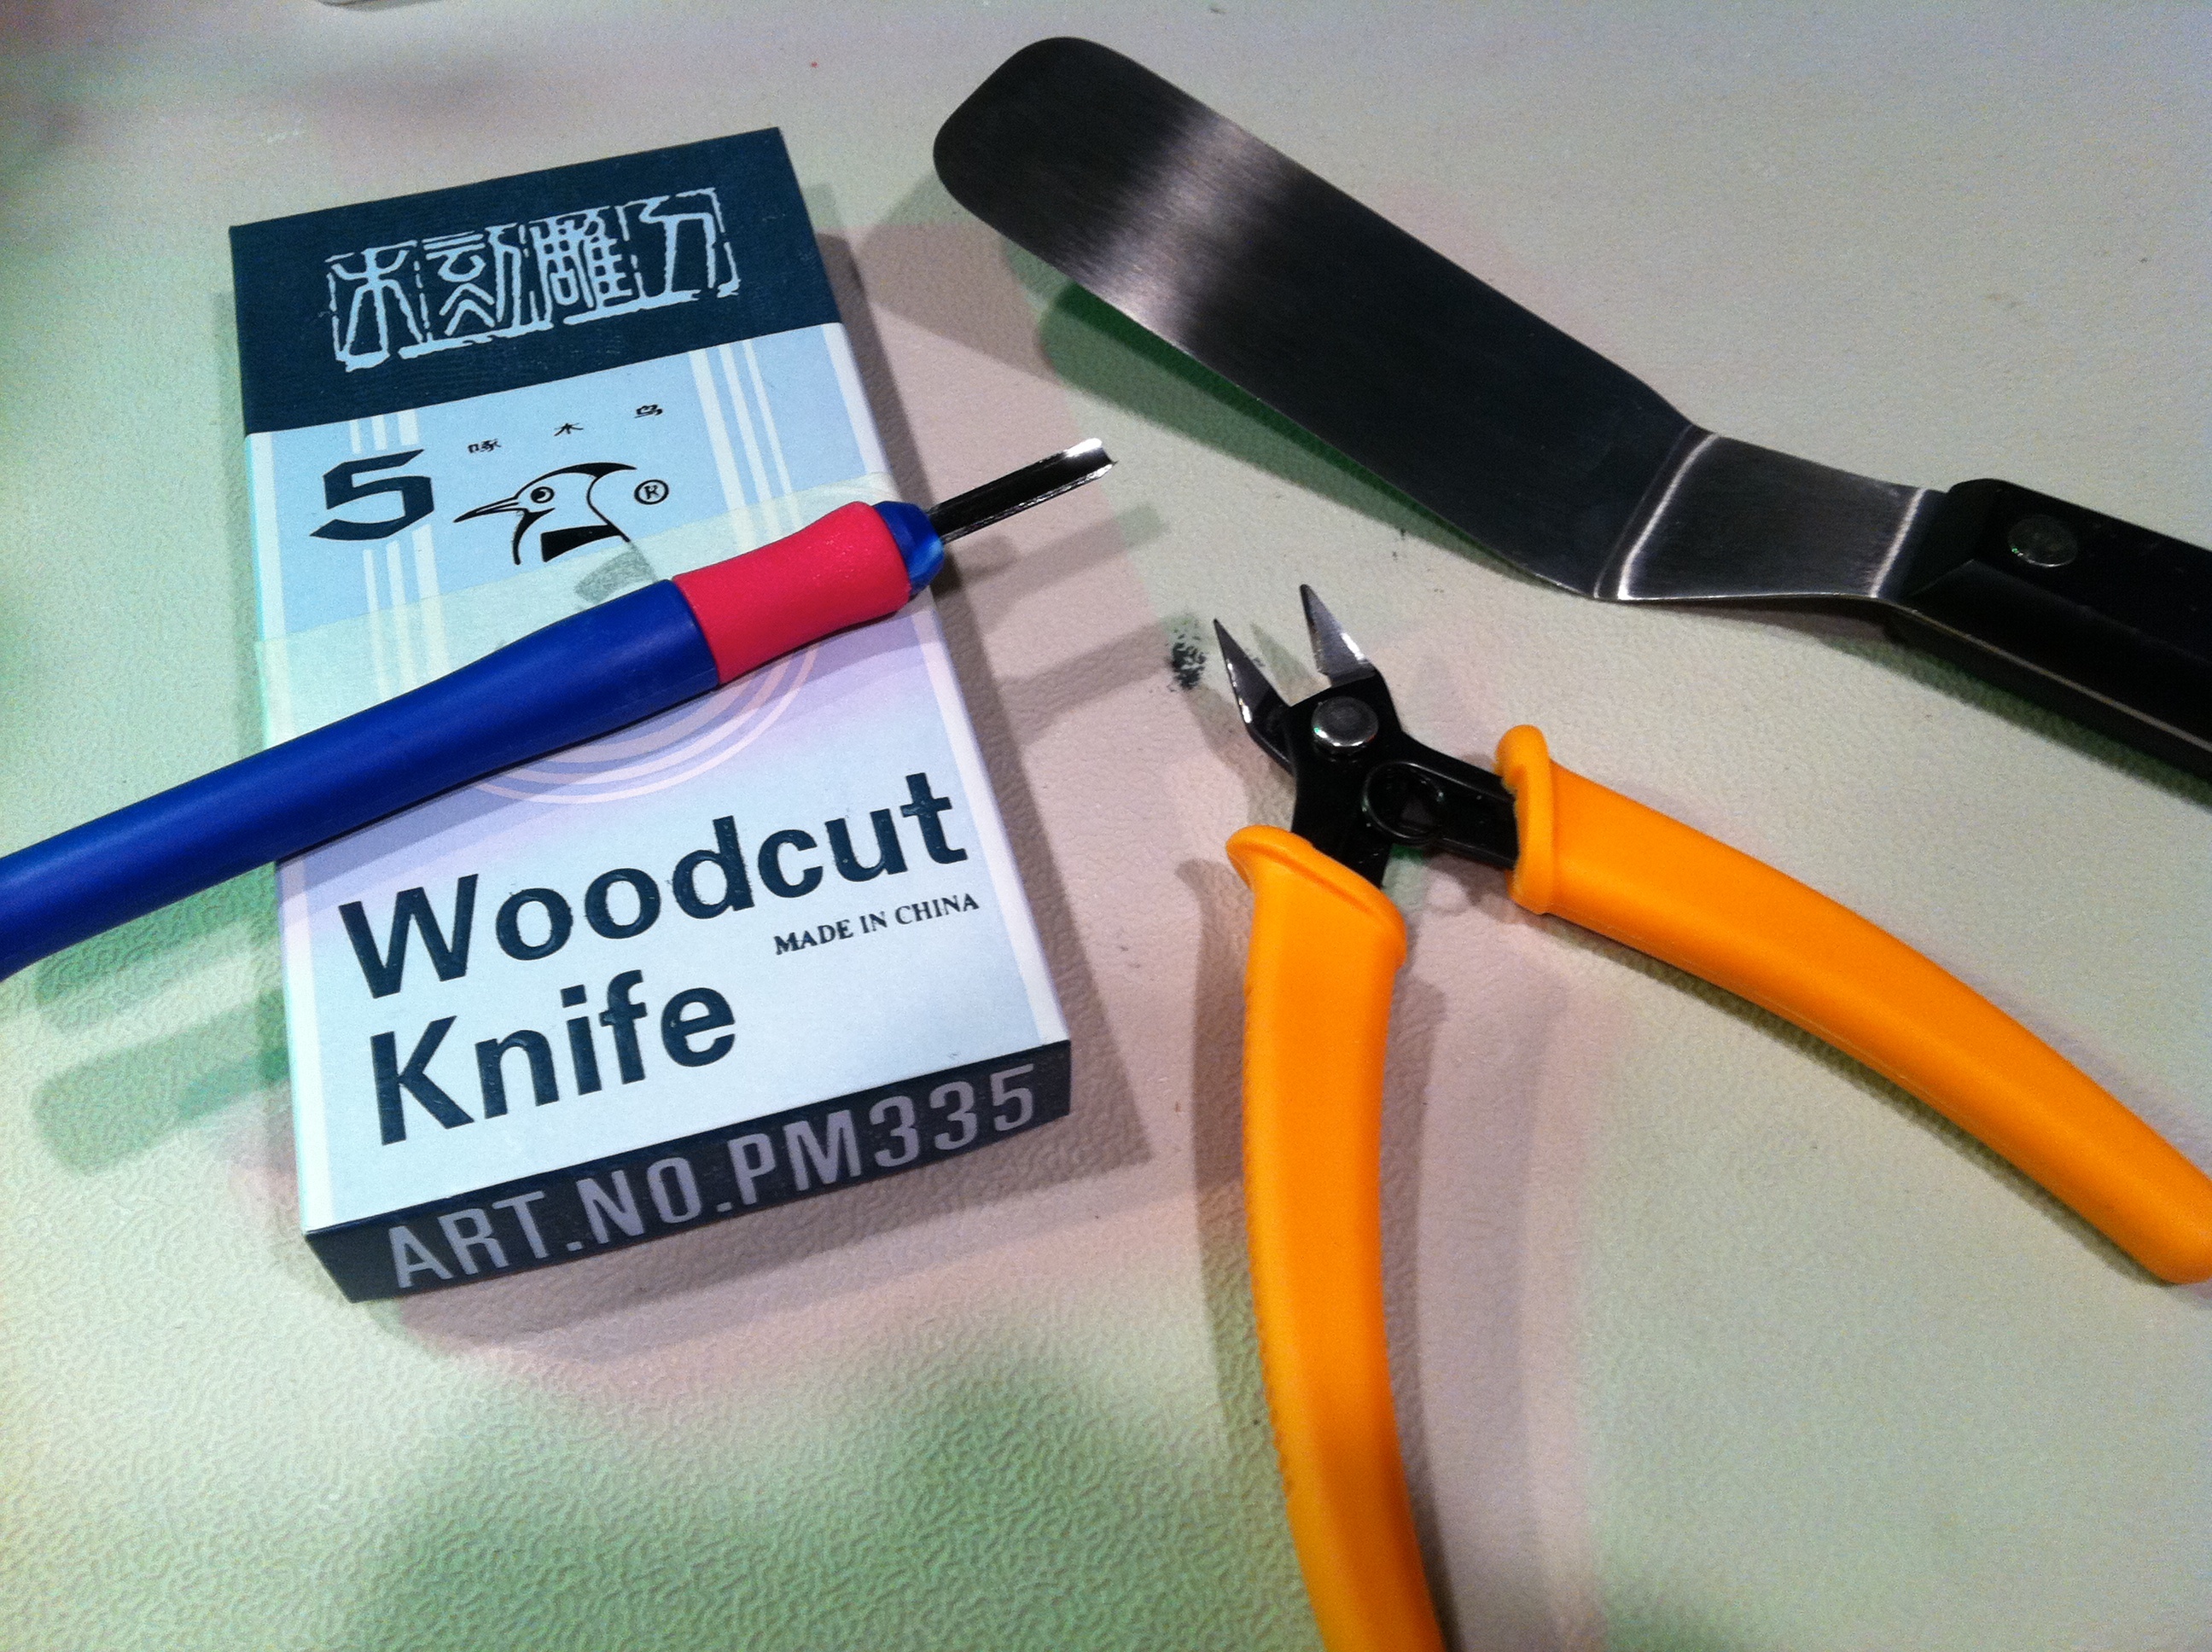 The metal-framed Up! comes mostly assembled, and includes a pretty extensive toolkit, which Phil describes as “Well Equipped”. The kit includes a multi-tool wood cutting kit, excellent for removing the voluminous support material that seems to appear on almost every print; snips for cutting filament; a really thin metal lifter; and a set of cheap industrial gloves.
Phil says he’s paying PP3DP approximately USD$35 for a spool of 0.7Kg filament (which, by the way, is a lot thinner than standard RepRap/MakerBot 3mm filament).
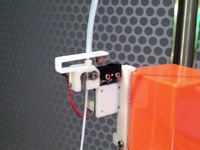 The Up! includes an unusual filament feeder mechanism: the filament travels through a tube, which tightens up as filament is eaten by the print head. When the tube tightens close enough to the spooler, it touches a mechanical switch to engage the spooler motor, which then delivers a few centimetres of fresh filament. It’s fascinating to watch this process repeat, for some unexplainable reason.
The Windows-only software provided by PP3DP is both good and bad. Good because it tremendously simplifies the process for the user, who is faced with a straightforward control window with only a few knobs, as opposed to RepRap/MakerBot/RapMan SkeinForge users who must diddle with hundreds of parameters. Up! operators merely choose things like “Solid” or “Loose”, etc. While this simplification is good, much control is lost. For example, there doesn’t seem to be a way to NOT print a raft. Also, if a print doesn’t come out right, there’s often not a lot you can do about it. However, Phil said PP3DP has been very good about releasing upgraded software on a pretty frequent basis, often with interesting new features.
A great feature is automatic support structures. You simply open up any STL file and the Up! does its best to print it. Very often we observed support structures printed, sometimes even when there was no apparent need for them. We spent a lot of time peeling prints. Interestingly, one problematic STL file, unprintable on a MakerBot, actually printed successfully on the Up!
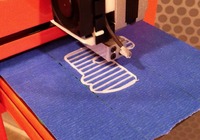 The quality of the prints is superb, particularly when the printer is set to its finest resolution: 0.2 (we suspect that means millimetres, but it’s not completely clear, as with most aspects of this overly mysterious machine). The software offers four choices of resolution, with the “coarsest” being perhaps not as good as the average MakerBot print. The poor resolution prints also take mercifully less time than the finest, which seem to go on forever.
Curiously, the warm-up process involves a massive test extrusion – of about half a meter of filament, or so it seemed. The only reason for this, we thought, might be to encourage additional filament sales. We’ve also heard of challenges in using filament from places other than PP3DP, since you have to somehow get the foreign filament onto the Up! spool, but it can be done, apparently.
The purchasing process was interesting: Operator Phil had to make arrangements to wire funds directly to a previously-unheard of factory business somewhere deep in China. We asked if it was uncomfortable to send that amount of cash to an unknown company far away, and Phil agreed, saying “it seemed totally sketch”.
The Up! seems to have a couple of power challenges. It needs power for the heater, electronics and a few motors for XYZ axes and extruder. Where does it get this power? From the THREE separate power plugs you must insert into several nearby electrical outlets. Worse, the device has NO Off switch. That’s correct – to turn it completely off you must unplug THREE cords.
Noise factors are both good and bad. The Up! is astonishingly less noisy than a MakerBot; you can hardly notice it printing, as it’s almost silent. However, the silence is broken by extremely loud and annoying BEEPs that must signify something of importance.
Bottom Line: This is a pretty decent device, producing high-quality prints with little effort required by the operator. We believe this device could be successfully operated by someone with only light technical skills. However, the simplification of the interface doesn’t quite hide all the complexity behind the scenes.
Via PP3DP
Yes, PP3DP recently started releasing Mac-compatible software to drive the printer. It will work and work well.
Yes, PP3DP recently started releasing Mac-compatible software to drive the printer. It will work and work well.
Hi
i only have macs
will it work on one of these ?
Hi
i only have macs
will it work on one of these ?
PP3DP are very active in the development of the UP. The new UPs only use one power supply, support raftless printing, support PLA, has a cool STL fix option, and the intialise uses less plastic. What an awesome printer -most of this is a free software upgrade!
PP3DP are very active in the development of the UP. The new UPs only use one power supply, support raftless printing, support PLA, has a cool STL fix option, and the intialise uses less plastic. What an awesome printer -most of this is a free software upgrade!
Yes, PP3DP seems to be contracting with various resellers in different regions recently, I guess to get around the very problem we described here.
Yes, PP3DP seems to be contracting with various resellers in different regions recently, I guess to get around the very problem we described here.
Hi – On the sending money to an unknown Chinese company thing – Cool Components in the UK (an established webshop) are now selling them. CC seem to have a very good rep in the electronics world.
Hi – On the sending money to an unknown Chinese company thing – Cool Components in the UK (an established webshop) are now selling them. CC seem to have a very good rep in the electronics world.
So as it turns out, I don't have to extrude every time I want to print. There isn't a manual provided by the manufacturer, so that wasn't clear to me.
The community has stepped up and someone wrote a user manual that is available in
the forums, direct link below.
http://www.ciri.org.nz/downloads/UP!%20User%20Manual%2020101228.pdf
I've learned a few more things since my visit, the manual has been extremely useful.
Raftless printing is in fact not possible. There are some settings related to support material that I've learned to adjust which can make it easier to control how much or little is added to a print.
I've also re-calibrated the device which has yielded some impressive improvements.
I've been printing a fair bit with the Up! and haven't come across the 1/2 metre of filament consumption during warm-up. Maybe 10cm if there's a bit of sag, but if you remove it there's less weight to pull it down.
The direct wiring of cash was a bit odd indeed, I waited for some good news for early adopters first.
But the print quality is indeed wonderful. I've done some really small parts using it.
http://www.madox.net/blog/
PP3DP probably requires a raft because the build platform has an uneven, consumable coating quite unlike Makerbot's smooth acrylic surface. The raft layer creates a level foundation for building the model. Dimension's FDM machines build a raft-like foundation for the same reason, but they build it using the support material (BST or SST) so it's easily removed.
As for using a wire transfer, that's relatively common for B2B sales of major tools and equipment. I wouldn't be surprised if PP3DP's manufacturer might have a background in business sales and thus might consider wire transfers a 'normal' way to sell things at this price point.
@AndrewP The STL was not sliceable by Skeinforge, yes – but the PP2P software absorbed it immediately without incident. Perhaps changing the settings in Skeinforge would have worked – will try that sometime. Thanks!
@AndrewP The STL was not sliceable by Skeinforge, yes – but the PP2P software absorbed it immediately without incident. Perhaps changing the settings in Skeinforge would have worked – will try that sometime. Thanks!
Would love to hear a brief run-down on which machines in this price range (the $2690 of the current UP!) Phil would be more interested in buying the next time around…
Would love to hear a brief run-down on which machines in this price range (the $2690 of the current UP!) Phil would be more interested in buying the next time around…
I'm curious about the problematic STL that you found unprintable on your MakerBot. Was it that skeinforge wouldn't slice it (try switching Mesh Type to "Unproven Mesh" in your "Carve" settings) or that the overhangs required support and you haven't explored those skeinforge settings yet?
I'm curious about the problematic STL that you found unprintable on your MakerBot. Was it that skeinforge wouldn't slice it (try switching Mesh Type to "Unproven Mesh" in your "Carve" settings) or that the overhangs required support and you haven't explored those skeinforge settings yet?