

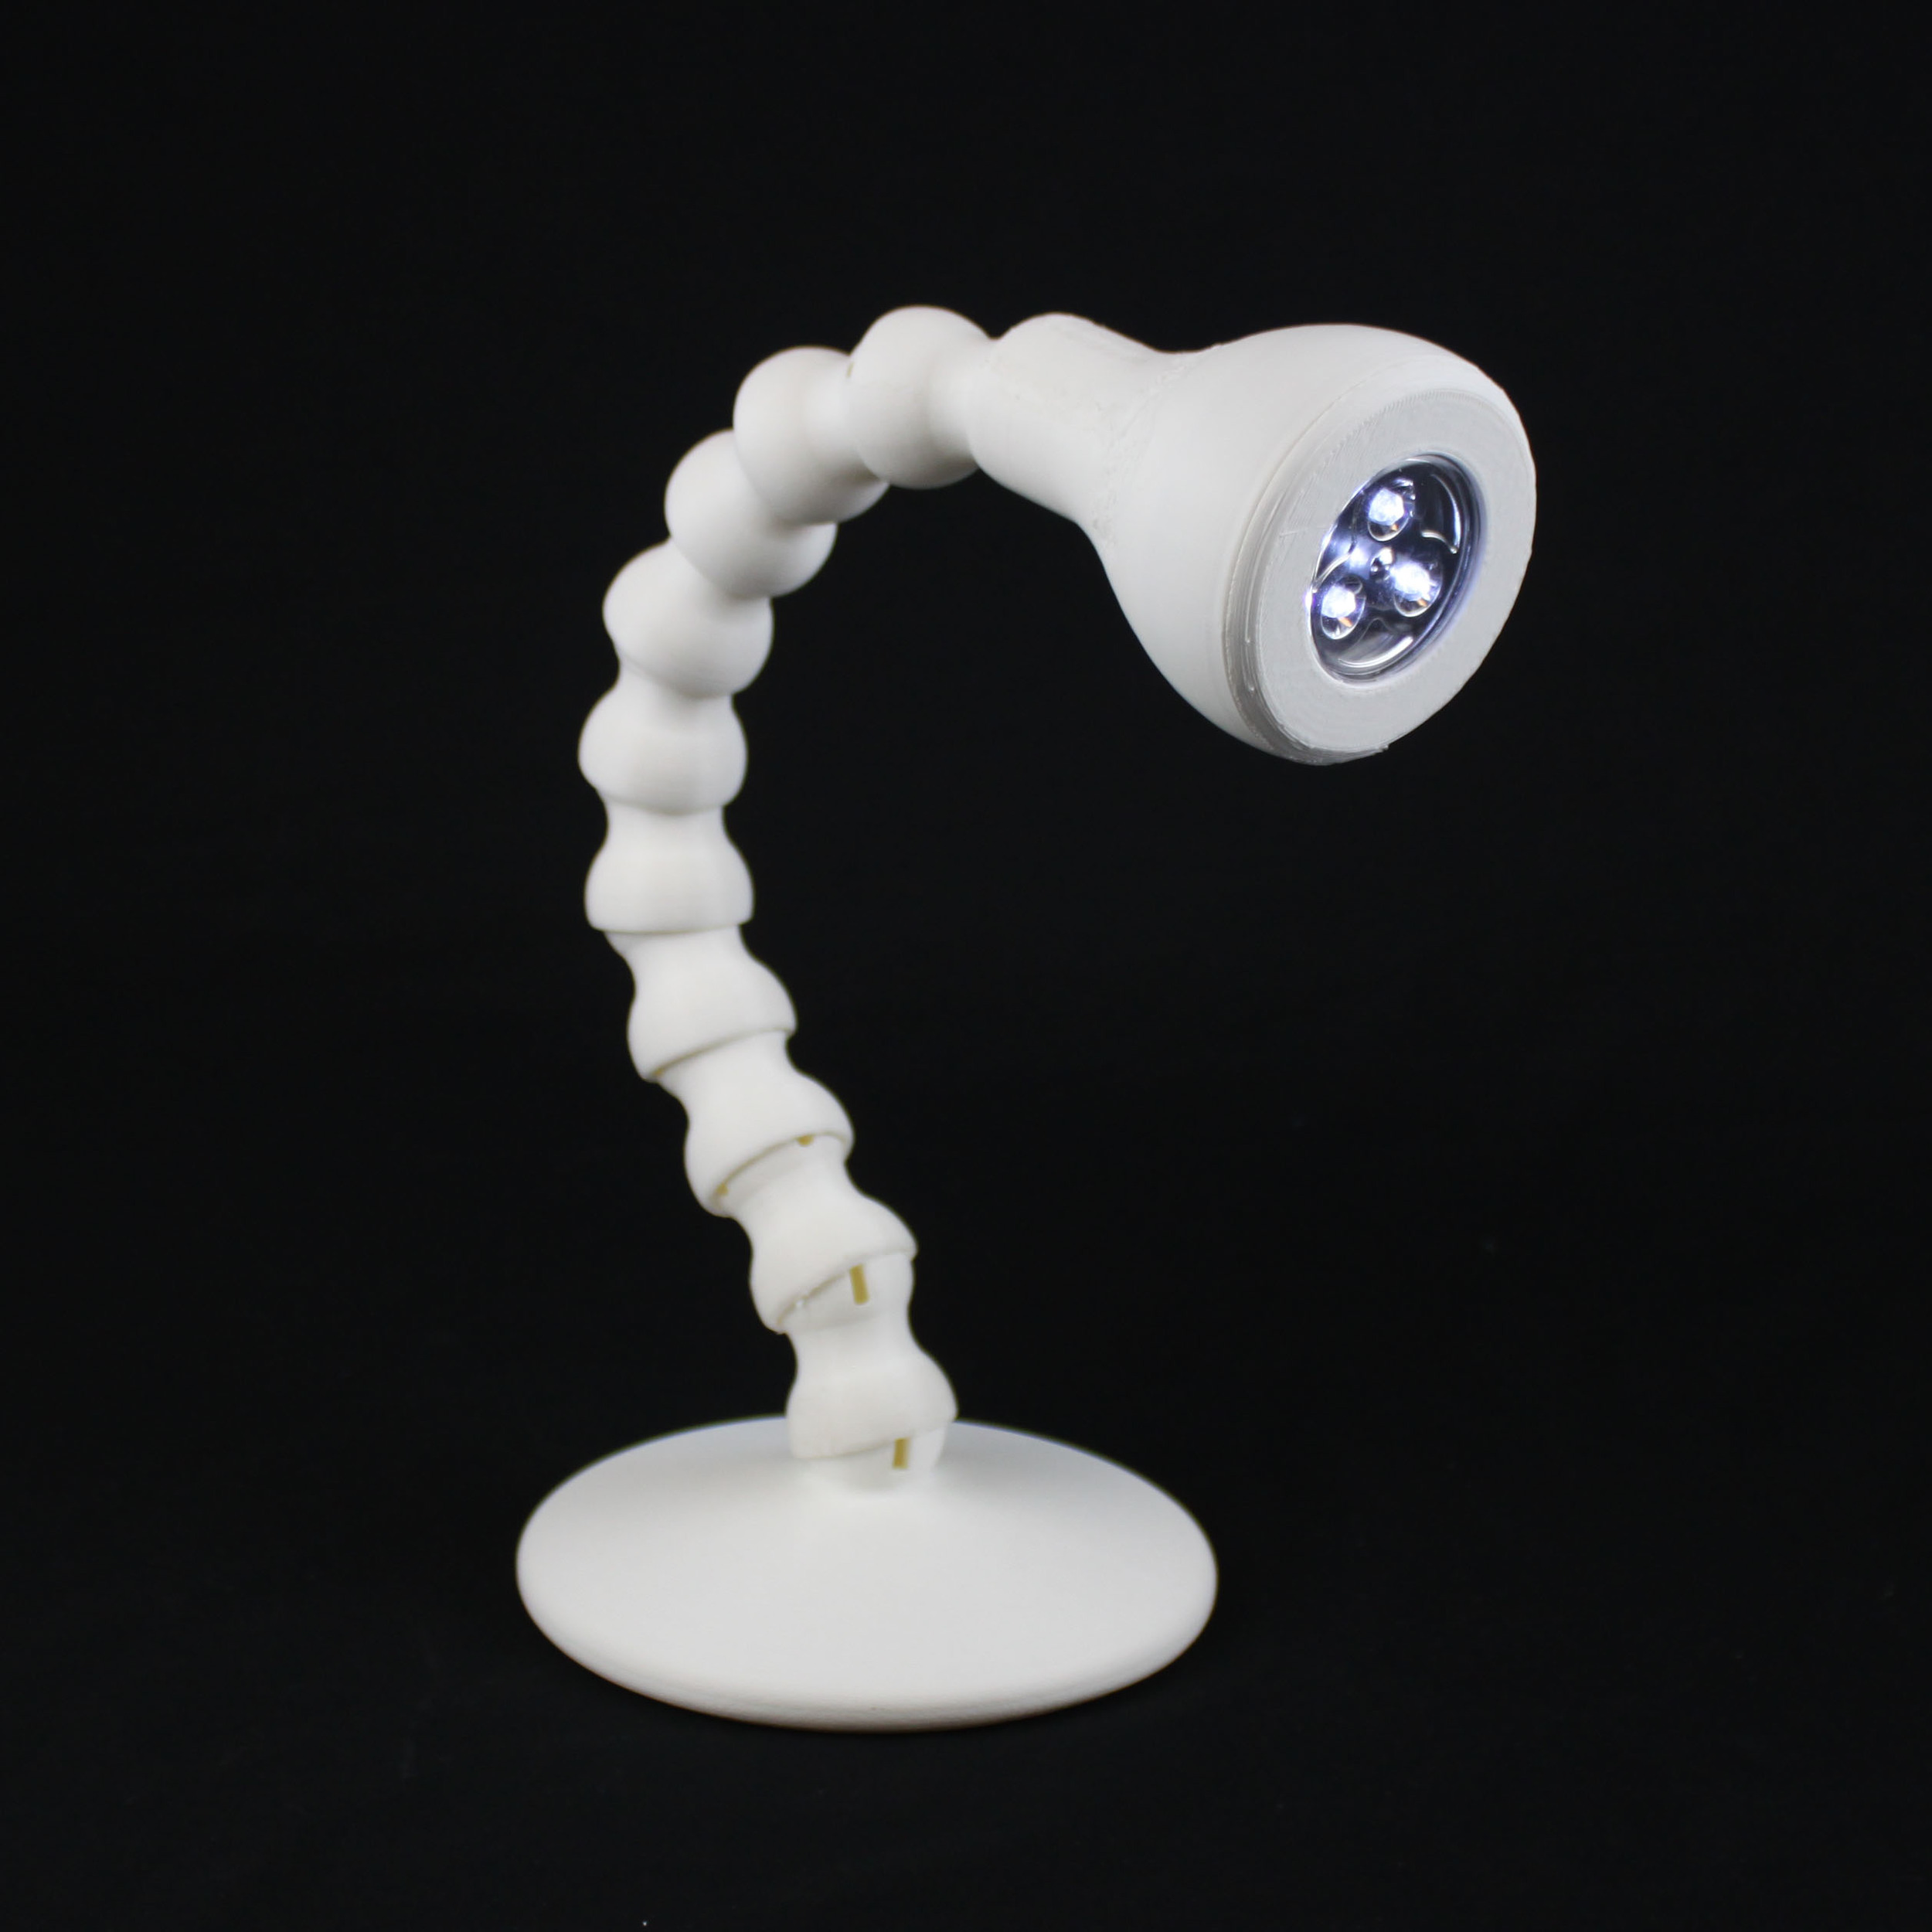
This week’s selection is the tricky-to-make, but useful Articulated Lamp by MyMiniFactory contributor Luca Parmegiani.
The print is actually a bit of a project, in which you will print a number of items for assembly, plus adding in the actual lamp itself.
When you’re done, you’ll end up with a truly useful desk lamp that’s also quite portable.
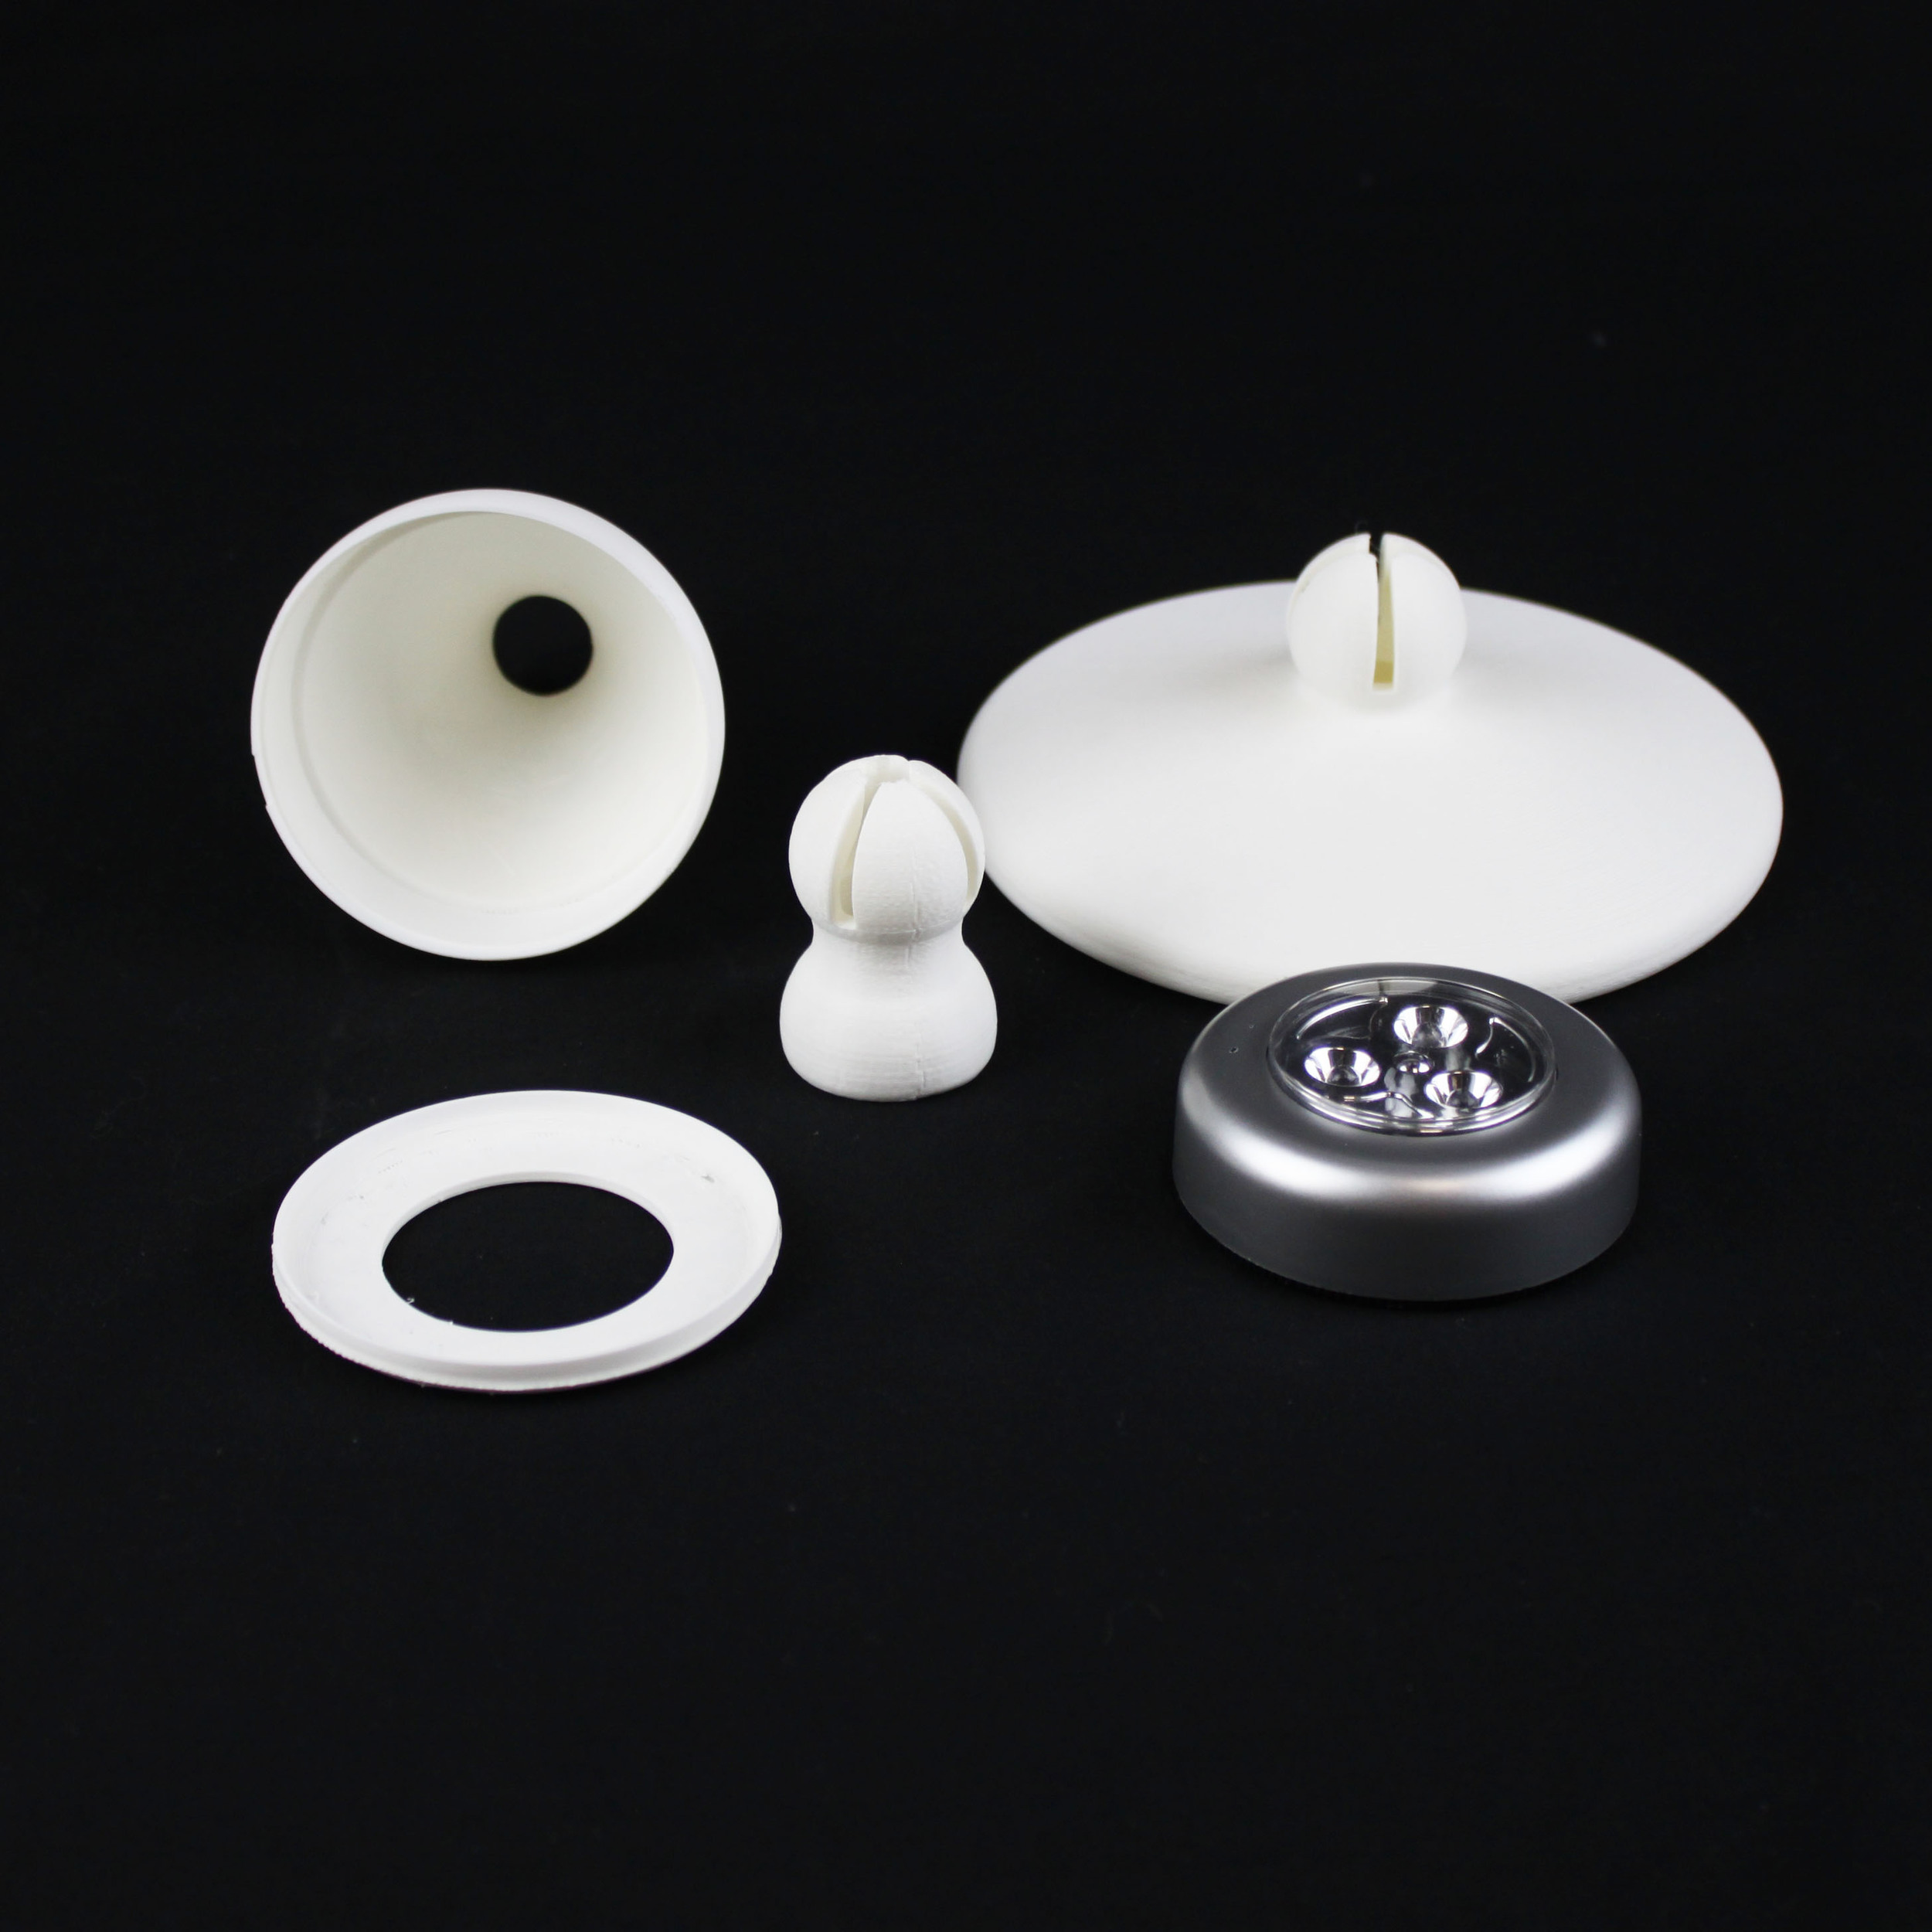
There are five pieces to this print: two screwable components that make up the lamp housing; two kinds of snap-together trunk segments and a wide, flat base to hold it upright.
You’ll need to print a number of trunk segments to match your requirements, but if you attempt to use too many, the lamp may become more unstable.
The lamp, of course, is not 3D printed, as it is simply a common portable LED lamp, which you can get for about USD$3 each. It’s battery operated, meaning the Articulated Lamp does not require power wires running through it – and means the lamp is entirely portable, too. To turn it on or off, just push on the lamp surface.
At first this may seem to be a relatively straightforward project, but in fact it is actually very challenging to print. There are three key obstacles to 3D printing this item successfully.
First, the lamp housing is designed as two pieces that screw together, sandwiching the lamp. You’ll need to print these at high resolution in order to have sufficiently resolved threads. If not, it won’t fit together.
Second, there are many snap-together parts in this project. The trunk segments, of course, use a ball-joint approach, where the “ball” bends slightly to enter the socket. There is also a special cylindrical segment that must fit into the base. The challenge here is to print the pieces with sufficient dimensional accuracy so that they actually fit. Some printers and slicing programs end up printing pieces a bit larger than they are intended to be, making assembly impossible. You’ll also have to select the right kind of plastic for the job, likely ABS in this case, as it should be somewhat flexible to perform the snap-ins. For strength, you’ll need to play with the slicing settings to balance flex versus fragility. This may require some experimentation.
To make this challenge more specific: if you print two trunk segments and they don’t fit together, you might think you could simply resize one segment down a bit and then it would fit. Nope, you CANNOT do that, because in this design each segment has a ball AND a socket. If you size down the ball, you’re downsizing the socket too! The only solution is very precise 3D printing.
Finally, the base is recommended to be printed at 100% fill so that it is sufficiently heavy to balance the structure. Printing at 100% is something only well-tuned 3D printers can do successfully, without slopping extra material outside the intended tool path, or having sparse portions. Another approach might be to print the base with sparse fill, say 10%, and pause the print operation mid-way through to drip some heavy, solidifying liquid into the interior. This may be cheaper than printing in expensive plastic, too.
All said, this is a tricky item to print, in spite of its initial simple concept.
If you’re willing to give this one a try, you may do so by downloading the 3D model parts from MyMiniFactory, where it is available at no charge.
Via MyMiniFactory