

Our look at the Seal and Seal Lite 3D scanners from 3DMakerpro concludes with Software, Scan Results and Final Thoughts.
This is part three of a three part series, please read parts one and two.
3DMakerpro Seal Software
As mentioned above the software used for handling the Seal 3D scanner is 3DMakerpro’s ubiquitous JMStudio. The software is very powerful in its ability to process 3D scans, and runs quite quickly compared to some others that I’ve tested in the past. As you’ll see, the results are quite good.
There are three modes in JMStudio: Editing and two types of Scanning. The two types of scanning are handheld and turntable modes, which we’ve covered in our previous 3DMakerpro review.

During scanning, JMStudio displays a real time camera view in the top right by which you can coordinate your hand movements. In the center of the display is the scan results, where “captured” structure gradually grows as your scan proceeds.
Once the scan is completed you’re presented with an option to “append” additional scans. The idea here is that many objects require at least two scans: front and back, top and bottom, etc.
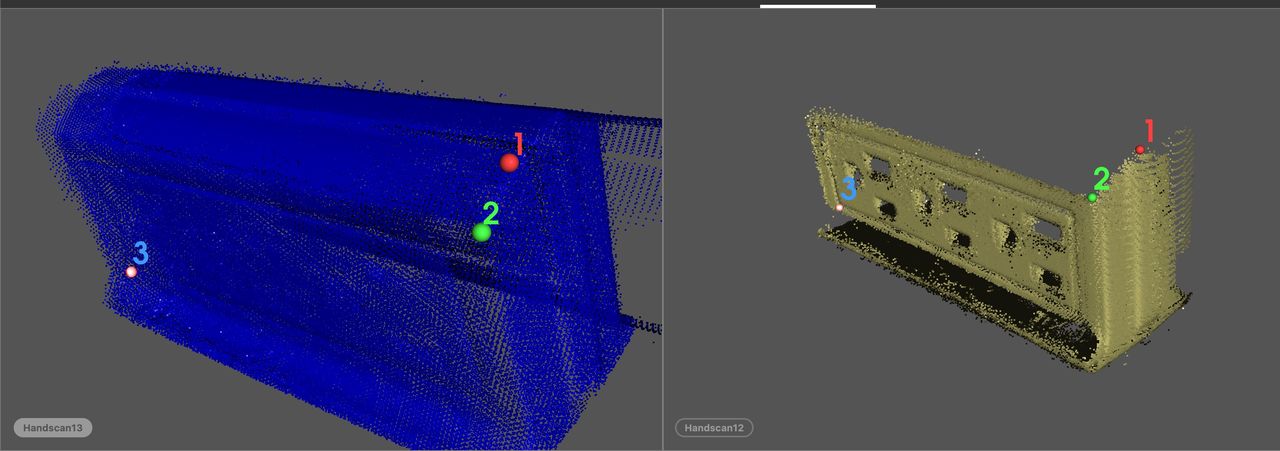
When you capture more than one view of the subject, say top and bottom, you are then presented with the alignment function. The goal is to move dots 1, 2 and 3 to the same physical point on both 3D scans. This provides JMStudio with a strong hint of how the two pieces fit together.
You can have JMStudio do this automatically, but often it guesses wrong, particularly on symmetrical objects were it isn’t completely obvious which side is which. I prefer doing this step manually so that I can ensure the sides are correct.
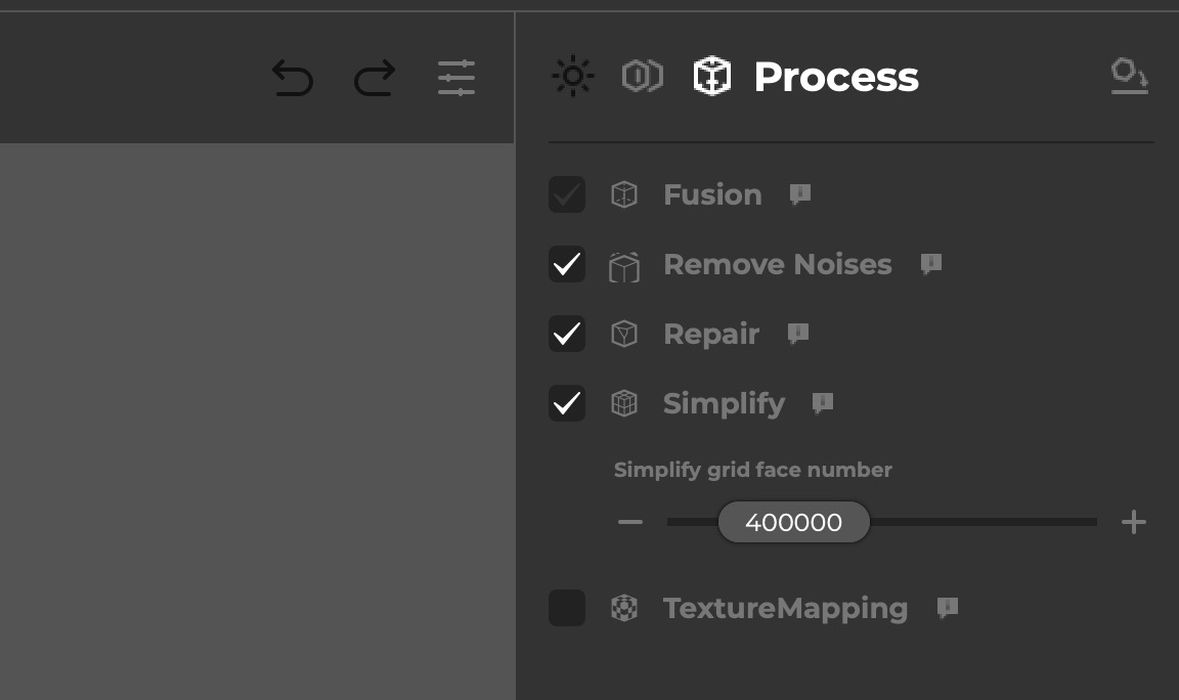
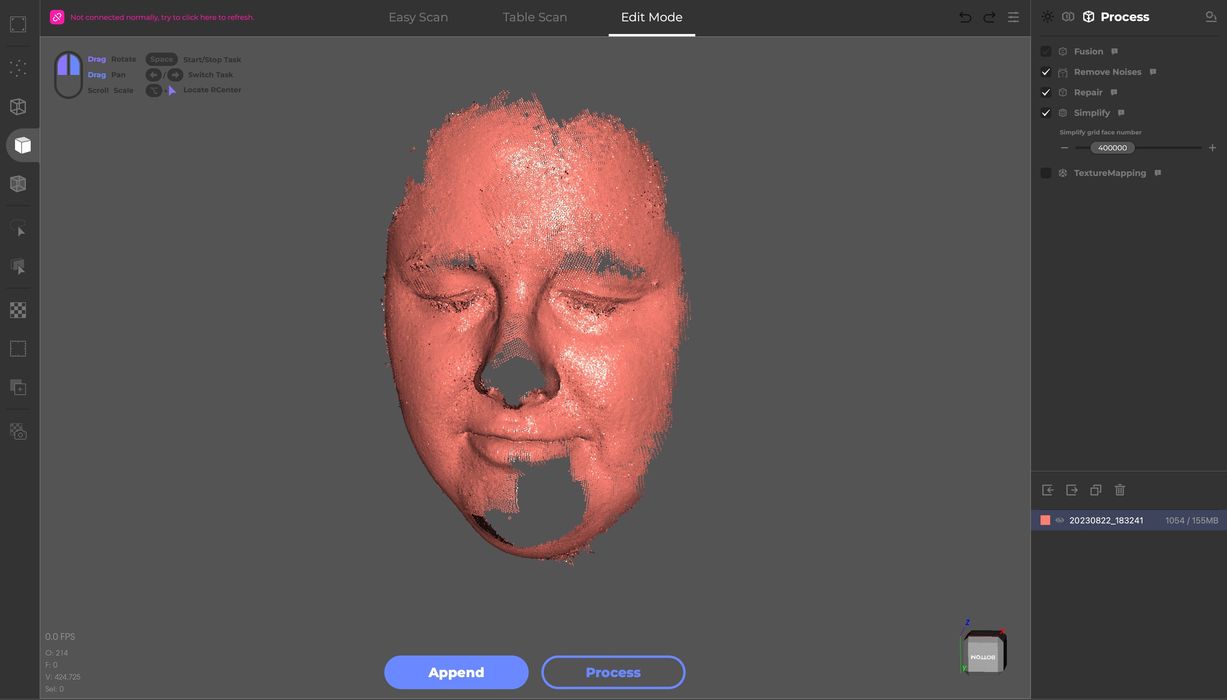
Once the point clouds are aligned, you can then proceed to the “Process” step. This is a complex stage that knits the points together into a surface, and cleans up the scan. Above you can see and select which functions can be performed.
The “Remove Noises” step seems to remove stray scan bits that are disconnected from the main body, something I often have to do manually with other scan tools. Here JMStudio does a good job on its own.
The repair step is important, as it closes the inevitable holes generated by missing scan data.
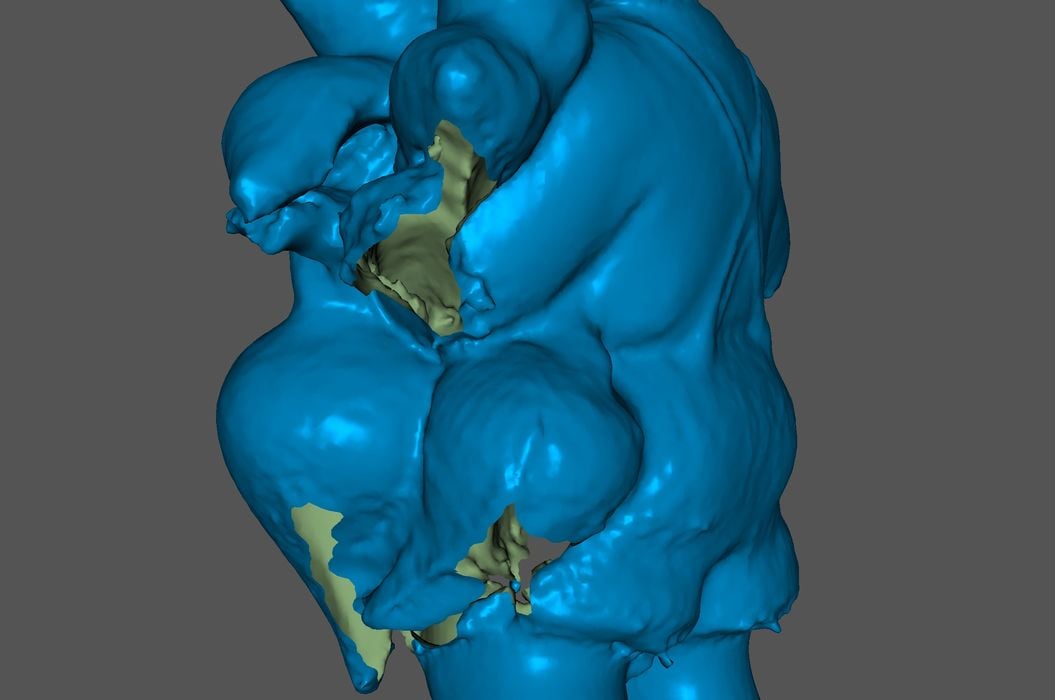
While JMStudio does a good job, sometimes when the holes are too big it just isn’t able to fill them. That’s not a fault of the software; it’s because the operator didn’t collect enough data for that surface. In other words, JMStudio can’t do magic, and the operator must be quite diligent to capture all surfaces. This is why multiple scans are sometimes required.
The interface to JMStudio is somewhat easier to handle than others I’ve used that can be quite technical. While JMStudio does suffer from some awkward wording here and there due to translation issues, it’s easy to figure out what’s going on.
The Simplify step reduces the final 3D mesh to a set target number of faces. This is important because the resolution captured by the Seal is so fine that the 3D models can be quite gigantic if you don’t manage the simplification step properly.
One issue I have with JMStudio that has persisted since our last test is the choice of colors for the interface. There are several displays where tiny light gray text is used on top of a slightly darker grey background and they can be extremely difficult to read. JMStudio could be challenging to use by many operators because of this. It’s fine to make something look attractive, but it also has to be readable.
3DMakerpro Seal Scan Results
When everything goes correctly, the Seal can produce amazingly good scan results.

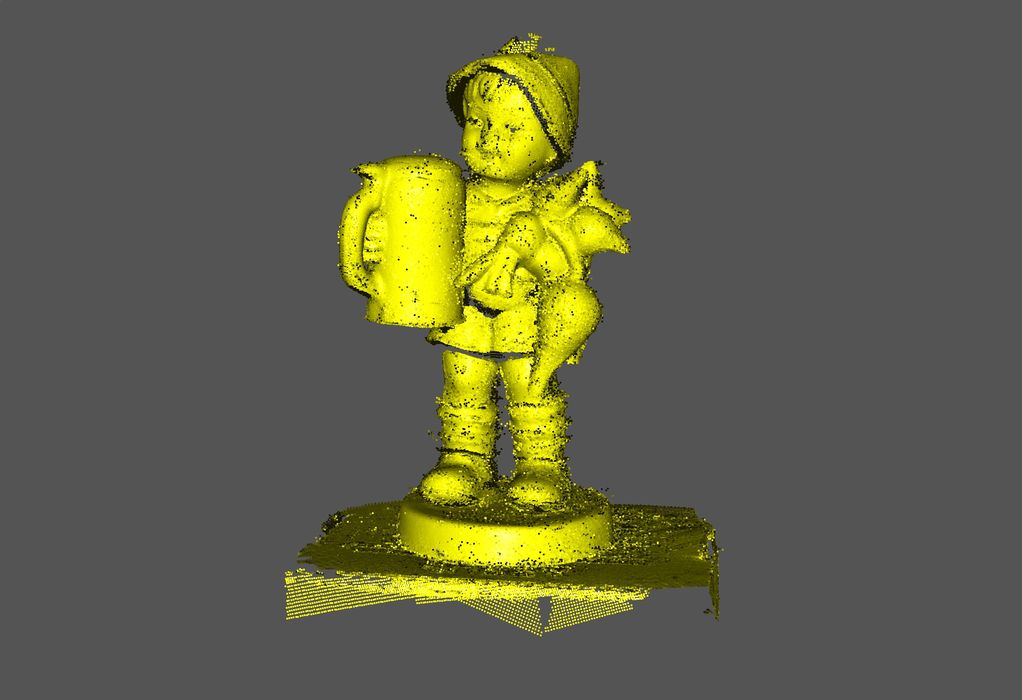
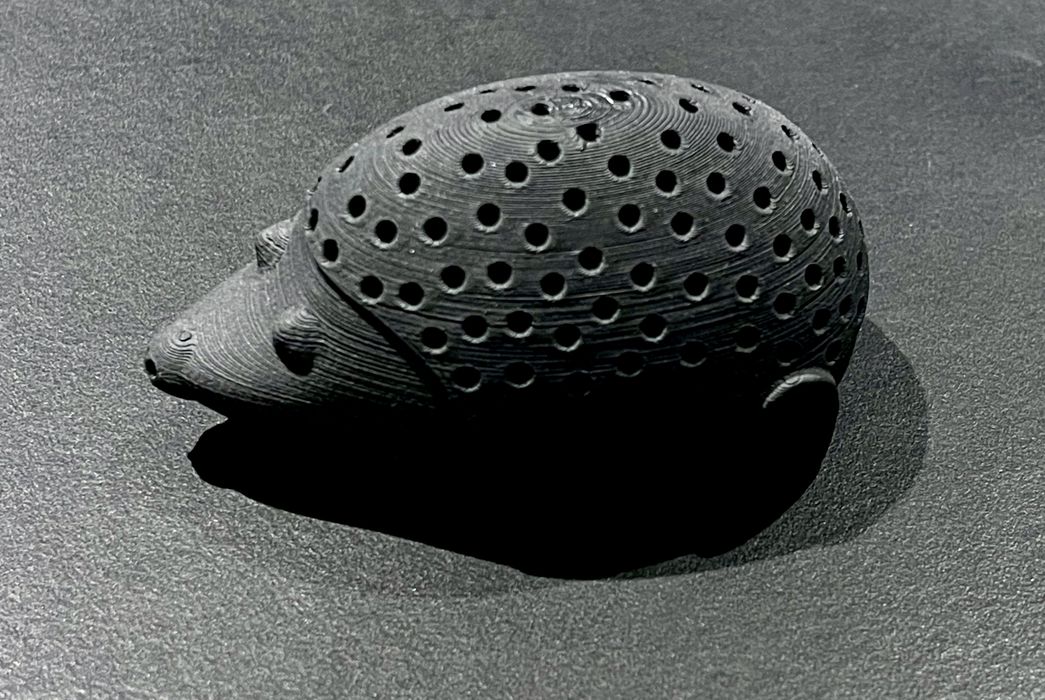
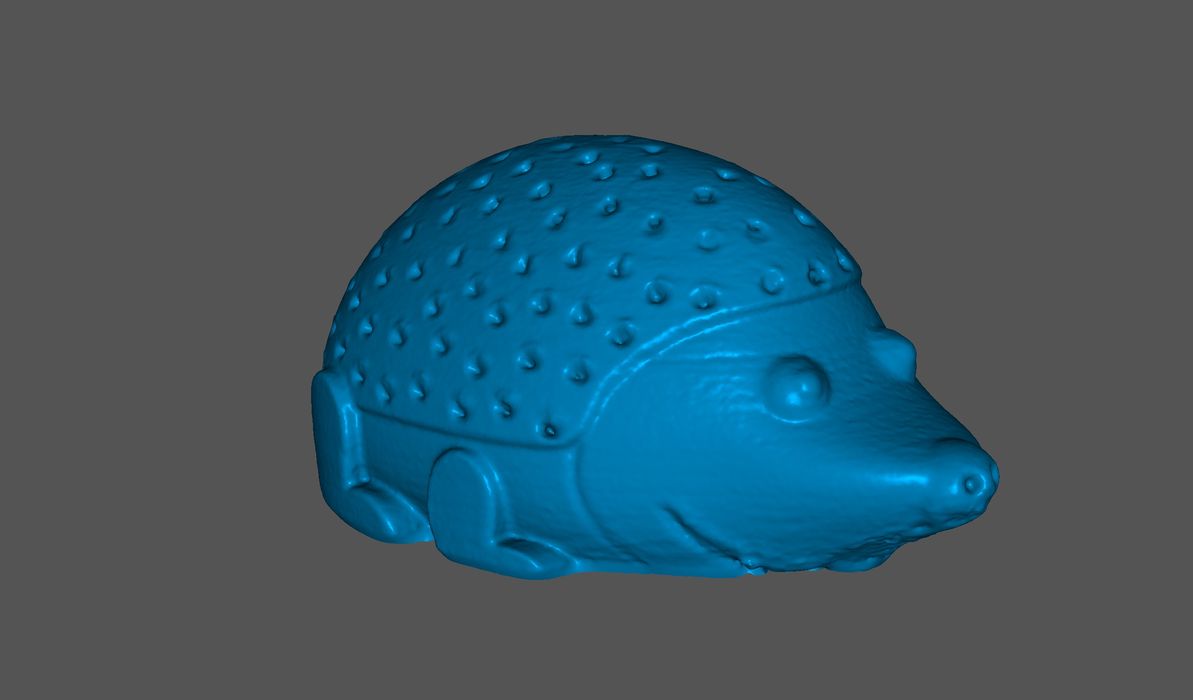
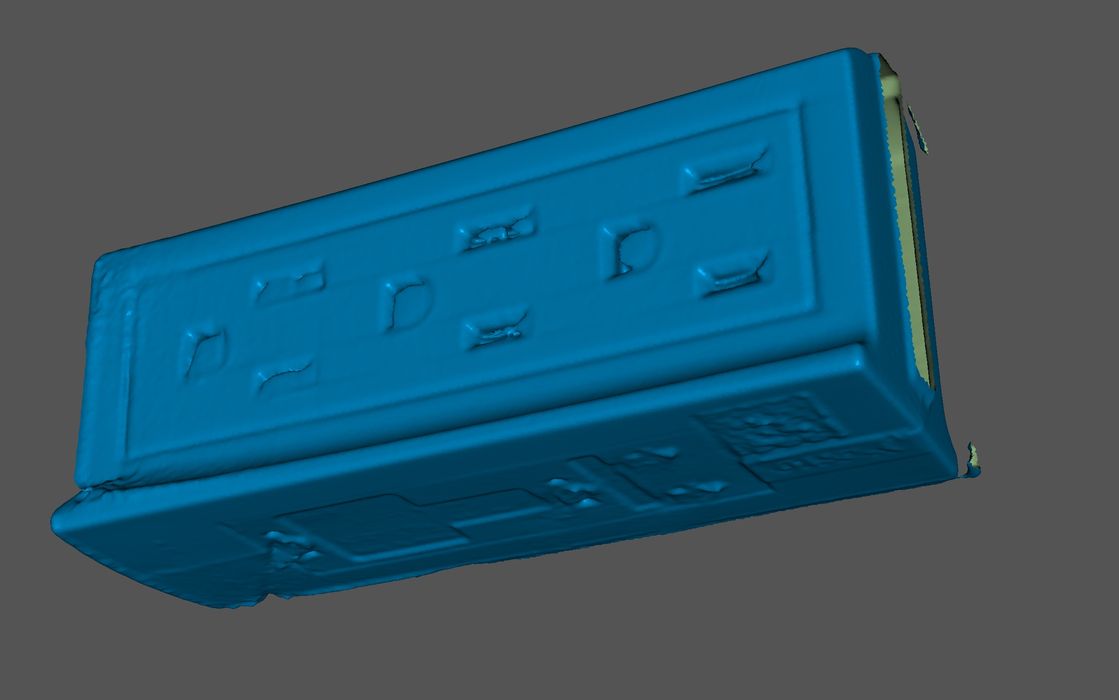
My standard scanning test object, this ceramic Hummel figurine, came out extraordinarily well when using the Seal scanner.
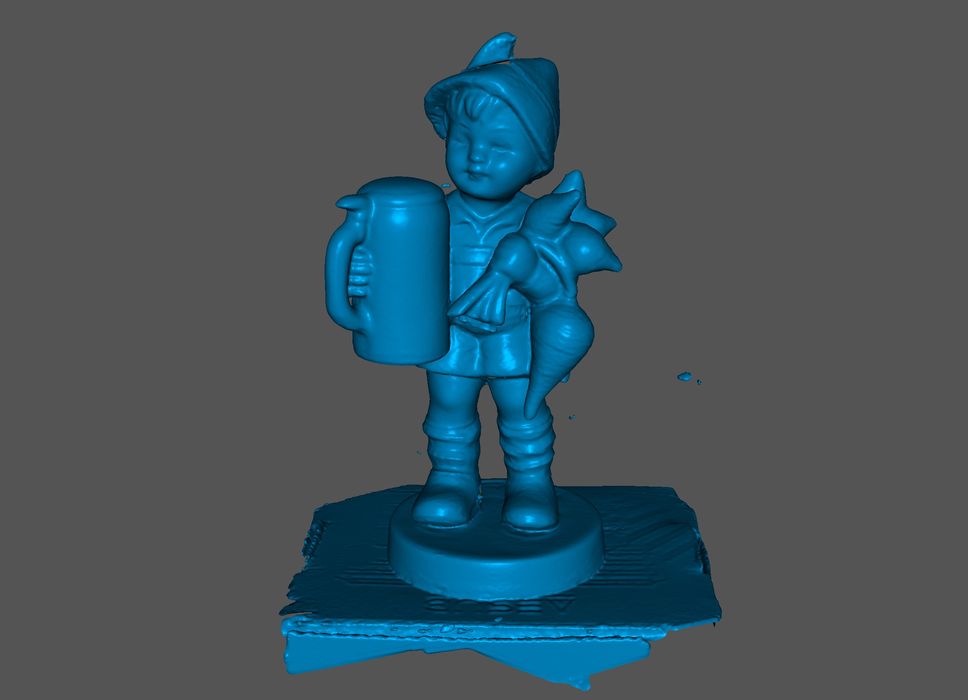
This is the result of a somewhat quick scan with the Seal of the figurine. There are considerable details present, and I have to say this is the best scan of the figurine I’ve yet achieved with any scanner. The Seal and JMStudio did an incredible job on this subject.
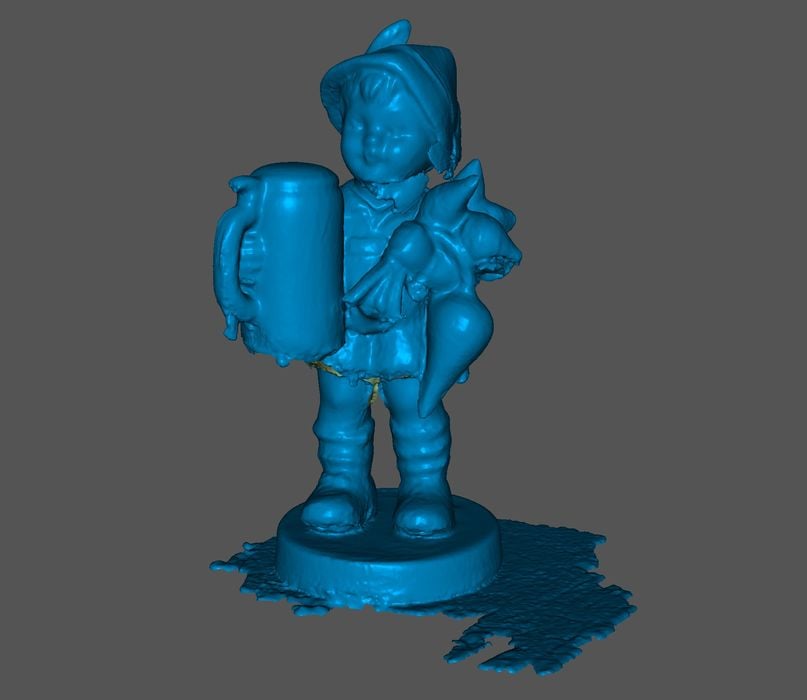
As for the Seal Lite, while the operations were about the same, the scan was slightly less good, but still excellent. I did find that tracking seemed a little bit more difficult with the Seal Lite, however.
This item was an interesting scan because it’s dark, but not so reflective. Would it scan properly?
It did! The scan came out near-perfect. The Seal units seem capable of capturing darker objects, so long as they aren’t shiny.
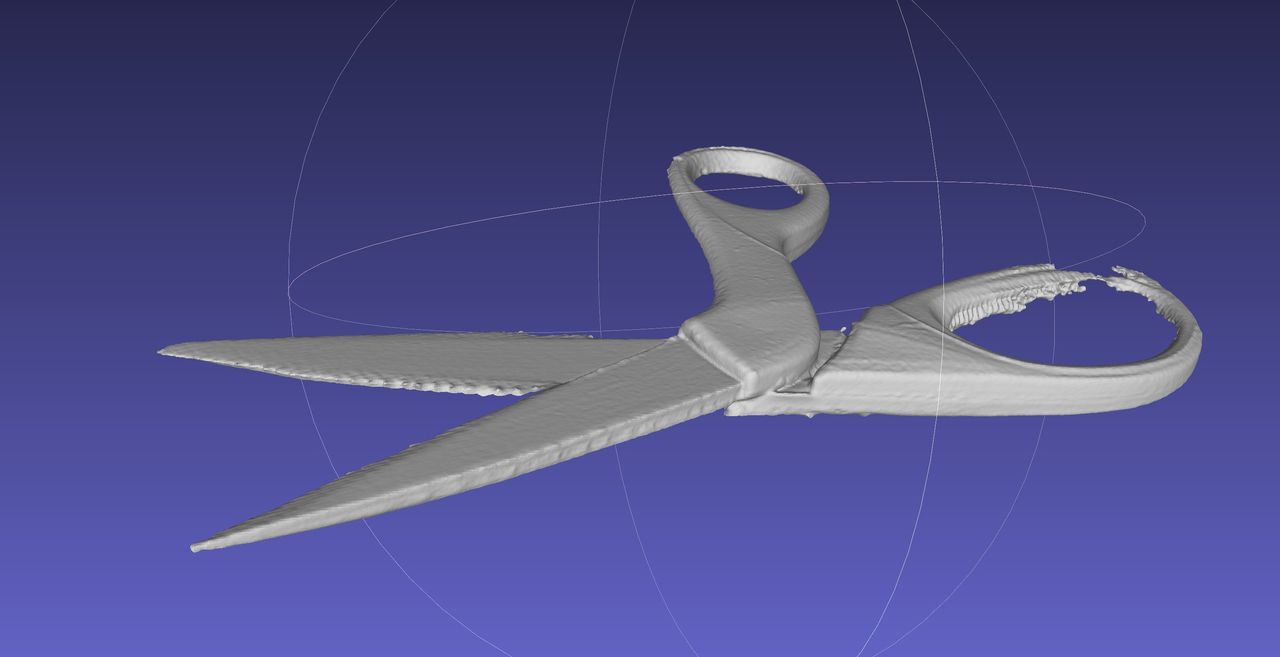
Here I attempted to scan something shiny, a pair of scissors that had both brushed and somewhat shiny surfaces. Surprisingly, it came out very well after I adjusted the brightness correctly.
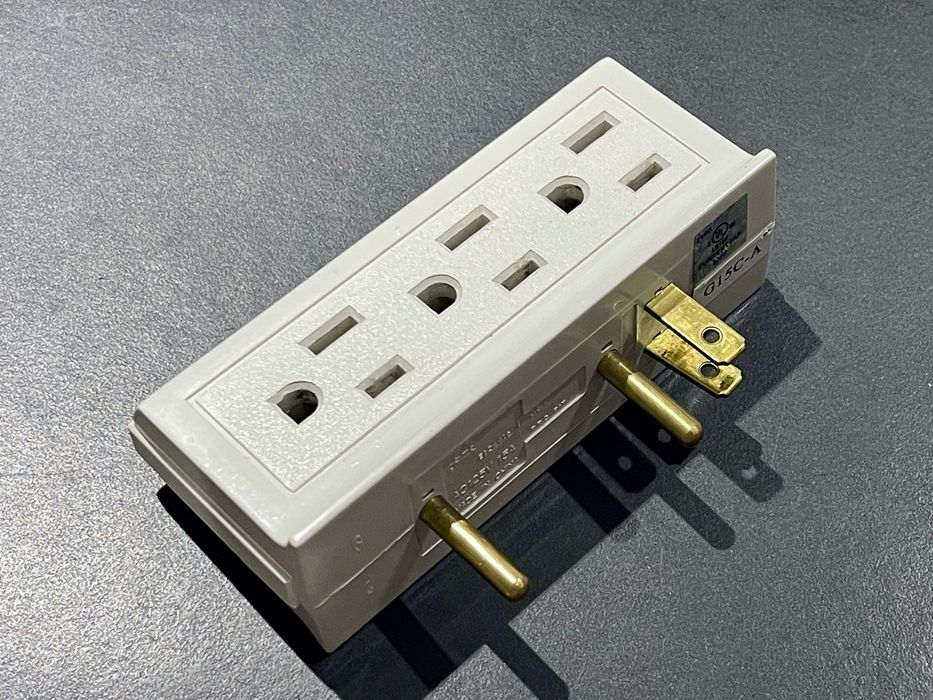
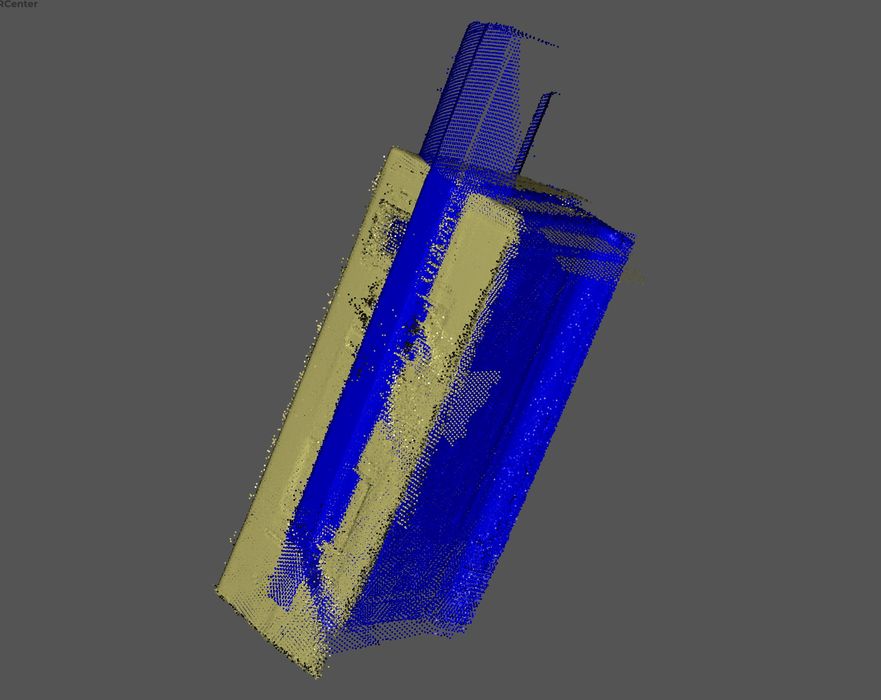
This item proved challenging because the prongs were shiny, and the rest was not.
Aside from alignment issues due to the symmetrical nature of the part, the Seal did not capture the prongs at all. I suspect this might be solved by changing the brightness settings to capture the prongs and then appending that to the rest of the scan.
However, keep in mind that any shiny object can be successfully 3D scanned by using a specialized scanning spray, such as those provided by AESUB.
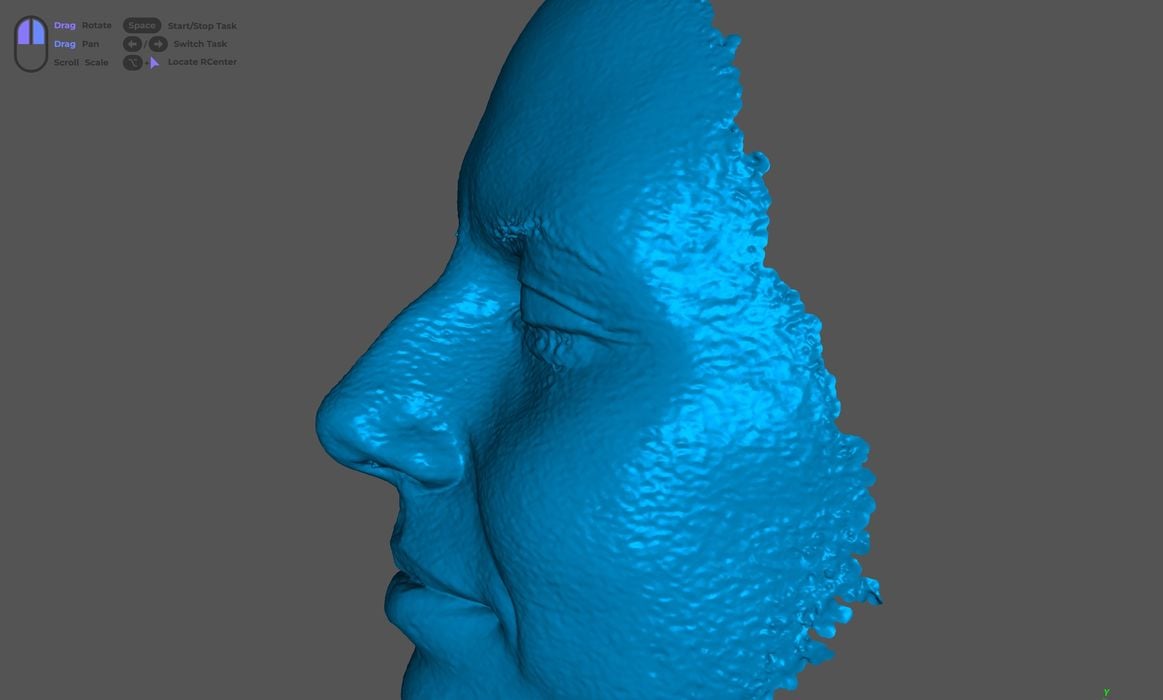
Here you can see a careful scan of a face. We didn’t capture the entire head, but focused on the face. It came out quite well, although you can see some wiggles in the surface. Some of that could be due to the subject being not perfectly stationary. Note that the eyes are closed during the scan.
One tip for scanning human faces: start on the nose, because JMStudio really wants to grab onto some distinct geometry for tracking. If you start on the cheek or other flat surface, it takes quite a while to register and begin capturing frames.
3DMakerpro Seal Final Thoughts

I was really impressed with both Seal 3D scanners. They are fairly easy to use and produce incredibly good 3D scans, if the operator is skilled and subject is suitable.
There are some ease-of-operation improvements that could be made in the Seal system, including a way to more easily configure the device, rework JMStudio’s color interface for readability and provide an easy-to-use guide for newbies that might be confused by the multi-step workflow required to complete a 3D scan.
Nevertheless, the Seal and Seal Lite are terrific 3D scanners with powerful software that can, with some experience, be used to produce excellent 3D scans.
The Seal and Seal Lite launch this week at a very good price point, as compared to competing hardware 3D scanners. The Seal’s MSRP is US$699, but can be obtained during their launch for as low as US$384. The Seal Lite’s MSRP is US$359 and is discounted down to only US$199. At these prices, many 3D print operators should be able to afford a high quality 3D scanner.
This is part three of a three part series, please read parts one and two.
Via 3DMakerpro and Indiegogo