
We had the opportunity to check out 3DMakerpro latest 3D scanners, the Seal and Seal Lite.
This is part one of a three part series, please read parts two and three.
3DMakerpro Seal Background
3DMakerpro is actually a brand name used by Shenzhen Jimuyida Technlogy Co. Ltd, and it’s gradually becoming more recognizable in the West. The company launched in 2015 with a focus on 3D scanning and related technologies, and since then they’ve developed several units already on the market, including the highly useful “Mole”, which we recently reviewed.
They also supply the underlying hardware and software for Creality’s CR-SCAN Lizard 3D scanner, which that company rebrands. Last year we also tested that 3D scanner.
Now they’ve released a new line of 3D scanners, the “Seal”, which is provided in two models, the Seal and the Seal Lite. While the Seal provides more resolution, the two units are more or less the same otherwise.
3DMakerpro Seal Specifications and Features
The “Seals” have to be about the smallest hardware 3D scanners we’ve ever encountered. The camera unit is only 110 x 60 x 35mm in size, and weighs hardly anything. However, they cannot be operated by themselves; they need an attachment to a PC or the “Smart Grip”, as we’ll see later.
3DMakerpro indicates the Seal has an accuracy of 0.1mm, with a resolution of only 0.05mm, which is quite incredible for a low cost hardware 3D scanner.
The scanner is able to capture 24-bit color textures during scanning, which can be useful for certain types of 3D scans. However, that feature did not seem to be enabled on the units we tested.
The fundamental scanning technology in the Seal units is structured light, where a pattern is flashed onto a subject, and the detected distortions in the reflected pattern can be interpreted into 3D geometry.
That light source turns out to be different than most other structured light 3D scanners, which use either LED or near-infrared lighting. Instead the Seals use a blue light that has a shorter wavelength. This smaller wavelength apparently allows the device to capture a bit more resolution.
One important feature is the complete lack of markers. Many other hardware 3D scanners require the operator to paste reflective “makers” onto the subject to aid the scanner in keeping track of its position in 3D space. Somehow the sophisticated software built by 3DMakerpro is able to track its position without markers, and none are provided with the units, nor are any recommended.
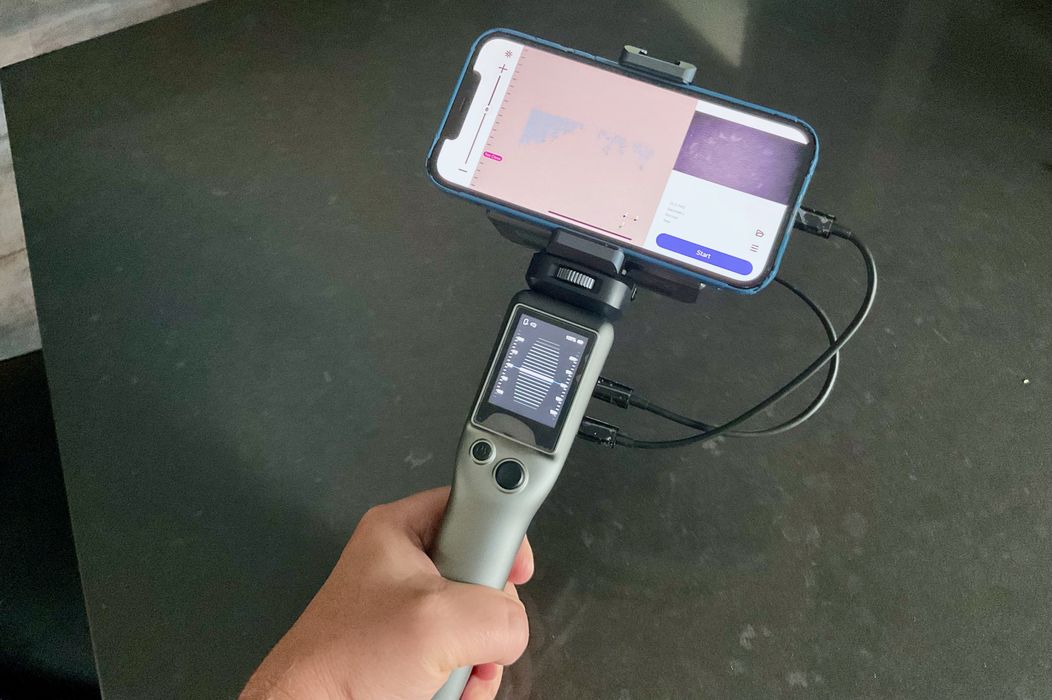
Finally, both Seal units are able to operate in multiple modes. They can be used in handheld mode attached to a PC, in mobile mode using the “Smart Grip”, and in turntable mode where the scanner is stationary and the subject rotates in front of the device.
3DMakerpro Seal Unboxing and Assembly
The Seal is shipped in a rather useful carrying case. All items within are held within molded crevices, and it’s easy to take the device on the road with you.
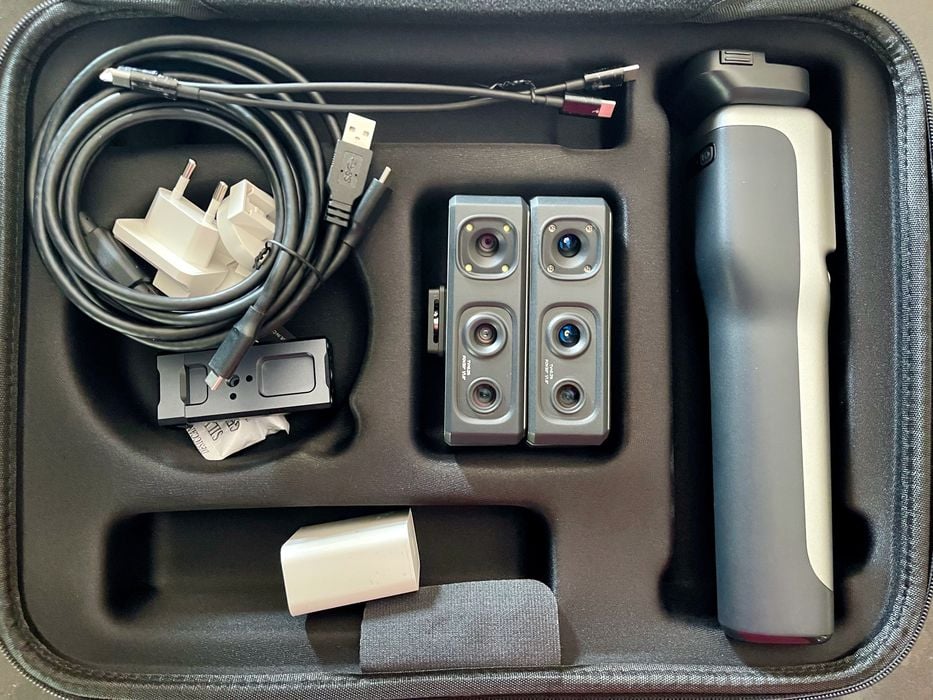
Inside the case are the scanners, the Smart Grip for mobile operations that I’ll explain later, a power supply and a number of cables.
Note that we have both the Seal and Seal Lite in the case, as we were shipped both to provide an evaluation of each. Buyers will find one or the other, depending on which model was purchased. We did find that they were very similar, however, except in terms of capture resolution, and that the Seal’s case is metal while the Seal Lite’s case is plastic.
3DMakerpro Seal Setup and Calibration
You might think there’s not much to setting up a 3D scanner, and that’s often the case. However, we did have a little bit of trouble getting these devices going.
Physically, there’s not that much to do. The Seal device must be set up in one of these two modes:
- Handheld, where it is attached to the PC running JMStudio and a power supply via a split USB cable
- Mobile, where it is attached to the Smart Grip, which provides power, and a smartphone running the JMStudio app
These are easy to set up, as it’s just a matter of pluggin in cables. But then there is the configuration to do.
It turns out that JMStudio is used by 3DMakerpro to power all of their 3D scanners. The software must know which 3D scanners are in the inventory and the operator must select which one to use. If you have only one 3D scanner, this isn’t much of an issue. If you have more than one (which we did), then you have to be careful which scanner you select for use.
If you select the wrong scanner in the app, then unexpected results can occur. The hardware must match the software.
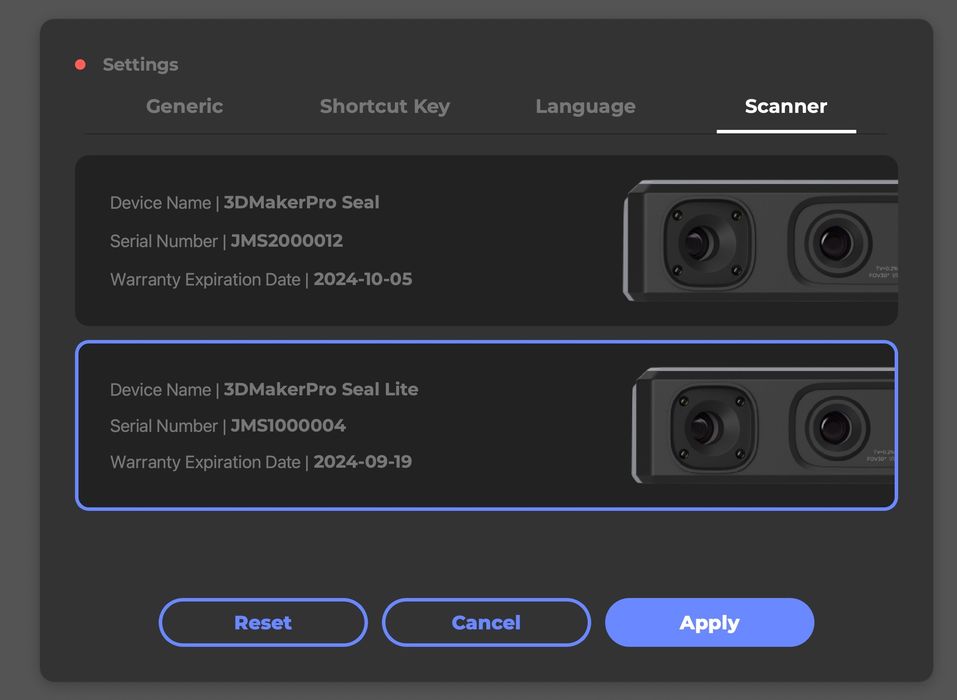
The critical configuration step is to load the correct calibration file into JMStudio for the scanner. It turns out that 3DMakerpro creates a specific and unique calibration file for each and every Seal at the factory, and this file must be loaded for the scanner to work properly.
JMStudio offers to look up the calibration file over the Internet, and that should work well. However, this didn’t seem to work for me, and 3DMakerpro had to send over the calibration files manually. Then it was a matter of matching the calibration file name to the serial number of the scanner, and eventually I got two matches and the scanners were finally able to function properly. Tip: be extremely careful when reading the serial numbers, as it’s easy to get them mixed up.
Your goal is to get all the scanners present in JMStudio, each with the correct calibration file. At that point you are ready to perform 3D scanning. In the future I hope that 3DMakerpro simplifies this process; it should be automatic and not expose the operator to calibration flies.
This is part one of a three part series, please read parts two and three.
Via 3DMakerpro and Indiegogo