
Our look at the new Bambu Lab H2S desktop 3D printer continues with operations.
This is part three of a four-part series; please read parts one, two and four.
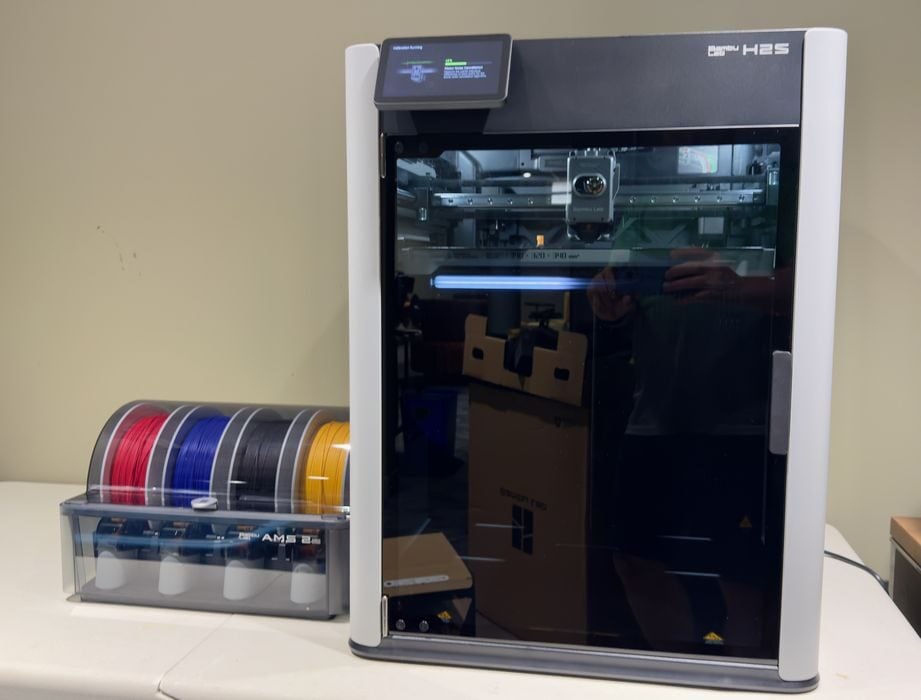
Bambu Lab H2S Operations
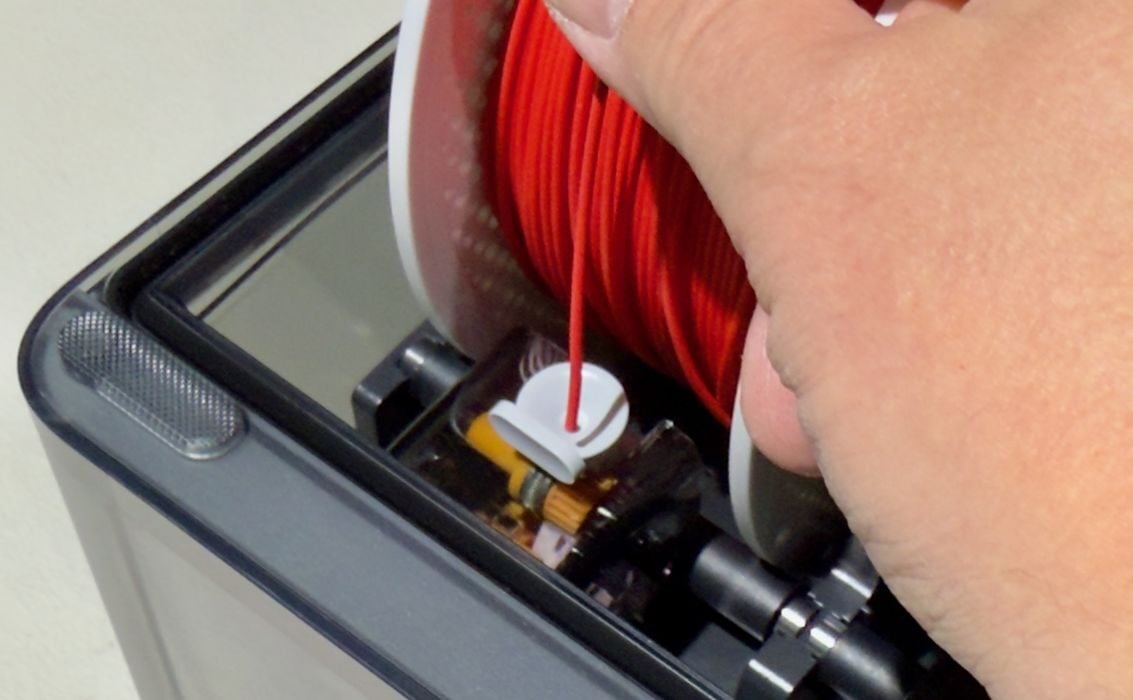
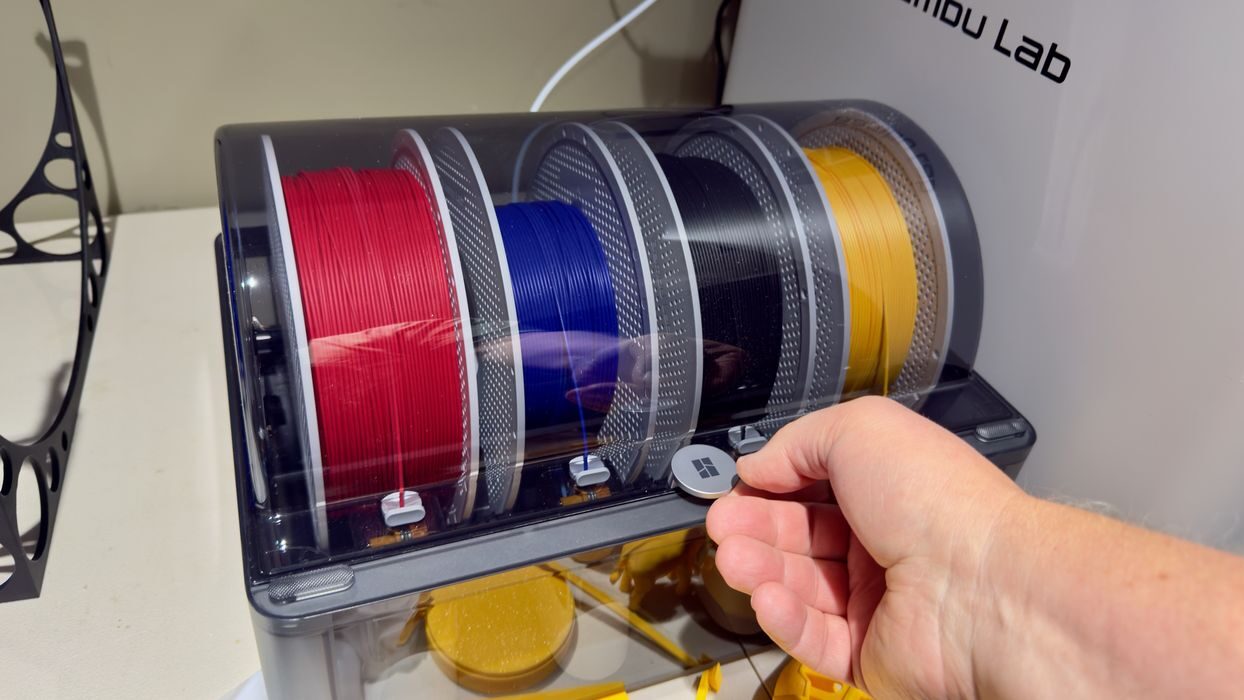
Before you can print, you must load filament. This is easily done with the AMS 2 Pro, which quickly slurps up any short segment of filament that is presented. Removal of a filament is also easy: just press the lever and they pull out without issue. Just push the lever in the correct direction, which I always messed up.
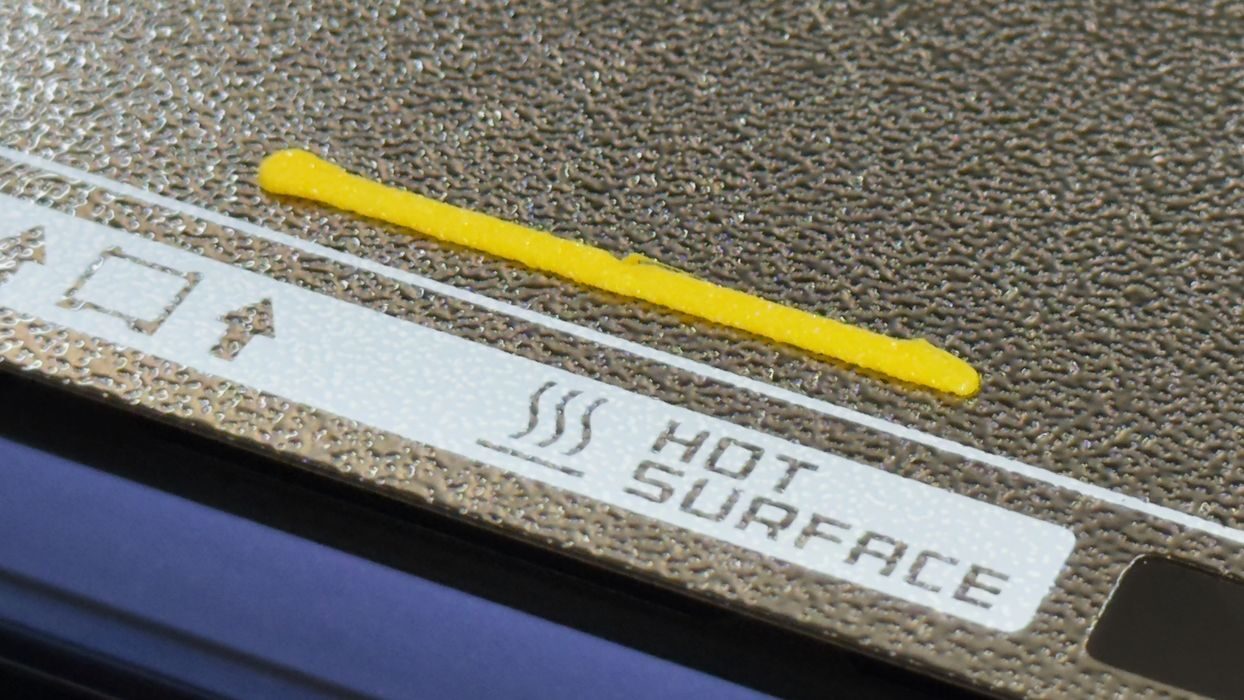
During filament swapping, the H2S will produce a filament poop, which is ejected at the back. I will eventually print a proper poop basket — of which there are several excellent and humorous designs available. In the meantime, an empty filament box does the job just fine.
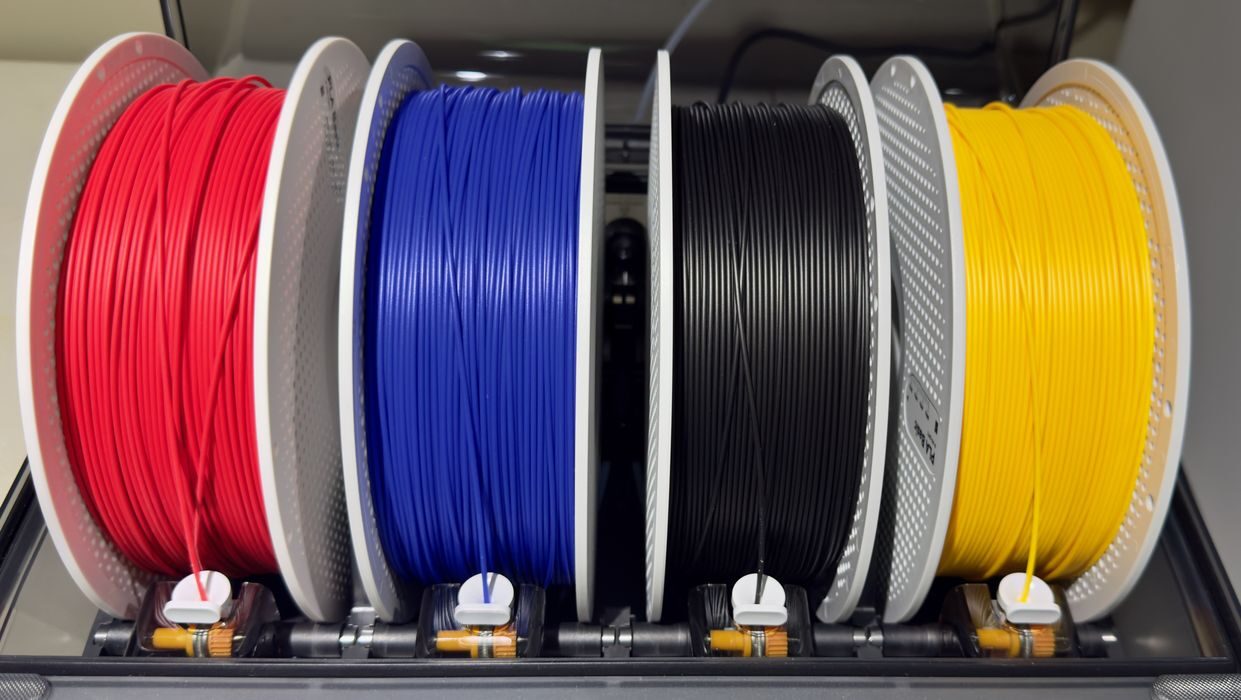
I completed loading four spools of Bambu Lab filament into the AMS 2 Pro, which accepted all of them easily. The AMS 2 Pro includes an RFID reader for all slots, meaning it can automatically identify the material type and colour for each mounted spool — if you’re using Bambu Lab filament. I then went to the touchscreen to continue.
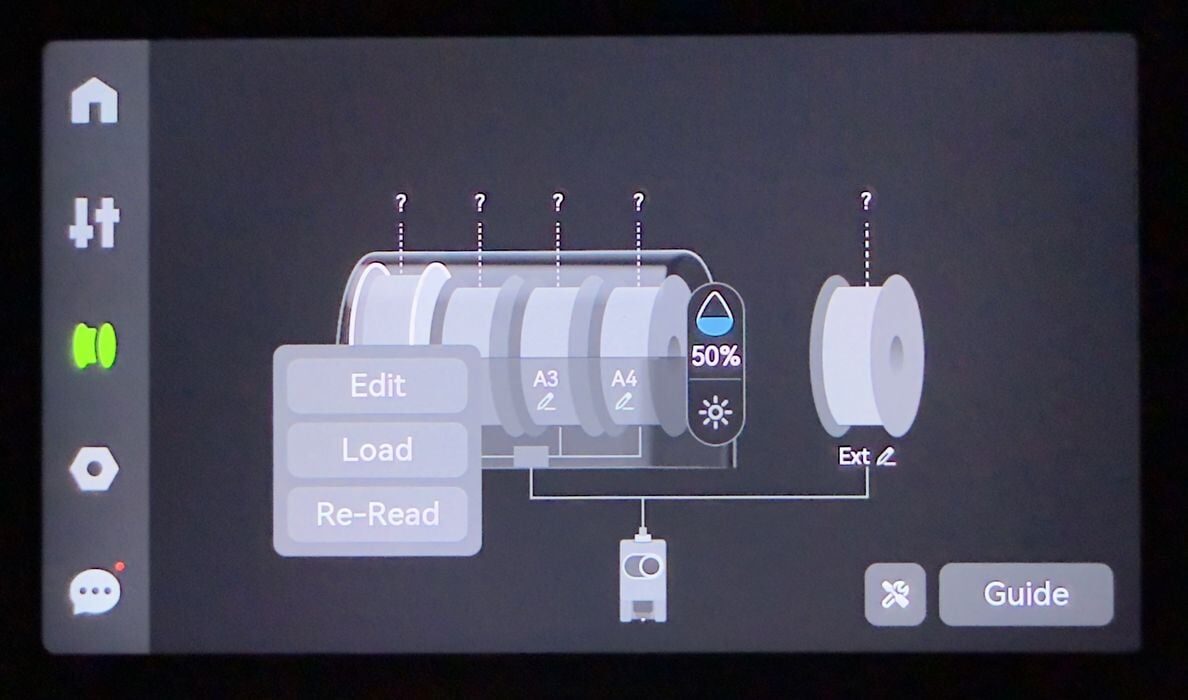
But hold on, the H2S did not detect the spools! I wiggled them back and forth in case the RFID chip didn’t pass by the sensor. No go. The H2S thought there were no spools loaded.

Eventually, I ended up selecting the “edit” button on one of the slots on the touchscreen, and suddenly the spools were detected, one by one. I’m not sure what was going on there, but it seemed that it needed a bit of a push to get going.

The main control panel is beautifully designed, and I commend Bambu Lab’s user interface designers for continuing to produce one of the cleanest interfaces found on today’s 3D printers.
My testing occurred before the release of the H2S, which meant that the current version of BambuStudio did not support that machine yet. While I awaited delivery of pre-release software that did understand the H2S, I was able only to print some of the pre-sliced models installed on the machine’s internal memory.
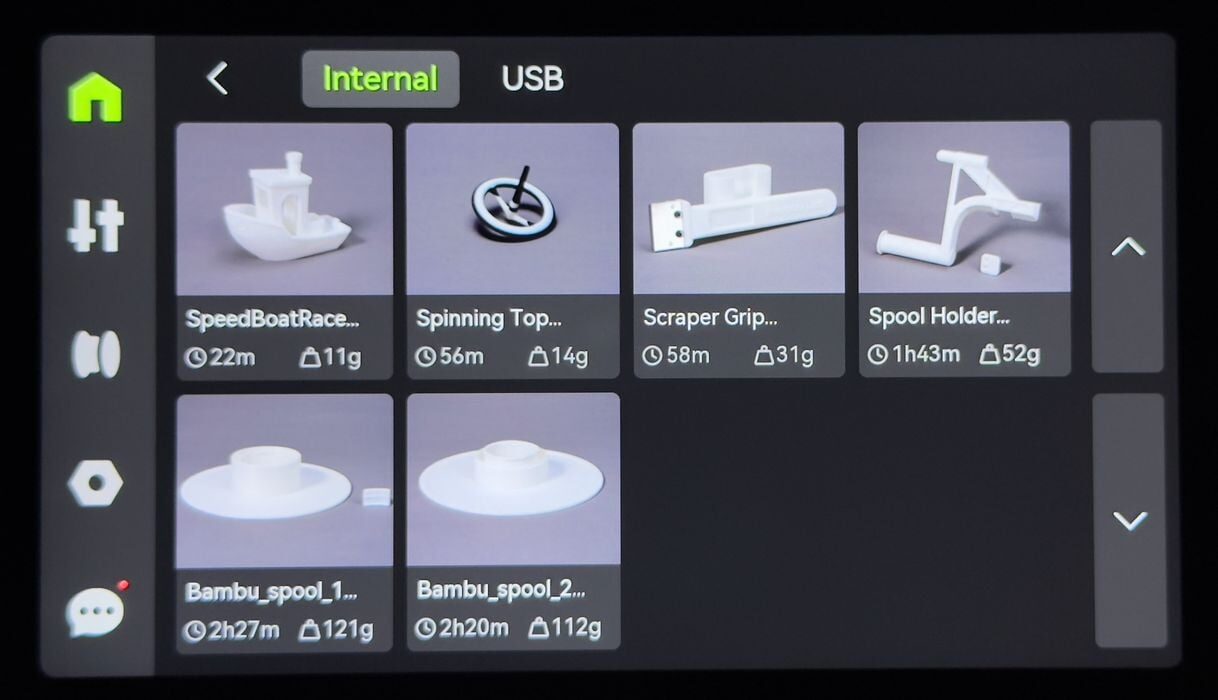
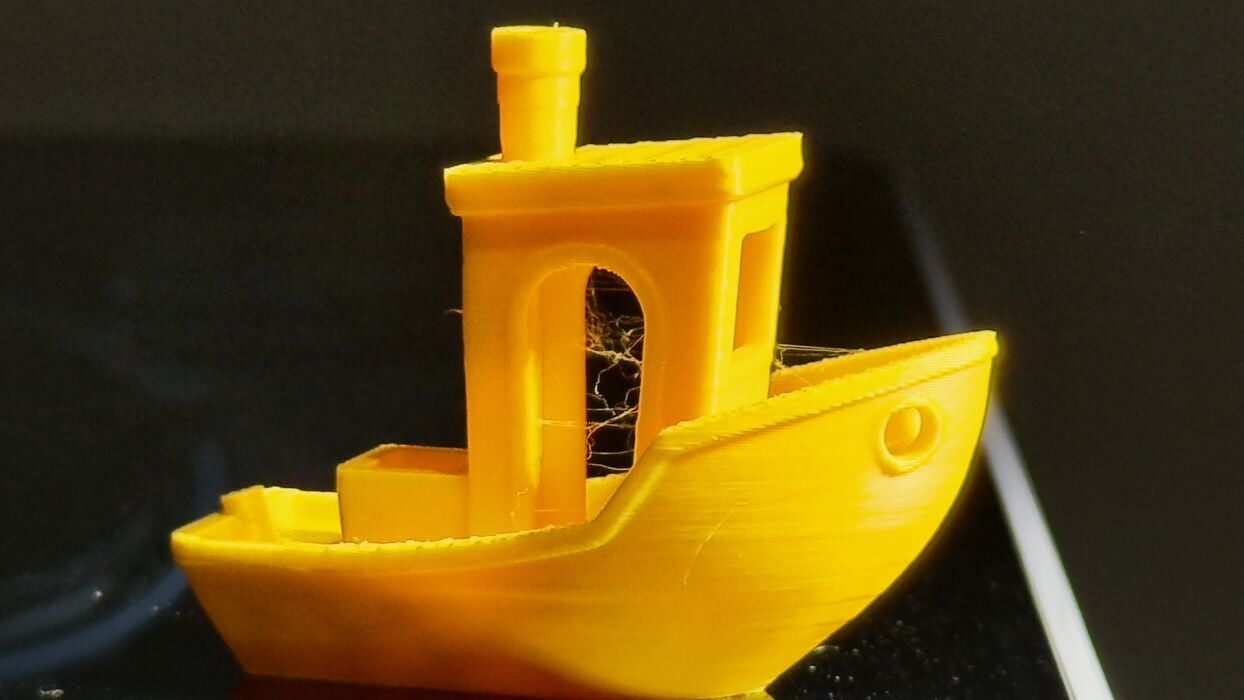
Here you can see the models found on my machine, which weren’t too numerous. They did include the 3D models for the reusable filament spool, which could prove extremely useful in the future. I decided to print, you guessed it, a #3DBenchy.
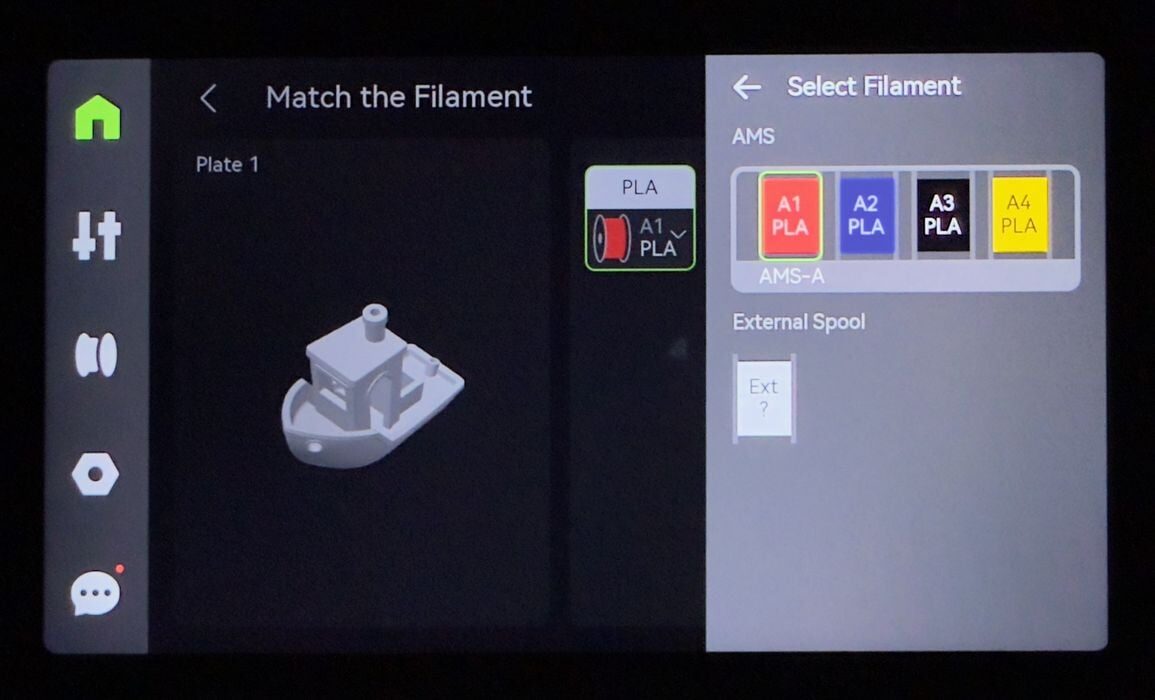
The H2S requires you to specify which filament is to be used, and the selection process is straightforward.
As the job started, I was surprised to see a vent open on the top of the H2S. Since I was printing low-temperature PLA, they don’t want too much heat to accumulate in the build chamber. The vent allows excess heat to escape. But it also means you can’t put anything on top of the H2S in that area.
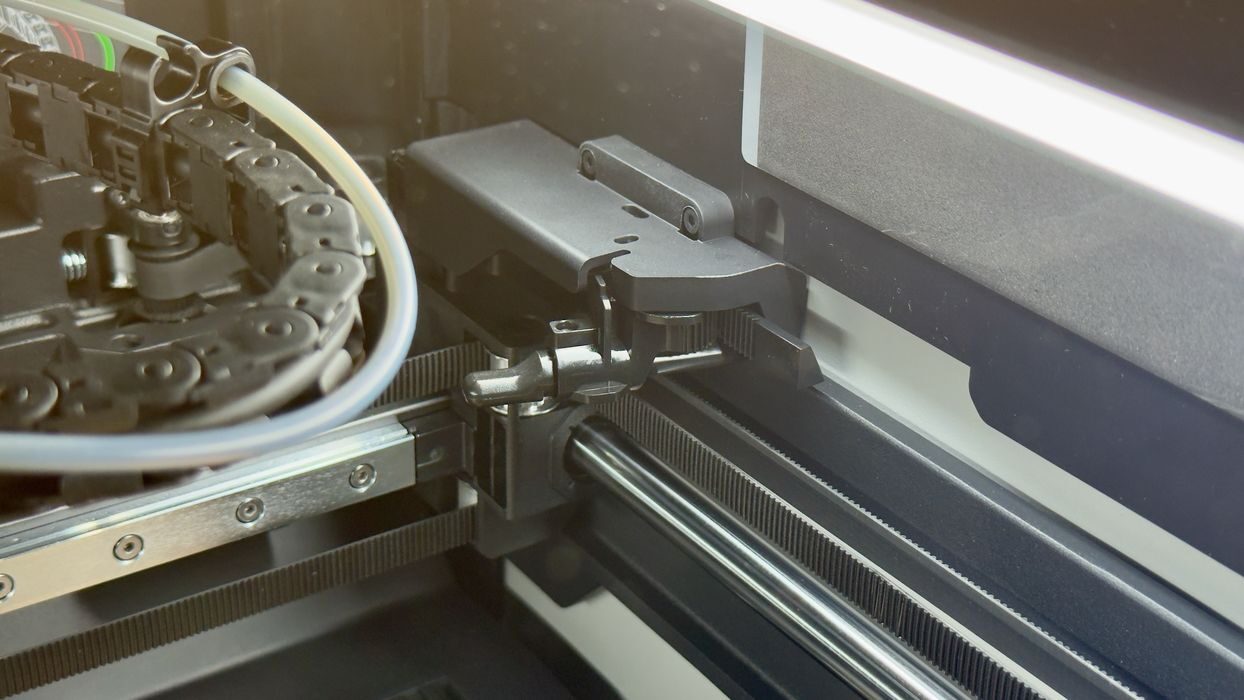
The first thing you’ll hear when the machine comes alive is a lot of clunking. Normally this would be a disastrous sound, but in the H2S it’s about this item. It’s a knob that the toolhead presses against to cut filament. The knob is not permanently deployed, and only does so when the toolhead moves right to the back of the build chamber. That’s the clunky noise that you hear, and it seems to be normal.
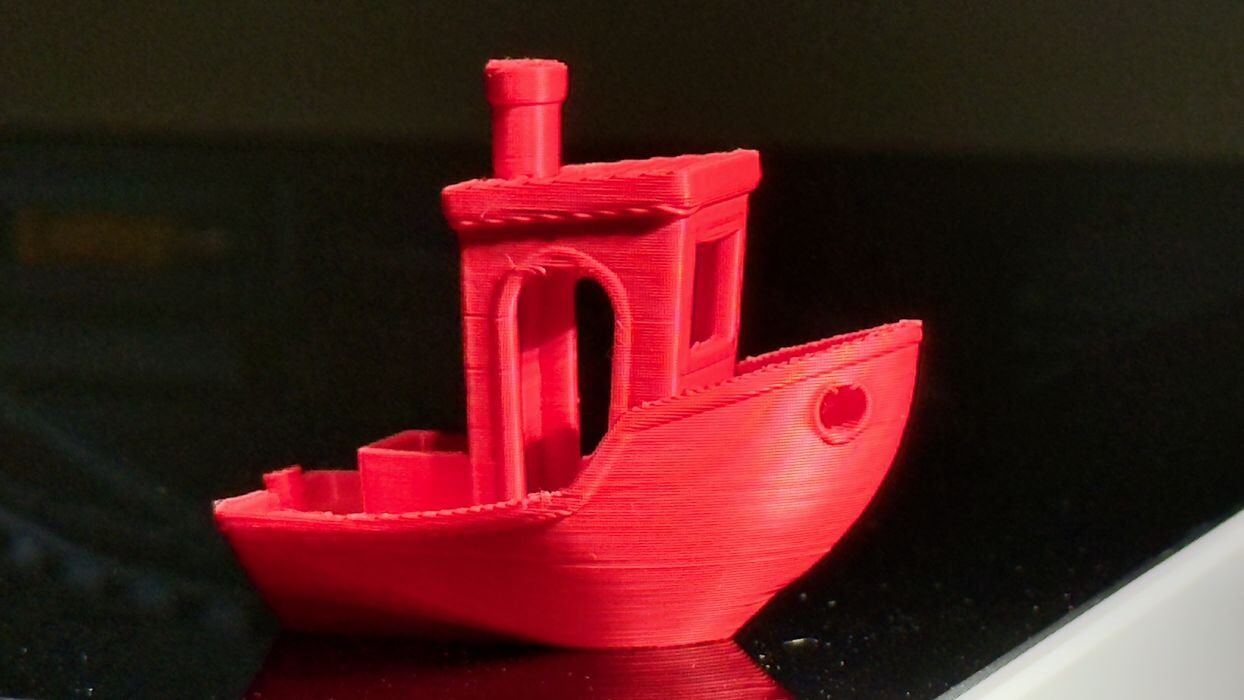
The first #3DBenchy printed quite normally, and the quality was excellent. This is to be expected with pre-sliced GCODE and company filament.
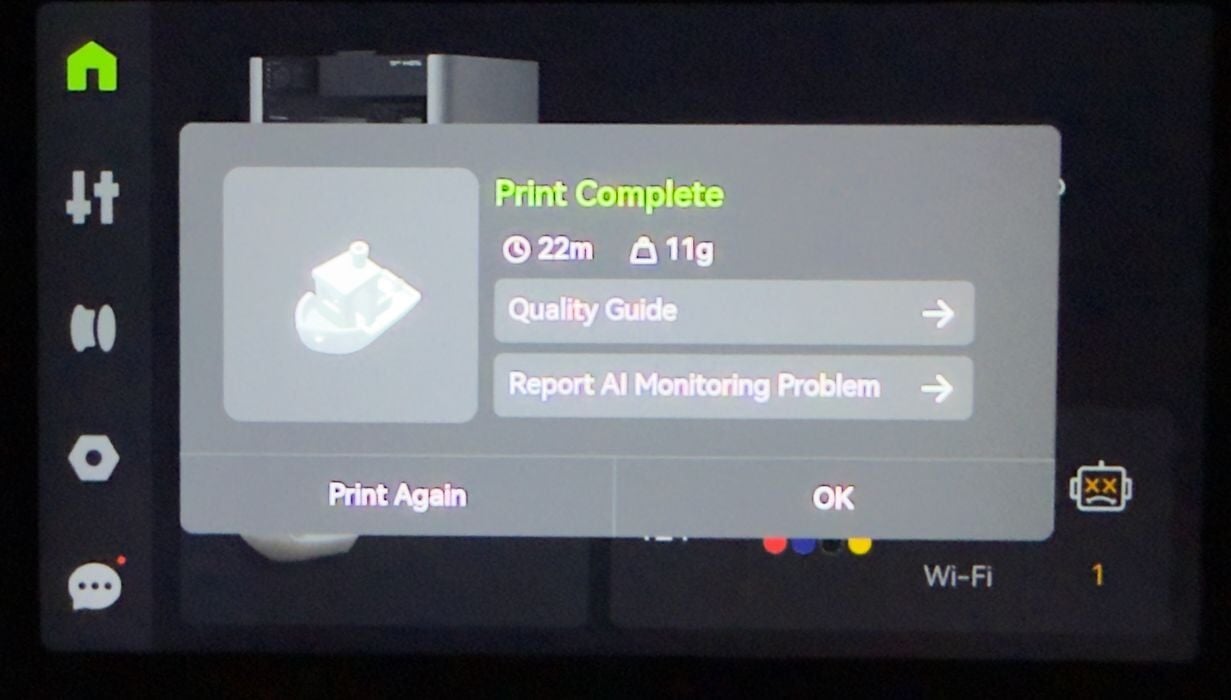
At the end of the job, the H2S presents job statistics, but also asks whether any AI detection errors occurred.
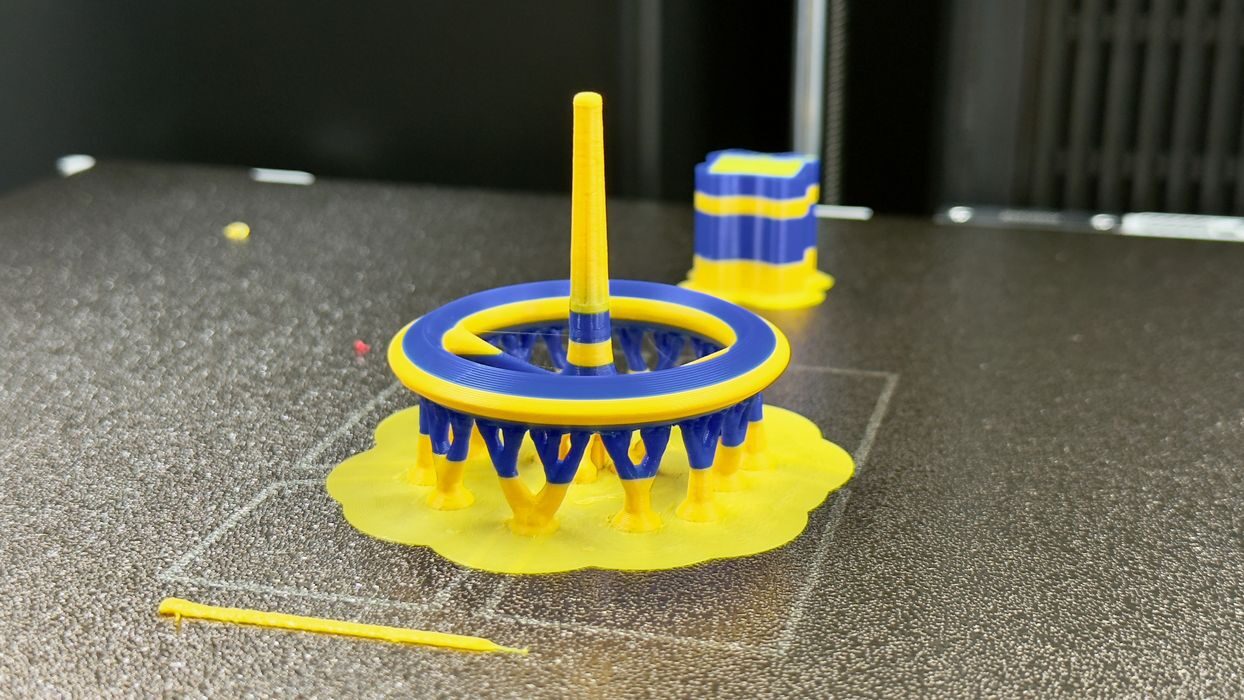
I ran a second pre-sliced job, this one using two colors. This meant the AMS 2 Pro would swap filaments, producing some poop. The job completed normally and with good quality.
While removing prints from the chamber, I had to replace the spring steel print plate. At the back of the chamber, there are two foolproof aligners that make sure the plate is always in precisely the correct spot. This might not sound like a big deal, but let me tell you how many machines I’ve used that don’t have a way to automatically align the print plate.
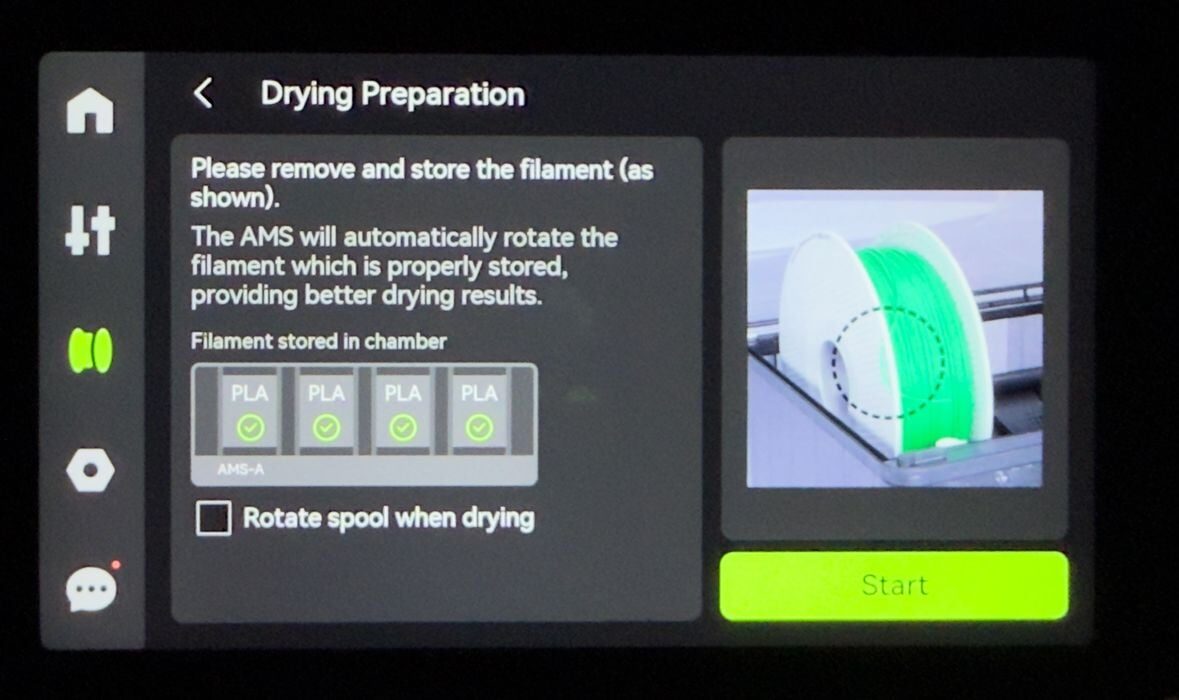
The AMS 2 Pro doesn’t have a control panel of its own, and it must be managed from the H2S screen. The AMS 2 Pro also acts as a drying unit — it can heat up its chamber for timed periods. Here you can see how it’s controlled from the touchscreen.
Note that you can dry spools for lengthy periods, and they offer an option to automatically rotate the spool to ensure uniform drying coverage. But if doing so, you must unmount the filament and tie up the end to allow for free rotation.
Something else I noticed with the AMS 2 Pro: it’s pretty airtight. If you attempt to lift the lid, there is notable resistance from the air seal. This is very different from competing AMS-like accessories where there is no resistance when opening them.
Something else I noticed and appreciate: the prime line is very short. Some 3D printers have enormously long prime lines that waste material and time. Here it’s only a couple of centimeters long, showing how confident Bambu Lab is in all the automated calibration already performed.
I printed a second #3DBenchy, this time sliced by myself in an upgraded version of BambuStudio. This completed with no issue, and the workflow is basically the same as other Bambu Lab 3D printers.
Recall the lengthy initial calibration? The motor cancellation really does work, as this machine is extremely quiet. The enclosure also blocks some sound. However, the noisiest activity, aside from the cutter, is the AMS 2 Pro. When it loads a filament, it is far louder than the H2S.

There’s a button at the top right front corner of the H2S, something you don’t see on most enclosed 3D printers. This button is used to pause prints in progress quickly, without having to fiddle with the touchscreen. It’s a big convenience if you notice something wrong. However, it’s also very easy to accidentally hit if you grab the corners of the machine when peering inside. Several times I had to stop myself from hitting that button.
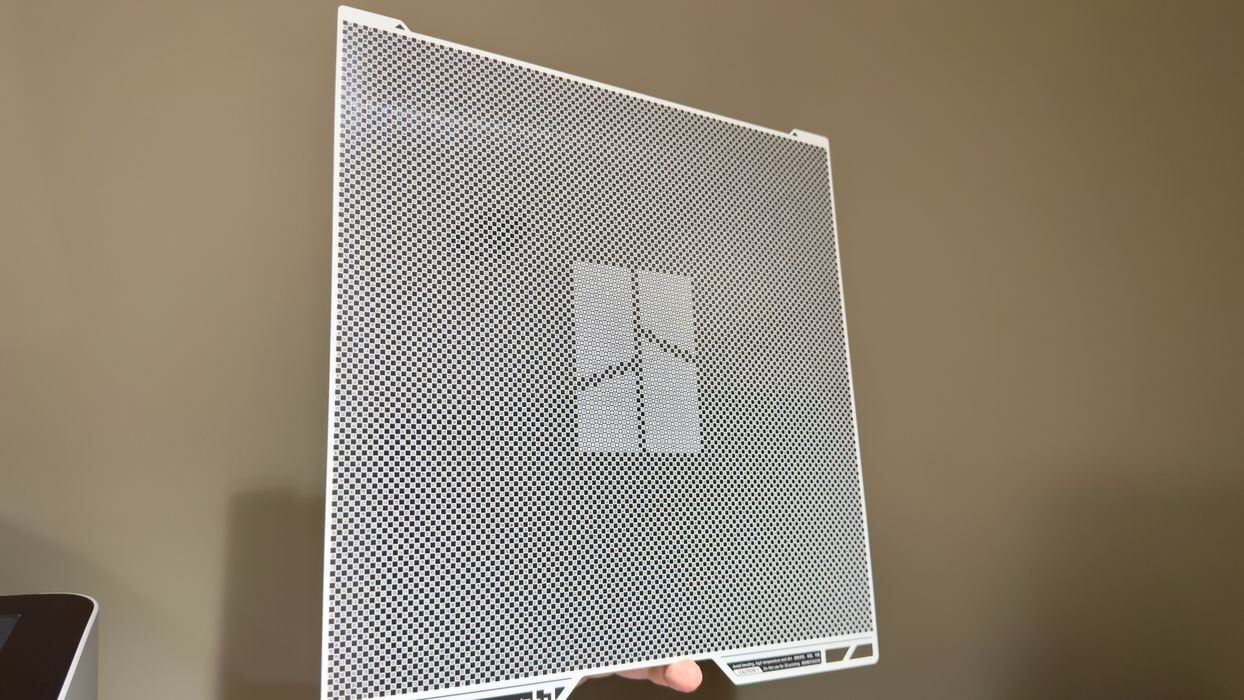
I mentioned the Vision Encoder earlier. This is a special plate that is used to supercalibrate the motion system. You simply mount it and in calibration select the motion system. The process takes only a few minutes to complete.
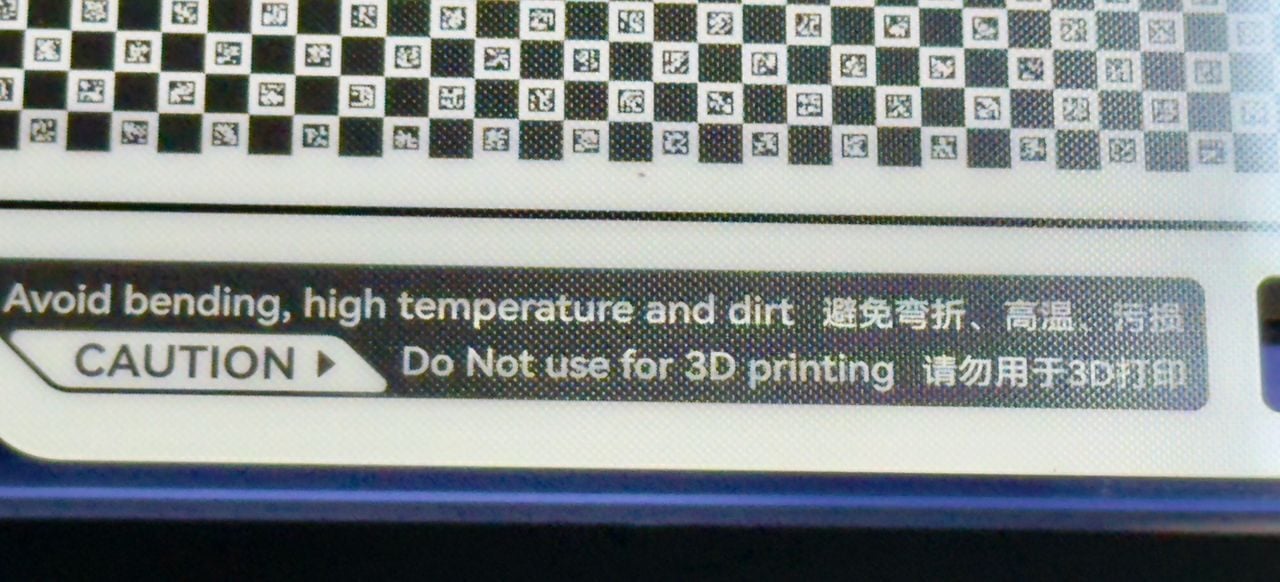
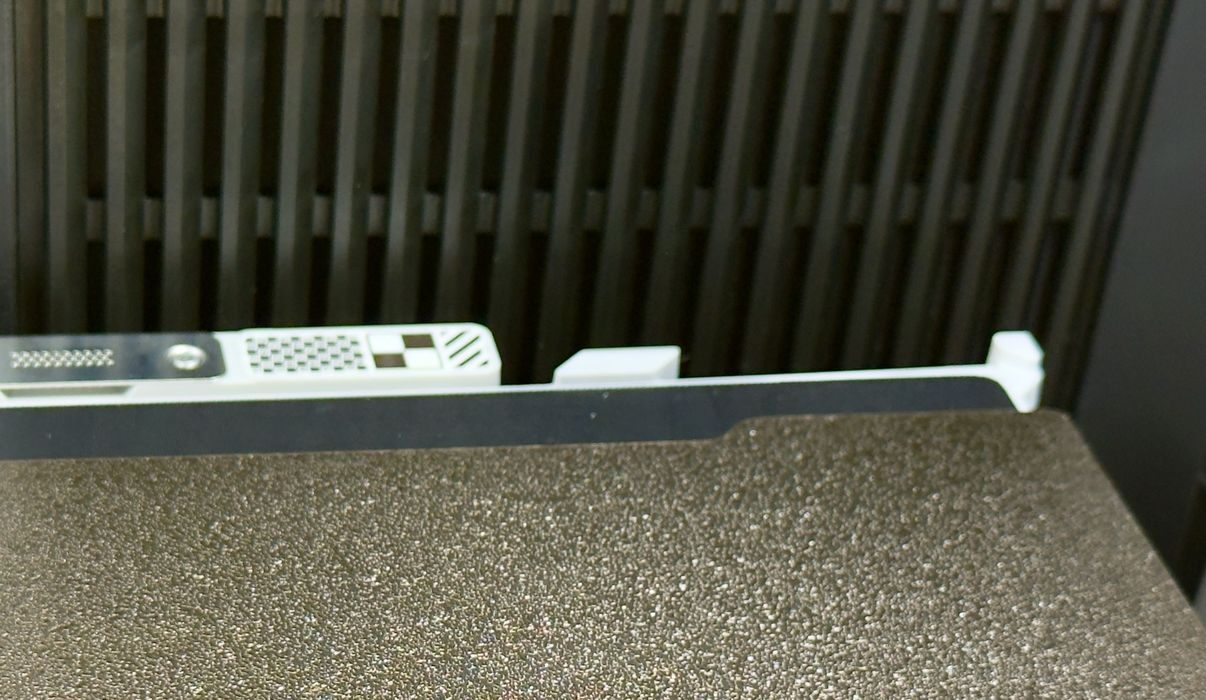
If you look very closely at the Vision Encoder you’ll see a series of unique shapes, each one being different. This pattern is very similar to the one found at the back of the PEI plate beside the nozzle cleaner.
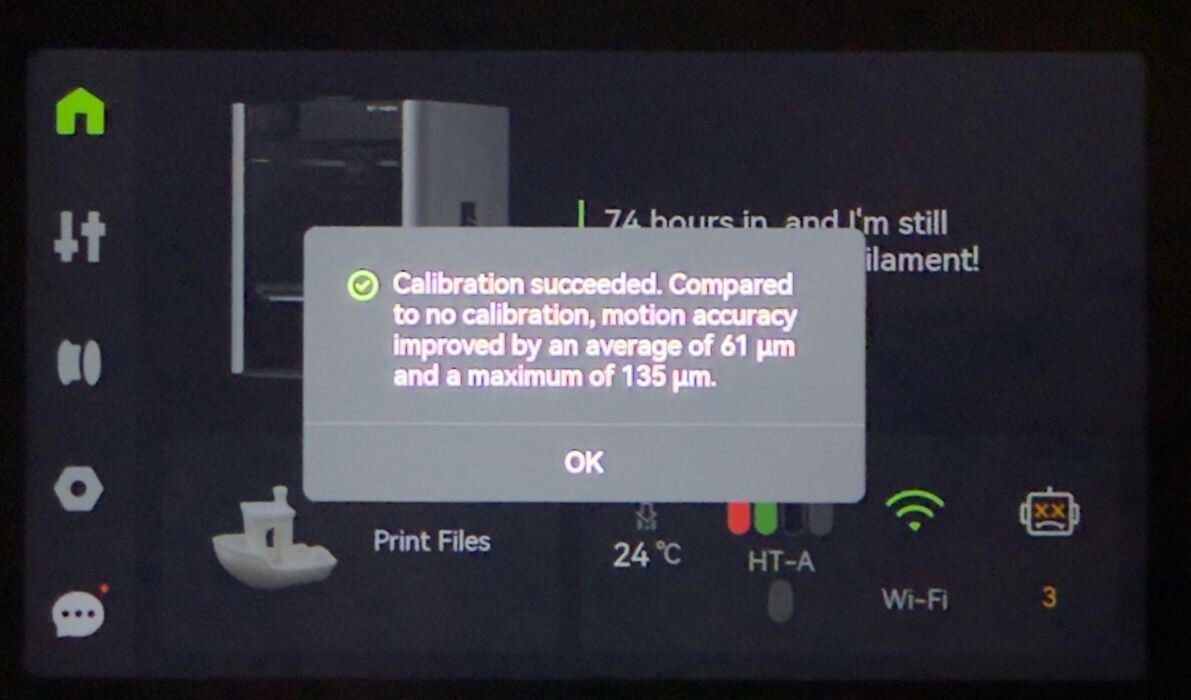
When calibration is completed you are presented with a report on results. Here you can see that my system improved significantly, leading to more accurate prints. However, it’s honestly hard to tell without measurement equipment, since the regularly calibrated H2S produces such good output already.

At some point in my testing I looked at the print files, which normally should have a history of all my print jobs. However, for some reason I saw only one, when in fact I had done many. I’m not sure why the machine wasn’t recording my jobs. It wasn’t a big deal for me, but in a production environment the H2S had better record everything that happens.
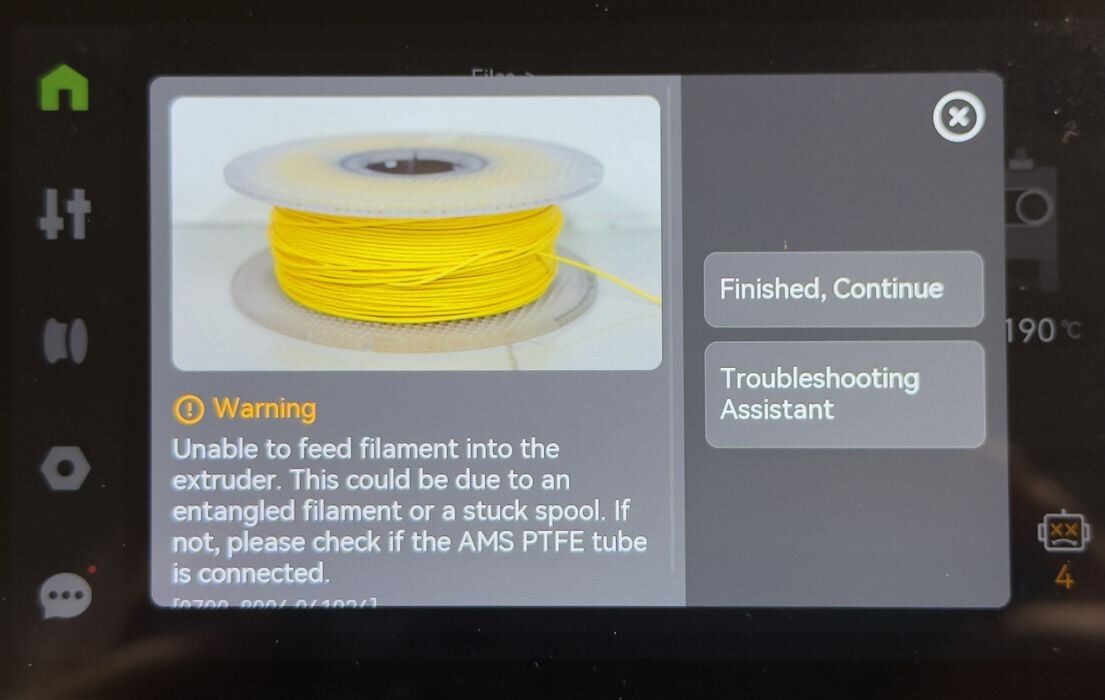
If for some reason the H2S is unable to pull filament from the AMS 2 Pro, you get this error message. A tangle would produce this, for example. I didn’t have a tangle, and the AMS 2 Pro was misbehaving for some reason. Powering the system up and down seemed to rectify the situation.
If you’re familiar with operating any other Bambu Lab device, especially the H2D, you will be immediately familiar with the workflow. When using the AMS 2 Pro, printing is easy.
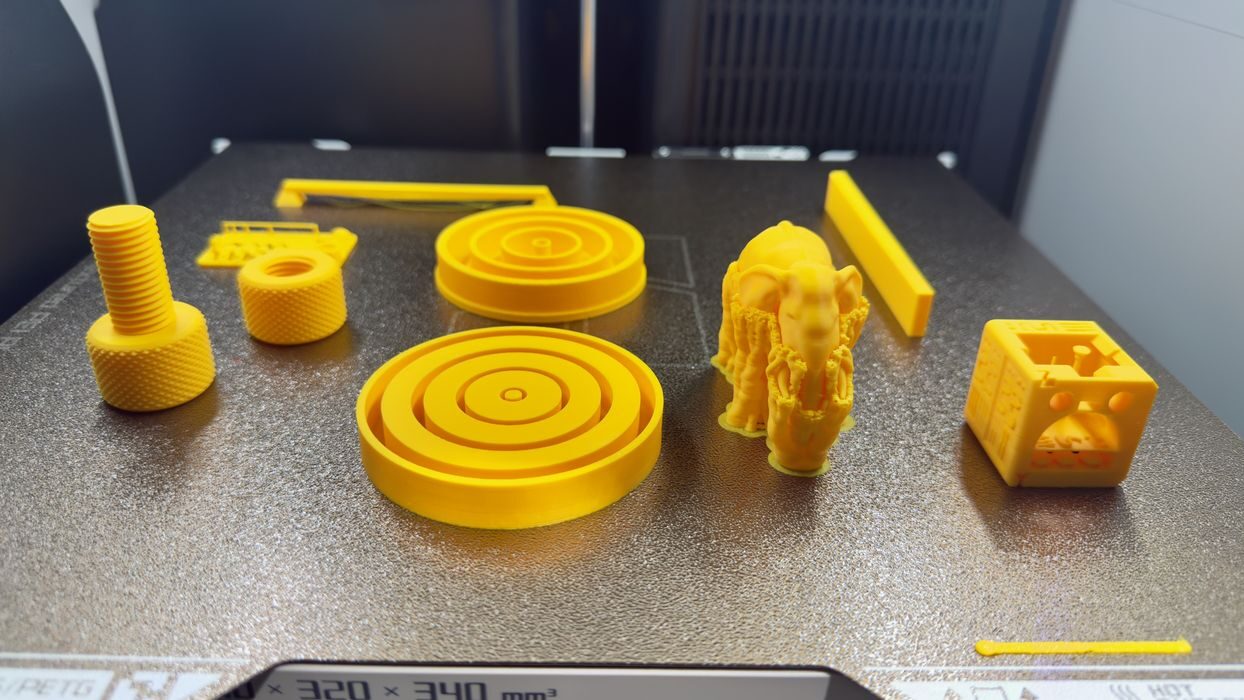
When testing a 3D printer, I typically run through a series of prints to see how the machine reacts. However, the H2S is so immense that I realized it could simply print them all at once on the massive build plate. Here I printed a number of items in PLA.
This is part three of a four-part series; please read parts one, two and four.
Via Bambu Lab