
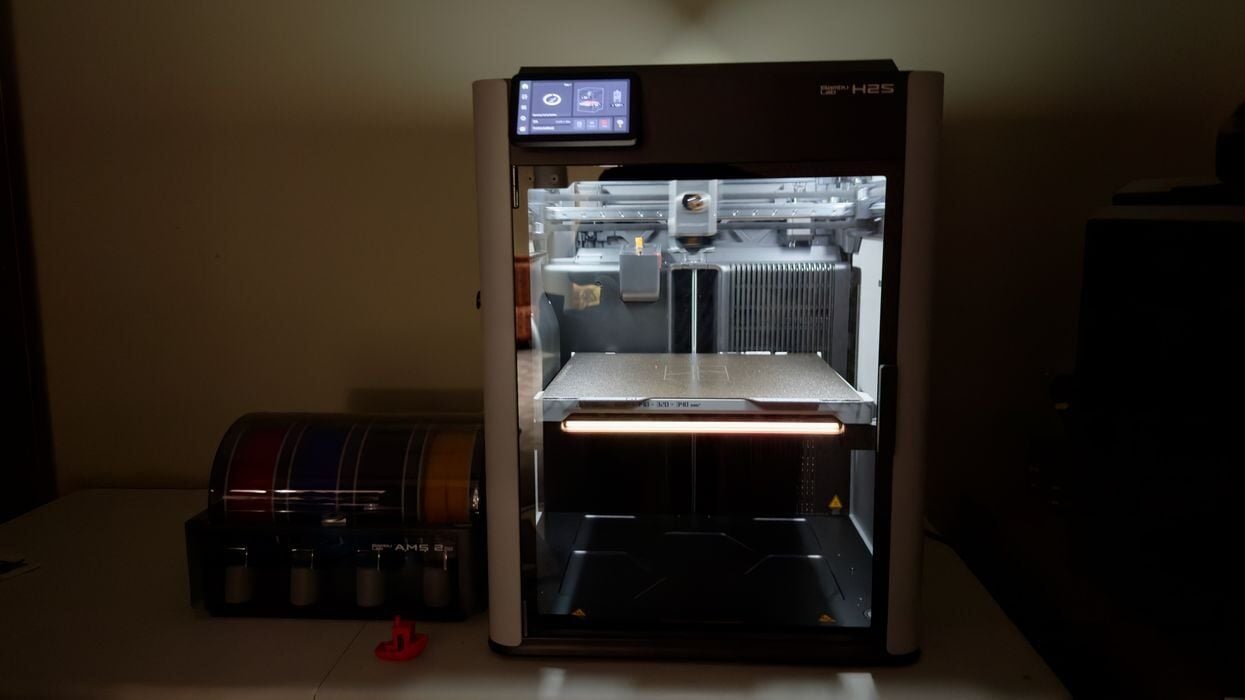
Our look at the new Bambu Lab H2S desktop 3D printer concludes with print results and final thoughts.
This is part four of a four-part series; please read parts one, two and three.
Bambu Lab H2S Print Results
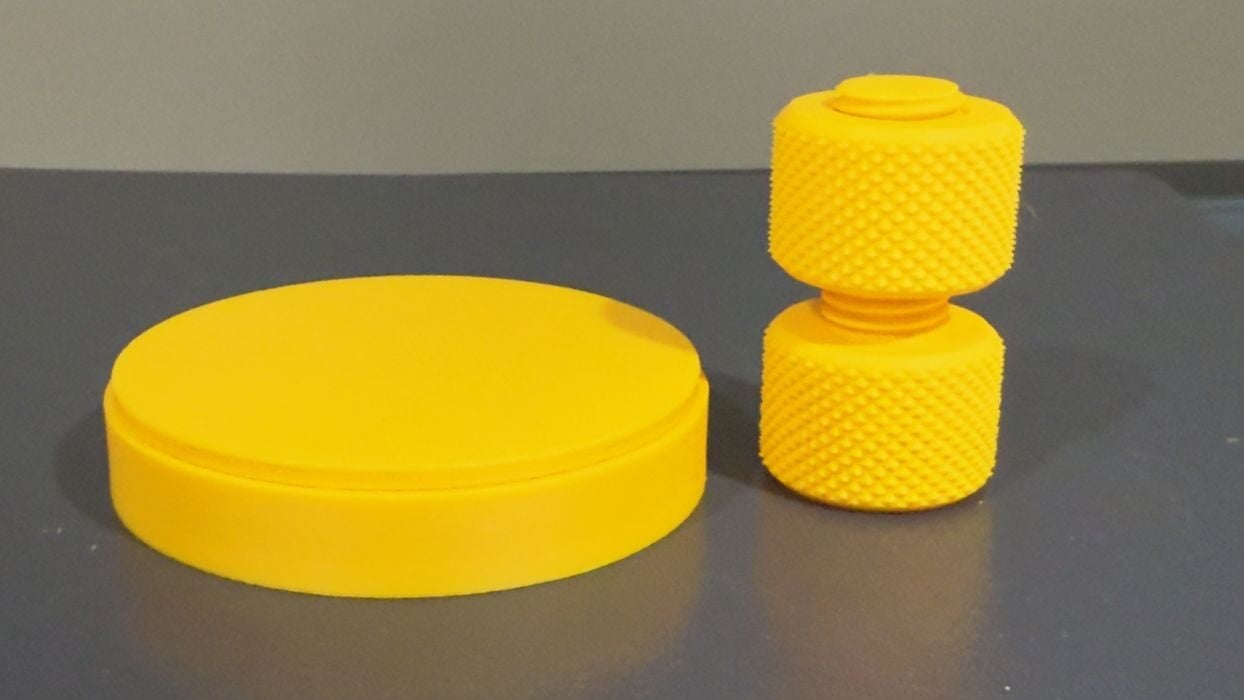
One of the tests I like to do is to see if parts can fit together. If they do, then dimensionality is accurate. Here I printed the classic bolt and nut, which spun on without any effort at all.
The concentric rings test (the cylindrical thing) was the best I’ve ever printed. The top and bottom have a series of concentric rings to fit together, and most times this print fails. However, here the fit was so perfect that you simply let go of the top and it gently slides into the bottom. Perfect!
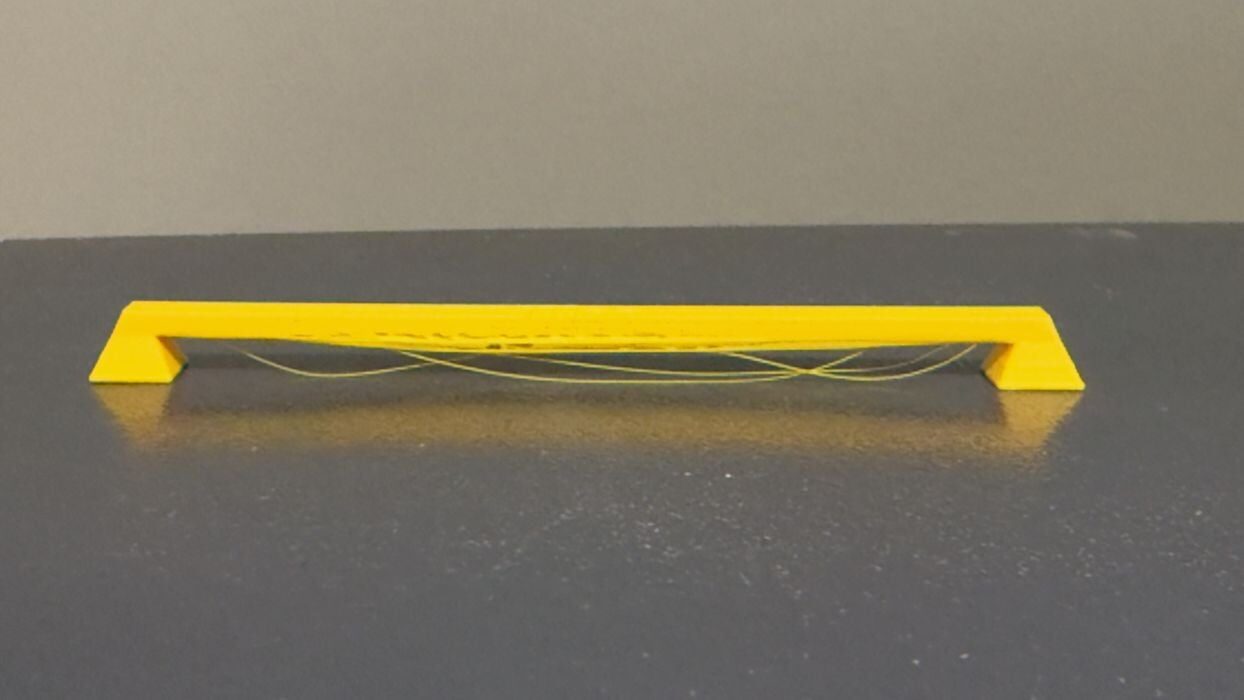
The PLA bridge test didn’t come out so well — at least using standard settings. I didn’t want to play with the settings during testing to show the actual experience a typical user would encounter. There was a bit of slop. However, it’s very likely you could eliminate the droops with some tweaks.
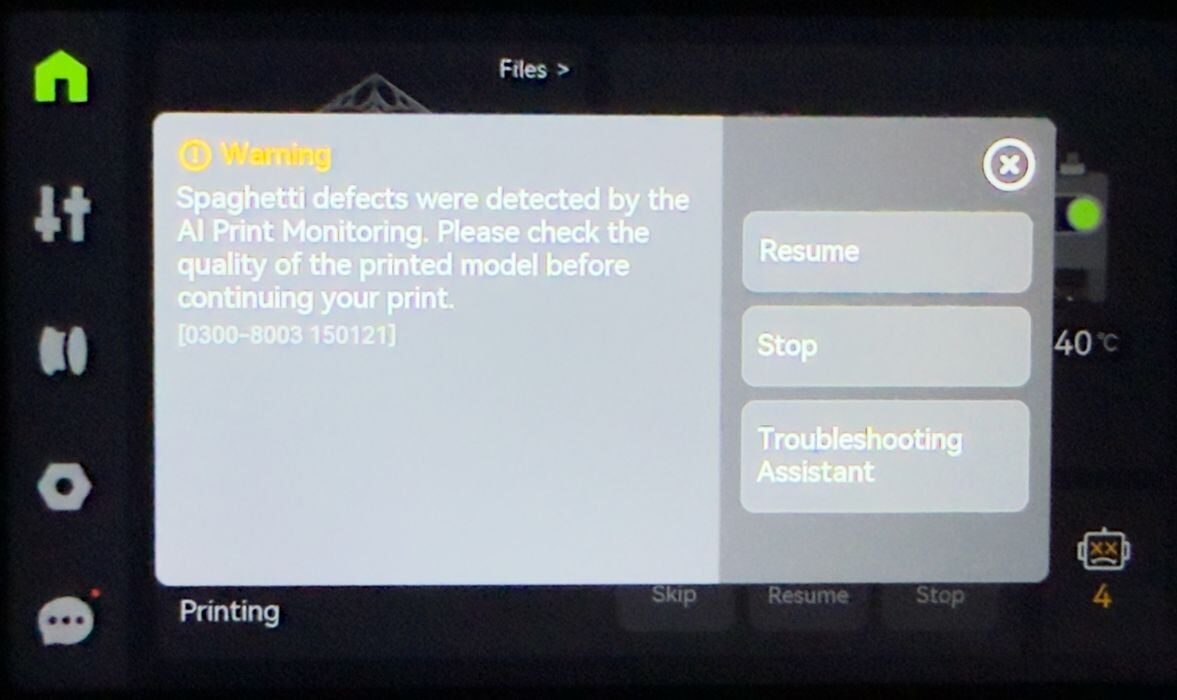
The AI monitoring is active during printing, and if it detects something wrong, this is what you see. I’ve also accidentally triggered it when I start a print job. Sometimes after starting a job I realize there are a bit of stray filament bits on the side of the plate, so I reach in to swipe it out before printing takes place. But on the H2S the job will stop because it detects your hand in the build chamber.
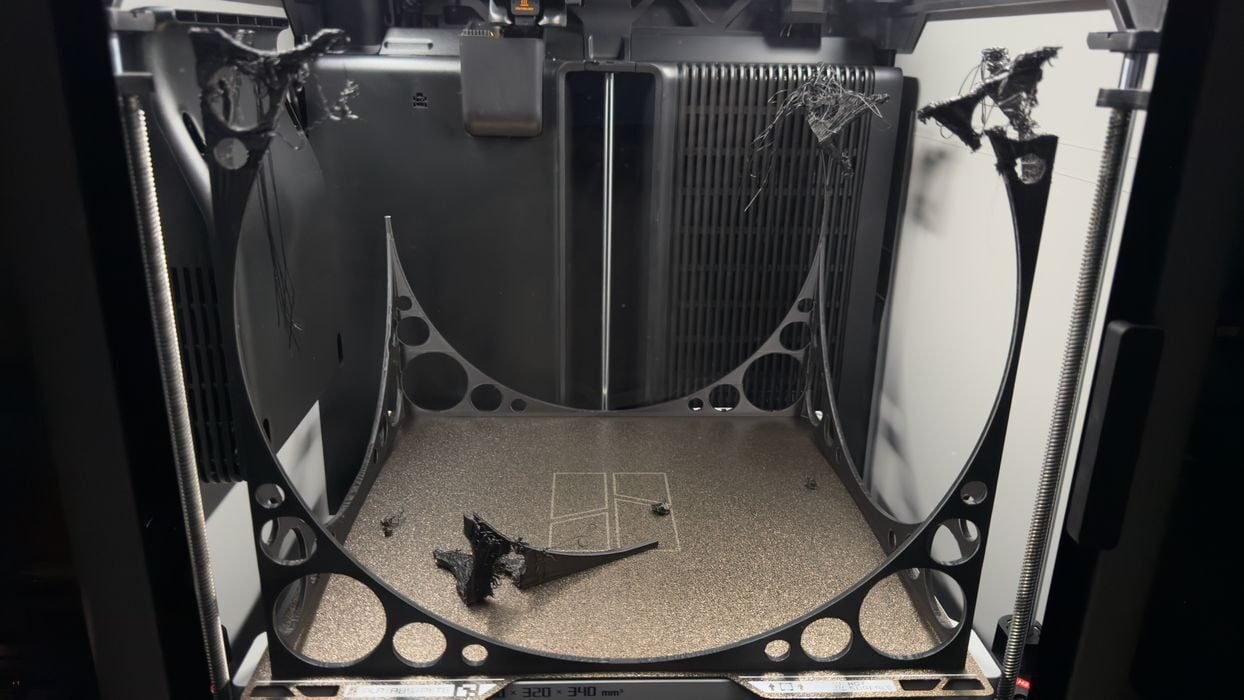
I wanted to show the H2S’ truly enormous build chamber, so I quickly designed a spindly cube that occupied the entire volume. However, the job failed because it was a bit too spindly. On the other hand, the H2S did indeed correctly detect a spaghetti situation and stopped the job.
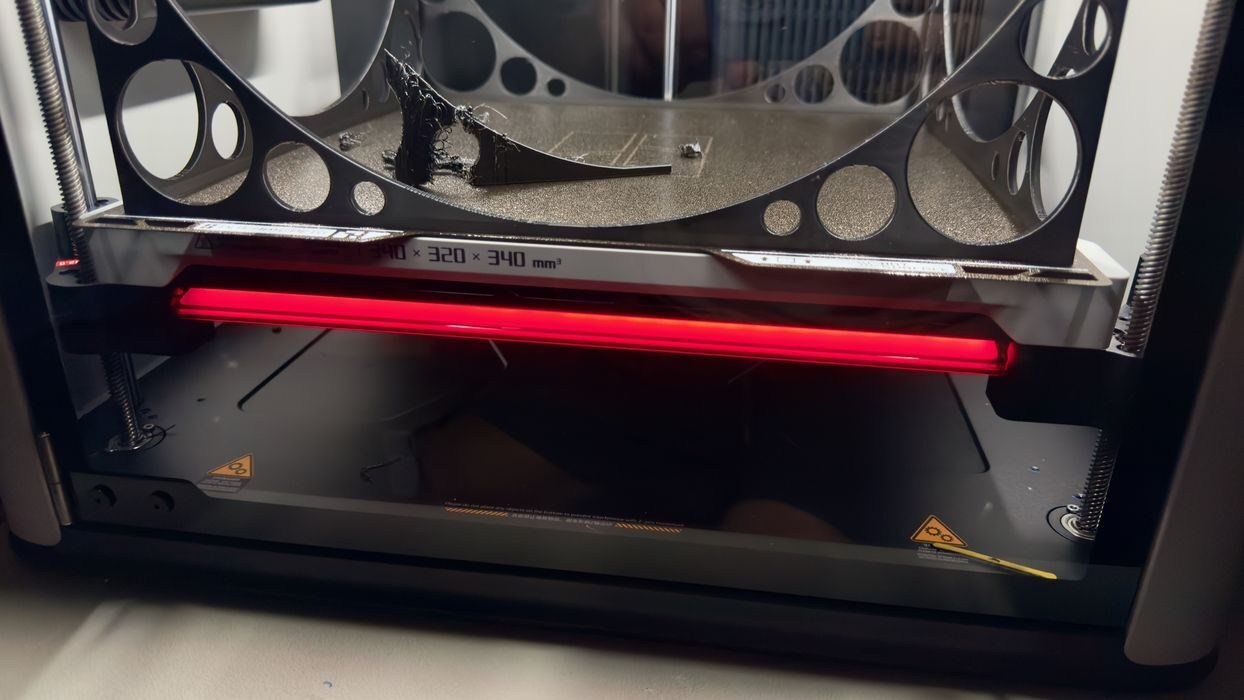
When the job stopped, I also noticed that the front of the H2S has a large LED status light. Here you can see it red, indicating a problem. The LED changes colours depending on the situation. This could be quite useful in a production environment with a number of H2S units: you could easily find the one with the problem.
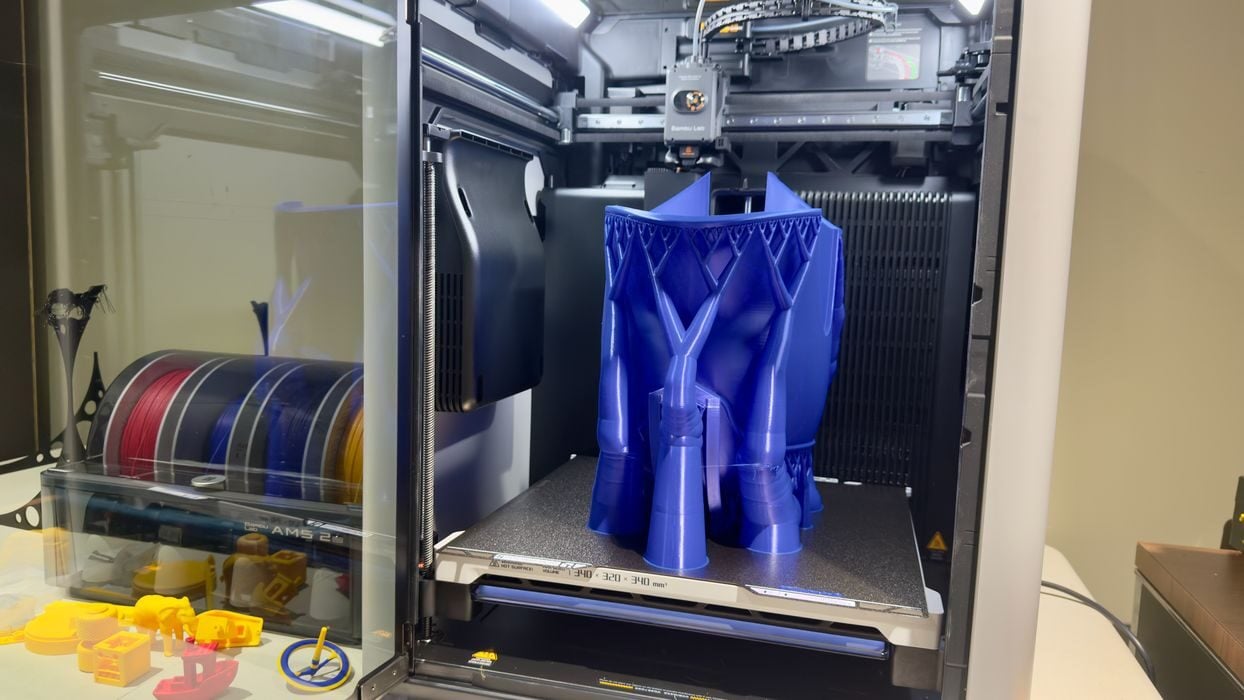
As an alternative large print demonstration, I found a Spartan Helmet 3D model, and printed it. The job took a lengthy 21 hours to complete, and it did so perfectly.
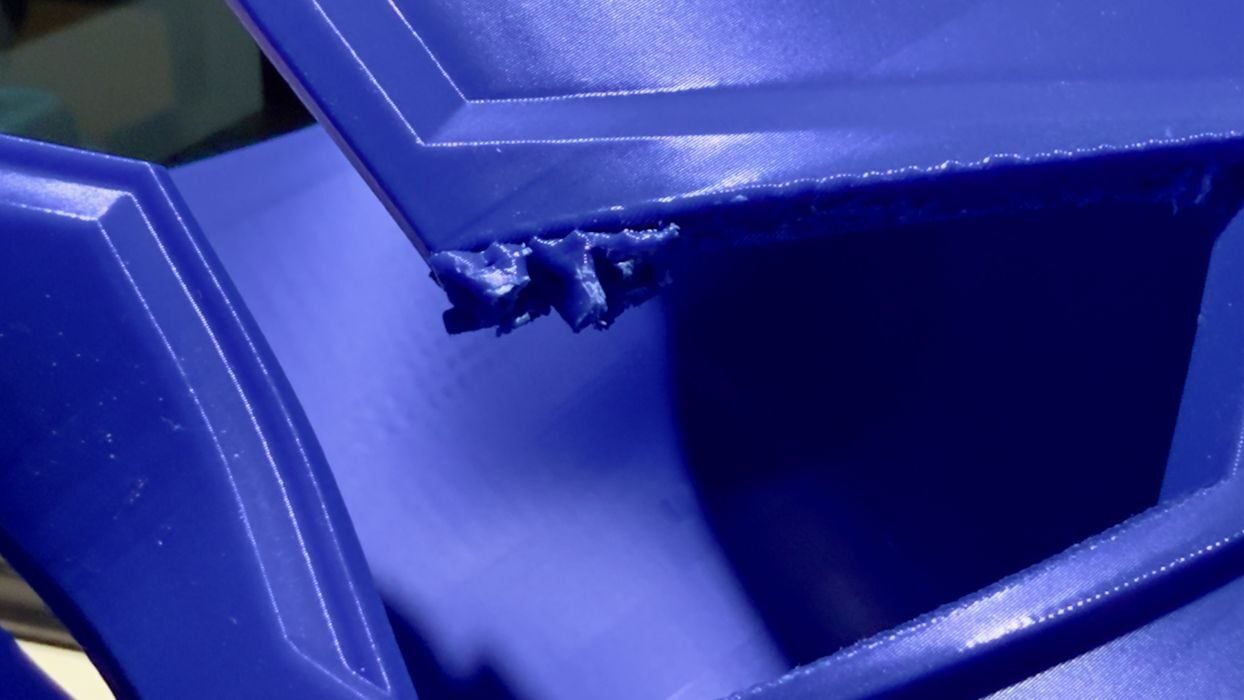
The only issue I found was support structures. The supports at the bottom of the helmet near the plate were easily removed — the support settings were ideal. However, at the top they were not so easy to remove. I suspect that the slight wobble of the print at that height messed up the contact point for the supports slightly.
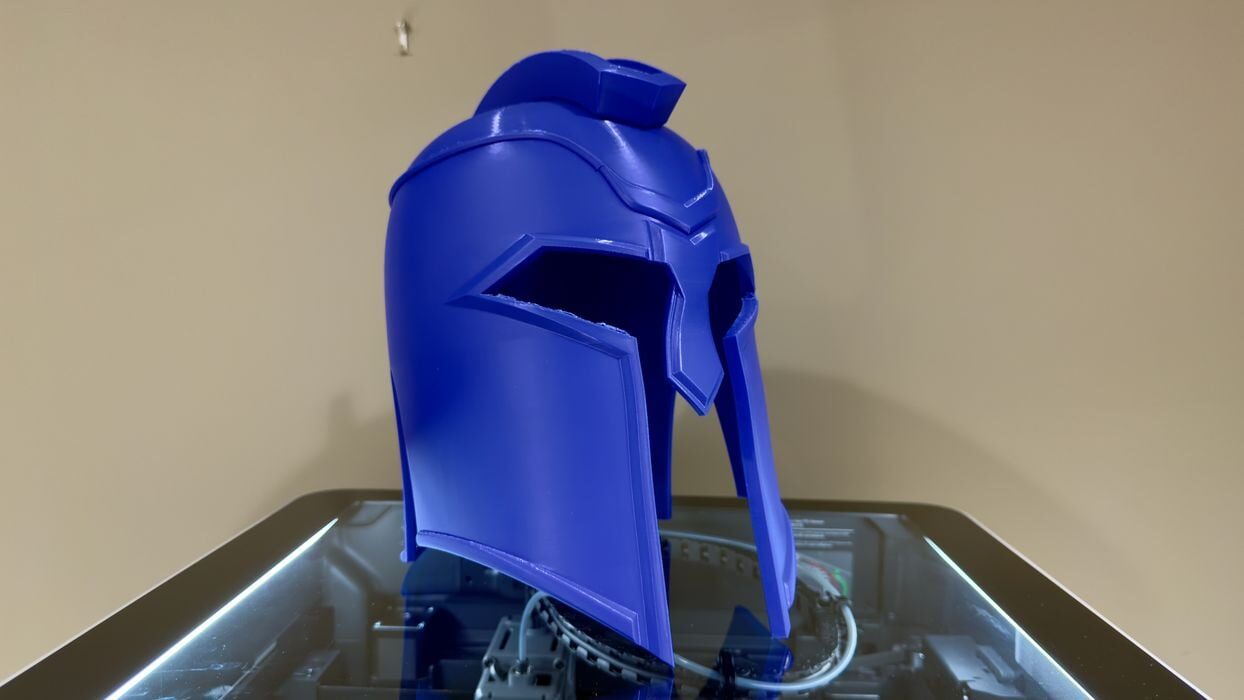
The helmet was enormous, and near perfect quality. Unfortunately it was slightly too small for my extra-large head.

Time for another material, this time PLA-CF. This material is printed at the same temperatures as PLA, but is far more rigid due to the chopped carbon fibre mixed with the PLA. Again, I printed an entire plate of parts overnight without issue.
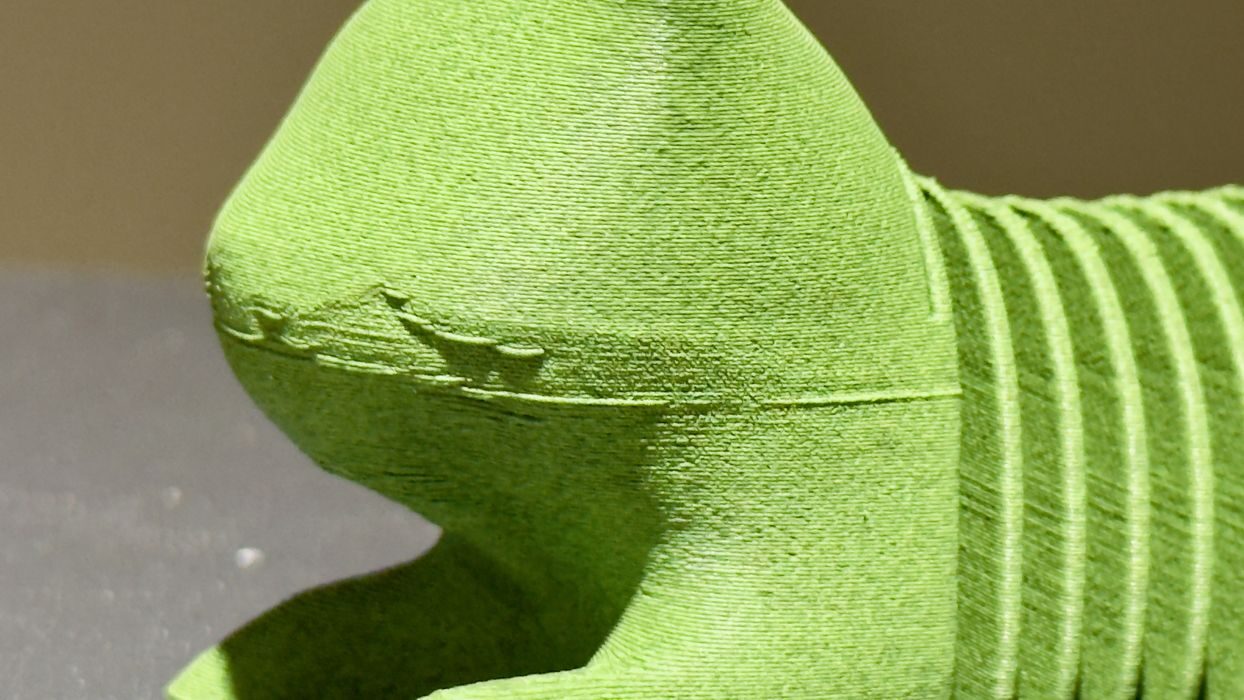
Inspecting the parts, here we see a kitty 3D model with a bit of droop on an overhang. I’m not sure what was happening there, but that was the only quality issue I found with that material using standard settings.
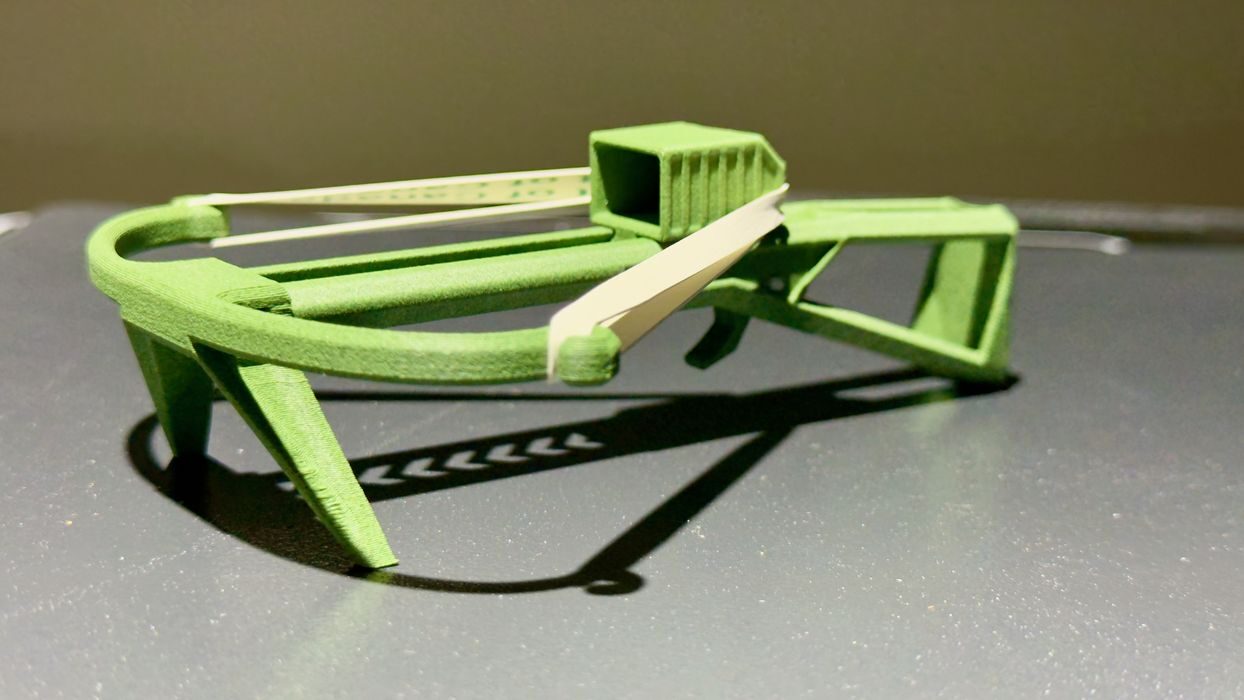
Other PLA-CF parts came out very well. Here I made a “poop blaster”, which requires stiff parts for handling the elastic stresses. The blaster worked perfectly, and I was able to shoot poops around the room.

Now moving on to PETG-CF, I again printed an entire plate of parts. These all came out very well, although I found the supports were harder to remove. It’s likely that could be fixed with some tweaks to the print settings. I also found that this material sticks to the print plate far more than PLA or PLA-CF.
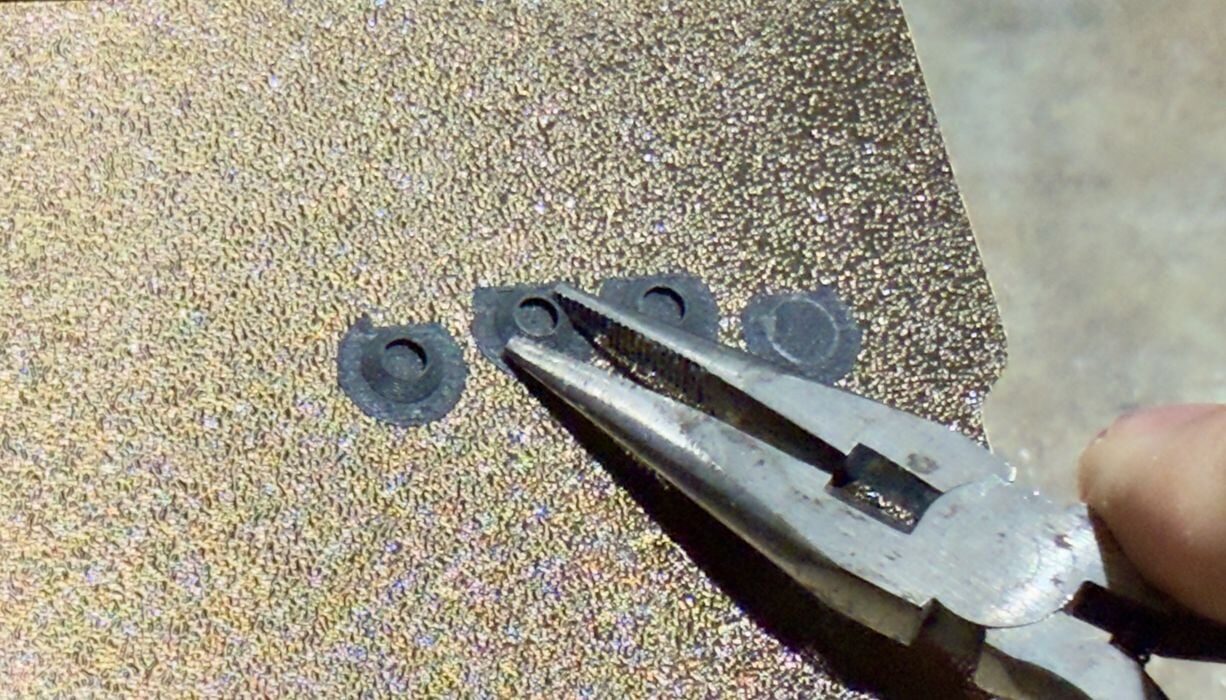
Then there was a problem. Some of the support structures broke off, leaving small bits stuck to the plate. Bending the plate did not release them, as they were held fast.
I could not proceed without cleaning the plate, so I used at first fingernails to pry up these bits, but that didn’t work. I tried using a plastic scraper to prevent plate damage, and was able to get some of it off. But quite a bit just would not release no matter what I did.
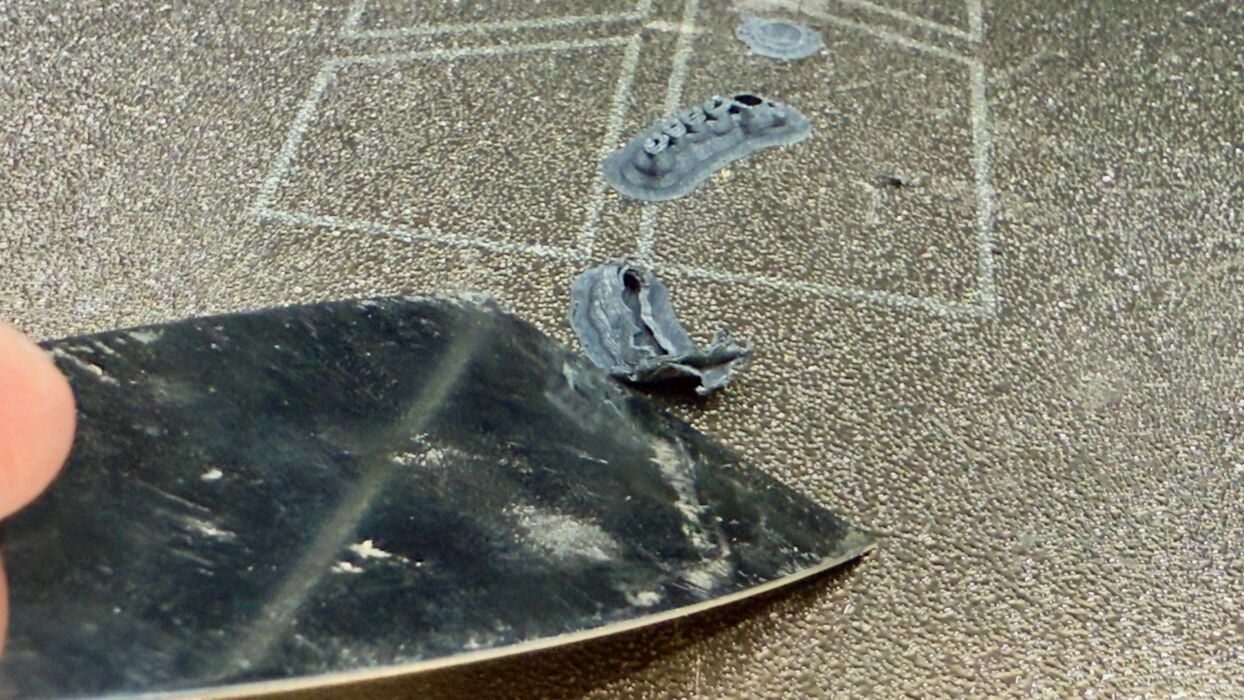
Eventually I found an approach that was able to remove the PETG-CF debris. I put the plate back in the H2S and heated it up to 70C. Then I very, very carefully used a metal scraper to lift up a corner of each blob, allowing me to grab it with pliers and slowly peel it off.
In all, I spent about an hour cleaning the plate off. I’m thinking the next time I print PETG-CF on the H2S, I may apply some glue stick to the plate to allow parts to detach more easily.

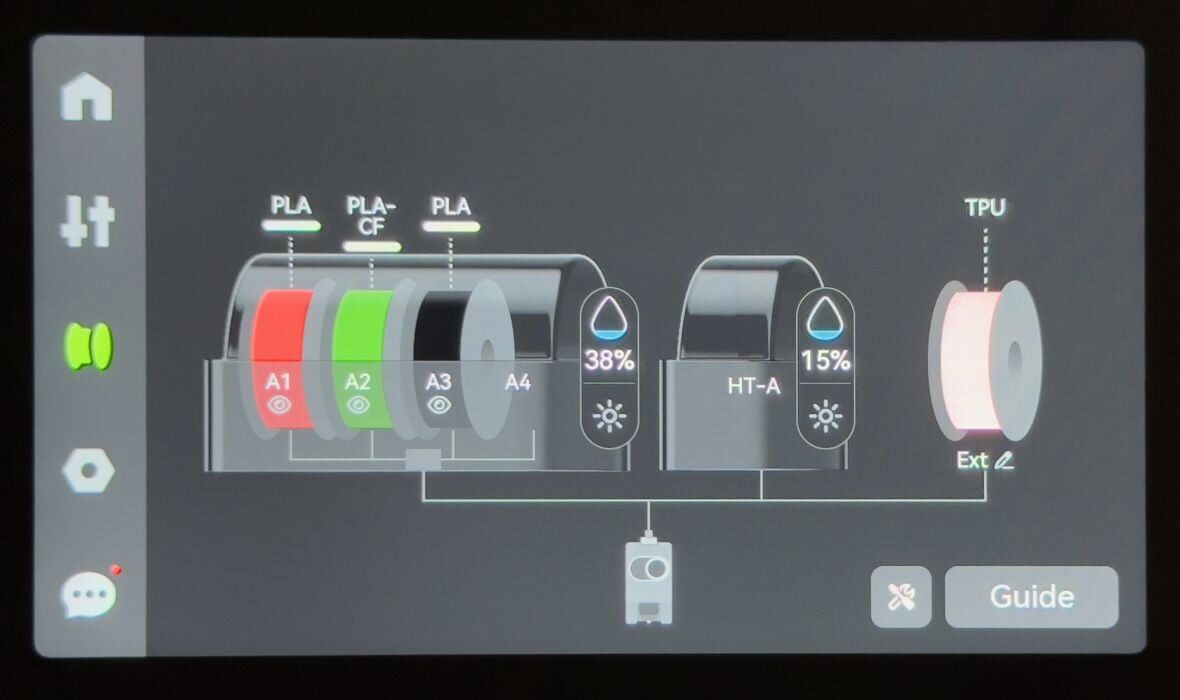
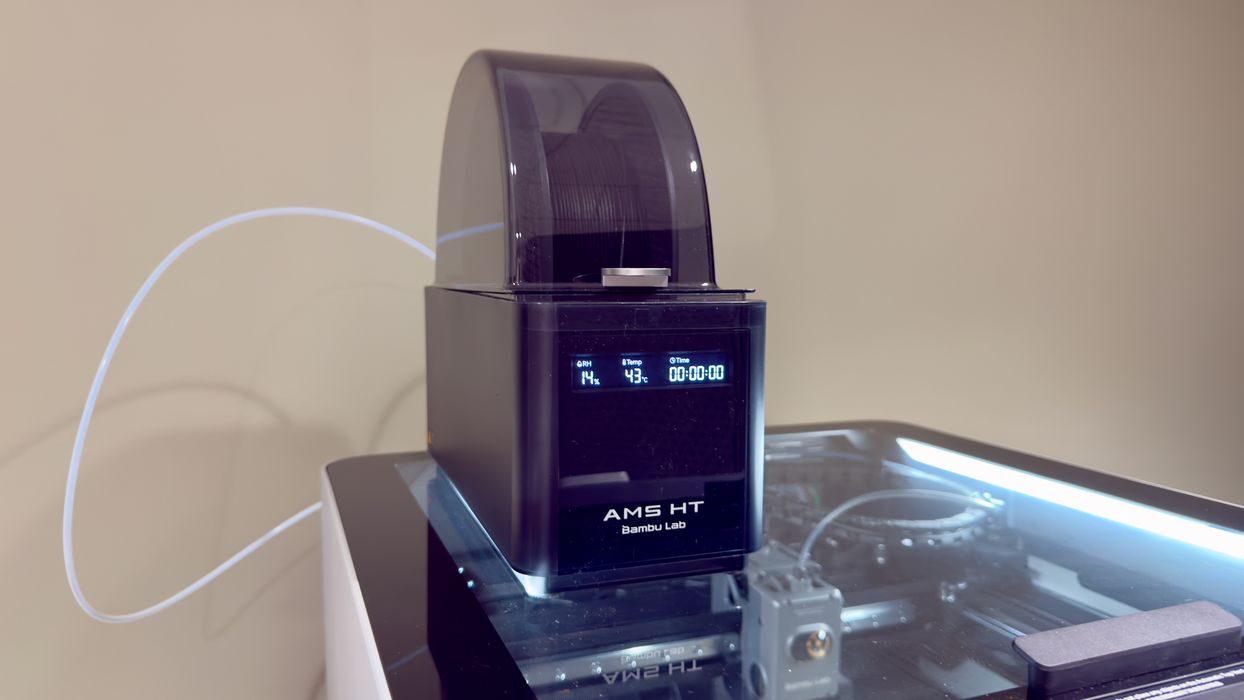
Now I moved on to more challenging materials, with the next one being TPU. I printed with Bambu Lab’s TPU90A, which is fairly flexible. This material must be dried before printing, and to do this, I used the Bambu Lab AMS HT accessory.
It’s a single spool affair, but it does include a motor to push filament, just as the bigger AMS 2 Pro does. There is a status display on the AMS HT, but no controls.
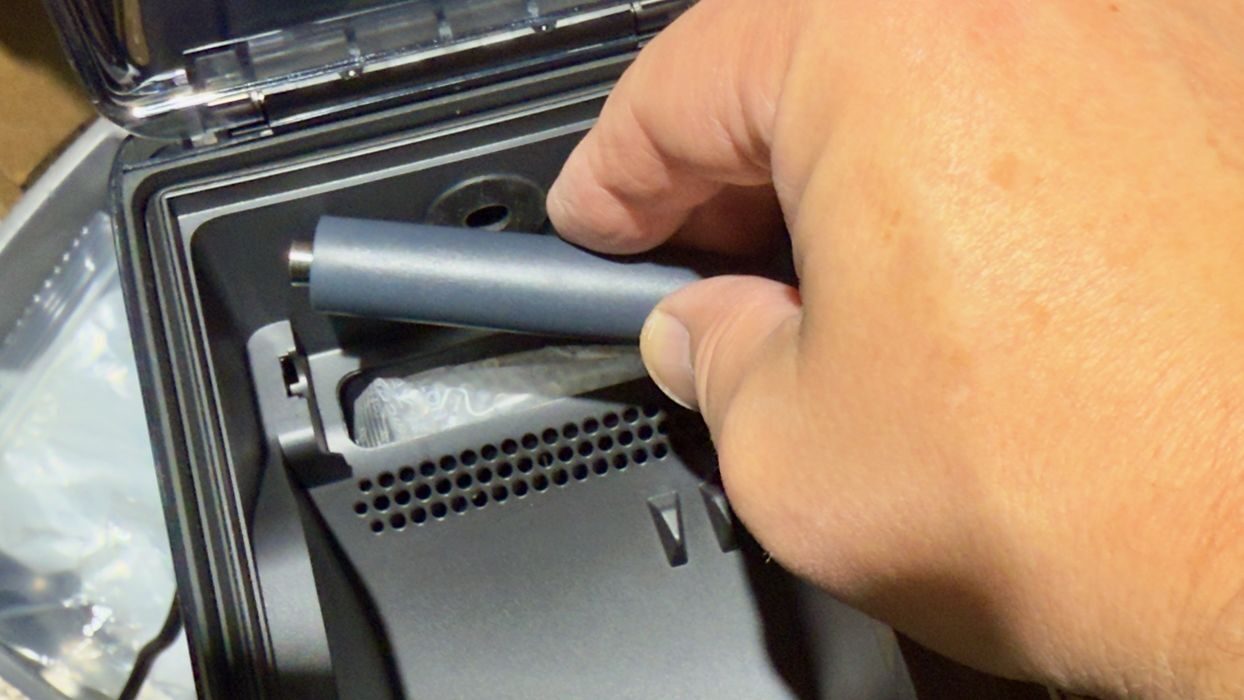
Like the AMS 2 Pro, the AMS HT has desiccant packets that have to be debagged and inserted. The insertion location is underneath a roller that requires a bit of force to remove and replace. It feels like it isn’t supposed to be removed, but it does when you pull hard enough.
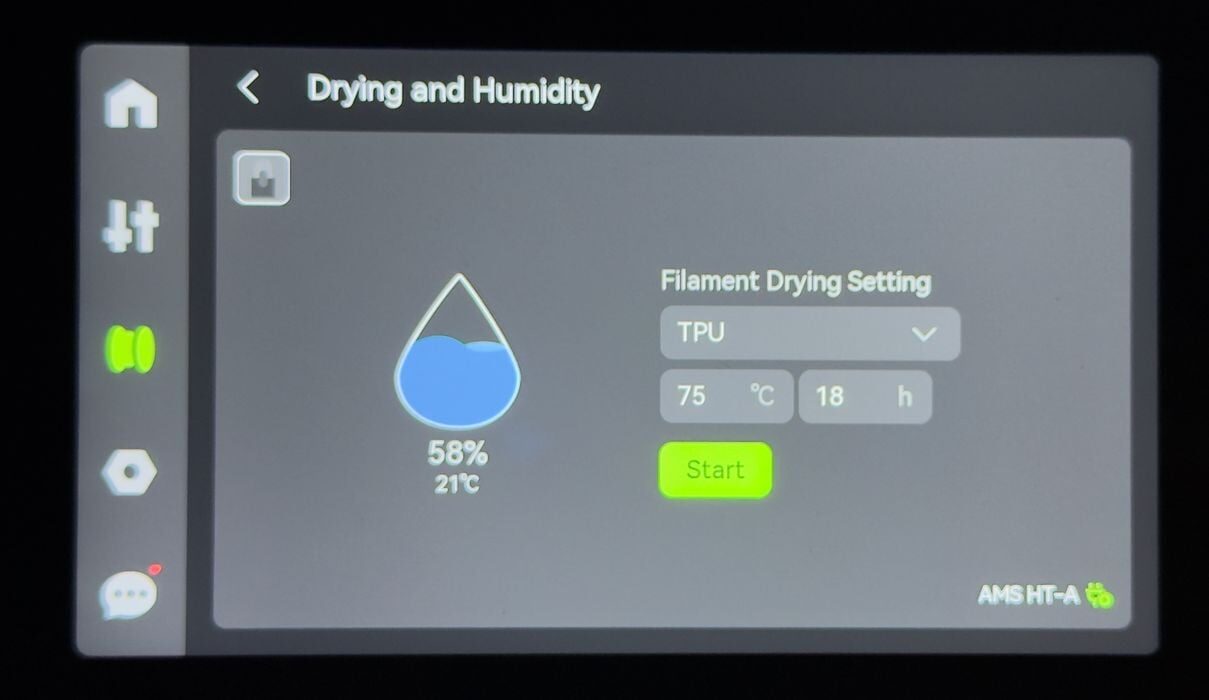
Also similar to the AMS 2 Pro, the AMS HT is controlled entirely by the H2S touchscreen. The difference is that the AMS HT can go to much higher drying temperatures than the AMS 2 Pro. These higher temperatures are required for certain engineering materials.
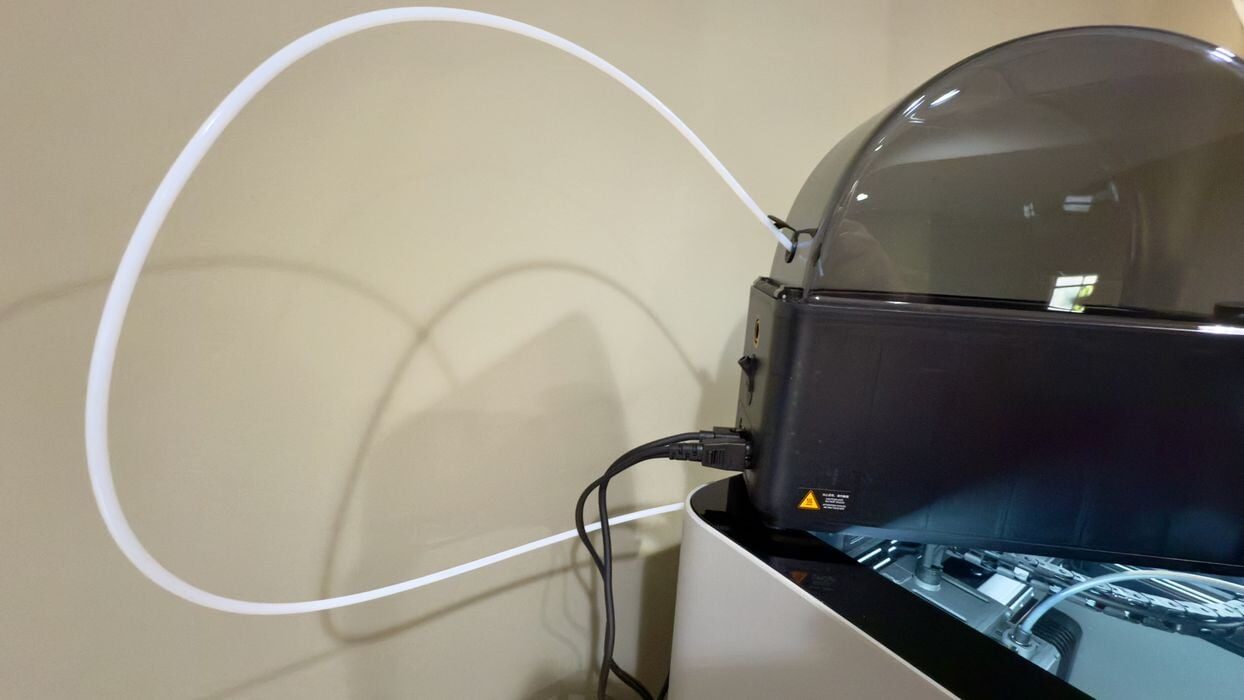
TPU filament cannot be pushed, so you have to take special steps. Instead of using the AMS HT’s motor, you have to slide the TPU out a special port, directly into the H2S, which will pull the filament itself.
Note that I am placing the AMS HT on top of the H2S, where it has a short length for the TPU filament path. This is why I did not place the AMS 2 Pro on top of the machine: because it would have to be moved when printing with the AMS HT.
I had some confusion as the AMS HT instructions didn’t register with me. I initially attempted to insert the TPU into the normal filament inlet port (usually connected to the AMS 2 Pro). However, that didn’t work at all.
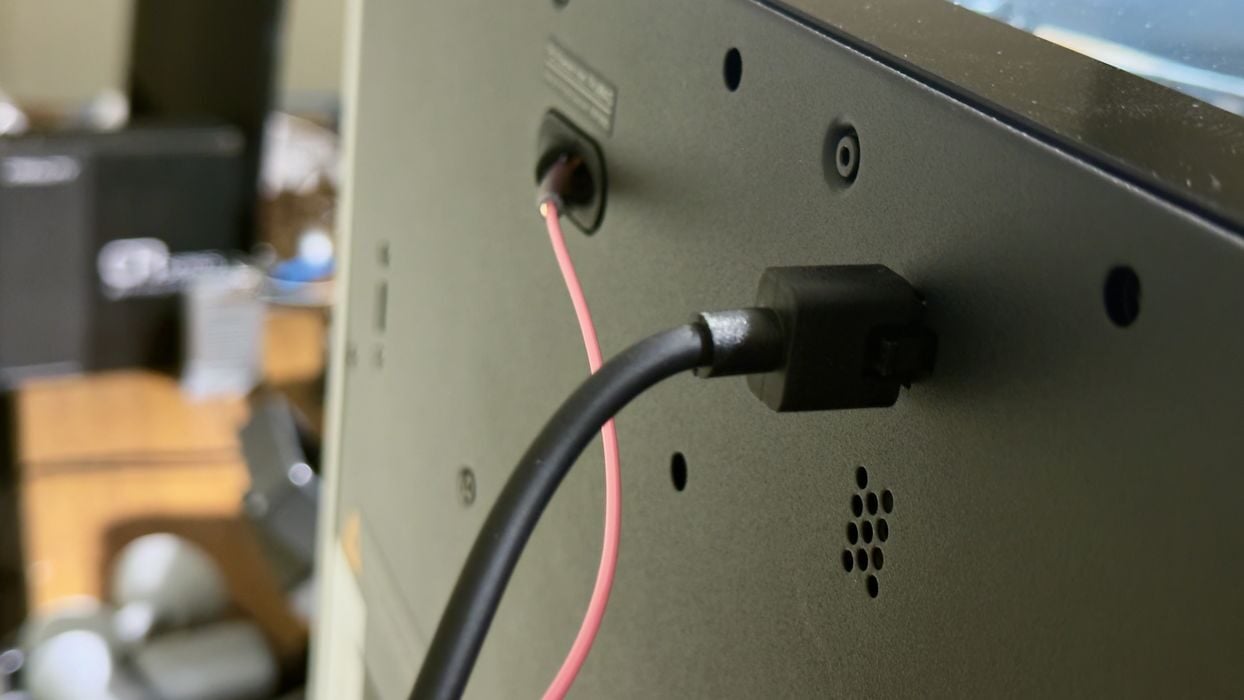
There was also confusion about how to cable up the AMS HT. It uses the same signal cable as the AMS 2 Pro, but there’s only one port for them on the H2S. Which one should I plug in? The one you’re using, obviously. However, it is also possible to plug the AMS HT into the second port on the AMS 2 Pro, and as seen here you can have both active.
But this doesn’t make sense because there is only one filament port on the H2S. I found this all quite confusing until I figured out what was going on. The AMS HT instructions didn’t really clear it up for me, but I eventually got it properly connected.
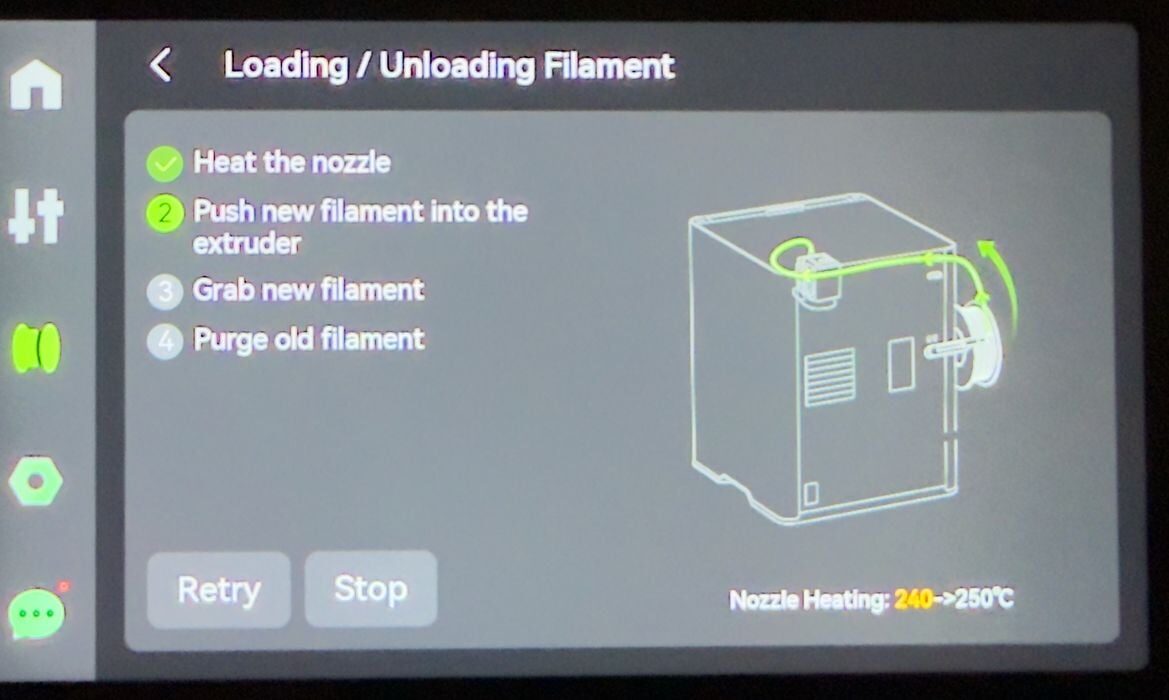
Loading the TPU filament was also confusing. Here you can see the touchscreen clearly indicating that you use the normal port when loading.
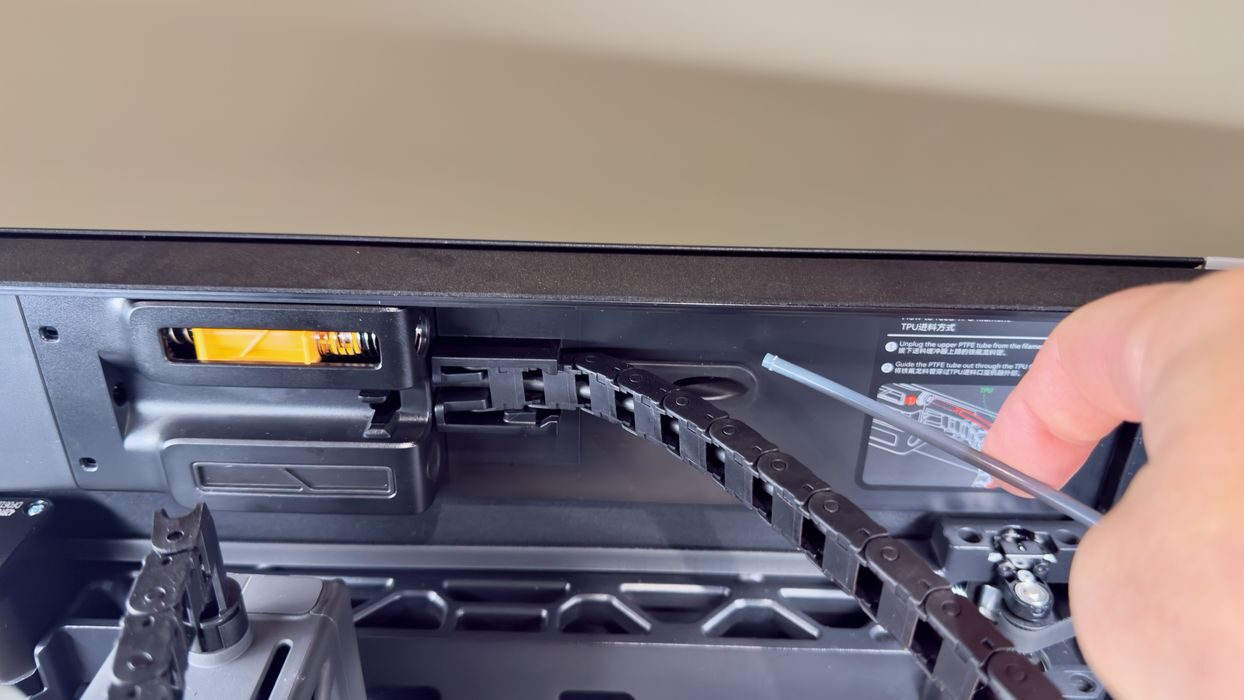
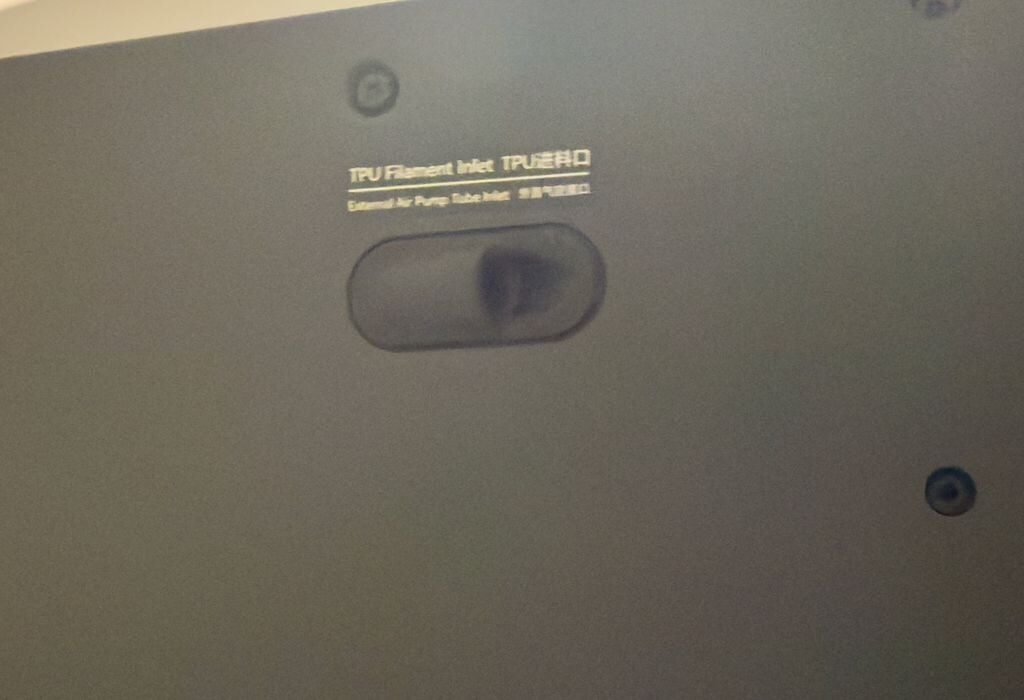
I realized what was wrong when I finally noticed a tiny instruction sticker on the inside of the H2S.
When you’re printing TPU you must detach the PTFE tube from the AMS buffer, and slide it out a special TPU port at the back of the H2S. This is where the TPU is fed in.
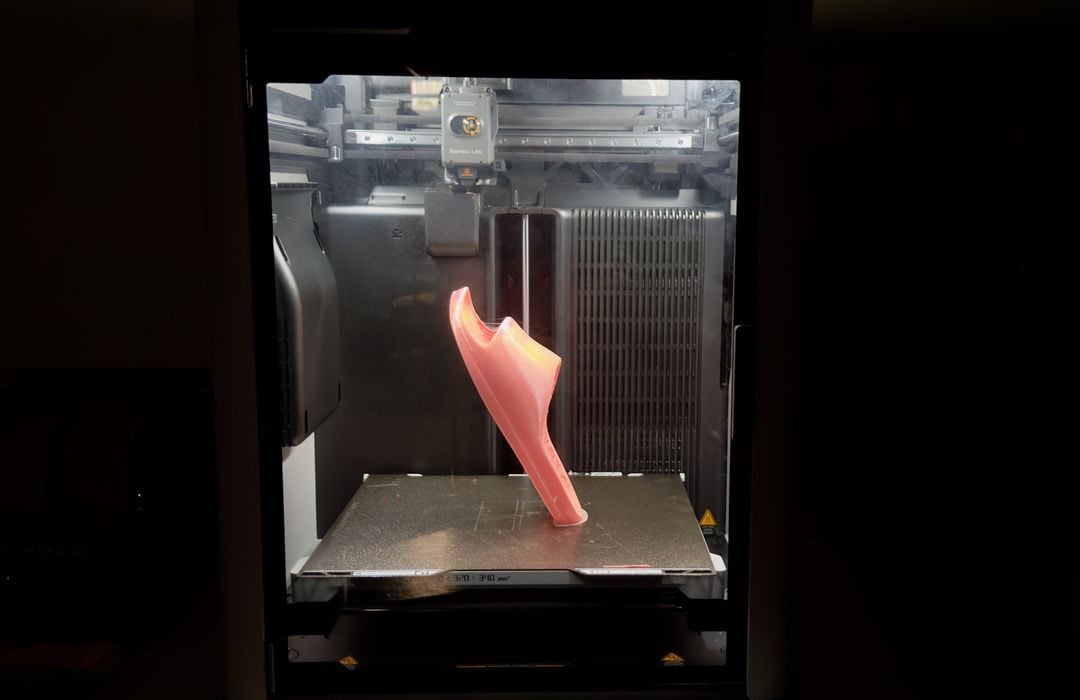
Finally I was able to get TPU working on the H2S, so the next step was to print a sandal. Here you can see that it worked quite well. TPU sticks excellently to the print plate, allowing this very tall print to be done without supports.
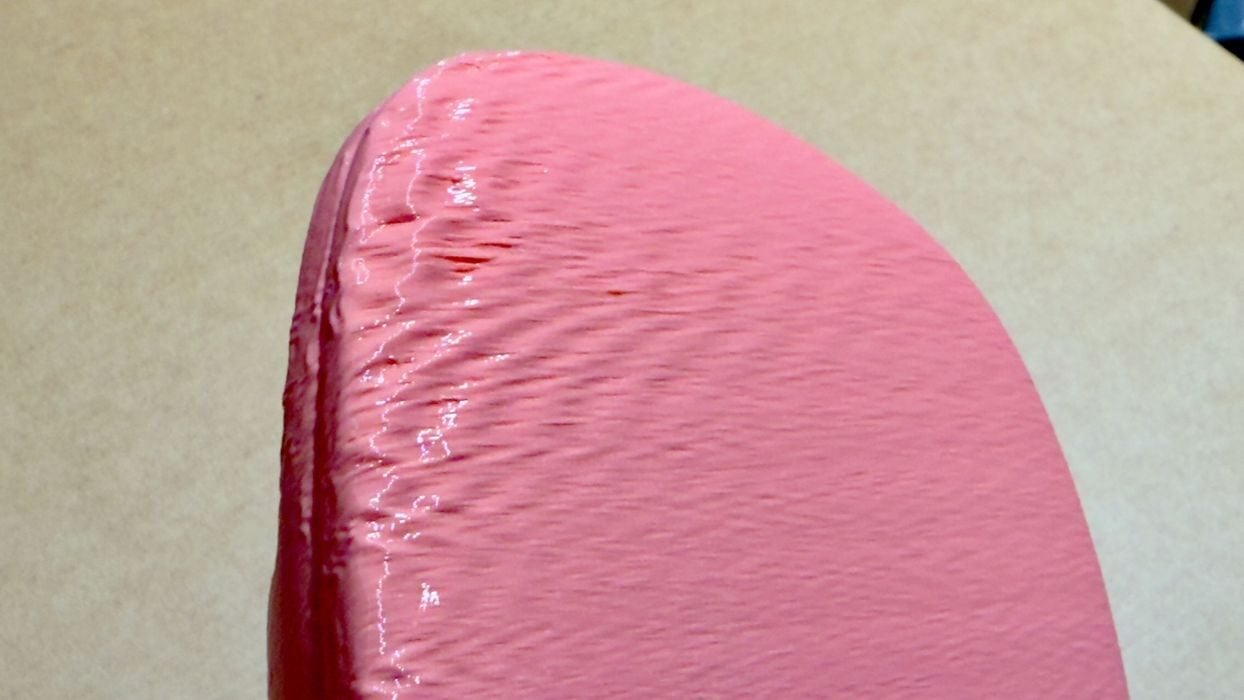
However, I noticed at the top there was a bit of distortion. I thought this was similar to the large helmet print, where some wobble takes place on tall objects.
Now I moved on to testing PAHT-CF, a very exotic engineering material that’s suitable for outdoor use, exposure to chemicals and is quite strong and lightweight. I reconfigured the AMS HT to feed using its onboard motor, unlike the TPU configuration.
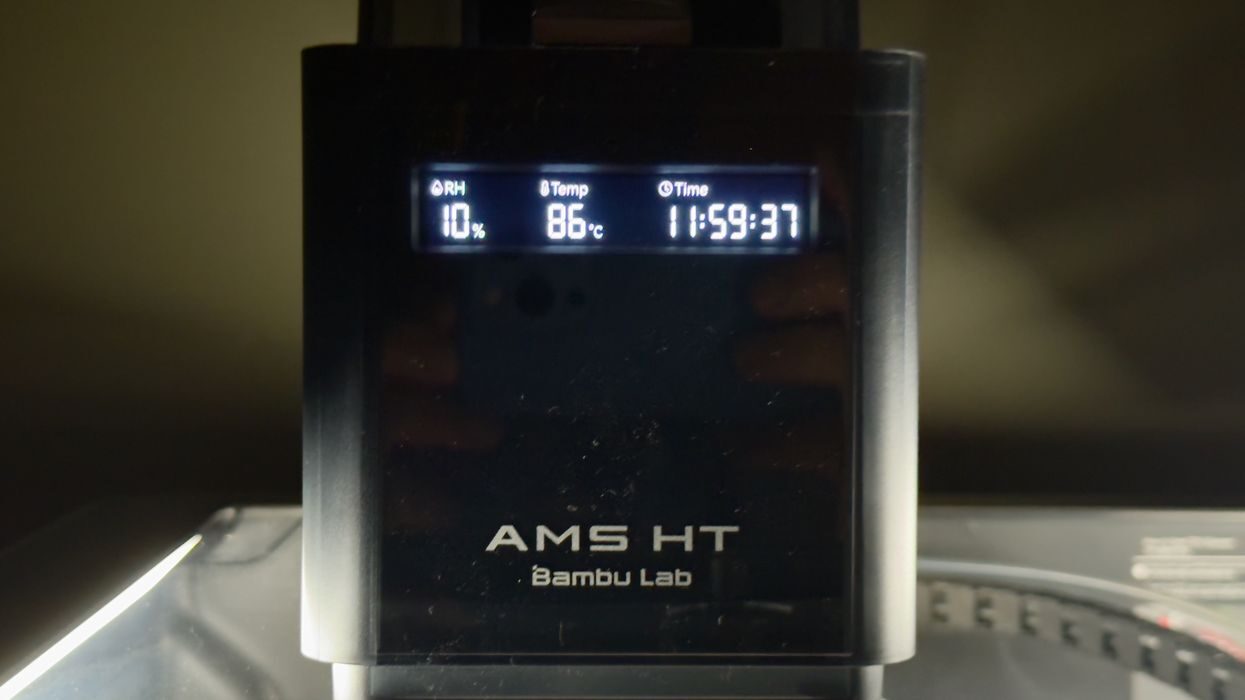
However, as PAHT-CF is a PA material, it absorbs moisture like a sponge. It requires at least 18 hours drying at 85°C to prepare for printing. I set it up in the AMS HT and waited a day for drying to complete.
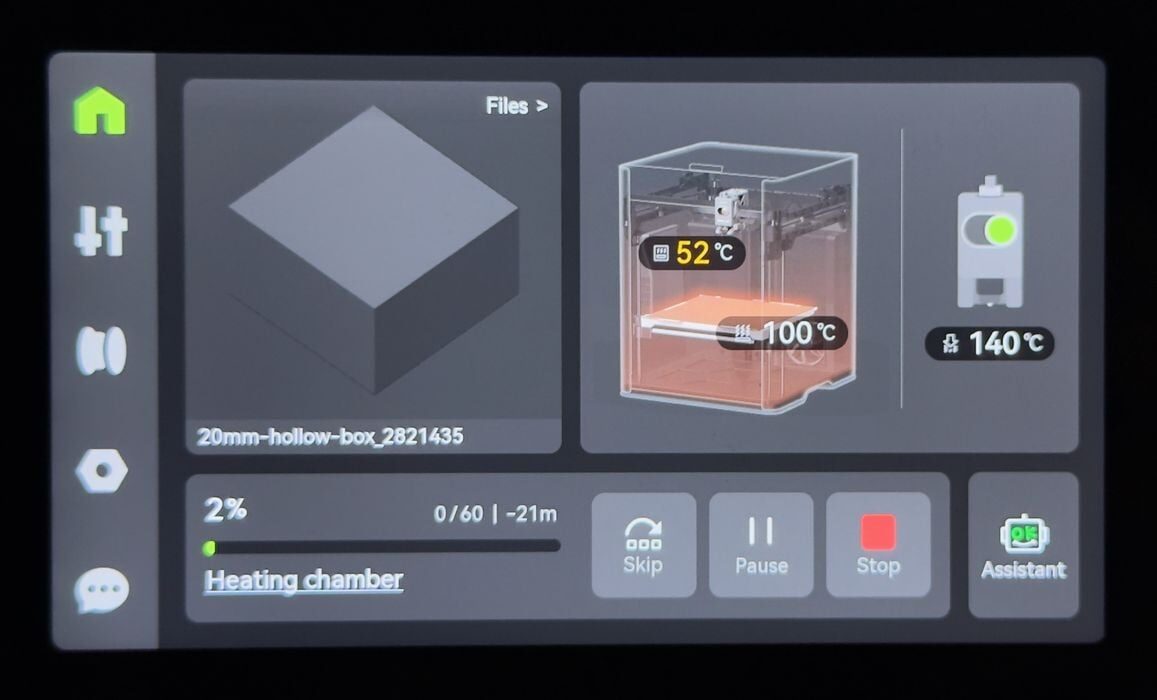
Finally, I started a job to print a test cube and noticed that the H2S was using its active heating capability. The chamber was being heated up to reduce warping, something you don’t see on most desktop 3D printers. This took a bit of time before the print actually started.
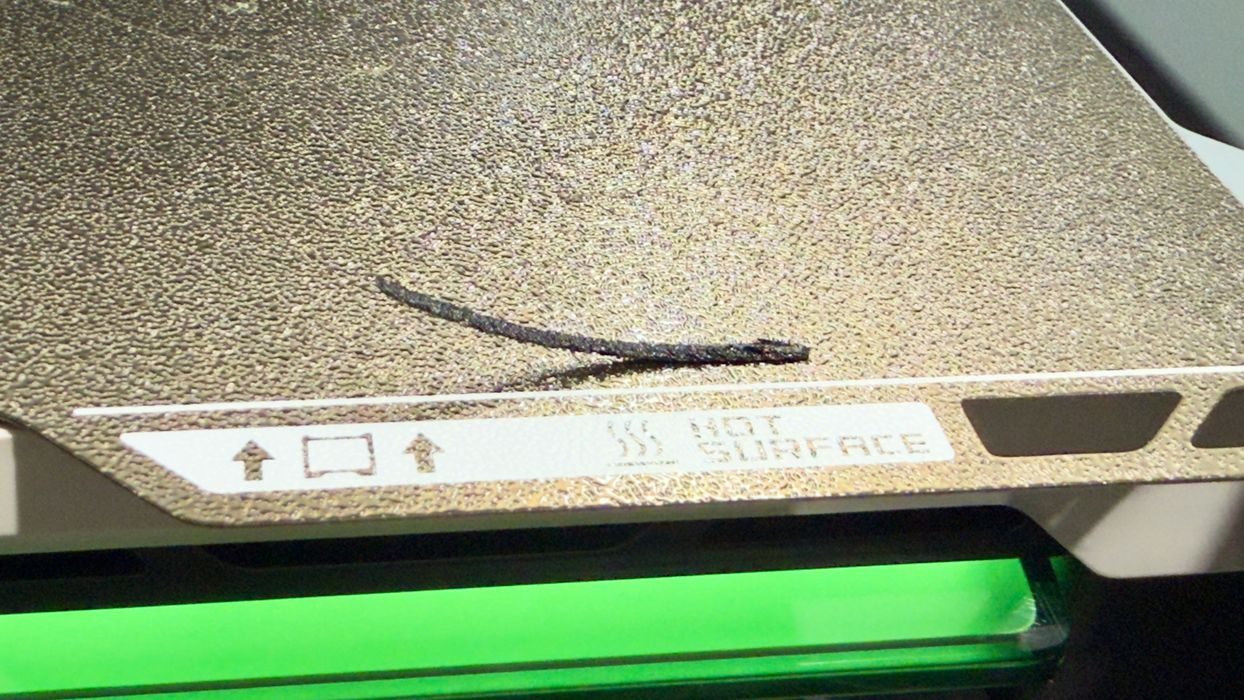
I should have known there might be problems with PAHT-CF, as it didn’t seem to stick very well to the PEI plate.

Indeed, that was true. I tried printing a pair of pliers several times, but each time the print would detach part way through and make a spaghetti mess.
However, the H2S’s AI spaghetti detector did not detect this problem multiple times. I am guessing that the dark material might have something to do with this problem.
I don’t think a brim would help much, as the adhesion seemed very poor, even after carefully cleaning the plate, so the most likely solution is use of a glue stick or a specialized plate for this material.
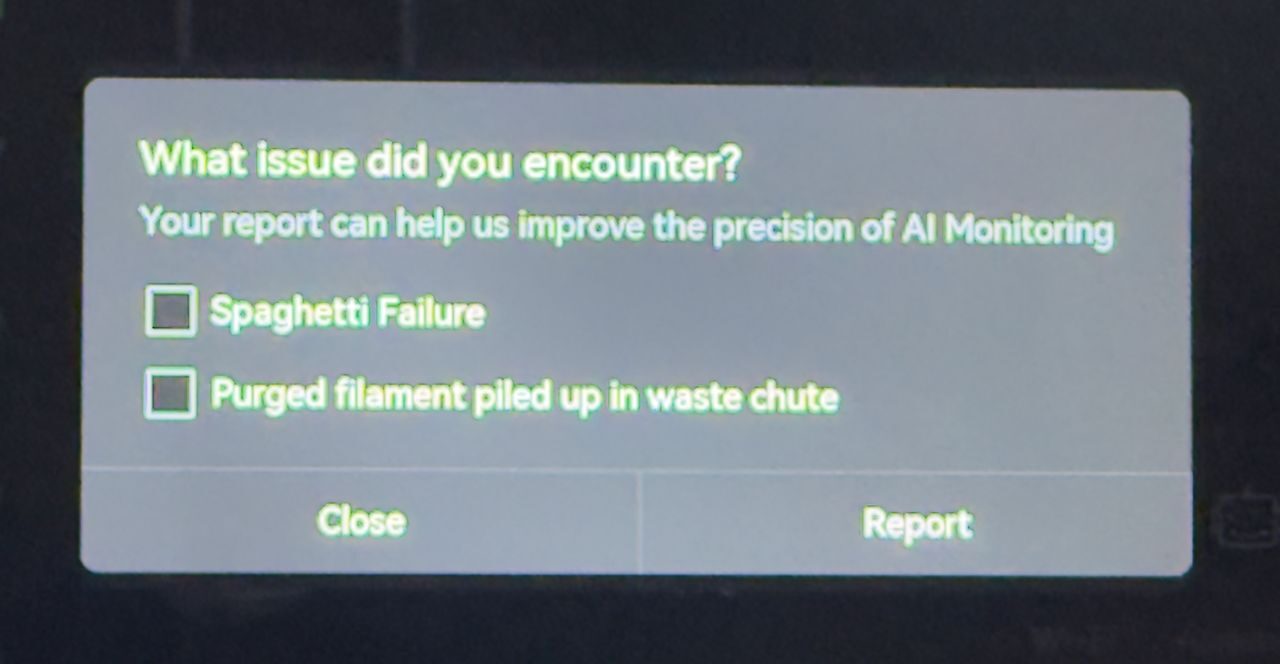
Fortunately, at the end of the job, you can report AI failures, which helps Bambu Lab train the AI to be better in the future.
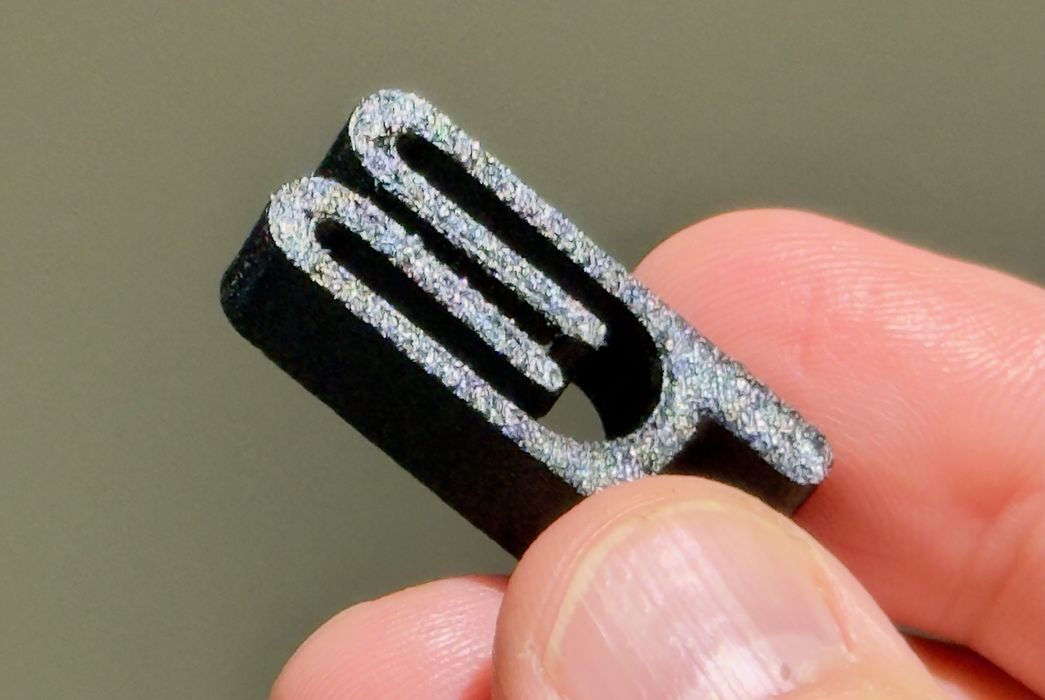
Eventually, I ended up printing some smaller bag clips in PAHT-CF, which turned out very well. Note: these parts are printed at very high temperatures, and you can easily burn yourself if you’re not careful. Always wait for the system to cool down before removing a high temperature print.
Aside from the material setup problems, the H2S produced outstanding quality prints once it’s ready to go.
Bambu Lab H2S Final Thoughts
The H2S is an incredible 3D printer that can do almost anything, and do it very well. It has a truly enormous build volume that is able to handle parts that would be impossible on most desktop 3D printers.
In fact, I found myself printing huge plates full of parts overnight several times. Each morning I’d find a basket full of parts, all in near perfect quality. This machine would be ideal for production purposes, and I can see it being placed in print farms where its large LED status light would be very useful.
The machine follows Bambu Lab’s tradition of clean and easy to use interfaces, with plenty of care taken to prepare instructions, online assistance and more.
The H2S’s high temperature extrusion and drying systems are easily able to handle a wide range of engineering materials, making this device suitable for producing some end-use parts.
I used stock materials and profiles during my testing, and found they worked pretty well. That said, some could use some minor tweaks, particularly for support settings, which I am certain that Bambu Lab will eventually release.
I did find printing TPU to be quite awkward to set up. The normal configuration is using the AMS 2 Pro, and the alternate is to use the AMS HT, and the TPU requirement is a modification of the alternate AMS HT setup. This could be quite confusing for some, although it does make sense when you eventually figure it out. Still, there seems to be too much tube rearrangement required for TPU printing.
The AI monitor mostly works, but I did encounter several situations where it flat out failed. These are certain to be fixed by Bambu Lab, which will now be gathering information from H2S systems when error reports arrive.
The flaws I found were mostly instructional or things that Bambu Lab can fix with updated software or firmware in the future. This means that the H2S will be an even better machine going forward. It already is a great 3D printer right now.
Enthusiasts might like the features and performance of the H2S, but some may desire more ability to modify and tinker with the machine. That’s not really how the H2S was designed, as it’s intended to be operated in a standard manner. The H2S is not a machine for tinkering.
Is this a machine for beginners? I’m not so sure. It’s massive and has lots of capabilities, but some of them are going to be challenging for newcomers to the technology. On the other hand, professionals and even production operations would certainly make very good use of the H2S.
Their tagline of “your personal manufacturing hub” is actually true.
BAMBU LAB
H2S
★ BEGINNER 7/10
★ ENTHUSIAST 9/10
★ PRODUCTION 10/10
BEST FEATURES
✔︎ Quality prints
✔︎ Outstanding calibration
✔︎ Large build volume
QUESTIONS
✖︎ PETG-CF adhesion
✖︎ AI spaghetti detector
✖︎ TPU setup
This is part four of a four-part series; please read parts one, two and three.
Via Bambu Lab