
We’ve been quietly testing the new Mole 3D scanner for a few weeks and have a full, hands-on review.
This is part one of a three part series, please read parts two and three.
Mole 3D Scanner Background
The Mole is the latest 3D scanning system from 3DMakerpro, a brand of Shenzhen Jimuyida Technology Co., which was founded in 2015. The company produces a series of 3D scanning systems for a variety of applications.
According to their website, the company has over 100 R&D personnel, and has spent “over 30 million dollars” developing the hardware and software used in their systems. They hold dozens of patents & copyrights on their hardware and software technologies.
The “Mole” is one of their latest 3D scanning units, and its price places it clearly in the low-cost category. At only US$329 (the current sale price) it is vastly less expensive than many professional units.
Mole 3D Scanner Specifications and Features
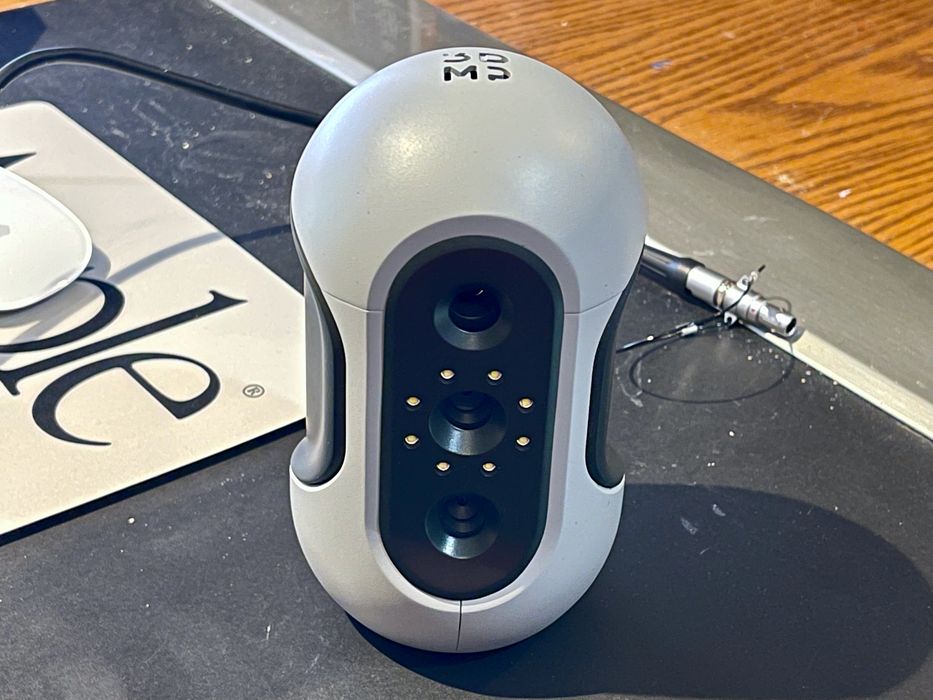
There are different technologies used in 3D scanners, including photogrammetry, lasers, structured light, but the Mole uses a near-infrared light system. This is advantageous because it works better with troublesome scanning subjects and doesn’t harm eyes as can some laser systems.
3DMakerpro lists the scanning accuracy as 0.05mm, with a resolution of 0.1mm. That is to say, they can capture 3D structures as small as 0.1mm wide, and ensure their placement in 3D space within 0.05mm. That’s exceptionally good for a low cost unit.
One of the huge benefits of the Mole technology is the lack of markers. Many 3D scanning systems require the operator to temporarily place a series of highly visible (to the scanner) markers. These are then used by the scanner to ensure it tracks its position in 3D space accurately. While markers work well with some systems, it can be a lot of work to set them up on a large object — and take them down afterwards.
The Mole doesn’t require any markers at all, and the operator can simply start 3D scanning almost immediately.
3DMakerpro suggests that the Mole is capable of scanning very challenging materials, including metal, shiny and dark subjects, which we put to the test as you will see.
Mole 3D Scanner Unboxing and Assembly
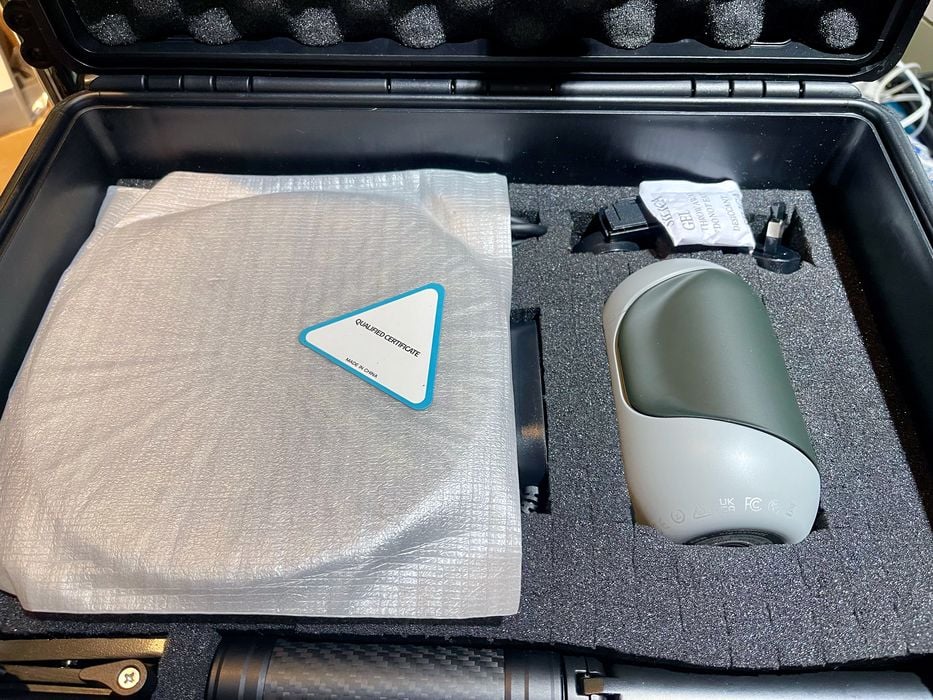
The Mole ships in a very convenient carrying case, and from the rugged looks of it, I suspect it would be ideal to take to field locations for scanning activities.
The components of the scanning system are all safely embedded in shape-fitting foam inside the case, and we found no damage to the unit after shipment. My intention is to continue to use this case for the lifetime of the equipment.
The scanner ships with only a few components:
- The scanner unit itself
- Collapsible tripod
- Cables
- Power supply
- Turntable
- USB stick with software
One immediate observation is that the scanning unit is suspiciously similar to another 3D scanner we’ve previously review: the Creality CR-Scan Lizard. It’s slightly different in appearance, but there’s no question it is related.

I also noticed when running the “JMStudio” software that the Mole was listed as the “Creality CR-Scan Lizard” on one of the windows.
I asked 3DMakerpro about this, and they explained that Creality is their partner, and that they provide the hardware and software to Creality for that 3D scanner. However, the Mole apparently provides superior capabilities when compared to the CR-Lizard.
Mole 3D Scanner Setup and Calibration
Setting up the Mole is ridiculously easy:
- Install the software
- Mount the scanner to the tripod
- Cable the scanner to the PC
- Plug in the scanner’s power supply
That’s it. There’s no other hardware to set up, aside from operating the scanner.
Well, that’s not entirely true. Sometimes you will use the turntable, so you have to set that up:
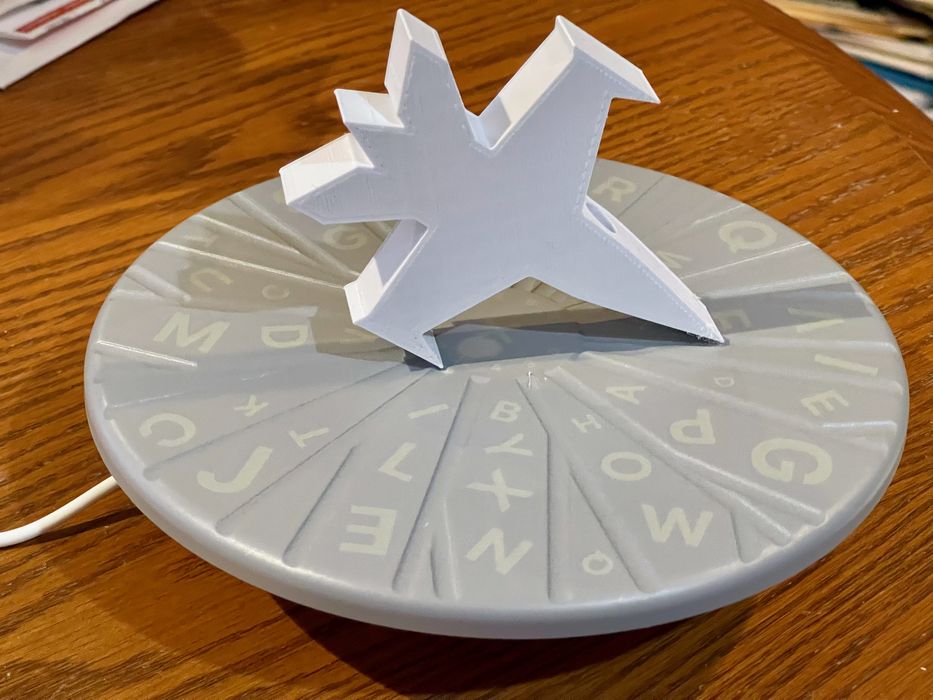
Place the table surface on the rotating base
Plug the turntable’s USB-C cable into a power source
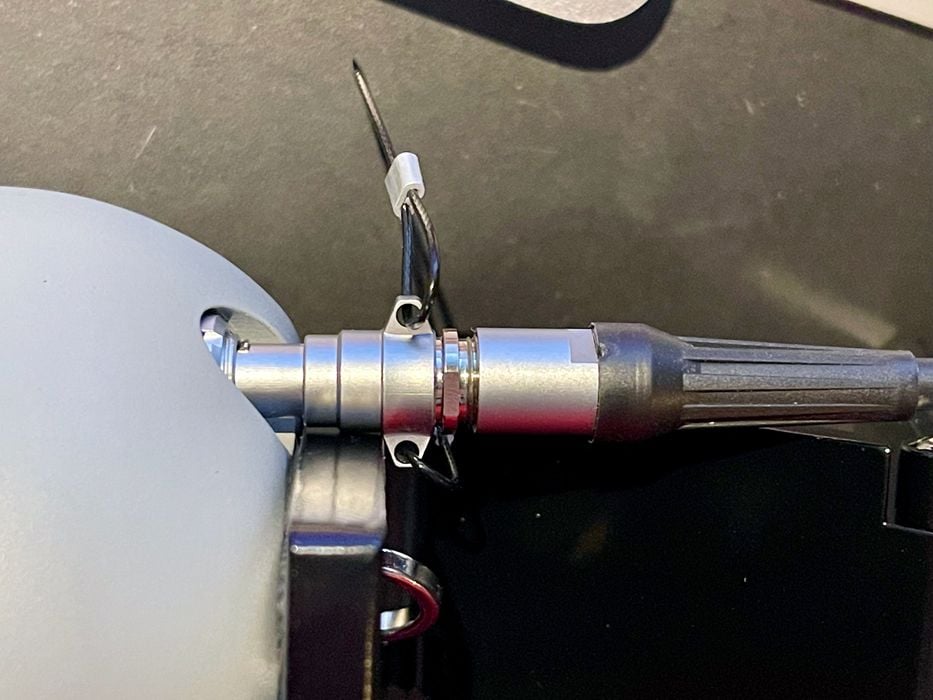
One minor issue encountered was that the cable plug for the scanner tends to bump into the tripod mount arm, which prevents the scanner from rotating freely. This meant that I sometimes had to use oddball positions to aim the scanner.
I found this setup process to be quite straightforward, especially compared to some other 3D scanners I’ve used that require specific calibration processes. Perhaps that’s because the other scanners are sometimes more precise, and require extra calibration. Nevertheless, it’s very easy to get going on the Mole.
This is part one of a three part series, please read parts two and three.
Via 3DMakerpro