
Our hands on test of the new Mole 3D scanner concludes with software, scan results and final thoughts.
This is part three of a three part series, please read parts one and two.
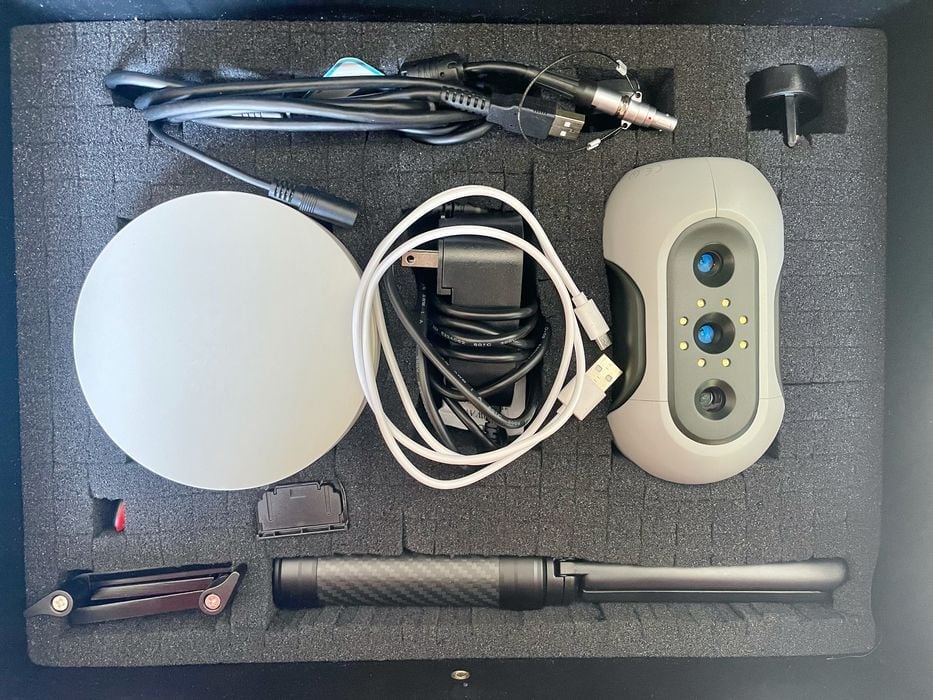
Mole 3D Scanner Software
JMStudio is the software in question, and eventually I found it to be quite good. However, it did have a bit of a learning curve, and most of that I believe is due to the manner in which it presents the scanning workflow.
JMStudio is quite visually attractive, with a dark mode and colored buttons. While that’s a lot better than some rough “engineer style” scanning software I’ve used, I think 3DMakerpro could tweak some of the colors.

For example, there are several areas where the contrast is really poor, and it was often difficult for my old eyes to see what was presented. Light gray on slightly darker gray isn’t a good combination.

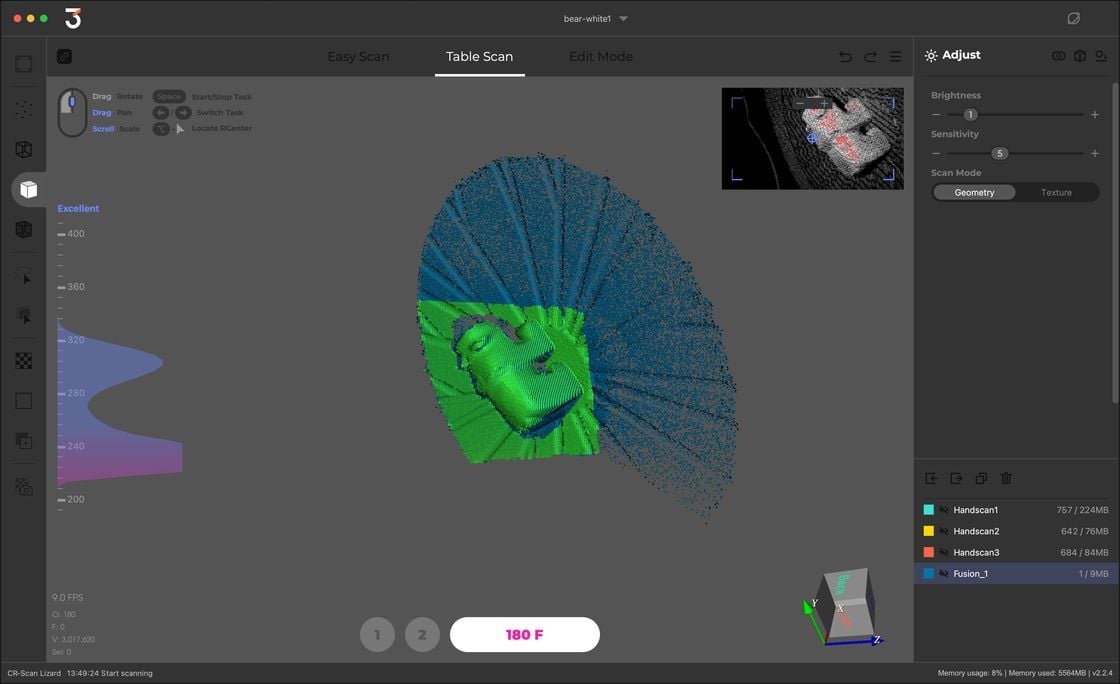
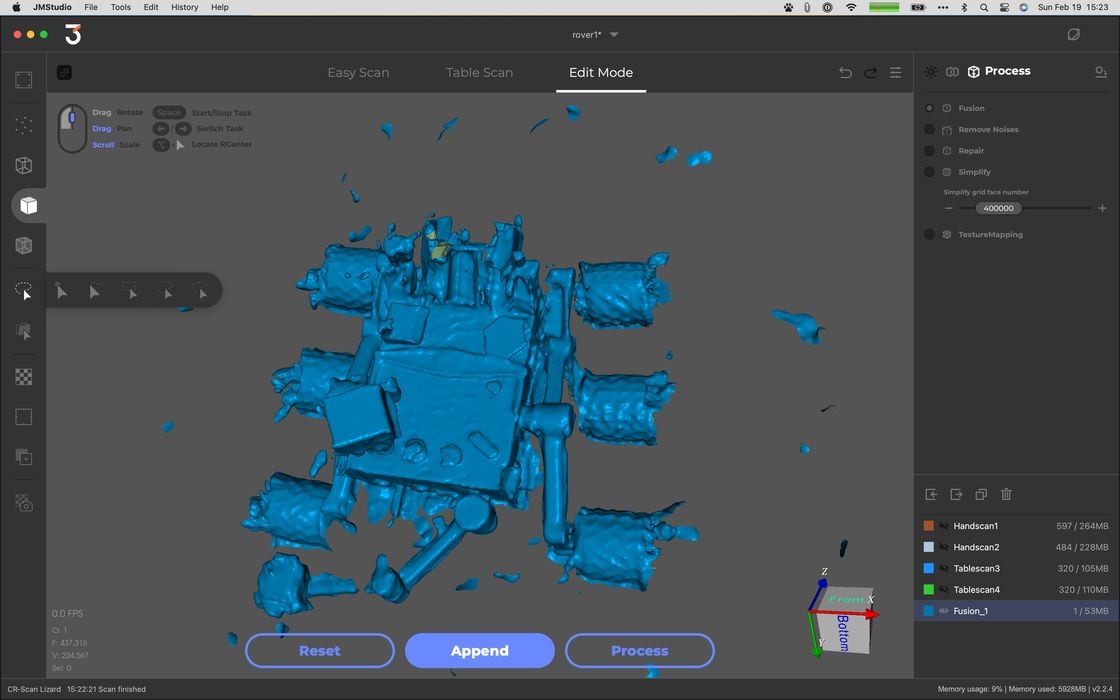
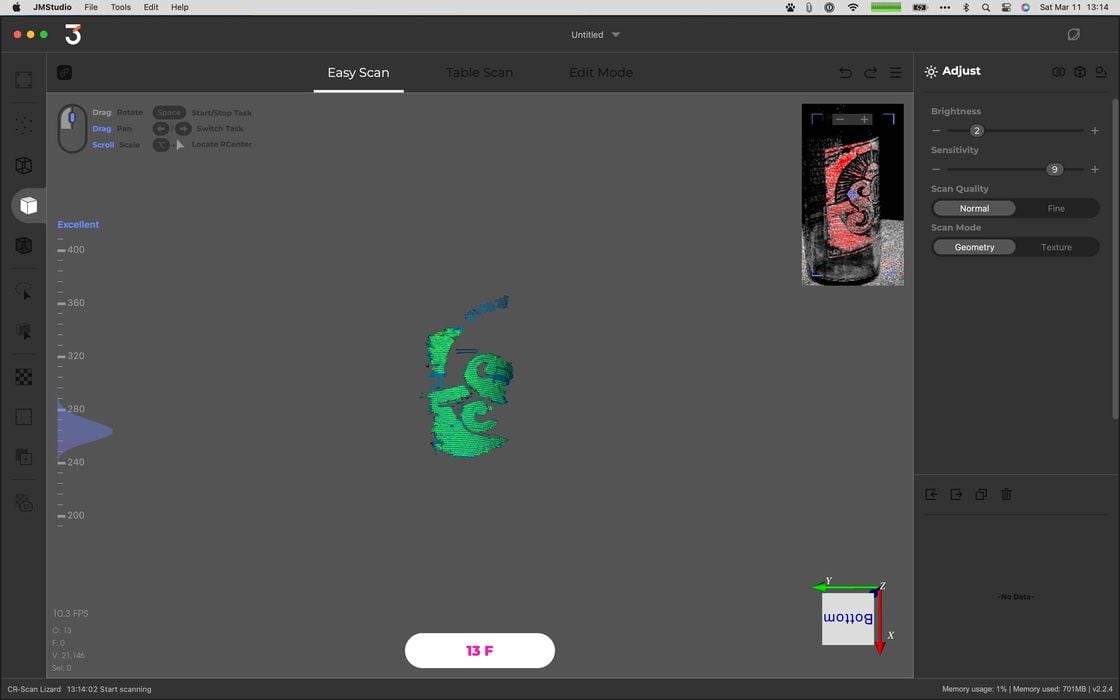
I found navigation a bit confusing. The JMStudio interface does present this guide at the top left of the window, which requires a bit of thought before you can understand what it’s trying to explain. Can you figure it out?
However, it didn’t help me at all when using this:
JMStudio, like most 3D software tools, ends up being confusing because there is no standard key combinations for common window navigation. Each tool seems different, and I always end up having to re-discover them in each tool. JMStudio is no different.

One thing I found particularly confusing was the workflow process through the scanning steps described above. JMStudio tends to present buttons to move between steps, but in an inconsistent way: sometimes steps do not appear, sometimes they are words, sometimes icons. I think it would be a lot clearer to operators if they had a more consistent and easy-to-follow workflow navigation system.
Nevertheless, it is definitely possible to learn their workflow and operate JMStudio effectively.
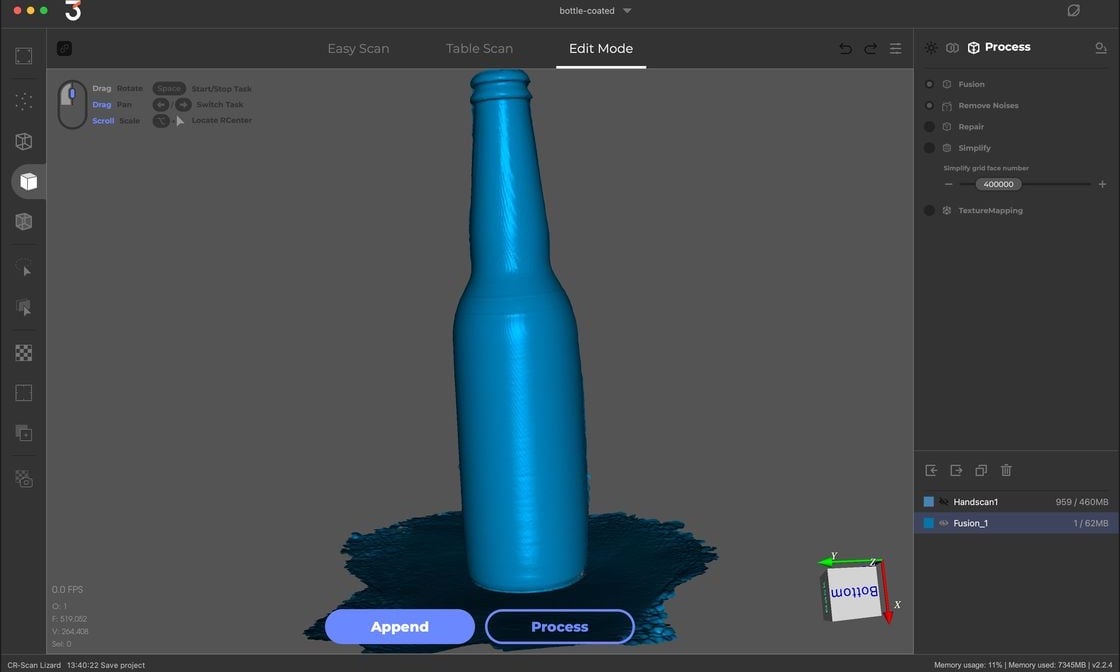
JMStudio includes a powerful “Edit” mode. This can be used to alter both point clouds before fusion, or 3D models after fusion. You can chop models, clip out bits, reorient them, but most of the time I would use Edit mode to remove excess scanning crap.
3D scans are usually quite noisy, and there will always be stray bits that are not part of the subject. It’s best practice to clip these out before you process the point cloud, otherwise you risk having them being incorporated into the result. I was able to produce very high quality 3D models by doing this.
However, using edit mode requires specific key combinations and yes, they must be discovered, too. I frequently found myself wondering whether I’m supposed to hold the “control” button down, or was it the “option” button? Or maybe with the “shift” button?
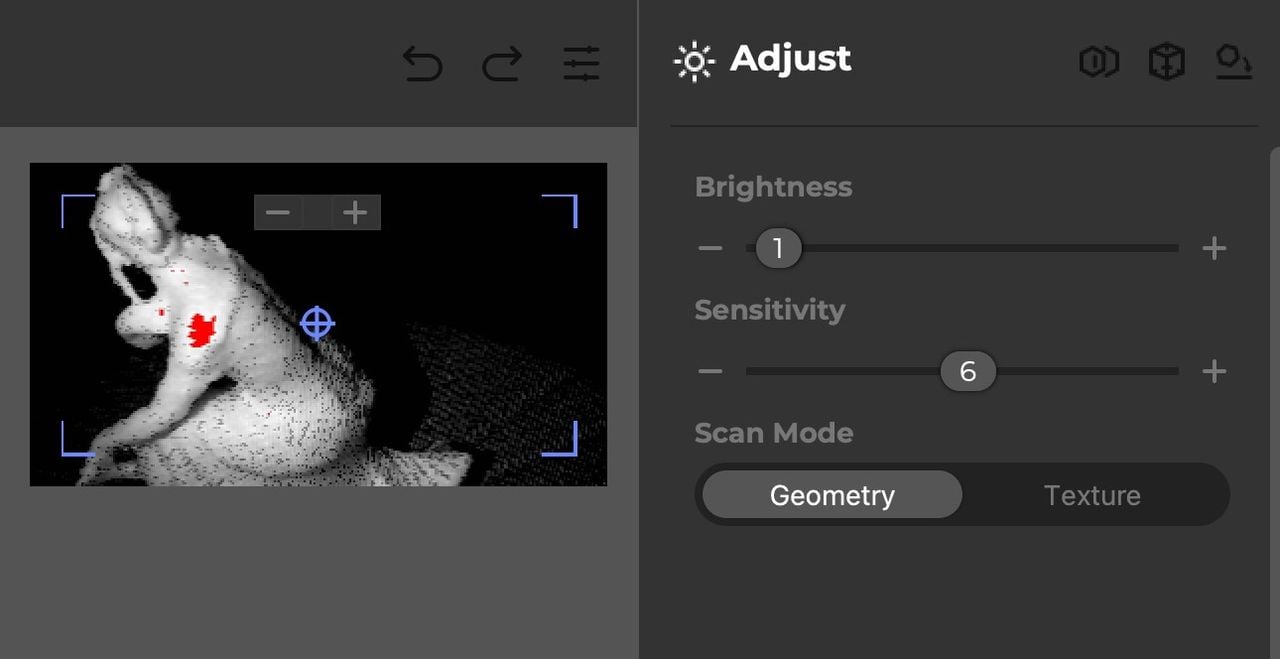
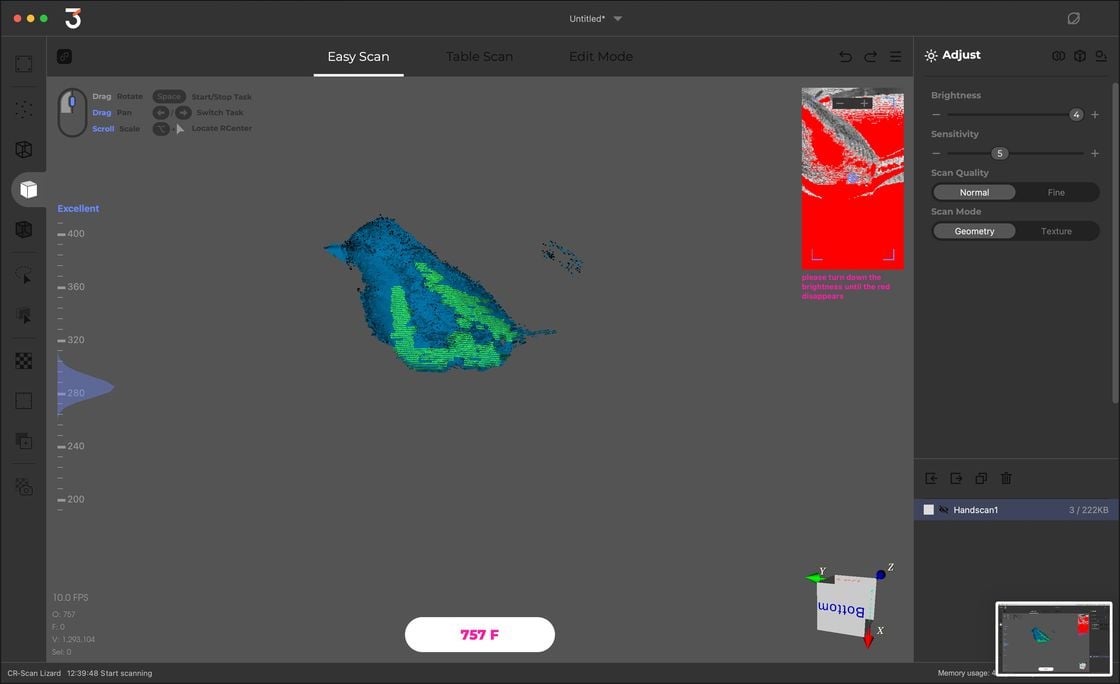
When scanning there are two settings to tweak. One is brightness, and the other is sensitivity. I never figured out what sensitivity does, but the brightness is quite important because it should match the albedo of the subject. However, the brightness setting cannot be continuously changed: it can only be moved to fixed positions. Sometimes I found the optimum brightness would be at, say, 2.7, but I could only set the brightness to 2 or 3, not 2.7.
Mole 3D Scanner Scan Results
While obtaining the scan is one thing, the processing and results are quite another. Typically one has to perform a very careful scan to obtain good results, but ultimately quality depends greatly on the processing done by the software.
I found the JMStudio processing to be quite effective. One of the first items I scanned was a simple sanding tool. Here’s the scanned result, with minimal editing:
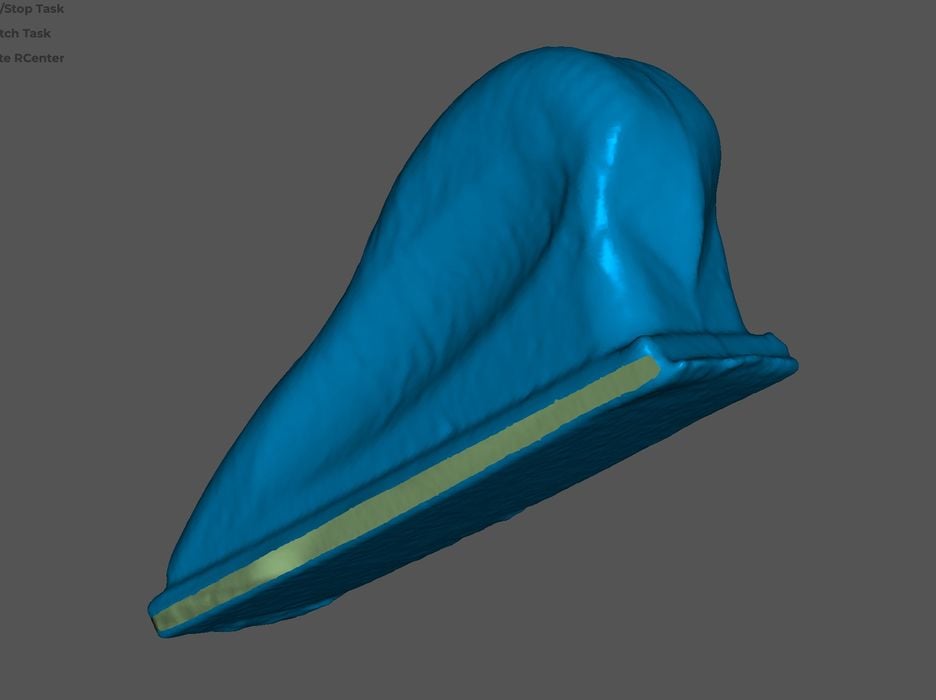
It’s quite impressive.
I attempted a very complex 3D scan, this one of a print of the Mars Curiosity Rover. This item has dozens of small niches and protrusions, and in turntable mode the Mole just wasn’t able to see everywhere. I expect that this particular model would best be scanned in handheld mode so that the operator could “reach” all the nooks and crannies.
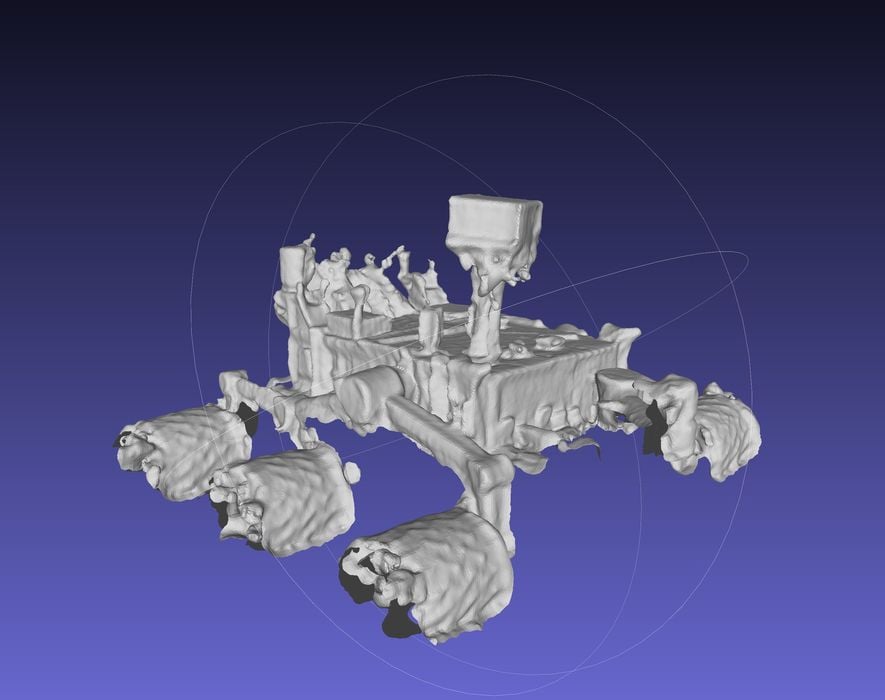
This means that a Mole operator should consider carefully which mode is best for each specific subject. Even though it may fit on the turntable, it doesn’t always mean it should be scanned in turntable mode.

This small ceramic Hummel figurine is one I often use for testing 3D scanning systems, so it had to be scanned by the Mole. I used handheld mode for this item, so I could capture all surfaces with two scans for alignment.
Also, this scan was captured in direct sunlight, with shadows and bright areas on the figurine. I was curious to see what would happen, as bright light can often mess up 3D scanners. However, sunlight did not affect the scan in any way.
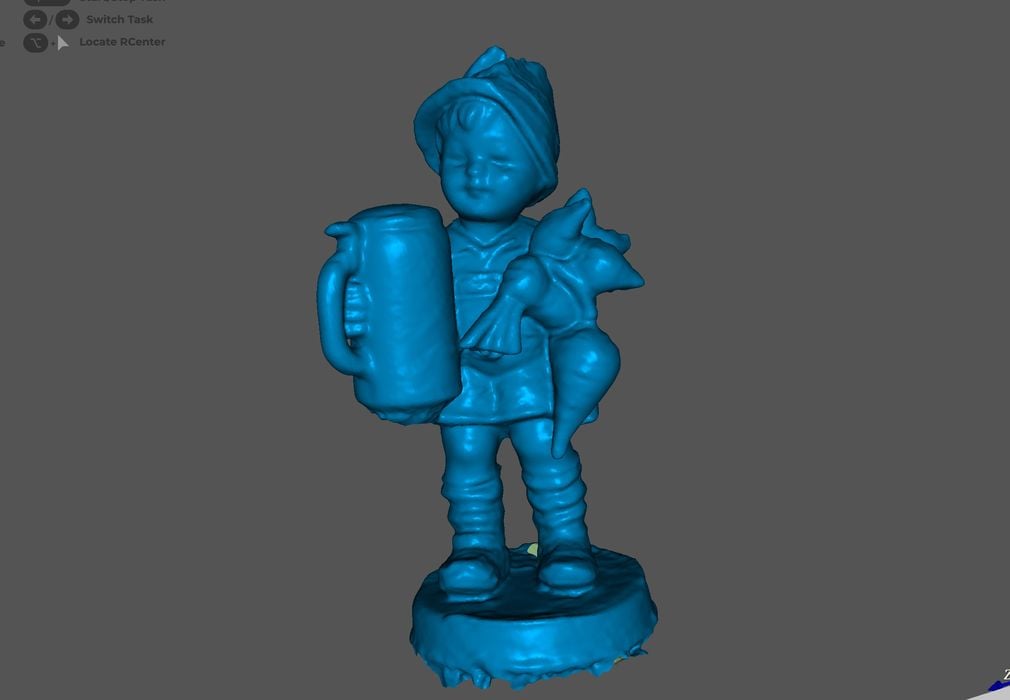
The result was incredibly impressive. Here’s the result of the JMStudio fusion. Note that the surfaces are appropriately smooth and continuous. Somehow the software is able to make a really good surface out of “fuzzy” point cloud data. I found this to be the case on almost all of my Mole scans.
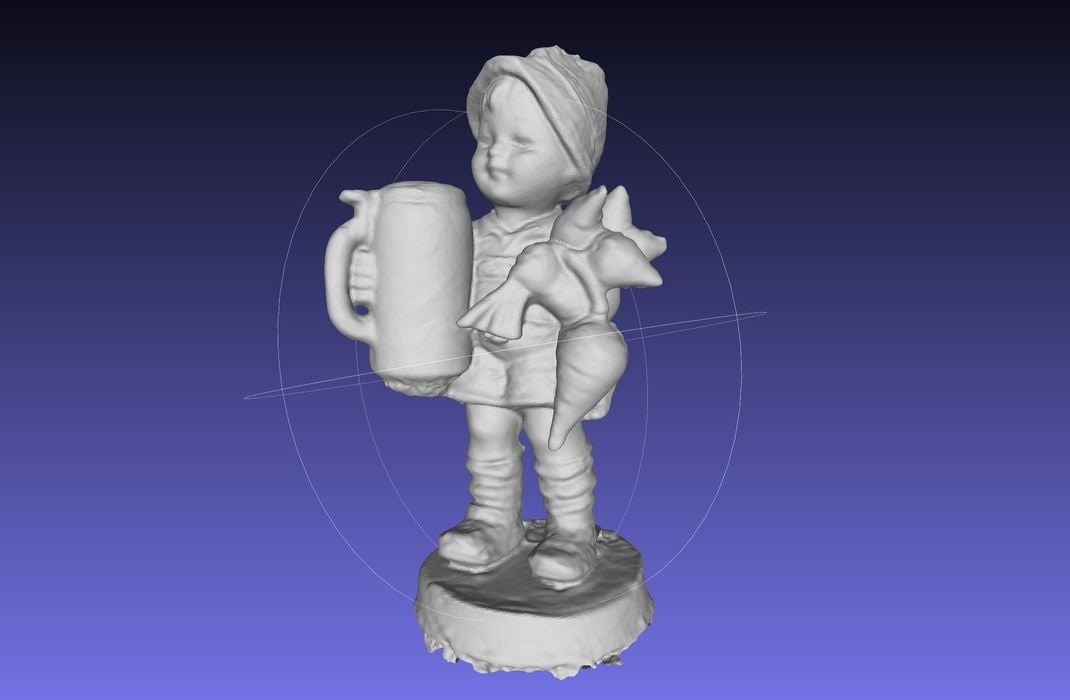
The resulting 3D model of the Hummel figurine was actually the best I’ve ever made using this subject, and that’s after using a wide variety of 3D scanning tools.

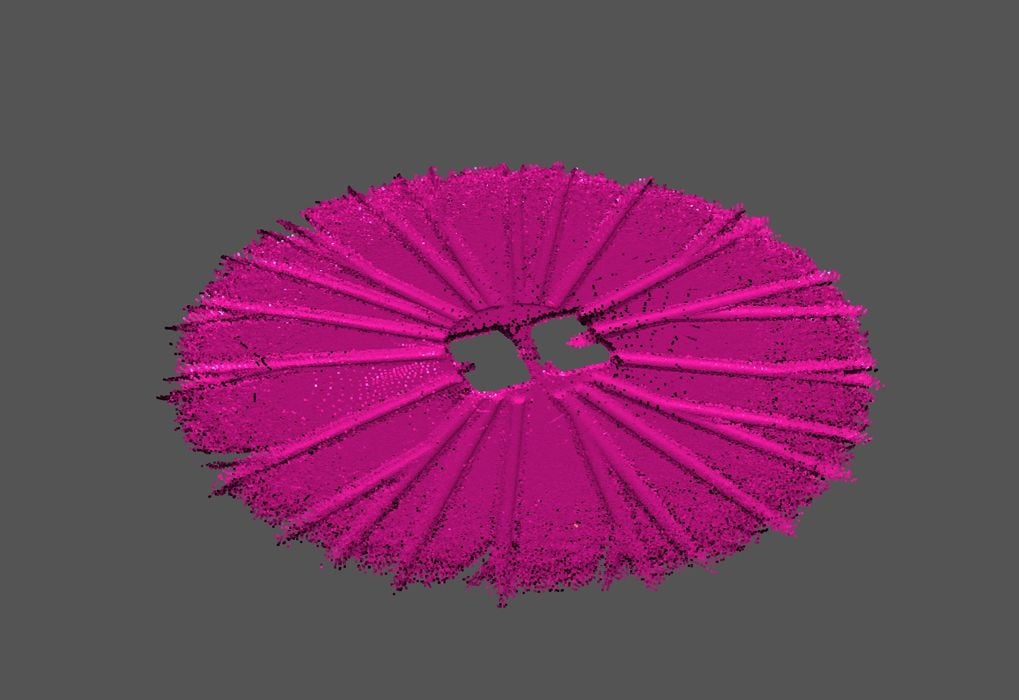
I wanted to try testing the Mole’s capability against difficult subjects. Here is a bird ornament that is very shiny. This item would be basically invisible in most scanning systems.
To scan it with the Mole, I turned up the brightness to the max, and while JMStudio complained, it was actually able to capture some of the geometry!
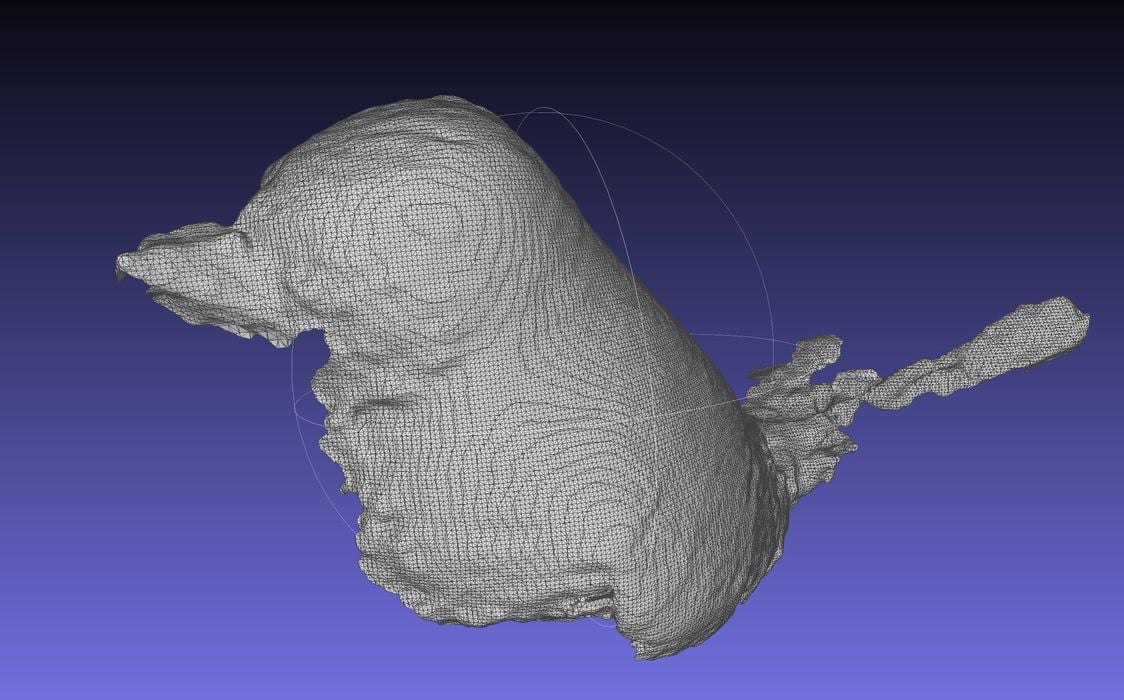
I’ve never seen a 3D scanner able to capture a shiny item like this. While I scanned the bird only once, I am pretty sure I could have done multiple scans and knitted them together to make a complete shiny bird 3D model. Impressive!
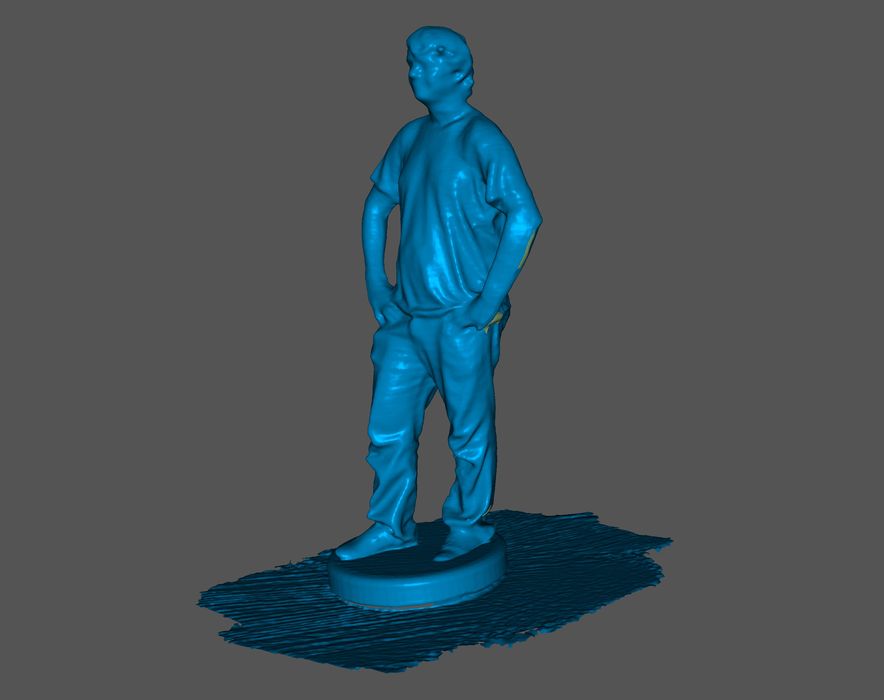
This scan is of a tall (400mm) 3D print, done in handheld mode. The interesting part is that it was done in complete darkness. It seems that the Mole operates very well in the dark, as it uses near infrared light for scanning. The resulting 3D model was near perfect.
I attempted to scan glass by means of an empty beer bottle. As you can see here, the scanner couldn’t see the glass at all, and I captured merely the label.
However, after applying a specialized scanning spray, I was able to capture the entire bottle easily, as you can see above.
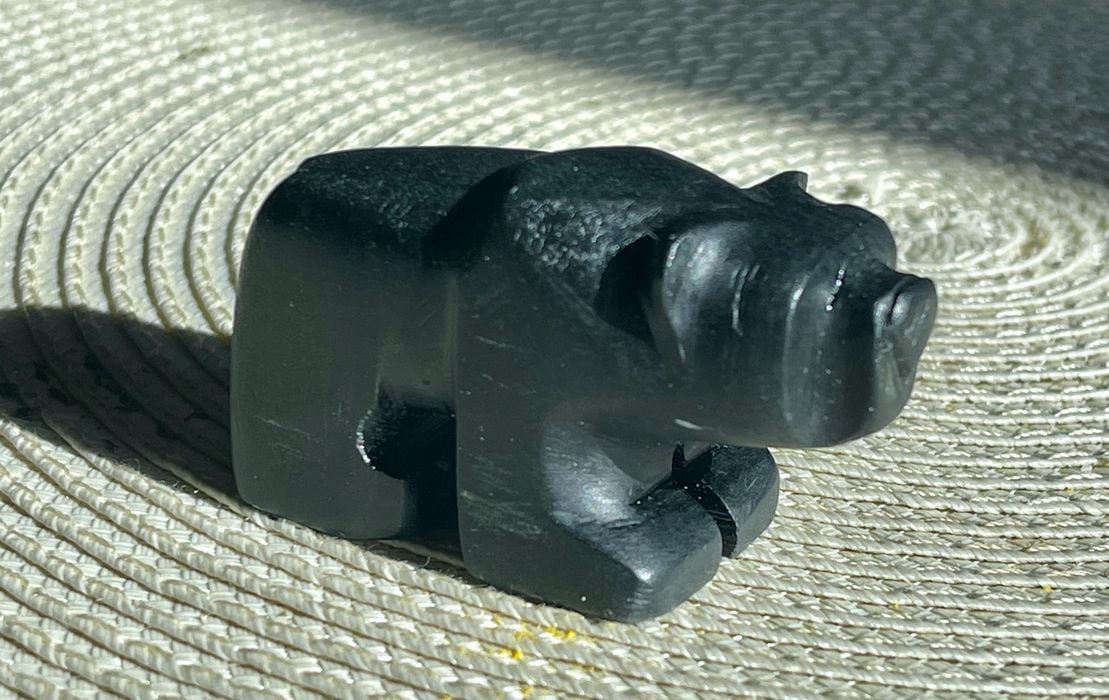
Finally, I brought out my scanner killer: a small Inuit soapstone carving of a polar bear. This item is by far the most difficult item I’ve ever attempted to scan, and I’ve never been able capture it properly. It’s dark, cold and has tiny crevices, and the material should be considered for use on military stealth aircraft.
My first attempt on the bear resulted in this:
You can see only the bear’s footprints — it is literally invisible to the scanner, and only the table was captured. Repeated attempts using different brightness levels achieved nothing.
Finally, I had to resort to using the scanning spray again, which coated the bear completely.
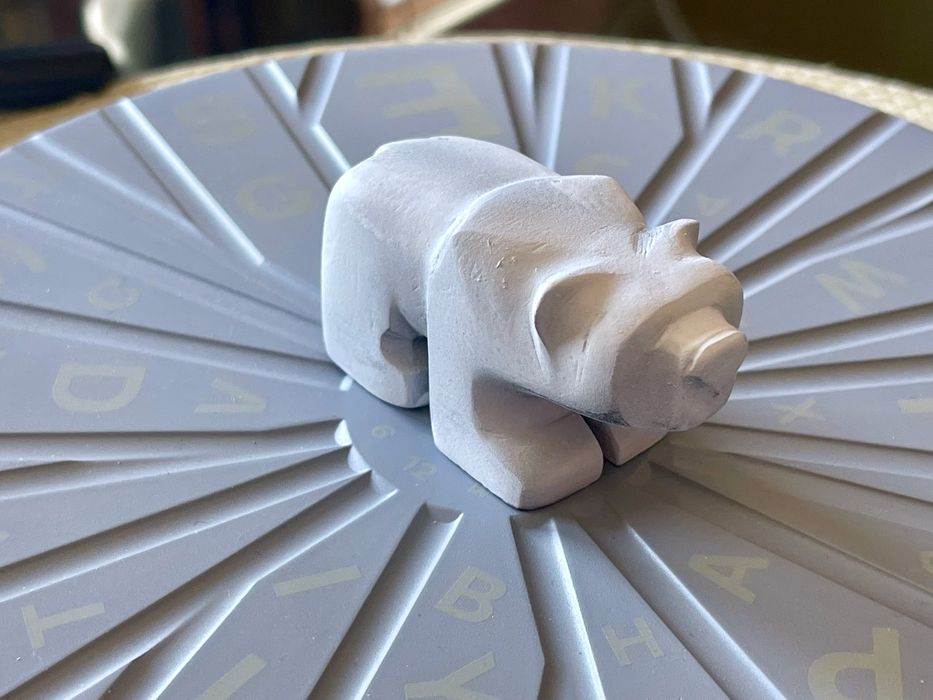
Then the scan actually worked, and worked extremely well.

This is very the first time I’ve ever been able to properly capture this bear in an accurate 3D model.

I was even able to print it out with almost no editing of the 3D model.
Mole 3D Scanner Final Thoughts
The Mole carries a pretty low price for a 3D scanner, and therefore I didn’t expect much from it. I’ve tested many 3D scanners in this price range previously, and they all had issues of one sort or another.
The Mole, however, is quite different. I was able to create incredibly good 3D scan results from a wide variety of subjects in varying conditions. Each model was impressive and accurate.
The Mole is very easy to set up and, after some practice, scan objects. The software is quite powerful, and while 3DMakerpro has taken steps to make it more visually attractive, the workflow aspects deserve a bit of attention in future releases. Nevertheless, it is quite possible to learn how to use the software and leverage its ability to accurately process scans.
The low price point makes the Mole a very attractive option for 3D scanning, and I recommend it for anyone looking for an inexpensive tool for obtaining good quality non-textured 3D scans.
This is part three of a three part series, please read parts one and two.
Via 3DMakerpro
Can you post some of the project files from objects you scanned?