
Our look at the new Mole 3D scanner continues with operations and alignment.
This is part two of a three part series, please read parts one and three.
Mole 3D Scanner Operations

The Mole has two basic operational modes: handheld and turntable, which you would choose depending on the nature of the subject.
For example, if the subject is a small item that would fit on the turntable, you’d use that mode. On the other hand, if your object is bigger, the handheld mode would be more useful.

Unfortunately, these modes are not quite as clear as I’ve portrayed them. JMStudio calls them “Easy Scan” and “Table Scan”. “Easy Scan” is handheld mode, and “Table Scan” is turntable mode.
The 3D scanning workflow used by the Mole more-or-less follows our basic “Ten Steps of 3D Scanning”. Our previous story describes these in detail, but in point form they are:
- Calibrate
- Scan
- Scan again
- Align
- Fusion
- Meshing
- Texturing
- Editing
- Simplification
- Export
In a sentence, the scans collect point clouds of the object in 3D space. These are then “fused” into surfaces, which are transformed into meshes (STL, OBJ or 3MF), and then textured before finally exporting the file for use in other applications.
It’s quite important to understand these steps before you begin using JMStudio, because the software doesn’t always make it clear which step you’re on and what happens next. However, once you do understand the workflow and 3DMakerpro’s terminology, it’s pretty easy to get through it with JMStudio.
The handheld mode is easiest to understand opposite the workflow: you perform the scan, then process it to produce the meshed object.
The turntable mode is at first a bit confusing, and that’s because 3DMakerpro is trying to make things easier later in the process. The problem they’re solving is that when in turntable mode, you always end up scanning the object — and the turntable itself.
The turntable must be removed from the 3D model because it’s not required. Normally this would require a bit of editing to clip it out, but JMStudio can do this automatically.
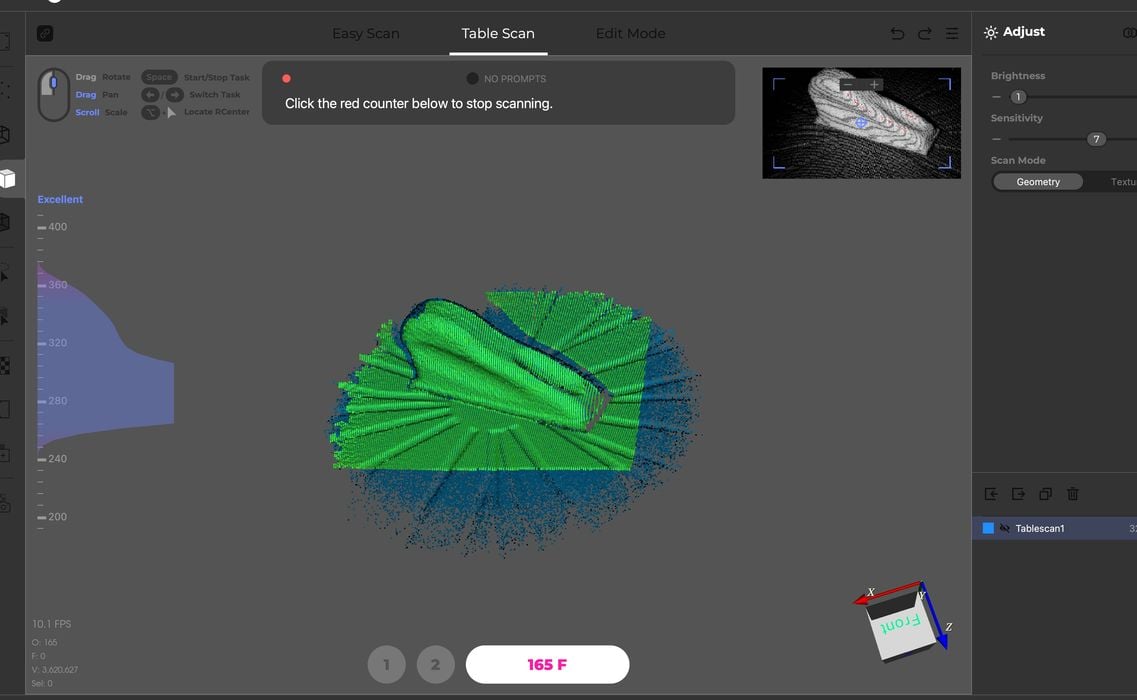
Here’s how it works: when in turntable mode, JMStudio presents you with a mysterious “Initial” button. What you’re supposed to do is remove your object from the turntable, and hit that Initial button. The scanner then scans the empty turntable — so that it “knows” where the turntable is located. Then the next step is to place the scanning subject back on the turntable and hit “Scan”. This captures the point cloud for the object AND the turntable surface.
However, when the scan is processed, the software can automatically remove the turntable surface because it knows all about it from the “initial”. In fact, the turntable surface shows up in a different color in the scan because it is “selected”. It’s often just a simple matter of “deleting” it with a keystroke.
This is a pretty useful feature, but the problem is that this sequence isn’t explained well and the software doesn’t really help you understand what’s happening. However, once you know how this works, it’s very easy to do.
Turntable mode is relatively easy to execute, because the turntable performs all the action — the operator just presses buttons.
Meanwhile, handheld mode requires a bit more expertise. The scanner must be moved precisely around the subject, all while keeping the subject in frame. In addition, you can’t move too quickly, or the Mole will lose its place in 3D space and you’ll receive the dreaded “lost tracking” message.
Some 3D scanning systems stop the scan when tracking is lost. However, the Mole has a pretty good method of re-establishing tracking. After receiving the lost tracking message, you slowly move the scanner’s view back to a point previously scanned, and it almost always picks up where it left off.
I found this feature to be essential in making it easy to use the Mole, because I frequently lost tracking. One reason for my aiming issues is that the odd round structure of the Mole makes it somewhat difficult to aim by hand.
Normally handheld scanners have a kind of “pistol” design where you can intuitively point the device at the subject. However, the Mole is completely round and it’s very hard to tell where it is pointing at any moment.
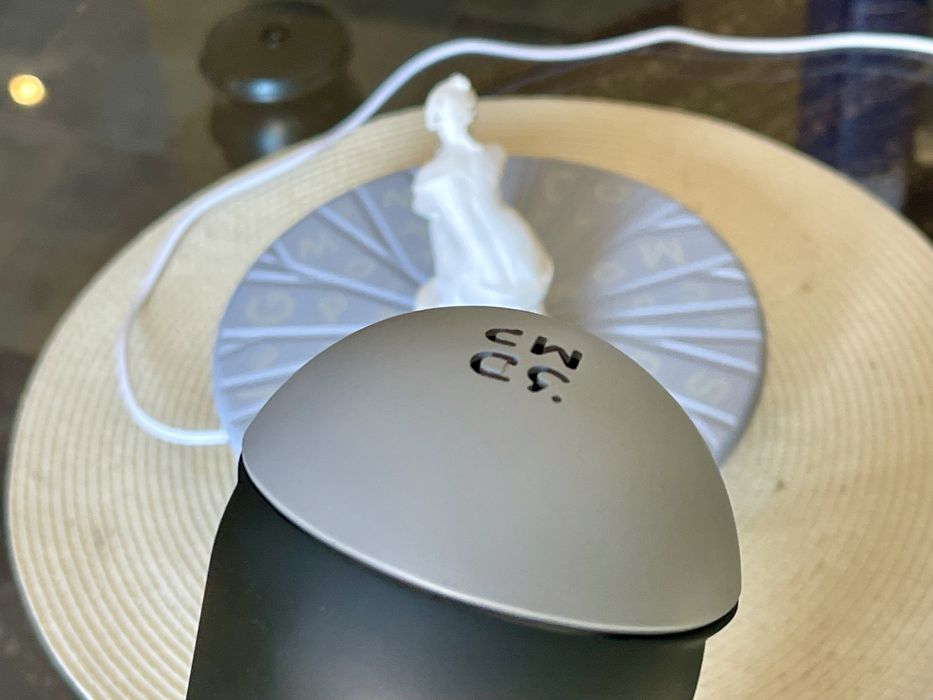
There isn’t even any markings on the top of the Mole to clearly indicate where the aim is pointing.
I found the best practice for scanning movement was to keep eyes on the PC screen where the preview image is shown. It takes a bit of hand-eye coordination, but soon you’ll get the hang of moving the Mole properly. I found that the act of scanning would get easier each time I performed one.
I’m told that other versions of the Mole will have the ability to attach a smartphone to the back of the Mole and allow a “direct” view of the scene on the smartphone. This would be significantly easier to use, but I was not able to test this mode with my Mole.
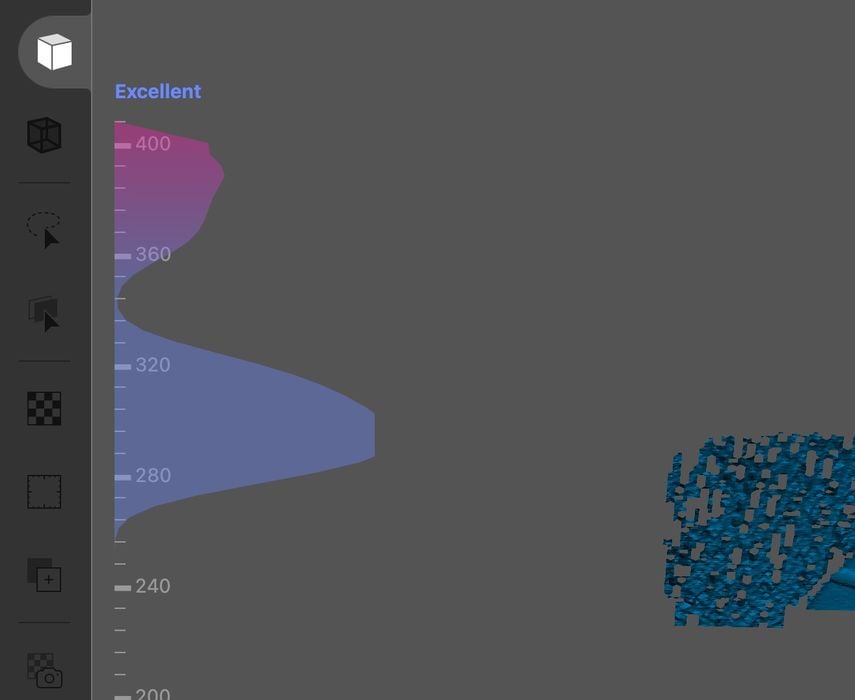
When scanning, JMStudio shows a graph of the current distance between the subject and the scanner. The game is to ensure you are within the “good” range. This is because the scanning process is essentially the act of sweeping a virtual cube across all surfaces of the subject. That cube is at a particular distance from the scanner, and the graph can help you manage that distance.
Mole 3D Scanner Alignment
One of the most important features in the software is “alignment”. This enables you to capture all sides of an object.
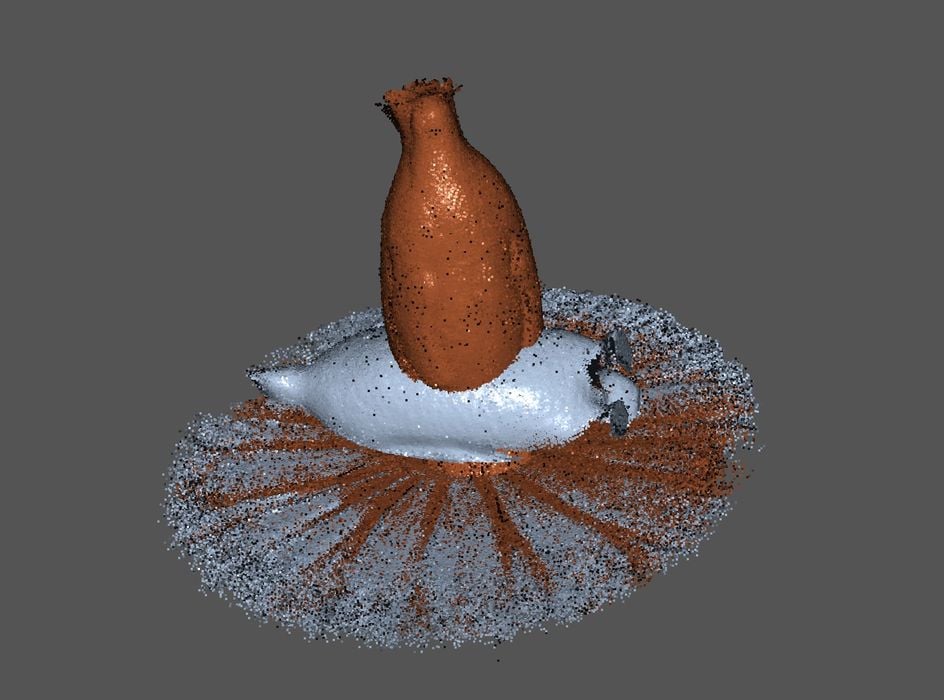
For example, say you’re scanning a bottle. While you might have captured most of the bottle, you didn’t capture the bottom of the bottle because it was hidden against the floor or turntable.
The solution to this dilemma is called “alignment”. The idea is that you take two different 3D scans, each with different orientations. In the case of the bottle, you’d perform a second 3D scan with the bottle on its side, thus exposing the bottom.
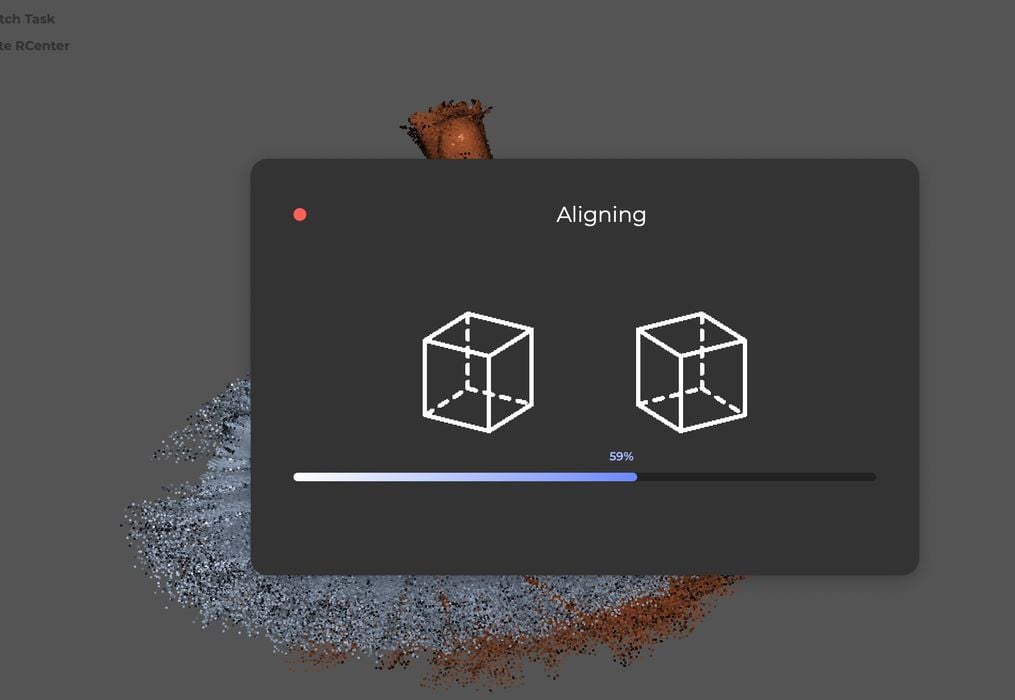
Alignment is pretty easy in JMStudio, and there are two ways to align.
The first, and easiest method is “automatic”. This procedure has the software attempting to figure out how the two scans can fit together. I presume this is done by rotating the scans around until they are “close”.
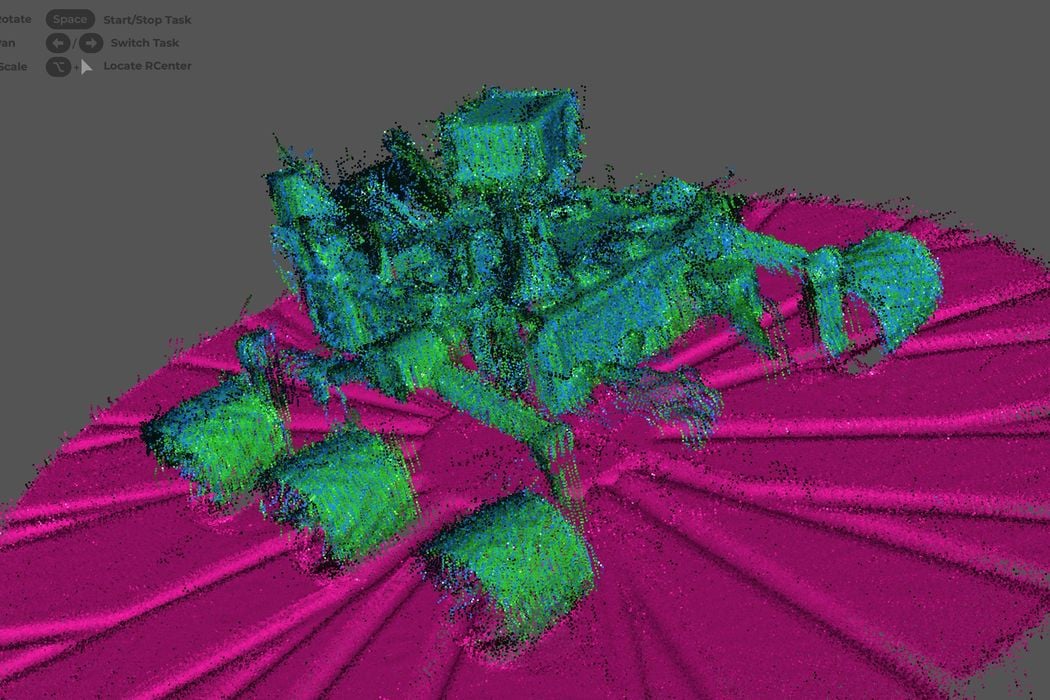
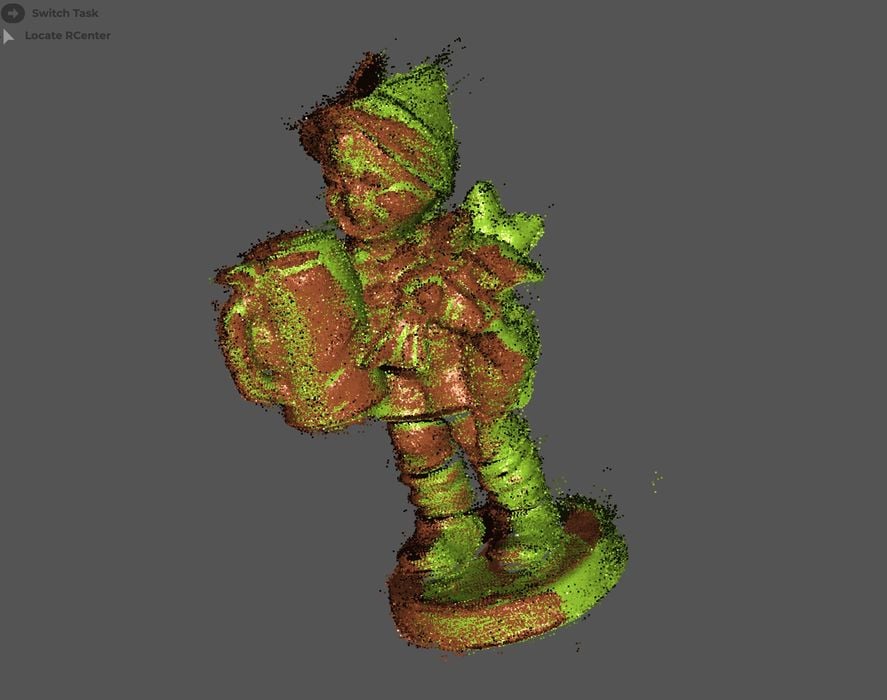
I found the automatic alignment procedure would usually work, but sometimes not. It seemed to depend on the geometry of the subject, with more complex and incomplete scans tending to fail. By the way, an alignment failure is always interesting to observe, as it is usually a wild mashup of your subject.
Should the automatic alignment fail, there is a manual mode.
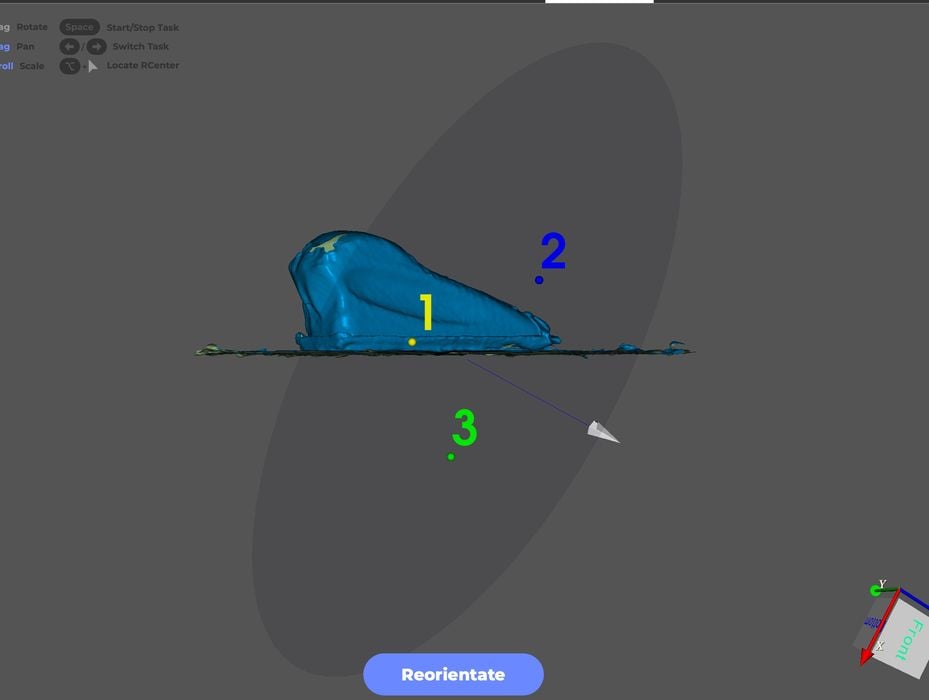
To manually align scans, you select two scans, which are displayed side-by-side. Then you create “alignment points” by pressing the “+” button.
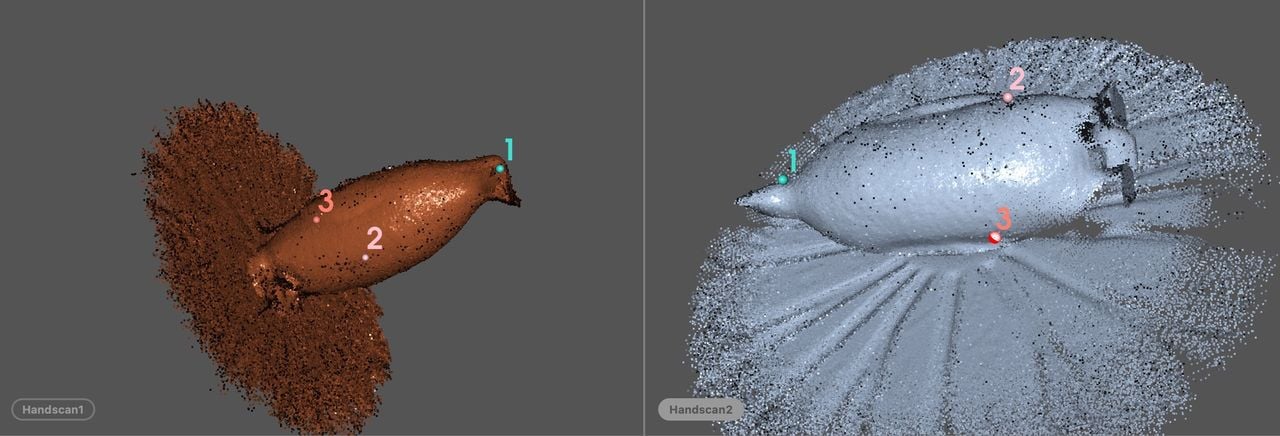
The alignment points appear on both scans, and are numbered 1, 2 and 3. Your job is to move the points on each scan so that they are in the corresponding positions. For example, if scanning a sculpture of a dog, point 1 might be placed on the left front heel of each scan. Point 2 might be placed on the tail of each scan, and point 3 could be on the nose.
These three point locations in 3D space provide a strong hint to JMStudio of how the two scans might be placed together — or, “aligned”. The software then overlaps the two point clouds and can then process them into a single 3D model including both top and bottom of the subject.
An important tip for alignment is to attempt to capture as much geometry as possible for each scan. It’s too easy to think, “no problem, that portion will be scanned next time”. Except that you might miss it because it’s hard for human brains to keep track of geometry when it’s rotated.
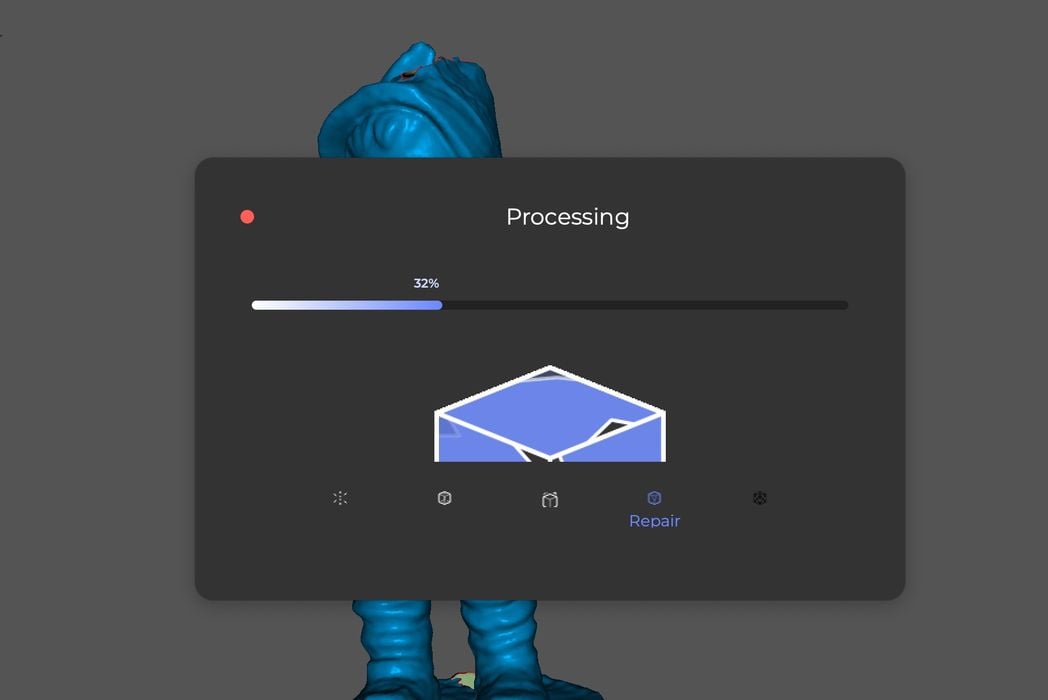
After “fusion”, the resulting 3D model can be edited, meshed, repaired and exported.
One step that I found confusing was the texturing step. Usually in 3D scanning of this type, the scanner would occasionally capture some full color frames of the subject from different angles. Then later on these would be projected onto the 3D model, thus applying a color texture to the surface.
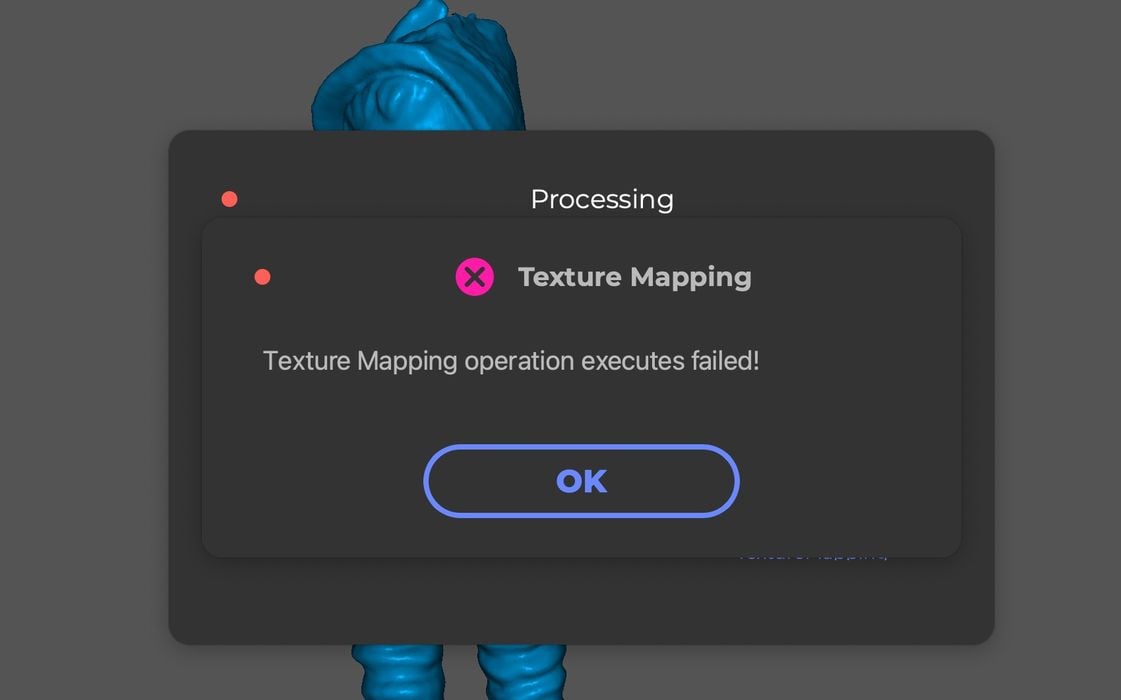
While JMStudio seemed to have a texturing option, I could never get it to work. Later, 3DMakerpro explained that the particular Mole system involved does not do texturing as that is an optional additional feature. This means that the low-cost Mole is not able to capture full color textures, but is excellent for geometry captures.
This is part two of a three part series, please read parts one and three.
Via 3DMakerpro