
I had a chance to assemble and test Voxelab’s new Aquila X2 desktop 3D printer.
This is part one of a two-part series. Part two is here.
This 3D printer is an inexpensive model, yet produces excellent output, as you’ll see later in my review.
Aquila X2 Features

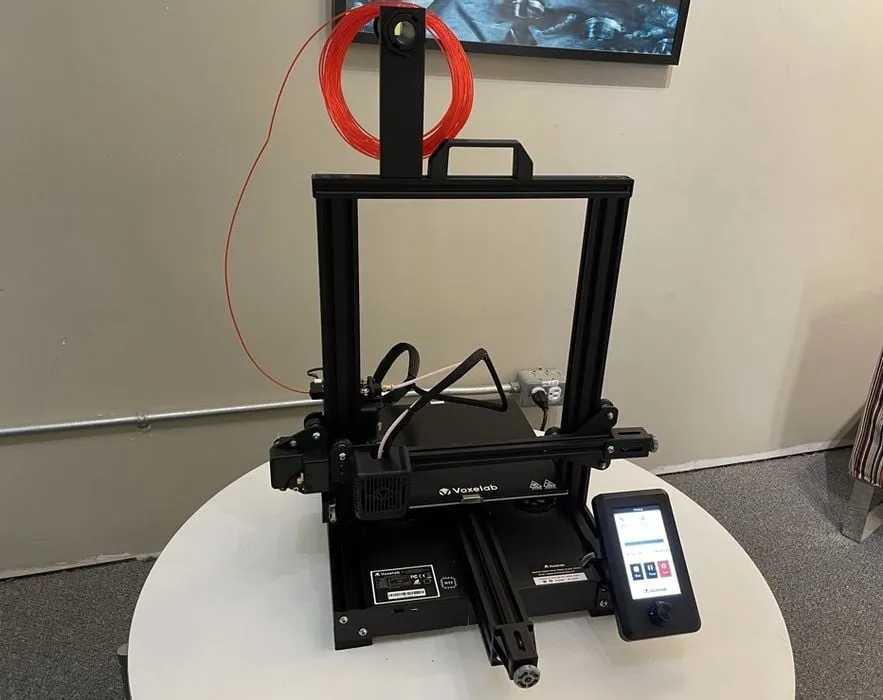
An open-gantry device, the new Aquila X2 has a number of features that put it ahead of many other low-cost devices. Features I particularly noted were:
- 32-bit controller; there is enough processing power to handle relatively rapid print speeds
- Silent stepper drivers; the motion system is nearly silent when operating
- Meanwell brand power supply provides more than enough power to quickly heat the build plate
- Carborundum glass build plate is perfectly flat and conducts heat easily
- Generous build volume of 220 x 220 x 250 mm
- Rigid aluminum frame with a very sturdy structure; I found no vibrations when printing
- Resume printing: Aquila resumes the job exactly from where it stopped when power is restored
- Filament auto feeding: An inserted filament starts pulling automatically, and an enhanced module ensures stable feeding
- Color touchscreen with a friendly, icon-based interface
- Open software support, meaning you can use any of Ultimaker Cura, PrusaSlicer, Simplify3D or Voxelab’s own VoxelMaker slicing software
Most other 3D printers in the same price range have a smaller print volume than the Aquila X2, or other 3D printers have the same print volume as Aquila but are more expensive. Aquila seems to be one of the most cost-effective options.
Aquila X2 Unboxing
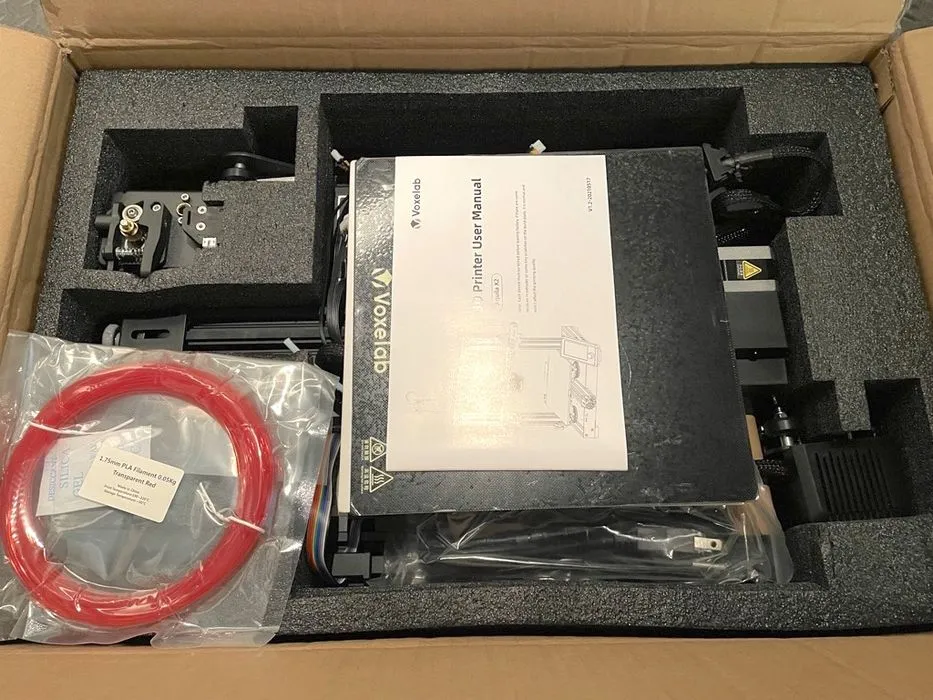
Like most 3D printer kits, the Aquila X2 was very well packaged. There is little chance the printer would be damaged in normal shipment conditions — although there is always the possibility of a catastrophe, and no vendor can overcome that.
The printer comes with quite a few extra items.
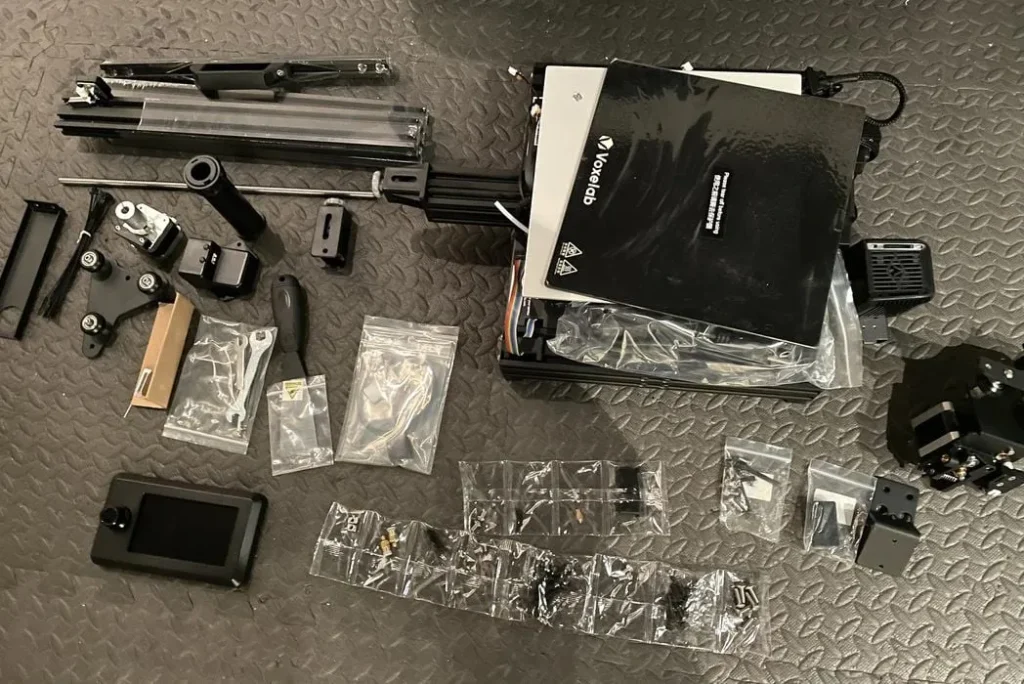
I laid out all of the tools and parts, which were all present when I took inventory. It’s rare these days to encounter missing parts, but it’s always a good idea to check just in case.
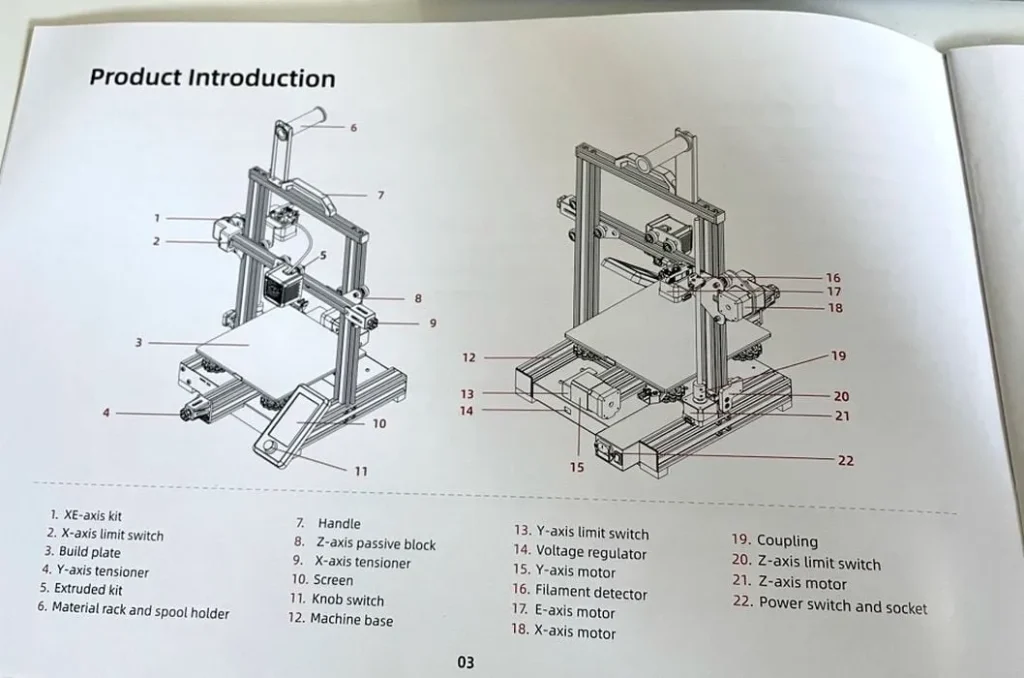
The next step was to review the product introduction and the user manual, which was quite easy to understand and follow. This is quite important, because for many buyers instructions are critical — not everyone is sufficiently familiar with machines and electronics to overcome assembly issues. Voxelab must be thinking of a very broad audience for this machine.
Fortunately, each and every item in the 3D printer kit is labeled, and that’s definitely not true for many kits. This includes the main printer mechanisms, cables and other parts.
Many of the “other parts” are not what I would think of as spare parts, but in fact are tools needed to assemble the printer such as the Allen keys, wrenches and screwdrivers. In fact, you likely will not require any other tools to assemble and tune the Acquila X2 except those that come with the machine.
Aquila X2 Assembly
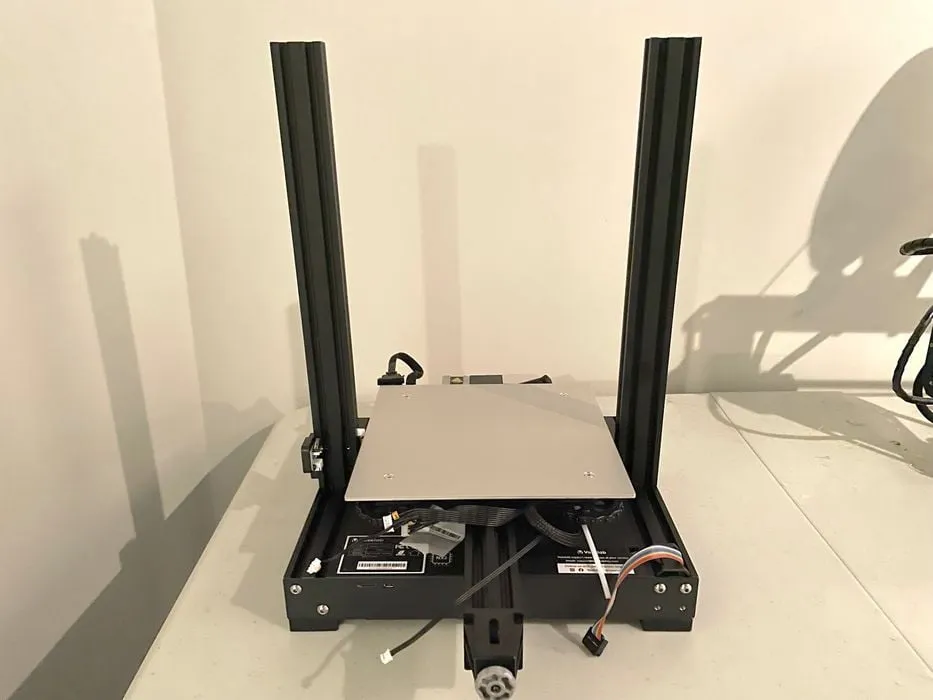
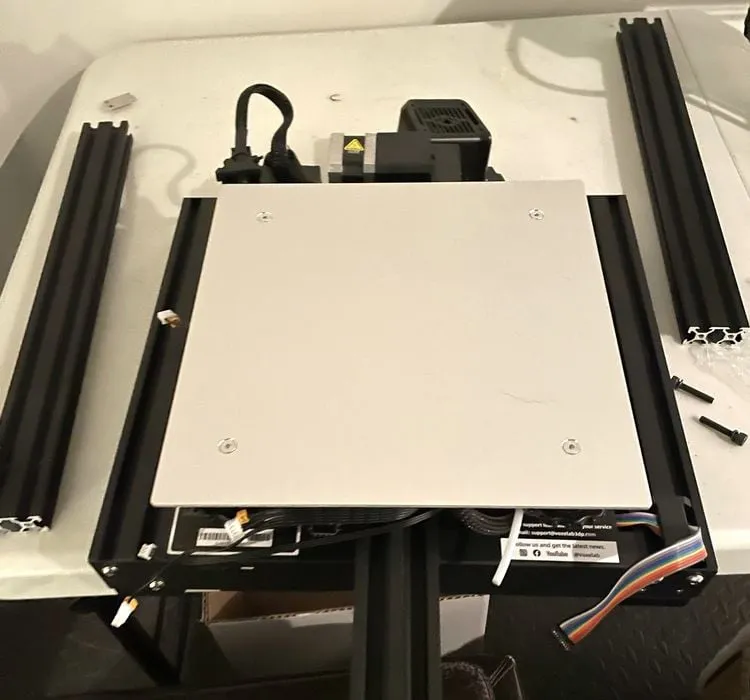
Assembly of the unit essentially involves building the gantry on top of the base unit, and connecting a number of cables. This is typical of today’s 3D printer kits, but like all other 3D printers, the Aquila has some unique aspects.
Installation of Z-axis limit switch kit and z-axis profiles was not difficult. Strangely, there was no step in the assembly instructions for clipping the glass build plate onto the heated plate. I figured this out based on the images in the user manual, and it wasn’t difficult to do.
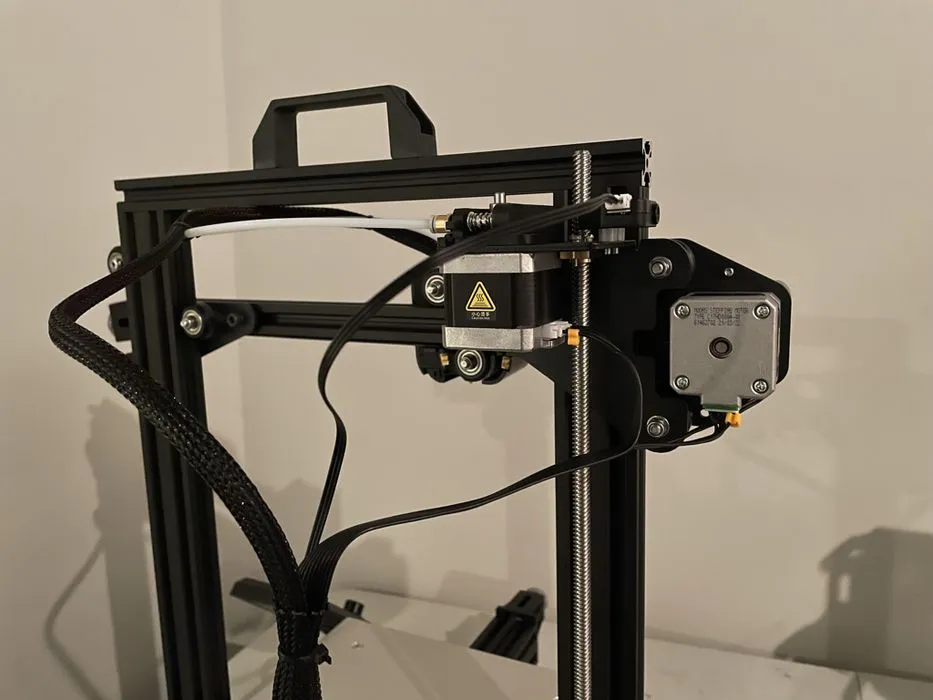
Installation of the Z-axis motor kit and T-shaped screw rod was a bit tricky. It took me a while to find the correct nuts to unlock to ensure the screw rod was secure. I really do not feel like I have the screw rod in the correct spot despite reviewing this step a number of times. However, the printing eventually did work correctly, so it must be good enough.
It might be helpful to view an assembly video before attempting a print, just to make certain you’ve got all the pieces installed correctly.
It is important to review where the back and front of the printer base is located. I made this mistake and had to redo this step, and it still does not seem correct. But again, the prints work correctly, so it must be good.
The next step was installation of the pneumatic joint, and X-axis kit. I found these steps were easy to follow.
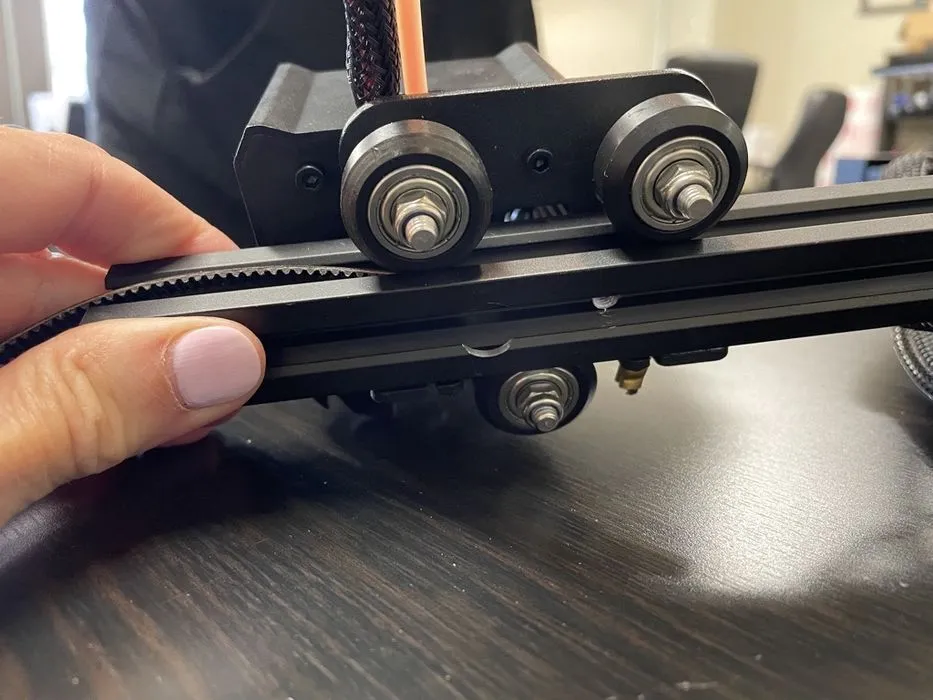
That was not the case when I attempted installation of the synchronous belt, extruder kit and Z-axis passive block.
This step took me longer than most people probably would take because I went through my normal order of operation, which is to install based on how it looks in the picture rather than actually carefully following the instructions.
After reviewing a YouTube video I discovered that I had installed the Z-axis passive block backwards! I removed it and installed it the correct way. Always check the instructions twice before committing!
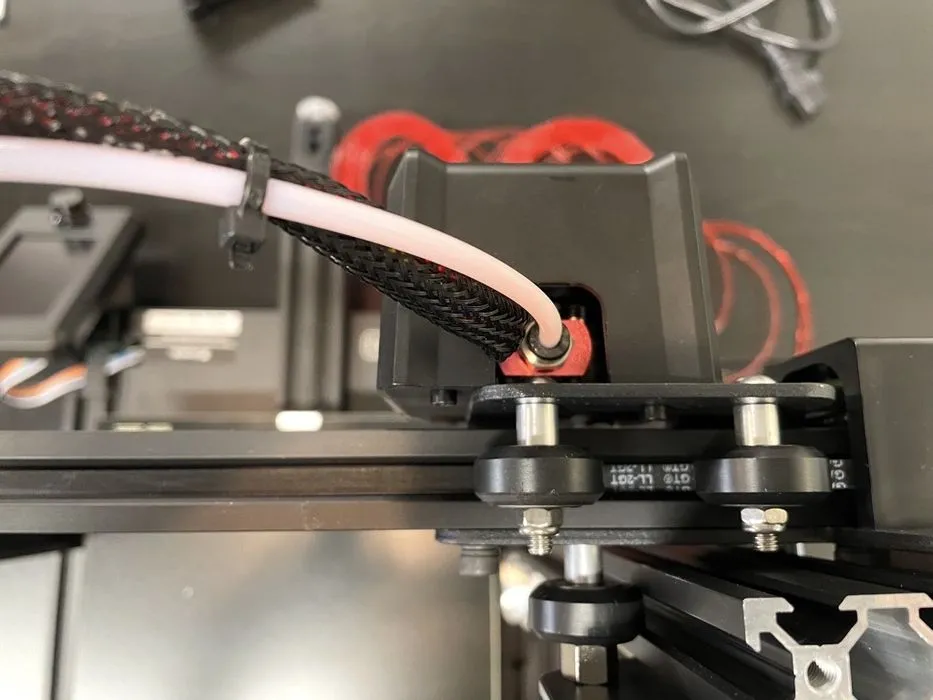
The next step was to install the X-axis tensioner. I found this step tricky to complete as the synchronous belt did not seem to be long enough to fit into the notches. I connected it into the notches first and then into the tensioner. This worked but also seems to maybe not be quite correct. The tensioner on my printer seems to be slightly tilted upwards instead of level.
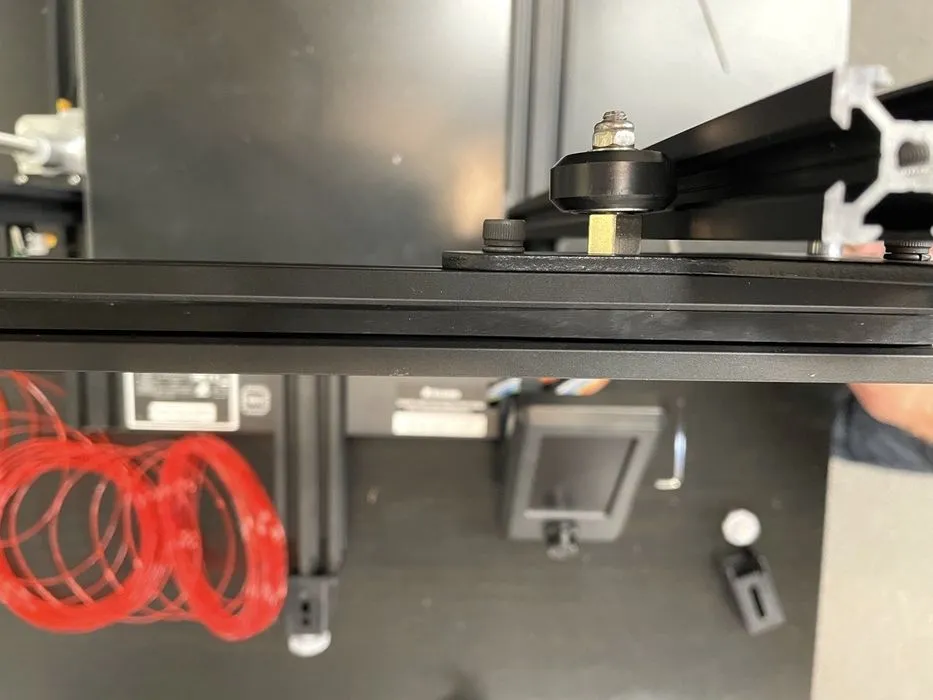
On the X-axis next was the moving kit. This is when I noticed that I may have the T-shaped screw in the wrong spot because the moving kit does not move easily. More YouTube video watching is required!
Installation of the gantry profile and screen kit came next. This step was quite clear, except that the screws at the top of the gantry do not seem to fit easily.
I recommend a big change to Voxelab’s kit that would have made many of these steps easier. For the sealed bags of parts, the screws could be labeled to match the corresponding screw numbers in the steps. This would have eliminated much of my guessing during the assembly. Even now, I am pretty sure I did not always guess correctly, in spite of the machine printing correctly.
After all the mechanical parts were assembled, they must then be connected with cables.
I found it challenging to follow all eight steps as they are written in the assembly manual, but it was somewhat confusing. I ended up connecting all wires into the spots that matched the pin sizes and this worked.
This is part one of a two-part series. Part two is here..
Via Voxelab