

I have been very fortunate to be able to spend considerable time testing the new Calibry handheld 3D scanner, and wow, what a device!
This is part two of a four-part series on the Calibry handheld 3D scanner. Please read parts one, three and four. (Please note parts three and four will be published tomorrow, 24 June, and these links will work at that time.)
In this part we’ll look at the operations of the Calibry handheld 3D scanner.
Calibry Scanning Modes
One of the most interesting features on the Calibry system is its ability to scan using different modes. Previous handheld 3D scanners I’ve used had only a single mode available.
What do I mean by “modes”? It’s the method by which the scanner is detecting geometry. One typical mode used by many handheld 3D scanners is by “target”. You’ll soon see an image of how this is done below.
In this mode targets with a known and reflective surface are placed all around and on the subject. The scanner easily detects them and when four or more are seen at once, the scanner can quickly compute its position in 3D space. Of course, the problem with this mode is that you have to spend time placing targets in advance. You also must ensure the 3D scanner is always pointed towards at least four visible targets or it will lose track of its position and the scan fails.
The Calibry 3D scanner does have this mode, and it’s quite useful for larger 3D scans as you will see later in this story. But the Calibry can also use two other completely different modes for 3D scanning!
One is by geometry. In this mode the scanner attempts to gradually develop a 3D model of what it’s seeing in real time and tracks its position by observing changes in the detected geometry. This is a mode suitable for smaller objects, and works quickly because there’s no need for target setup. However, a subject with well-defined differentiated shapes seems best for this mode, like a mechanical object or sculpture.
Finally, the Calibry system can also use texture-based positioning. In this mode the scanner is observing color textures that appear in the scene and as they change appearance the software can keep track of the scanner’s position in 3D space. This is a very easy mode to use, but only if there are sufficiently different and unique textures visible in the scene — and they must be visible from all directions you’ll be pointing the scanner.
In the past I’ve found 3D scanners less useful because I’d always run into a scenario where the scanner’s only operational mode was not optimal for the specific subject being scanned. Normally you’d need more than one scanner to supply all required scanning modes. But now Calibry solves that by giving you the ability to change the scanner’s mode at the touch of a button. You can select the scanning mode that matches the situation. And if you’re not sure, just try all of them, because it’s that easy to do.
It’s almost like having three different scanners in one!
Calibry Nest Workflow
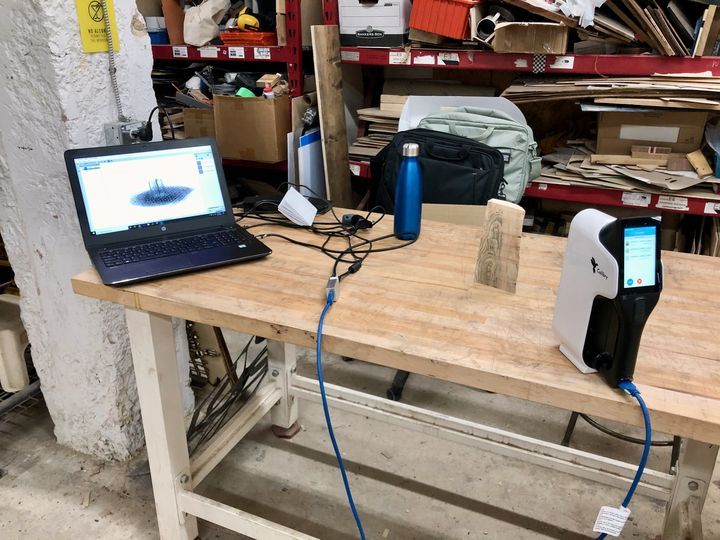
I can tell you the workflow using the Calibry system is quite straightforward once you’re shown how it works. Here’s the basics of the workflow, once you’ve set up the hardware and subject for scanning:
- Launch Calibry Nest on the laptop; the handheld unit will recognize this and get itself ready for scanning
- Hold the scanner in your hand and you’ll see an image of the scanner’s current view. It isn’t scanning yet, but you can use this mode to practice your scanning movements to come
- Select the mode for this scan job, texture, geometry or targets
- Point the scanner at the target and hit the “start” button
- The laptop is then capturing scan frames, and you need only sweep the scanner’s view over the entire object
- Hit stop to complete the scan capture
- On Calibry Nest, trigger the three stages: registration, finalization and texturing, which can be done individually or automatically
- Edit your 3D model in Calibry Nest using the extensive editing tools
- Export your 3D model, and you’re done
While this sounds simple, and it is, Calibry allows you to tweak settings throughout each stage to optimize the scan and its analysis.
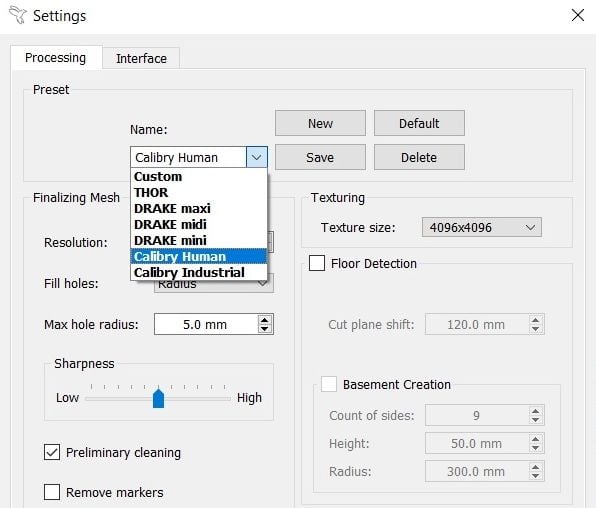
For example, after a session has collected a series of capture frames, they can be repeatedly analyzed using different parameters. Calibry nicely provides a couple of pre-made profiles that hold decent default parameters for several typical scenarios, including scanning an “industrial part”, or a “human”, both of which are entirely possible with the Calibry. You can also set up custom profiles for your own specific scenarios.
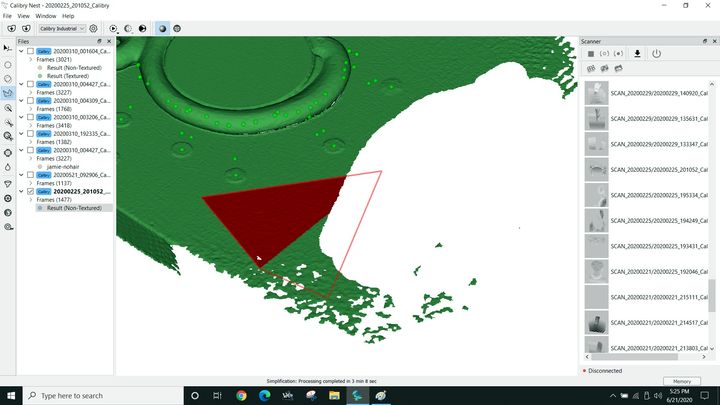
One of the powerful features of Calibry Nest is its editing capabilities. Once a 3D model is generated it will typically include some extraneous segments, such as the table the object was resting upon. These must be chopped out, and that’s very easily done with the Calibry Nest editing system. You can even perform some repairs on 3D models as there can be holes where an insufficient density of scan data occurred.
Calibry Limitations
While the Calibry system is quite flexible, there are a few limitations you should be aware of, beyond the cable length challenge.
One is that the scanner is really not able to operate properly in sunlight. The structured light pattern emitted by the scanner is simply overwhelmed by the sun, and this could potentially also happen indoors if the lighting is extremely bright.
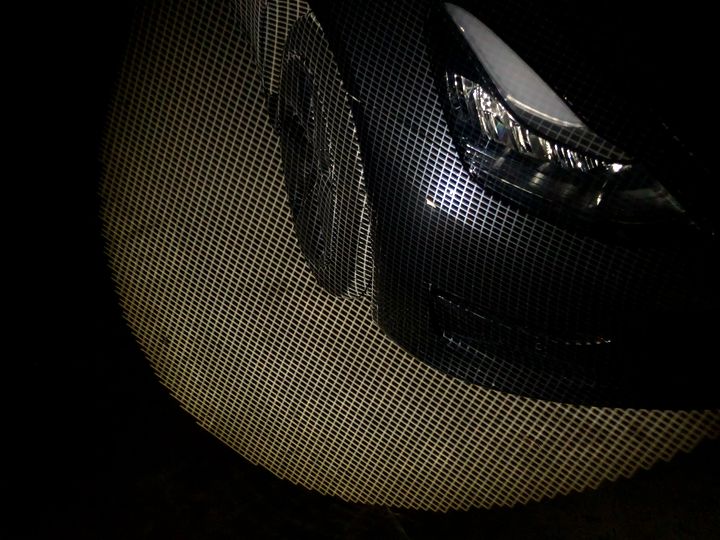
I’m told Calibry scanning could be best done at night, and that’s something I tried myself. It worked extremely well in a dark room, as the scanner had only its own light source to “see”, with no “competition” from other light sources.
Like many 3D scanners, the Calibry has challenges with transparent or very shiny objects. This is because the light is not following a path anticipated by the software, and thus it cannot easily determine where the shiny or transparent surface actually exists. For some shiny objects it’s necessary to coat them with a temporary opaque surface spray to eliminate the light refractions and reflections.
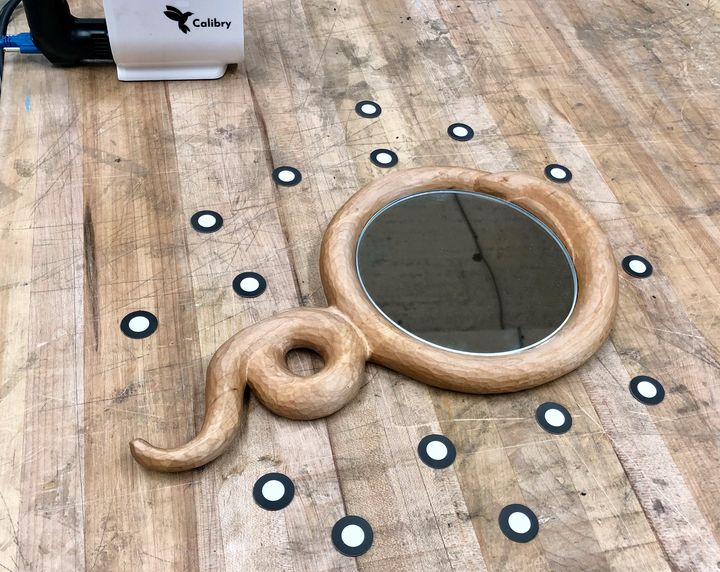
That said, I did attempt to scan some problematic objects of this type, such as this mirror, and was impressed with how Calibry Nest was able to deal with them. Some systems simply go berserk when encountering unpredictable light patterns, but the Calibry system was able to consistently isolate those effects to the affected region only.
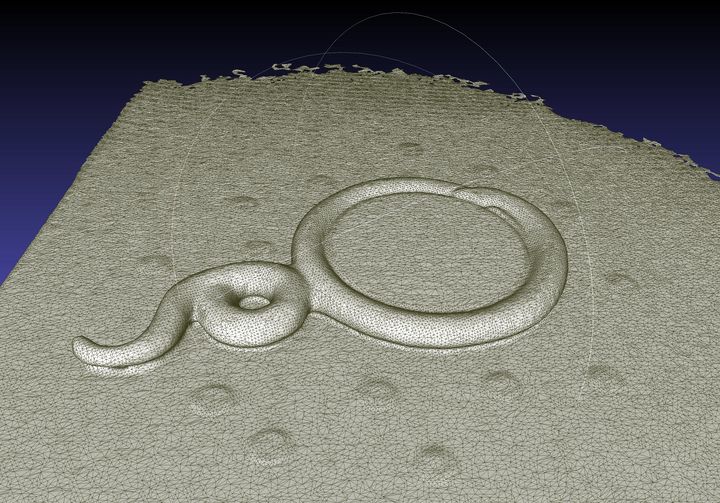
Here’s the 3D model of the mirror 3D scan, which isn’t that bad at all. In fact, it’s near-perfect! It’s almost as if the Calibry Nest software was able to detect the wacky scan data from the reflection and eliminate it. Impressive!
There’s one more thing you should know about the Calibry. I’m not sure it should be called a limitation, but it is certainly a constraint. The Calibry has an effective range during which it is properly capturing data. In other words, if you are holding the scanner too close to the object, or too far away, that won’t work. This is likely due to the size of the structured light pattern.

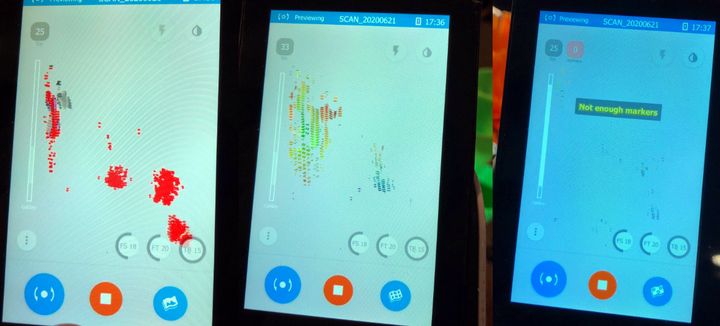
In practice this is relatively easy to deal with, as the view on the handheld’s screen shows you the current surface color-coded: red if you are too close, blue if too far away and a gradient of colors in-between, with green being optimal. Basically you have to hold the scanner at just the right distance to ensure you’re seeing “green” on the scanner.
However, you’ll usually see red and blue sections because there will be some portions of the subject farther or closer than the segment you’re currently scanning. The idea is to sweep the “green zone” along the surface and never have only red or blue showing.
In all, the Calibry’s constraints were somewhat less than I have encountered in other 3D scanning systems.
This is part two of a four-part series on the Calibry handheld 3D scanner. Please read parts one, three and four.
Via Thor3D
[UPDATE] Some readers have asked whether this multi-part story was sponsored by Calibry. The story is not marked “sponsored content” as is our policy, and definitely was not sponsored, however the equipment was temporarily loaned to us for purposes of the review. In our experience, the Calibry 3D scanner is as good as we’ve written.