
I have been very fortunate to be able to spend considerable time testing the new Calibry handheld 3D scanner, and wow, what a device!
This is part four of a four-part series on the Calibry handheld 3D scanner. Please read parts one, two and three.
This part explains my experience using the Calibry 3D scanner to capture 3D models of larger objects and and my conclusions on using this device.
Scanning A Large Object with Calibry
Another challenge I undertook with the Calibry was to capture larger objects. While some human subjects can be large, there are particular challenges in capturing even larger items.
With the Calibry I am quite certain it is possible to capture very large objects, like entire automobiles or even airplanes. There’s a trick to doing so that requires a bit of explanation.
As you might recall from above, the Calibry scanner is “seeing” only a small section of the subject at a time. After scanning is completed it must somehow connect all these images together to form a dense point cloud representing the object.
However, with a large mechanical object there will usually be segments that are separated but have near-identical single frames. This seems to confuse the Calibry system sometimes when in geometry or texture mode. For example, say you are 3D scanning a very large block. With so much flatness, many scan frames will have the same flat view. How can Calibry Nest fit it all the pieces together?
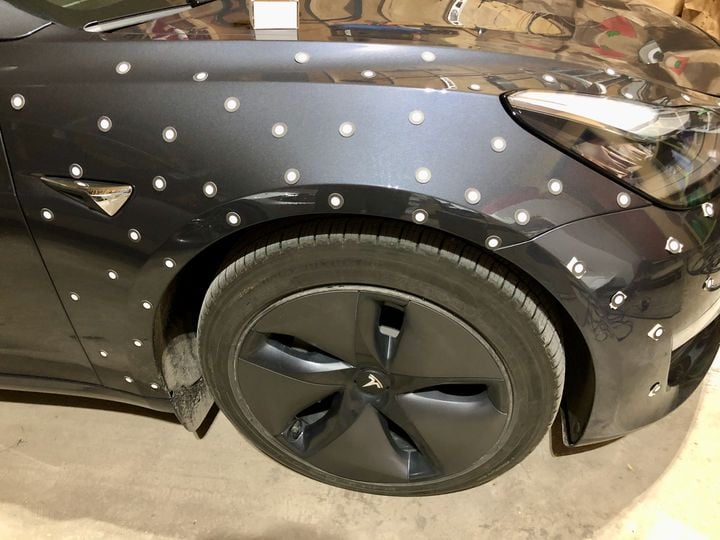
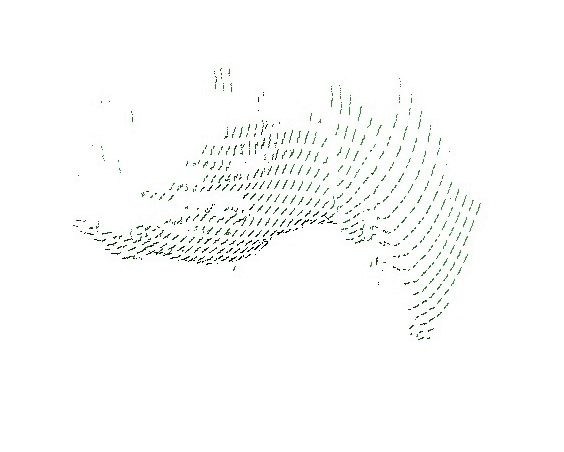
Sometimes it can’t. Here I 3D scanned a car fender area. In the scan there are plenty of similar curvy sections, and the software got a bit confused, leaving me with this strange result that seems to have multiple wheels even though there was only one in real life:

This can also happen when scanning humans, and if that’s the case you’ll end up with a horrifying transporter accident like this:

This seemed to happen frequently for me when attempting to 3D scan larger objects, but then it was suggested by the helpful Calibry support folks that I should use target mode instead of geometry or texture.
The targets would enable Calibry Nest to more easily register each frame in the 3D scene as they are highly visible and not moving. The unique placement of the targets allows the scanning system to keep track of its position over a larger 3D space.
Once I understood this, 3D scanning larger items became far easier to accomplish.
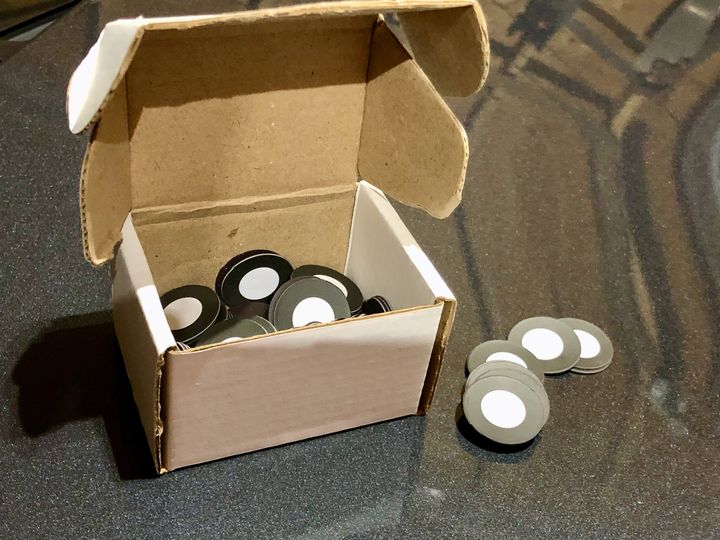
Applying targets can be straightforward, as the box of them supplied with the Calibry were magnetic. For metal objects it was as simple as tossing them onto various surfaces at random locations. Sometimes in the case of 3D scanning a car fender I found the car was actually made of plastic in certain areas instead of metal, and the targets did not stick!
I’m not sure if Calibry supplies stick-on targets, but they may do so. I didn’t have any, so a quick application of adhesive tape fixed that and allowed me to continue 3D scanning.
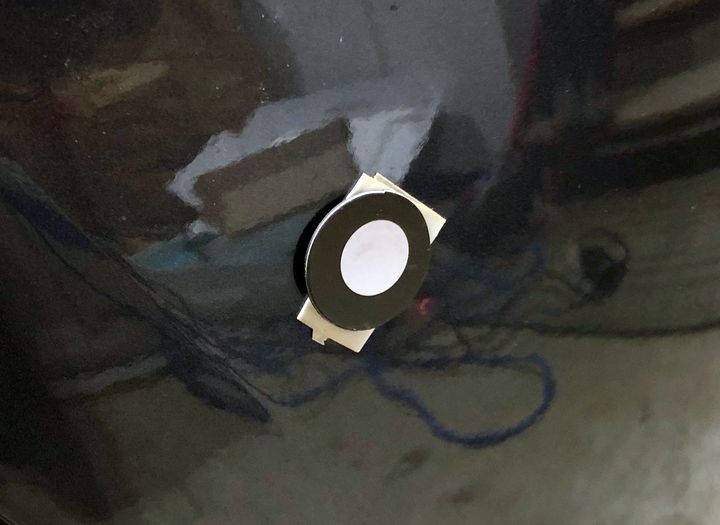
I found an issue when using targets, however. It seems that whenever I would aim the scanner directly at a target (i.e., perpendicular to the target’s surface), it would “disappear” from the scanner! I’m not quite sure what’s going on, but it may have something to do with the nature of the reflective surface.
Thus occasionally during a scanning session using targets I’d suddenly “lose tracking” and the scan would stop. This was a bit maddening because I believed I was doing everything properly and ensured a sufficient number of targets were in view.
Eventually I realized this was because in the course of my “organic” movements I would occasionally point the scanner directly at targets by chance, they would disappear and the scanner would suddenly not have the four or more visible targets to keep tracking.
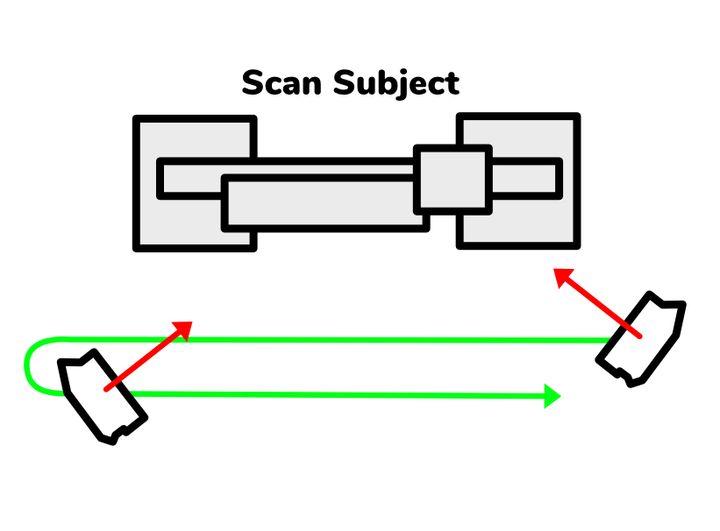
Pro-Tip: The solution was straightforward once I understood this: always hold the scanner at an angle to the targets. This meant that for a large object you’d start at one end with the scanner at an angle, and maintain that angle as you pass along the length of the object. Then, you’d carefully turn the scanner around in the opposite direction and retrace your route to capture anything obscured during the first pass.
The tricky part was in turning the scanner around, as you’d have to somehow maintain visibility of four or more targets while doing so, and not point the scanner directly at a target. But it’s a lot easier to do than it is to describe the process. In the end I was easily able to sweep through larger scans, although I’d have to think about target placement to allow for these turnarounds.
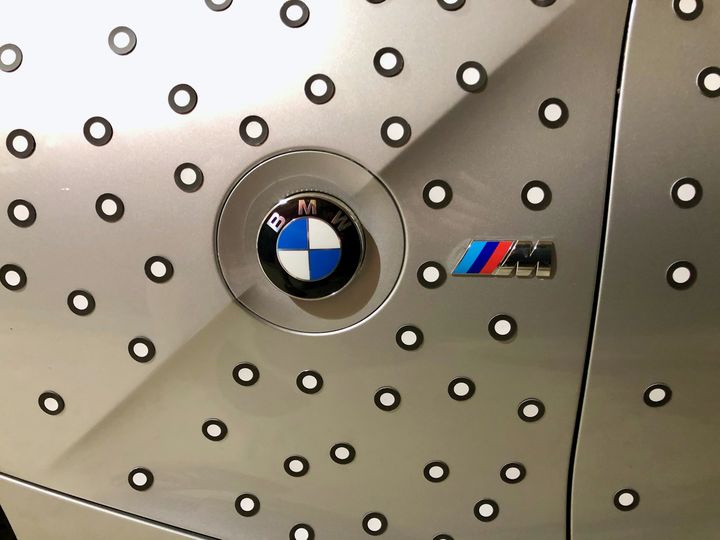
In the case of the BMW above, I was not only able to successfully capture the entire fender in a single scan operation, but with some editing in Calibry Nest I created a 3D printable model of the fender. Here I printed it out:

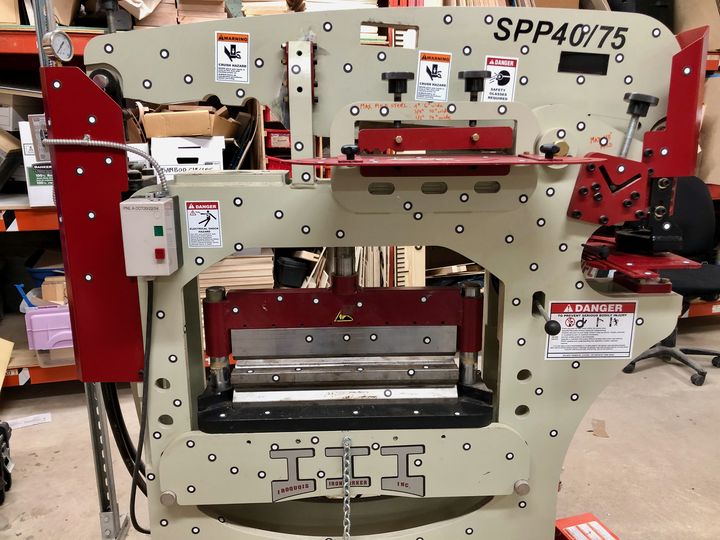
Here’s a complex mechanical device I 3D scanned with some targets, in real life:
And the resulting 3D scan:
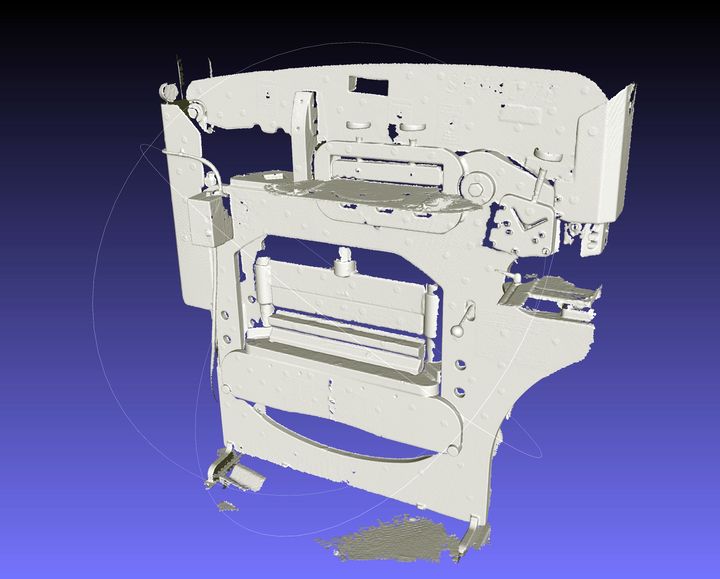
As you can see, the scan is quite detailed. The actual scan process took only a minute or two, once things were set up — and I moved the handheld unit properly.
I should mention that the processing time required for Calibry Nest to register and finalize a 3D model is obviously dependent on the number of frames captured. I found the system would bog down when many thousands of images were captured, so I would limit my sessions to less than 3-5,000 images, or a few minutes of scanning. The registration is relatively quick compared to the texturing processing, which can take quite a few minutes to complete.
For exceptionally large objects there is a way to capture them: simply repeat the process on segments of the object, and then use Calibry Nest’s editing features to join two or more scans together to form a larger object.
In this way you could in theory scan as large an object as your workstation could handle.
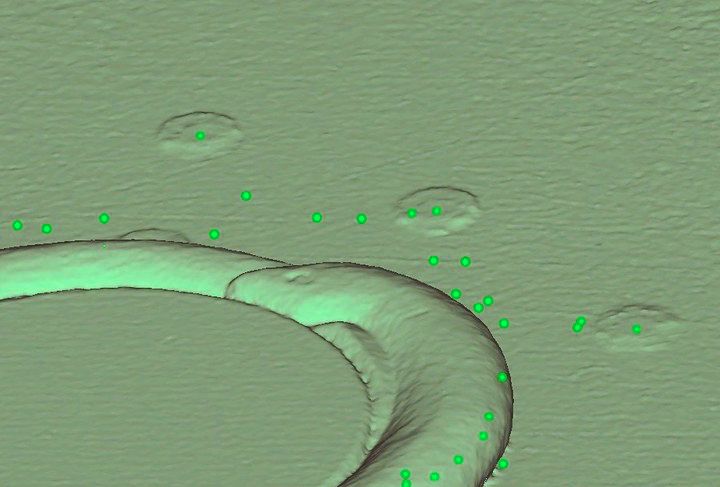
The Calibry is so accurate that it actually picks up the thin magnetic targets while 3D scanning and they will actually appear in your 3D model — if you let the software process in default mode. You would normally have to pop open a 3D editor and smooth them out manually.
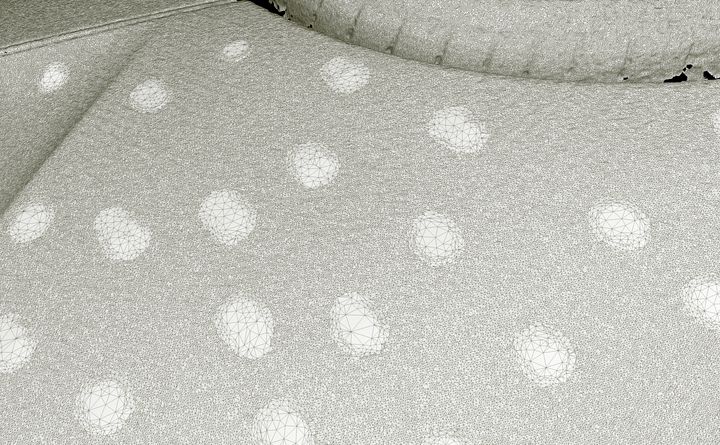
However, there’s a very handy setting in the Calibry Nest processing options that automatically removes the bumps created by the targets. Evidently the software keeps track of the target locations and is thus able to easily eliminate them.
More Calibry Experience
Fabbaloo friend Joel Telling, the 3D Printing Nerd, has also gone hands-on with the Calibry scanner.
Calibry Conclusions
After using the Calibry handheld 3D scanning system for several weeks, I am quite impressed with the device’s capabilities. It is easy to assemble and operate, while producing excellent 3D scans using a variety of techniques.
I’m pretty sure that one could become far more experienced than I did by spending more time tweaking the scanning parameters and delving even deeper into the comprehensive editing system provided by Calibry Nest. 3D scanning results could certainly be even better than the excellent scans I obtained.
It seems pretty clear that those who built the Calibry also use it themselves, as I constantly encountered ease-of-use features. These made it a breeze to learn and use this device.
As easy as it is to learn, the system includes quite a number of knobs to tweak your scan and subsequent processing. While my results were quite good using mostly default settings, I am pretty certain you could obtain even better, near perfect 3D scans with some additional experience and training.
There’s one more thing that I should mention about the Calibry 3D scanner: its price.
Handheld 3D scanners have traditionally been quite expensive. My first experience with one was a unit that cost well over US$60,000, and frankly it did not produce scans as good as what I obtained with the Calibry. It was also a lot harder to use.
The Calibry system — again without a workstation that you must provide on your own — costs a mere €4,990 (US$5,600). A fully functional and highly flexible, full color, lightweight handheld 3D scanner available for less than US$6K!
If you’re in the market for a handheld 3D scanner, you’d better take a long look at the Calibry.
This is part four of a four-part series on the Calibry handheld 3D scanner. Please read parts one, two and three.
Via Thor3D
[UPDATE] Some readers have asked whether this multi-part story was sponsored by Calibry. The story is not marked “sponsored content” as is our policy, and definitely was not sponsored, however the equipment was temporarily loaned to us for purposes of the review. In our experience, the Calibry 3D scanner is as good as we’ve written.
Great review. If anyone wants to see data or interested let me know I am happy to assist.
Always here to help out. [email protected]