
I have been very fortunate to be able to spend considerable time testing the new Calibry handheld 3D scanner, and wow, what a device!
This is part three of a four-part series on the Calibry handheld 3D scanner. Please read parts one, two and four.
This part explains my experience using the Calibry 3D scanner to capture 3D models of small objects and medium-sized objects, as well as 3D scanning live subjects.
I put the Calibry system through a series of tests to see how well it worked.
Scanning Small Objects with Calibry

This turned out to be the sweet spot for the Calibry, as it was consistently able to capture wonderfully detailed scans of smaller objects, and it was very easy to do so. Larger objects can certainly be scanned as you’ll see below, but it’s even easier to capture small objects with Calibry.
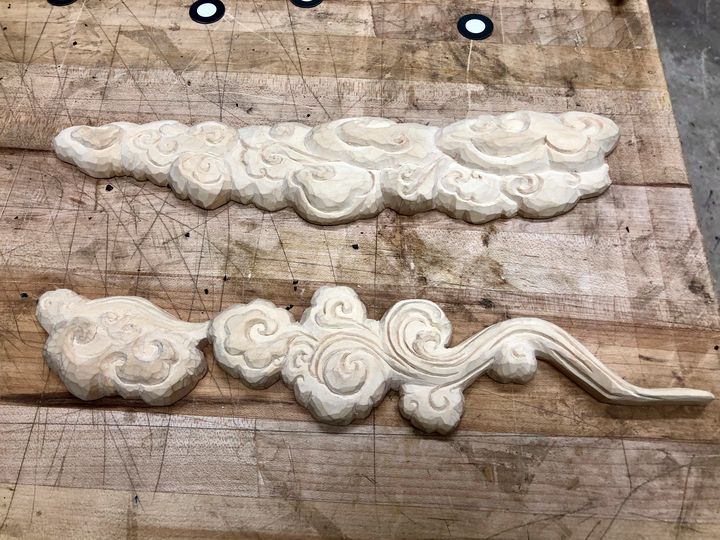
In one example, I scanned a wooden hand carving. This was done by using all three scanning modes.
Note that when using target mode on a small object you don’t necessarily have to put the targets ON the object; you need only put them around the object to ensure there are a sufficient number visible at all times. This is a really good way to 3D scan as the targets don’t affect the surface scan of the object, as they do slightly when applied to the object’s surface.
Scanning movements are relatively easy due to the light weight of the Calibry handheld unit, but you still must ensure you expose all surfaces to the view of the scanner. This will require you to mentally plot and execute a continuous path for the scanner through 3D space around the object.
Pro Tip: I found I could get better results by slowly rotating the scanner left and right in my hand while scanning. It’s a bit tricky to get this going at first, as it requires some eye-hand coordination, but the mesh density can be significantly increased in this way.
How does this work? The scanner is essentially collecting scan lines, as you’ve seen in the above single frame capture images. If you were to imagine these scan lines being dragged across the subject you would capture the geometry. But if you were to rotate those lines to different orientations during the scan you’d pick up more geometry. It’s like painting a surface with a brush horizontally and then again vertically: you’re more likely to achieve 100% coverage.
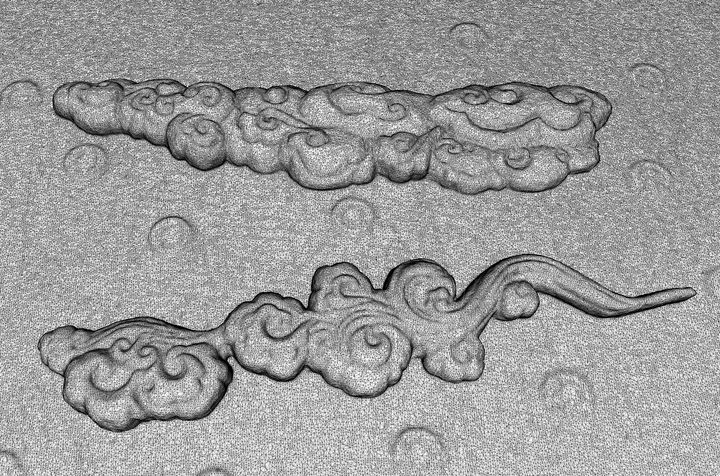
From the above carving I obtained this wonderful 3D model with almost no effort:
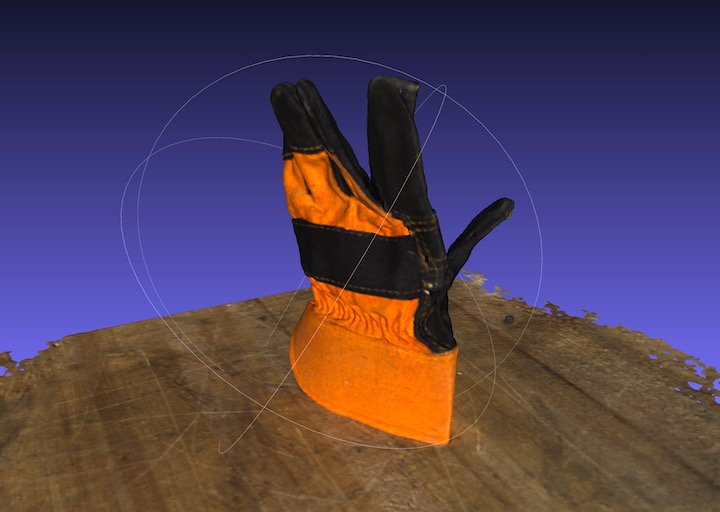
Here’s another small object I scanned: a glove, held erect by a piece of wood inside.
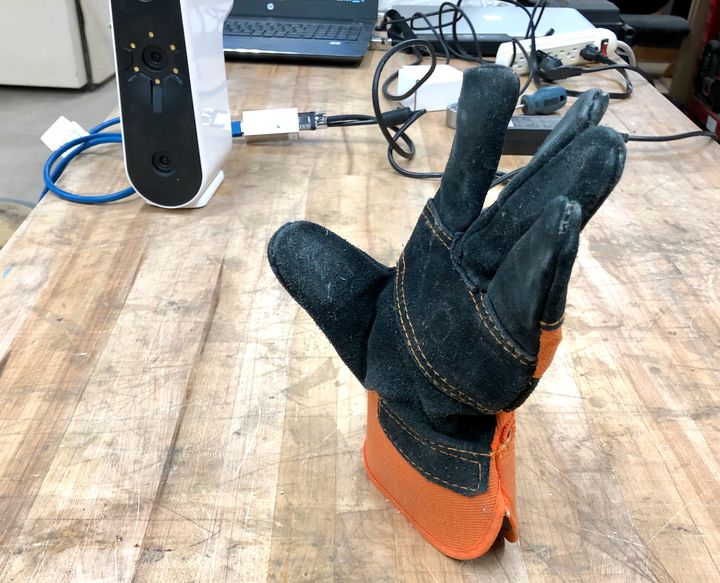
The object was captured with incredible detail, including the color textures. Here’s the resulting 3D model:
I attempted to scan a much smaller object to see what would happen. For this test I used a bolt, set upright. I hoped to see if I could capture the threads on this object.
Unfortunately, it didn’t work, as the object was simply too small for the Calibry to recognize. In speaking with the Calibry techs this was confirmed. I’d say the Calibry will scan objects of at least a several centimeters in width or larger. If you need to get a detailed 3D scan of a small object like a bolt, you should consider a different scanning solution, one that can handle “tiny” objects.
I tried a larger object, a combination lock, and had similar results. Perhaps this was also due to the shiny surface on some of the lock. Small and shiny are probably not good candidates for the Calibry, although I might have obtained better results if I had sprayed the combo lock with a temporary non-reflective surface coating.
For small — but not tiny — objects, the Calibry 3D scanner is an excellent choice for geometry and texture capture.
Scanning A Person with Calibry

Everyone wants to capture people with 3D scanners, so I thought I’d try that. People are notoriously more challenging to capture as they often misbehave during the scan and frequently have complex hair structures. Complex hairstyles may look attractive to the human eye, but they can be bad times for a 3D scanner.
It turns out that scanning humans is a bit more tricky than scanning static small objects, likely because people tend to move ever-so-slightly during the scan, and that movement is usually detectable by a scanner of Calibry’s accuracy.
3D scanning photo booths overcome this problem by capturing all sides simultaneously with multiple cameras, but that’s not the case here as you must sweep the Calibry handheld’s view over and under the subject during the course of several minutes. Note, however, that the Calibry 3D scanner is vastly less expensive than a 3D photo booth.
For scanning a human head, I’d advise the subject to be seated to aid in keeping the natural movements as small as possible, and of course you must ensure the subject is equally illuminated on all sides to avoid capturing shadows in the texture.
Pro-Tip: When 3D scanning a human head, have the subject sit on a rather low seat. While it may look and feel awkward, this position allows you to easily sweep the Calibry up over their head to capture the top. In my first human head 3D scans with the Calibry, I found I could not reach high enough because of the Calibry’s minimum scan distance.
Calibry Nest includes a processing profile specifically designed for human scans. This vastly simplifies the processing after the scan is captured, so long as you remember to switch to this profile from the “mechanical” profile. I will not explain how I know this.
For human scans I never used “target mode” because the misbehaving humans could not sit still and the targets would wiggle slightly. The subject would also be annoyed during the application of the targets, so I went with texture or geometry mode and was quite successful.
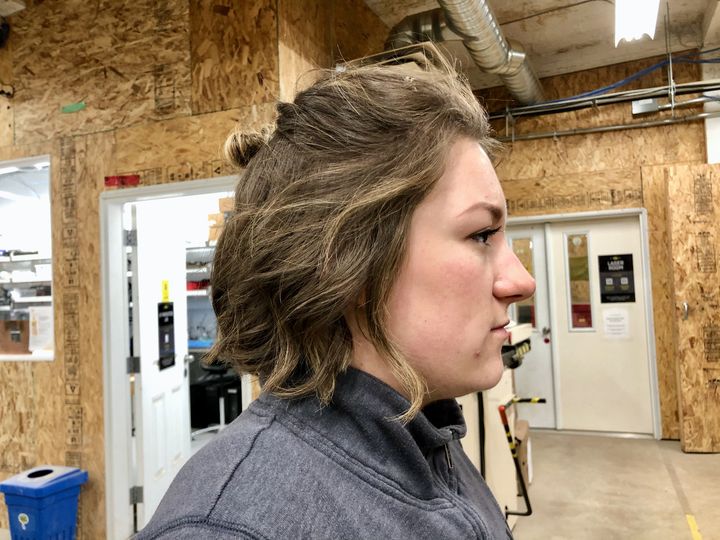
Here’s one of the several cooperative human subjects I used to 3D scan in real life:
And here’s the corresponding capture:

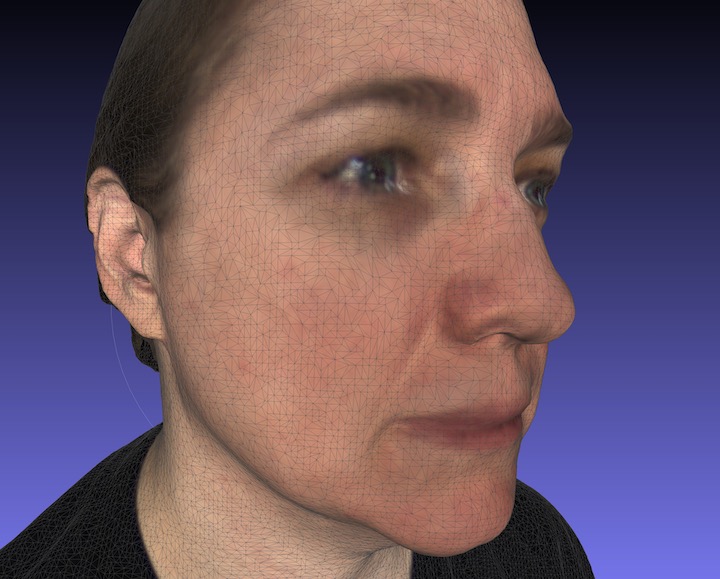
And the textured 3D scan:
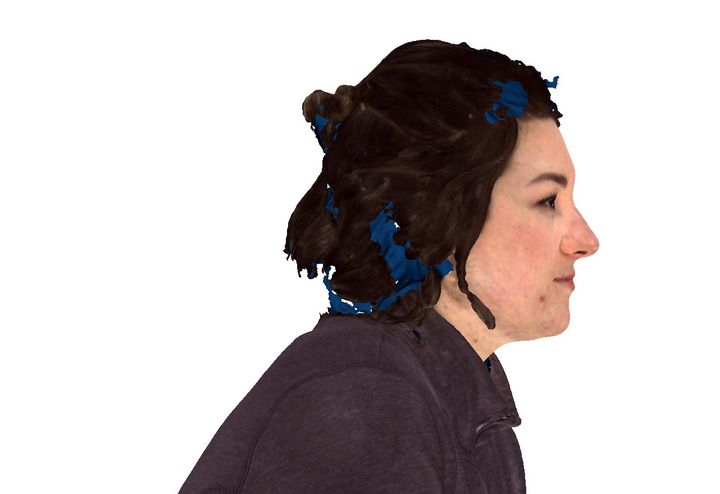
Note that the skin is near-perfect in the 3D model. Calibry does an outstanding job of transforming a quick 3D scan into a highly detailed 3D model.
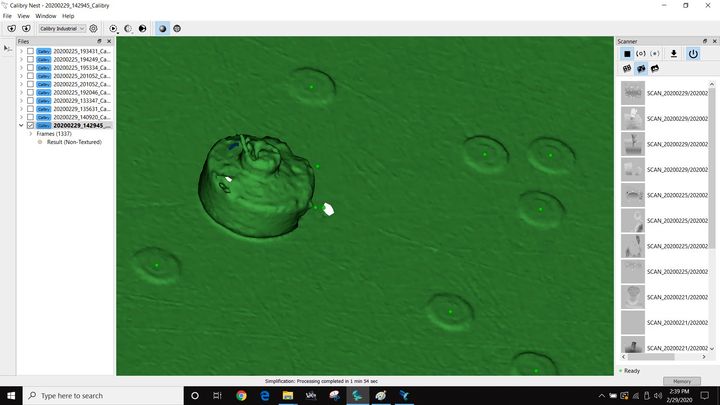
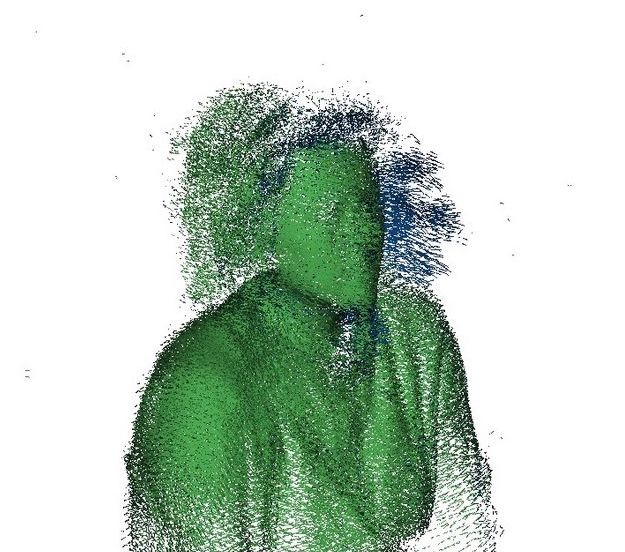
There is a challenge in scanning hair, however. As you can see in the 3D model, Calibry was only able to capture some portions of the hair structure. Only the very well defined, larger hair structures were “seen” by the scanner. Here is a view of the capture in Calibry Nest, where the hair is clearly in an uncertain registration state, as opposed to the remainder of the subject:
It’s vastly easier to capture 3D models of humans with “less”, or preferably “no” hair at all. Here’s a 3D scan of my friend Robert that I captured in literally only a single minute as he was walking by in the workshop:
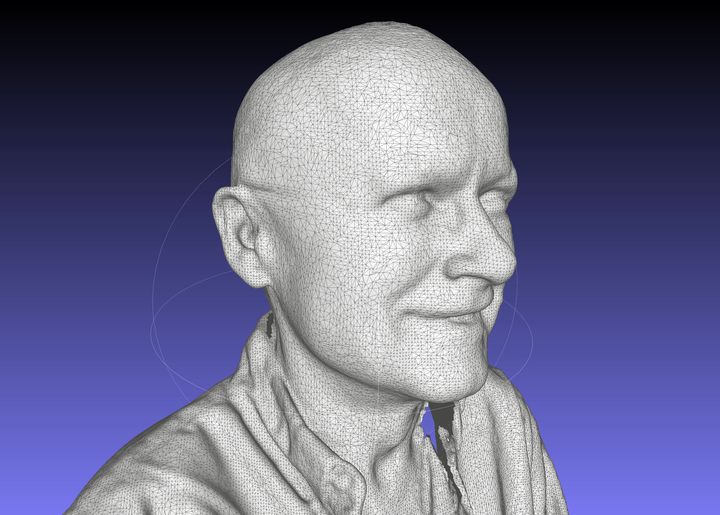
And here’s the real Robert for reference:
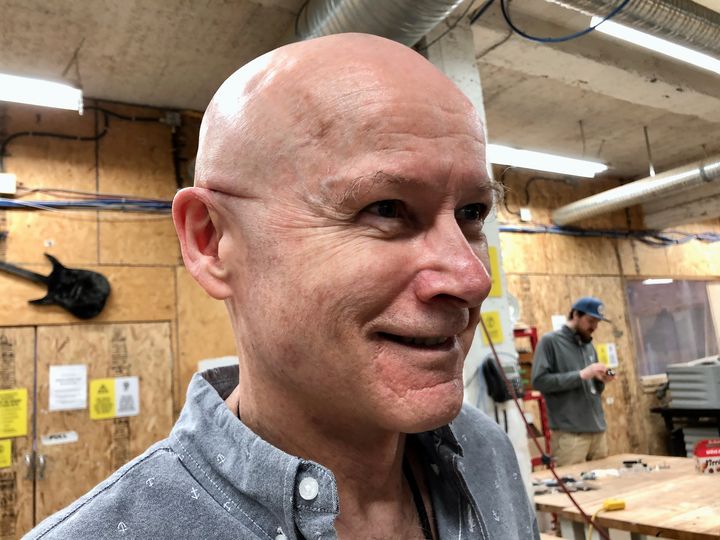
I have to think that Rob’s hairstyle contributed to the success of this 3D scan.
3D Scanning Hair Challenges
I was puzzled by the difficulty scanning hair structures, so I sought a pathological subject, or I mean one with pathological hair. With this attempt I hoped to understand more about how hair 3D scanning works — or doesn’t work.
The subject here has very long hair that is a bit “puffy”, as in the strands are often not laying close to each other; they are essentially “independent” hair structures.

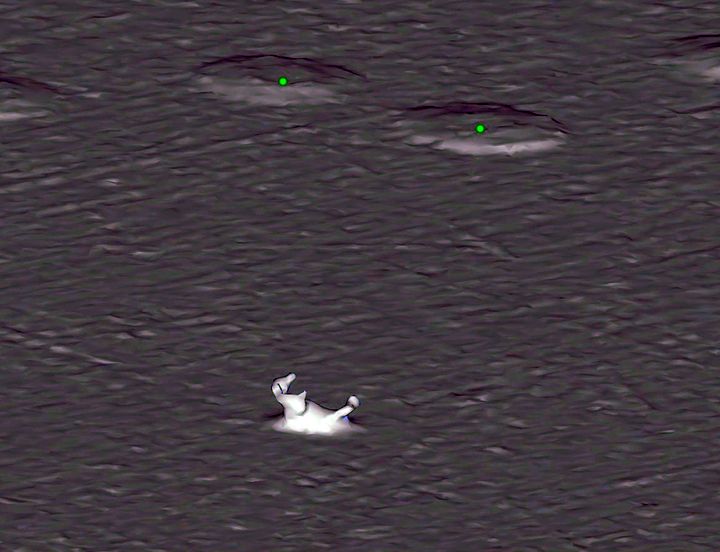
From this subject I obtained this 3D scan:
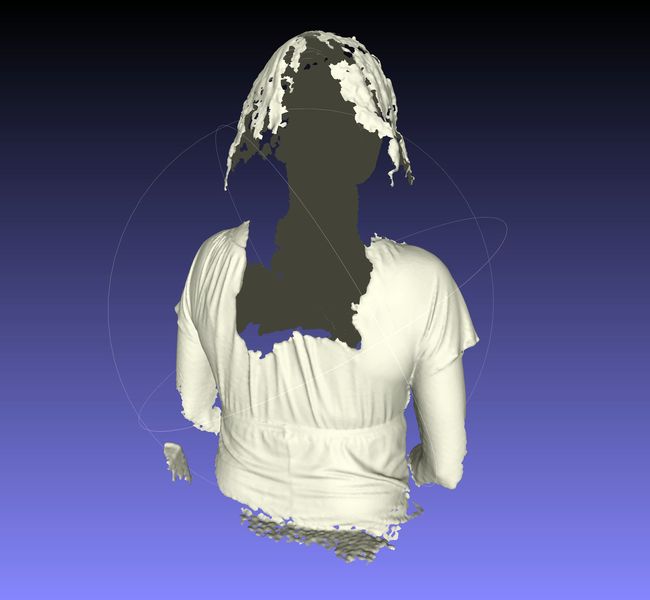
As you can see, the hair was effectively invisible, while the subject’s solid portions were captured perfectly. The scanner simply could not see any of the puffy hair, although it did seem to catch some of the surface under the edges of the hair.
I eventually realized what was going on. If you recall, the scanner operates by collecting scan images that are composed of lines. These lines would lay across a 3D surface and be slightly distorted by the surface’s geometry. It’s those distortions that the software attempts to reconstruct into a 3D model.
However, in the case of Ms. Puffy Hair above, imagine how the scan lines would land on a loose hair: only a microscopic segment of a hair would be illuminated, and that’s too small for the scanner to see or link with adjacent hairs. Essentially the structured light pattern passes through the hair, rendering it invisible.
I’m not sure any 3D scanning system would be able to capture hair of this type. I consider this one of the major technological challenges facing 3D scanning.
Capturing an entire person is similar, at least for the head component. However, it’s a bit more challenging to do because the “object” is much larger. There are quite a few more movements to make as you must sweep across all portions of the body. There are also frequently partially obscured areas created by clothes or limbs that require you to angle the scanner in a way to capture those areas.
It’s hard to know whether you captured all of these semi-obscured areas during the 3D scan, as the display is not showing an accumulated “build up” of the scan progress. This means you must learn how to perform the scan carefully and often this requires multiple attempts.
[UPDATE: I’ve just leaned that the latest release of Calibry Nest, which I was unable to test, does exactly this by providing an accumulated view right on the handheld unit. This should make scanning really easy!]
Eventually you get better at it through practice. However, there’s always a few holes or missing segments in the complex structure of a full-sized human, and these must be repaired using Calibry Nest or other 3D model editing software.
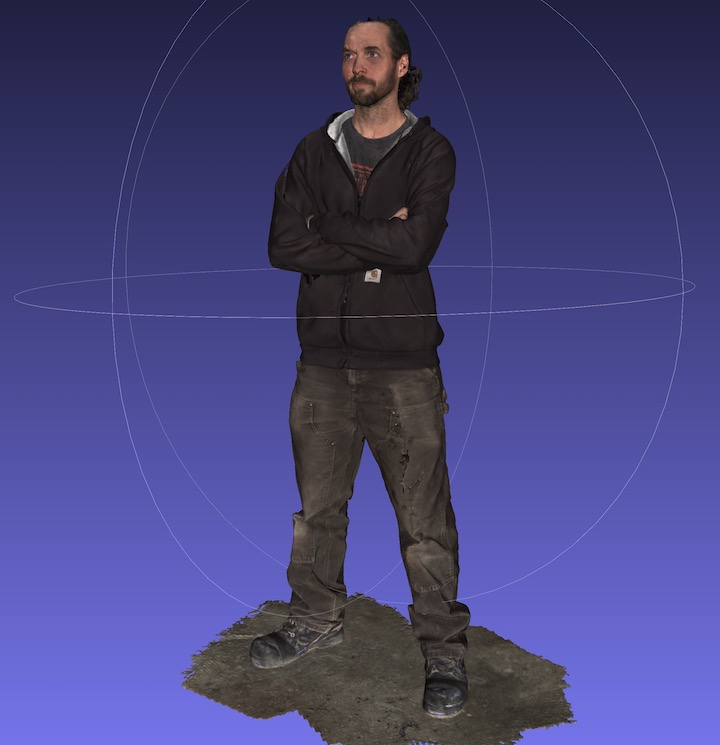
The results can be outstanding, however. Here’s a full body, full color 3D scan of my friend Doug:
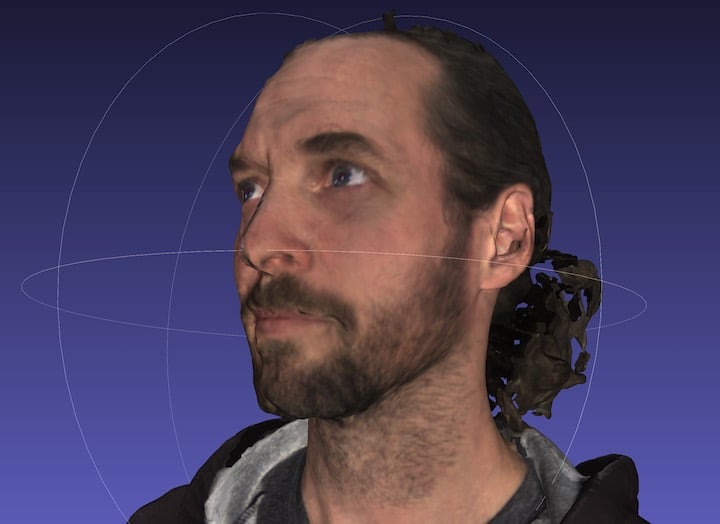
Even Doug’s face turned out quite well:
Having used several other systems for capturing 3D models of fully bodies, I have to say that the Calibry system is the easiest I’ve used. Now, to be clear, I have not used a 3D photo booth scanner, which would be the easiest, but they are also substantially more expensive than the Calibry.
The best human 3D scans I’ve taken were with the Calibry.
This is part three of a four-part series on the Calibry handheld 3D scanner. Please read parts one, two and four.
Via Thor3D
[UPDATE] Some readers have asked whether this multi-part story was sponsored by Calibry. The story is not marked “sponsored content” as is our policy, and definitely was not sponsored, however the equipment was temporarily loaned to us for purposes of the review. In our experience, the Calibry 3D scanner is as good as we’ve written.
Great review. If anyone wants to see data or interested let me know I am happy to assist.
Always here to help out
[email protected]