
I have been very fortunate to be able to spend considerable time testing the new Calibry handheld 3D scanner, and wow, what a device!
This is part one of a four-part series on the Calibry handheld 3D scanner. Please read parts two, three and four after this one.
In this part we’ll examine the Calibry hardware and software configurations.
Calibry is a brand of Thor3D, a producer of 3D scanning products. The Calibry is their latest venture, and I believe it should be very successful based on my experiments with the device.
There are multiple styles of 3D scanning, including tabletop, long-range, landscape, and “photo booth”, but the Calibry is a handheld device that is able to capture medium to large-sized objects in great detail. The Calibry would compete with several other high-resolution handheld scanners on the market.
Calibry Opening, Hardware & Setup
The Calibry is shipped in a convenient stiff cardboard box with foam insert for holding the device during transport. While it’s just “a box”, it actually can serve as a reasonable carrying case for the 3D scanner on a permanent basis. It even has a plastic handle for easy grasping. Don’t get me wrong, this is not a rugged case that you’d feel comfortable checking in at the airport, but for occasional around-town totes it’s perfectly acceptable.

Hardware-wise, the Calibry list of components isn’t very long. In the box you’ll see:
- The 3D scanner
- Two USB-3 cables
- A power adapter with cable
- An interface unit
- A box of scanning targets
Of course, you’ll also need a reasonably hefty Windows workstation, preferably a laptop, to run the software that drives the scanner during operations. That’s not something you’ll receive with the Calibry, so you’ll have to get one on your own. Fortunately, most folks involved in 3D work already have such a device handy.
Assembling the hardware for 3D scanning is pretty straightforward. Here’s a quick diagram to show you how simple it is:
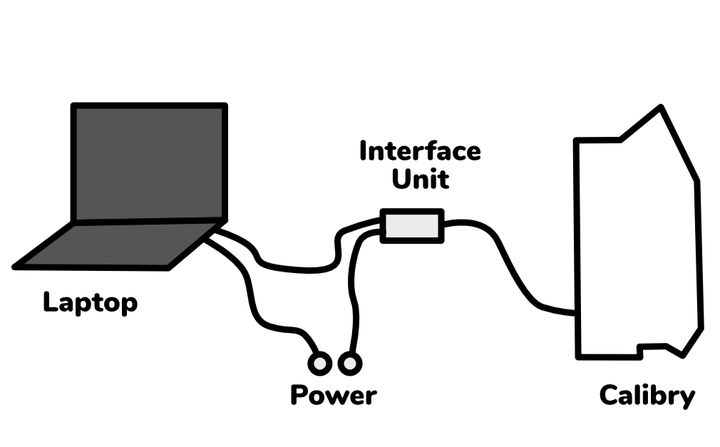
It takes me only a couple of minutes to set up the hardware, although I’d recommend bringing a fine slot screwdriver as the knobs on the USB-3 cables can be a bit difficult for those with hot dog fingers like me.
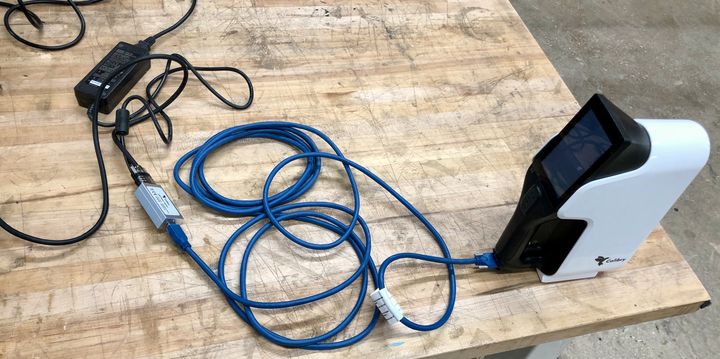
Pro Tip: although there are two USB-3 cables included and theoretically you can use both in either position, you should attach the much longer blue cable to the scanner itself. This allows you much more length when walking the scanner around a target.

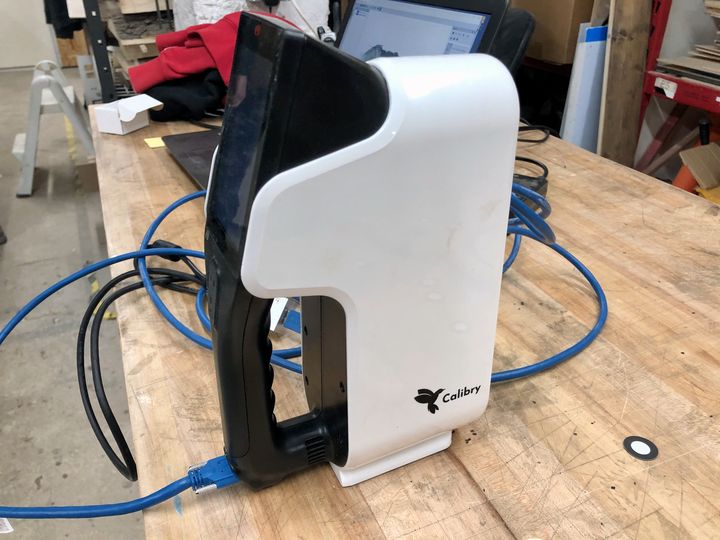
The scanner itself is quite interesting, as it includes an on-board color screen. This is a massive advancement over previous handheld 3D scanners I’ve used that do not have such a screen and require you to somehow have one eye on the scanning subject and the other eye on the laptop screen to understand where you are pointing. That’s entirely unintuitive and rather difficult to do, particularly for longer sessions. With the screen on the handheld unit, it’s far easier to operate successfully and without eye strain.
I have in the past briefly tested a handheld 3D scanner that was entirely integrated, as in there was no need to attach it to a computer as all the smarts were onboard. While this configuration also provided a great platform for good eye-hand coordination during scanning operations, the unit was quite hefty and it would be tiring to use it continuously for a longer scan session. I actually prefer Calibry’s configuration with a very lightweight handheld unit and a long tether cable.
However, if you happen to be scanning a very large object you will find the tether might require you to move the laptop to reach some sections of the scan subject. In such cases an assistant would be valuable to manage the laptop during the session. But for most scenarios it is entirely possible to perform 3D scanning all by yourself.
There’s one more thing necessary to get started 3D scanning with the Calibry: software. The required software is Calibry Nest, available for Windows only. I’m not sure why it’s called “Nest”, but it certainly works, as you’ll see later.
Wait, I’ve just realized the Calibry logo is an abstract bird! The software name now makes sense, as the lightweight scanner “flies around” while scanning, and the attached software is its “nest”.
The software concept is actually very interesting. The Calibry system essentially has the bulk of the “smarts” in the Calibry Nest software on the laptop, where it can leverage the powerful hardware resources present. Meanwhile, the activity on the handheld unit is simply mirrored through to the laptop throughout 3D scan operations. For example, Calibry Nest allows you to literally view what’s currently on the handheld unit’s screen in real time — or is it the other way around? Regardless, the hardware and software here are tightly integrated, and both need each other. You cannot operate the handheld unit without the software attached and running.
Calibry Software
Scanning operations are very easy to manage with Calibry Nest, and it is one of the easiest 3D scanning software systems I’ve used.
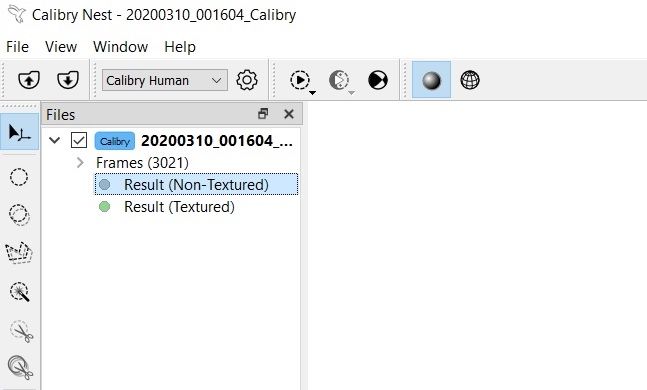
Each scan job creates a timestamped “project” within Calibry Nest that contains all the files associated, captured or generated, with the project.
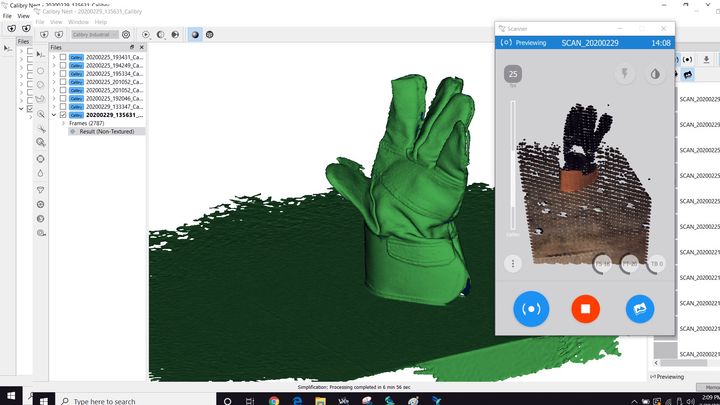
This is quite an interesting paradigm, as it allows you to dig deep into the weeds of a project without much trouble, but only if necessary. For example, you can literally examine individual capture frames; here’s what one looks like:
As you can see, the scanner has a somewhat limited view of the object at any one moment, but this is only a single frame of many hundreds that would be combined to create a more complete view of the object. Note the single images each contain scan lines representing what the scanner “sees”. Understanding these lines will become important later.
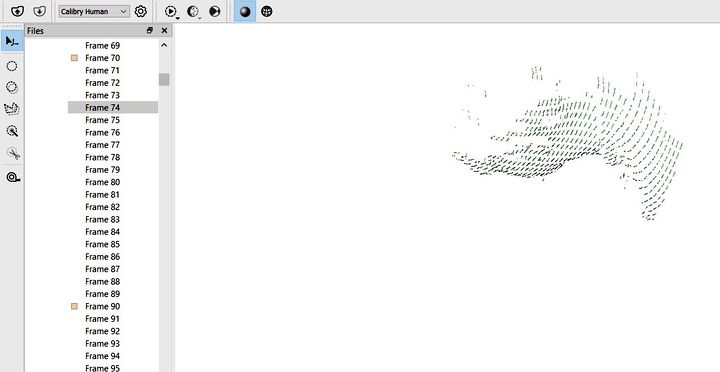
You can also select groups of individual capture frames to get a larger view of what the scanner has detected over a short time period:

The Calibry system not only captures 3D geometry of a subject, but also captures color textures. Their method of doing so becomes obvious when you look at the capture frames: while most of the captures are of geometry as above, occasionally a color image is inserted into the sequence. You can even adjust how frequently these are captured, but I found the defaults to be entirely usable.
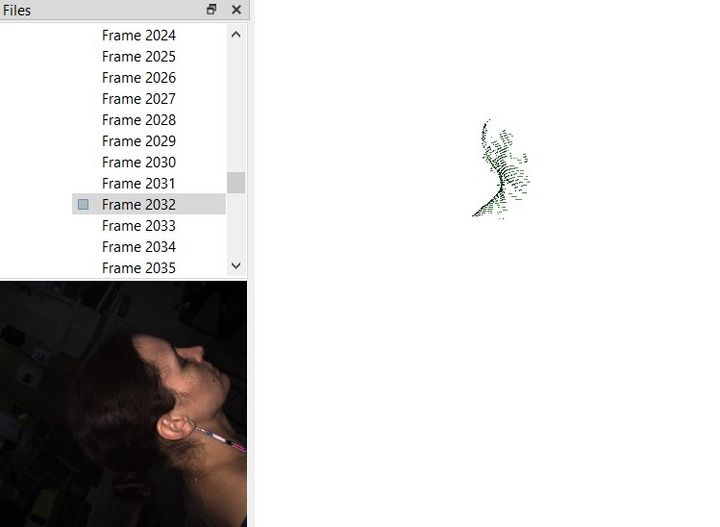
After the scan is processed into a 3D model, the texture frames are “applied” to the generated surface from all the different angles they were captured. This essentially “paints” the 3D model with full and usually accurate color.
However, if you’re hoping to acquire a full color 3D model you’d better plan on providing full 360 degree equal lighting from all sides. If you don’t, some of your subject will be in shadow and those shadows will become part of the 3D model. Not good, but easily solved with some even lighting.
Before 3D scanning can commence you must “calibrate” the 3D scanner. This is a relatively painless process that involves placing the scanner on a handy provided mount, and pointing it at a target sheet. The software will ask you to repeatedly move the scanner to and fro and line it up with the target.
Eventually the software will tell you the scanner is calibrated and you’re done. You don’t have to calibrate every time you want to scan, but you should consider doing so after transporting the scanner. Also you’ll be reminded periodically that it’s “Time To Recalibrate” automatically by the software.
This is part one of a four-part series on the Calibry handheld 3D scanner. Please read parts two, three and four after this one.
Via Thor3D
[UPDATE] Some readers have asked whether this multi-part story was sponsored by Calibry. The story is not marked “sponsored content” as is our policy, and definitely was not sponsored, however the equipment was temporarily loaned to us for purposes of the review. In our experience, the Calibry 3D scanner is as good as we’ve written.