
We’re testing the new Creality Hi Combo multicolor 3D printer.
This is part one of a four-part series, please read parts two, three and four.
Creality Hi Combo Background
Shenzhen Creality 3D Technology Co., Ltd., better known as Creality, is one of the leading brands of desktop 3D printers, established in 2014. Creality is known for its popular Ender, HALOT, and Sermoon series, and also has a large ecosystem of additional products such as 3D scanners, laser engravers, filaments, and other accessories.

The Hi Combo is one of Creality’s latest printer models and is a low-cost, high-speed bedslinger paired with a CFS multi-material unit, with the Creality Hi Combo being aimed at the enthusiast market. The CFS, or “Creality Filament System”, allows operators to print objects in multiple colours, unlike most standard desktop 3D printers.
Creality Hi Combo Specifications and Features
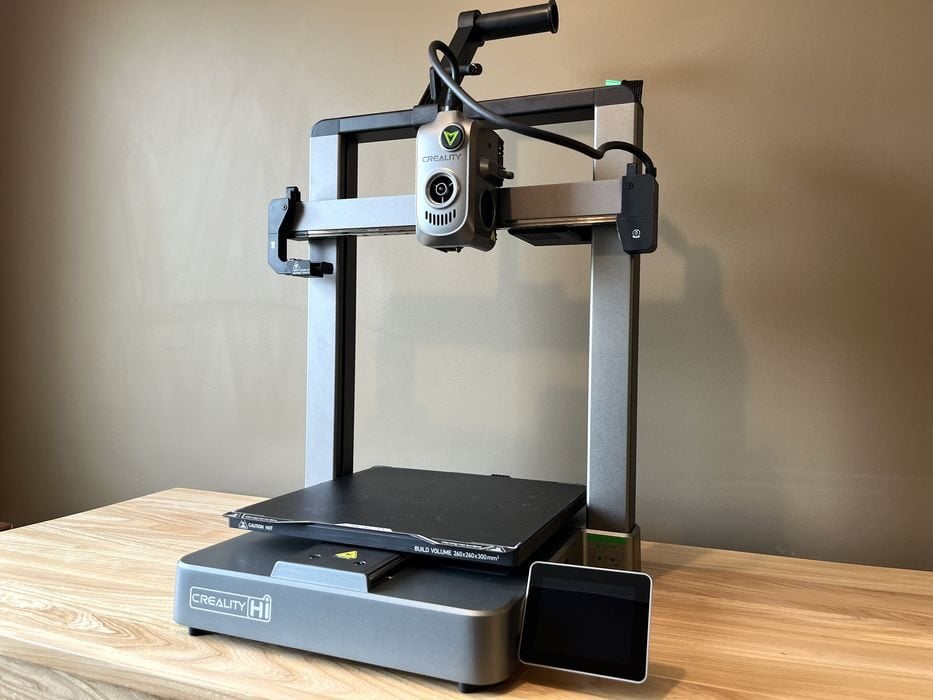
The printer portion of the Creality Hi Combo is a high-speed bed-slinger with a rigid all-metal aluminum alloy construction that ships 95% preassembled.
To keep things simple for the operator, the Hi is equipped with automatic hands-off calibrations – Auto Bed Leveling via a strain gauge located in the toolhead, G-Sensor based Input Shaping, a dedicated sensor for Pressure Advance fine-tuning, and two independently motorized lead screws allow for the X-axis to self-adjust when needed to ensure it is always in the correct horizontal position.
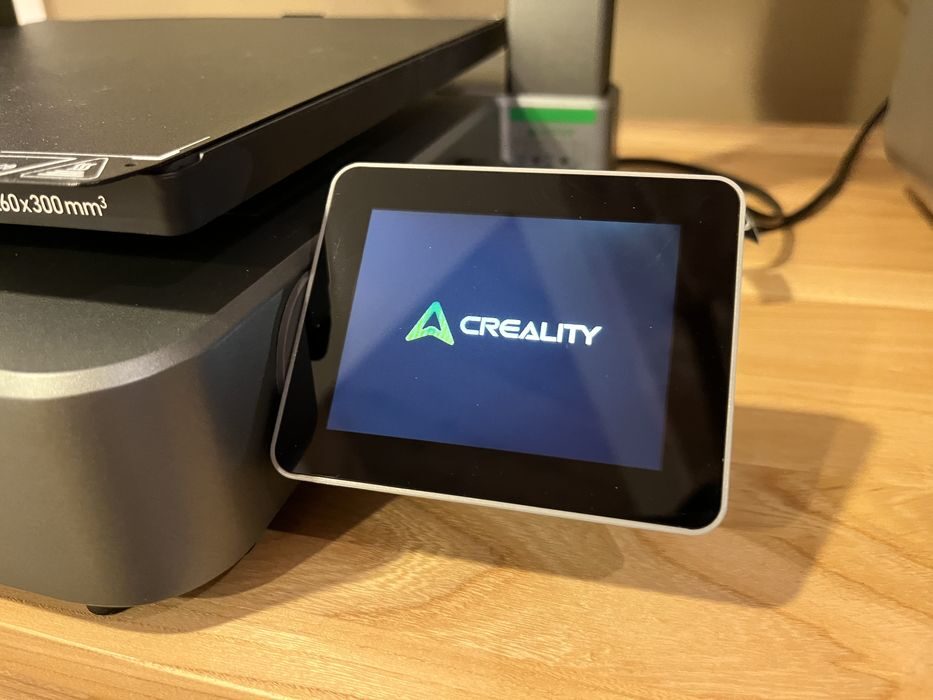
The printer is controlled physically with a fold-away 3.2” – 320×240 touch screen, or remotely via Creality Cloud App and/or their own desktop slicer, Creality Print 5.1. Transferring of sliced print jobs is done via WiFi or USB, with the printer having 8GB of built-in storage.
A dual-core ARM Cortex-A7 microprocessor provides the computing power necessary to run the Creality Hi Combo.
The printer boasts a max print speed of 500 mm/s and a maximum acceleration of 12,000 mm/s/s, with 300 mm/s being its typical print speed. The build volume of the Hi is 260 × 260 × 300 mm and features a two-sided epoxy flexible steel build plate that is magnetically attached to a heated bed capable of reaching 100°C.
The steel geared extruder assembly is paired with an all-metal hot end capable of reaching 300°C and comes equipped with a 0.4mm tri-metal nozzle, although 0.6 and 0.8 mm diameter options are also available. All of this is set up to work with 1.75 mm filaments such as Hyper-PLA/PLA/PETG/ABS/PLA-CF from Creality or third parties.
A filament run-out sensor is located inside the extruder assembly along with a built-in filament cutter, ensuring that filaments can be loaded and unloaded with less overall waste, either inserted manually or swapped out automatically with the CFS.
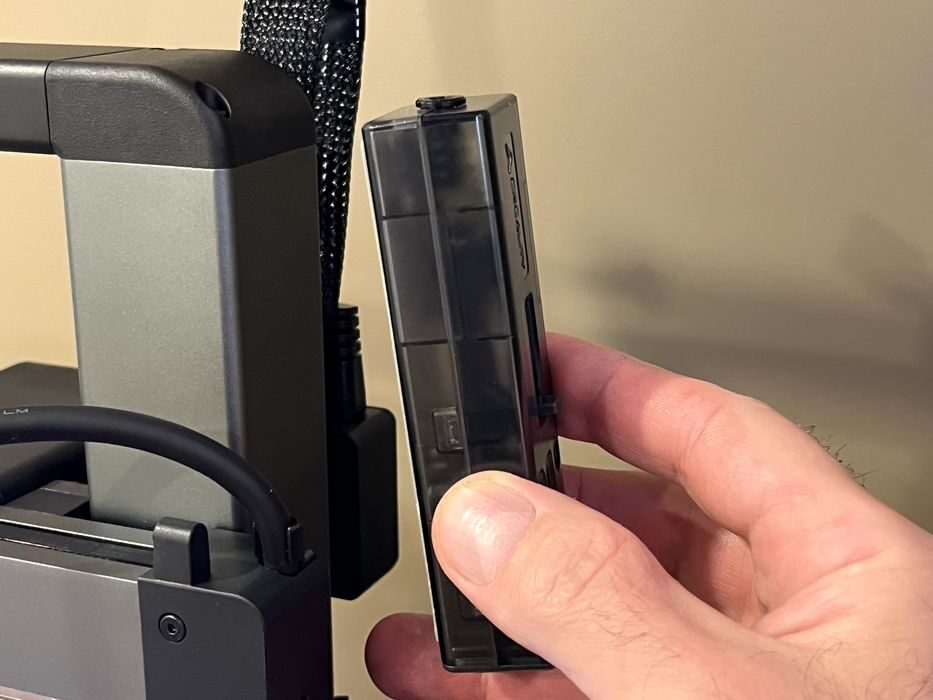
Creality also includes an RFID sensor on the side of the printer that reads filament details before placing on the spool holder, thereby automatically adding spool details to the printer and preventing mismatches between sliced data and loaded materials. However, this works only with Creality chipped spools.
Other features include a single LED light and camera for monitoring print progress, or recording timelapse videos, if that is something that interests you.
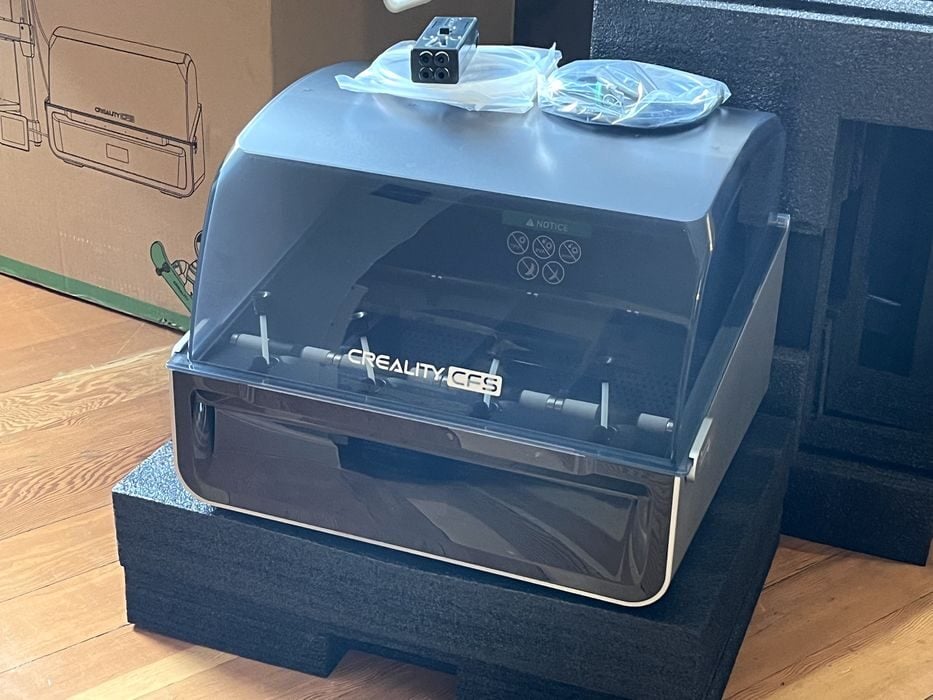
The CFS portion of the Hi Combo is basically a desiccant-based dry box with four RFID-equipped motorized filament bays. The CFS and Hi connect to each other via an Auto Filament Relay Buffer, which can accommodate connecting up to four CFS units that deliver a single PTFE output to the extruder.
The buffer is a very important part of the configuration, as we found out later.
Loading filament into one of the four bays of the CFS is very easy, with the operator simply inserting the filament into the feeding tube until the CFS grabs and loads the material through the various PTFE tubing until it reaches the buffer, then rewinds it back to a ready state and updates the printer as to what material was detected. A total of up to four CFS units can be daisy-chained together for up to 16 colours – although a separate power source is required for operating two or more units.
Creality Hi Combo Unboxing and Assembly

The first of the two shipping boxes we opened from Creality contained four rolls of their branded Hyper PLA filament in white, red, blue, and black, with each spool equipped with an RFID chip.
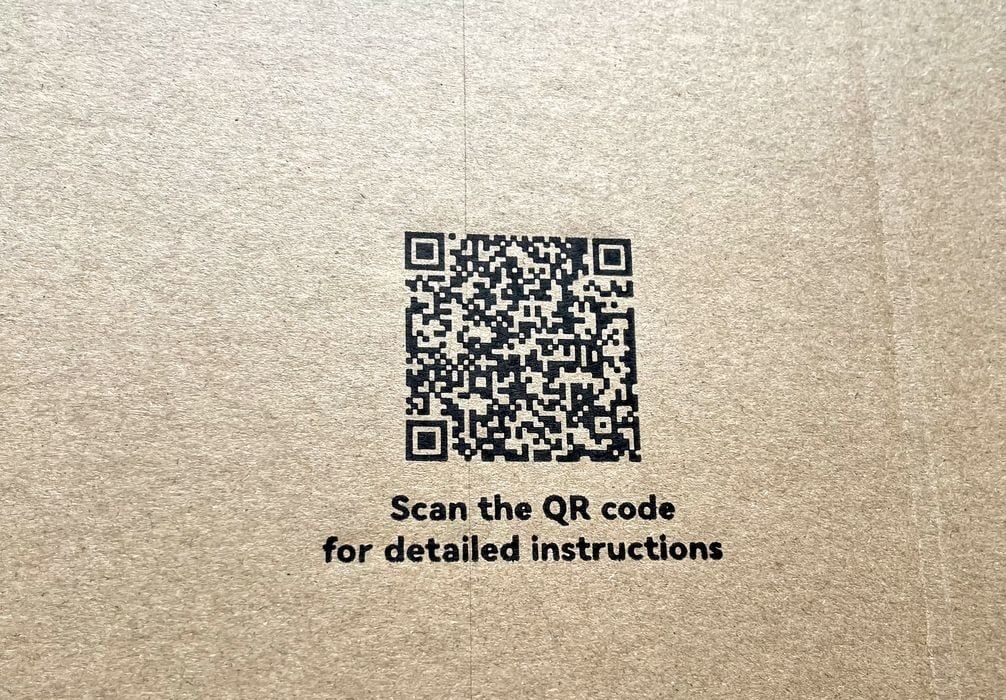
Upon opening the larger box containing the printer, we noted a QR code on an inside flap that read, “Scan for detailed instructions”, which we did, but all it did was take us to the main page of the Creality Wiki, rather than the specific instructions for the Hi Combo.
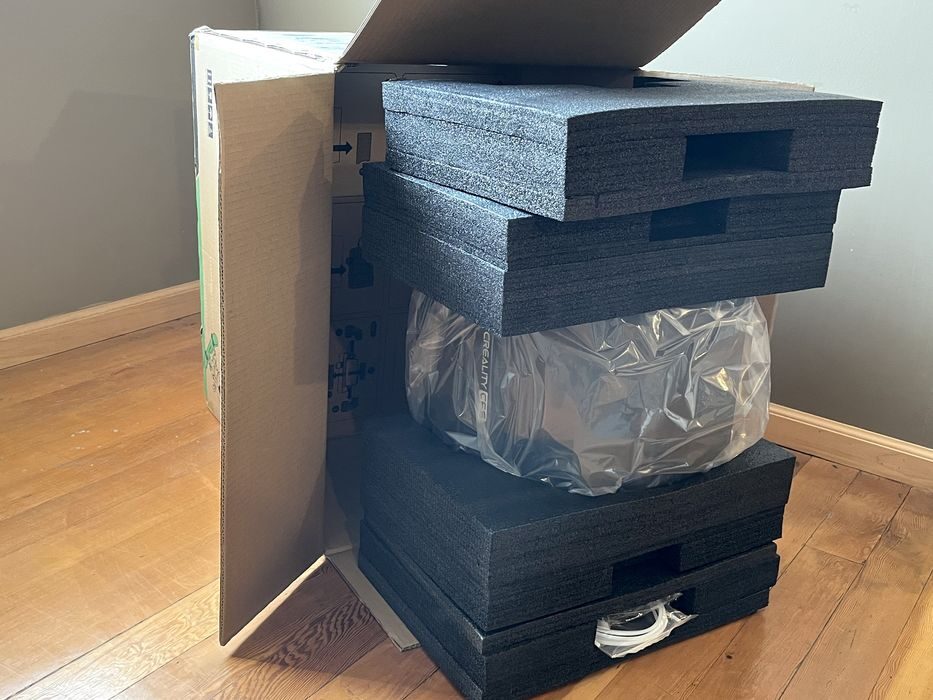
Since we weren’t being directed to an obvious unboxing guide, we continued along on our own. As with many of the boxed printers we’ve received, we found it quite easy to tip the box on its side and pull the foam packing out all in one go.
The first layer of packing contained the Creality CFS unit and a few accessories. The second layer of packing had unboxing instructions printed right on the cardboard, which we made sure to follow.
The layer directly below contained a Hi Quick Installation Guide, a bag of goodies, a small sample coil of filament, and a few small components.
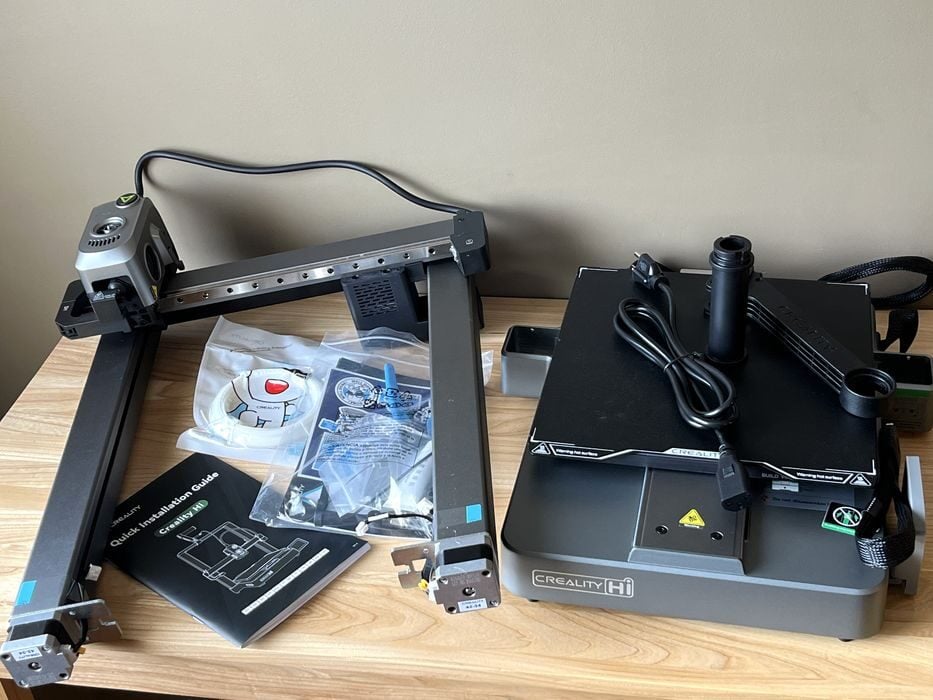
Below this layer, we found and removed the X/Z axis gantry, followed by lifting out a zip-tied bundle that was the base of the printer.

We clipped the zip-ties and transferred the contents of the shipping box onto our workbench to take a closer look at and prepare the printer components for assembly.
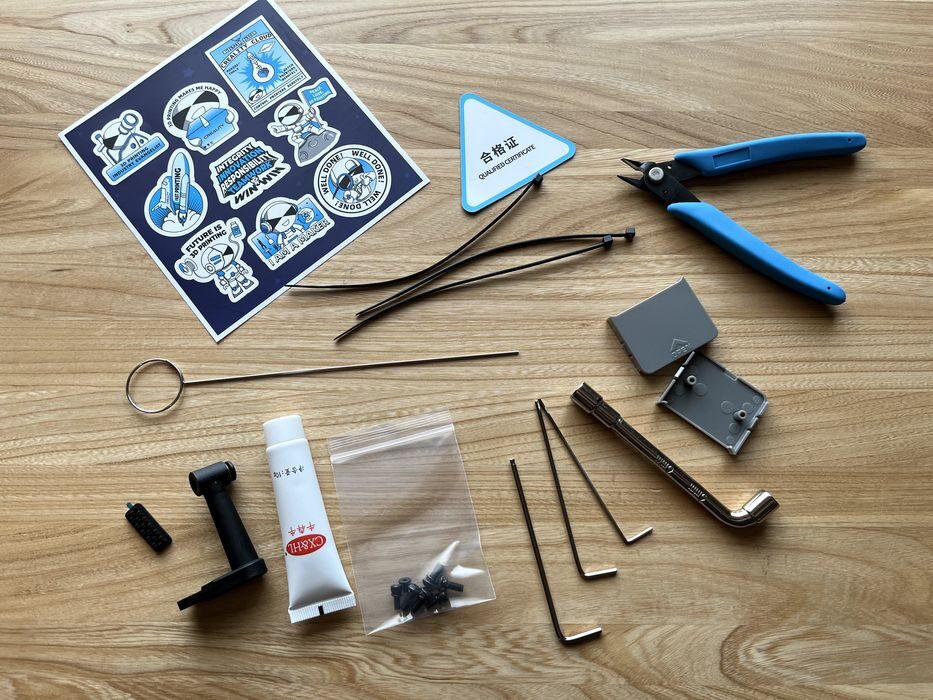
The goodies bag contained side cutters, socket spanner, nozzle cleaner, some hex wrenches, a few screws, two small plastic covers, a few zip ties, a curious little plastic part, a tube of grease, and a replacement silicone nozzle wipe. Conspicuously absent was a USB stick usually included with 3D printers that would contain slicing software, digital manuals, and sample print files.
The printed Quick Installation Guide for the Hi contained clear, clean illustrations and instructions, which is not often the case. Since we had them in our hands, we decided to use these printed instructions instead of going online and searching for a digital version on the Creality Wiki.
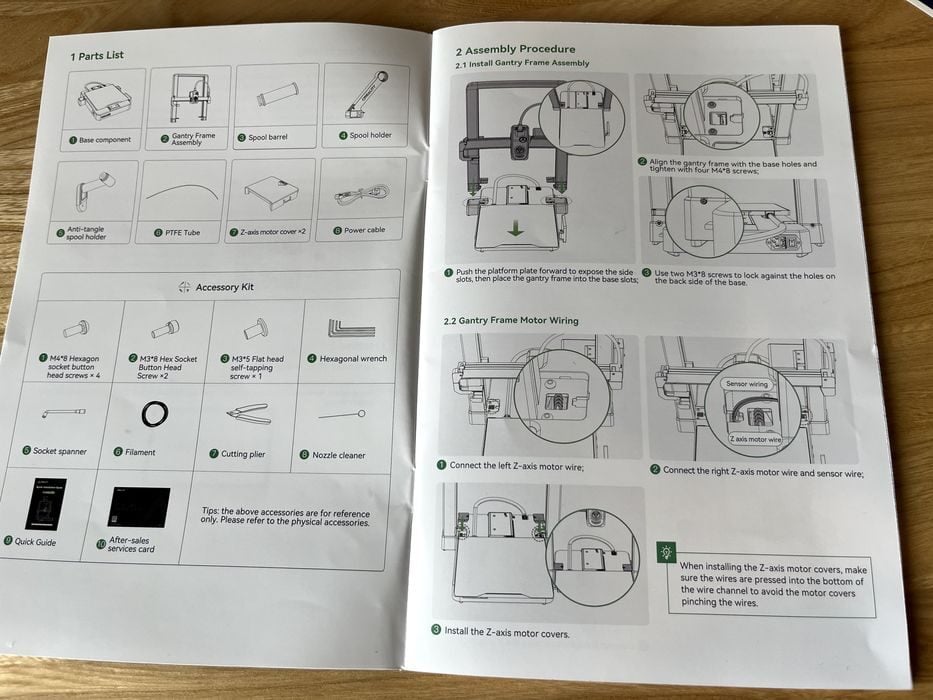
The gist of the instructions was to insert the gantry into the two slots of the base and then fix it in place with a few bolts.
Usually, the bolts that do this function attach from the bottom of the base, which usually involves a bit of a balancing act with the components, but in this case, all we needed to do was place the printer base on the table, slide the Y-axis print platform out of the way, drop the gantry assembly gently in place, and attach it with four bolts from the top and two from the rear. So easy!
While doing this, we noticed a warning sticker advising to make sure to properly install the rear bolts, otherwise, it may affect print quality.
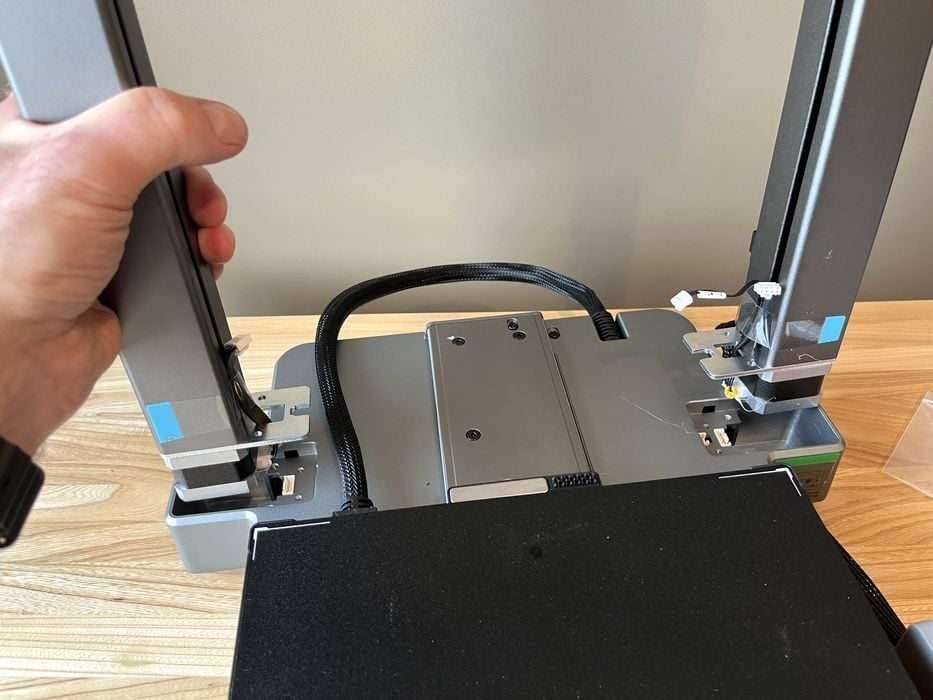
Creality has given some thought to cable management on the Hi, leaving the various connectors exposed and accessible, with the plugs conveniently taped beside where they needed to be installed. Once everything was attached, two small protective covers were installed to hide the connections.

The cable for the X-axis was routed up the rear of the gantry and fixed in place via two snap clips before being plugged into a connector at the top of the Creality Hi Combo. We noted a few warning labels here describing how to properly remove the cable (if ever needed), and to never hot-swap it.
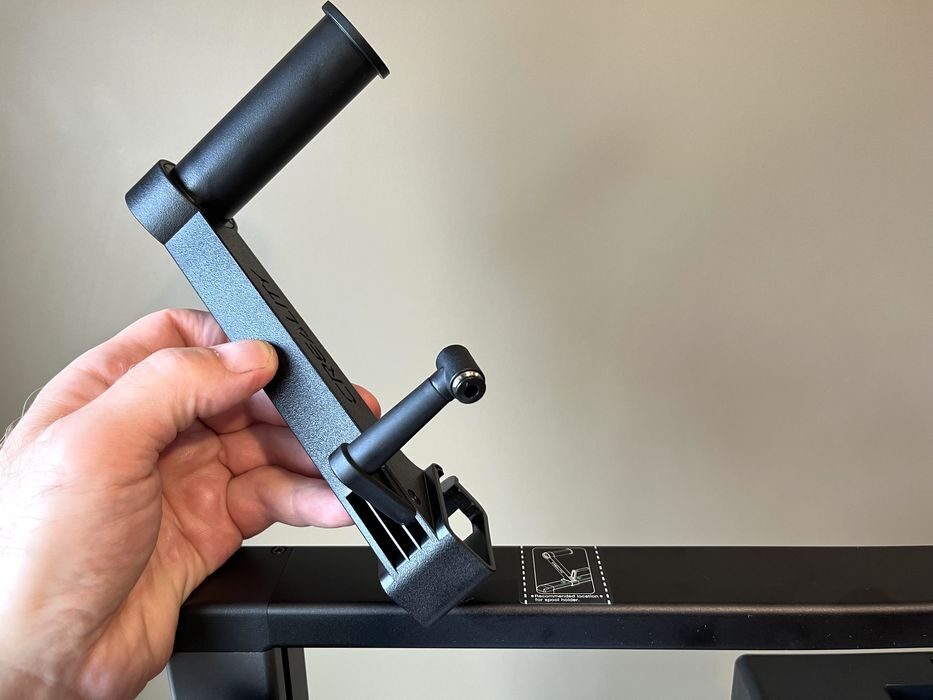
The spool holder installation was simple, as there was a clearly marked location of exactly where to clip it in place, but before we did that, we added a small anti-tangle device to the spool holder’s base.
We removed the protective covering from the LCD and rotated it into place. Then, as a final step, we checked the printer’s power supply to see if there was a voltage selector switch for us to adjust.
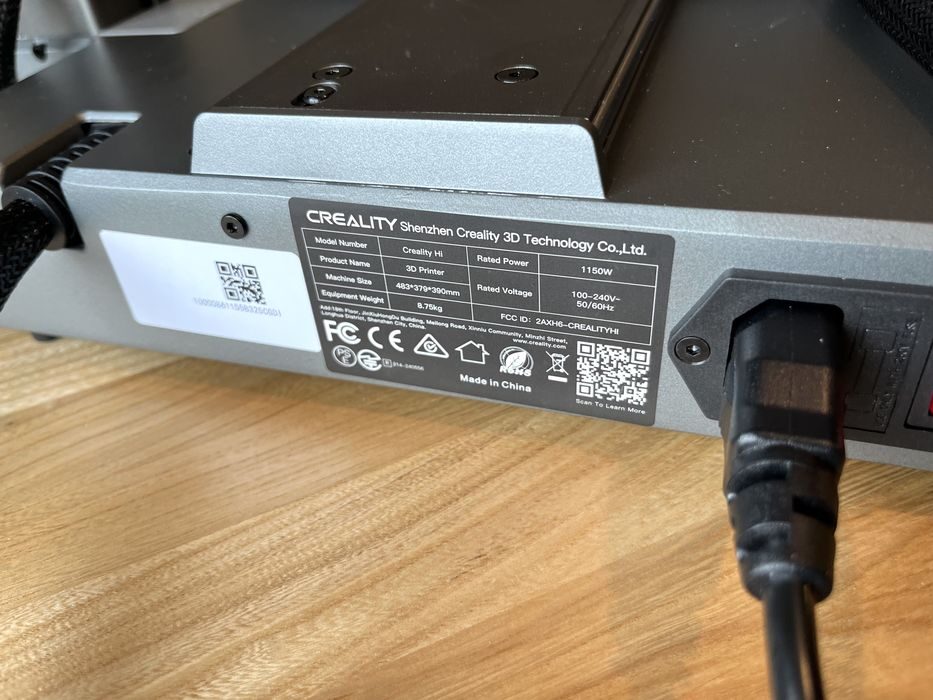
We found it to be self-adjusting for switching to the correct input voltage, so we went ahead and plugged in the power cord and just like that, we were done assembling the printer!
We now turned our attention to setting up the CFS. The printed Quick Installation Guide for the CFS had absolutely no installation instructions, so we decided it was time to hop onto the Wiki and do some reading.
Digital versions of user manuals typically have more information than the printed versions and are always more up-to-date. In this case, the digital user manual had all the information we needed to complete the installation of the CFS.
The instructions boiled down to:
- Install a filament buffer module onto the side of the gantry using double-sided tape.
- Connect a 60cm PTFE tube from the CFS to one of the four inputs on the bottom of the buffer.
- Connect a 65cm PTFE tube to the top of the buffer to the extruder.
- Remove two small sealed packages of desiccant hidden behind two small grates inside the CFS.
- Strip off the plastic and put them both back in place so that the desiccant could do its job.
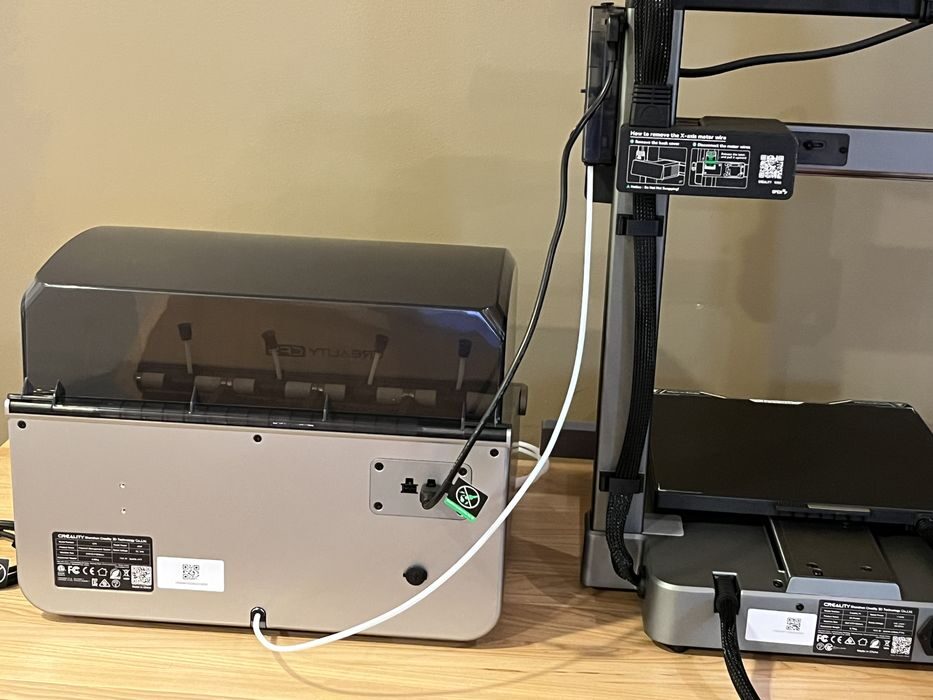
Communication and power to the CFS are done through the use of two 485 communication cables. We connected one of these cables from the CFS to the buffer and the other between the CFS and the printer.
With all that done, we were now ready to power on the printer!
This is part one of a four-part series, please read parts two, three and four.
Via Creality