
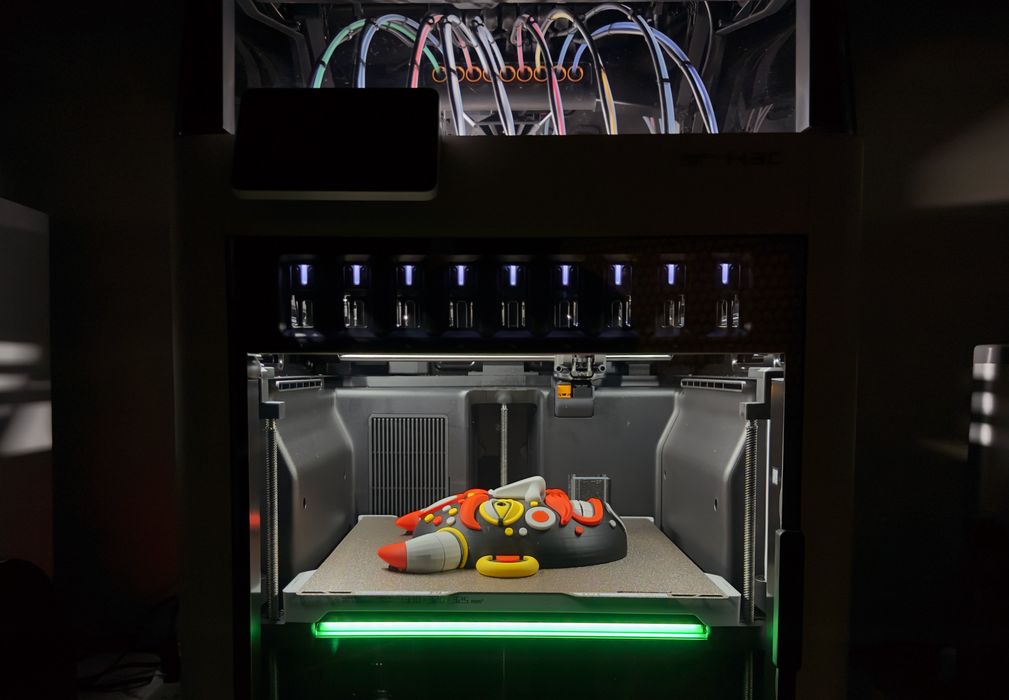
Our review of the Bambu Lab H3C 3D printer continues with a look at Operations and Software.
This is part three of a four part series, please read parts one, two and four.
Bambu Lab H3C Operations
The H3C is not a simple machine. It has quite a range of capabilities, and with that comes many different operational procedures.
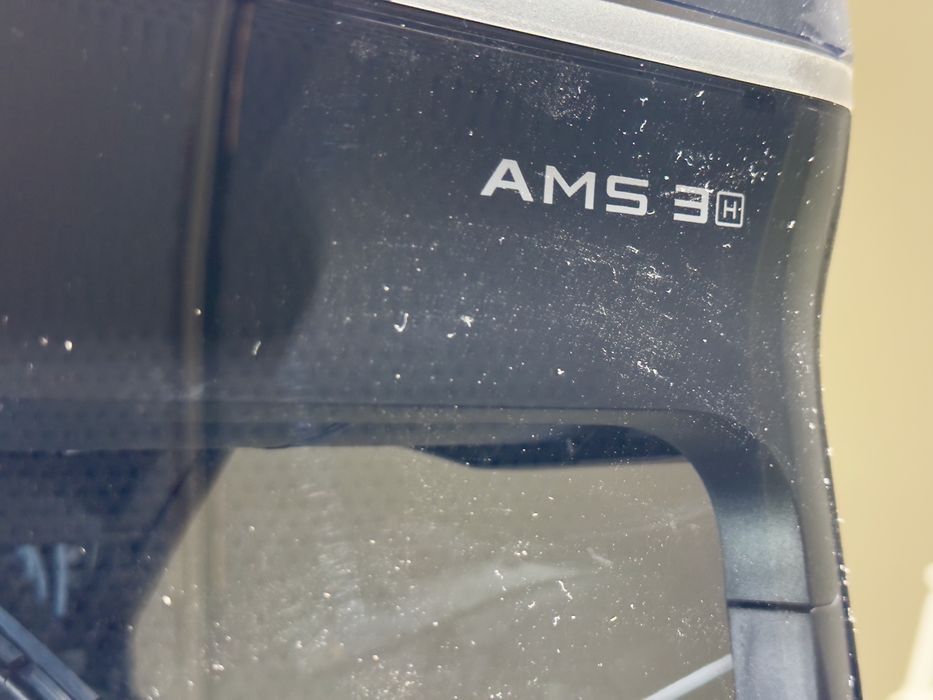
I noticed that the acrylic cover on the AMS 3H tends to attract dust, so your H3C will certainly require periodic wiping to keep it clean.
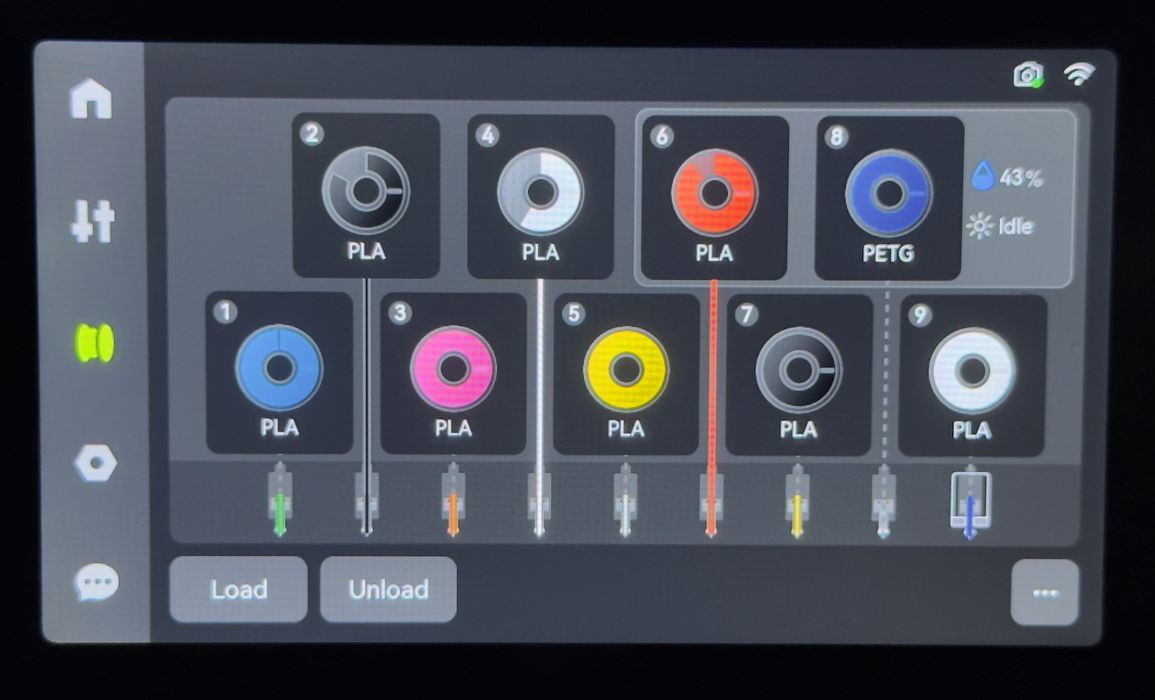
The machine at this point had loaded with CMYKW colors, and I was quite interested to try the full spectrum CMYKW capability, and my first test was just a few blots.
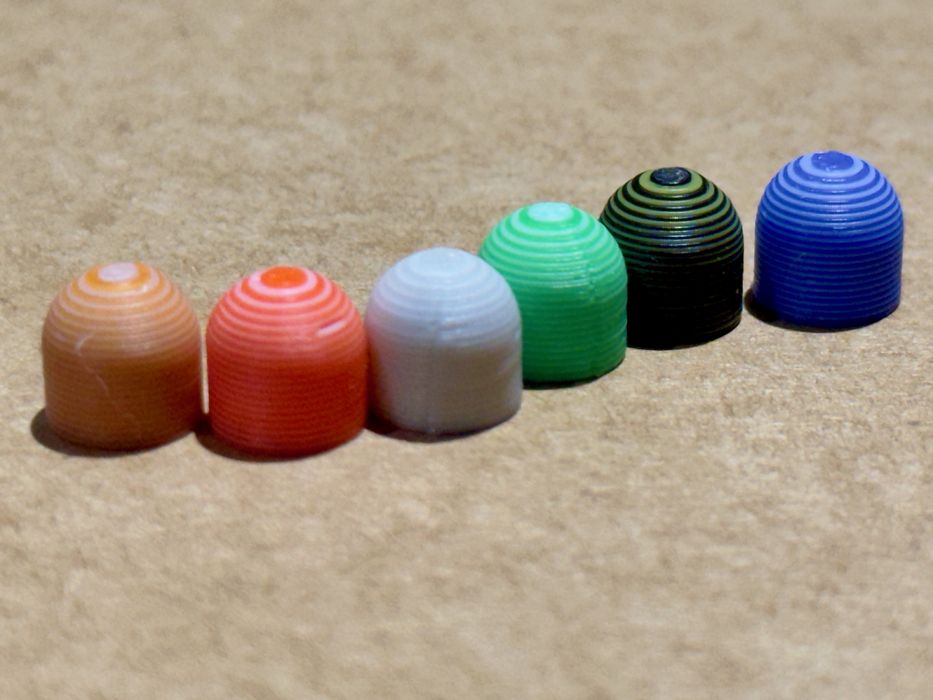
The H3C prints the blots with alternating layers to achieve visual color mixing. While this image shows the layers clearly, from a distance they blur together and look different. The green blot, for example, looks like a minty green, even though it’s made from green and white layers.
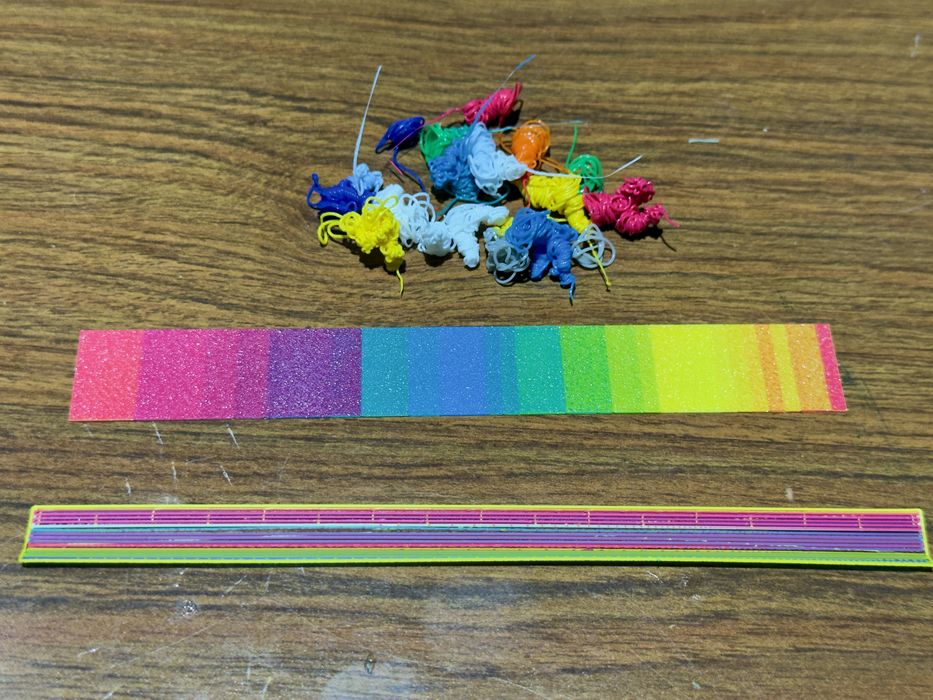
Now a different color test. Here I printed a strip that has overlain coloured layers. For example, a cyan layer underneath a yellow layer produces visual green. The strip shows quite a spectrum of colors, yet only three different materials were used in the print. And there was basically no waste, too.
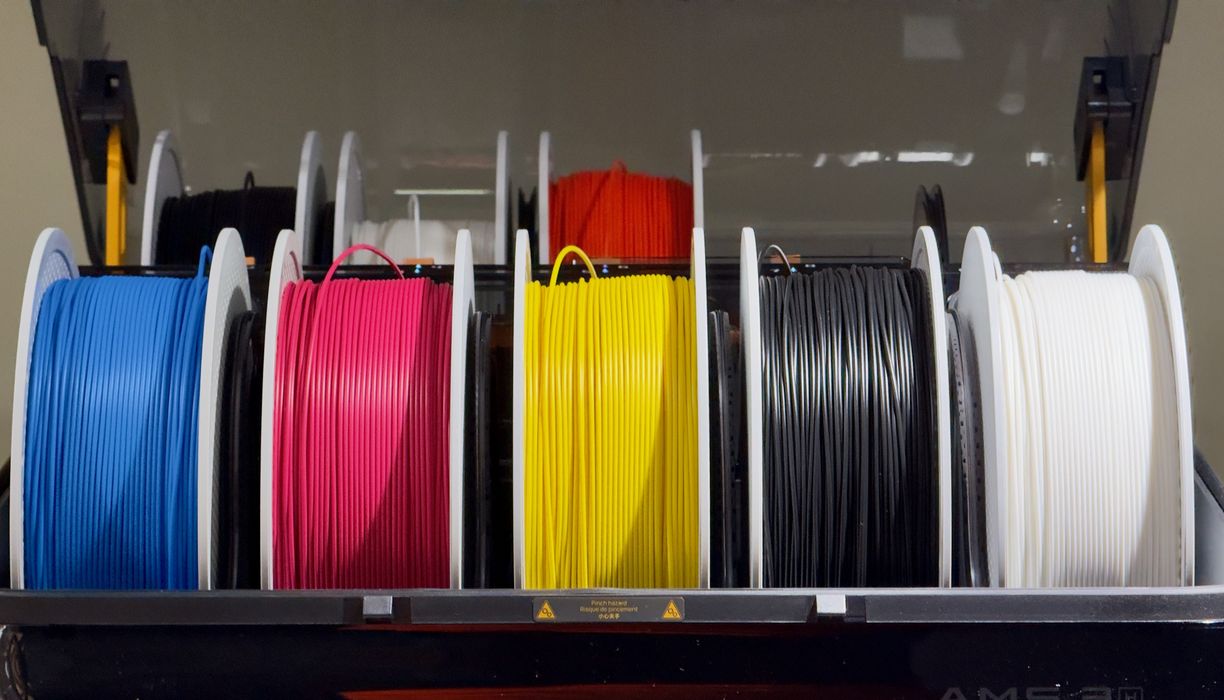
Could this be the typical spool configuration of the future? CMYKW could be a popular set of materials to purchase.
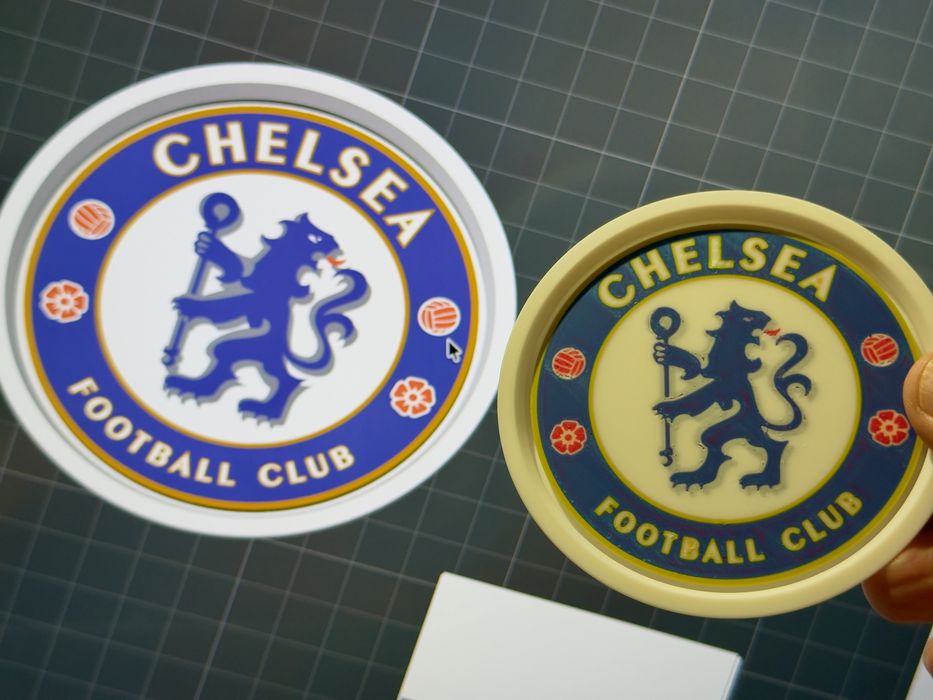
Here’s another color test, this time a sports coaster. On the left is the screenshot of what it’s supposed to look like, and on the right is the actual print. It’s not quite the same, showing the limitations of the approach, and ambient lighting conditions. Nevertheless it is pretty amazing that you can do this at all.
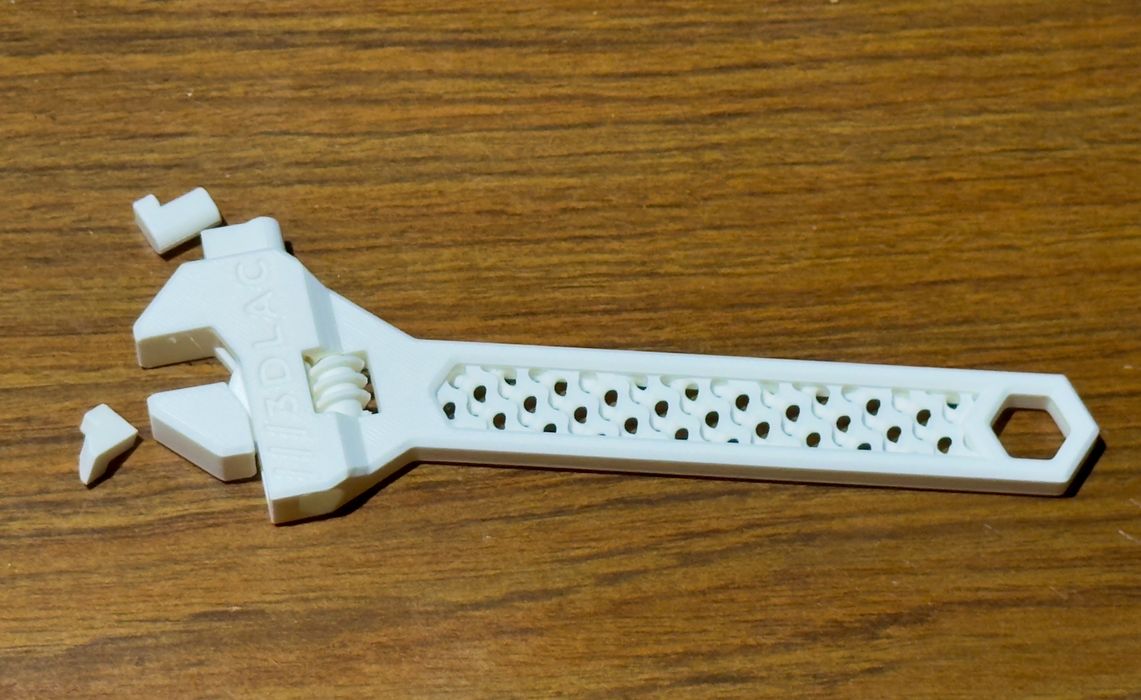
Moving on to test different materials, I tried ABS. This material should print very well with the enclosed and heated chamber, and it did. I printed the wrench with no raft or brim. Normally you’d have to use a brim with ABS due to warping, but here no warping occurred. However, the gap tolerance wasn’t perfect and the wrench did not spin — and in fact snapped when I pressed too hard. But it did print quite well otherwise.
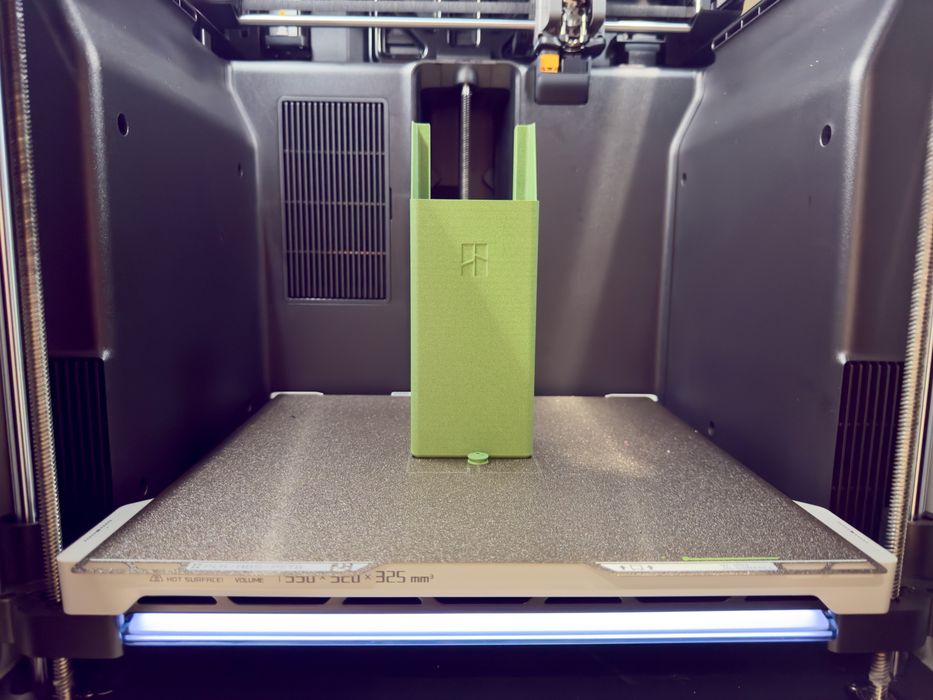
I printed a large poop bucket using PLA-CF. The bucket was sized for the H2S, as there were no H3C poop bucket models available yet. The bucket printed absolutely perfectly, but of course did not fit on the H3C. The good news is that the amount of poop is so low you almost don’t need a poop bucket.
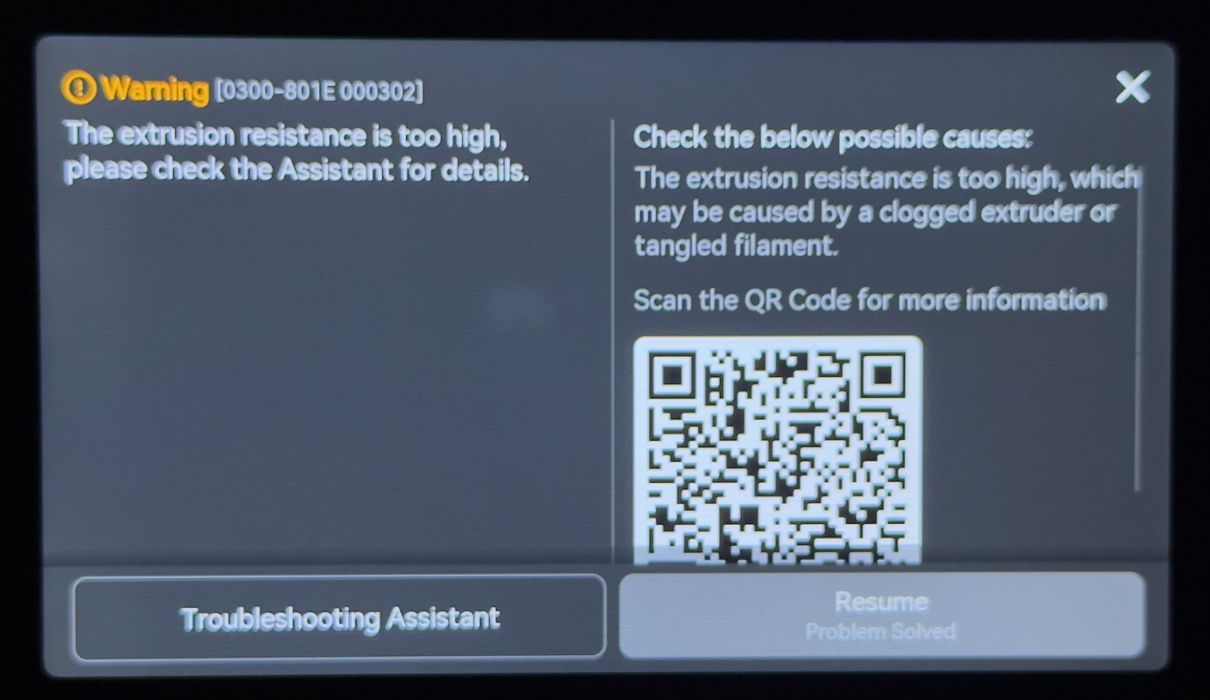
In printing the very challenging PAHT-CF material, I encountered an error! Somehow the spool wasn’t moving properly.
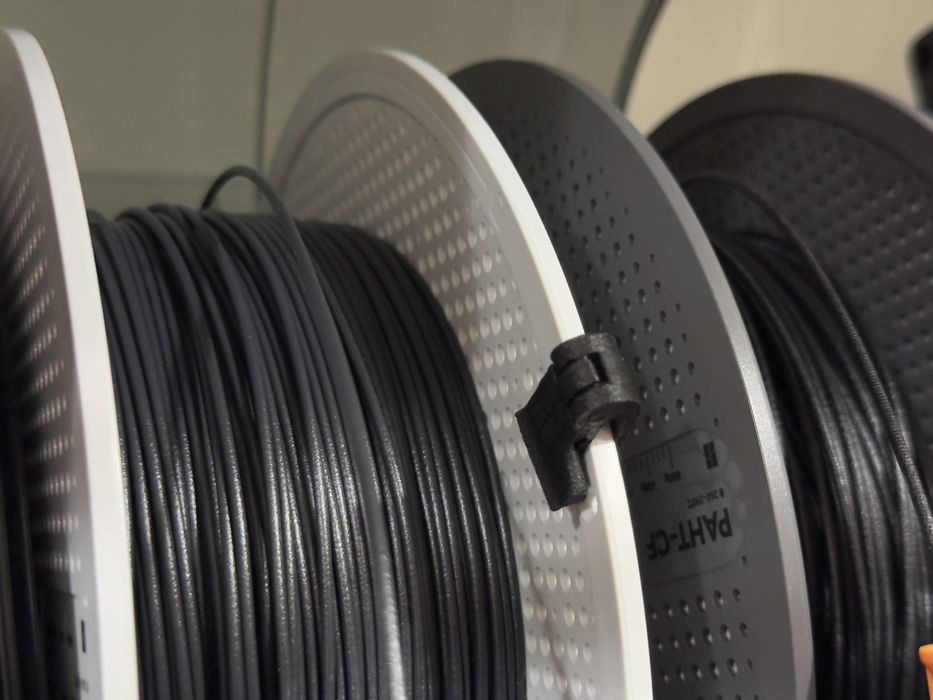
The solution was that I had neglected to remove this filament clip from the spool. As the spool rotated it would bump into the clip, causing the issue. I was able to remove the clip and resume the job.
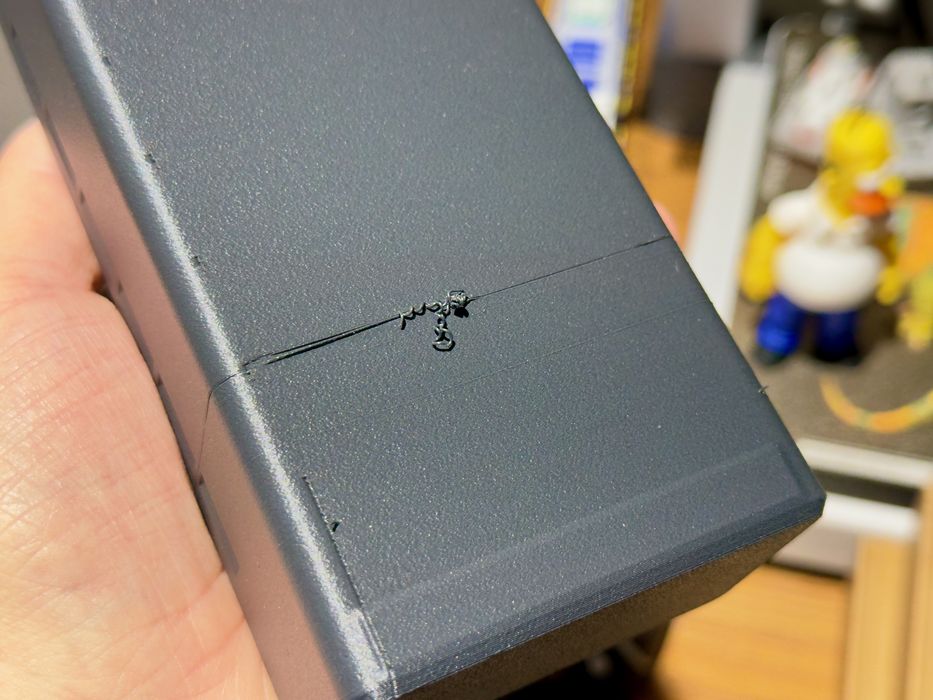
But it wasn’t without errors. Here you can see a weak line in the print, precisely where the error occurred. The H3C cannot recover from low flow extrusions, since it detects them after they happen, like every other machine.
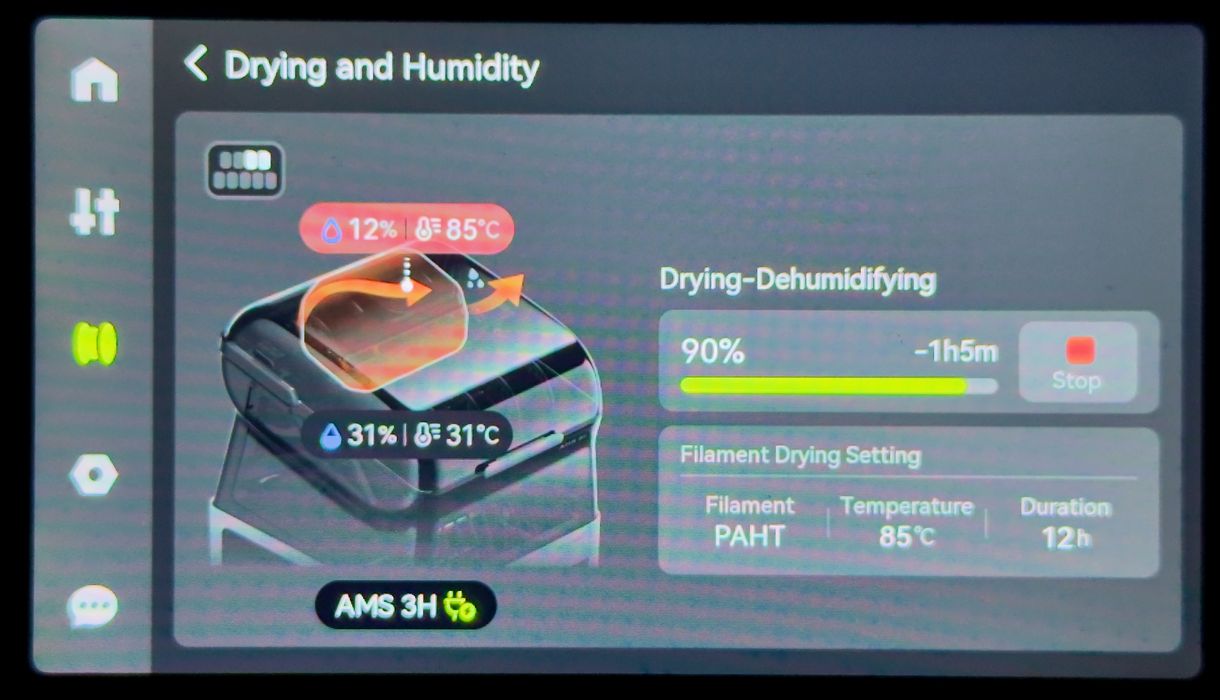
Did I mention that the AMD 3H is also a dryer? It is, but it’s a bit different. There are only two of the nine slots that can be dried, the rear right two. There’s also an acrylic cover that goes over them — inside the AMS 3H — to contain the heat. I tried the drying function on several spools, and it works very well.
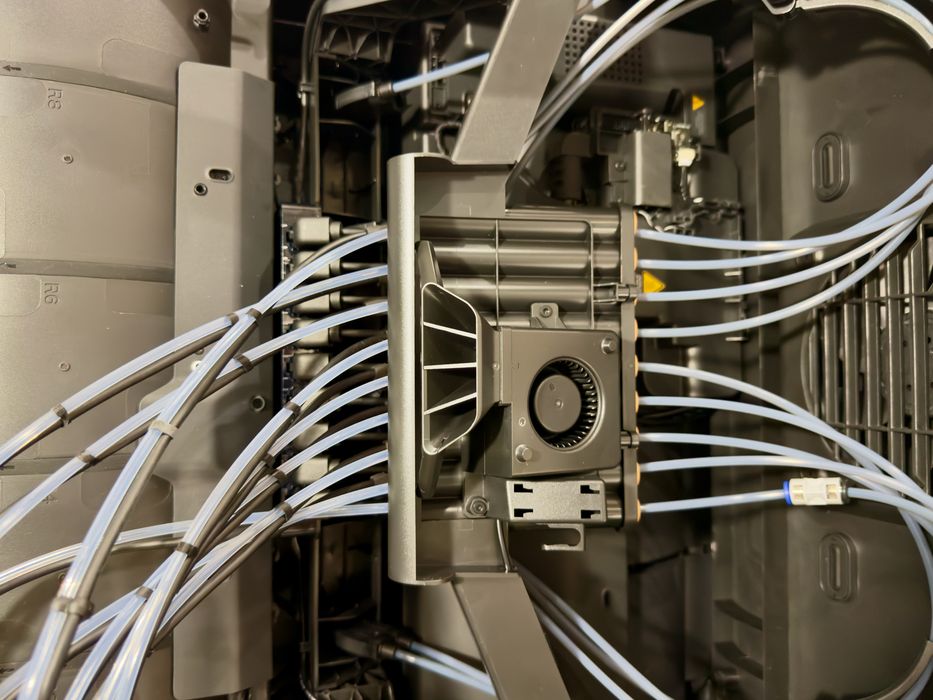
For fun I got my camera inside the H3C, looking up. Here you can see the incredible complexity of the nine tools. There are eighteen PTFE tubes flying all over.
I tried to swap out a toolhead for fun.
It wasn’t fun.
To do so you basically have to de-install the AMS 3H to access the tubes and cables to disconnect them, and remount the replacement. Fortunately, you don’t have to do this very often.
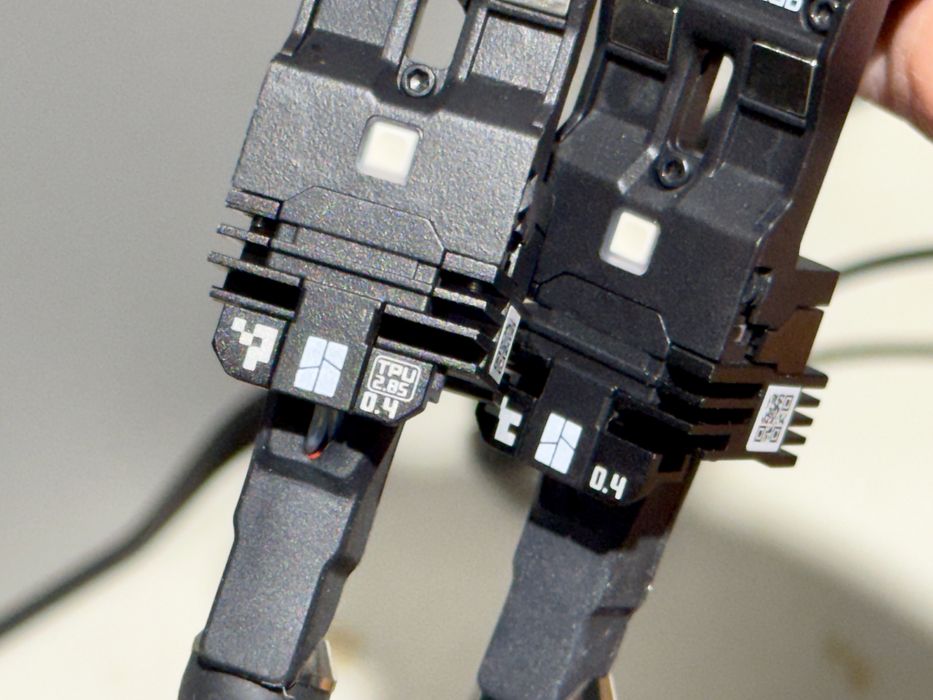
Now it was time to test the 2.85mm nozzle capability, and let me explain why this is so important.
A persistent issue with AMS (and similar) units is that they cannot handle TPU properly. TPU is soft, so you can’t push it properly through the system. It’s like trying to push wet spaghetti up the tube. The only approach that has previously worked is Bambu Lab’s “TPU for AMS”, which is basically a “harder” TPU that just barely manages to work in the AMS.
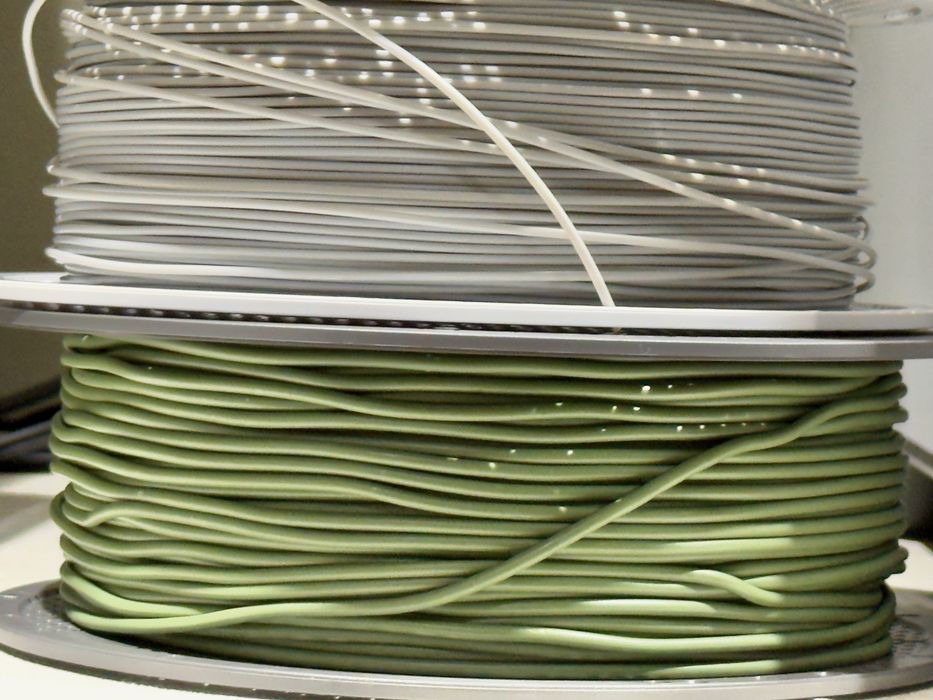
Bambu Lab’s brilliant solution here is to use 2.85mm TPU filament instead of 1.75mm filament. The added diameter provides just enough additional strength to allow it to flow through the AMS 3H. This means the H3C can print much softer TPUs, up to 75A, which would never work on a standard AMS.
Also interesting is that the 2.85mm toolhead can also 3D print 1.75mm filament! In fact, the stock H3C configuration includes one 2.85mm toolhead, ready to go. But you wouldn’t need to change it just to print 1.75mm filament.
There is a catch, however. You can’t feed the softer TPUs all the way through the normal PTFE tube path. Instead they are to come off the spool and through a special “back door” port on the AMS 3H slot, and dangle down through for connection to the printhead.
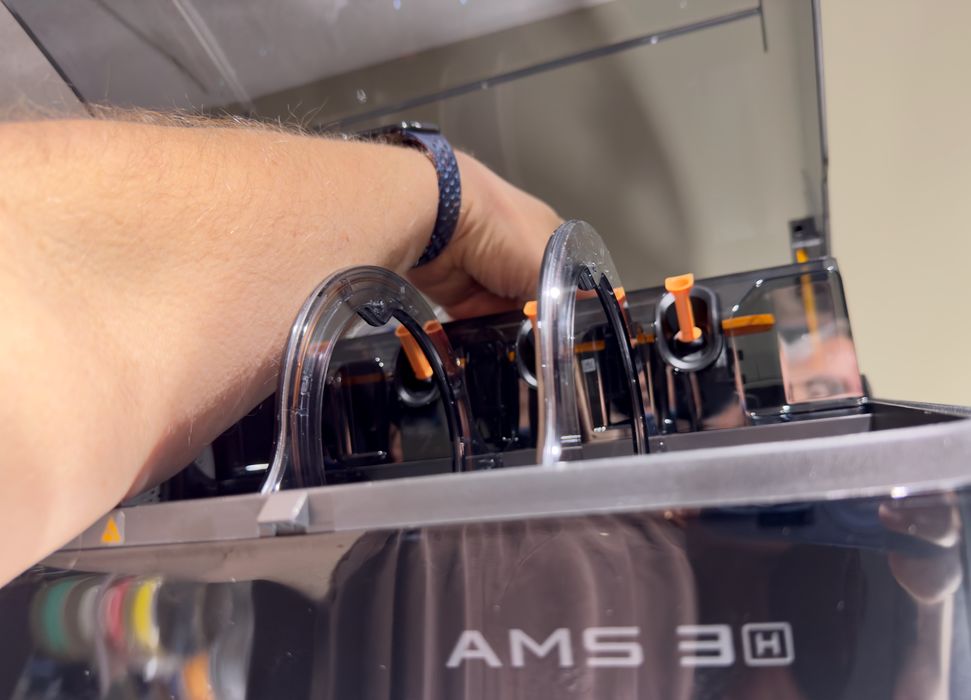
Then the reach problem happened again. To access the back door port, you cannot see it without a ladder, so I had to find it by feel only. This was quite awkward, and I recommend you buy a small ladder.
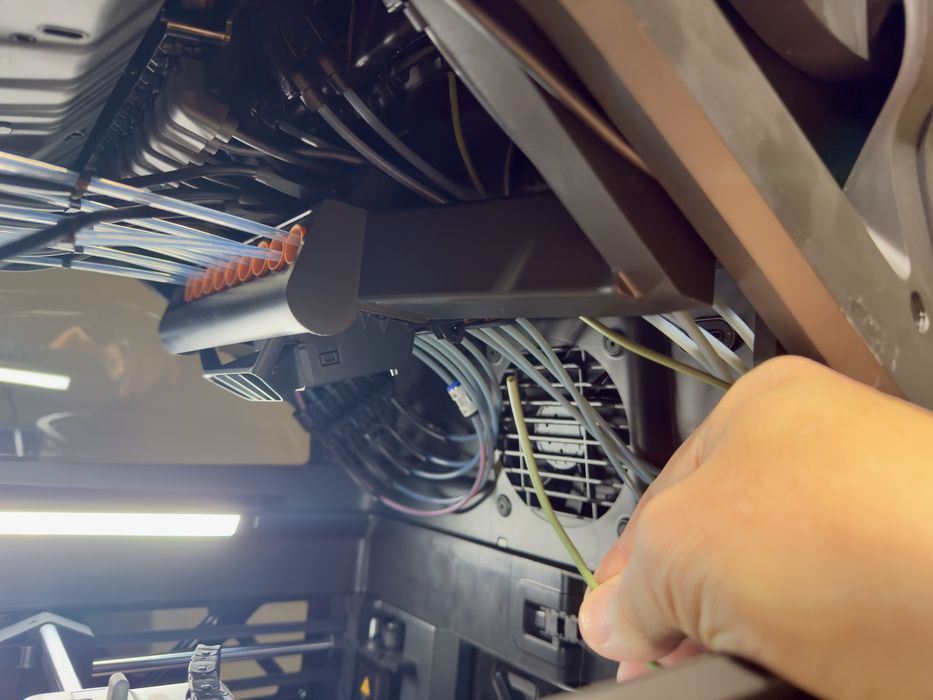
Threading the soft TPU through the tangle of tubes is really quite strange. You can’t see where it emerges from the port at all, as it’s quite crowded in there, and your viewing angles are terrible. You simply have to push the soft filament along until it appears. Then grab it and pull.
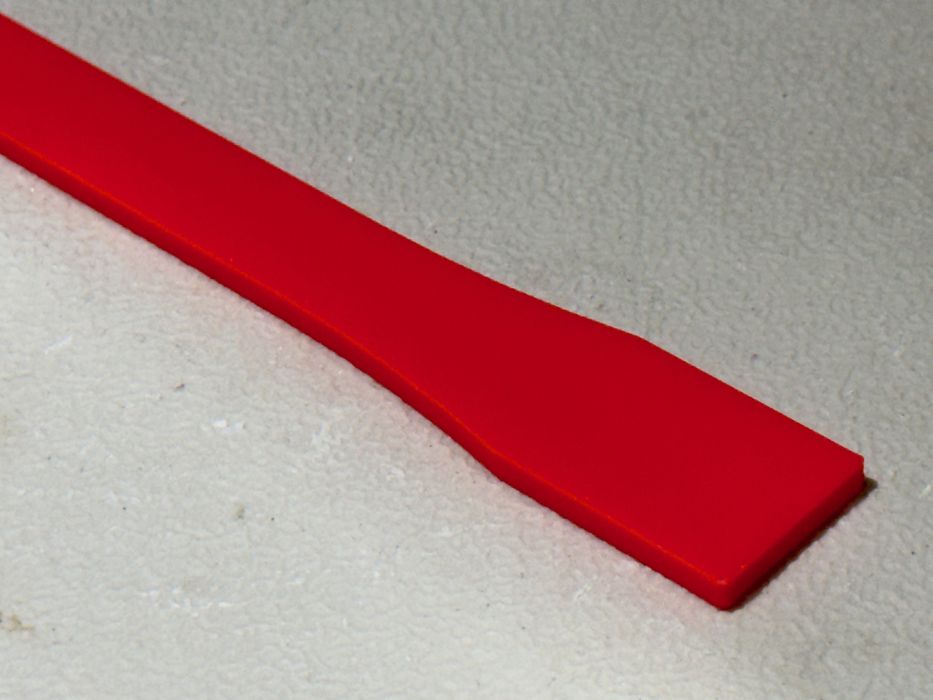
So my TPU testing began, first with the standard TPU for AMS (1.75mm). It prints directly from the AMS 3H in the normal PTFE tubes.
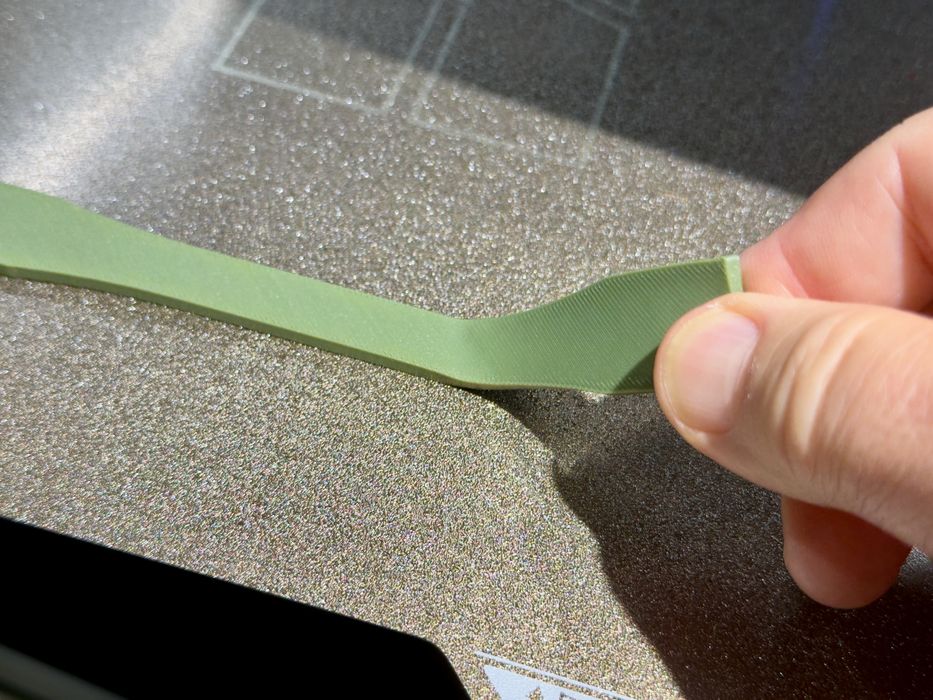
Then I tried printing TPU 75A (2.85mm) using the no-tube approach. And it printed perfectly! It stuck to the bed very well, and was easily peeled off — in a way that you don’t normally see with rigid 3D prints.
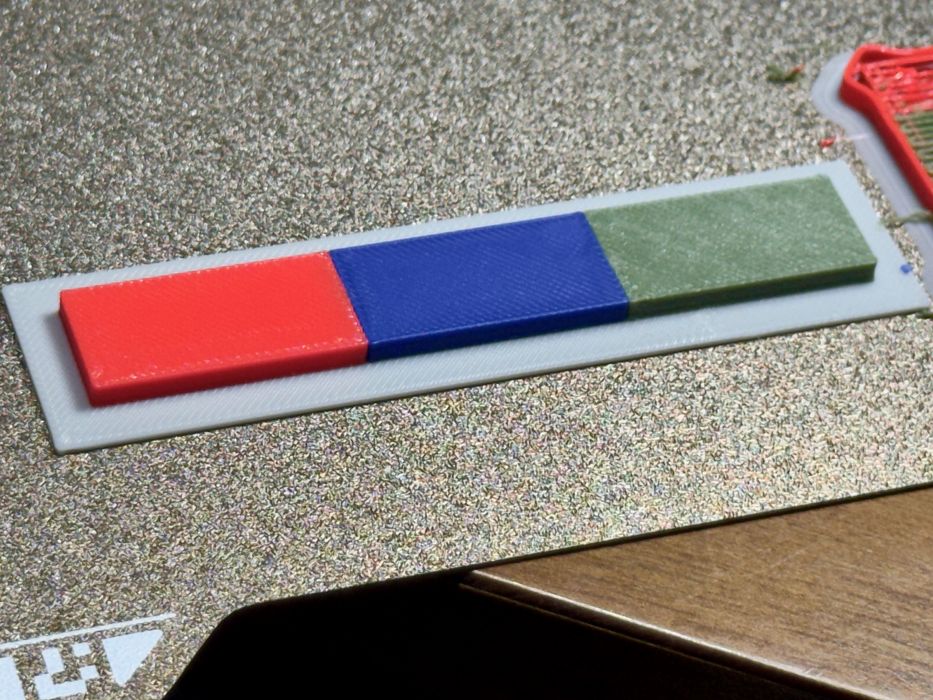
The H3C can then print more than one TPU at a time. To demonstrate this I printed a part with three different materials: TPU for AMS; PLA; TPU 75A.
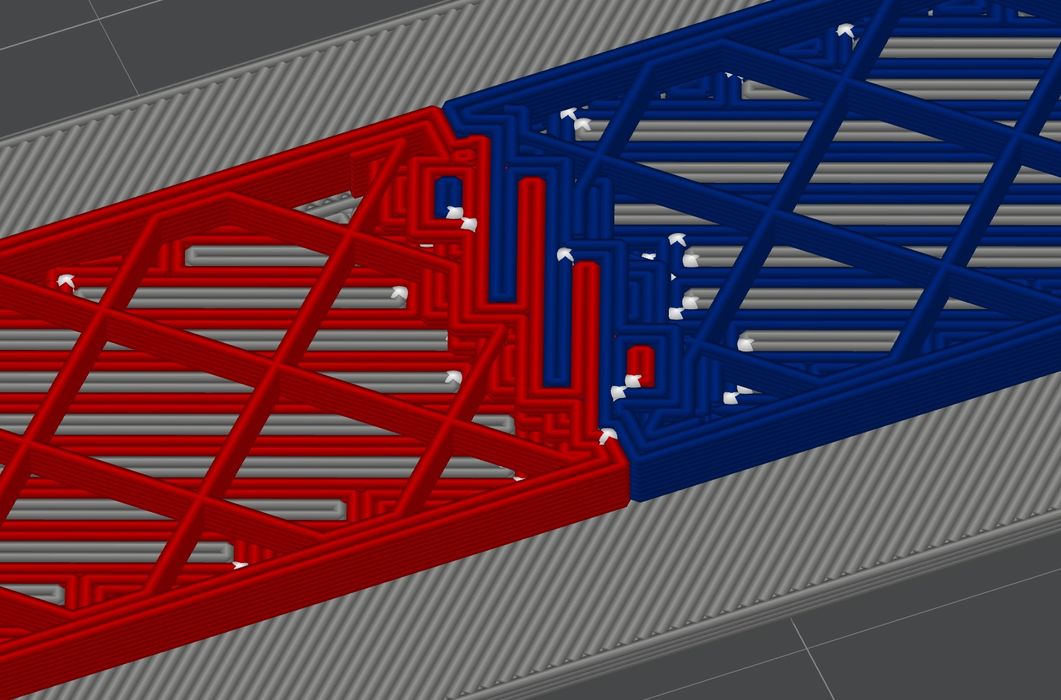
I used the interlocking feature in the slicer to ensure the different materials were bonded to each other, and it worked perfectly! This means you can easily print objects with portions made from different TPUs.
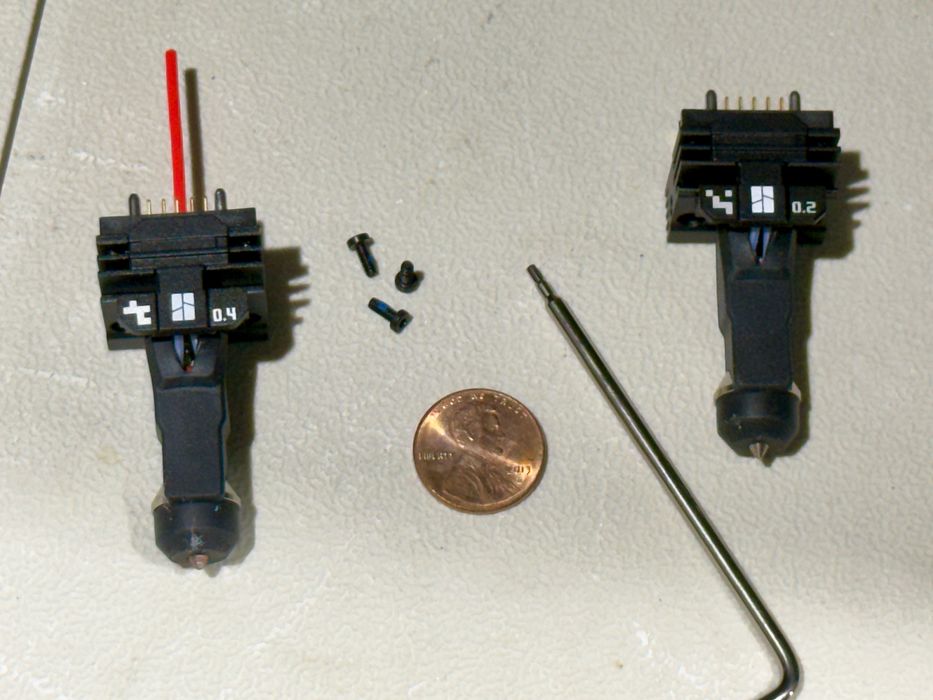
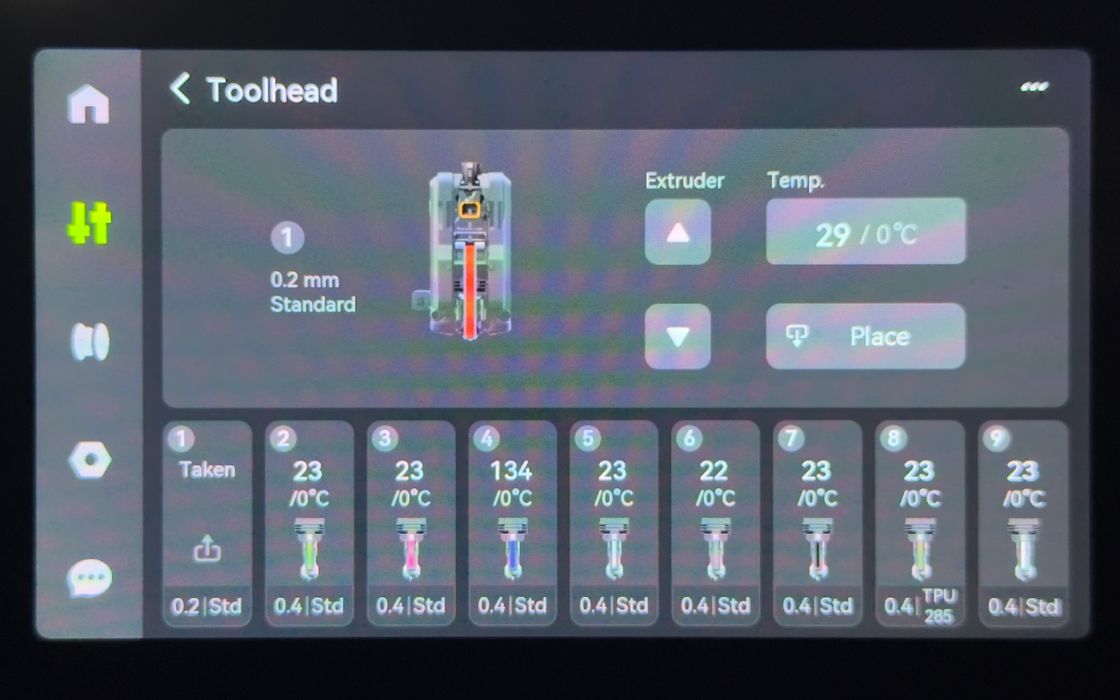
The H3C also allows for use of different nozzle diameters within the same print job. This is something that has never been done on other typical desktop systems, although it’s something I’ve wanted forever.
To install the nozzle, you don’t need to extract the entire toolhead assembly. Simply pull it out the side (because only the sides provide suitable access), remove two bolts and swap the nozzle assembly.
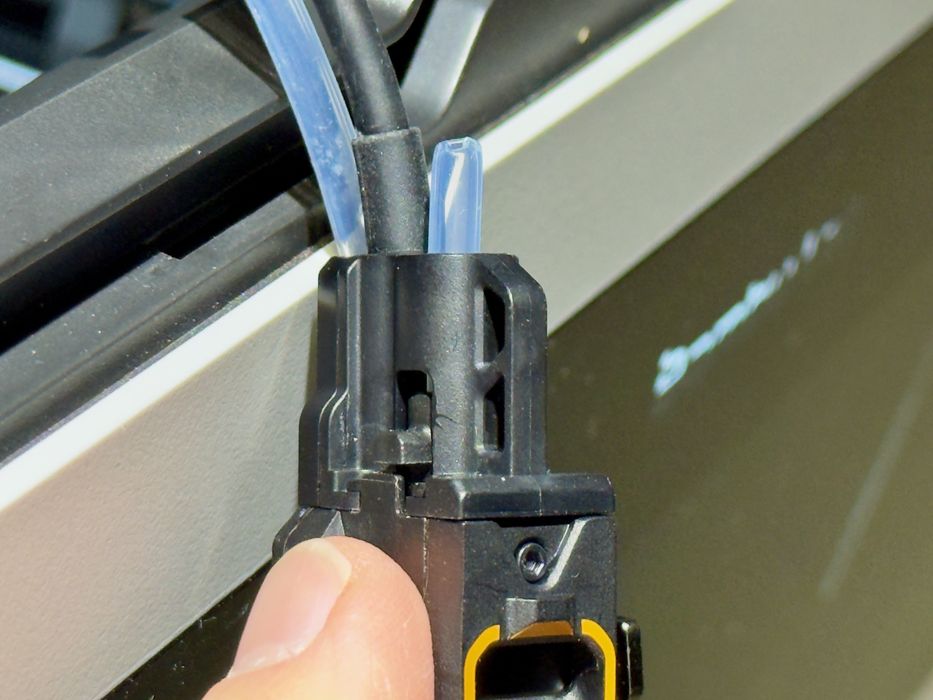
For printing TPU 90A (1.75mm) you must also use the no-PTFE tube approach as above. But there’s one difference: you must insert a short 35mm (exactly, no exceptions!) tube into the printhead. This, presumably, keeps the thinner TPU filament from twisting as it enters the hot end.
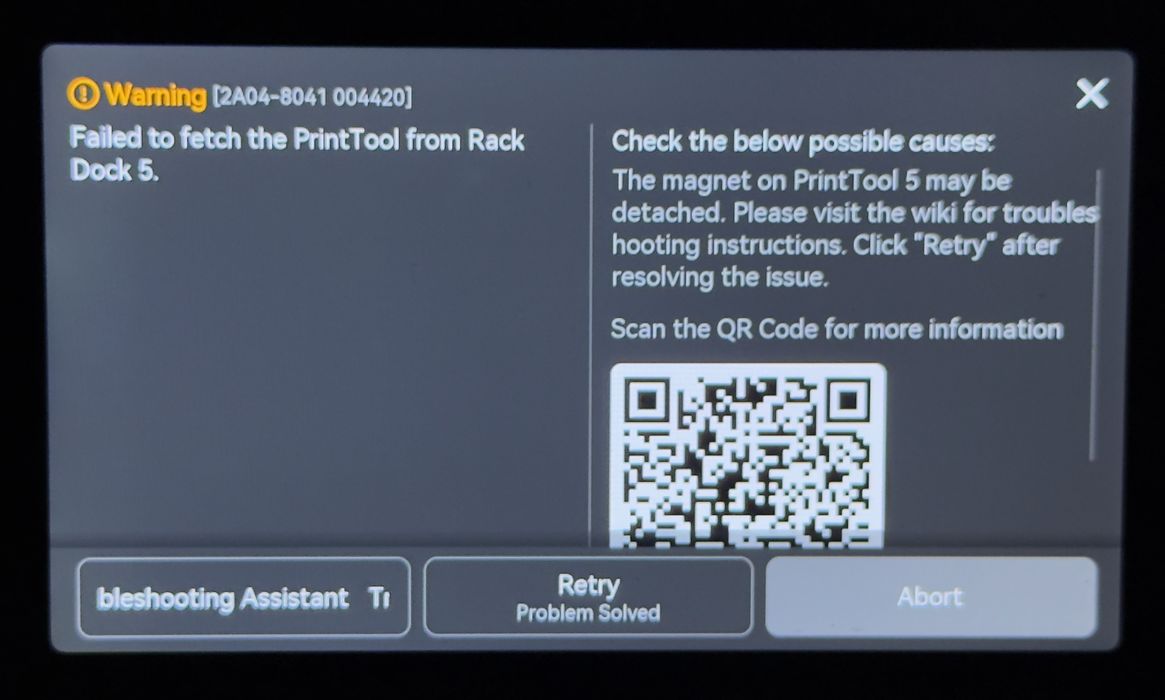
When printing a job with this configuration, I suddenly received this error! I wasn’t sure what was going on? Had I broken the H3C?
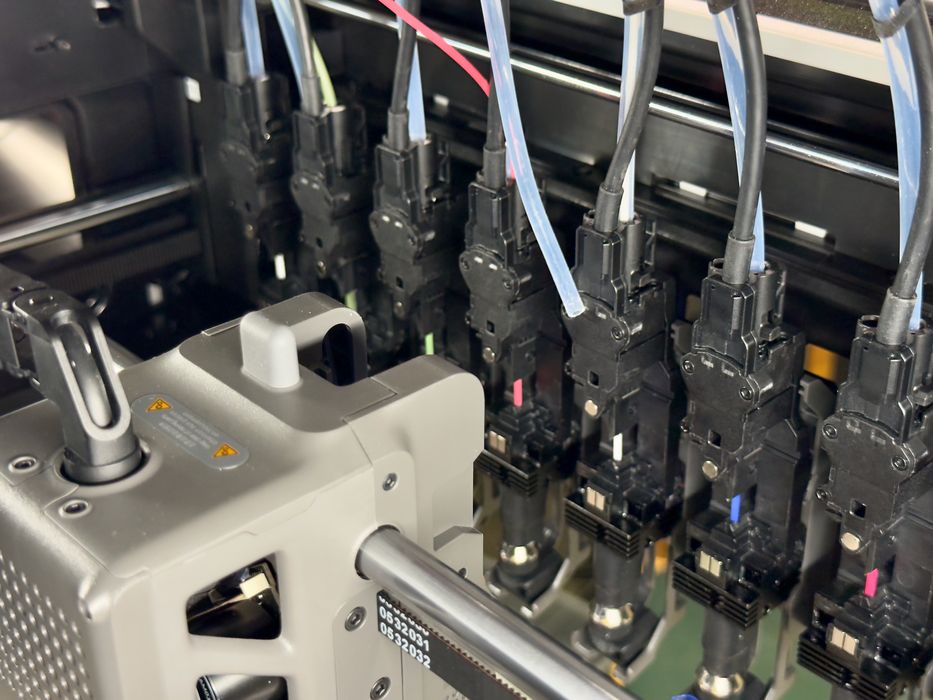
Nope, it was an operator error. If you look closely at this image, you’ll see that the #6 PTFE tube I unplugged for the TPU was dangling — right in front of tool #5. When the H3C attempted to use tool #5, it ran into the tube, causing the error.
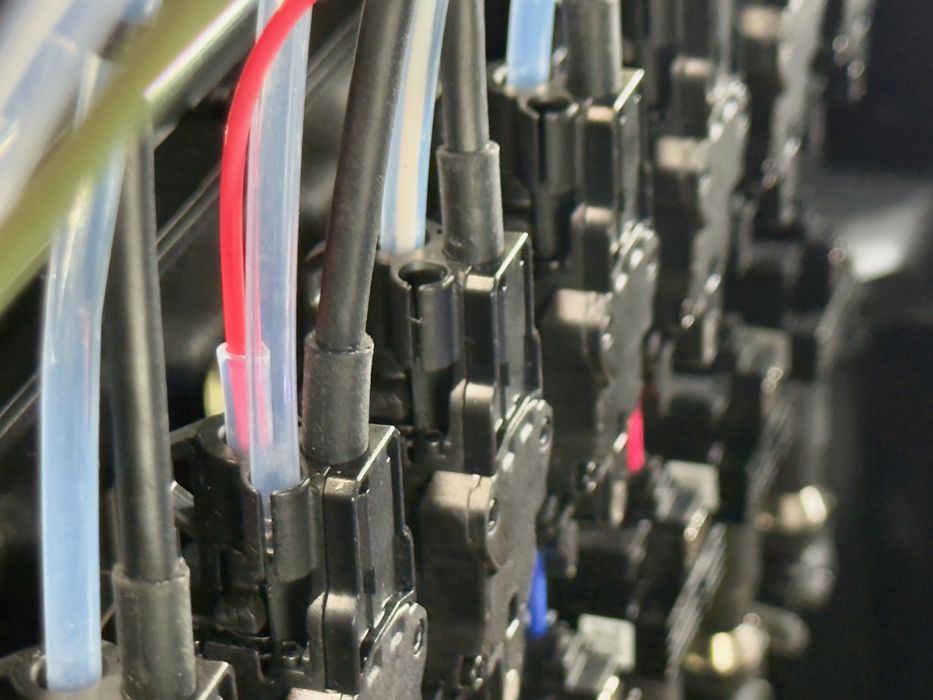
The answer is to stow away the stray tube in a special mounting point on the toolhead. This is easy to do, but also easy to forget, as I did.
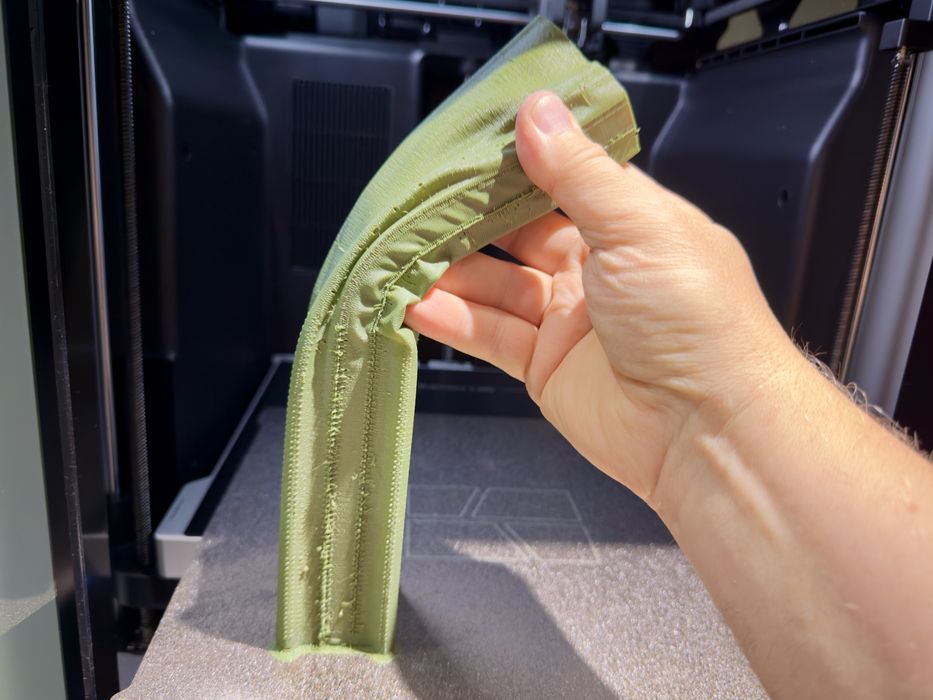
One other peculiar operational thing I encountered: floppy towers. I had been printing a large TPU object, and of course it required a purge tower since more than one material was used. But the tower was made from TPU! It was not at all rigid, and could even be bent in half. I’ve never seen a tower like this.
Bambu Lab H3C Software
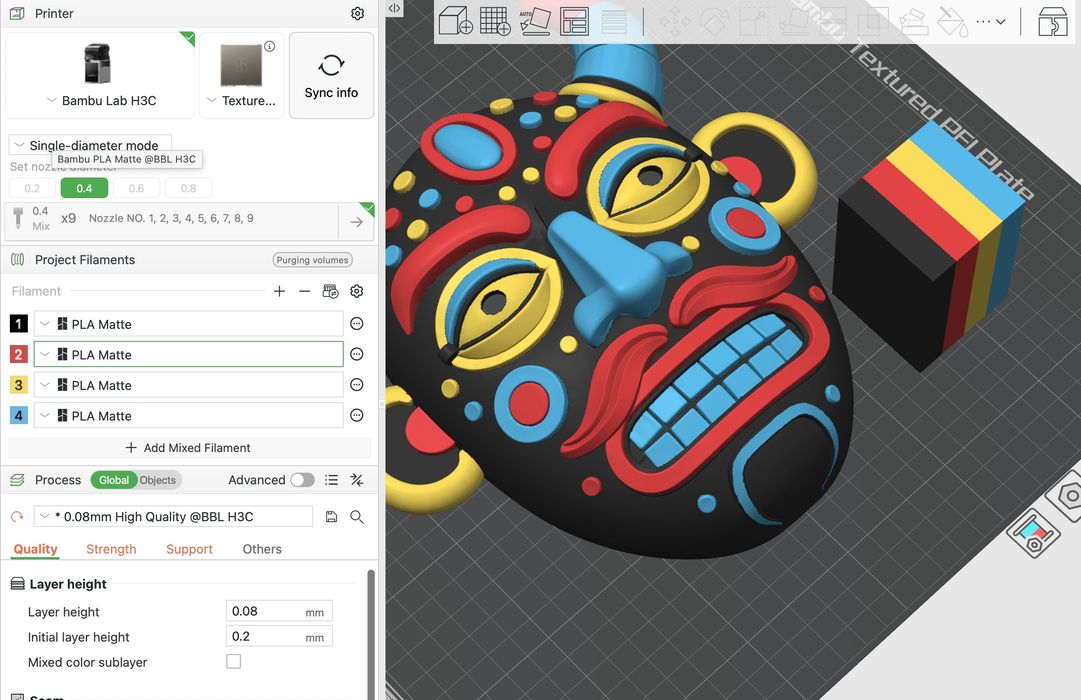
Software for the H3C is exactly the same as every other Bambu Lab 3D printer: Bambu Studio on the desktop and Bambu Handy on your mobile. These work basically identically, and they are well-known to be easy to use.
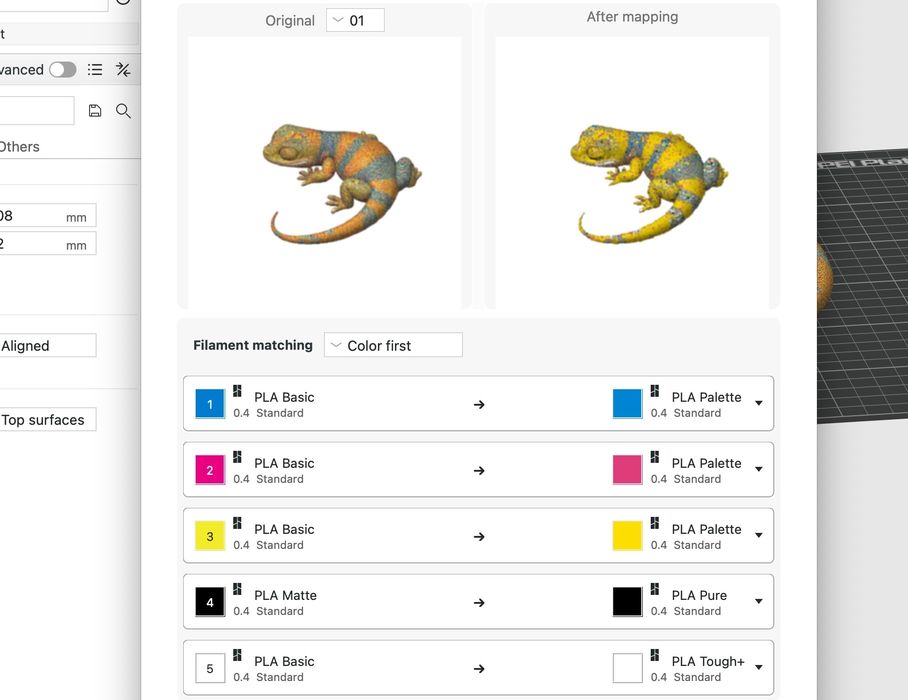
The main difference from typical 3D printing on the H3C is that there are a lot more colors to deal with. Fortunately, Bambu Studio provides a way to automatically map colors. In other words, if someone creates a 3MF file with color assignments, Bambu Studio will do its best to match the intended colors in the design to the colors you actually have mounted on your H3C. Of course, you’d better sync the filaments from the 3D printer to Bambu Studio before doing so.
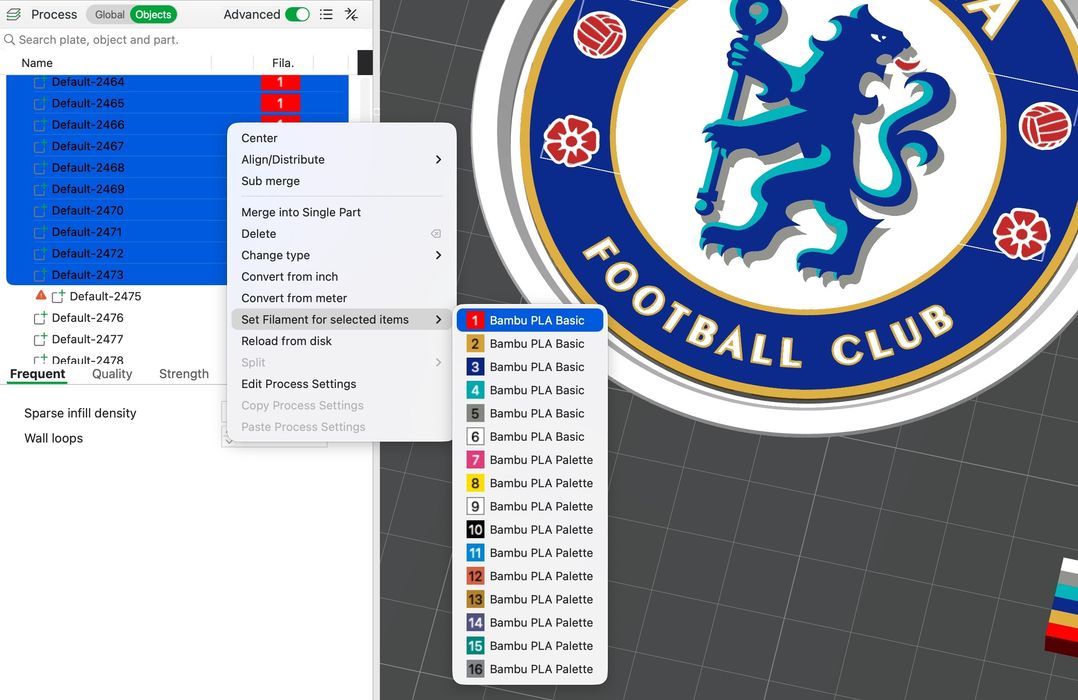
Sometimes it messes up, however, and you have to resort to manual color setting. This can actually be incredibly tedious if there are multiple components with a color, such as any text. For that you should use this menu to set a group all to the same color immediately.
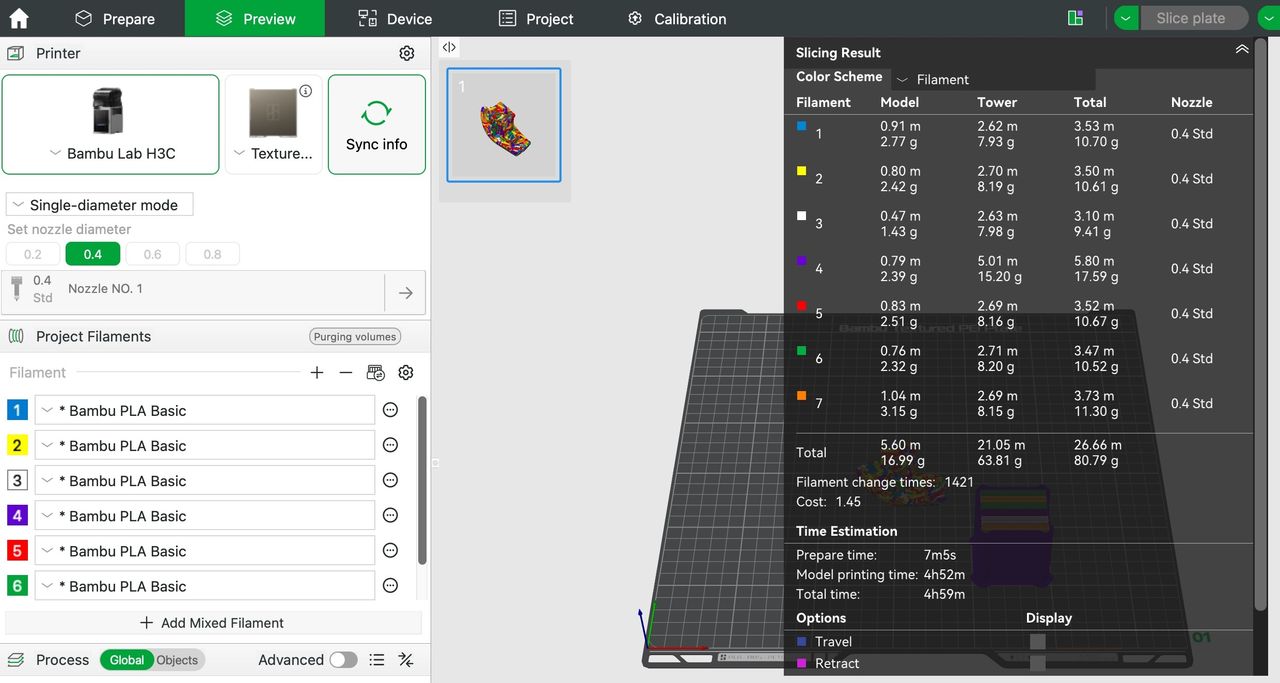
Something you’ll have to get used to is the more complex preview panel, where it shows all the different colors involved. Long ago you’d simply ask yourself if “that spool has enough?” Now with the H3C you have to ask that question for EVERY spool. It’s more complicated to manage all this, and you can easily get confused.
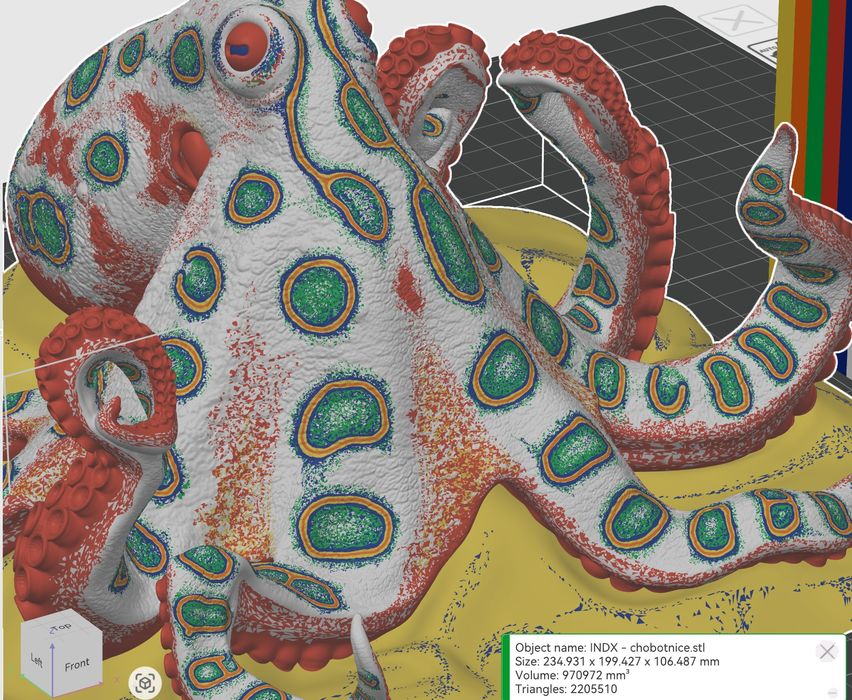
Sometimes the subject is so complex and the color matching fails so miserably that you really can’t proceed. Here the poor octopus kept coming out as the wrong colors, and eventually I gave up.
This is part three of a four part series, please read parts one, two and four.
Via Bambu Lab