
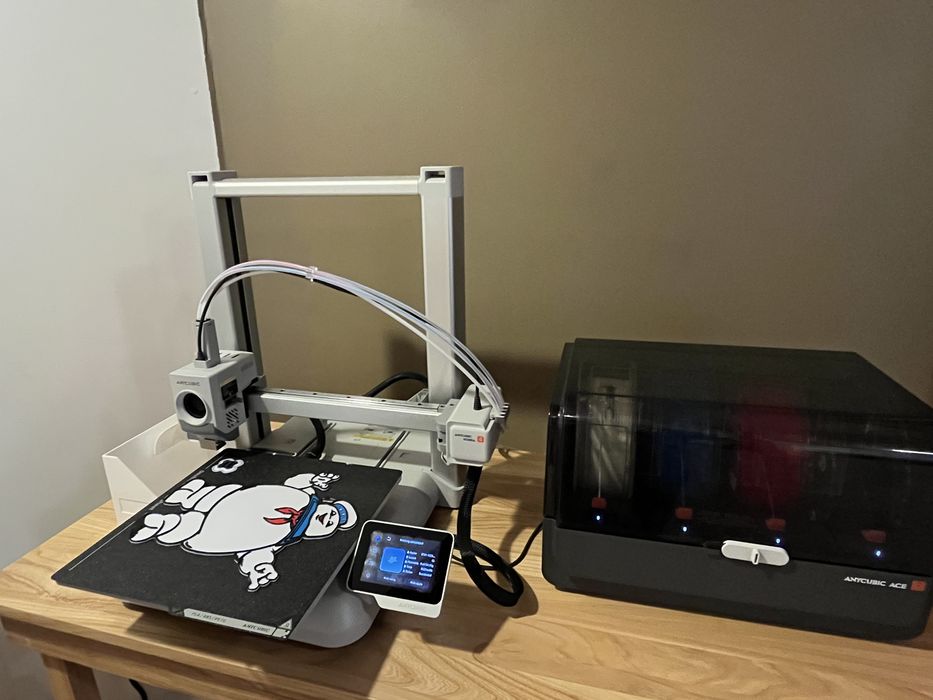
We conclude our look at the Kobra 4 Combo 3D printer with print results and final thoughts.
This is part three of a three-part series. Please read parts one and two.
Kobra 4 Combo Print Results
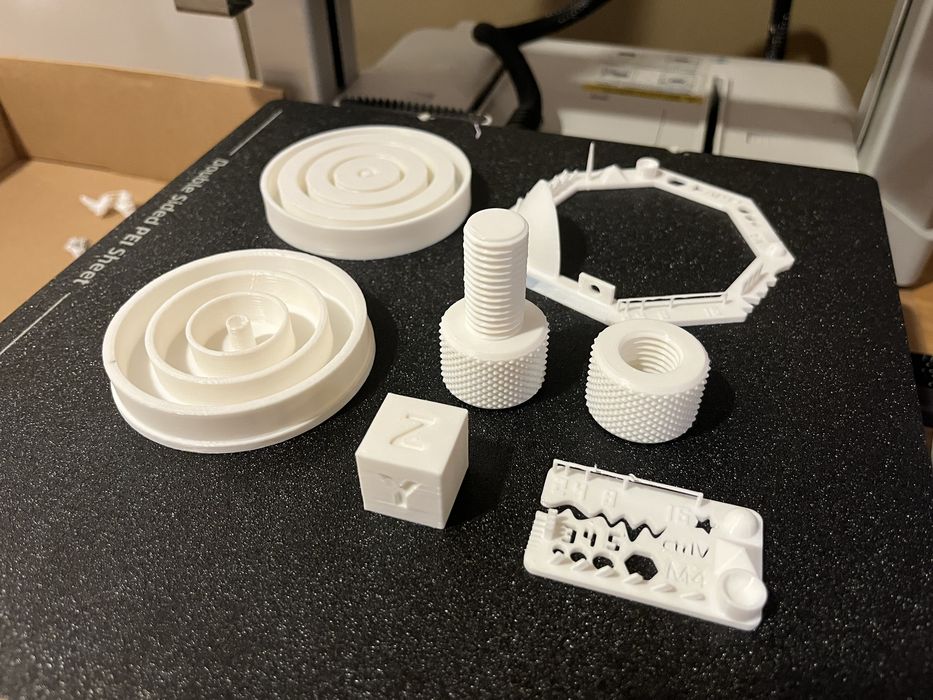
We grouped several of our standard test prints together into one large print job – cylindricity test, knurling nut & bolt, Cube_v1, CTRL–V and 3-D_Test_V3, slicing them at a layer height of 0.2mm using standard settings, getting an estimated print time of 3h24m using 72g of material.
All models had very good details, the cylindricity and the nut & bolt fit together perfectly and there was just some slight ringing on the cube.
Out of curiosity we reran the cube on its own with calibration on to see if we would get a better result, with the finished print having a slight improvement.
We sliced a series of #3DBenchy’s with standard speedboat settings of .24mm layer height, 2 walls, 3 top & bottom shells, 10% infill. The first print had an estimated print time of 33m.
The finished print looked similar in quality to the pre-sliced #3DBenchys we had printed earlier.
We reran the same print in Sport Mode to see if there would be a difference in quality, completing in 31m and looking pretty much the same.
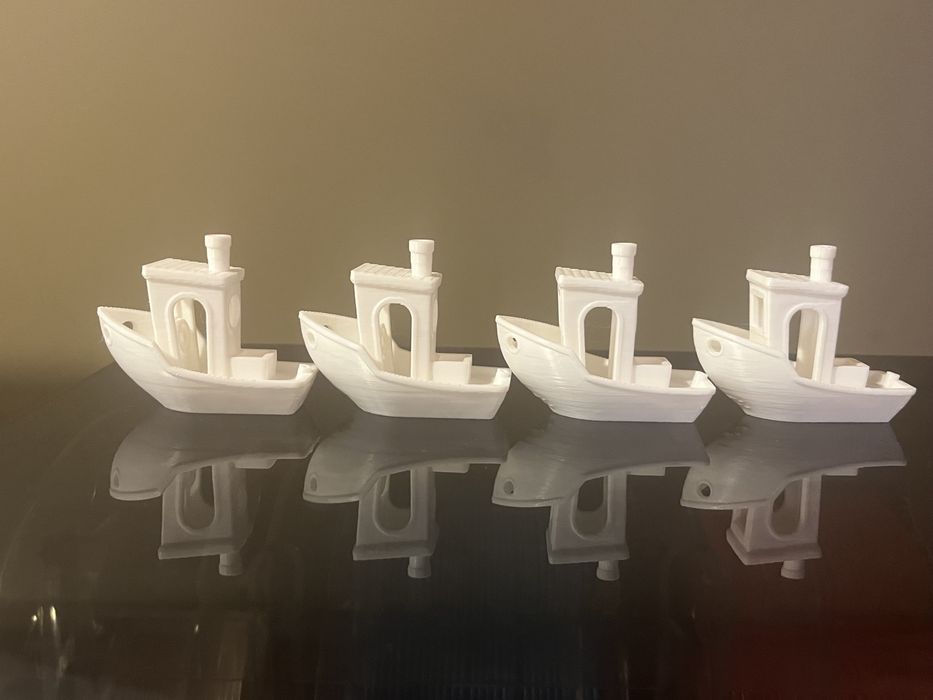
We adjusted several slicer settings to maximize print speed and sliced again, with the print completing in 27m. Reprinting again in Sport Mode got the time down to under 27m. When we compared the prints, quality slowly got worse with the higher speeds, with a bit of deforming in the hull of the boat. We were unable to recreate the slicing time of the pre-sliced 15m #3DBenchy. Anycubic must have very finely tuned that pre-sliced job at the factory.
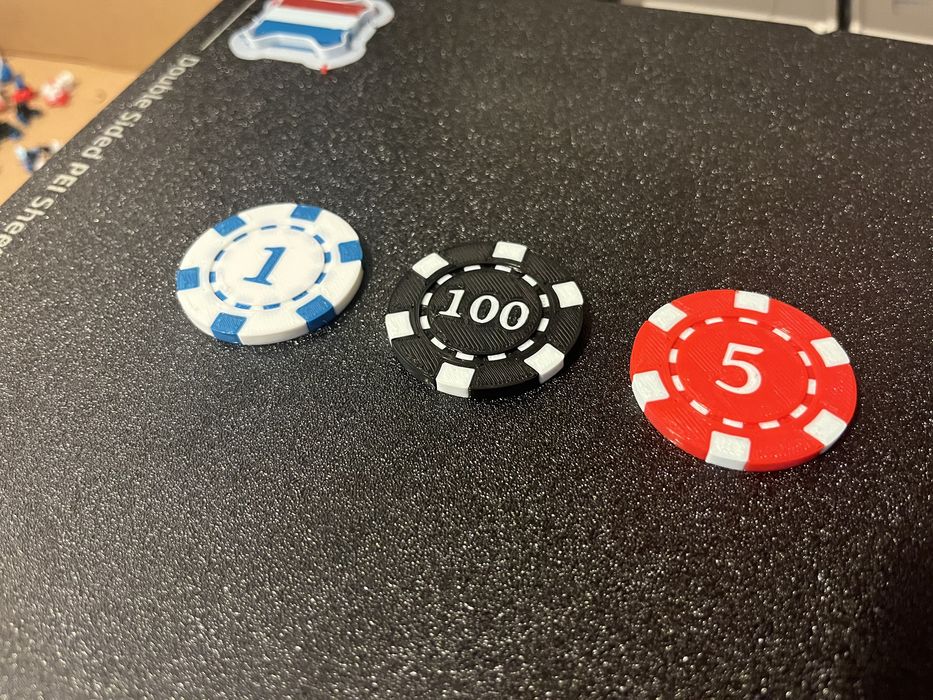
We switched over to testing some multicolor prints by loading up three Poker Chip models, assigned colors, and sliced with default settings getting an estimated print time of 1h37m using 29g of filament, with 11g for model, 16g for flushed, and 2g for tower.
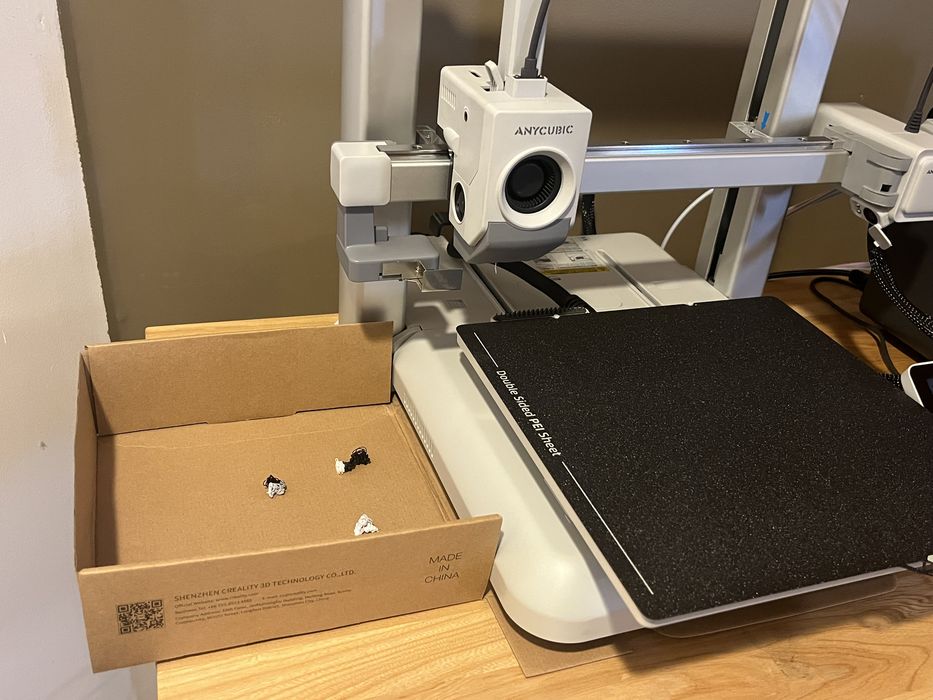
The Kobra 4 has no method of collecting the “poop” generated during mid-print purging, so we used an old filament box as a temporary waste bucket.
The job completed in 1h39m with the whites not looking completely white, so we increased flush volumes for the white filament only and reprinted, but had the same issue.
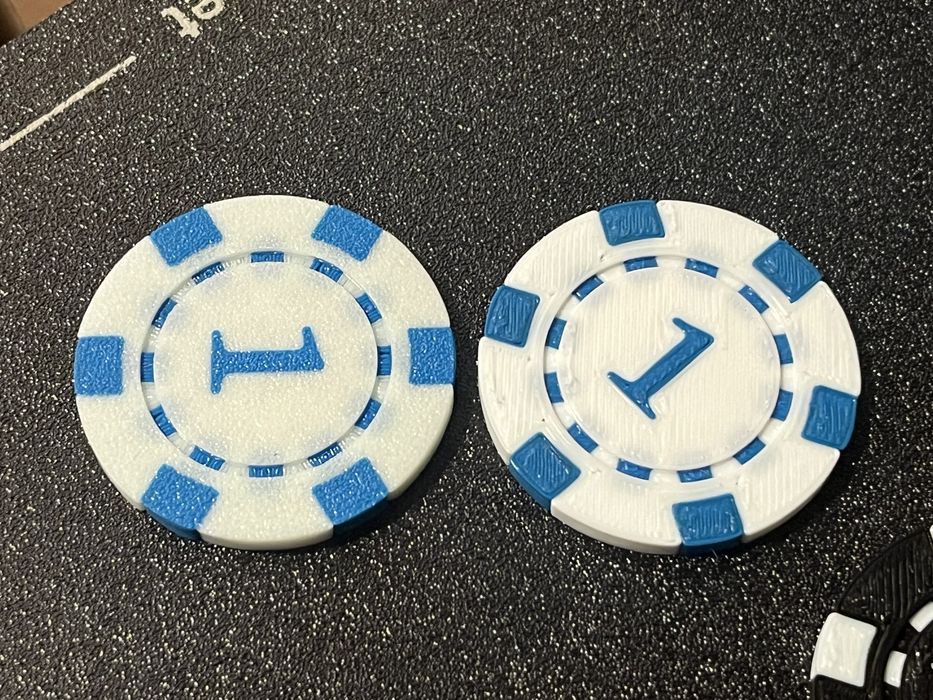
We swapped out the roll of Creality Hyper White PLA we were using for some Elegoo Rapid PLA Plus White and reprinted the job with the original flush multiplier settings and this time got very good whites. As we’ve learned over the years, sometimes the fault lies with the filament and not the printer. It also shows how flush settings must be done for the exact filament involved, not just the color of the filament.
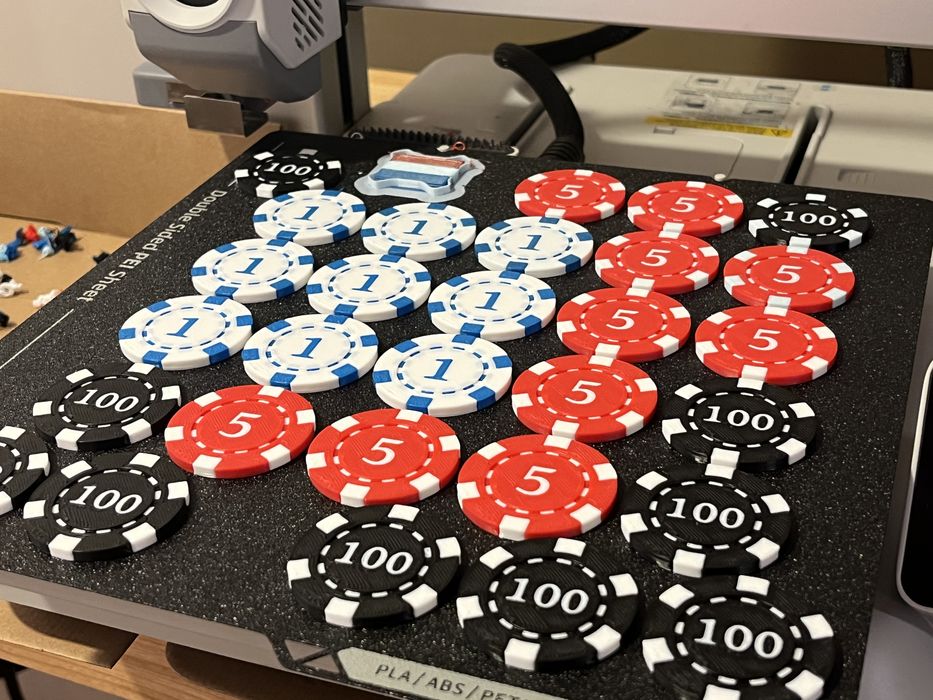
We filled the build plate with 29 of the same Poker Chips, getting an estimated build time of 7h32m using 125g of filament, with 107g for the model, 16g for flushed, and 2g for the tower. That was a far more effective use of filament, as we would get 29 chips vs 3 with the same amount of poop. The job completed in 7h33m and they all looked excellent.
We noticed that the cardboard box we were using as a waste bin was missing the occasional energetic poop that was launched, so we took a quick look on Anycubic’s MakerOnline 3D model site and downloaded a proper Waste Bin model.
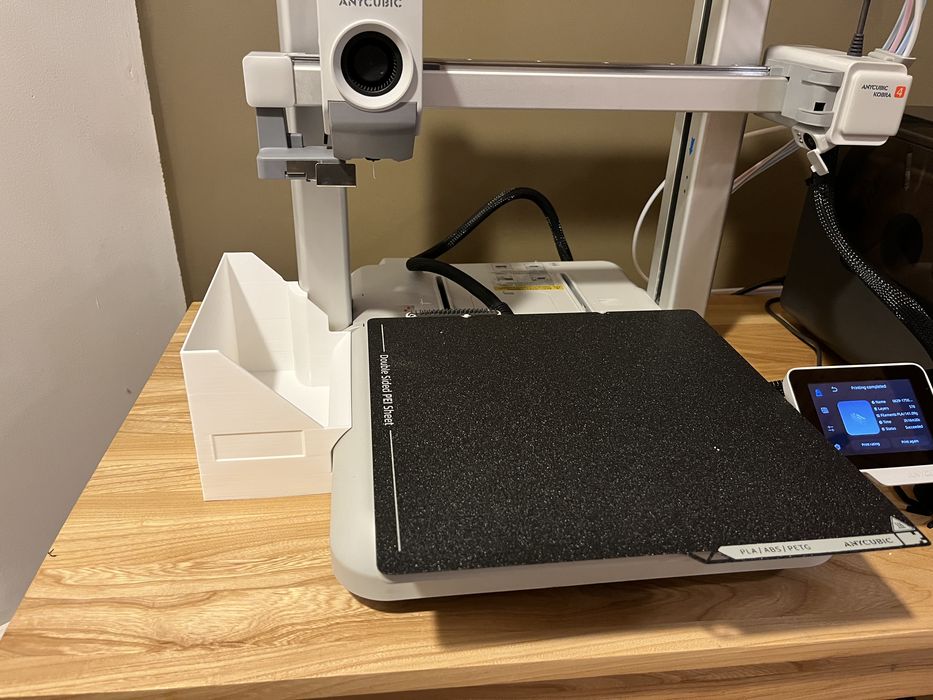
We sliced it with standard settings, getting an estimated print time of 3h15m and using 139g of filament, and it looked terrific when done.
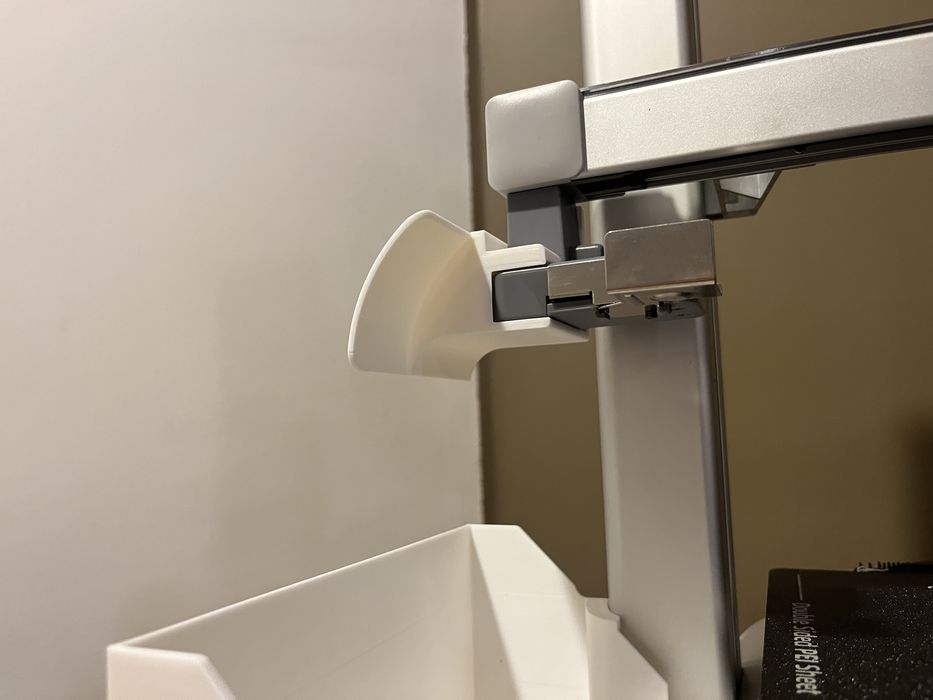
We also grabbed and sliced a Poop Deflector model to tame the really wild poop ejections. It fit perfectly into place on the printer by detaching and reattaching two screws on the x-axis. We found it and the bin to be a welcome addition to the printer, and should be among the first items printed when you crack open your Kobra 4.
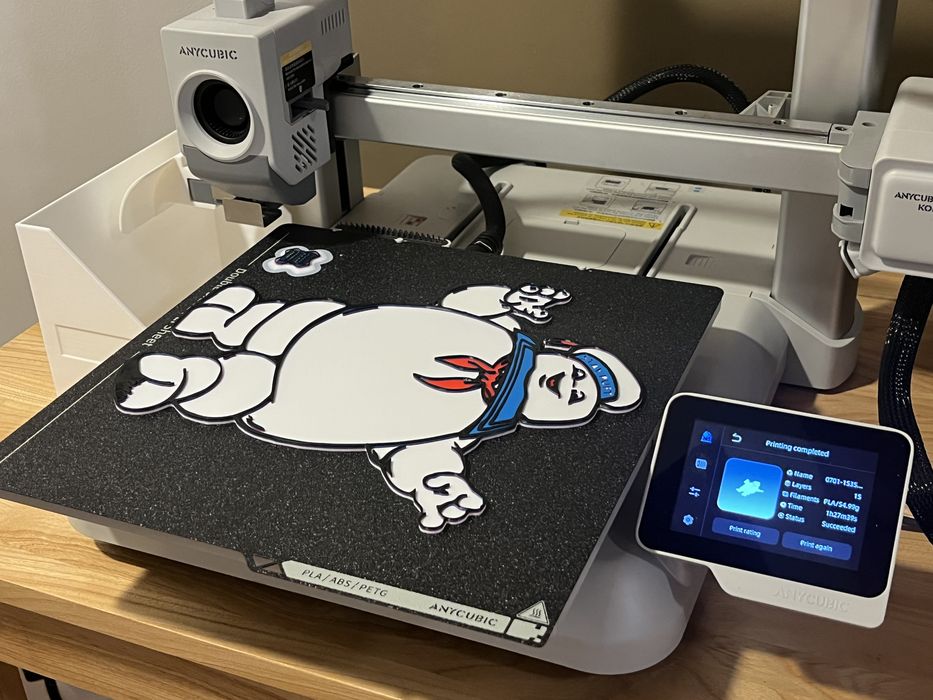
We returned to multicolor printing, slicing a Stay Puft marshmallow man, getting an estimated build time of 1h16m and using 55g of filament. The print started with white filament that changed to red at layer 8, blue at layer 10, and then black at layer 13. The finished print looked fantastic and had next to nothing for poops because of the sequential colour changes.
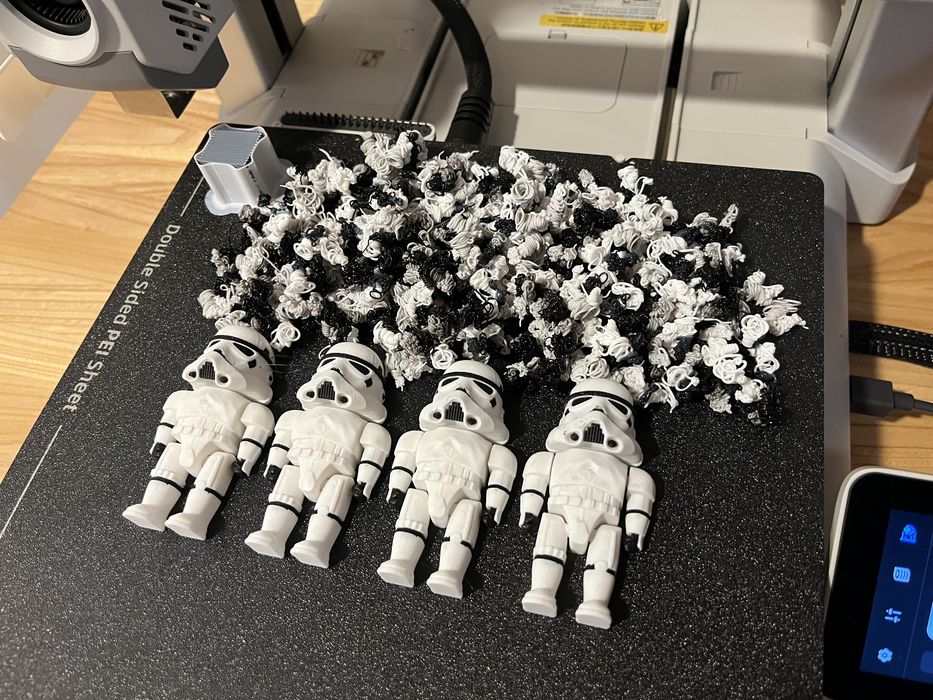
Our final multicolor test was slicing some small articulating Stormtroopers. The print completed with all of the models articulating well and looking quite good, with the exception of two of them having a few little black speckles in the white helmet. Most likely due to some residue sticking to the nozzle during a filament change, as some of the poops had piled up in the waste bin and may have been bumped by the hot end. So much for taming the poops.
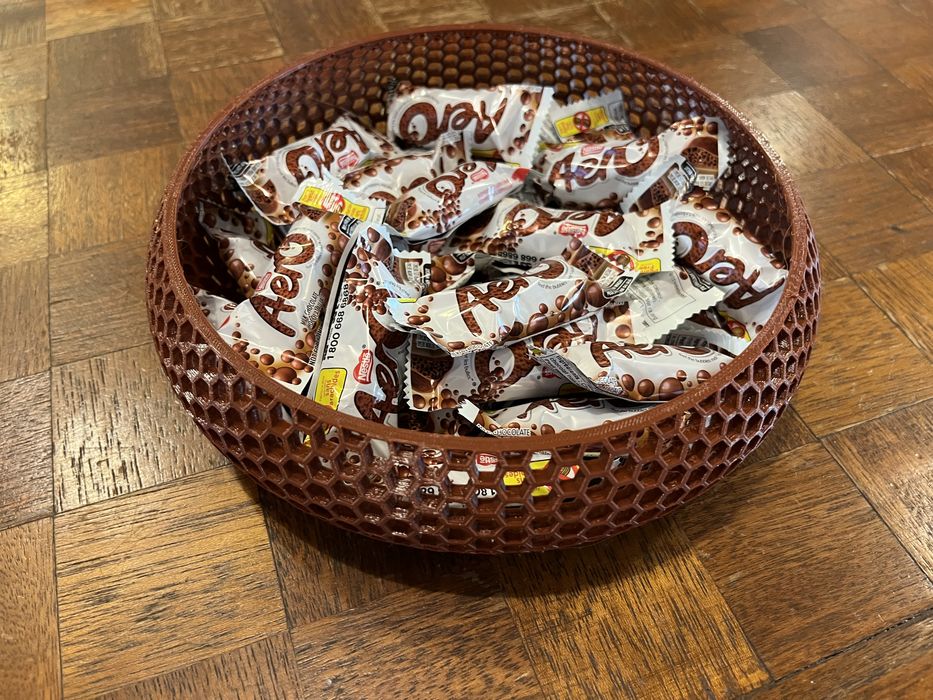
We switched over to some PETG to slice a HexCatchAll Bowl, getting an estimated print time of 10h50m and it looked excellent with some very minor stringing.
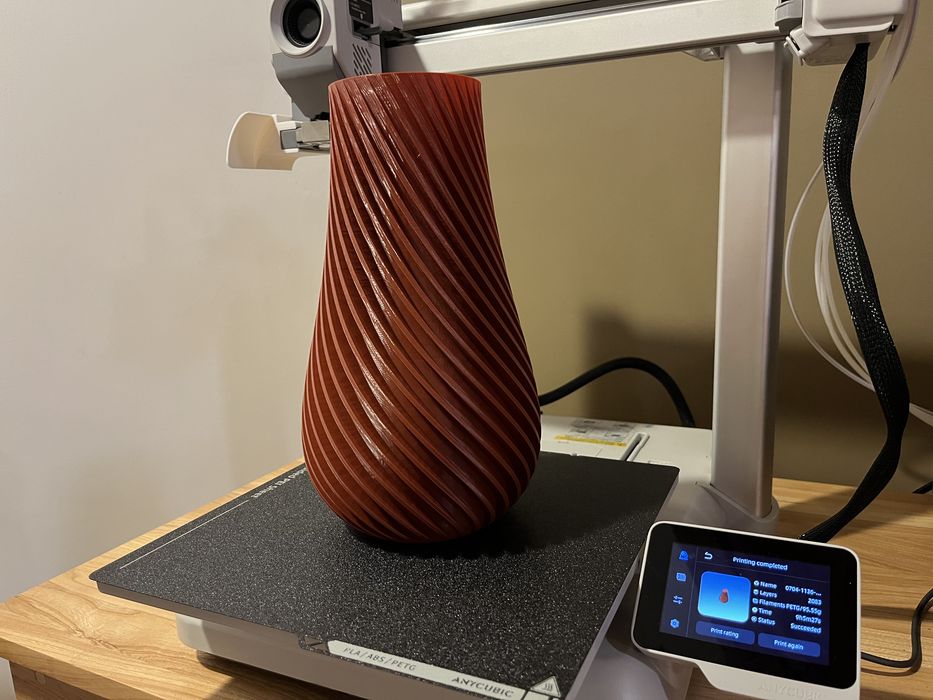
We sliced up a Spiral Vase that maxed out the build height of the printer at around 250mm, getting an estimated build time of 8h42M, using and it also looked superb.
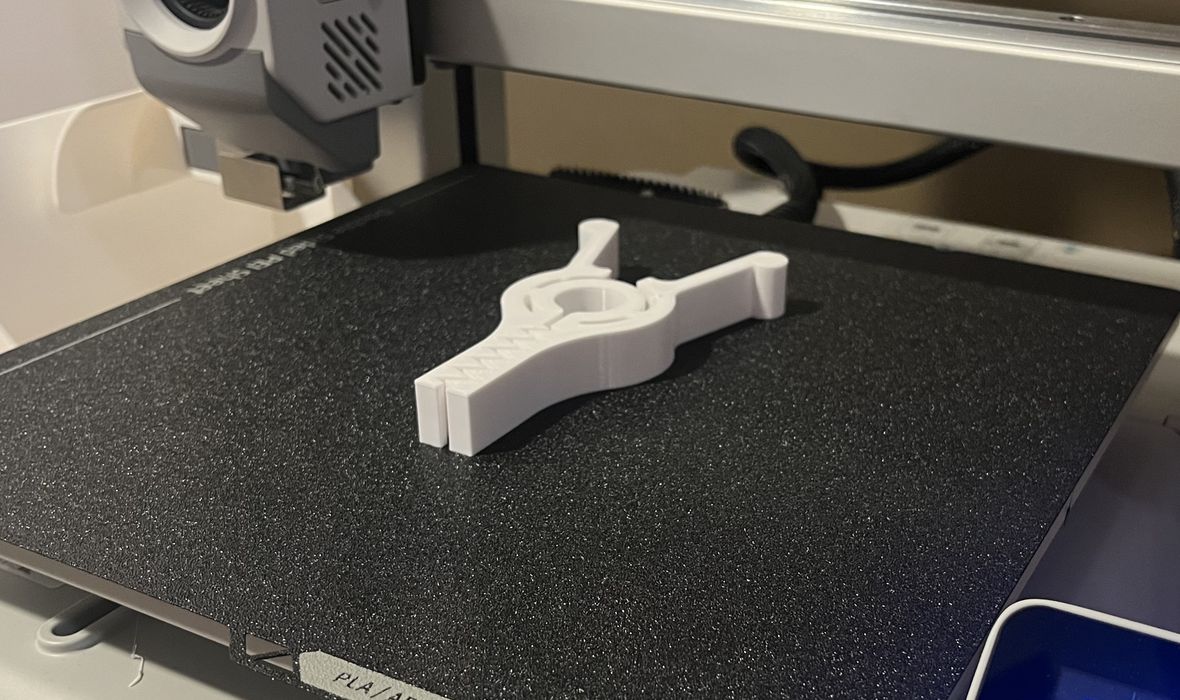
A final PETG print was a Chip Bag Clip. It looked and functioned perfectly.
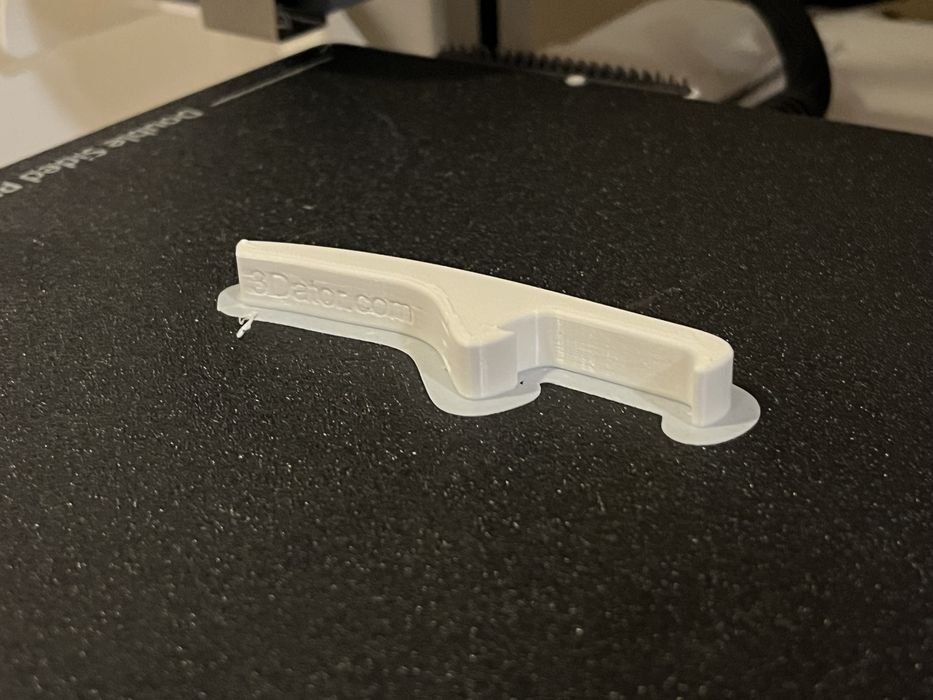
ABS isn’t listed as a supported filament for the Kobra 4, but just for fun we tried a small Bottle Opener Whistle, using a wide brim to hopefully prevent warping. It was actually successful and looked and functioned as designed, with no warping. But don’t try printing larger items in ABS or ASA on the Kobra 4.
The instructions for the Kobra 4 Combo say that TPU 95A is supported by the printer; however, it is not supported by the ACE.
For some strange reason, the 3D printer that we received did not come with a separate spool holder, although the website does list it as an included item. Evidently it was missed in the packaging stage.
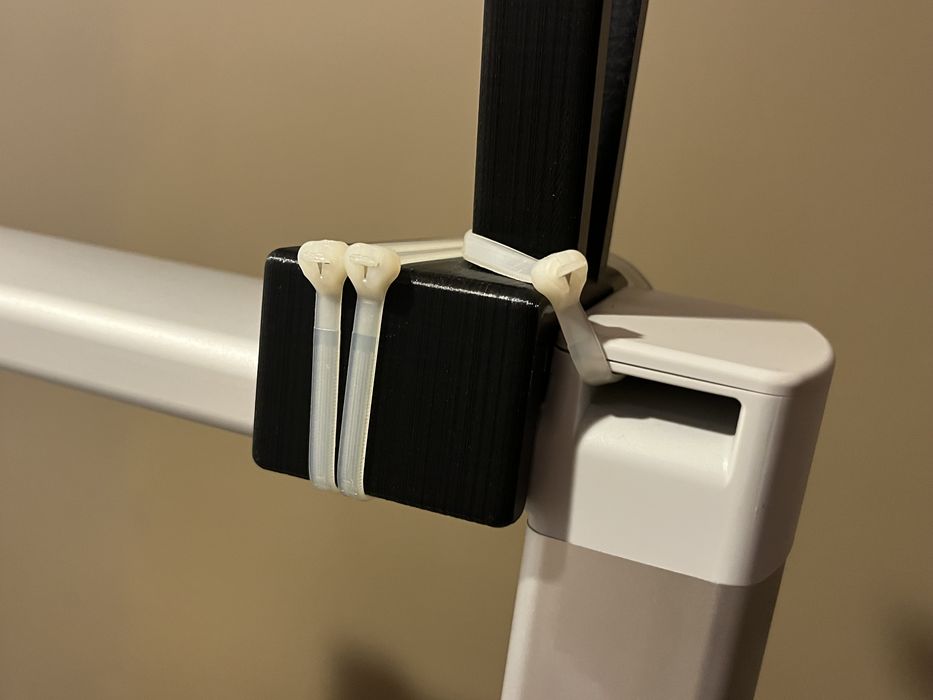
We looked around the lab and found an old spool holder print from days gone by that we could adapt to attach to the top of the Kobra 4 and then run the TPU filament to the extruder via open air and into one of the four PTFE tube inlets on the buffer.
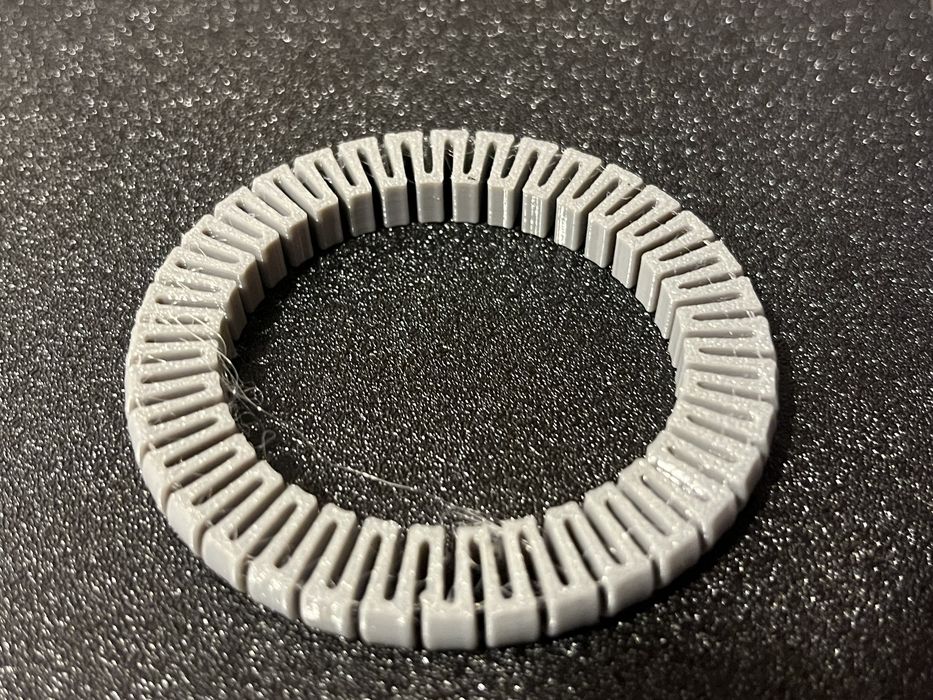
This makeshift setup worked well, and we were able to load TPU 95A into the printhead without issues. We sliced a Flexible Bracelet model, and it turned out very good.
It’s likely the Kobra 4 shipment you receive will include the spool holder.
Kobra 4 Combo Final Thoughts
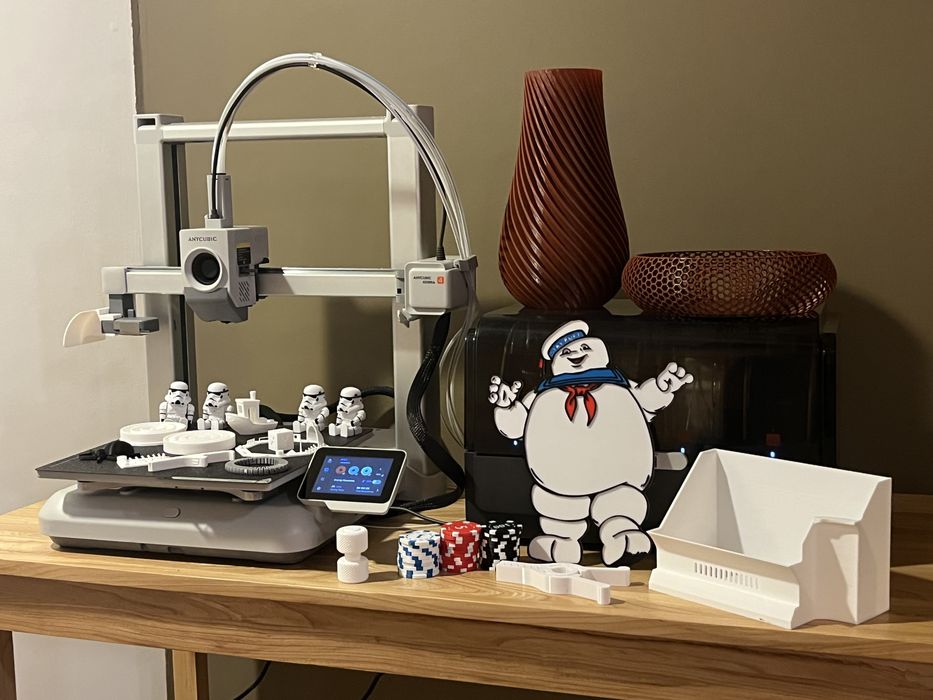
The printer arrived in a box that was a bit squished on top. At first, we thought it was some shipping damage where something heavy had crushed the box, but it turned out that the box was either incorrectly sized or it was missing some additional packing, leaving a large gap on top – possibly a piece of foam containing the missing spool holder?
Unboxing & setting up the printer was easy; however, we were surprised to find the lack of an included printed user manual or thumb drive containing a digital manual.
There weren’t any obvious direction as to how to proceed or where to go and find any supporting literature. The only instructions we found were printed on a flap of the shipping box, but these only mentioned the removal of some brackets that held the z-axis in place for shipping.
We did eventually find a QR code on the base of the printer that was hidden under the heat bed that led to the Anycubic Wiki, but by then, we had already gone to the Wiki on our own and found what we needed. This would have been very confusing for any beginner unboxing their first printer.
We will give Anycubic the benefit of the doubt and assume that the User Manual is just sitting with the missing spool holder back at their production facility.
That said, for a gantry-style Kobra 4 Combo, assembly of the Kobra 4 was simple and minimal, with really just the print head to attach to the X-axis with a few screws. It actually took longer to remove the various shipping bracket hardware than it did to install the print head.
Connecting the ACE2 Pro was also very easy and really took no time at all. The entire setup was quite tidy looking when all the tubing was properly routed and clipped into place.
As Anycubic mentions on their website, it is quite possible to have everything assembled in 15 mins, and we agree, as long as you have some decent machine assembly skills.
The initial setup screens on the LCD guide an operator through the various set-up steps, making it a breeze to connect the printer to the network, bind it to an account, and run the automatic calibrations. The Orca-based slicer took no time to set up, with instant connectivity to the printer once we logged into our Anycubic account.
The ACE2 Pro worked quite reliably during the course of the review. It automatically detected any Ancubic RFID’d filament and/or allowed us to manually enter the type and colour of any filament without a chip.
We didn’t have a single issue with the ACE during the review, and the only thing we could say (if we were to be really picky) is that it moves filament a bit slower than what we’ve seen with other systems. But given that the filament needs only travel far enough to clear the buffer when doing a filament change, it is a moot point, as the filament changes themselves are quite speedy.
Oh, and we really enjoyed the ability to dry filament anytime we wanted!
The Kobra 4 Combo is advertised as supporting PLA, PETG, and TPU95A, but with the caveat that the ACE2 Pro unit won’t accept TPU95A. So to print this filament, it is necessary to disconnect the ACE2 Pro communication cable, remove one of the PTFE tubes from the buffer, and then attach a top-mounted spool holder to feed TPU directly down and into the buffer. A spool holder wasn’t included with our review printer, but we were able to bodge together something for testing purposes and can confirm this works.
In the end, we were quite pleased with the reliability of the Kobra 4 and ACE2 Pro hardware and with the quality of output we got and genuinely look forward to making many more prints with it in the future.
ANYCUBIC
KOBRA 4 COMBO
★ BEGINNER 7/10
★ ENTHUSIAST 8.5/10
★ PRODUCTION 7/10
BEST FEATURES
✔︎ Easy setup
✔︎ Spool changes
✔︎ Active drying
QUESTIONS
✖︎ No documentation
✖︎ Missing cutters
✖︎ Spool holder
This is part three of a three-part series. Please read parts one and two.
Via Anycubic